10 Winter Survival Basics Preppers Follow

Whether you’re camping, backpacking, living off the grid, or in a survival situation, you’ll need to consider your options for staying warm in all kinds of weather. That’s tougher than it sounds when you’re far from civilization.

How to Dress Up for Winter Survival

Clothing is your first level of protection in this harsh weather, so make sure you’ve got proper layers on. 

Your base layer should be made of wicking fabric to keep sweat and moisture off of your skin. Merino wool is an exceptional kind of fabric that keeps you warm and dry when it’s cold and keeps you cool when it’s hot out. Synthetic fabrics like polyester do well as a base layer, too. Stay away from cotton as it absorbs a lot of moisture. It will stay soaked when it gets wet, and that could lead to hyperthermia.

People who live in arctic climates have used animal hide and sealskin to fend off the cold, so take it from them to keep warm if you’re in the same terrain. Prevent heat from escaping your head by wearing hats and scarves.

Finding Your Way and Getting Help

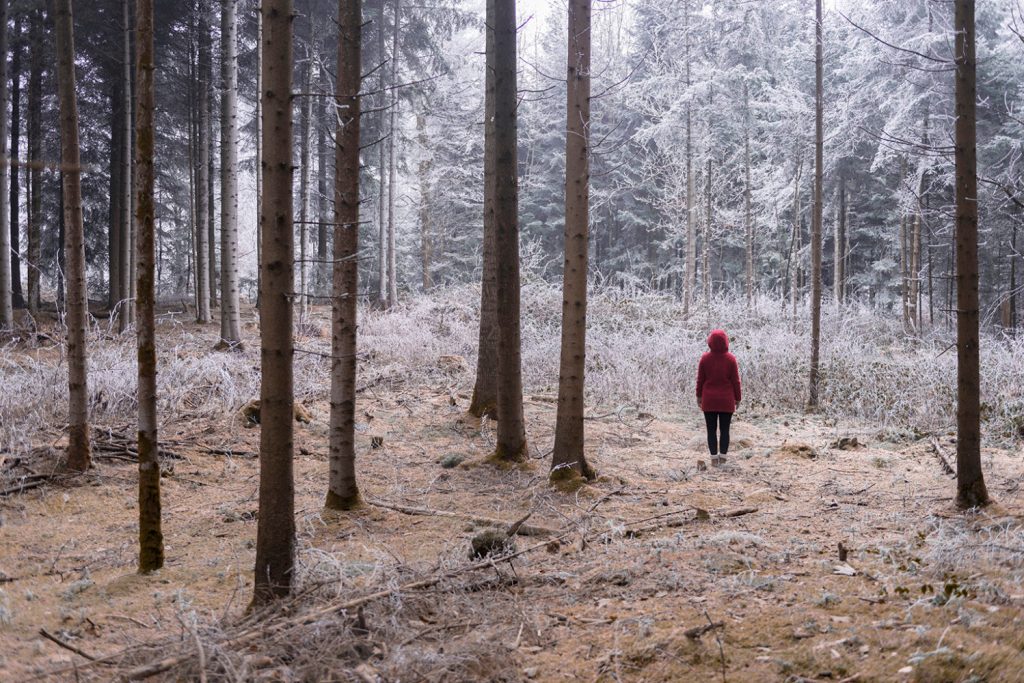
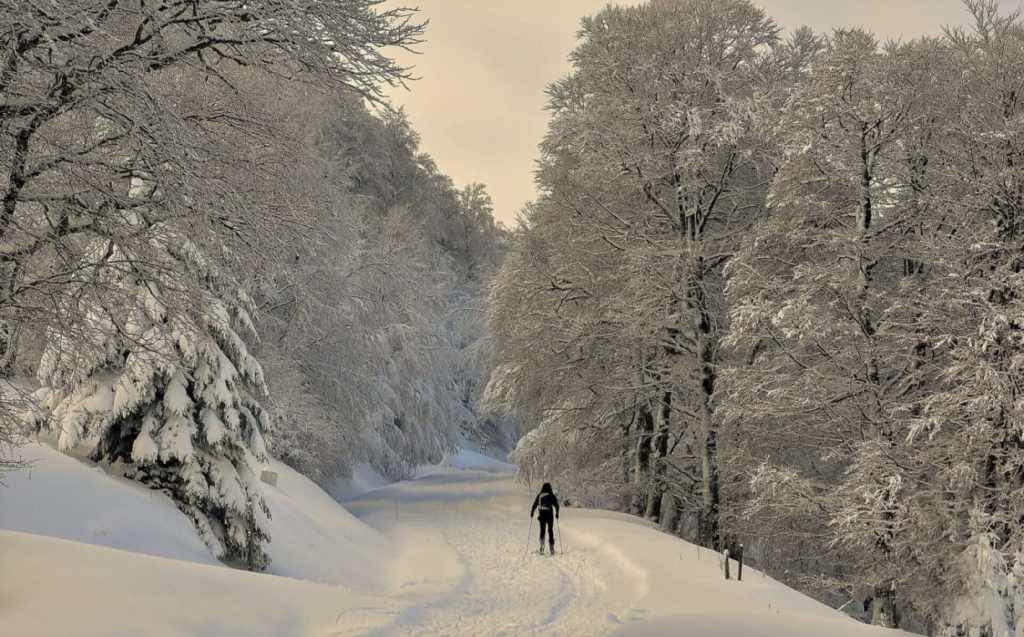
Navigating in the winter, when trails can be obscured by snow and daylight is painfully short, is no easy feat. The combination of thick snow, biting wind, and poor visibility can pose a challenge, even when you’re familiar with the terrain.

A map or even a GPS device will be of great help in finding your way back to safety. Avoid avalanche-prone areas like steep inclines and areas with scarce trees. If you can’t find a trail, try looking for other signs and watching for landmarks.

Sat phones will come in handy when you’re trying to reach for help. Fire, smoke, and mirror distress signals can be helpful, too. Anything dark or that contrasts with the white backdrop (like branches forming an SOS over the snow) can serve as a signal for help.

Pick the Right Location

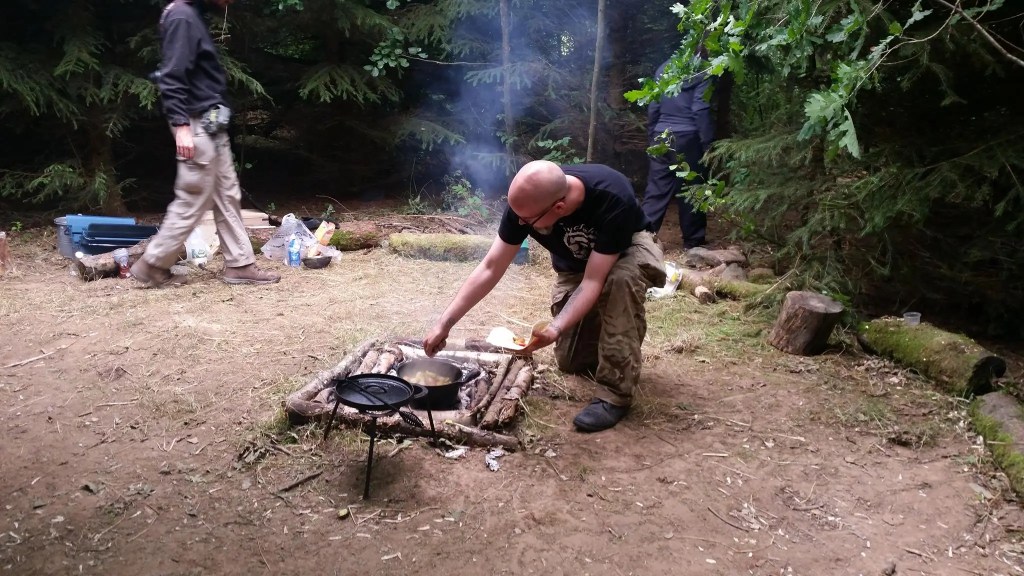
Picking the right location is crucial to building your fire. Choose one with natural protection against the wind; a large rock, boulder, or log would do. These natural windbreakers can also act as heat reflectors. Dig beneath the snow and keep the area clear from it. Don’t build your fire beneath trees — their branches are laden with snow that can melt and put your fire out.

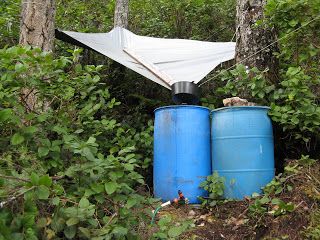
Build a Winter Shelter

You gotta keep in mind that not all tents are suitable for the winter, so pick one that can withstand the biting cold.

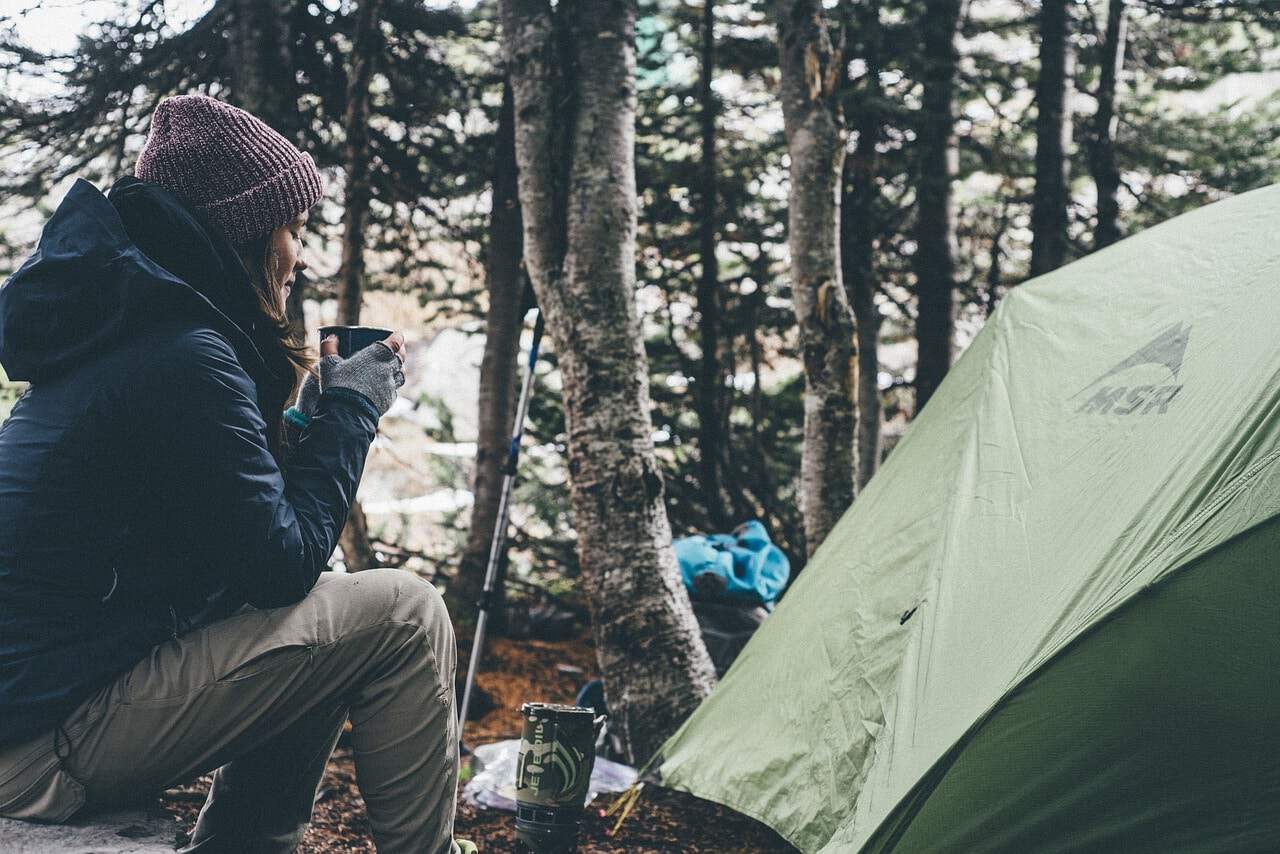
Many cold-weather shelters and specialty tents are large enough to accommodate you and your gear and have ample space for wood-burning stoves to keep you warm. 

Basic seasonal tents are usually made from nylon, while cold-weather tents are typically made of silicone and polyurethane to keep cold and moisture out. However, these types don’t accommodate wood-burning stoves very well. They can be bulky and heavy as well, so take the fabric’s weight and durability into account when you’re choosing a tent. You also have to make sure that the tent has enough ventilation.

Another great addition to your winter tent is a space blanket. Also known as an emergency or mylar blanket, this item helps reflect heat to the body. It’s also lightweight and widely available so that you can bring one or two in your backpack. Tarps also do a good job of keeping the rain out of your camp.

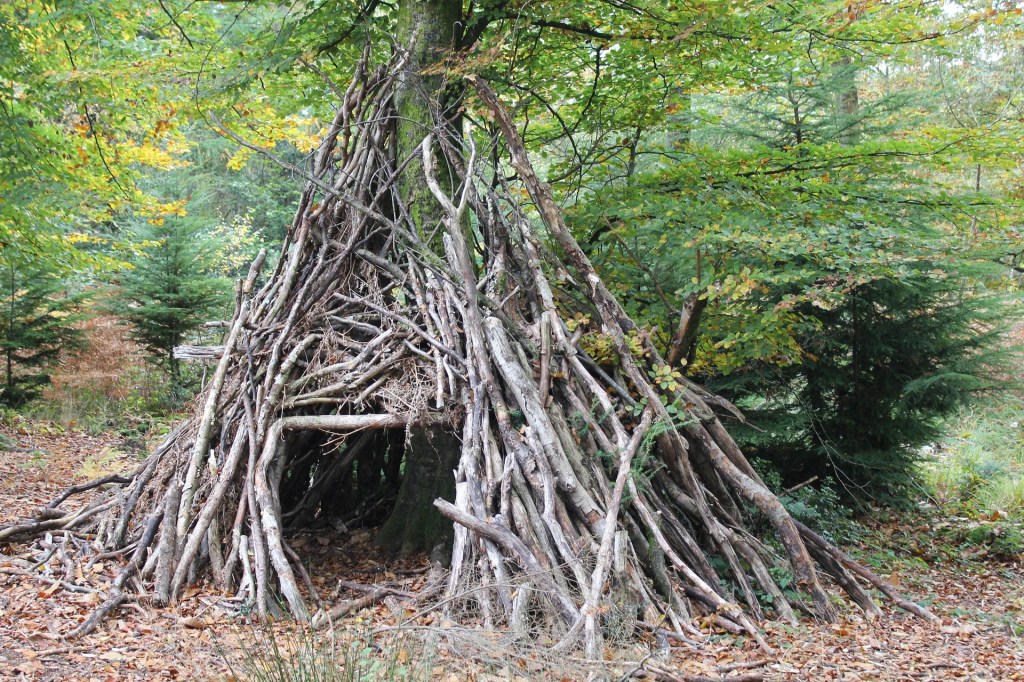
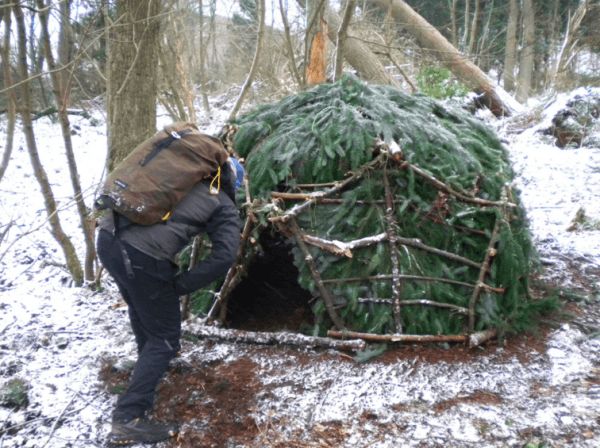
On the off chance that you find yourself without a tent, space blanket, or tarp, there are various emergency shelters that you can build using natural materials like poles, branches, foliage, and some cordage.

Sometimes several feet of snow can be a good thing as it allows you to build snow caves. Snow caves are made by excavating snow and forming a shelter to protect people from the wind.

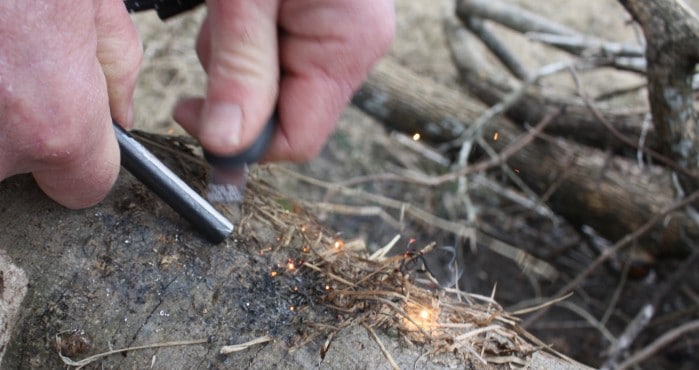
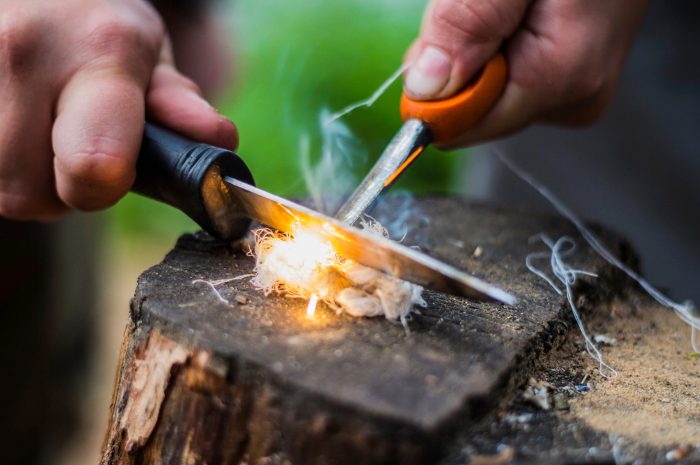
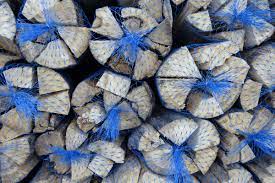
Carry Multiple Firestarters

Why stick to one when you can have a bunch? It’s always great to have an array of firestarters within your reach — when one doesn’t work, you’d still have other options to light your fire with. 

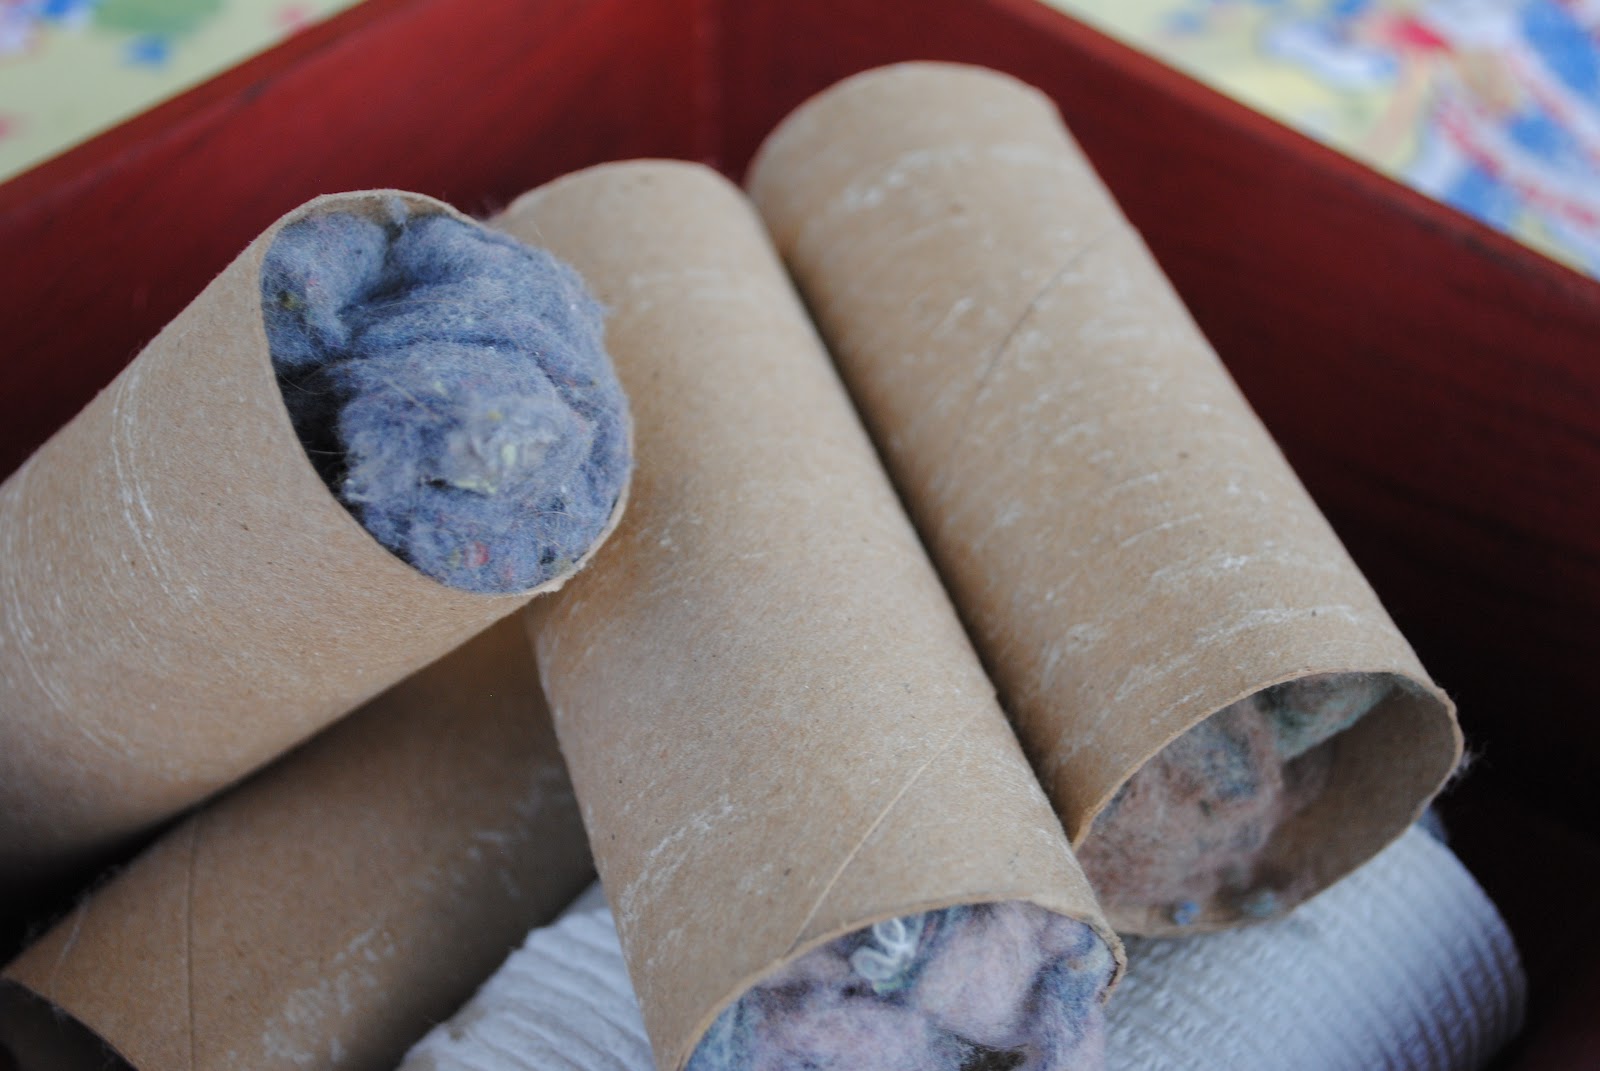
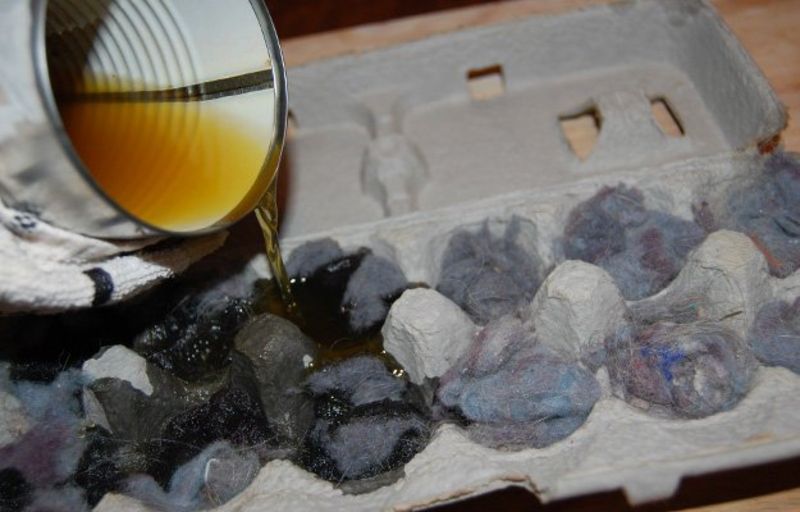
If you’ve suffered from a wreck, you can use the oil to start a fire. Char cloth is also a handy firestarter that you can keep in an Altoids tin. You can also pack some DIY egg carton firestarters in a waterproof Ziplock baggie.

Make sure you’ve got more than one way to light that fire. Your matches can easily get wet and soggy, so don’t forget to pack a Ferro rod, firesteel, and a couple of trusty BIC lighters in your kit as well.
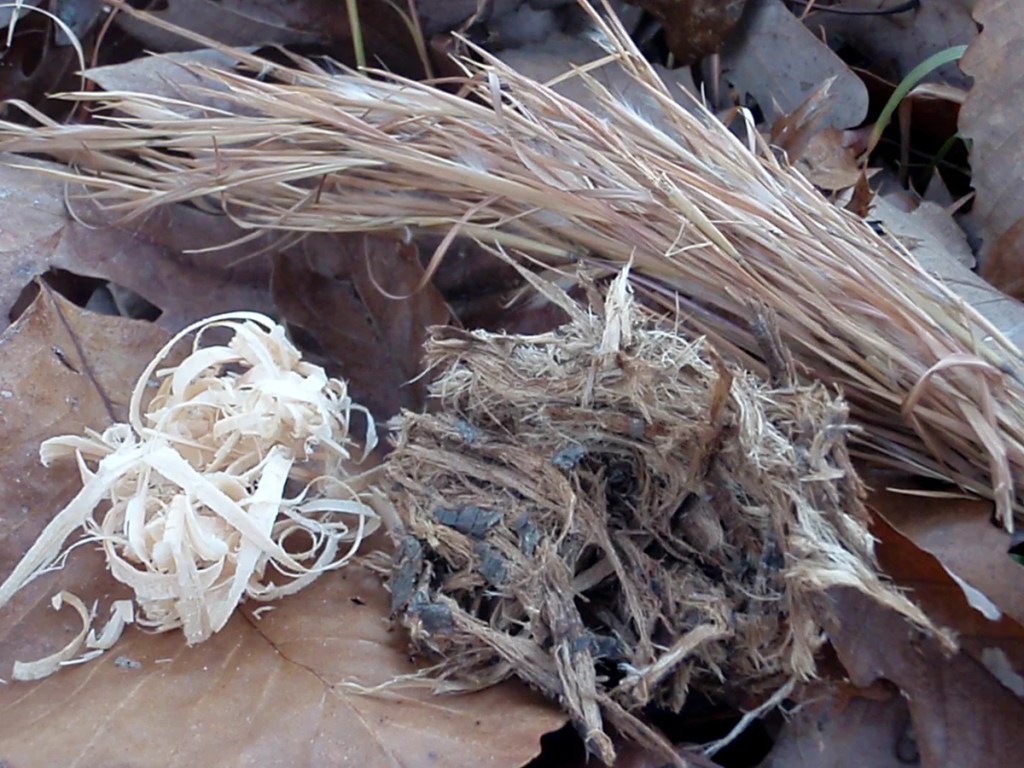
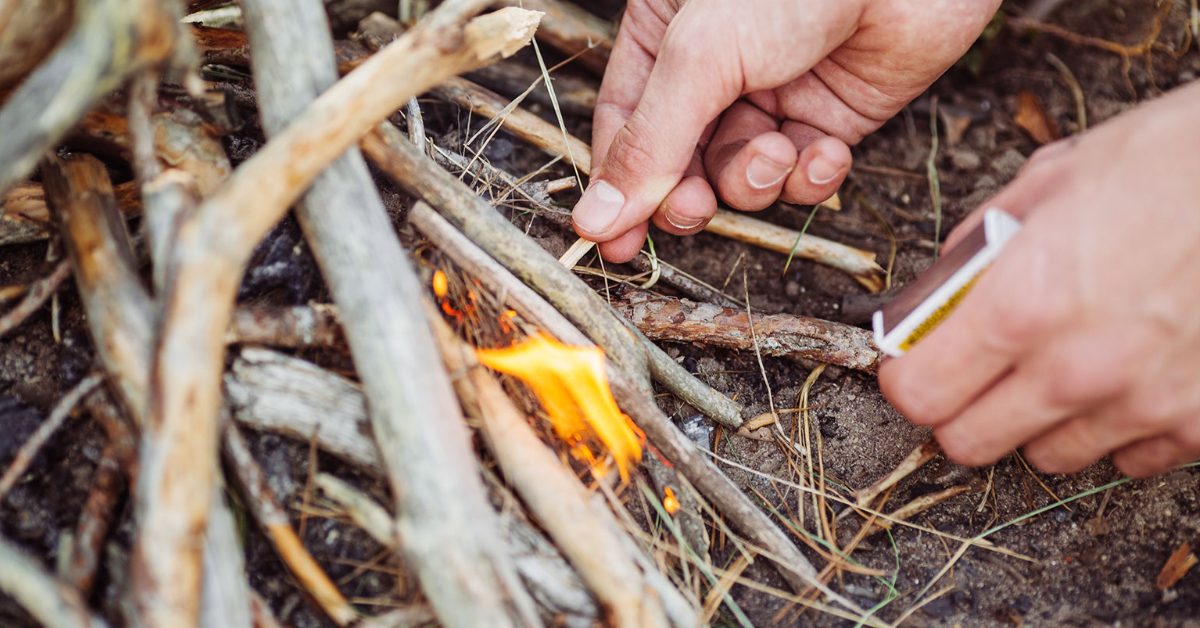
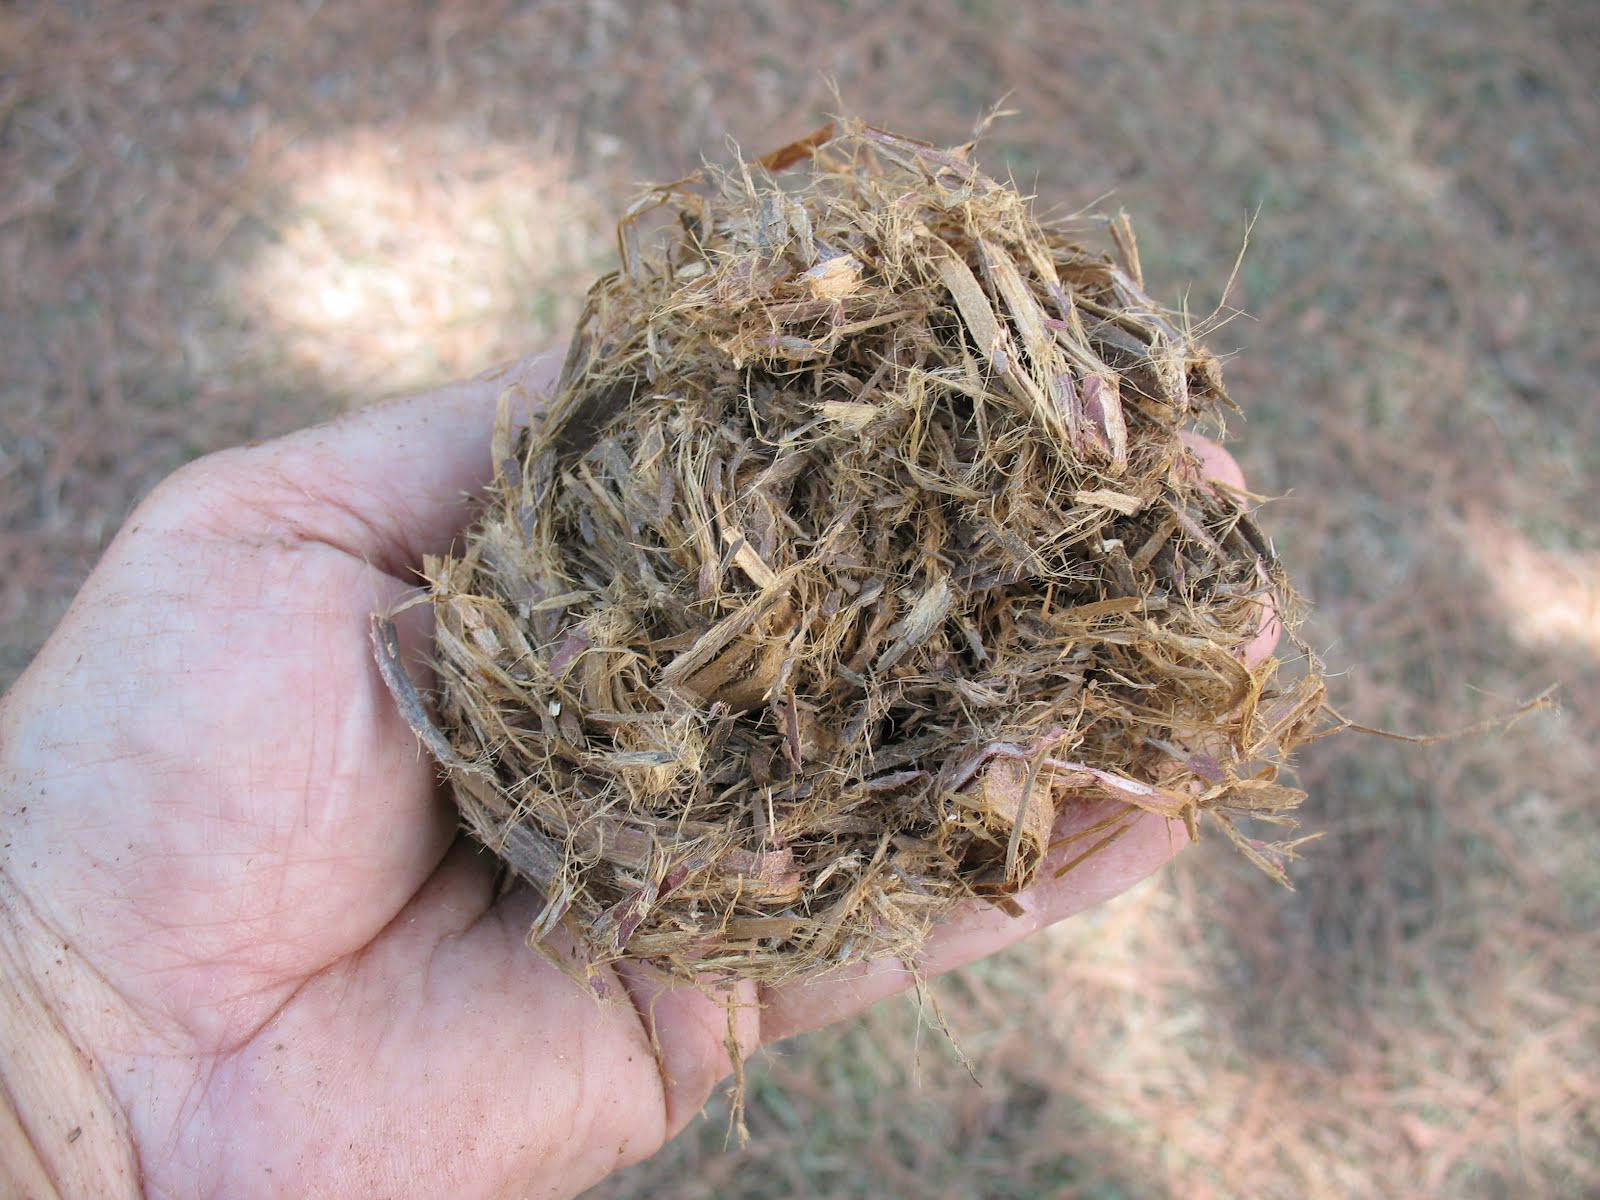
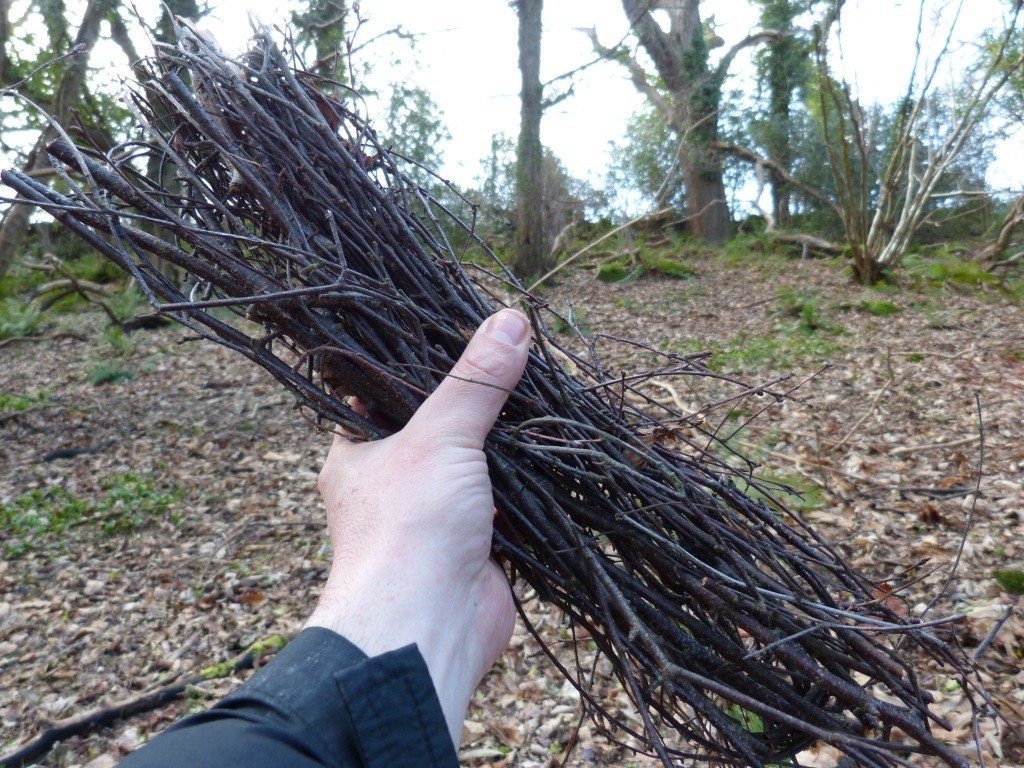
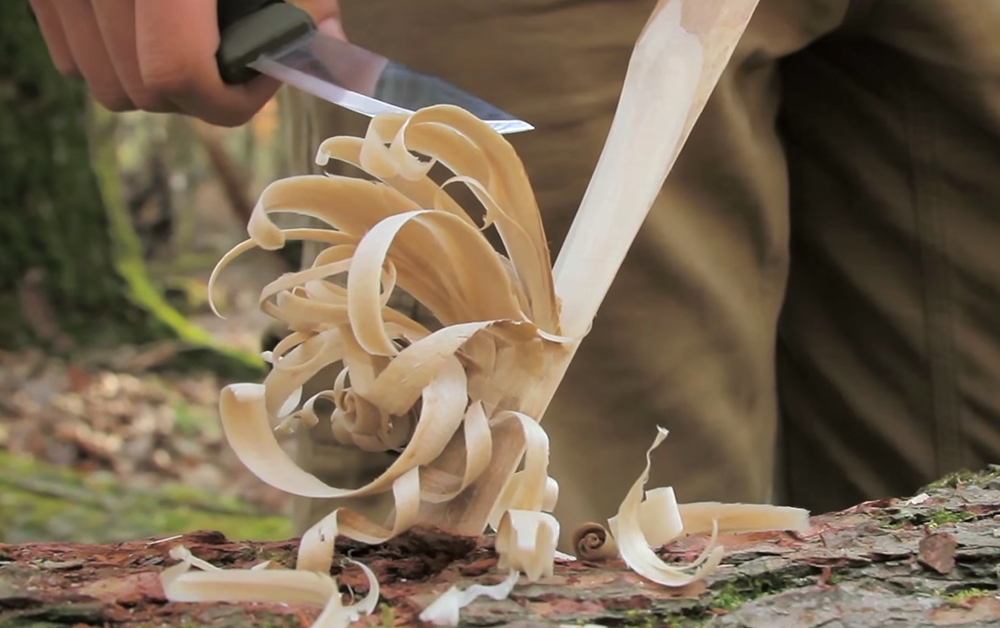
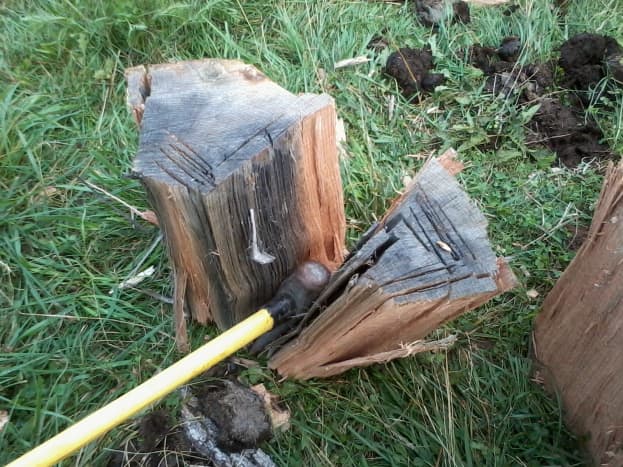
Find Dry Tinder

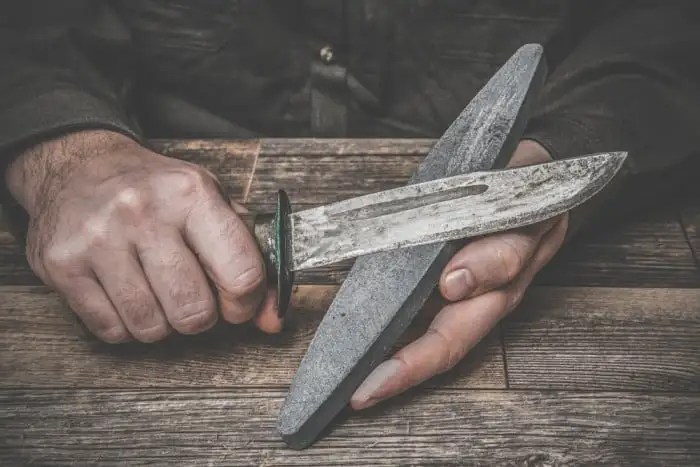
Trying to find dry tinder in the winter can be a challenge as everything will be damp from the snow. Your knife will be your best friend; you can use it to whittle down dead branches until you get rid of the damp bark and find dry wood. Pine and birch bark also work nicely.

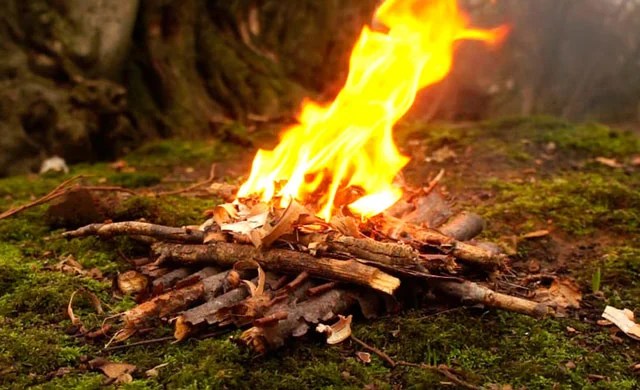
Keep That Fire Burning

Making a fire in the winter is tricky, but not impossible. The cold, damp, and windy conditions will be a challenge, so have a lot of patience…and dry tinder on hand.

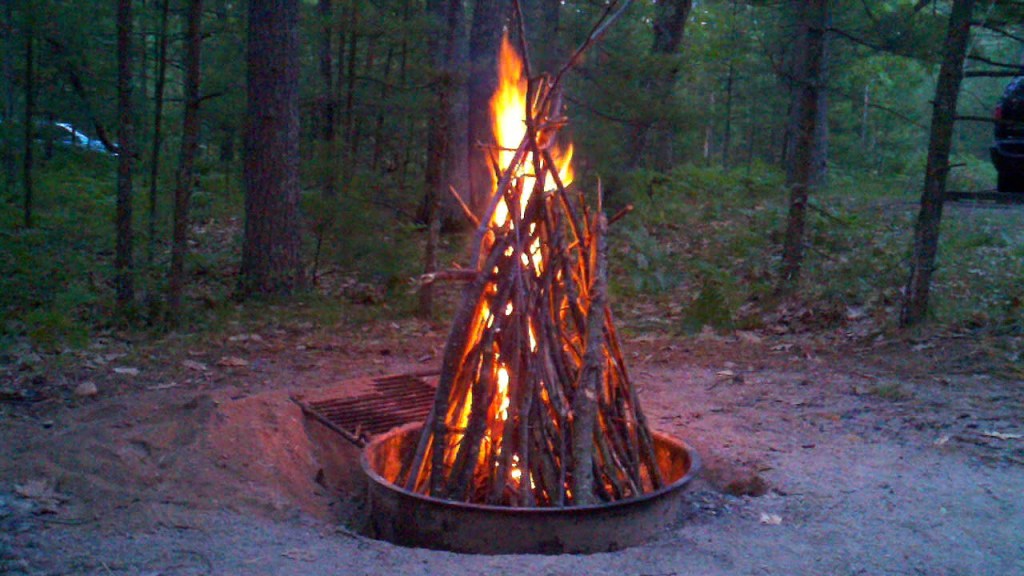
Use the Right Type of Firelay

Using the right firelay can keep your fire burning for a longer period. Ideal firelays for winter are the log cabin and upside-down firelays, as they can burn for a long time with minimum supervision. You can also try to build a long fire or this self-feeding fire that can burn for 14+ hours.

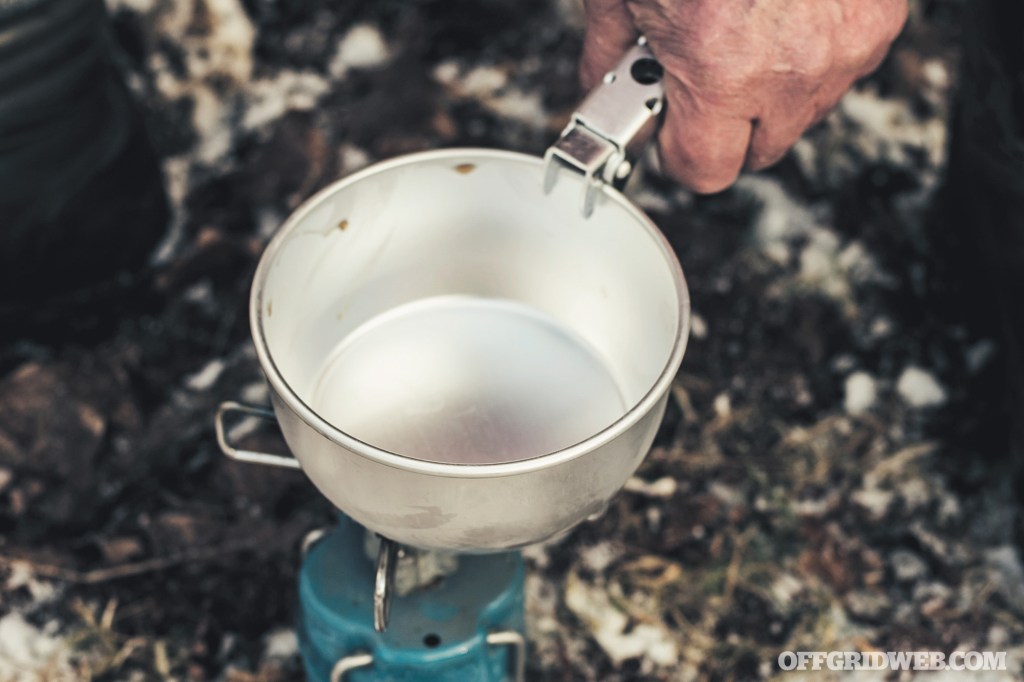
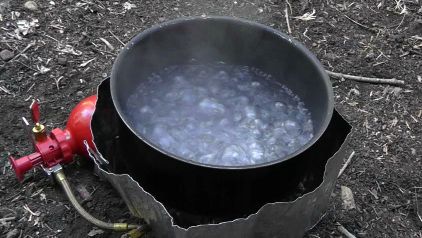
Stay Hydrated (But Don’t Eat Snow)

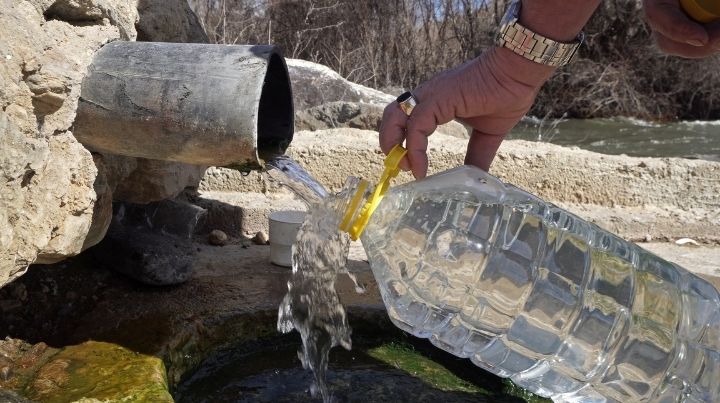
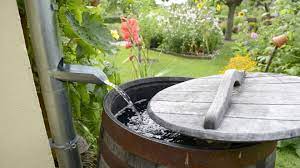
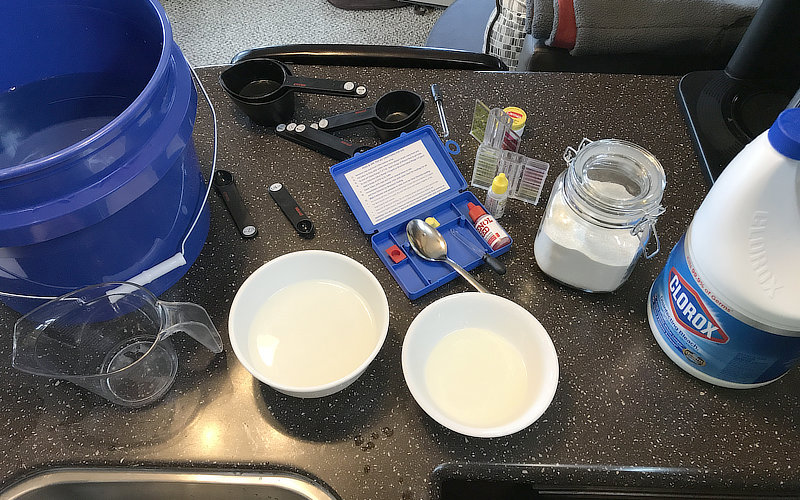
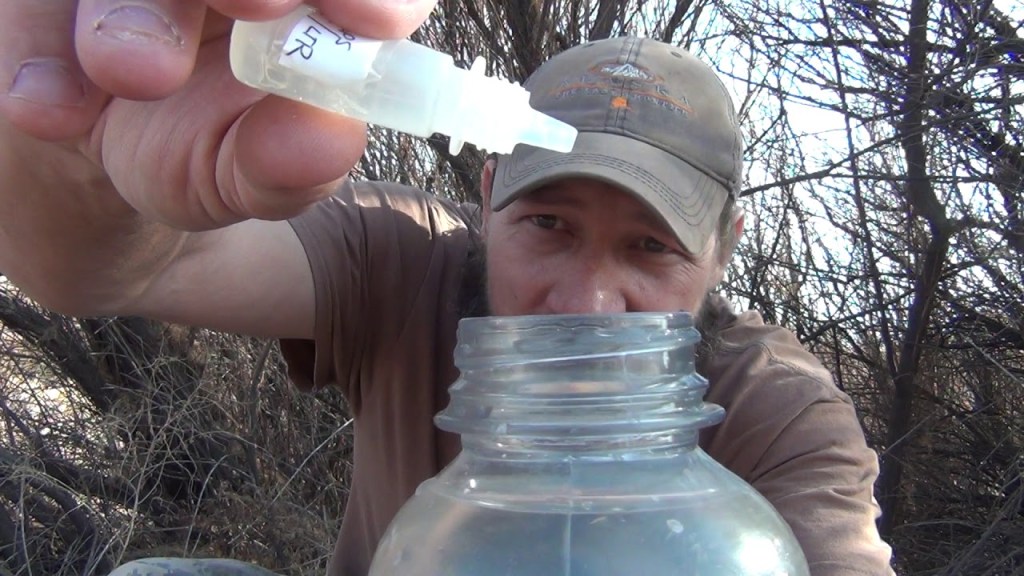
Just because it’s cold out doesn’t mean you don’t have to replenish lost liquids. It’s also a way to protect yourself from hypothermia and possible frostbite. Fortunately, finding water during the winter is not a problem as long as you have the means to melt it.

Under no circumstances are you to ingest snow.

Doing so would decrease your core temperature and will bring all sorts of trouble, starting with hypothermia. You want to pack that snow tight into a container to get rid of any excess air before putting it over the fire to melt. The heat also kills microorganisms and other nasties from your drinking water.

How to Find Food and Keep Your Energies Up

It’s important to keep your energy up during the winter. Your body is working twice as hard to keep you warm, so it will need all the fuel it can get. Hypoglycemia (low blood sugar) is a real threat during these cold times, and it can often lead to confusion, headaches, and dizziness. 

Drinking plenty of water will help reduce the hypoglycemic effect. Foods like apples, molasses, licorice roots, and wild yam are also particularly effective in combating hypoglycemia.

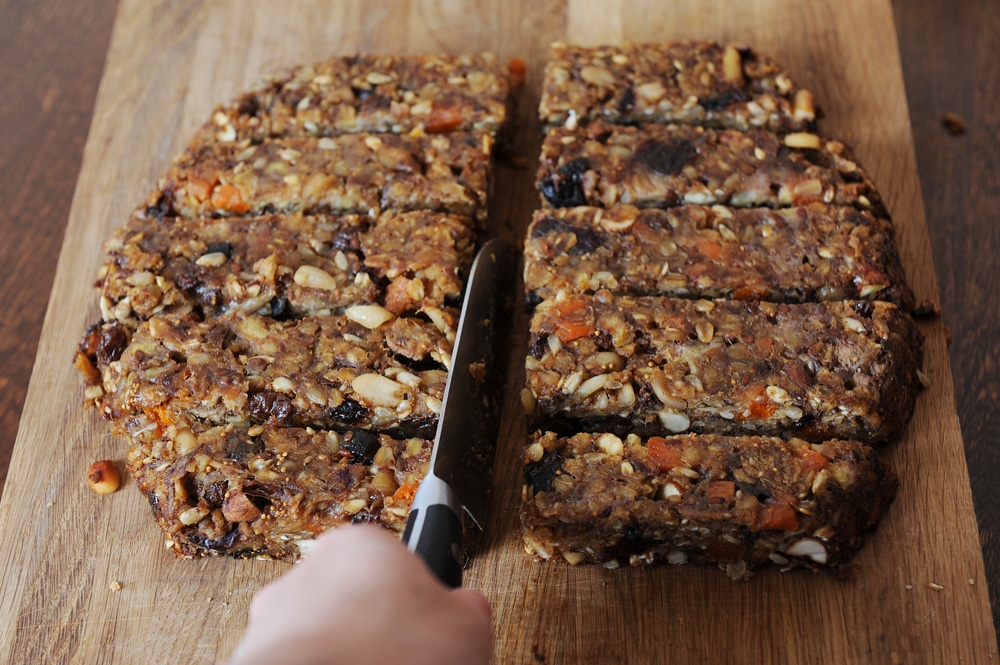
Other foods that can tolerate winter temperatures include wild nuts like acorns, berries, plums, cattails, and mushrooms.

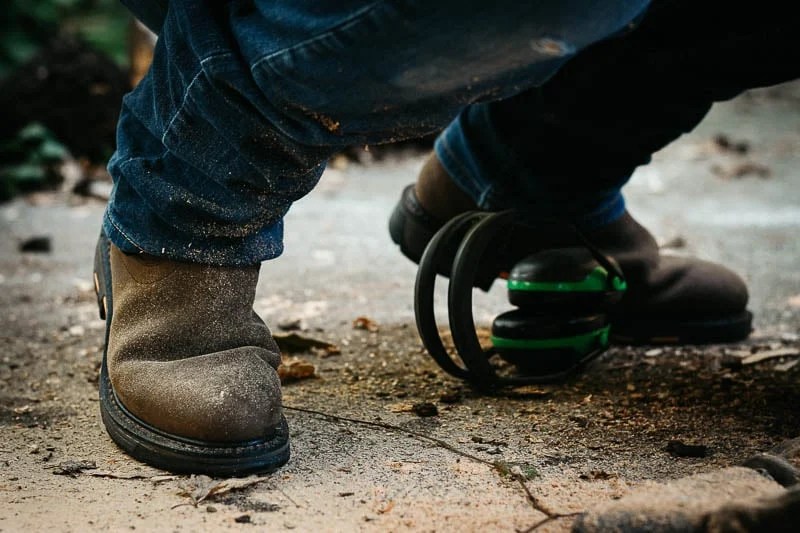
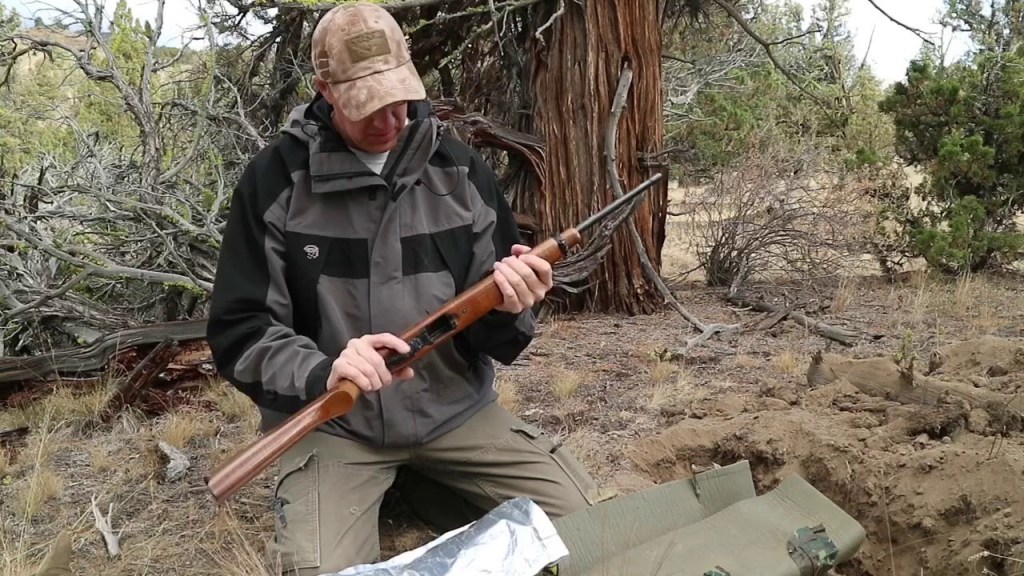
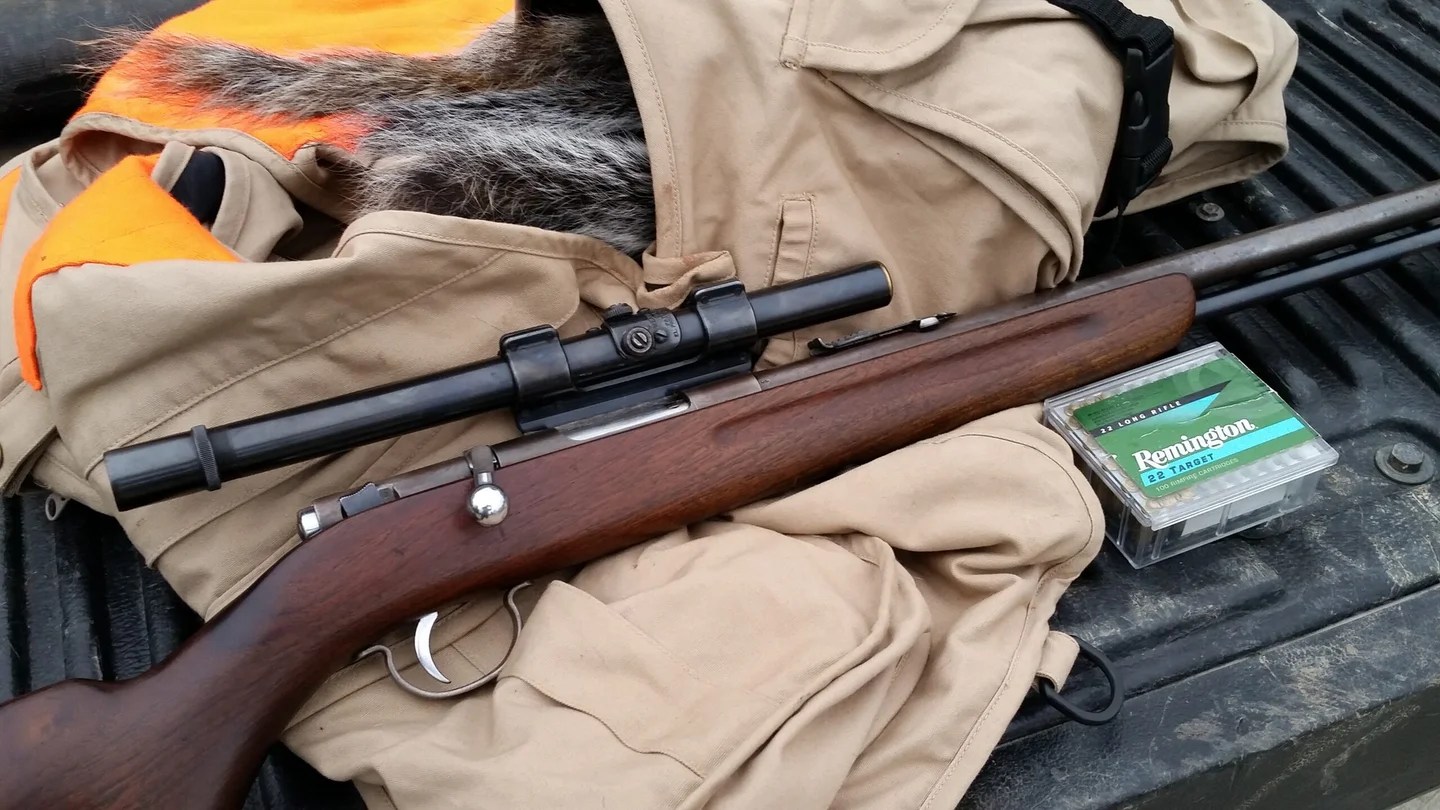
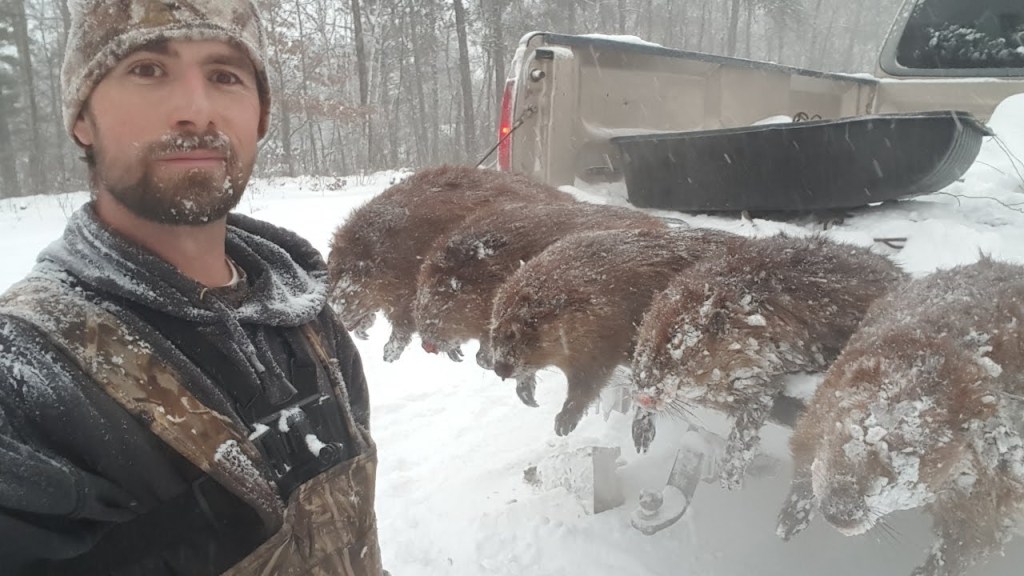
Trapping is an efficient way to find some meat. Rigging multiple traps and snares saves you a lot of time and energy compared to hunting. Rabbits and squirrels are available even during the winter. Their meat is pretty lean and won’t lend a lot of fat, but it should sustain you in a survival situation. Other meatier game includes beavers, raccoons, and deer, but you’ll have to hunt for these acts.

You can read more by going here.

Survival Prepper: Climate Change

We live in a world suddenly plagued by wildfires, extreme heat, novel viruses, and sociopolitical unrest.

The realities of climate change are slapping me in the face. I’ve had personal run-ins with weather disasters for five straight years now, starting in 2017 when my mom’s house burned down in California’s Tubbs fire. This summer, after temperatures topped off at 116 degrees in Portland, Ore., the city I call home, I know the game has changed. If this can happen, anything can. Snow in Houston: Why not? How about a heatwave in Greenland or severe flooding in Germany? Before summer even began, the entire West — extending as far east as Texas and as far north as British Columbia — was laid flat by record-breaking temperatures, worsening drought, and an unusually early fire season. For more than two weeks, the Bootleg fire has been burning in southern Oregon, so hot and extreme that it generates its own weather.


The only thing predictable about such events is that they will continue to happen, with increased severity and frequency, and they will cause a lot of human misery. They’ve forced me to reevaluate my indifference toward prepping.


In fact, our whole society seems to have been caught off guard by changes that, not so long ago, seemed far off. Here in the Pacific Northwest, people sweltered in houses that aren’t typically equipped with air conditioning. Our roadways warped and cleaved, and power lines melted; hundreds were hospitalized with heat-related illnesses. In Texas, where my brother lives, state regulators urged citizens to limit power usage during a June heatwave to avoid the massive grid outages that, during a severe winter storm in February, left nearly 70 percent of Texans without electricity and half without water. In New York City, heavy rainfall flooded stretches of the subway system this month; in Miami, the construction of properties on a dissolving shoreline no longer seems sound.

With these infrastructural and governmental inadequacies, people resort to improvised, often subpar measures to stay safe. Last fall, when wildfires surrounded Portland, awarding us the worst air quality in the world, YouTube videos on how to make DIY air purifiers circulated on social media. Though a box fan and a furnace filter panel were the only things required — items typically found at any hardware store — the entire city was sold out.

My prepper mentality came to mind again for me when temperatures soared a few weeks ago, and I drove to four different locations looking for ice because our refrigerator had started smoking. (According to my landlord, mine was the third refrigerator that needed replacing in less than 24 hours.) At my last stop, the cashier shook his head apologetically: “Everyone’s trying to stay cool.” This time, city residents were slapping together jury-rigged swamp coolers with large bowls of ice and those perennially versatile box fans. I’d run up against the limits of what the marketplace could provide. In a moment of desperation, I asked my neighbors two doors down if I could store my perishable goods with them. Though they kindly accommodated, it made for awkward interactions later when I had to knock on their door and ask for my coffee creamer or salad greens. After a while, I decided I didn’t really need those things after all.

You can finish reading this article by going here.

Survival Prepper: Electronics

I myself am an advocate of using technology, especially for homestead defense purposes. I prefer an induction kitchen over an open fire, without any doubt. And I know that given the fantasy of the need for an endless-expanding market, things are designed, engineered, and manufactured for failure. This is because of the need of being sold at an affordable price and keep the money flowing. YOUR money, flowing from your pocket to theirs. No matter if you decided to use some “excess” money you may have, in buying a new microwave, or some other stuff. Keep reading, please.

Simplicity is reliability.


But what I do feel the need to mention, is how important is to keep our devices and appliances as simple as possible. Simplicity is reliability. Sophistication, in my opinion, has been used for decades now to absorb the excess money generated by the boost of the companies’ profits, produced by an incredible increase in the use of automation and information technology, outsourcing, and other similar phenomena that allowed to decrease the production costs.

This sophistication has brought us extremely beneficial devices at affordable prices: heat/thermal vision for our cellphones, high-powered crossbows (carbon fiber, anyone?), and tons of other gadgets. Tablets, GPS, tasers, drones, and a good variety of these survival gadgets are going to be very useful and widely used in the sustainability or defense of our homestead. Air rifles technology and some interesting toys like 3D printers and all types and flavors of machines for making other machines in the skilled hands of the mechanically savvy are all over the place.

If you don’t really need fancy electronics, then keep it simple for your basic day-to-day needs. In the present conditions, someone who needs to fix their luxury refrigerator with a Bluetooth connection and with more computing power than my laptop is going to have a heart attack. That is if they are lucky enough to find someone able to fix that kind of thing that has not left the country yet.

You need a simple repair set-up

There are plenty of tutorials about lots of maintenance so you can do without thinking it twice, always of course with the assistance of someone with the needed technical knowledge. This is important because you will be able to diagnose problems at an early stage.

You do need, as a prepper, a bio-digester that will provide the gas generated by the waste of the chicken coop, to boil the rainwater that you have filtered previously with your entirely gravity-fed, high capacity, custom homemade, filtering equipment, and prepare your coffee. Only then, you can turn on your large TV, naturally powered by your solar/wind/hydro generator/batteries setup, to admire Scarlett in all of her beauty.

Complicated electronics are great…in good times.


Electronics have come to improve lots of things, and I am pretty aware of that.

Having equipment and devices that are made to last, perhaps with analog systems, instead of lots of electronics, is something that in the long term will be rewarded.

Yes, I have some digital measurement tools, of course. A digital vernier calibrator (sort of a very precise rule used by technicians to measure dimensions of small pieces, like in machining or repairing), for example. But I do have a mechanical one J as a backup that I could buy for a few bucks (and know how to use it).

I hope you have enjoyed the reading, by Jose from Venezuela.

God bless us, fellows!

Survival Prepper: Clean Water

If you are an outdoor lover who enjoys hiking, camping, or trips in the wilderness, you understand how quickly a bottle of water can be consumed. The intense heat of the sun and sweating profusely can require you to drink more to stay hydrated. Water can be consumed quickly and you can run out fast.

This can be particularly true in a disaster situation where clean water might not be available for a while. An earthquake, flood, hurricane, or other disasters can damage water and sewer lines making freshwater unavailable for homes and families until water lines are repaired or help comes. Drinking unclean and unsafe water can lead to disease and death.

If you are in a situation where you need to find clean water to drink, here are some ideas.

Water Heater Tank


Be sure to turn off the electricity or gas before you unplug the drain at the bottom of your water heater tank. This water is already filtered water, and unless you fear it’s been contaminated, it should be safe to drink.

Stored Water


Store water in food-grade clean containers now before a disaster happens. Rinse out and thoroughly clean used 2-liter soda containers or plastic juice jugs and fill them with tap water. You can store these in your closet, behind beds, in your basement, under furniture, or wherever you have room. You can also use containers made for water storage like 5-gallon jugs, 55-gallon drums, or stackable WaterBrick containers. It is suggested that water storage be rotated every six months to 1 year. If not rotated, then have the means to filter if needed. Having some water stored on hand can be a lifesaver in the event of a disaster.

Rainwater


If you can collect rainwater in rain barrels or buckets attached to the downspouts from the roof of your home, it can be your main substitute water next to your stored potable drinking water. Rainwater will still need to be strained, filtered, and purified before you drink it.

Sillcock Key


A sillcock 4-way key is an inexpensive preparedness item that you can find and purchase online. It gives you access to emergency water in commercial buildings like entertainment venues, mall strips, ballparks, golf courses, government buildings, rest stops, and so forth. Even if the water is turned off in a building, there can still be water in the pipes. Simply locate the water spigot on any business or public building and use the sillcock key to turn the spigot on. Have a bucket or hose ready to collect the water. The Sillcock key can be used where an adjustable wrench or pliers will not.

Avoid Standing Water


Pools and puddles of water are typically a focal point for bacteria and other harmful toxins. While this water can be purified, it will probably taste bad and might contain other harmful substances that are more difficult to filter out. Brown or muddy reddish water can be a sign of rust particles or other harmful substances and must be avoided. Most purification methods typically won’t be effective in this case and the water could be dangerous to consume.

Boiling to Purify Water


If you have any water that you are not sure if it is safe to drink, you will want to purify it. One of the oldest and most proven ways to purify water is by boiling.

To purify by boiling, first, pour the water through a clean piece of cloth or a coffee filter to strain out the visible dirt and debris. Then heat up the water in a pot until it starts to boil. It’s best for the water to reach a boiling point of 212 degrees Fahrenheit or 100 degrees Celsius to destroy pathogens if you have a thermometer to check.

Allow the water to boil for a minute or so to ensure it is completely up to temperature and that anything living in the water is killed. Boiling for too long will cause you to lose some of it to water vapor. You might want to cover it with a lid so that any water you lose to vapor will collect and condense again in the pot.

You also want to note that while boiling water will kill bacteria and dangerous living organisms, it won’t do anything to salts, chemicals, or rust. It also won’t change the taste of the water due to minerals or substances that make it taste bad.

Pool Shock to Purify Water


Calcium Hypochlorite or pool shock can be a bleach substitute for purifying water. Its long shelf-life and affordability make it a good choice to have on hand when needed. It also takes up less space than liquid bleach. The EPA states that you can use granular calcium hypochlorite to disinfect water.

Create a chlorine solution: Put one teaspoon of granular calcium hypochlorite (about ¼ ounce) into ONE gallon of water and allow it to dissolve. This blend creates a stock chlorine solution.

To disinfect water: Add ¾ ounce of the chlorine solution to treat ONE gallon of water.

[The ratio to use is one-part chlorine solution to 100-parts water to be treated. This is about equal to adding 16 ounces (1 pint) of stock chlorine to 12.5 gallons of water.]

To get rid of any unwanted chlorine smell, aerate the disinfected water by pouring it back and forth between two cups or canisters. This is true for bleach purified water, or stored water as well.

Chlorine Bleach to Purify Water


You can use regular, unscented chlorine bleach to disinfect your water. Check the label that it contains 6 or 8.25% sodium hypochlorite. Avoid using color-safe, scented, or bleaches with added cleaners. Be sure to filter the water getting out any debris or sediments first.

Then use 16 drops (¼ tsp) of chlorine bleach to purify TWO gallons of water or 8 drops to purify ONE gallon. If the water is cloudy, cold, or colored then double this amount. Stir the water and allow to stand for 30 minutes.

You can find the full article here!

Survival Prepper: Essential Shoes

While it might not be as exciting or sexy as some of the survival gadgets on the market today, a good pair of boots is an essential piece of survival equipment. If you ever find yourself bugging out, forget your tennies, they won’t survive. You’ll need a good pair of hiking boots or work boots to help you on your trek through the wilderness.

Good boots are an investment. Properly cared for, they will last. But if you don’t care for them, then you can count on their life being considerably shorter. That could very well leave you in a position where you don’t have any footwear; not something you want to contemplate in a survival situation. Going without good footwear in such a situation could see your feet cut to ribbons.

Of course, a lot depends on the quality of boots you buy. Like many other things, you tend to get what you pay for with boots. Good ones are better made, with higher quality materials and greater comfort. But the quality of the boots themselves doesn’t matter as much as how well you take care of them. Proper care can add years to the life of a pair of boots.


Break Them In


Break them improper break-in may not add years to the life of your boots, but they will add years to the life of your feet. Actually, it will help your boots to last too, as painful feet cause people to walk improperly, causing unnecessary wear on soles and heels.

Breaking in should be done in small stages. Don’t try to wear your boots for a whole day, until you’ve got them well broken in. Until then, only wear them for a couple of hours at a time. That will give your feet a chance to recover so that you don’t end up limping or walking improperly.

Some boots are made with harder, stiffer leathers. If there is a part of the boot in which your foot needs to be flexible, it can help to work that area by hand, bending it over and over to remove the stiffness from the leather. Do this as you are oiling the boots, and it will do a world of good for your feet.


Waterproof Them

Waterproof boots need to be waterproofed; they don’t come that way from the factory. Even if your boots say that they are waterproofed, don’t believe it. The sprays they use at the factory aren’t very good and will wear off quickly.

Waterproofing is either done with wax or oil, depending on the way the leather was tanned. If your boots are made of oil-tanned leather, then you’ll need to use oil to waterproof them. If they are chrome-tanned, you’ll need to use silicone spray or shoe wax to waterproof them. One of the best products around for waterproofing boots is mink oil. This paste product works for both oil and chrome-tanned types of leather, as it is a combination of oils, lanolin, and silicone.

Survival Prepping: Weapons

If you’re in a survival situation, lost in the wilderness, you’ll need survival weapons of some sort to get you through.


Firearms


Firearms are often the first and most obvious choice for many people when selecting a survival tool. Guns are widely available, relatively easily procured, and easily used and carried. They also provide a level of security against dangerous animals and would-be human assailants that is hard to beat.


They are able to be quickly deployed and, in the case of handguns, can effectively be used with one hand if necessary. For those of us who conceal carry, carrying a handgun is a part of daily existence. You’ll have to decide which caliber and which style of handgun you prefer–revolver or semi-automatic–based on a number of considerations.


I’d suggest a .22 rifle as an all-around wilderness or urban survival gun, as it’s lightweight, reliable, easy to use, and clean, and the ammunition it uses is cheap, easily affordable, and small. You can kill deer and larger game with a .22. Its report isn’t too loud, which could be a disadvantage if you’re trying to signal someone. I’d also suggest carrying a larger caliber handgun, something akin to a .357 Magnum or .44 Magnum, for self-defense and peace of mind.


Of course, you should also carry an adequate supply of ammunition, which brings up another disadvantage associated with firearms. Once you run out of ammo, they’re basically useless, with the possible exception of scaring off would-be human attackers.

Knives


A knife should be considered a must-have survival tool. Carrying at least one knife, and probably more, is a given in any survival situation. Knives are the single most versatile “multitool” you can have. With a knife, you can make other tools and DIY weapons, build a shelter, build a fire, procure food, make clothing, open a can of beans and defend yourself. You can even just whittle away the time when you’re bored waiting for the rain to stop.


There are many good survival knives on the market today. I won’t go into all of the attributes you should look for when choosing a survival knife. I will, however, a mid-sized fixed blade knife and a folding pocket knife are the knife style you should be carrying. Folding knives aren’t as sturdy as fixed blade knives, but their compactness makes them easy to stow away until needed. Knives are generally lightweight enough that you can easily carry more than one.


You’ll also probably want to carry a sharpening stone with you in order to keep your knife edge keen. The sheath you choose for your fixed blade knife can also be a source of additional survival tools. For instance, you can have a knife sheath made that’ll also hold fire steel, a whetstone, a compass, and any other tidbits you might find useful in a survival situation.


Hatchet


The benefit of carrying a hatchet is that it’s both a functional tool and a self-defense weapon. A hatchet or stout tomahawk can be used to chop wood or small trees, carve a spear, clear brush, and more. It can also put a little more distance between you and a would-be attacker or dangerous animal in close quarters should you need to employ it in that regard.

In a survival scenario, I would definitely want to carry a knife and a hatchet. If you’re able, you should also consider carrying a small file with you to touch up the edge of your hatchet when necessary.

If you can comfortably carry or stow an actual, full-length ax, all the better. The weight of carrying such a tool may be prohibitive, however. You can do a lot more with an ax that might unduly tax a hatchet, but a good, sharp hatchet is a great choice. It’s relatively lightweight and can perform multiple tasks with ease.

Firemaking Basics: How To Fuel Your Fire

As a basic survival need, fire is essential in keeping your body temperature at a normal level.

Fire also enables you to cook food, boil water for consumption, and protect yourself from predators.

Temperatures tend to drop drastically at night, especially in temperate climates. In the US alone, hypothermia accounts for around 1,300 deaths each year— so starting a fire is an invaluable skill if you don’t want to freeze to death.

So, the question on our mind; how does one start a big roaring fire? You’d need three things:

  • Oxygen
  • Heat
  • Fuel

These three make up the “combustion triangle” and without one or the others, it would be impossible to ignite a fire.

20% of the air is made up of oxygen, so you don’t really have to worry about this element. The density of oxygen does decrease at high altitudes, so you have to use extra effort in creating a fire in areas significantly above sea level.

Heat can be produced through friction, like rubbing sticks together, striking a flint, lighting a match against a surface, or using a lighter.

Fuel can be any flammable object that feeds the fire and keeps it burning such as tinder, kindling, and firewood.

What’s The Difference Between Tinder, Kindling, And Firewood?


Tinder
Tinder is any dry and fibrous material that would easily combust.

When out in the woods, a “bird’s nest” made from dry tree bark makes for excellent tinder. Trees like cedar, pine, and birch are all rich in resin, which makes their barks easily combustible even when they’re damp. These resinous trees grow all over North America, too, so you wouldn’t have trouble finding them when out in the wild.

To create a tinder bundle with tree bark, all you have to do is peel the bark off of dead fallen trees. Make sure they’re nice, dry, and fluffy. Tear the bark into fine strips and bunch it up to form a bundle. Congrats, you now have tinder to start a fire.

Other things you can use as tinder include dry grass, wood shavings, pine needles, pine cones, dry coconut husks, and fluffy plants like cattails.

You can also prepare some fire starters before leaving home. These catch flame really quickly and will help you create fire even when conditions are less than ideal. An example of one would be:

Dryer lint – This may be the bane of many dryer filters, but don’t throw them out just yet. Dryer lint is made of hundreds of tiny fabric fibers and is highly flammable. You can use dryer lint on its own, or turn it into hardcore firestarters with some egg cartons and candle wax.
Cotton balls – Like dryer lint, cotton balls are great on their own, but if you slather them in petroleum jelly or vaseline, they become even better.

Kindling
Kindling is a type of fuel that’s slightly larger than tinder and is meant to keep the fire going long and hot enough for you to feed it larger pieces of wood.

With kindling, it’s important to start small. Ideally, kindling should be thin enough to snap with your hands. They’re usually around the diameter of a match, but no larger than a pencil. Think thin twigs, wood splinters, and small pieces of softwood.

Each layer of kindling that you put into your fire should ignite the next, so make sure to feed them gradually. Patience is a virtue in this stage of fire-making. Add too large pieces too soon and you’ll smother your flame.

Like Tinder, you have to make sure that your kindling is dry. Look for dead-standing tree branches and twigs. Stay away from pieces of wood that are on the ground, since they absorb a lot of moisture. They’re most likely rotten or have vegetation growing all over them, too. If a branch bends but doesn’t snap, that means it still has some moisture within and is not ideal for kindling.

It could be difficult to find good kindling after a rain shower, where everything’s wet or damp. It could also be a challenge when you’re in an area with limited trees, or if all you could find are thick tree limbs. In such cases, you’d need to know how to create feather sticks.


Firewood
Once you light a fire with your tinder and kindling, it’s time to keep it going by feeding it larger pieces of fuel. You can bring some processed firewood from home, buy a bundle from camp stores along the way, or gather some firewood from dead standing trees around your camp.

Be careful not to smother your fire with too big pieces. Carry a bushcraft axe or learn how to baton with your knife to break large chunks of wood into smaller pieces.

Building Shelter: Do’s & Don’ts

I think there are as many different ideas on how to build a survival shelter as there are survivalists. I have spent my share of nights in the wild, many times without any shelter, but on occasion, a good shelter comes in handy.

When to Build
I think the biggest mistake a lost person who really needs a shelter makes is that they wait too long before they decide to make a shelter. Most people who die in the wilderness do so from exposure.

A lost person thinks they are going to find salvation just around the next bend, or just over the next rise. The problem is that this thinking keeps on until they notice darkness is falling and it is almost too late to put any kind of effective shelter together.

Location, Location, Location
The next problem is many people pick the wrong location for their shelter. By just looking ravines makes a nice location for a shelter, but are prone to flash flooding. Avoid them because they can be deadly. Many will fail to look overhead when building their shelter, and end up with a dead tree, or large rock that could come down on them in the middle of the night.

Depending on where you live, unless the forest has been logged you can’t completely get away from large trees that may come down or drop a big branch on you. The best bet here is to find a large downed tree and build your shelter against it. This way the tree will take the blow, and hopefully spare you if something does fall.

Wind Direction
One of the most annoying things is to get a nice shelter built and then put in your fire, only to have the smoke inundate your shelter because you didn’t take the wind into account when you built it. A good angle away from the wind is best.

If you place it directly away from the wind the lee will cause the smoke to eddy and back up into your shelter.

Fire Safety
So you have a nice shelter built and warm fire in front only to be awakened from a deep sleep by your shelter being on fire! Basic fire safety is important especially in a survival situation, where what would be an inconvenience in a normal situation, can be fatal if you are lost. There should be some thought put into building your shelter other than just the mechanics of building it.

It’s important that you are not only warm, fed, sheltered, but also safe. Fire, while providing you comfort, can be very dangerous. So, please make sure to respect the nature around you by caring for your fire properly. Do not start a forest fire. Your fire pit must have boundaries, and you must keep an eye on it. Also, as we mentioned previously, observe where there is a break in the tree canopy before you set your fire.

Survival Prepping: Best Non-Perishable Foods

Natural disasters—a flood, hurricanes, blizzards—often come with little or no warning. Stocking up now on the right non-perishable food items will help you weather the storm (or global pandemic) with less stress.


Why Eat Differently During an Emergency?


Fueling your body during an emergency is very different from your everyday diet. (Think of how an emergency fund functions differently than a savings account.) Because you’ll probably expend more energy than you normally would during your emergency plan, you should eat high-energy, high-protein foods. If the emergency is disease-related (as in the coronavirus pandemic of 2020), it is especially important to eat nutritious foods that will help you maintain good health. And because you’ll have a limited supply in your emergency preparedness kit, the higher-quality foods you eat—and the fewer of them—the better. Start stockpiling as soon as possible!


What to Always Keep in Your Pantry


These non-perishable food items (or close to it) have lengthy expiration dates, so you can stash them away for long periods of time, even if it’s not hurricane season or tornado season. Make a list of everything in your stockpile and check expiration dates every six to 12 months to keep things fresh. And don’t forget to have a can opener on hand at all times—all that food won’t be of any use if you can’t open it.

Peanut butter

Peanut butter is a really good survival food. It is readily available, shelf-stable, nutrient-rich, calorie-dense, and easy to store while being easy on the wallet compared to many survival foods. Powdered peanut butter, specially designed for survival stores, can even last up to 10 years.

Powdered peanut butter is the best peanut butter for long-term storage. If it is sealed in a #10 can and stored in a cool, dry place it can last between 5 and 10 years. It can also last up to a year in a plastic pouch.

Whole-wheat crackers


Crackers are a good replacement for bread and make a fine substitute when making sandwiches. Due to their higher fat content, whole-wheat or whole-grain crackers have a shorter shelf life than their plain counterparts (check the box for expiration dates), but the extra fiber pays off when you’re particularly hungry. Consider vacuum-packing your crackers to prolong their freshness.

For added value, purchase a family-sized pack of whole-wheat crackers. The toasted crackers give a bit more of a healthful kick and are made without high-fructose corn syrup as well.


Nuts and trail mixes


Stock up on these high-energy foods—they’re healthful and convenient for snacking during a hurricane, tornado, or other emergencies. Look for vacuum-packed containers, which prevent the nuts from oxidizing and losing their freshness.

Canned tuna, salmon, chicken, or turkey


Generally lasting at least two years in the pantry, canned meats provide essential protein. Vacuum-packed pouches have a shorter shelf life but will last at least six months.

Moreover, vacuum-sealed packs may come in handy if you don’t have a can opener. For your pantry, purchase a 12-pack of Safe Catch Elite Wild Tuna, which has the lowest mercury count of any brand on the market, making it a safer choice for kids and even pregnant women.


Canned vegetables, such as green beans, carrots, and peas


When the real deal isn’t an option, canned varieties can provide you with essential nutrients, making these a great hurricane food or natural disaster option. To pack in as many of those healthy vitamins and minerals as possible, order a case of mixed vegetable cans by Libby’s. Inside each can you’ll find peas, carrots, corn, lima beans, and green beans, giving you a well-balanced meal straight from the jar.