Is Iowa’s Drinking Water Safe? Hell No – And You’d Better Learn These 15 Filtration Skills Before It’s Too Late
Listen up. If you’re sitting around trusting the government or your local utility to provide you clean drinking water—especially in Iowa—you’ve already lost. You’re the sheep, and they’re counting on your ignorance to keep you quiet while they dump nitrates, bacteria, and God-knows-what into your so-called “safe” water supply.
Let me be crystal damn clear: Iowa’s drinking water is under siege.
You think that glass of tap water is pure? Think again. Iowa is surrounded by fields sprayed with chemicals—nitrates, phosphorus, and manure runoff from industrial agriculture. That filth ends up right in your faucet. And they’ll say it’s “within legal limits.” Oh yeah? Legal limits set by bureaucrats who wouldn’t last three days without bottled water.
The truth? If you’re not already treating your water like you’re in a post-collapse scenario, you’re already in danger. You better start living like the grid is one blackout away from failure. You better learn to filter, purify, and protect every drop like your life depends on it—because it does.
15 Water Filtration Survival Skills You Need Yesterday
These aren’t suggestions. These are skills every prepared person must master before the water crisis knocks on your door—or poisons your kids without warning.
1. Boiling Water to Kill Pathogens
Basic, but effective. Boil your water for at least one minute (longer at higher altitudes). Kill bacteria, viruses, and parasites. If you can’t start a fire in under five minutes, you’re not ready.
2. DIY Charcoal Filter
Crush activated charcoal from a campfire. Layer it with sand and gravel in a bottle or PVC pipe. This filters out chemicals and improves taste. Not pretty, but it works when the taps run brown.
3. Using a Survival Straw (LifeStraw, Sawyer, etc.)
Carry one at all times. These suck up directly from rivers or questionable puddles and block bacteria and protozoa. Don’t trust plastic bottles in your go-bag without one.
4. Solar Disinfection (SODIS)
Fill a clear PET bottle, leave it in the sun for 6+ hours. UV rays kill pathogens. It’s low-tech and lifesaving. Got sunlight? You’ve got clean water.
5. Portable Water Filter Pump
Buy one now. Pump water through ceramic or carbon filters. Essential in rivers, ponds, and when the local supply is compromised.
6. Gravity Water Filtration Systems
Like Berkey systems. Let gravity do the work. They’re slow but thorough. Get one, stash extra filters, and keep them dry.
7. Chemical Purification: Bleach
Unscented household bleach. Use 8 drops per gallon, shake and wait 30 minutes. Smells bad, tastes worse—but if it fizzes, you live. Learn the damn math.
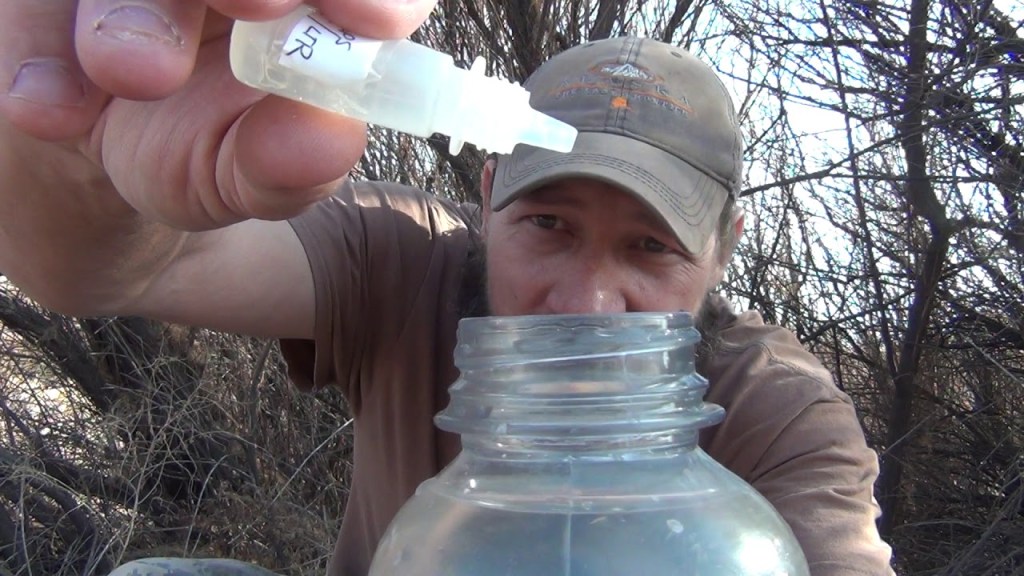
8. Chemical Purification: Iodine Tablets
Used by soldiers and preppers. Drop ‘em in water, wait, drink. Kills bacteria and viruses. Watch out if you have thyroid issues.
9. Sand and Gravel Filter Buckets
Layer buckets with gravel, sand, and charcoal. Pour water through top, collect filtered water from bottom spout. Cheap, scalable, effective.
10. Learn to Identify Contaminated Water Sources
Green scum? Dead fish? Metallic smell? Don’t touch it. Cloudy? Murky? Runoff nearby? Filter the hell out of it—or walk away.
11. Know Your Local Watershed
Study maps. Know what feeds your city’s supply. Find natural springs. Know which rivers are downstream of farms or factories. Use your brain.
12. Rainwater Harvesting and Filtering
Collect rain from rooftops into barrels. Filter it before use. It’s illegal in some places—imagine that. Pure water falling from the sky, and they want to regulate it.
13. DIY Bio-Filter System
Use buckets or barrels. Layer charcoal, sand, gravel. Maybe even use cheesecloth or coffee filters. Replace layers often.
14. Distillation
Boil water, catch the steam, condense it back into water. Removes EVERYTHING—chemicals, metals, salt. Slow, but purer than what the city hands you.
15. Test Your Water Regularly
Get test strips or kits. Know the levels of nitrates, lead, E. coli. Trust your results, not the city’s “annual report” full of watered-down half-truths.
3 DIY Survival Drinking Water Hacks for When the SHTF
When it all goes south—and it will—these hacks could be the difference between dying of thirst or dying with a rifle in your hand. Pick your battle, but stay hydrated.
Hack #1: The T-Shirt + Sand Filter
Tear up a shirt, wrap it over a bottle or funnel. Fill it with gravel, then sand, then charcoal. Pour water slowly through it. It won’t kill microbes, but it filters out dirt, bugs, and grime. Follow up with boiling or bleach.
Hack #2: Tree Branch Water Filter
Yup—certain tree branches (like pine or birch) can act like filters. Cut a piece, insert it into tubing, and pour dirty water through. The wood’s xylem filters microbes. Not perfect, but scientifically sound. Look it up.
Hack #3: Emergency Solar Still
Dig a hole, put a cup in the middle. Fill the hole with wet leaves or urine if you’re desperate. Cover with clear plastic, weight the center with a rock. Sunlight evaporates water, it condenses and drips into the cup. Slow as hell, but safe.
Final Warning
Back to Iowa. You think Des Moines has it bad with its nitrate problems? Try living near a CAFO (Concentrated Animal Feeding Operation) and tell me you trust what’s flowing from your faucet. The rivers are poisoned. The groundwater’s tainted. And no one’s coming to fix it when the system crashes.
You have to be your own water utility. Your own chemist. Your own damn filtration plant.
Iowa’s water isn’t just unsafe—it’s a canary in the coal mine. What’s happening there will happen everywhere. It’s a blueprint for environmental collapse and government inaction. They won’t protect you. They’ll tell you it’s fine right up until they’re handing out bottled water on the news.
Don’t wait for that moment. Don’t be the fool crying at a FEMA tent wondering what went wrong. Prepare now. Filter everything. Question everything. Trust nothing.
Because when the lights go out, and the taps go dry, only the prepared will drink.
If there’s one thing that everyone has to learn how to survive during tough times…
It’s making do with what you have.
Seeing the potential in everyday items is what separates an experienced prepper from a beginner.
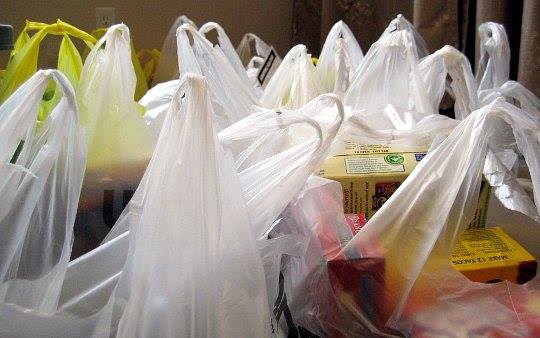
In this short letter, I want to talk to you about the surprising survival uses of a simple plastic bag.
First, let’s talk about the obvious. Carrying stuff.
Whether you’re foraging for wild edibles or just organizing your tools, a sturdy plastic bag can hold a surprising amount of weight and volume.
But let’s dig deeper, folks.
Imagine this. You’re in a pinch, and you’ve run out of clean water.
There’s a clear, beautiful stream nearby.
But we are aware of the risks of drinking directly from it, right?
Enter the plastic bag. Fill it up, then use your survival water purifier and make it safe to drink.
Another use is in food gathering. Fill a bag with lush, green, non-poisonous leaves, and you’ve got yourself a solar still that can provide you with precious drinkable water.
(There are tons of tutorials on the web on how to do that).
Or let’s say you’re caught in the rain without proper gear.
A large trash bag can easily be converted into an emergency poncho, keeping you dry and protecting you from hypothermia.
One more tip…
One that might sound a little unusual.
A black plastic bag can be used for signaling.
Fill it with air, tie it shut, and you’ve got yourself a noticeable distress signal that could attract the attention of rescuers.
I’m not saying a plastic bag is the answer to every survival need.
But in a pinch, it can serve you in ways you might not expect.
The key, as always, is to think creatively and adaptively.
The more you can see the potential in the ordinary, the easier you’ll fare when the chips are down.
So, the next time you see a discarded plastic bag, give it another look. It might just be your ticket to self-sustenance.
This Will Be Your Most Robust Tool When SHTF
Let me ask you an honest question.
When SHTF, what will be your most useful tool?
Most people think about their stockpiles or their security systems.
However, there is another important aspect of emergency readiness that is quite often overlooked.
And that’s your skills.
If everything around us crumbles to the ground, the dominant currency will shift.
And our usual means of exchanging goods and services no longer hold value.
If that happens, your unique skills become your most valuable asset.
The more diverse your skillset, the more valuable you become to your community, and the better you’ll do when everything else falls apart.
In such a world, it’s not about being the strongest or the smartest.
It’s about having a wide range of abilities that can assist you and those around you navigate through challenging times.
The more versatile you are, the more ready you’ll be for whatever comes your way.
So, what can you do to ensure that you have the most powerful tool at your disposal when SHTF?
The answer is simple.
Invest in yourself.
By learning different skills and expanding your knowledge, you become more well-rounded and capable.
You don’t have to be an expert in everything, but even a basic understanding of various skills can make a significant difference when it matters most.
This also means that everything you know so far could be useful.
Are you a good cook?
A good mechanic?
A good dentist?
When SHTF, everything could be useful?
If you can provide something that other people will need, you will be in a more advantageous position to protect your family.
You will be able to trade your skills for food, water, gear, and anything else you might need.
So think about the abilities that you currently have…
What skills you can acquire?
Where you can improve?
And try to expand your skillset as much as possible
How To Be Your Own Medic When SHTF
Imagine this…
A major emergency has struck, and people everywhere are panicking.
You find yourself alone, with no healthcare personnel in sight.
You’ve got a nasty cut that needs attention, pronto. Do you know what to do?
In situations like this, knowing how to perform first aid on yourself is crucial.
It’s a piece of knowledge that every American needs to know.
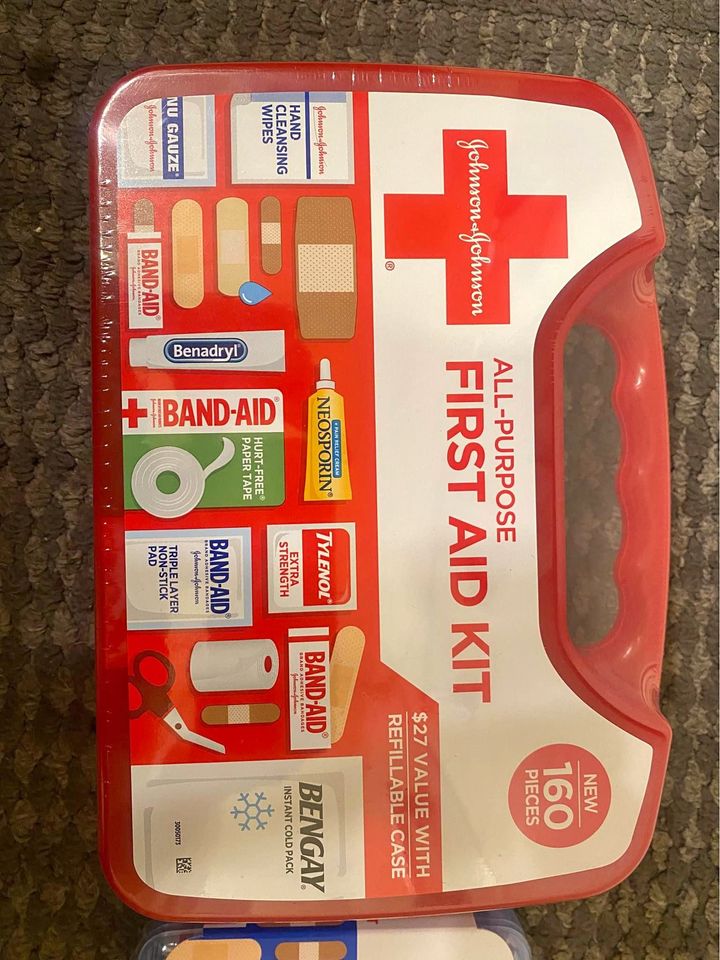
Everyone has a trusty first aid kit…
But how many of us actually know how to use everything in it properly? Knowledge is your greatest weapon, folks.
Let’s start with the basics.
First up is dealing with cuts and scrapes.
If it’s a minor one, you just need to clean it with warm water and soap, apply some antibiotic ointment, and cover it with a bandage.
However, if it’s deep, you need to take care of the bleeding first.
Apply pressure using a clean cloth until it subsides.
If it’s very severe, you might need to use a tourniquet, but this should be your last resort.
Next, let’s talk sprains.
If you’ve rolled your ankle or twisted your wrist, remember the acronym R.I.C.E.
Rest, Ice, Compression, and Elevation.
Keep the injured area immobilized, use an ice pack if available, wrap it in a bandage, and elevate it above your heart level.
How about burns?
Everyone has felt the sting of touching a hot pan. Minor burns can be soothed with cool (not cold) water and a soothing cream or aloe vera.
Severe burns, however, require immediate professional attention.
The safest thing you can do is cover it with a clean, dry cloth and try not to burst any blisters.
So far so good.
The true challenge arises when it comes to dealing with broken bones.
If you suspect a fracture, the first step is immobilization.
Use a splint or even a piece of wood to keep the injured area from moving. Then, apply a cold pack to reduce swelling.
And remember, this is a temporary fix to survive until you receive professional attention.
I know this is a lot to take in. I’m not expecting you to become an expert medic overnight.
But the reality is that in a survival scenario, we have to take on roles we might not be comfortable with.
You may have to be your own medic, nurse, and first responder rolled into one.
I suggest you start with these basics, and then keep learning.
Because in the world of survival, knowledge isn’t just power. It’s everything.
Focus On These Areas To Retain A “SHTF” Physique
You know that sinking feeling when you’ve been sitting too long and stand up, just to feel aches and stiffness in your joints?
Imagine that feeling in a high-stress emergency situation.
Not an ideal scenario, right?
When it comes to prepping, we often focus on the tools, the skills, and the items we need to endure.
However, we mustn’t overlook one of our most important assets. Our own muscles.
Physical fitness is an essential, yet often underrated, aspect of prepping
In an emergency, a strong, agile, and resilient physique can make an incredible difference.
Whether you’re bugging out on foot, chopping wood for a fire, or defending yourself and your family, your physical capabilities will play a critical role in your overall security.
To build an emergency-ready physique, focus on these key areas:
Endurance
When emergency strikes, you may have to cover long distances on foot, carrying heavy loads.
Cardiovascular exercises like running, biking, or swimming will allow you to build the stamina you need.
Strength
In a high-stakes situation, you’ll likely have to carry heavy equipment, move obstacles, or climb over barriers.
Incorporate weight training or bodyweight exercises to build overall strength.
Flexibility
Flexibility and mobility are essential for injury prevention and general well-being.
Stretching can allow you to maintain a full range of motion and reduce the risk of injury in high-stress situations.
Balance
Good balance is vital for navigating uneven terrain, crossing streams, or climbing trees.
Incorporate exercises like single-leg stands, balance board workouts, or even slacklining to improve your stability.
And if you want to make the most of your workouts, you can even train outdoors.
This will allow you to become more comfortable with various terrains and weather conditions.
Folks, remember that a fit and healthy physique is one of your most valuable assets in a high-stakes situation.
Don’t let your physical capabilities be your weakest link when it matters most.
Embrace the challenge and strive for an emergency-ready physique.
This Bug-Out “Mistake” Could Prove Fatal When SHTF
Imagine if a hurricane struck tomorrow out of the blue, and you were forced to bug out with no warning.
You grab your bug-out kit, you wake up your kids, you put them in your car
And your car doesn’t start.
What do you do then?
You’re left at God’s mercy.
Our vehicles are essential in emergency situations.
If you don’t want to find yourself in this nightmare situation, you always have to maintain your car.
I know that the probability of your vehicle failing on you at the worst possible moment is slim
But when we are talking about surviving, we have to eliminate anything that might go wrong completely.
Like any tool, your vehicle needs proper maintenance.
You have to ensure that the fluids in your vehicle are regularly maintained and filled to the appropriate level.
This includes oil, coolant, transmission fluid, and brake fluid.
Each of these fluids plays a critical role in keeping your vehicle running smoothly and preventing damage to your engine and transmission.
Another important aspect of vehicle maintenance is tire care.
Monitor your tire pressure regularly and keep them inflated to the recommended level.
Underinflated tires can cause poor gas mileage, uneven tire wear, and even blowouts on the road.
It’s also crucial to rotate your tires every 5,000 to 7,500 miles to ensure even wear.
Then there are the brakes.
If they fail on you at any point, it could lead to a car crash.
Regularly inspecting your vehicle’s brakes is essential.
This includes checking your brake pads and rotors for wear and tear, as well as your brake fluid level.
Properly functioning brakes are essential for safe driving, especially in emergency situations.
Remember, your vehicle is a vital tool for survival.
If it fails on you when you need it the most, the consequences could be catastrophic.
So always make sure it’s up to the task.
The Very First Essential Good That Will Become Extinct When SHTF
In the world of survivalism, one thing is certain. Emergencies can happen anytime, anywhere.
Natural catastrophes like earthquakes or hurricanes arrive with no warning.
And every family man and woman should be prepared for them.
A lot of people, however, don’t know how to do that.
With so many different possible scenarios, it can be overwhelming to figure out what to prepare for and what items to gather.
But even though the survival situations are essentially endless, they have one thing in common.
When SHTF, the first essential good that will become scarce will be the same. Water.
Water is the most important ingredient for survival, and yet, it will most likely be the first one to become extinct.
There are many reasons for that.
The most critical one is contamination.
When the power goes out, water treatment facilities and distribution systems may be damaged or cease to function.
When the water supply is compromised, clean water becomes scarce.
During natural emergencies, sewage and other chemicals also end up in the lakes and rivers, making them unsafe to drink.
In situations like these, people become competitive.
They flock to the remaining water sources, creating a high demand that quickly depletes the supply.
That’s why before you do anything else, you need to ensure you always have drinkable water.
Your first step should be to store water.
It’s recommended to have at least one gallon of water per person each day for drinking and hygiene purposes.
Store water in containers that are designed for long-term water storage, like heavy-duty plastic containers or water barrels.
But storing is not enough.
No matter how much you have, it might run out.
You also need to know how to purify water.
There are several methods for water purification, including boiling, using water filters, or using chemical treatments.
Take your time to learn these skills, and practice purifying water, so you’re ready for when the time comes.
During a SHTF scenario, every drop counts.
If you were looking for a way to prioritize your preps, begin with water.
How do you ensure you always have water in your household? Reply and let me know!
How To Turn On Your “SHTF Sensors”
Did you know that you have sensors that detect emergency situations, and respond to them?
And that it was thanks to these “SHTF sensors” that our ancestors managed to survive in spite of the harsh conditions?
You can turn these sensors on whenever you want, even when things are going well.
I will show you how to do that in this newsletter.
I have no idea why this is not common knowledge.
I found that information on a small Youtube page that belongs to an American biologist.
His page should have way more followers than what it currently has.
If more people knew about this, there would be less disease.
People would live longer.
And they would make it unscathed out of survival situations.
It has to do with how our systems developed ages ago.
Our ancestors did not have the abundance of food that we have nowadays.
They would eat whenever they successfully hunted an animal, or when they’d find something edible in the surrounding land.
In other words, they would eat a lot less often than us.
This might sound like a bad thing, but it’s not.
This activated their survival sensors and gave them more energy to keep hunting.
It kept them from getting sick even though they did not have houses to protect them from the cold.
And it made them feel alert.
Nowadays, however, this rarely happens.
Whenever we feel hungry, we can just have food delivered to our houses, or go out to eat.
This makes our systems feel like they have everything they need to survive.
So they become “lazy.”
They don’t expend energy to defend themselves because there is no need for it.
So our metabolism goes down.
We burn less fat.
And most importantly, we are not ready for when a real SHTF scenario occurs.
Imagine if you asked a modern man to survive in the harsh conditions of the past.
Without having food to eat, shelter, or first aid.
These conditions could occur in survival situations.
But most people are not ready for them.
However, there is an easy answer to that.
You can begin to turn on your survival sensors as early as tomorrow.
If you simply limit your eating hours, then you can trick your system into thinking there is not a lot of food around.
I am not asking you to eat fewer calories.
But to simply restrict your eating to a shorter period of time each day, such as 6-8 hours, instead of the whole time you are awake.
People nowadays refer to this as “fasting.”
This will make you feel hungry (something we rarely experience nowadays), and activate your SHTF sensors.
And it will greatly improve your health and allow you to survive emergency situations.
Why don’t you try it?
This Ancient Skill Could Protect You When SHTF
As humanity evolved, we learned to use technology to simplify our lives.
And while this made our survival easier…it gave us an “excuse” to not develop critical skills that could come in handy in emergencies.
There is a skill that our ancestors had carefully developed, that is pretty much forgotten nowadays….
Navigation.
If God forbid, you are ever caught in a survival situation, you need to know how to navigate.
Why?
Because being lost in the wilderness can be a dangerous and disorienting experience.
If your smartphone doesn’t have any signal, you need alternative ways to find your way.
Without a sense of direction, you may wander aimlessly, depleting your energy and resources.
Even worse, you may end up in a hazardous or risky situation.
That’s where navigation and orienteering come in.
These skills allow you to determine your position and plan a route to safety or civilization.
So let’s go into some practical tips for navigating and orienteering in the wilderness.
Always carry a map and a compass.
A map will give you an overview of the area you’re in and help you plan your route. A compass will help you determine your direction and stay on course.
You should teach yourself how to use them.
Familiarize yourself with the symbols and features on your map, and practice using your compass to take bearings and follow a straight line.
Use natural landmarks to orient yourself.
Look for prominent features like mountains, rivers, and valleys to help you find your bearings.
You can also mark nearby trees or rocks to make sure you are not walking in circles.
Pay attention to the sun and the stars.
The sun rises in the east and sets in the west, so you can use it to determine your general direction.
At night, look for the North Star (also known as Polaris) to find the North.
Practice “dead reckoning.”
This is a navigation technique where you estimate your position based on the distance and direction you’ve traveled.
It’s a good backup plan if you don’t have a map or compass.
Remember, being able to navigate and orienteer is a crucial survival skill.
It will help you find your way back to civilization or to a safe location.
You might need it when you least expect it.
That’s why I believe everyone should have it in their prepping skillset.
Should You Drive Away When SHTF?
I was chatting with someone at the supermarket the other day.
And at some point during our conversation he said that if SHTF, he’d just “drive away.”
This is something that I hear many people say. But the truth is, “simply driving away” isn’t always an option.
There are a lot of things to consider when bugging out on vehicle. Let’s go through them.
Road Conditions.
During emergency situations, road conditions can deteriorate rapidly.
This may be due to natural emergencies like earthquakes, floods, or landslides.
Or man-made risks like riots, roadblocks, and infrastructure damage.
Navigating such treacherous conditions will require a well-equipped, capable vehicle with sufficient fuel.
Having spare tires and a tire repair kit is also essential.
Congestion…
In emergencies, people will likely attempt to evacuate simultaneously, causing annoying bottlenecks.
This can be especially problematic in urban areas where roads are already congested.
If you don’t want to become stuck in such situations, consider alternative routes and have a backup plan in case your primary escape route becomes impassable.
Fuel Availability…
Fuel stations may run out or become inaccessible during an emergency.
To ensure your vehicle’s continuous operation, store extra fuel in safe, approved containers.
Just be mindful of the expiration dates and storage conditions of your fuel reserves.
Additionally, consider using a fuel-efficient or alternative fuel vehicle to maximize your range.
Communication and navigation…
When SHTF, traditional communication and navigation systems may become unreliable or non-functional.
Having a CB or HAM radio in your vehicle can allow you to stay informed about local conditions.
And don’t forget to keep a physical map and a compass in your vehicle as a backup.
Vehicle Security…
When things go wrong, your vehicle might become a target.
People might attempt to steal it from you. To reduce the risk, ensure your vehicle is secure and unnoticeable.
Also, consider using a steering wheel lock, a car alarm, or a concealed immobilization device to deter would-be thieves.
As you can see, evacuating by vehicle is more complicated than most people think.
There are a lot of factors at stake.
If this is too much to remember, write them down, so that you can make an informed decision when the time comes.
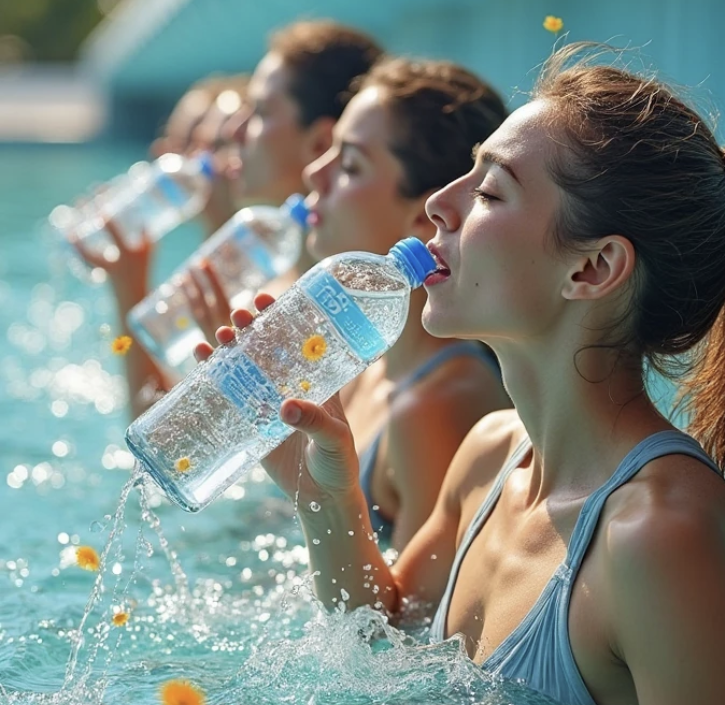
If you are an outdoor lover who enjoys hiking, camping, or trips in the wilderness, you understand how quickly a bottle of water can be consumed. The intense heat of the sun and sweating profusely can require you to drink more to stay hydrated. Water can be consumed quickly and you can run out fast.
This can be particularly true in a disaster situation where clean water might not be available for a while. An earthquake, flood, hurricane, or other disasters can damage water and sewer lines making freshwater unavailable for homes and families until water lines are repaired or help comes. Drinking unclean and unsafe water can lead to disease and death.
If you are in a situation where you need to find clean water to drink, here are some ideas.
Water Heater Tank
Be sure to turn off the electricity or gas before you unplug the drain at the bottom of your water heater tank. This water is already filtered water, and unless you fear it’s been contaminated, it should be safe to drink.
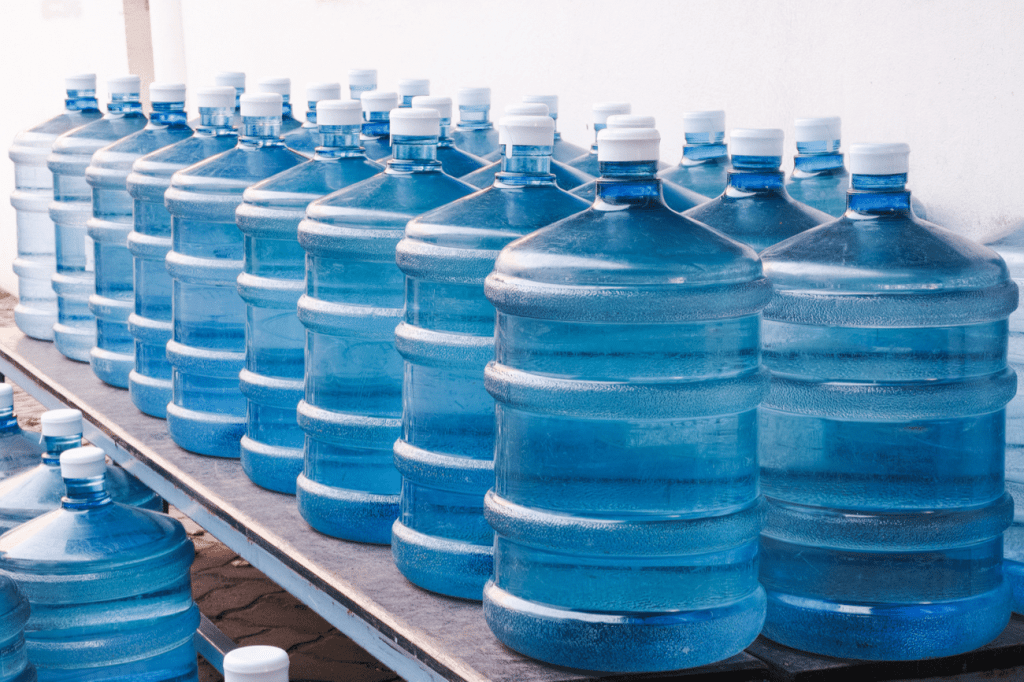
Stored Water
Store water in food-grade clean containers now before a disaster happens. Rinse out and thoroughly clean used 2-liter soda containers or plastic juice jugs and fill them with tap water. You can store these in your closet, behind beds, in your basement, under furniture, or wherever you have room. You can also use containers made for water storage like 5-gallon jugs, 55-gallon drums, or stackable WaterBrick containers. It is suggested that water storage be rotated every six months to 1 year. If not rotated, then have the means to filter if needed. Having some water stored on hand can be a lifesaver in the event of a disaster.
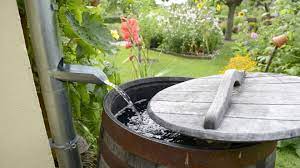
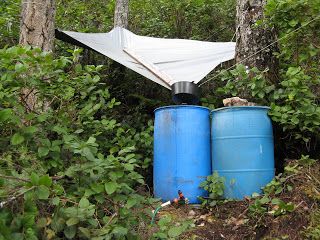
Rainwater
If you can collect rainwater in rain barrels or buckets attached to the downspouts from the roof of your home, it can be your main substitute water next to your stored potable drinking water. Rainwater will still need to be strained, filtered, and purified before you drink it.
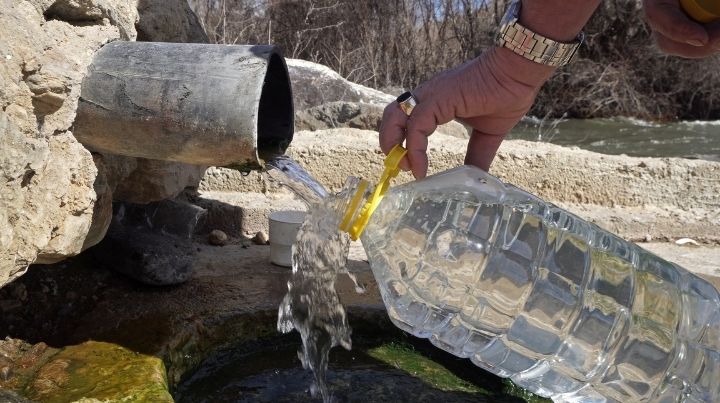
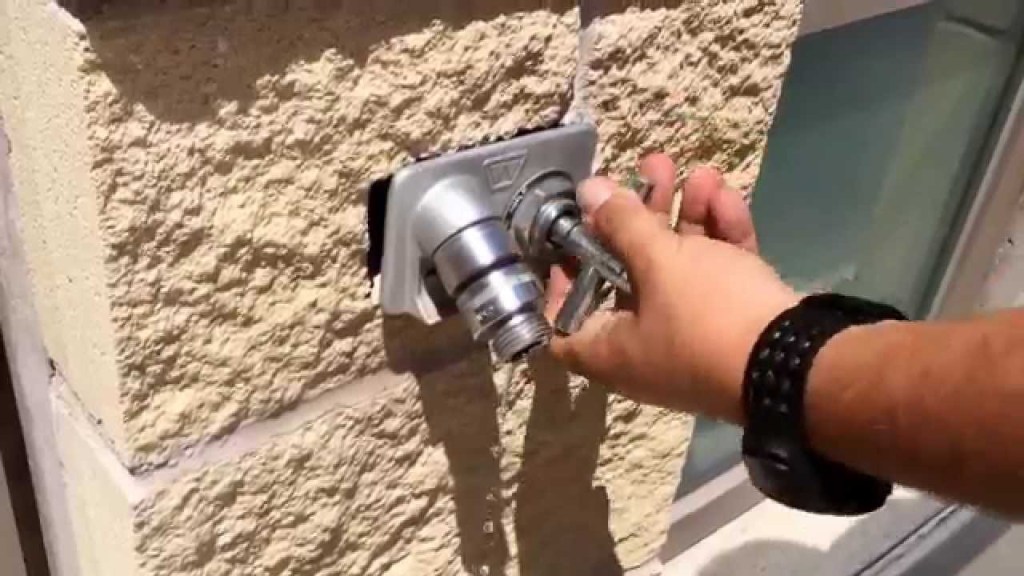
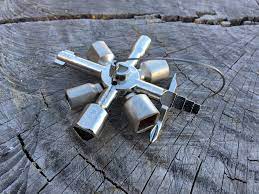
Sillcock Key
A sillcock 4-way key is an inexpensive preparedness item that you can find and purchase online. It gives you access to emergency water in commercial buildings like entertainment venues, mall strips, ballparks, golf courses, government buildings, rest stops, and so forth. Even if the water is turned off in a building, there can still be water in the pipes. Simply locate the water spigot on any business or public building and use the sillcock key to turn the spigot on. Have a bucket or hose ready to collect the water. The Sillcock key can be used where an adjustable wrench or pliers will not.
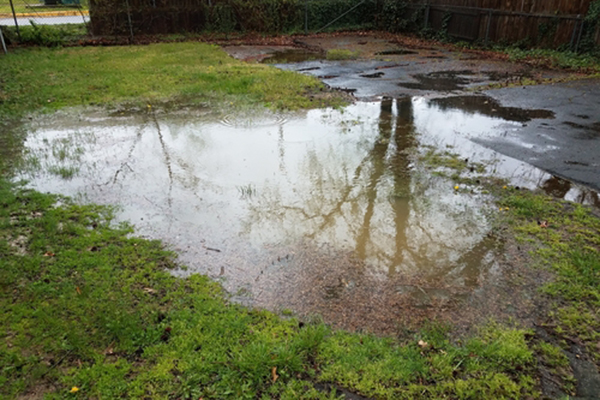
Avoid Standing Water
Pools and puddles of water are typically a focal point for bacteria and other harmful toxins. While this water can be purified, it will probably taste bad and might contain other harmful substances that are more difficult to filter out. Brown or muddy reddish water can be a sign of rust particles or other harmful substances and must be avoided. Most purification methods typically won’t be effective in this case and the water could be dangerous to consume.
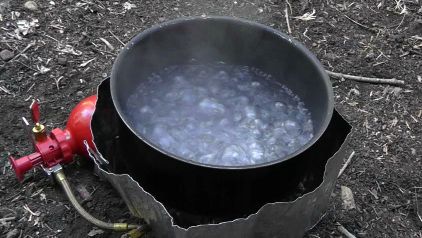
Boiling to Purify Water
If you have any water that you are not sure if it is safe to drink, you will want to purify it. One of the oldest and most proven ways to purify water is by boiling.
To purify by boiling, first, pour the water through a clean piece of cloth or a coffee filter to strain out the visible dirt and debris. Then heat up the water in a pot until it starts to boil. It’s best for the water to reach a boiling point of 212 degrees Fahrenheit or 100 degrees Celsius to destroy pathogens if you have a thermometer to check.
Allow the water to boil for a minute or so to ensure it is completely up to temperature and that anything living in the water is killed. Boiling for too long will cause you to lose some of it to water vapor. You might want to cover it with a lid so that any water you lose to vapor will collect and condense again in the pot.
You also want to note that while boiling water will kill bacteria and dangerous living organisms, it won’t do anything to salts, chemicals, or rust. It also won’t change the taste of the water due to minerals or substances that make it taste bad.
Pool Shock to Purify Water
Calcium Hypochlorite or pool shock can be a bleach substitute for purifying water. Its long shelf-life and affordability make it a good choice to have on hand when needed. It also takes up less space than liquid bleach. The EPA states that you can use granular calcium hypochlorite to disinfect water.
Create a chlorine solution: Put one teaspoon of granular calcium hypochlorite (about ¼ ounce) into ONE gallon of water and allow it to dissolve. This blend creates a stock chlorine solution.
To disinfect water: Add ¾ ounce of the chlorine solution to treat ONE gallon of water.
[The ratio to use is one-part chlorine solution to 100-parts water to be treated. This is about equal to adding 16 ounces (1 pint) of stock chlorine to 12.5 gallons of water.]
To get rid of any unwanted chlorine smell, aerate the disinfected water by pouring it back and forth between two cups or canisters. This is true for bleach purified water, or stored water as well.
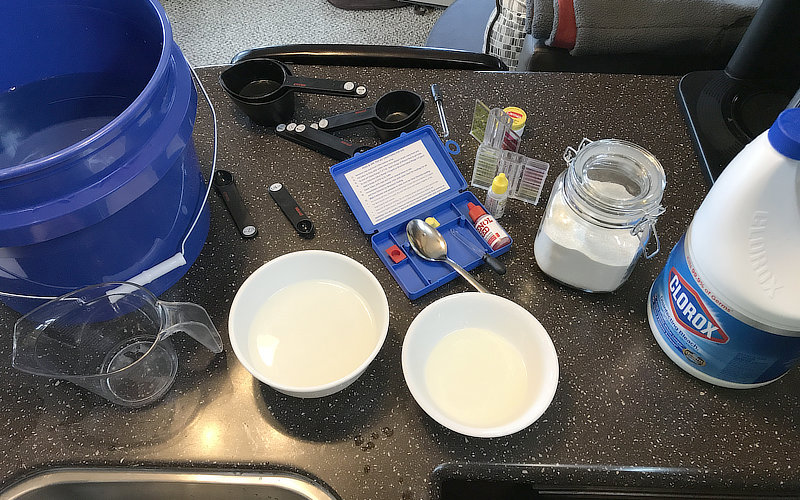
Chlorine Bleach to Purify Water
You can use regular, unscented chlorine bleach to disinfect your water. Check the label that it contains 6 or 8.25% sodium hypochlorite. Avoid using color-safe, scented, or bleaches with added cleaners. Be sure to filter the water getting out any debris or sediments first.
Then use 16 drops (¼ tsp) of chlorine bleach to purify TWO gallons of water or 8 drops to purify ONE gallon. If the water is cloudy, cold, or colored then double this amount. Stir the water and allow to stand for 30 minutes.