New York Power Outages and How to Stay Safe With No Electricity During SHTF

When the lights go out, everything changes. If you’ve ever been caught in a power outage—especially a long one—you know how quickly our modern comforts can disappear. For those of us living in New York State, where population density, weather extremes, and infrastructure vulnerabilities converge, losing power isn’t just inconvenient; it can be downright dangerous. Whether you’re in the heart of Manhattan or in a small upstate town, being prepared means more than having a flashlight and a few cans of soup.

Let’s talk about how to stay safe, smart, and sane when the grid goes down, especially during a situation where everything hits the fan (SHTF). From hard-earned survival skills to practical DIY electricity hacks, this guide is here to empower you with both knowledge and confidence.


5 Survival Skills for Living Without Electricity

Living without power can feel like stepping back a century. But people lived that way for thousands of years, and so can we—with the right mindset and skills. Here are five critical abilities every New Yorker should learn before the lights go out.


1. Fire Craft and Off-Grid Cooking

Cooking is one of the first hurdles you’ll face in a blackout, especially if your stove or microwave relies on electricity. Being able to start a fire safely is a foundational survival skill. Learn how to make a Dakota fire hole—an efficient, smokeless fire pit—and how to cook over an open flame using cast iron. If you have a propane grill, keep extra tanks stored safely. Bonus points if you know how to cook with a solar oven, which works wonders in summer.


2. Water Procurement and Purification

In a prolonged power outage, municipal water systems can fail, especially if the pumps rely on electricity. You’ll need to locate alternate sources of water (like rainwater or streams) and purify them. Learn how to make a gravity-fed water filtration system using activated charcoal, sand, and gravel. Always keep a stash of water purification tablets, and know how to boil water over an open fire if needed.


3. Food Preservation Without Refrigeration

Food spoilage is one of the biggest threats when the fridge dies. Learn traditional methods of preservation like canning, pickling, smoking, fermenting, and dehydration. For example, salt-cured meats can last weeks unrefrigerated, and fermented vegetables can supply essential nutrients long after the fresh stuff is gone.


4. Manual Sanitation and Waste Management

Let’s be honest—when the toilet won’t flush and the water stops running, things get… uncomfortable. In urban areas especially, this can quickly become a health hazard. Learn how to create a sawdust toilet (composting toilet alternative), manage gray water safely, and maintain personal hygiene with minimal water. Keep a well-stocked sanitation bucket system with heavy-duty trash bags, baking soda, and bleach.


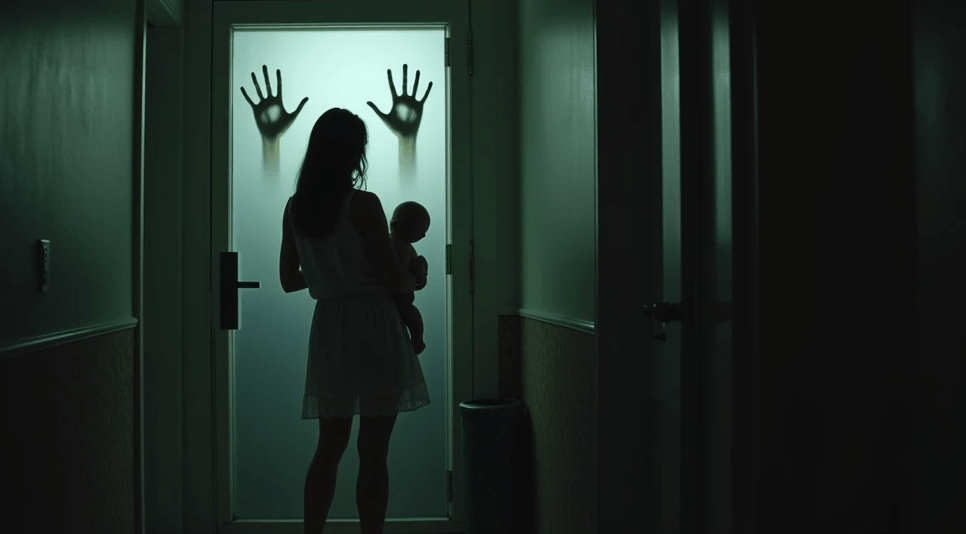
5. Situational Awareness and Community Communication

When the grid goes down, you lose not only power but also connection—no internet, no news, and possibly no phone signal. Train yourself to rely on local radio, ideally a hand-crank emergency radio. Form neighborhood alliances and have a community plan. Understand the signs of civil unrest or worsening conditions and how to respond calmly and smartly.


3 DIY Electricity Hacks When the Grid Goes Down

You don’t have to be an electrical engineer to generate a bit of power during a blackout. Here are three practical, do-it-yourself hacks that can bring light, charge your devices, or even run small appliances in a pinch.


1. DIY Solar Charger with USB Output

With a small solar panel kit (available online or at hardware stores), you can build a basic solar charging system for phones, radios, or flashlights. You’ll need:

  • A 10-20W solar panel
  • A solar charge controller
  • A 12V battery (like a deep-cycle marine battery)
  • A USB car adapter

Connect the panel to the charge controller, then to the battery, and plug in your USB adapter. This can keep your essential devices running for days.


2. Bicycle Generator for Small Power Needs

If you’re handy, convert an old bike into a pedal-powered generator. You’ll need a bike stand, a belt or chain drive, and a small alternator or motor. This setup can generate enough electricity to charge a battery pack or power a few LED lights. It’s also great exercise and a morale booster during dark times.


3. Saltwater Battery Lamp

When resources are scarce, even salt and water can make a difference. Using magnesium and copper plates (or coins), you can make a rudimentary battery with saltwater. Connect enough of these cells in series, and you can power an LED. It won’t light up your whole house, but in an emergency, every little bit of light helps.


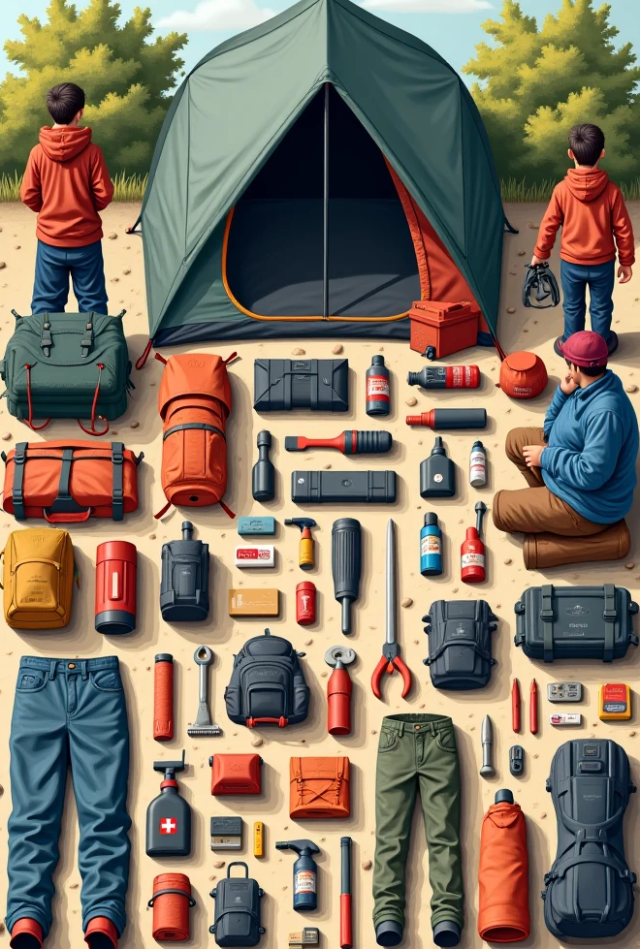
3 Most Important Survival Products Without Electricity

While survival is mostly about mindset and skill, having the right gear can make a night-and-day difference. If I had to choose just three must-haves for a no-electricity scenario, these would be it:


1. Multi-Fuel Camp Stove (e.g., MSR WhisperLite)
Reliable, versatile, and portable, these stoves can burn white gas, kerosene, or even unleaded gasoline. It’s your best bet for cooking or boiling water safely when the power is out and fire pits aren’t an option.


2. Solar Generator (like Jackery or Bluetti)
A solar generator is a quiet, clean way to power essentials like a CPAP machine, lights, or small appliances. Look for one with at least 500Wh capacity and a foldable solar panel. It may be an investment—but in a long-term blackout, it can be a lifeline.


3. Headlamp with Rechargeable Battery
Hands-free lighting is more useful than a flashlight, and using a rechargeable model with a solar bank or hand crank makes it even better. Always have backup lights and extra power sources available.


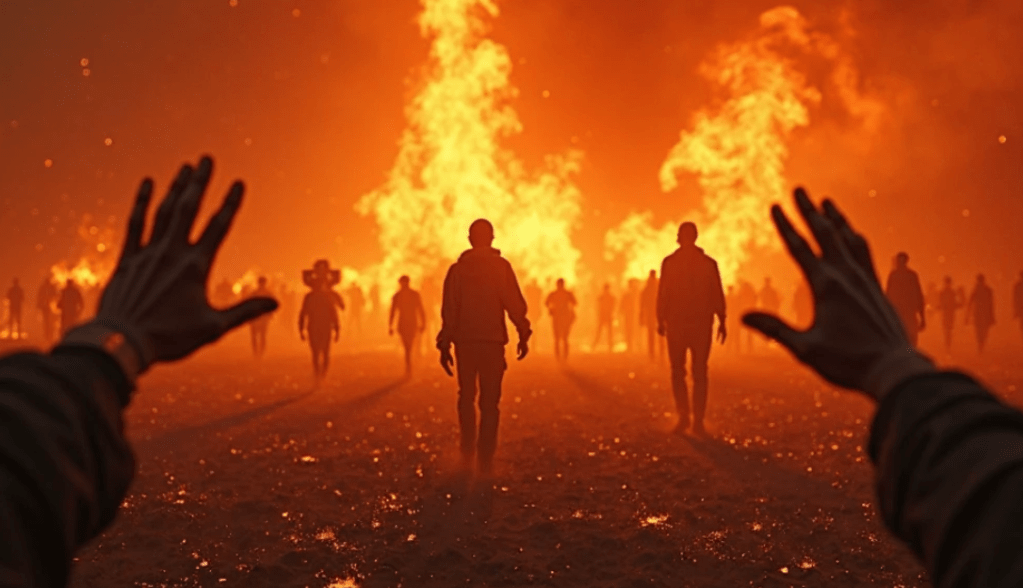
5 Worst Cities in New York to Be in During a Power Outage

Not all places in New York are created equal when the grid goes dark. The following cities pose unique challenges due to their infrastructure, population density, crime potential, and lack of immediate resources.


1. New York City
No surprise here. The Big Apple is deeply reliant on electricity for everything—transportation, water pumps, elevators, and communication systems. A prolonged outage could result in gridlock, water shortages, looting, and a breakdown in services. If you’re in NYC, you must have a robust bug-in or bug-out plan.


2. Buffalo
Heavy snowfall in winter combined with aging electrical infrastructure makes Buffalo a risky place for long-term outages. Frozen pipes, inaccessible roads, and limited local resources can make it extremely challenging to stay warm and safe.


3. Albany
The capital city is a central hub, but its aging grid and colder winters make power outages especially tough. Hospitals and government systems may get backup generators—but residential areas might not. Additionally, it’s prone to flooding, adding another layer of risk.


4. Rochester
Another cold-weather city with a high dependency on the grid. Its older buildings and infrastructure are not well-equipped for extended blackouts, especially during storm season. Food spoilage and heating become urgent concerns here.


5. Yonkers
Close to NYC but with fewer resources, Yonkers faces the double threat of population density and limited emergency services. If an outage leads to cascading failures in sanitation, water, or policing, residents could be left fending for themselves.


Staying Safe, Staying Smart

Preparedness isn’t about fear—it’s about confidence. When you have the skills, tools, and mindset to meet challenges head-on, you’re not just surviving. You’re thriving under pressure.

If you live in New York or any other urban or semi-urban area, take the time now—while the lights are still on—to build your resilience. Practice your fire-starting skills in a controlled setting. Stock up on clean water, batteries, canned goods, and medical supplies. Make sure your family knows the plan.

Don’t wait for FEMA or the city to come knocking. When the grid goes down, you’ll be glad you took the time to prepare.

Stay safe, stay aware, and above all, stay kind. In the darkest times, a little light from a helping hand can go a long way.

Michigan’s Worst Roads to Drive on During a Disaster

I’ve driven across the windswept deserts of Arizona in a sandstorm, through Appalachia with a busted axle, and in the dead of a Montana blizzard using nothing but chains and grit. But let me tell you—few things test your mettle like driving in Michigan after a disaster hits. Cracked pavement, narrow shoulderless highways, forgotten forest roads—if you’re not prepared, Michigan will eat you alive. The state’s infrastructure is a patchwork quilt of old industrial routes, pothole-riddled backstreets, and seasonal access roads that seem to vanish when you need them most.

So when disaster strikes—be it an ice storm, tornado, chemical spill, or civil unrest—you better be ready to outdrive the chaos. Below are the roads you should avoid in Michigan when SHTF, the survival driving skills to get you out of harm’s way, and a few DIY hacks if your tank runs dry in the middle of nowhere.


The 5 Worst Roads in Michigan to Drive on During a Disaster

1. I-94 Between Detroit and Jackson

I-94 is a vital artery, but in a crisis, it turns into a clogged vein. Construction is constant, traffic backups are brutal, and exits are limited. When panic sets in, this stretch becomes a parking lot. Worse, if you’re caught during a snowstorm or flash freeze, you’re stuck—possibly for hours, maybe days.

2. M-39 (Southfield Freeway)

This one’s a death trap when it rains, snows, or floods. The underpasses flood so fast you’d think Poseidon had a hand in designing them. In a disaster, your odds of getting stuck under a flooded viaduct are alarmingly high.

3. M-10 (Lodge Freeway)

Known for sharp turns and reckless drivers, M-10 is tough to manage even on a good day. In a mass-evacuation or emergency situation, it becomes a twisted mess of broken-down vehicles and frustrated drivers with nowhere to go.

4. Telegraph Road (US-24)

Once a major thoroughfare, Telegraph has aged poorly. Deep potholes, worn paint, and uneven surfaces make it a tire killer. Add a disaster scenario and you’re looking at suspension damage, loss of control, or worse.

5. M-59 (Hall Road)

Hall Road is Michigan’s strip mall superhighway—cluttered, confusing, and full of people who drive like they’ve never seen a turn signal. When things go bad, everyone floods here, hoping for supplies. You’ll find gridlock, road rage, and nowhere to go.


15 Survival Driving Skills You Need When the Grid Goes Down

  1. Know Your Exit Routes
    Always memorize at least three ways out of your city—main roads, back roads, and rural trails.
  2. Read the Terrain
    In Michigan, snow hides potholes and floods disguise sinkholes. Train yourself to read water lines, tree movement, and road texture.
  3. Drive Without GPS
    Learn to read paper maps, follow compass bearings, and use natural landmarks like rivers and elevation to navigate.
  4. Brake Feathering on Ice
    Avoid slamming your brakes on slick roads. Instead, feather them—light, pulsing taps that keep traction without losing control.
  5. Off-Road Transitioning
    When roads fail, you’ll need to take to the forest, ditches, or fields. Know how to gently drop off curbs and cross rough terrain without bottoming out.
  6. High Water Assessment
    Never drive through standing water unless you can judge depth. If you can’t see the road markings, it’s too deep.
  7. Combat Reverse
    Master the art of reversing through narrow passages under pressure—especially important during blocked escape routes.
  8. Swerve Control
    Practice controlling your vehicle during evasive maneuvers. Swerving too hard leads to rollover—keep your hands light and don’t overcorrect.
  9. Engine Management in Cold Weather
    Michigan winters are brutal. Keep a block heater, monitor oil viscosity, and always carry a thermal blanket for engine emergencies.
  10. Clutch & Coast
    If you’re running low on fuel or trying to escape silently, knowing how to coast in neutral or clutch can save gas and reduce noise.
  11. Know How to Fix a Flat (Fast)
    Disasters don’t wait for AAA. Practice changing a tire under five minutes—blindfolded, if you want a challenge.
  12. Use Mirrors Like a Hawk
    You can’t afford tunnel vision. Train yourself to check mirrors every five seconds—spot ambushes, detours, and traffic snarls early.
  13. Run Flat Awareness
    Not every tire will die with a bang. Feel for pull, vibration, and steering lag—change it before it strands you.
  14. Situational Lights Discipline
    Use brake lights sparingly when fleeing. Tail lights scream your position. Know when to go dark.
  15. Evade & Obscure
    Use smoke, road flares, or mud to obscure your vehicle from pursuers or drones. Always be ready to vanish.

3 DIY Survival Driving Hacks When You Run Out of Gas

  1. Siphon with a Water Bottle and Tube
    Keep a few feet of clear tubing and a clean water bottle. You can siphon fuel from abandoned vehicles using gravity and suction. Just be careful—gas fumes are toxic. Never do this near flame or spark.
  2. Emergency Biofuel Blend
    If you’re driving a diesel engine, you can blend vegetable oil (from restaurants or pantries) with a small amount of rubbing alcohol and let it settle. Filter well. It’s rough—but it might get you 10–20 more miles to safety.
  3. Solar Heat & Pressure Hack
    On sunny days, place a sealed metal gas can in a hot area (like the car roof) to slightly pressurize remaining vapors. Then, carefully tip it toward your fuel intake using gravity to draw every drop. Slow, but better than nothing.

Final Word From the Road

I’ve driven through chaos in more places than I can count—New Orleans post-Katrina, NorCal during wildfire evacuations, and Flint during the water crisis. If there’s one thing I’ve learned, it’s this: mobility is survival. If your vehicle becomes a prison on wheels, you’re done.

Michigan is a land of contrast—gleaming cities, thick pine forests, frozen lakes, and endless cornfields. But its roads weren’t built for disaster. They were built cheap, patched over decades, and stretched beyond their limits. So you’ve got to make up the difference with skill, smarts, and nerve.

Keep your rig maintained. Practice those survival driving skills like your life depends on them—because one day, it just might. And when you’re sitting at the edge of the road, watching others panic while you’re quietly driving off into the woods with a full tank, you’ll know you’ve made it to a higher level.

Stay sharp. Stay quiet. Keep moving.


The Ultimate EDC Checklist: Are These Key Items in Your Kit?

Imagine this scenario for a moment—you’re heading out the door, running errands, or even just walking to the mailbox. Everything seems perfectly normal. Then, suddenly, the unexpected happens. A power outage. A car breakdown. An emergency situation where you need to think on your feet and act fast.

Now, ask yourself: Are you really prepared for the unexpected?

Most people go about their day with the bare minimum in their pockets or bags: a wallet, a smartphone, and a set of keys. But what if that wasn’t enough? What if you could make a few small changes to your everyday carry (EDC) that could help you in a survival situation or simply make life a little easier?

It’s time to think beyond the basics and upgrade your EDC. When disaster strikes—whether it’s a natural disaster, power outage, or even just an unexpected situation—you’ll want to be as prepared as possible. With the right EDC, you can navigate these events with confidence, without being caught off guard.

Let’s go over the crucial items every survivalist should have in their everyday carry kit. These tools could very well be the difference between surviving and being caught unprepared.

1) Multi-tool

A multi-tool is perhaps the most essential item in your EDC. This versatile tool is your Swiss Army knife for modern-day survival. From knives and screwdrivers to bottle openers and pliers, a quality multi-tool will serve you in nearly any situation. Whether you’re fixing a broken item, opening a package, or handling an unexpected repair on the go, having a multi-tool at your disposal is invaluable.

Survival Prepper Tip: Choose a multi-tool that’s compact, durable, and easy to carry. Look for one that includes a knife, scissors, pliers, and a few screwdrivers. Don’t forget about the weight – you want something that’s easy to carry without weighing you down.

2) Flashlight

When the lights go out, a flashlight is your best friend. Whether you’re facing a power outage at home, navigating through a dark area, or even just trying to find something in a poorly lit space, a flashlight is a must-have in your EDC. Opt for a small, durable, and powerful flashlight that can be easily carried in your bag or pocket. There’s nothing worse than fumbling around in the dark when you need light the most.

Survival Prepper Tip: Look for a flashlight that uses rechargeable batteries, which can save you money in the long run. Solar-powered models are an excellent choice for preppers who want a sustainable option. Always have spare batteries in your kit as well.

3) Fire Starter

When you’re caught in a situation where you need warmth, cooking, or a signal for help, a reliable fire starter can be a game-changer. A Ferro rod fire starter is compact and easy to carry, and it’s capable of igniting a fire even in wet conditions. You never know when you might need to create a fire to cook food, stay warm, or send out an emergency signal. Fire is also essential for purification, whether you’re boiling water for drinking or disinfecting something.

Survival Prepper Tip: Practice using your fire starter before you need it. The last thing you want is to struggle with it during an emergency. Keep a few fire-starting supplies, like cotton balls soaked in petroleum jelly or tinder, in your kit for easy ignition.

4) Water Bottle

Water is life, and in any survival scenario, access to clean drinking water is critical. Carrying a durable, reusable water bottle ensures you’re never without hydration when you need it. Additionally, a high-quality water bottle with a built-in filter can help you purify water from lakes, streams, or questionable sources. Having access to clean water is a fundamental survival skill, and carrying it with you makes it a part of your everyday readiness.

Survival Prepper Tip: Choose a stainless steel or BPA-free plastic water bottle. If you’re worried about contamination, consider one with a built-in filtration system. This ensures you can purify water from a variety of sources in the wild.

5) First Aid Kit

When you’re in a survival situation, injuries can happen fast—whether it’s a cut, burn, sprain, or something more serious. A small but well-stocked first aid kit is essential in your EDC. You should be able to address minor injuries and have supplies for more serious situations, like infection prevention or wound care.

Survival Prepper Tip: At the very least, your first aid kit should include antiseptic wipes, bandages, gauze, medical tape, tweezers, pain relievers, and any personal medications. Don’t forget to include an emergency whistle, as it can help you signal for help if you need it.

6) Paracord

Paracord is one of those items that you’ll be glad you packed, even though you might never need it. However, when you do, you’ll be amazed at its versatility. From building shelter, tying down gear, making repairs, to even using it for fire-starting (by stripping it), paracord is a survivalist’s go-to utility tool. Keep at least 10 feet of it in your EDC kit.

Survival Prepper Tip: Choose a high-quality, 550-paracord with a higher tensile strength. It should be durable enough to withstand harsh conditions. If possible, look for a paracord bracelet, so you have it easily accessible.

7) Survival Blanket (Mylar Blanket)

A Mylar survival blanket, also known as a space blanket, is a must-have in your EDC. It’s small, lightweight, and helps retain body heat in extreme temperatures. It can also be used as a reflective signaling device in emergencies. These blankets are an essential part of your kit because they protect you from hypothermia and other weather-related dangers.

Survival Prepper Tip: The reflective nature of Mylar blankets makes them ideal for signaling. Use them in survival situations to attract attention from rescuers. Consider carrying a small survival shelter or poncho for added protection.

8) Knife

A high-quality, folding pocket knife is essential for your EDC. From preparing food to cutting rope, a sharp knife can help you handle multiple survival tasks. Choose a compact, easy-to-carry knife that is capable of handling heavy-duty tasks. Make sure the blade is durable, and the handle is comfortable to grip.

Survival Prepper Tip: When selecting a knife, consider the lock mechanism for safety. Always sharpen your blade and check for rust to maintain optimal performance.

9) Compact Tool Kit

While a multi-tool is great, sometimes you need specialized tools for specific tasks. A small, compact tool kit with essentials like a small wrench, pliers, or even a screwdriver set can be a lifesaver. This can help you with repairs or minor fixes during your day-to-day life or in emergency situations.

Survival Prepper Tip: A lightweight, minimal tool kit with just a few essential tools will help you make repairs on the go without adding unnecessary bulk to your kit.

10) Tactical Pen

A tactical pen is another item that can be part of your EDC kit without drawing attention. While it functions as a regular pen, it also serves as a self-defense weapon, glass breaker, and even a tool for small repairs. It’s an inconspicuous but practical addition to your gear, and it could come in handy in a wide variety of scenarios.

Survival Prepper Tip: Choose a tactical pen made of heavy-duty materials, like aluminum or titanium, so it can withstand rugged use. Ensure it also has a reliable writing mechanism to make it functional as a regular pen.


Final Thoughts:

In a survival situation, your ability to adapt, improvise, and make use of the resources at hand is what will keep you alive. Your EDC is more than just a collection of random items. It’s a critical component of your overall preparedness strategy. The key to an effective EDC is to make sure you have the tools that you need to handle unexpected situations, whether that’s a minor inconvenience or a full-blown emergency.

By having these items in your kit, you’re setting yourself up for success. Keep refining your gear, add more items as necessary, and always stay alert. The world is unpredictable, but with the right tools in your pocket, you’ll be ready for whatever comes your way.

Survival Prepper Tip: Regularly review your EDC kit. Seasons change, your needs evolve, and new gear becomes available. Keeping your kit up to date will ensure that you’re always ready for whatever life throws your way.

The Wifi Trap: What Most Preppers Overlook When SHTF

As preppers, we’re always thinking about the “what ifs” — what if the power grid goes down? What if food becomes scarce? What if our security is compromised? But one thing that often gets overlooked in prepping is how we handle something as common as wifi when SHTF (Sh*t Hits The Fan).

Sure, most of us are used to having wifi at our fingertips. It’s something we take for granted in our daily lives, whether we’re at home, at a café, or even traveling. But when disaster strikes—whether it’s a natural disaster, an EMP, or some form of societal collapse—the wifi we rely on can become a huge liability.

Think about it: every time a major storm hits or an earthquake shakes things up, what happens? The power grid goes down, cell towers collapse, and suddenly, we’re cut off from the world. The internet disappears. But if you’re a prepper, you’ve probably planned ahead. You’ve got your own generator, and maybe even a backup power source for your wifi. You’re sitting pretty, right?

Well, not quite.


The Dangerous Wifi Mistake Most People Make

The truth is, while having wifi during a crisis can be a blessing—it can also make you a target. When you’ve got a working wifi signal in an otherwise digitally dead area, you’re sending out a beacon. A signal to anyone with a device searching for a connection. And when people are desperate—whether it’s for information, communication, or resources—they’ll stop at nothing to get to you. That includes the possibility of using force.

Picture this: a massive power outage or grid failure. You’re sitting in your home with your backup generator, using your wifi to access essential information or stay in touch with other preppers. But that signal, that tiny little wave bouncing off your router, is broadcasting to anyone nearby. And when resources are scarce, there are plenty of people who would be willing to do whatever it takes—perhaps even storm your house or break into your perimeter—to steal those resources.

This is a situation we must be prepared for. If you’ve got wifi set up for a SHTF scenario, there are a few things you need to understand to stay safe.


Reducing Your Wifi Range: A Smart Strategy

What’s the solution? Do we simply throw our routers out the window during a power outage? Of course not. But there are steps you can take to ensure your wifi doesn’t make you an easy target in an already dangerous situation.

One way to protect yourself is by reducing the range of your wifi signal. Most modern wifi routers allow you to adjust the power output—basically controlling how far your signal reaches. By lowering the power, you can restrict your wifi’s range and make it much less noticeable to anyone outside your immediate vicinity.

This is a smart strategy for preppers who don’t want to broadcast their presence to the wrong people.

Tip #1: Most wifi routers allow you to control the transmit power. Check your router’s settings and adjust the power output. You’ll want to reduce it to a level where only those inside your home or immediate property can access the signal.

Tip #2: Always refer to your router’s manual or interface to make sure you’re adjusting the correct settings. Each router model is different, but most will have an option to control the signal strength or transmit power.


How to Hide Your Wifi with Physical Barriers

Now, let’s say you’re not tech-savvy or don’t want to mess with your router settings. There’s another simple method you can use: physical barriers. You can reduce the range of your wifi signal by surrounding your router with dense materials like concrete or stones.

Think about it: wifi signals can only travel through certain materials. Concrete, metal, and stone are excellent at blocking signals. By placing your router in a space surrounded by these materials, you’re naturally limiting the range without having to adjust any settings. For example, if you have a basement or a sturdy, windowless room in your house, that could serve as a great space to keep your router safe.

Tip #3: A simple and effective method is placing your router in a room with thick concrete walls or a storage area made of dense materials. This will help shield the signal from reaching the outside world.


Prepping for Emergencies Beyond the Basics

As a prepper, it’s crucial to think outside the box, especially when you’re facing an unprecedented situation. Most people think of wifi as a convenience, not as a potential vulnerability. But in an emergency, your technology can become both a tool and a liability. The key is to adapt.

Tip #4: Don’t just prep for short-term scenarios. Plan for long-term sustainability. A few days without the grid is one thing; surviving for months or even years is something entirely different.


The Importance of Digital Security

Just as you would lock your doors and secure your home, you need to protect your digital space. In the chaos following a major disaster, people might go to extreme lengths to obtain your resources. You need to be aware of how much you’re broadcasting. This goes beyond just wifi—think about all the digital signals your devices are sending out. Cell phones, radios, and even Bluetooth can be tracked or intercepted if you aren’t careful.

Tip #5: Turn off Bluetooth, GPS, and Wi-Fi on devices when not in use. The fewer signals you send out, the less chance you’ll attract attention from those looking to exploit your resources.


Additional Wifi Safety Measures

Another smart move is to create a network that’s encrypted and secure. In a post-collapse world, information is power, and anyone who can hack into your system will have a major advantage. Set up a VPN (Virtual Private Network) to protect your online communications and data.

Tip #6: Always use a VPN on your devices. It encrypts your online activity and adds an extra layer of security when accessing the internet in a crisis.


Know Your Neighbors (But Keep Your Distance)

If you’re living in a close-knit neighborhood, don’t underestimate the value of knowing who is nearby. The stronger your community connections, the better prepared you’ll be to handle any situation. But even within a close community, you need to remain vigilant. Trust is built, not given.

Tip #7: Form a prepper group with trusted neighbors, but always remain cautious about who you allow into your circle. Trust, but verify.


Redundancy is Key to Prepper Success

While you’re reducing your wifi signal and securing your digital footprint, remember that redundancy is critical. You can’t rely on a single system. A backup communications plan is necessary, whether it’s a two-way radio or even an old-fashioned CB.

Tip #8: Invest in walkie-talkies or ham radios for backup communication in case the internet and cell towers fail completely.


Stay One Step Ahead

At the end of the day, the goal is to stay one step ahead of the game. By taking these simple but effective precautions, you reduce your exposure and keep your home from becoming a target when the chips go down.

Tip #9: Be proactive, not reactive. Anticipate problems before they occur, and stay prepared for any scenario that may unfold.


Conclusion: A Tactical Approach to Wifi in a Crisis

When SHTF, you’re going to face a whole new set of challenges. Wifi may be a tool, but it can also be a dangerous liability if you don’t handle it right. From adjusting power settings to using physical barriers, there are simple and effective ways to reduce the range of your wifi signal and avoid drawing attention to yourself.

Tip #10: Continuously reassess your preparedness plan. Emergencies evolve, and your prepping must evolve with them.

By being aware of the wifi mistake that many preppers overlook, you’re one step closer to ensuring that your home remains secure—and that you’re truly ready when the chips go down.

Bug Out Bags (BOB) – What to pack, how to tailor it to your needs, and keeping it ready.

Let me be crystal clear right off the bat: if you don’t have a Bug Out Bag (BOB) packed and ready to grab this dang second, you are not ready for anything but a front-row seat to your own demise. This isn’t some Boy Scout sleepover or a cute Instagram hike. This is survival, plain and ugly. When the world turns sideways — and trust me, it will — you won’t have time to debate the pros and cons of your gear choices. You either grab your bag and get out, or you stay put and rot. Those are your options.

What the Heck Is a Bug Out Bag, and Why You Need One Yesterday

A Bug Out Bag is your lifeline — your emergency pack for when staying where you are means death, detention, or destruction. It needs to sustain you for at least 72 hours of full self-reliance. You can build it for longer, but don’t make the mistake of packing your whole garage. You’re not moving house. You’re escaping Hell.

Most of the world walks around with their heads shoved so far up their rear ends they could see their own tonsils. They think Amazon Prime and a 911 call are going to save them. Let me tell you something, cupcake — no one’s coming to save you. You are the cavalry. So get off your ass and start packing your BOB.


The 15 Survival Skills You Better Damn Well Know Before You Bug Out

You can have the best gear in the world, but if you don’t know what the hell you’re doing, you’re just a well-equipped corpse. Learn these skills like your life depends on them — because it does.

  1. Fire Starting (Without a Lighter) – Learn to spark a flame with flint, steel, a ferro rod, or hell, even a damn battery and steel wool.
  2. Water Purification – Boil, filter, use iodine tablets — or die slowly from diarrhea. Your call.
  3. Shelter Building – Tarps, space blankets, or natural materials. Know how to stay dry and off the ground.
  4. Knot Tying – You think rope ties itself? Learn real knots: bowline, taut-line hitch, trucker’s hitch.
  5. Navigation Without GPS – Compass, topographical map, sun and stars. Your phone’s going to be dead weight in a real crisis.
  6. First Aid – CPR, wound care, infection control. Blood is slippery; learn how to deal with it.
  7. Food Foraging – Know what plants won’t kill you and which ones will make you vomit blood.
  8. Hunting and Trapping – You’re not living off granola bars forever. Know how to snare, fish, and shoot.
  9. Security and Self-Defense – Know how to use a knife and a firearm. And not like a damn movie star — properly.
  10. Stealth Movement – Loud people die first. Learn how to move like a ghost.
  11. Situational Awareness – Pay attention. Stop looking at your feet. Know your surroundings.
  12. Camouflage and Concealment – Blending in isn’t just fashion; it’s survival.
  13. Bartering and Negotiation – People will kill for toilet paper. Know how to deal and not get swindled.
  14. Mental Toughness – Stop crying. Stay calm. Think fast. Panic is a killer.
  15. Improvisation – You won’t always have gear. Learn to MacGyver your way through life-threatening situations.

How to Tailor Your BOB Without Being a Damn Idiot

Here’s where most people screw up — they copy a list from the internet without thinking. Tailor your bag to your region, your climate, your body, your skills, and your realistic bug-out plan.

Are you in the city or the woods?
If you’re in a city, weight matters more — you may be walking 20 miles in boots. You’ll need more water purification and urban navigation tools. If you’re out in the boonies, focus on shelter and hunting tools.

What’s your climate?
Cold? Pack layers, a thermal bivvy, and waterproof gear. Hot? Shade tarp, hydration tabs, light clothing, and sunscreen.

Got kids? A dog? Medical issues?
If you need meds, pack extra. If you have kids, double water and snacks. Dogs? They eat and drink too, genius.

Fitness level?
Don’t pack a 60-pound bag if you can’t jog across the street without wheezing. Tailor it to your real ability, not your fantasy.


What Goes in a Bug Out Bag – The Non-Negotiables

Screenshot

Here’s the foundation. Don’t argue. Just pack it.

  • Water: At least 1 liter per day. Bring purification tabs, LifeStraw, Sawyer Mini, and a metal container for boiling.
  • Food: MREs, energy bars, trail mix, jerky. High calories, low space. Rotate stock every 6 months.
  • Shelter: Tarp, space blanket, bivvy sack, paracord.
  • Fire: Ferro rod, waterproof matches, dryer lint in a pill bottle. Redundancy matters.
  • Knife: Fixed-blade full-tang. Don’t bring some flimsy kitchen crap.
  • Multi-tool: Leatherman or equivalent.
  • First Aid Kit: Stop bleeding. Kill infection. Include tourniquet, QuikClot, trauma shears, gauze.
  • Light: Headlamp with spare batteries.
  • Clothing: Season-appropriate. Layers. Wool socks. Underwear. Gloves.
  • Navigation: Compass, local map, laminated and marked.
  • Cash: Small bills. ATMs will be dead.
  • Documents: Copies of ID, insurance, prescriptions, in a waterproof pouch.
  • Comms: Crank radio, emergency whistle, signal mirror.
  • Self-defense: You do what’s legal in your area. Just be able to protect what’s yours.
  • Hygiene: Toothbrush, soap, toilet paper, feminine supplies. Sanity matters.
  • Misc: Duct tape, zip ties, super glue, fishing kit, sewing needle and thread.

3 DIY Survival Hacks You’ll Thank Me For Later

You want clever? Here’s your clever. These hacks are field-tested, dirt-approved, and desperation-certified.

1. Altoid Tin Survival Kit
Pack a mini kit in an old mint tin: fire striker, fish hooks and line, a mini compass, a razor blade, needle and thread, safety pins, water purification tabs. Throw it in your BOB as backup — or stash one in your glovebox, jacket, and every damn coat pocket you own.

2. Tampon Trick
Not just for first aid or hygiene — tampons are compact, sterile, and super absorbent. Use them to stop bleeding, as tinder, or even a water filter (in a pinch). Keep a couple in a Ziploc bag. Laugh now, live later.

3. Crayon Candle
In the dark and need light? A standard crayon burns for 20–30 minutes. Use a paperclip as a stand, light the tip — now you’ve got emergency lighting in a pinch. Carry a couple in your bag. Cheap, light, and long-burning.


Keep It Ready — Or Kiss Your Ass Goodbye

A Bug Out Bag that isn’t ready is just a duffel full of dead weight. Rotate your food every six months. Check your water filters, batteries, and meds. Do a seasonal gear audit. You want to find out your flashlight’s dead when your home’s on fire?

Stash your BOB by the exit. Not in the attic. Not buried under camping gear. Put it somewhere you can grab it with your eyes closed. Hell, practice doing just that. Run drills. Time yourself. You should be out the door in 60 seconds, max.


Final Thought

This world doesn’t owe you a damn thing. Not power. Not food. Not peace. If you’re still waiting for the government to take care of you, you’re already dead — they’ll get around to scraping up what’s left of you after the dust settles.

But if you’ve got a solid Bug Out Bag, real skills, and a plan, then maybe — just maybe — you’ll be one of the few standing when the smoke clears.

So get mad, get ready, and get packed.

Vehicle Prepping – Bug-out vehicle modifications, fuel storage, and mobile supplies.

Why Your Vehicle Is Your Most Important Survival Tool

First off, understand that when society collapses, roads won’t be safe, gas stations won’t be open, and help won’t be coming. Your vehicle has to be more than just a means of transportation — it has to be a mobile fortress, a supply depot, and your ticket out of danger. This means serious upgrades, hardcore modifications, and smart planning.


15 Survival Skills for Your Bug-Out Vehicle

  1. Basic Mechanical Know-How
    If you can’t fix your own vehicle, you’re screwed. Learn how to change tires, replace belts, check fluids, and jump-start your battery. Know your vehicle like the back of your hand.
  2. Tire Repair and Maintenance
    Carry a high-quality tire repair kit — plugs, patches, inflator — and learn how to use it. Flats will happen, and roadside assistance will be a fantasy.
  3. Fuel Management and Conservation
    Drive slow, steady, and avoid unnecessary trips. Know your vehicle’s fuel consumption, and carry extra fuel safely.
  4. Off-Road Driving Skills
    Disasters don’t happen on smooth highways. Practice driving on dirt, mud, gravel, and rocky terrain.
  5. Navigation Without GPS
    Memorize key routes, use a physical map, and carry a compass. GPS satellites may be down or compromised.
  6. Emergency Vehicle Signaling
    Learn how to use your horn, lights, and reflective materials to signal for help or warn others.
  7. Basic First Aid
    Always have a well-stocked first aid kit. Know how to treat cuts, burns, shock, and broken bones — because a wound on the road can be a death sentence.
  8. Firearm Familiarity
    If legal in your area, keep a firearm and ammo in the vehicle for protection. Learn to use it responsibly.
  9. Water Purification
    Carry water purification tablets or a portable filter. Water found on the road might be contaminated.
  10. Communication
    Have a CB radio or ham radio setup to receive emergency broadcasts and communicate with others.
  11. Vehicle Recovery
    Carry a winch, tow straps, and shackles. Learn how to recover your vehicle if it gets stuck.
  12. Solar Charging
    Install portable solar panels to keep batteries, radios, and devices charged without draining the vehicle.
  13. Self-Defense Training
    Know how to defend yourself physically if attacked while on the move or at a stop.
  14. Night Driving Without Lights
    Sometimes you need to move stealthily. Practice driving without headlights or use low-impact lighting options.
  15. Thermal Management
    Know how to deal with heat and cold in your vehicle — blankets, insulated windows, ventilation, or portable heaters can be lifesavers.

3 DIY Survival Hacks for Your Bug-Out Vehicle

1. DIY Fuel Can Carrier and Safety System

Don’t just throw extra fuel cans in the back of your truck and hope for the best. Construct a secure, ventilated frame inside your vehicle that holds fuel cans upright and separated by fireproof materials (like metal sheets). Drill a small vent hole with a one-way valve to prevent dangerous vapor build-up. Attach straps to keep the cans from sliding or tipping. This isn’t just convenience — it’s a potential life-saver.

2. Emergency Water Catchment System

Attach a collapsible rainwater collector tarp or tarp system on your vehicle’s roof rack. In a pinch, park your vehicle under a tree or anywhere rain falls, and funnel water through a hose into sanitized containers. You can even rig a simple gravity filter with a coffee filter and activated charcoal packed in a clean bottle, giving you a decent first line of water filtration.

3. Improvised Vehicle Armor

You don’t need a tank, but a little extra protection goes a long way. Use steel mesh or thick metal sheets to reinforce vulnerable areas—especially windows and undercarriage. If you’re super handy, fashion a removable shield for your radiator and lights to protect from flying debris and attacks. Remember, even a layer of hardened plywood screwed tightly over windows can buy you seconds to escape.


Essential Bug-Out Vehicle Modifications

  • Heavy-Duty Suspension and Tires: Upgrade your suspension to handle rough terrain. Invest in all-terrain or mud tires that won’t fail when you need them most.
  • Skid Plates: Protect the undercarriage from rocks, stumps, and debris.
  • Roof Rack and Storage Boxes: Maximize your cargo capacity with weatherproof containers for gear and supplies.
  • Winch Installation: A winch can pull you out of mud, sand, or snow—and help others.
  • Dual Battery Setup: Keep your communications, fridge, or other electronics powered without draining your starter battery.
  • Additional Lighting: Install off-road lights, spotlights, and emergency flashers.
  • CB Radio Antenna and Radio: For communication beyond cell service.
  • Fuel Storage and Transfer Pump: Safely carry extra fuel and transfer it without spilling.
  • Portable Air Compressor: For inflating tires on the go.
  • Heavy-Duty Tow Hooks: For recovery or towing others.
  • Window Tint or Mesh: For privacy and to reduce heat.
  • Lockable Storage Compartments: Keep valuables and weapons safe.
  • Fire Extinguisher Mounts: Easily accessible in case of fire.
  • Solar Panels: Mounted or portable to keep batteries charged.
  • Camouflage Netting: To conceal your vehicle in hostile environments.

Fuel Storage: Don’t Be a Sitting Duck

Fuel is your lifeblood. When the grid goes down, gas stations close or get looted within hours. You need:

  • Approved Containers: Use DOT-approved metal or high-grade plastic jerry cans. Cheap cans leak and degrade fuel.
  • Rotation System: Store fuel and rotate it every 6 months with fresh fuel to avoid ethanol separation and gumming.
  • Cool, Ventilated Storage: Keep fuel containers in a shaded, ventilated area to prevent vapor buildup and degradation.
  • Separate Storage: Never store fuel inside the vehicle’s passenger compartment — keep it outside or in a dedicated, ventilated box.
  • Add Stabilizers: Use fuel stabilizer additives to extend shelf life.

Mobile Supplies Checklist

  • Food and Water: Non-perishable, compact rations like MREs, energy bars, and water purification kits.
  • First Aid: Trauma kits, bandages, antibiotics, painkillers, and burn treatment.
  • Tools: Multi-tool, hand saw, crowbar, duct tape, zip ties.
  • Fire Starting: Waterproof matches, lighters, ferro rods.
  • Shelter: Compact tarp, emergency blanket, small tent or bivvy.
  • Clothing: Weather-appropriate, durable, and layered.
  • Lighting: Headlamp, flashlights, spare batteries.
  • Self-defense: Pepper spray, knives, firearms if legal.
  • Communications: Radios, extra batteries, signal mirrors.
  • Navigation: Maps, compass, GPS device.
  • Hygiene: Soap, sanitizer, toilet paper.
  • Miscellaneous: Paracord, sewing kit, spare vehicle parts.

Final Word of Warning: Don’t Be a Lazy, Unprepared Moron

If you think survival is as simple as just “bugging out,” you’re walking straight into the lion’s mouth. Your vehicle is an extension of you—keep it sharp, keep it fueled, keep it loaded with everything you need to get out and stay out alive. When the world falls apart, there’s no room for mistakes or shortcuts. Your life depends on the quality of your preparation, your skills, and your resolve.

If you’re serious about surviving, start working on these survival skills and prepping your bug-out vehicle TODAY. Because when the chaos hits, you won’t get a second chance.


You want to survive? Then get your hands dirty, get smart, and get ready. The road ahead is going to be rough—and if you’re not prepared, it’ll swallow you whole.

Surviving Connecticut’s Worst: A Prepper’s Guide to Natural Disasters

5 Ways Connecticut Preppers Survive the State’s Worst Natural Disasters

Living in Connecticut means you’ve got to be ready for anything. Whether it’s the bitter cold of winter, hurricane-force winds, or sudden floods, every prepper knows that survival isn’t about luck — it’s about preparation. As a seasoned prepper in the Nutmeg State, I’ve learned through experience that the best way to survive any natural disaster is to stay ahead of the game. Here’s how I and many other Connecticut residents get ready for the worst.

CLICK HERE TO LEARN HOW TO SURVIVE A FAMINE

1. Preparing for Severe Winter Weather

Connecticut winters are nothing to laugh about. While the coastal areas might get some respite, the rest of the state, especially inland, gets hit with heavy snow, freezing rain, and bone-chilling temperatures. To prepare for winter storms, preppers in Connecticut focus on three main priorities: heat, food, and transportation.

  • Heat: You should have multiple heat sources. A wood stove, propane heater, or kerosene heater can save your life when the power goes out during a winter storm. If you can, make sure your stove or fireplace is in good working order and has a reliable supply of wood. Invest in thermal blankets, sleeping bags rated for sub-zero temperatures, and extra fuel for heaters.
  • Food and Water: Make sure you have a minimum of three days’ worth of non-perishable food and water, but ideally, go for at least two weeks’ worth. Canned goods, freeze-dried meals, and water purification systems like a LifeStraw or Sawyer Mini filter are absolute essentials.
  • Transportation: Keep your vehicle stocked with essentials like jumper cables, blankets, food, and water. Keep it well-maintained and ensure you’ve got good winter tires, as snowstorms can make the roads treacherous.

2. Dealing with Hurricane Season

Hurricane season in Connecticut can be unpredictable, especially for coastal areas like New Haven and Bridgeport. When a storm like Hurricane Sandy hit in 2012, the devastation showed how quickly the state could be knocked off its feet. Preppers in Connecticut know it’s vital to keep a close eye on weather patterns and stay prepared.

  • Evacuation Routes: Know your local evacuation routes and have a bug-out bag ready for each member of your family, including pets. Have a go-bag with clothes, food, water, a flashlight, batteries, and important documents ready to grab in case of an evacuation order.
  • Flood Prevention: If you live near the coast or a river, investing in sump pumps, sandbags, and waterproofing your basement is crucial. You can never be too prepared for flooding. If your home isn’t in a flood zone, consider elevating critical equipment and electrical outlets at least 12 inches above the ground.

3. Preparing for Flooding

Flooding is one of Connecticut’s most common natural disasters. Heavy rainstorms, especially during the spring and fall, can cause rivers to overflow and create flash floods. You don’t need to live on the coast to be at risk — inland areas like Hartford, New London, and Torrington are often affected.

  • Flood-Resistant Gear: Keep waders, waterproof boots, and water-resistant bags in your prepper kit. These items are essential when navigating through flooded areas, especially if you have to evacuate on foot.
  • Home Floodproofing: You should have a plan for elevating your home’s essential systems. This includes moving electronics and valuables to higher ground and using sump pumps or drainage systems to minimize water intrusion. If you’re in an area prone to repeated flooding, you might want to consider installing flood barriers.

4. Tornadoes in the Quiet Corner

Tornadoes are a less common but very real threat in Connecticut. Although they don’t occur with the same frequency as in Tornado Alley, they do pop up, especially in the eastern part of the state, sometimes referred to as the “Quiet Corner.” These twisters can be extremely dangerous and unpredictable.

  • Shelter: A basement or storm cellar is your best option, but if that’s not available, an interior room with no windows (such as a closet) is the next best thing. Keep helmets, heavy-duty gloves, and blankets in your tornado kit to protect against flying debris.
  • Warning Systems: Sign up for Connecticut’s emergency alert system. The state issues tornado warnings through multiple channels, so make sure your family knows what to do when those sirens go off.

5. Earthquakes and Seismic Activity

While Connecticut is not known for major earthquakes, it does experience minor tremors. The New Madrid Fault Zone, while mainly active further west, can still send shockwaves across the region. Minor earthquakes can cause structural damage, so it’s best to prepare for the unexpected.

  • Structural Stability: Secure heavy furniture and appliances to walls, and use non-slip mats for electronics and fragile items. It’s important to make sure you have a clear exit path, as buildings may sway or crack during a tremor.
  • Emergency Plan: Make sure you have a family emergency plan that includes what to do during an earthquake. Practicing drop, cover, and hold on drills can save lives in case the ground shakes.

Top 10 Survival Prepper Tips for Connecticut’s Natural Disasters

  1. Stock Up on Essentials: Always have at least two weeks’ worth of non-perishable food and water. Don’t forget pet food and other family essentials.
  2. Build a Bug-Out Bag: Each family member should have a bug-out bag that includes clothes, food, water, first aid, and a flashlight.
  3. Know Your Local Hazards: Whether it’s floods, hurricanes, or tornadoes, research your area and prepare accordingly.
  4. Backup Power: Keep a portable generator and extra fuel on hand in case of power outages. Solar-powered chargers are a must for your devices.
  5. First Aid Skills: Learn basic first aid and CPR. You never know when you might need to treat a wound or assist someone in distress.
  6. Water Purification: Invest in a high-quality water filter or purification tablets to ensure you have access to clean water during emergencies.
  7. Plan for Pets: Make sure your pets have their own emergency kit, including food, water, and any necessary medications.
  8. Communication Plans: Set up a communication plan with your family so you can stay in contact during an emergency, even if phone lines are down.
  9. Maintain Your Vehicle: Regular maintenance is key, especially in harsh winter conditions. Keep your car well-stocked with emergency supplies.
  10. Stay Calm and Educated: The more you prepare, the calmer you’ll be when disaster strikes. Stay informed and stay calm.

Other Preparedness Resources:

  • Local Prepper Groups: Connect with other preppers in your area. Many of us share knowledge, tools, and support when things go wrong.
  • Red Cross Classes: Take a first aid and CPR course through the American Red Cross or a local community center.

In the end, Connecticut is a beautiful state, but as preppers, we know how important it is to be ready for anything. Whether it’s a blizzard, flood, or hurricane, having the right gear, knowledge, and plans in place can make all the difference when disaster strikes. Stay safe out there, and remember: It’s always better to be over-prepared than underprepared.

The Ultimate Survivalist In-Car Checklist: 7 Items You Need

Disaster doesn’t announce itself.

It strikes when you’re least ready—when your guard is down, and your mind is elsewhere. You might be thinking about dinner plans, your kids’ soccer game, or just getting home to a warm bed. But emergencies don’t care about your schedule.

CLICK HERE TO LEARN HOW TO NEVER STARVE WHEN DOOMSDAY HITS!

Picture this: It’s Friday evening. You’re finally off work. You’re cruising down a quiet stretch of road, miles away from the nearest gas station, thinking about how you’ll spend the weekend with your family. And then—BAM. A loud thud. Your car jerks violently. You lose control for a split second before steering to the shoulder. You get out, and there it is… a flat tire.

And just your luck—it’s raining sideways. Not a streetlamp in sight.

CLICK HERE TO LEARN HOW TO NEVER STARVE WHEN DOOMSDAY HITS!

Now let me ask you: Are you ready?

Because if you’re not, that flat tire could turn into a full-blown survival scenario. As any seasoned prepper will tell you, your vehicle isn’t just a means of transportation. It’s a mobile command center. It’s your lifeline when SHTF. Whether you’re evacuating due to wildfires, stranded in a snowstorm, or simply stuck with a mechanical failure, your car must be prepped for anything.

Here are the 7 essential items every survival-minded individual needs in their vehicle—and 10 additional prepper tips to keep you one step ahead when the unexpected hits.


1. Spare Tire, Jack, and Lug Wrench

Let’s start with the basics. A flat tire is more than just an inconvenience—it can leave you stranded for hours, or worse, overnight in the middle of nowhere. You need a fully inflated spare tire, a sturdy jack, and a reliable lug wrench.

Prepper Tip #1: Rotate and inspect your spare every three months. A flat spare is as useless as no spare at all.

Prepper Tip #2: Consider adding a tire plug kit and portable air compressor. Sometimes a quick patch and refill is all you need to get moving again.


2. Jumper Cables (or Jump Starter)

A dead battery is another common issue, especially in extreme temperatures. Having a solid pair of jumper cables can save you hours of waiting for help—or worse, being stuck in hostile conditions.

Prepper Tip #3: Upgrade to a lithium-ion jump starter. These compact power packs can jump your car without needing another vehicle. Plus, they usually have USB ports to charge your phone.


3. First-Aid Kit

This is non-negotiable. From minor cuts and scrapes to more serious injuries, a well-stocked first-aid kit can save lives.

Prepper Tip #4: Customize your kit. Add painkillers, antiseptics, trauma supplies (like a tourniquet), and allergy meds. Don’t forget a laminated card with CPR instructions and your personal medical info.


4. Flashlight and Extra Batteries

When darkness falls, you’ll need a dependable flashlight. Whether you’re checking under the hood, flagging down help, or navigating on foot, a solid light source is crucial.

Prepper Tip #5: Invest in a high-lumen LED flashlight with a strobe or SOS function. Keep extra batteries in a waterproof container, or go with a solar/crank-powered model for infinite power.


5. Emergency Blankets and Warm Clothing

Hypothermia can set in faster than you’d think, especially if your car won’t start and you’re trapped in cold weather. Emergency mylar blankets are compact, lightweight, and designed to reflect 90% of body heat.

Prepper Tip #6: Include a wool hat, gloves, socks, and a waterproof poncho. Hypothermia often starts with extremities, and you’ll be thankful for that added layer.


6. Non-Perishable Food and Water

If you’re stuck for hours—or days—you’ll need calories and hydration. Keep a stash of non-perishable, high-energy food and bottled water in your vehicle.

Prepper Tip #7: Use vacuum-sealed ration bars and emergency water pouches with a 5-year shelf life. They’re space-efficient and built for survival.

Prepper Tip #8: Toss in a LifeStraw or water purification tablets. If you run out of bottled water, these could keep you alive in a longer crisis.


7. Portable Charger or Power Bank

Your phone is your most powerful tool in a crisis—but only if it’s charged. A high-capacity portable power bank ensures you stay connected when your car battery isn’t an option.

Prepper Tip #9: Look for solar-powered models. Even if the grid’s down, you’ll still be able to charge your devices.


10 Bonus Survival Prepper Tips for Your Car

Now that you’ve got the 7 essentials, take it a step further. Hardcore preppers know that redundancy and versatility are key.

1. Multi-tool or Survival Knife

From cutting seatbelts to making repairs or defending yourself, a quality multi-tool is invaluable.

2. Duct Tape

Fix a hose, seal a window, secure gear, or even splint an injury. The uses are endless.

3. Maps and Compass

Don’t rely on GPS. If the grid’s down or you’re in a dead zone, paper maps and a compass will keep you on track.

4. Fire Starter Kit

Waterproof matches, ferro rods, or lighters—fire can provide warmth, boil water, signal for help, or keep predators away.

5. Reflective Triangle or Road Flares

Increase your visibility to other drivers, especially during night or low-visibility conditions.

6. Cash in Small Bills

ATMs might be down or inaccessible. Keep a stash of $1s, $5s, and $10s hidden in your car.

7. Toilet Paper and Hygiene Kit

Sanitation can be crucial. A small hygiene kit with TP, wipes, and hand sanitizer is easy to store and highly valuable.

8. Gloves and Safety Glasses

Whether fixing a tire or clearing debris, protect your hands and eyes.

9. Tow Strap

Help others—or get helped—without relying on a tow truck.

10. Notebook and Pencil

Record important details, leave a note if you have to leave your vehicle, or track resources. It’s old-school, but it works.


Final Word

Emergencies aren’t a matter of if, they’re a matter of when. Your vehicle is your mobile bug-out location—treat it like one. A well-stocked car can mean the difference between inconvenience and catastrophe.

So prep it now. Load it with gear. Check your supplies. Refresh items regularly.

Because when the moment comes—and it will—you won’t rise to the occasion.

You’ll fall back on your preparation.

And that, my fellow survivalist, is how you thrive when the rest of the world panics.

Do This Before Neighbors Become Dangerous

Picture this.

You are enjoying a nice dinner with your family on a quiet Sunday afternoon.

When suddenly an incredible earthquake strikes your city without warning. Leaving devastation in its wake.

Power lines are down, and it seems like it could be days, or even weeks, until they’re restored.

But that doesn’t scare you.

Because your essentials are well-stocked, your family is safe, and you’re ready to weather the storm.

You breathe a sigh of relief.

But then there’s a knock at the door…

What happens when the most dangerous thing after an emergency isn’t the emergency itself, but the people living right next door?

It’s a reality we don’t like to confront.

And yet, the truth is, not everyone is as ready as we are.

When the world around us crumbles, and desperation seeps in, your well-laid plans and stockpile might make you a target.

So how do you navigate this potential challenge?

Well, there is no way around it. If you have neighbors, transforming them into fellow preppers is the safest thing you can do.

It might seem a bit paradoxical at first.

Talk about your well-earned knowledge and resources with the very people who could pose a threat?

However, it’s this shift in perspective that could make a world of difference.

When your neighbors are also ready, then they are not dangerous anymore.

If anything, they might aid you in emergencies.

The transformative power of community readiness is something that is vastly underestimated.

Instead of being isolated and under potential threat from unprepared neighbors, fostering a culture of preparedness can turn your neighborhood into a network of allies during difficult times.

You can start by investing your time in spreading awareness about the importance of readiness.

Or host a neighborhood meeting where you share valuable insights on emergency planning, food and water storage, basic first-aid, and necessary survival skills.

Or, if this sounds like too much work, you could just forward my emails to them.

I share everything I learn about emergency preparedness, and I hold nothing back.

We are in this together.

Helping each other survive is the natural thing to do.

By sharing your knowledge, you’re equipping your neighbors to stand on their own feet.

And you are eliminating a potential threat.

Let’s embrace the power of community. Because when SHTF, unity is strength.

10 Critical Items Every Southern California Prepper Should Stock

Ready for the End: 10 Critical Items Every Southern California Prepper Should Stock

Hey there, SoCal! Whether you’re a seasoned prepper or just starting to think about disaster readiness, it’s essential to be prepared for the unexpected. From wildfires and earthquakes to power outages and civil unrest, having the right gear can make all the difference. Let’s dive into the top 10 survival tools every Southern Californian should have on hand.


1. Water Filtration System

In a region prone to droughts and wildfires, access to clean water can become scarce. A portable water filter, like the Sawyer Mini, allows you to purify water from lakes, streams, or even puddles, ensuring you stay hydrated when municipal systems fail. Survival Magazine


2. Multi-Tool or Survival Knife

A high-quality multi-tool or fixed-blade knife is indispensable. Brands like Gerber and Leatherman offer models equipped with pliers, screwdrivers, and blades, making them versatile for various survival tasks, from building shelter to preparing food.


3. Portable Power Station

Power outages can last for days, especially after a wildfire or earthquake. A portable power station, such as the Goal Zero Yeti, can charge your devices, run small appliances, and keep essential equipment operational during extended blackouts.


4. First Aid Kit

Accidents happen, and having a well-stocked first aid kit is crucial. Ensure it includes bandages, antiseptics, tweezers, pain relievers, and any personal medications. Regularly check and update your kit to keep it ready for use.


5. Emergency Shelter

In the event of evacuation or if your home becomes uninhabitable, having an emergency shelter is vital. Compact tents, tarps, or emergency bivvies can provide protection from the elements and a place to rest.


6. Fire Extinguisher

With the threat of wildfires in Southern California, having a fire extinguisher on hand is essential. Ensure it’s rated for all types of fires (Class A, B, and C) and that all family members know how to use it.


7. Flashlight and Headlamp

Power outages can occur without warning. A reliable flashlight and headlamp ensure you can navigate safely in the dark. Opt for LED models with long battery life and consider solar-powered options to reduce reliance on disposable batteries.


8. Emergency Radio

Staying informed is crucial during a disaster. An emergency radio, preferably hand-crank or solar-powered, can provide updates on weather conditions, evacuation orders, and emergency broadcasts when other communication channels are down.PlanetWare


9. Duct Tape and Paracord

These versatile items can be used for a multitude of purposes, from repairing gear to building shelter. Duct tape is excellent for quick fixes, while paracord can serve as rope for various tasks.


10. Emergency Food Supply

Having a stash of non-perishable food ensures you have sustenance during emergencies. Opt for freeze-dried meals, protein bars, and canned goods that are easy to prepare and have long shelf lives.


10 Survival Prepper Tips for Southern Californians

  1. Create a Family Emergency Plan: Establish meeting points and communication methods in case of separation.
  2. Maintain a 72-Hour Emergency Kit: Ensure each family member has a kit with essentials like water, food, and first aid supplies.
  3. Secure Your Home: Install fire-resistant materials and clear vegetation to create defensible space.
  4. Stay Informed: Sign up for local alert systems and monitor NOAA Weather Radio for updates.
  5. Practice Evacuation Drills: Regularly rehearse evacuation routes and procedures with all family members.
  6. Know Multiple Routes: Familiarize yourself with alternative evacuation routes to avoid traffic congestion.
  7. Maintain Your Vehicle: Keep your car fueled and stocked with emergency supplies, including a spare tire and jumper cables.
  8. Secure Important Documents: Store copies of important documents in a waterproof and fireproof container.
  9. Learn Basic First Aid: Take a first aid and CPR course to be prepared for medical emergencies.
  10. Stay Calm and Follow Official Instructions: During a disaster, remain calm and follow the guidance of local authorities.

Best Camping Sites in Southern California

For preppers, camping isn’t just about recreation—it’s about training and testing gear. Here are some top spots to consider:

  • Jumbo Rocks Campground, Joshua Tree National Park: Offers surreal desert landscapes and clear night skies, ideal for stargazing and testing gear. PlanetWare
  • San Onofre Bluffs Campground: Located near San Clemente, this site provides ocean views and access to surf breaks, perfect for coastal survival training. wildoutdoorsy.com
  • Green Valley Campground, Cuyamaca Rancho State Park: Situated near Julian, this campground offers cooler temperatures and lush forests, providing a different environment for survival practice. PlanetWare
  • El Capitan State Beach Campground: Located near Santa Barbara, this site offers beachfront camping with opportunities for fishing and marine survival skills.
  • Idyllwild Campground, Mount San Jacinto State Park: Nestled in the San Bernardino National Forest, this campground offers cooler temperatures and access to hiking trails, ideal for wilderness survival training.