The Ultimate Survivalist In-Car Checklist: 7 Items You Need

Disaster doesn’t announce itself.

It strikes when you’re least ready—when your guard is down, and your mind is elsewhere. You might be thinking about dinner plans, your kids’ soccer game, or just getting home to a warm bed. But emergencies don’t care about your schedule.

CLICK HERE TO LEARN HOW TO NEVER STARVE WHEN DOOMSDAY HITS!

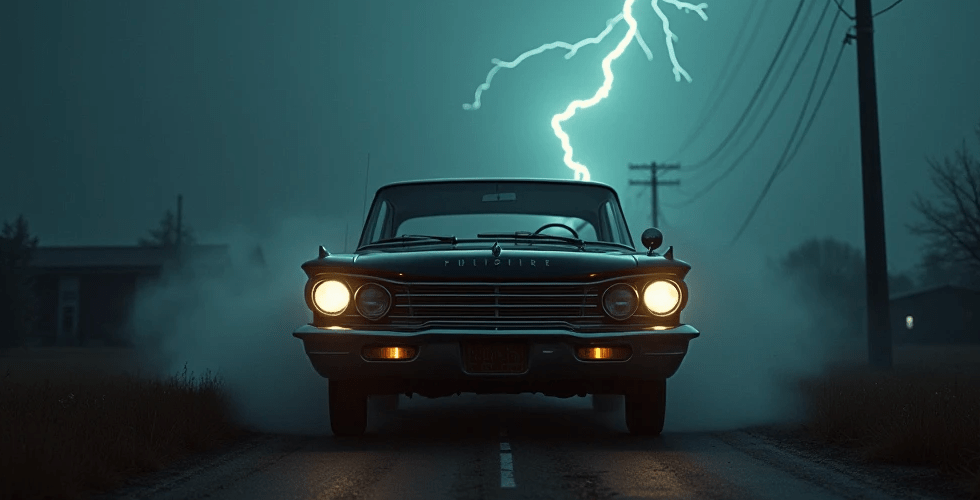
Picture this: It’s Friday evening. You’re finally off work. You’re cruising down a quiet stretch of road, miles away from the nearest gas station, thinking about how you’ll spend the weekend with your family. And then—BAM. A loud thud. Your car jerks violently. You lose control for a split second before steering to the shoulder. You get out, and there it is… a flat tire.

And just your luck—it’s raining sideways. Not a streetlamp in sight.

CLICK HERE TO LEARN HOW TO NEVER STARVE WHEN DOOMSDAY HITS!

Now let me ask you: Are you ready?

Because if you’re not, that flat tire could turn into a full-blown survival scenario. As any seasoned prepper will tell you, your vehicle isn’t just a means of transportation. It’s a mobile command center. It’s your lifeline when SHTF. Whether you’re evacuating due to wildfires, stranded in a snowstorm, or simply stuck with a mechanical failure, your car must be prepped for anything.

Here are the 7 essential items every survival-minded individual needs in their vehicle—and 10 additional prepper tips to keep you one step ahead when the unexpected hits.


1. Spare Tire, Jack, and Lug Wrench

Let’s start with the basics. A flat tire is more than just an inconvenience—it can leave you stranded for hours, or worse, overnight in the middle of nowhere. You need a fully inflated spare tire, a sturdy jack, and a reliable lug wrench.

Prepper Tip #1: Rotate and inspect your spare every three months. A flat spare is as useless as no spare at all.

Prepper Tip #2: Consider adding a tire plug kit and portable air compressor. Sometimes a quick patch and refill is all you need to get moving again.


2. Jumper Cables (or Jump Starter)

A dead battery is another common issue, especially in extreme temperatures. Having a solid pair of jumper cables can save you hours of waiting for help—or worse, being stuck in hostile conditions.

Prepper Tip #3: Upgrade to a lithium-ion jump starter. These compact power packs can jump your car without needing another vehicle. Plus, they usually have USB ports to charge your phone.


3. First-Aid Kit

This is non-negotiable. From minor cuts and scrapes to more serious injuries, a well-stocked first-aid kit can save lives.

Prepper Tip #4: Customize your kit. Add painkillers, antiseptics, trauma supplies (like a tourniquet), and allergy meds. Don’t forget a laminated card with CPR instructions and your personal medical info.


4. Flashlight and Extra Batteries

When darkness falls, you’ll need a dependable flashlight. Whether you’re checking under the hood, flagging down help, or navigating on foot, a solid light source is crucial.

Prepper Tip #5: Invest in a high-lumen LED flashlight with a strobe or SOS function. Keep extra batteries in a waterproof container, or go with a solar/crank-powered model for infinite power.


5. Emergency Blankets and Warm Clothing

Hypothermia can set in faster than you’d think, especially if your car won’t start and you’re trapped in cold weather. Emergency mylar blankets are compact, lightweight, and designed to reflect 90% of body heat.

Prepper Tip #6: Include a wool hat, gloves, socks, and a waterproof poncho. Hypothermia often starts with extremities, and you’ll be thankful for that added layer.


6. Non-Perishable Food and Water

If you’re stuck for hours—or days—you’ll need calories and hydration. Keep a stash of non-perishable, high-energy food and bottled water in your vehicle.

Prepper Tip #7: Use vacuum-sealed ration bars and emergency water pouches with a 5-year shelf life. They’re space-efficient and built for survival.

Prepper Tip #8: Toss in a LifeStraw or water purification tablets. If you run out of bottled water, these could keep you alive in a longer crisis.


7. Portable Charger or Power Bank

Your phone is your most powerful tool in a crisis—but only if it’s charged. A high-capacity portable power bank ensures you stay connected when your car battery isn’t an option.

Prepper Tip #9: Look for solar-powered models. Even if the grid’s down, you’ll still be able to charge your devices.


10 Bonus Survival Prepper Tips for Your Car

Now that you’ve got the 7 essentials, take it a step further. Hardcore preppers know that redundancy and versatility are key.

1. Multi-tool or Survival Knife

From cutting seatbelts to making repairs or defending yourself, a quality multi-tool is invaluable.

2. Duct Tape

Fix a hose, seal a window, secure gear, or even splint an injury. The uses are endless.

3. Maps and Compass

Don’t rely on GPS. If the grid’s down or you’re in a dead zone, paper maps and a compass will keep you on track.

4. Fire Starter Kit

Waterproof matches, ferro rods, or lighters—fire can provide warmth, boil water, signal for help, or keep predators away.

5. Reflective Triangle or Road Flares

Increase your visibility to other drivers, especially during night or low-visibility conditions.

6. Cash in Small Bills

ATMs might be down or inaccessible. Keep a stash of $1s, $5s, and $10s hidden in your car.

7. Toilet Paper and Hygiene Kit

Sanitation can be crucial. A small hygiene kit with TP, wipes, and hand sanitizer is easy to store and highly valuable.

8. Gloves and Safety Glasses

Whether fixing a tire or clearing debris, protect your hands and eyes.

9. Tow Strap

Help others—or get helped—without relying on a tow truck.

10. Notebook and Pencil

Record important details, leave a note if you have to leave your vehicle, or track resources. It’s old-school, but it works.


Final Word

Emergencies aren’t a matter of if, they’re a matter of when. Your vehicle is your mobile bug-out location—treat it like one. A well-stocked car can mean the difference between inconvenience and catastrophe.

So prep it now. Load it with gear. Check your supplies. Refresh items regularly.

Because when the moment comes—and it will—you won’t rise to the occasion.

You’ll fall back on your preparation.

And that, my fellow survivalist, is how you thrive when the rest of the world panics.

The Survival Essential That Should Be in Every Prepper’s Kit

The Survival Essential That Should Be in Every Prepper’s Kit

When it comes to prepping, many people focus on the flashy gear—the tactical knives, the high-tech radios, or the heavy-duty survival tools. These items might be essential, but there’s one overlooked gem in the survival world that doesn’t get the attention it deserves. It’s small, simple, and probably sitting right in your kitchen right now: baking soda.

CLICK HERE TO LEARN HOW TO NEVER STARVE WHEN DOOMSDAY HITS!

Yes, you read that right. Baking soda. It’s not flashy, it’s not high-tech, and it’s definitely not something that screams “survival gear.” But believe me, this humble compound is one of the most versatile and useful tools you can have in your survival kit. It’s more than just a baking ingredient or fridge deodorizer—it could be the difference between thriving and simply surviving when disaster strikes.

Now, you might be wondering why I’m recommending something so seemingly mundane. Well, let me walk you through just a few reasons why baking soda needs a spot in your emergency supplies—and how it can make a world of difference when the chips are down.

1. First Aid in a Pinch

In a survival situation, the likelihood of encountering minor injuries is high. Whether it’s a burn from cooking over an open flame, a sting from an insect, or a scratch from rough terrain, you need solutions that are easy to apply and effective. Baking soda can serve as a simple first-aid tool to treat these ailments.

  • Burns: If you’ve suffered a minor burn, make a paste of baking soda and water and apply it to the affected area. It will help soothe the pain and speed up the healing process.
  • Insect Bites and Stings: Same idea applies for insect bites and stings. A baking soda paste will help neutralize the itching and discomfort.
  • Skin Irritations: Baking soda can also work as an exfoliant for your skin and help soothe rashes or other minor irritations. It’s gentle but effective, making it ideal for when you don’t have a lot of options.

2. Personal Hygiene in Tight Spots

When you’re out in the wilderness or trying to survive without access to stores, staying clean is a priority, but not always an easy one. Baking soda can save the day when conventional hygiene products are unavailable.

  • Toothpaste Alternative: If you’re out of toothpaste or don’t have access to the store, baking soda makes a great stand-in. It’ll help clean your teeth, freshen your breath, and prevent bad odors.
  • Deodorant: You may not have access to your regular deodorant, but a little baking soda rubbed into your underarms can help neutralize body odor and keep you feeling fresh.
  • Body Scrub: If you need a scrub to exfoliate your skin and remove dirt or oils, baking soda is your go-to. Just mix it with a little water, and it’s perfect for a quick clean-up.

3. Taking Care of Your Equipment

In a survival situation, your gear becomes an extension of your life. Keeping it in good working condition is critical, and baking soda can help you with that, too.

  • Rust Removal: If you’ve been in wet conditions and your metal gear is showing signs of rust, baking soda can help. A simple paste of baking soda and water applied to the rusted area will gently scrub it away without damaging your tools.
  • Cleaning Pots and Pans: After a long day of cooking over a campfire, cleaning your cookware might feel like a chore. Baking soda can help you remove grease and grime from your cooking pots and pans. Just sprinkle it on, add a little water, and scrub away.
  • Cleaning Gear: Baking soda can also be used to clean the exterior of your gear—your knives, backpacks, or even your boots. It can help get rid of dirt and grime and leave things looking sharp and ready for the next mission.

4. A Fire-Fighting Agent

When SHTF, the ability to put out a fire quickly and safely can be a game-changer. A small grease or electrical fire could turn deadly if not contained. Baking soda can be used to smother these types of fires.

  • Fire Extinguisher: If you don’t have a fire extinguisher on hand, a decent amount of baking soda can help extinguish small fires. Simply pour it over the fire (especially grease or electrical fires) and watch it snuff out the flames.

However, let’s be clear: baking soda is not a substitute for a fire extinguisher. It’s a quick solution for small fires, but if the fire is large, you need to move quickly and use proper fire-fighting equipment.

5. Combatting Odors and Pollutants

In a survival setting, odors can become a major problem, whether it’s from food, waste, or something else. Thankfully, baking soda is a powerful odor neutralizer and can help keep your shelter and supplies smelling fresh.

  • Deodorize Your Shelter: Whether it’s your bug-out bag, tent, or shelter, baking soda can be used to absorb and neutralize odors, preventing them from becoming unbearable.
  • Food Preservation: If you’re storing food, baking soda can also help neutralize any funky smells, especially from canned goods or dried food. It helps to maintain a cleaner environment.

6. Natural Cleaning Agent

In survival situations, you can’t always count on store-bought cleaners or disinfectants. But you can count on baking soda as an excellent all-purpose cleaner.

  • Kitchen Cleaning: Use baking soda to scrub surfaces in your cooking area or even to clean your hands after handling raw meat or fish. It’s effective, non-toxic, and easy to use.
  • Deodorize Clothing: Baking soda can be used to freshen up your clothes, even if you don’t have a washer and dryer available. Sprinkle it on and let it sit, then shake or brush it off for a fresher-smelling outfit.

7. Relieving Heartburn and Digestive Issues

In the absence of medication, baking soda can serve as a home remedy for heartburn or indigestion. It neutralizes stomach acid, helping relieve discomfort quickly.

8. A Compact, Lightweight Addition to Your Kit

One of the best things about baking soda is how easy it is to pack. It’s lightweight, cheap, and incredibly versatile, making it a no-brainer to include in your bug-out bag, emergency supplies, or camping gear.


10 Survival Prepper Tips for Using Baking Soda:

  1. Store Baking Soda Properly: Make sure you keep it in a sealed container to protect it from moisture. You don’t want it to clump or lose its effectiveness.
  2. Use it for Personal Hygiene: Mix it with a bit of water to clean your teeth and freshen your breath when toothpaste isn’t available.
  3. Rust-Proof Your Gear: Regularly clean your metal tools with a baking soda paste to prevent rust buildup.
  4. Fire Safety: Keep a small container of baking soda close to your cooking area for quick fire suppression.
  5. Deodorize Your Shelter: Sprinkle baking soda around your shelter to help keep things smelling fresh.
  6. Cookware Cleaning: Use baking soda to clean grease and grime off your cookware after meals.
  7. Bug and Plant Care: Use baking soda as a natural pesticide to keep bugs away from your survival garden.
  8. Treat Minor Wounds: Use a baking soda paste to treat burns or stings on the go.
  9. Relieve Indigestion: Pack it as an emergency remedy for digestive discomfort.
  10. Always Have a Backup: Store extra baking soda in your long-term food supplies to ensure you have it when needed.

Final Thoughts

Baking soda may not be the most glamorous survival tool, but its versatility and practicality make it an essential item for any prepper. Whether you’re dealing with a burn, freshening your breath, or cleaning your gear, baking soda can serve you well in numerous survival situations. So, the next time you’re preparing your kit, make sure to add this humble compound—it’s a small investment that could pay huge dividends in the field.

The Brutal Truth: Why Most Will Fail When SHTF

Imagine you’re planning a road trip for a week. You plot your route, book places to stay, pack meals, and maybe schedule a few scenic stops along the way. You’ve got a plan, and you’re feeling good about it.

Now imagine that trip doesn’t last a week… but a year. No hotels. No grocery stores. No running water. No gas stations. No internet. No police. Just you, your family, and whatever you can carry—or grow, build, and protect.

Could you survive it?

That’s not just a hypothetical. That’s a real possibility. And if you think it can’t happen, you’re already in danger.

When SHTF—and it will, sooner or later—your life won’t just change for a few days. It could change forever. Most people are prepping for the wrong timeline. They prepare for a blackout or a short-term emergency. But they’re not thinking long-term. They’re not ready for the hard truth: the collapse of society won’t have a set expiration date.


Why Most People Will Fail

The average person is prepping for a weekend storm, not for societal collapse. When the shelves are empty, the power grid fails, and law enforcement is overwhelmed or gone, most people will fall apart in less than 72 hours.

Why? Because survival isn’t just about stuff. It’s about mindset, adaptability, and skills. Most folks are comfortable and soft. They rely on systems they don’t control. And when those systems go offline, they freeze, panic, or turn dangerous.

You and I both know: survival is a lifestyle, not a hobby.


The Shift in Thinking That Saves Lives

Canned food, bottled water, a flashlight, and a pack of batteries might get you through a blizzard or a flood. Maybe even a week-long power outage. But what happens when that stockpile runs dry?

The real preppers—the ones who’ll survive—aren’t just storing supplies. They’re building skills. They’re thinking five, ten, twenty years down the road.

That’s the difference between short-term survival and long-term resilience.

Your ancestors didn’t stockpile snack packs and battery-powered lanterns. They lived off the land. They built what they needed. They fixed what broke. They worked with the seasons and respected nature. And they didn’t wait for someone else to save them.

If we want to survive when SHTF—really survive—we’ve got to reclaim that mindset.


10 Survival Prepper Tips for Long-Term SHTF Living

These aren’t just “nice to haves.” These are the skills and principles that will separate the survivors from the statistics.


1. Learn to Grow Your Own Food

Canned beans won’t feed you forever. Learn to plant, cultivate, and harvest. Start small: lettuce, tomatoes, beans, potatoes. Expand into seed-saving, composting, and year-round gardening.

Tip: Practice crop rotation and companion planting to maintain soil health and improve yields.


2. Master Water Collection and Purification

Clean water is non-negotiable. Store it, but more importantly—know how to find it and purify it. Streams, rainwater, dew traps—learn them all.

Tip: Keep multiple purification options on hand—boiling, filters, tablets—and practice using each.


3. Practice Food Preservation

Dehydrating, canning, fermenting, smoking, salting—learn how to stretch your harvest. Your food isn’t useful if it spoils before you can eat it.

Tip: Build a root cellar or create a cool, dry place for long-term storage.


4. Build Practical First Aid Skills

You won’t be calling 911 when you’re miles from help. Learn wound care, splinting, infection control, and herbal remedies.

Tip: Take a wilderness first aid course and stock your kits accordingly.


5. Strengthen Your Body

A weak body can’t hike, haul, build, or fight. Prepping isn’t about having six-pack abs—it’s about stamina, mobility, and resilience.

Tip: Include lifting, cardio, and real-world movements (chopping wood, carrying loads) in your fitness routine.


6. Hone Situational Awareness

The unprepared walk blindly into danger. You need to be alert—always. The more you notice, the safer you’ll be.

Tip: Practice the OODA loop (Observe, Orient, Decide, Act) until it becomes automatic.


7. Learn Basic Carpentry and Repair

When things break—and they will—you need to know how to fix them. Simple tools, strong hands, and know-how can save the day.

Tip: Focus on multi-purpose tools and basic mechanical skills like using hand drills, patching roofs, or fixing plumbing without modern parts.


8. Create Community (But Choose Wisely)

A strong community is a force multiplier. Lone wolves get exhausted. But beware: not everyone is an asset. Some are leeches—or worse.

Tip: Vet people now. Build trust slowly. Train together. Have clear plans for roles, barter, and defense.


9. Get Comfortable With Discomfort

Most people are addicted to comfort. But discomfort builds toughness. Sleep on the ground. Work in the rain. Get dirty.

Tip: Do at least one thing every month that pushes you out of your comfort zone. Cold weather drills. Off-grid weekends. No electricity challenges.


10. Commit to Lifelong Learning

Prepping is never “done.” The world changes. Threats evolve. Your skills need to grow. Read. Practice. Repeat.

Tip: Keep a “prepper journal” to track skills, failures, and lessons learned. Teach others—it reinforces your own knowledge.


It’s a Marathon, Not a Sprint

Most people will fail when SHTF because they never truly committed. They bought gear but didn’t train. They stored food but never grew it. They talked tough but stayed soft.

But you? You know better.

You’re training now—not just to survive, but to thrive. You’re building a future where your family doesn’t just get by… but stands strong, off-grid, self-reliant, and untouchable.

Prepping isn’t about fear—it’s about freedom.

Don’t be like most people. Think long-term. Build real skills. And when the world changes—you’ll already be ready for it.

Stay alert. Stay sharp. Stay free.


Buzz Off Naturally: Chemical-Free Mosquito Solutions

Buzz Off Naturally: Chemical-Free Mosquito Solutions for Preppers

It’s that time of year again, folks. The sun’s hanging longer in the sky, the air’s getting thick, and the bugs—especially the blood-sucking kind—are coming out in force.

I was sitting outside on my porch the other evening, enjoying a rare moment of peace. I had my gear packed by the door, the radio tuned in to emergency chatter, and a thermos of hot pine-needle tea in my hand. Everything was calm.

And then I heard it.

“BZZZZZZ.”

That high-pitched whine that cuts through the quiet like a bullet through a tarp. I didn’t even have to look. I knew what it was. A goddamn mosquito.

CLICK HERE TO LEARN HOW TO SURVIVE A FAMINE

Now, for the average person, that might just mean an itchy arm or two. But for those of us who live the prepper lifestyle—who plan, train, and prepare for what most people deny is coming—a mosquito is more than just a nuisance. It’s a threat. And in a true survival situation, it can be a deadly one.

Let’s break this down like survivalists should.

The Real Threat Mosquitoes Pose

Sure, they’re annoying. They bite, they itch, they buzz. But in a bug-out scenario, or even just extended time off-grid, they can do a hell of a lot more damage than that.

  • They contaminate food and water: One mosquito in your water stash or ration bag can render it unusable—or worse, dangerous.
  • They disrupt sleep: Try pulling night watch with a cloud of skeeters around your face. You’ll get no rest, and your reaction time the next day could cost you your life.
  • They carry disease: Zika, West Nile, malaria—mosquitoes are flying hypodermic needles loaded with disease. In a grid-down scenario, you won’t have access to hospitals, vaccines, or antibiotics.

That’s why I’ve spent years learning how to repel mosquitoes naturally, without relying on commercial sprays full of chemicals I can’t pronounce. In a survival situation, you might not have a store to run to. But you will have nature.

Let’s get into it.


1. Plant-Based Defenses

Nature gave us the tools. You just have to use ‘em.

Citronella, lavender, basil, lemongrass, peppermint, and marigolds are your front-line defense. These plants emit strong scents that mosquitoes absolutely hate. If you’re bugging in, plant these around your perimeter—windows, doors, and patios. If you’re bugging out, keep seeds in your go-bag or crush leaves to rub on your skin.

Prepper Tip #1: Keep heirloom seeds of mosquito-repelling plants in your survival seed vault. They’ll grow year after year without corporate dependence.


2. Essential Oils Aren’t Just for Hippies

Don’t let the aromatherapy crowd fool you—essential oils are a prepper’s secret weapon. Tea tree, eucalyptus, lemon balm, cedarwood, and clove oil are all potent mosquito repellents. Mix them with a carrier oil (like coconut or olive) and rub onto exposed skin.

Prepper Tip #2: Stash a few essential oils in your bug-out bag. They’re lightweight, multi-purpose, and last forever if sealed properly.

Prepper Tip #3: Use soaked cotton balls in film canisters (or spent shotgun shells) with a few drops of oil for on-the-go repellents.


3. Standing Water = Breeding Grounds

This one’s basic, but often overlooked. Mosquitoes lay eggs in still, stagnant water. That birdbath? That tarp sagging under rainwater? That forgotten bucket behind your shed? It’s a mosquito maternity ward.

Drain it. Flip it. Burn it if you have to.

Prepper Tip #4: In a bug-out camp, dig your gray water pit far from your sleeping area and cover it with leaves or brush.

Prepper Tip #5: Carry a small vial of Bacillus thuringiensis israelensis (BTI) tablets in your kit. It’s a natural bacteria that kills mosquito larvae without harming wildlife.


4. Garlic – Not Just for Vampires

Turns out, mosquitoes hate garlic almost as much as the undead do. Crush it, boil it, and spray it. You can mix a few cloves with water and spritz it on plants, clothes, or even around your tent.

Prepper Tip #6: Eat garlic regularly in the summer. It seeps out through your pores and makes your scent less attractive to bloodsuckers.


5. Smoke: The Old-School Method

Mosquitoes are weak flyers and even weaker when it comes to smoke. A campfire, a charcoal tin, or even smoldering herbs like sage and rosemary will keep them at bay. Bonus—it also masks your scent from other threats.

Prepper Tip #7: Pack dried herbs for burning. Sage and rosemary bundles are easy to make, store, and use.


6. DIY Mosquito Traps

Make your own bait traps using sugar water and yeast. The CO₂ emitted mimics human breath and draws them in. Once inside the bottle, they drown.

Prepper Tip #8: In a stationary camp, set multiple traps around your perimeter to draw mosquitoes away from your living quarters.


7. Natural Clothing Treatments

You don’t need DEET. Soak your clothes in permethrin before a trip—it’s derived from chrysanthemum flowers and lasts several washes. You can also add a few drops of essential oil to your laundry for lightweight protection.

Prepper Tip #9: Treat bandanas and neck gaiters with oils or permethrin. It’ll protect vital areas like your neck, face, and wrists.


8. Camp Hygiene = Fewer Bugs

Sweat, dirty socks, and food waste attract more than just bears. Stay clean. Bury waste. Use vinegar or lemon juice in your wash water to neutralize odors.

Prepper Tip #10: Sprinkle wood ash around your tent or bedroll—it helps absorb odors and deters insects.


Final Thoughts

Look, mosquitoes aren’t just annoying—they’re a legitimate threat to your survival. In the field, in the woods, or even in your own backyard, they can wreck your sleep, spread disease, and make an already tough situation unbearable.

But you don’t need to rely on a can of DEET and hope for the best. You can fight back, naturally, using the resources around you. Because if you’re serious about preparedness, you know the battle doesn’t end when the grid goes down—it just changes shape.

So this summer, take action. Build your mosquito defense plan. Stock the right oils, grow the right plants, treat your gear, and stay alert.

Because when the world’s gone sideways, the last thing you need is to be grounded by a damn mosquito.

Survival Hack: How a Plastic Bag Could Save Your Life When SHTF

Survival Hack: How a Plastic Bag Could Save Your Life When SHTF

If there’s one golden rule in the world of survival—it’s this:

Make do with what you’ve got.

When the grid goes down, when the trucks stop rolling, when the food supply vanishes and chaos takes root in the streets, it won’t be your fancy gadgets that keep you alive. It’ll be your mindset. It’ll be your ability to adapt, improvise, and see value in things that others would call trash.

And few things represent that mindset better than the humble plastic bag.

We’ve all got them. Stuffed in drawers, tucked in glove compartments, crammed into backpacks. Most people toss them aside without a second thought. But not us. Not real preppers. We know better.

Let me walk you through just how powerful this overlooked tool can be when the world goes sideways.

CLICK HERE TO LEARN HOW TO SURVIVE A FAMINE


1. Hauling and Carrying

Let’s start with the obvious.

Plastic bags are made for carrying—and when SHTF, you’ll be moving gear, supplies, food, firewood, or wild edibles across rough terrain. A strong plastic bag—especially a thicker one like a trash bag or contractor bag—can handle a surprising amount of weight.

Survival Tip #1:
Keep a few large contractor bags in your bug-out bag. They fold flat, take up virtually no space, and can carry over 50 pounds of supplies if needed.


2. Water Collection and Storage

Water is life. If you don’t have access to clean, drinkable water, your chances of survival plummet fast. And out in the wild, even a pristine mountain stream can carry invisible killers—giardia, E. coli, cryptosporidium.

A plastic bag gives you a container—one of the most valuable things in the wilderness. Scoop up water from a stream, pond, or rainfall, and purify it using tablets, boiling, or your water filter.

Survival Tip #2:
Line a hole in the ground with a plastic bag to catch rainwater or morning dew. Cover it with a tarp or another bag to reduce evaporation.


3. DIY Solar Still

Here’s one most folks overlook—making a solar still with a plastic bag. If you’re in a survival situation with no clean water around, you can extract moisture from plants or damp earth using the sun’s power.

Fill a clear plastic bag with green, non-toxic vegetation (like dandelion greens or clover), tie it shut, and place it in direct sunlight. Over time, condensation will form on the inside, collecting at the lowest point of the bag.

Survival Tip #3:
Add a small rock inside the bag to help direct the condensation toward a corner for easy collection.


4. Emergency Shelter or Poncho

Caught in the rain? Exposure is one of the deadliest threats in survival. Hypothermia can set in fast, even in mild temperatures if you’re wet and the wind picks up.

A large trash bag can become a makeshift poncho. Cut holes for your head and arms, and you’ve got instant rain protection.

You can also cut the bag open and use it as a tarp for an improvised shelter roof, windbreak, or ground barrier.

Survival Tip #4:
Line the inside of your shelter with plastic bags to keep body heat in and moisture out.


5. Insulation and Warmth

Plastic is waterproof, and when layered with natural materials (like dry leaves or pine needles), it can create excellent insulation.

Stuff a trash bag full of soft, dry materials and use it as a pillow, mattress, or blanket insulation layer.

Survival Tip #5:
Use two plastic bags—one filled with insulation and one around your feet—to create emergency foot warmers for cold nights.


6. Signal for Help

Black plastic bags, especially when inflated, create a sharp contrast against natural landscapes. You can tie one to a stick or toss it into an open field as a makeshift distress signal.

Some preppers even write SOS or HELP on them with white paint or duct tape.

Survival Tip #6:
Inflate a black bag, tie it off, and place it in a high, open area to catch attention from air or drone rescue units.


7. Waterproof Your Gear

Electronics, maps, fire-starting materials, and dry clothes are essential in a survival scenario. And they’re all useless if soaked.

Plastic bags are your first line of defense against rain, floods, or even accidental drops into rivers.

Survival Tip #7:
Double-bag your fire-starting kit (matches, lighters, tinder) and store it in a dry section of your pack.


8. Improvised Gloves or Footwear Protection

If you have to cross contaminated areas, like flood zones, or deal with waste, plastic bags over your hands and feet offer basic protection against bacteria or harsh terrain.

Survival Tip #8:
Duct tape plastic bags around your shoes or boots to keep them dry during water crossings.


9. Makeshift Floatation Aid

Need to cross a body of water? A large plastic bag filled with air and tied off can act as a flotation aid. It’s not a life jacket, but it can help you keep your pack above water or assist with buoyancy in a pinch.

Survival Tip #9:
Use multiple inflated plastic bags tied together inside a net or fabric wrap for added flotation support.


10. Waste Disposal and Sanitation

Sanitation is key when bugging out or hunkering down. Illness spreads quickly when waste isn’t handled properly. A plastic bag gives you a clean, temporary toilet option or a way to seal off contaminated materials.

Survival Tip #10:
Use a bag-lined bucket as a portable toilet. Cover waste with dirt or sawdust and seal the bag tightly to reduce odor and bacteria.


Final Thoughts

Listen—plastic bags won’t replace your knife, your firestarter, or your firearm. But when SHTF, you’ll find that the small things often make the biggest difference. A simple plastic bag can haul your gear, keep you dry, provide drinking water, signal for rescue, or insulate you from the cold.

The key is always the same: think creatively, act decisively, and never underestimate the ordinary.

Next time you see a plastic bag blowing across the road or jammed in a fence—don’t scoff. Pick it up. Tuck it away. When the lights go out and society crumbles, that piece of plastic might just save your life.

Are you seeing the survival potential in your everyday gear?

Survival Gourmet: Crafting Mouthwatering Meals from Foraged Foods

As survivalists, we’re not here just to endure when things go south—we’re here to thrive. It’s about living comfortably and even enjoying a level of self-sufficiency that would leave most people scratching their heads in disbelief. When the world seems to crumble around us, why should we settle for just surviving? We should be aiming to live well, even in the worst of situations.

If you’ve been reading this newsletter for a while, you know that we’re not just focusing on scraping by on the bare essentials. We’re looking for ways to elevate our prepping and survival strategies—ways that allow us to thrive. One of the most overlooked aspects of prepping is the culinary potential of foraged foods.

When people think of foraged foods, they often ask, “Can I eat that?” or “How many calories does this have?” But have you ever considered that you can actually make gourmet meals from the wild ingredients you find around you? You heard me right—gourmet meals. In an emergency, it might seem a little far-fetched, as we often focus on surviving with the bare minimum, but it doesn’t have to be that way.

Nature, my fellow preppers, is an overflowing pantry, full of edible plants, roots, and berries that can be transformed into meals that not only nourish you, but actually delight your taste buds. Sure, it takes a little time to learn what’s safe to eat, and it requires some knowledge and skill. But once you’ve got a grip on your local foraged foods, turning them into meals that others would envy—whether it’s during normal times or post-collapse—isn’t as difficult as it might seem.

Getting Started: Learn Your Local Flora

Before we dive into recipes, the first step is to learn how to identify edible plants in your area. Knowledge is power when it comes to foraging. You don’t want to find yourself looking at a plant you think is edible only to realize it’s toxic or inedible. Start by getting a field guide specific to your area, or even better, attend foraging courses, and practice regularly.

Some basics to focus on include:

  • Wild greens like dandelion, lamb’s quarters, and purslane.
  • Nuts and seeds such as acorns and pine nuts.
  • Roots and tubers like Jerusalem artichokes and cattails.
  • Fruits and berries like elderberries, wild strawberries, and blackberries.

By studying these plants, you’ll build the foundation for successful foraging. Once you know what’s safe to eat, you can begin experimenting with different ways to prepare and combine your finds.

Gourmet Meals in the Wilderness? Absolutely.

Here’s where it gets interesting: once you’re comfortable with your foraging knowledge, you can move beyond survival foods and start creating delicious, gourmet-style meals. The key is in how you approach these wild ingredients. You’re not just throwing plants into a pot and calling it good; you’re using what nature has to offer to elevate your meals to something special.

For example:

  • Jerusalem Artichokes: These little tubers are often overlooked, but they can make a delicious faux potato salad when boiled and mixed with wild herbs, mustard, and olive oil (or whatever fat you’ve got).
  • Acorn Flour: If you’ve never tried it, acorn flour can be used to thicken stews or even make rustic flatbreads. It has a nutty, earthy flavor that gives your meal an amazing depth.
  • Wild Mushrooms: Certain wild mushrooms like morels and chanterelles can be sautéed in fat and added to just about anything for a gourmet touch. They provide a savory, meaty flavor that’s perfect for adding richness to a simple dish.

While it may seem complicated at first, you’ll find that once you get the hang of it, preparing meals from foraged ingredients becomes a skill that’s not only practical but also enjoyable. It requires creativity, an understanding of what flavors complement each other, and a willingness to experiment.

Cooking Without Your Gadgets

One of the biggest challenges when it comes to preparing meals in a post-SHTF world is cooking without your usual kitchen gadgets. Don’t worry, though—primitive cooking methods can be incredibly effective, and many of them can be done over an open fire or with minimal tools.

Here are some primitive cooking methods to consider:

  • Open Fire Cooking: A well-constructed fire pit can serve as your cooking hub. You can cook food in cast iron pots, or even use foil to wrap food and place it in the coals.
  • Dutch Oven: If you have a Dutch oven, it’s one of the best tools for slow cooking. Perfect for stews, soups, or even bread, a Dutch oven can withstand the heat of an open fire.
  • Clay Cooking: You can fashion cooking vessels out of clay or use stones to make primitive “bake ovens.” Just remember to test any homemade stoneware in a fire before using it for actual cooking.
  • Smoking and Drying: Learn to preserve meat and fish by smoking it or drying it over a fire. This is a valuable skill that will keep your foraged meats from spoiling.

10 Prepper Tips for Foraging and Cooking with Wild Foods

  1. Start Small and Build Knowledge: Don’t try to learn everything at once. Start with a few easily identifiable edible plants and build from there. Familiarize yourself with seasonal foraging to ensure you’re never left without options.
  2. Have a Foraging Kit Ready: Pack a foraging bag with a few essential items, such as a small knife, a notebook for notes, a field guide, and some gloves to protect your hands from rough plants or potential toxins.
  3. Practice Safe Foraging: Always be 100% sure that the plant is safe to eat. If in doubt, don’t eat it. Make use of online groups or local experts to double-check your finds.
  4. Know Your Toxic Plants: Familiarize yourself with the plants that are toxic or unsafe to eat. These include poison ivy, poison oak, and certain species of mushrooms. Avoid them at all costs.
  5. Prioritize Nutrition: When foraging, focus on plants that are rich in nutrients. Wild greens, nuts, berries, and tubers can provide the vitamins and calories needed to sustain you.
  6. Use Natural Condiments: Foraged plants like wild garlic, mustard, or even wild herbs can make excellent seasonings. Use them to bring flavor to otherwise bland meals.
  7. Stockpile Dried Foraged Foods: Preserve what you find by drying or dehydrating it. Herbs, fruits, and even mushrooms can be dried for long-term storage. This gives you a pantry to draw from in leaner times.
  8. Try Wild Game: In addition to plant foraging, learn how to hunt and fish. Wild game, including small animals like squirrels or rabbits, can be an essential protein source. Make sure you have a solid hunting or trapping plan.
  9. Practice Primitive Cooking Techniques: Set up a small campfire and practice cooking with primitive methods. This could include roasting food on sticks, using foil, or learning to cook in a Dutch oven.
  10. Stay Creative: The beauty of foraging is that it forces you to be resourceful. Look at wild ingredients and experiment—wild berries can be turned into jam, wild mushrooms into gravy, and greens into hearty salads.

Conclusion: Thrive with Foraged Foods

In a survival situation, you don’t have to settle for bland or basic meals. Nature is a treasure trove of delicious, nutritious, and varied ingredients just waiting for you to discover them. By learning how to identify and cook with foraged foods, you’ll be able to not just survive—but thrive.

So go ahead, prepper. Don’t just survive; live well, even when times are tough. Expand your knowledge, sharpen your skills, and get creative with the wild ingredients that are all around you. When the world falls apart, you’ll be eating gourmet meals over an open fire—and that’s a luxury worth having.

Dehydration Dangers: The 518,000-Case Wake-Up Call

518,000 Health Crises Later: Still Ignoring Dehydration?

Let me hit you with a cold, hard fact: over 518,000 Americans end up in the hospital every single year because of dehydration. And even more alarming—10,000 of them don’t walk back out.

Now if that number doesn’t stop you in your tracks, I don’t know what will. That’s 10,000 preventable deaths—from something as simple and essential as water.

As survival preppers, we spend our time thinking ahead, planning for the worst, and gearing up for the unexpected. We stockpile food, purify air, build bug-out bags, and plan for social collapse. But how many of us are truly ready to face a silent, creeping killer that’s already knocking on our door—right now, every summer, and in every disaster scenario?

You guessed it. Dehydration.


Don’t Be Fooled by a Sunny Day

Summer can fool the unprepared. Warm weather lulls folks into a false sense of comfort. The grills are fired up, beaches are packed, the kids are running through sprinklers—and right under our noses, people are dropping like flies from something that could’ve been fixed with a bottle of water and a little know-how.

But listen closely—dehydration doesn’t wait for you to feel thirsty. That’s right. By the time you’re thirsty, you’re already dehydrated.

Let me repeat that: thirst is not an early warning system—it’s a distress signal.


Dehydration Symptoms You Can’t Afford to Miss

If you’re building a prepper mindset, you need to know the early indicators. I’m not talking about some vague, optional side effects—these are battlefield-level warning signs that your body is running low on its most critical resource: water.

Here’s what to watch for—on the homestead, in the woods, or during the next grid-down scenario:

  • Fatigue or Dizziness – When you’re low on fluids, your blood volume drops, your pressure tanks, and next thing you know, you’re woozy and weak. That’s a liability in any emergency.
  • Infrequent Urination – Not peeing regularly? That’s a classic sign you’re drying up inside.
  • Dark-Colored Urine – If your urine looks like strong coffee, sound the alarm. You’re dehydrated.
  • Headaches – This isn’t just a nuisance; it’s your brain screaming that it’s running on low coolant.
  • Irritability or Confusion – If you or someone else starts acting out of sorts, don’t assume it’s stress. It could be dehydration impairing brain function.

These symptoms are red flags, and any one of them should have you reaching for water immediately.


Why This Matters More in Survival Situations

Now imagine this: the power grid goes down. It’s 100 degrees outside. The municipal water supply is compromised. You’re rationing food, the fridge is dead, and the only thing between your family and heat stroke is your emergency water reserve.

Dehydration becomes a life-or-death threat real fast.

And when that SHTF moment comes, there won’t be ambulances, IV fluids, or hospital beds waiting for you.

That’s why staying ahead of dehydration isn’t just smart—it’s survival.


10 Survival Prepper Tips to Combat Dehydration

Let’s get into some real prepper solutions—not just theory, but tactics that can help you and your family survive when clean water becomes a luxury.

1. Store More Water Than You Think You Need

FEMA recommends one gallon per person, per day. That’s a joke in a real emergency. Aim for three gallons per person, per day—minimum. Store it in food-grade containers, rotated every 6 months.

2. Invest in Water Filtration and Purification

A quality gravity-fed filter like a Berkey or Sawyer can turn sketchy river water into drinkable gold. Keep bleach drops, iodine tablets, and UV purifiers as backups.

3. Don’t Forget Electrolytes

Water alone won’t cut it. Salt, potassium, and magnesium are vital. Stock up on electrolyte powders or make your own rehydration mix with salt, sugar, and baking soda.

4. Monitor Urine Color Daily

Make this a family habit during hot months or crises. Light yellow = good. Dark yellow or amber = bad.

5. Drink Regularly—Not Just When Thirsty

Set a timer if you must. Sip water throughout the day—especially if you’re outside working, sweating, or exposed to the heat.

6. Eat Hydrating Foods

Canned fruits, cucumbers, tomatoes, and watermelon are high in water content. They also provide natural sugars and minerals that aid absorption.

7. Avoid Alcohol and Caffeine in Survival Scenarios

These are diuretics. They’ll drain your water reserves and leave you worse off. Save the whiskey for when the crisis is over.

8. Cool Your Body with Shade and Clothing

Reduce the need for water by keeping your core temperature down. Use tarps, wear light-colored clothing, and take breaks from the sun.

9. Educate Your Group or Family

Hold a 10-minute hydration drill. Teach everyone—from kids to elders—how to spot dehydration early and how to react fast.

10. Track Inventory and Rotate Supplies

Water and electrolyte supplies can go stale or expire. Log what you have, mark dates, and rotate stock like you would food.


Your Body Is Your First Survival Tool

Your knives, radios, and MREs won’t mean a thing if you collapse from heat exhaustion or dehydration. In every emergency, the first line of defense is your own health and awareness.

So while others are soaking up the sun this summer, let’s be the ones thinking two steps ahead. Let’s be the ones who teach our families that hydration is more than a habit—it’s an essential survival skill.


Final Word

Over half a million people every year in America alone suffer dehydration so severe it lands them in the hospital. 10,000 die. Most of them never saw it coming. Don’t be one of them. Don’t let your loved ones be one of them.

In uncertain times, we can’t afford to be reactive. We need to be proactive. Prepared. Trained. Aware.

Hydrate, stay alert, and stay alive.

Fueling Your Survival: How Many Calories Should You Consume in an Emergency?

Fueling Your Survival: How Many Calories Should You Consume in an Emergency?

When it comes to surviving a crisis, one of the most overlooked yet essential factors is nutrition. Sure, you can stockpile cans of beans and bags of rice, but do you know how much food you and your family actually need to stay alive when the worst hits? How many calories do you need to keep your body functioning during an emergency, and how should you prepare for the long haul? Let’s break it down.

The Basics of Caloric Needs

First off, let’s address a fundamental question: How many calories does a person really need to survive?

It turns out that the average adult requires only about 1,200 to 1,500 calories per day for basic survival. This number might seem low, but it’s based on the bare minimum your body needs to perform essential physiological functions—like keeping your heart pumping, your lungs breathing, and your body temperature stable. Researchers have shown that the body can survive on this minimal caloric intake for a period, provided there’s no physical exertion involved.

But here’s the catch: Survival is not the same as thriving. When you’re in an emergency situation, especially when it’s long-term, your body is going to be put under serious stress. It’s not just about staying alive—it’s about staying sharp, staying strong, and keeping your mental focus intact. You’ll be moving, lifting, thinking, and possibly defending yourself. Your calorie needs will increase.

What’s Your Actual Caloric Need in a Crisis?

If you’re in a situation where you’re physically active—whether it’s from preparing your shelter, gathering water, scavenging, building a fire, or defending yourself from threats—your caloric intake needs will skyrocket. In an emergency or survival situation, your body will burn through calories much faster than when you’re just sitting around.

For an average, moderately active man, the caloric requirement could easily be around 2,500 calories per day, and for an average, moderately active woman, about 2,000 calories per day. But even that might not be enough if you’re really working hard. If you’re chopping wood for hours, hiking long distances to find supplies, or performing other strenuous tasks, your body could easily demand an extra 500 to 1,000 calories per day.

Now, keep in mind, that’s just to maintain your weight and health. If you want to thrive, if you want to keep your energy levels high and your mind sharp, you’ll need to be even more strategic with what you eat.

Fueling for Long-Term Survival

When you’re preparing for a survival situation, you’re not just stocking up on food. You need to think about the quality of food, not just the quantity. High-calorie, nutrient-dense foods are a must. Your body needs more than just empty calories. It needs protein for muscle repair, healthy fats for energy, and carbohydrates for sustained fuel. The trick is choosing foods that pack a punch without being too bulky or hard to store.

Here are a few suggestions for survival-friendly foods that should be at the top of your list:

  • Nuts and seeds: These are calorie-dense and packed with healthy fats, protein, and fiber. A small handful of almonds or sunflower seeds can provide a substantial amount of energy.
  • Dried fruits: High in natural sugars, dried fruits like apricots, raisins, and figs can give you an instant energy boost. Plus, they’re lightweight and easy to store.
  • Canned goods: Canned beans, vegetables, and meats are calorie-rich and don’t require refrigeration. Just be sure to rotate them regularly and consider the sodium content, as too much salt can be a problem in large quantities.
  • Protein bars: A great way to get protein, carbs, and fat all in one portable package. They’re lightweight and easy to carry with you, making them perfect for survival situations.
  • MREs (Meals Ready to Eat): MREs are designed to be lightweight, nutrient-dense, and easy to prepare in the field. While they can be expensive, they’re a great addition to any prepper’s pantry for emergencies.
  • Dehydrated meals: These are a bit more convenient than MREs, and they offer a variety of meal options. Just add water, and you’ve got a decent meal that’s loaded with the calories you need.

The Importance of Prepping for Nutrient-Rich Calories

While stockpiling enough food for your family is essential, you need to make sure your food stores are not just full of empty calories. A steady diet of nothing but high-carb foods like ramen noodles or white bread will give you the calories you need to survive for a short period, but it won’t provide the nutrients your body needs to function at its best.

In an emergency, you’ll need foods that keep you alert and give you the stamina to keep moving. If you’re relying on canned chili and potato chips, your energy levels will plummet, and your mind will become sluggish. That’s why it’s so important to prioritize high-calorie, nutrient-dense foods—things that offer a full spectrum of vitamins, minerals, and other nutrients, not just calories.

Survival Prepper Tips for Managing Caloric Intake

Here are 10 survival prepper tips to make sure you have the calories you need when the worst happens:

  1. Know Your Caloric Needs: Understanding how many calories you need is the first step. Factor in your level of activity, your age, and your weight to determine the calories necessary to keep you going during a crisis.
  2. Prioritize High-Calorie, Nutrient-Dense Foods: Focus on calorie-dense foods that are rich in protein, healthy fats, and fiber. These will give you sustained energy without weighing you down.
  3. Stockpile Diverse Foods: Don’t just store one type of food. A variety of proteins, carbs, fats, and vitamins will keep your body functioning properly.
  4. Consider Freeze-Dried Meals: Freeze-dried foods have a long shelf life, are lightweight, and are packed with calories. Just add water, and you’ve got a hearty meal.
  5. Rotate Your Stock: Regularly rotate your food supply to ensure everything remains fresh and doesn’t go to waste. Set a schedule for checking expiration dates and using up older food.
  6. Carry Compact, High-Energy Snacks: Have portable, high-calorie snacks like protein bars, trail mix, or beef jerky on hand for when you need a quick energy boost on the go.
  7. Focus on Food Preservation: Learn how to preserve food in various ways—canning, drying, fermenting, and smoking. This will give you access to a variety of nutrient-dense foods for long-term storage.
  8. Hydrate Properly: Water is essential for survival, but so is the electrolyte balance. Keep a stash of electrolyte powders or sports drinks to replenish lost minerals during physical exertion.
  9. Think About Sustainable Sources: If you’re relying on wild foraging or hunting, know what’s edible and calorie-dense. Learn about local plants, nuts, and berries, and how to trap or fish.
  10. Avoid Junk Food: It’s tempting to buy cheap junk food that’s calorie-dense, but it’s often full of empty calories and won’t keep you feeling energized or healthy. Avoid overly processed, sugary, or high-sodium options.

Conclusion: Fueling the Fight for Survival

When SHTF, survival is a marathon, not a sprint. Keeping your body in peak condition is critical to navigating the challenges that lie ahead. Whether you’re holed up in a shelter or out scavenging for supplies, your body will need proper fuel to perform at its best.

By calculating your caloric needs and prioritizing high-energy, nutrient-rich foods, you can ensure that you and your loved ones will have the stamina to thrive, not just survive. Make sure your food stores are stocked with the right items, and plan for a long-term emergency. When the worst happens, you’ll be ready to keep moving, thinking clearly, and ultimately, surviving.

Do This Before Your Neighbors Become Dangerous

Do This Before Your Neighbors Become Dangerous: A Survivalist’s Guide

In times of crisis, the greatest threat may not come from distant enemies but from those living closest to you. When societal structures begin to crumble, neighbors—once familiar faces—can quickly become unpredictable and even dangerous. As a survivalist, it’s imperative to prepare not only for external threats but also for the potential dangers lurking next door.

Understanding the Threat

The collapse of societal norms can lead to desperation. People who once adhered to the rule of law may resort to violence or theft to secure resources. In such scenarios, your immediate environment becomes a battleground. Recognizing this reality is the first step in fortifying your home and ensuring the safety of your loved ones.

1. Fortify Your Home’s Exterior

Your home’s perimeter is your first line of defense. Strengthen it by:

  • Reinforcing Doors and Windows: Install solid core doors and metal or reinforced frames. Use security film on windows to prevent easy break-ins.
  • Securing Entry Points: Add deadbolts, slide bolts, and security bars where appropriate. Ensure all gates are locked and consider adding a secondary locking mechanism.
  • Installing Motion-Sensing Lights: These can deter intruders and alert you to movement around your property.

2. Establish a Safe Room

A designated safe room can be a lifesaver. This should be a room with:

  • Reinforced Walls and Door: Use materials like steel or solid wood.
  • Communication Tools: Keep a charged phone and a two-way radio.
  • Supplies: Stock with water, non-perishable food, first-aid kit, and self-defense tools.

3. Develop a Neighborhood Watch

Community vigilance can be a powerful deterrent. Organize a neighborhood watch by:

  • Establishing Communication Channels: Use group messaging apps to stay informed.
  • Setting Up Regular Check-Ins: Regularly assess the well-being of neighbors, especially the elderly or those living alone.
  • Sharing Information: Report suspicious activities to local authorities and fellow neighbors promptly.

4. Maintain Situational Awareness

Always be aware of your surroundings. This includes:

  • Monitoring Local News: Stay updated on events that could impact your area.
  • Observing Unusual Activities: Note unfamiliar vehicles or people in your neighborhood.
  • Trusting Your Instincts: If something feels off, investigate further or alert others.

5. Secure Water and Food Sources

In times of crisis, access to clean water and food can become scarce. Prepare by:

  • Storing Water: Aim for at least one gallon per person per day for at least three days.
  • Stockpiling Non-Perishable Foods: Include items like canned goods, dried fruits, and grains.
  • Purification Methods: Have water purification tablets or filters on hand.

6. Arm Yourself Responsibly

While firearms can be an effective means of self-defense, they come with responsibilities. Ensure:

  • Proper Training: Take courses on firearm safety and usage.
  • Secure Storage: Keep weapons locked and out of reach of unauthorized individuals.
  • Legal Compliance: Adhere to all local and state laws regarding firearm ownership and use.

7. Create Diversion Strategies

In case of an intruder, having diversion tactics can buy you valuable time. Consider:

  • Noise Makers: Use alarms or whistles to disorient intruders.
  • Escape Routes: Plan and practice multiple exit strategies.
  • Decoy Items: Place valuables in less obvious locations.

8. Build Strong Relationships with Trusted Neighbors

Not all neighbors will pose a threat. Cultivate relationships with those you trust by:

  • Offering Help: Assist with tasks or share resources.
  • Sharing Information: Keep them informed about potential threats or emergencies.
  • Establishing Mutual Aid Agreements: Agree on how to support each other during crises.

9. Practice Regular Drills

Preparation is key. Conduct regular drills to:

  • Test Emergency Plans: Ensure everyone knows their role during a crisis.
  • Identify Weaknesses: Spot areas in your defense plan that need improvement.
  • Build Confidence: Familiarize everyone with procedures to reduce panic during real events.

10. Stay Informed and Adapt

The landscape of threats can change rapidly. Stay informed by:

  • Attending Workshops: Participate in survivalist and preparedness seminars.
  • Reading Relevant Literature: Keep updated with books and articles on home defense and survival tactics.
  • Networking: Join online forums or local groups to exchange knowledge and experiences.

Conclusion

The safety of your home and loved ones depends on proactive preparation. By fortifying your home, establishing strong community ties, and staying vigilant, you can mitigate the risks posed by dangerous neighbors in times of crisis. Remember, in the world of survivalism, it’s better to be over-prepared than caught off guard.

For further reading and resources on home defense and survival tactics, consider exploring the following:

Stay safe, stay prepared.

DAY 10 AFTER THE SHTF — SURVIVAL ISN’T JUST ABOUT FINDING FOOD

It’s Day 10 since everything went sideways. The grid’s down. The streets are lawless. You’re living off what’s left of your preps and what you can scavenge in the ruins. Your family comes first—your kids eat before you do—because that’s what a real protector does.

Your gut’s been gnawing at itself for days now, that deep hunger turning into something primal. You’ve grown used to the emptiness. It becomes part of you. A constant reminder: you’re still alive.


Watch What The Off Grid Survivalist of the Year Has to Say About Survival Prepper!

Then it happens. You strike gold—a hidden stash of food. Maybe it was buried, maybe left behind in a rush, maybe a forgotten emergency cache. Either way, it’s yours now.

You dig in like a starving wolf. Your family devours every bite. For a moment, you taste victory.

And then—bam. Nausea. Dizziness. Weakness. Your body betrays you. What you thought was salvation turns into a full-blown emergency.

You’ve just met the silent killer called refeeding syndrome.


WHAT IS REFEEDING SYNDROME?

When you go without food for an extended time—say 10 days or more—your body hits the brakes. It slows your metabolism, conserves every last ounce of energy. You’re running on fumes, and your electrolytes (magnesium, potassium, phosphorus) get drained.

Then, you eat like it’s Thanksgiving. Your system gets shocked. That sudden spike in nutrients flips the metabolic switch, demanding electrolytes you no longer have. The result? Cardiac failure, seizures, coma—or worse.


SURVIVAL PREPPER TIPS: AVOIDING THE REFEEDING TRAP

  1. Reintroduce food SLOWLY after extended starvation.
    Start with fluids or broths. Give your system time to adjust.
  2. Focus on electrolyte-rich foods first.
    Bananas, bone broth, leafy greens, nuts—these can restock your depleted reserves.
  3. Avoid carbs in the first refeeding stage.
    Carbs spike insulin and demand phosphorus. Go with fats and proteins first.
  4. Keep oral rehydration salts (ORS) in your bug-out bag.
    They’re lightweight and can save your life during refeeding.
  5. Know the symptoms: weakness, confusion, shortness of breath.
    Don’t mistake these signs for just being “tired.” It could be fatal.
  6. Keep a stash of electrolyte tablets or powders.
    A little prep now can prevent a deadly crash later.
  7. Always rotate your food preps to avoid long fasts.
    Prevent running out altogether by tracking expiry dates and cycling through supplies.
  8. Train your body to adapt with occasional fasts before disaster strikes.
    This builds metabolic resilience and makes you more adaptable.
  9. Teach your family about phased eating.
    Survival isn’t just about feeding them—it’s about feeding them smart.
  10. Don’t let relief override discipline.
    Finding food isn’t the finish line—it’s just another checkpoint. Stay sharp.

Remember: In survival, it’s not always the obvious threats that take you down. Sometimes it’s the first meal after the storm that does it.

Stay vigilant. Stay smart. And for the love of all that’s sacred, don’t let your guard down just because you’ve found food. Survival is a marathon, not a sprint.

Prep hard. Stay ready. Live to tell the tale.