Bug-Out Shelter Choices Explained: Tent vs Trailer vs Mobile Alternatives

Every survival plan eventually runs headfirst into one unavoidable question: Where are you going to sleep when you bug out? Food, water, security, and mobility all matter, but shelter is what keeps you alive long enough to use the rest of your skills.

As a professional survival prepper, I approach bug-out shelter decisions with a simple mindset—assume nothing works perfectly, assume time is limited, and assume conditions will be worse than expected. Whether you’re evacuating due to wildfire, flooding, civil unrest, or a long-term grid failure, the shelter you choose determines how mobile, visible, and resilient you’ll be once you’re on the move.

So what’s the right choice? A tent? A trailer? Something else entirely?

The honest answer is that there is no universal solution—but there is a correct solution for your situation. This article breaks down the advantages, limitations, and real-world survival implications of each bug-out shelter option so you can make a decision before it’s too late.


The Core Bug-Out Question: Mobility vs Comfort

Every bug-out shelter falls somewhere on a sliding scale between mobility and comfort.

  • Highly mobile options sacrifice comfort and security
  • Comfortable options sacrifice stealth and flexibility

The biggest mistake preppers make is choosing shelter based on convenience instead of scenario planning. Your shelter must match:

  • Your physical ability
  • Your terrain
  • Your evacuation distance
  • Your threat environment
  • Your time window

Let’s break down the major shelter options from a survival-first perspective.


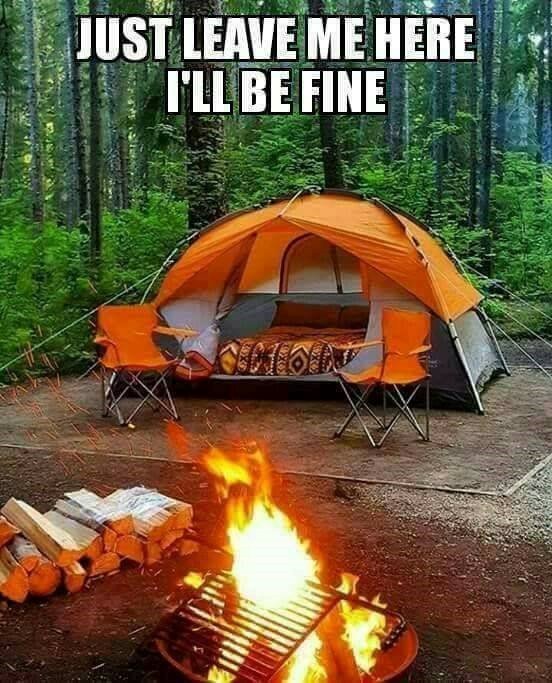
Bugging Out with a Tent: Maximum Mobility, Minimum Margin

A tent is the most common bug-out shelter—and for good reason. It’s lightweight, affordable, and adaptable. But it’s also unforgiving if you underestimate conditions.

Advantages of a Tent

  • Lightweight and portable
  • Can be carried on foot if vehicles fail
  • Inexpensive compared to trailers or RVs
  • Allows stealth camping if properly used
  • Works in remote or inaccessible terrain

For scenarios where roads are blocked, fuel is unavailable, or you’re forced to move on foot, a tent may be your only realistic option.

Disadvantages of a Tent

  • Minimal protection from extreme weather
  • Little to no security against wildlife or people
  • Limited insulation in cold conditions
  • Requires skill to select safe camp locations
  • Physically demanding over long periods

From a prepper’s standpoint, a tent is not a comfort solution—it’s a survival stopgap. It assumes you can manage exposure, fire, water purification, and security simultaneously.

Prepper Insight

If your plan includes a tent, you must also plan for:

  • Cold-weather sleeping systems
  • Rain and wind management
  • Low-visibility camping techniques
  • Rapid teardown and relocation

A tent is only as good as the person using it.


Bugging Out with a Trailer: Comfort with Constraints

Trailers—whether cargo trailers, camper trailers, or teardrop setups—offer a massive upgrade in comfort and storage. But they also come with serious trade-offs.

Advantages of a Trailer

  • Hard-shell protection from weather
  • Elevated sleeping area
  • Increased storage capacity
  • Easier long-term living
  • Better morale during extended displacement

For family bug-outs or long-duration evacuations, trailers can dramatically improve survivability if movement is possible.

Disadvantages of a Trailer

  • Dependent on a functioning vehicle
  • Reduced maneuverability
  • Increased fuel consumption
  • High visibility
  • Vulnerable to roadblocks and congestion

In real-world disasters, trailers often become liabilities when evacuation routes clog or infrastructure fails. A trailer that can’t move becomes a stationary target.

Prepper Insight

Trailers work best when:

  • You bug out early
  • You know your routes
  • You have multiple destination options
  • You can detach and abandon if necessary

Never let your trailer become a psychological anchor.


Vehicle-Based Bug-Out: The Middle Ground

Somewhere between tents and trailers sits vehicle-based shelter—sleeping in or on your vehicle.

Examples include:

  • SUV sleep platforms
  • Truck bed campers
  • Rooftop tents
  • Van conversions

Advantages

  • Faster setup than tents
  • More security than ground sleeping
  • Rapid relocation capability
  • Integrated storage and mobility
  • Reduced footprint compared to trailers

This option appeals to many preppers because it balances mobility with protection.

Disadvantages

  • Still dependent on fuel
  • Limited space
  • Mechanical failure risks
  • Difficult in extreme weather without modifications

From a prepper perspective, vehicle-based shelter is often the most practical option for short- to medium-term bug-outs.


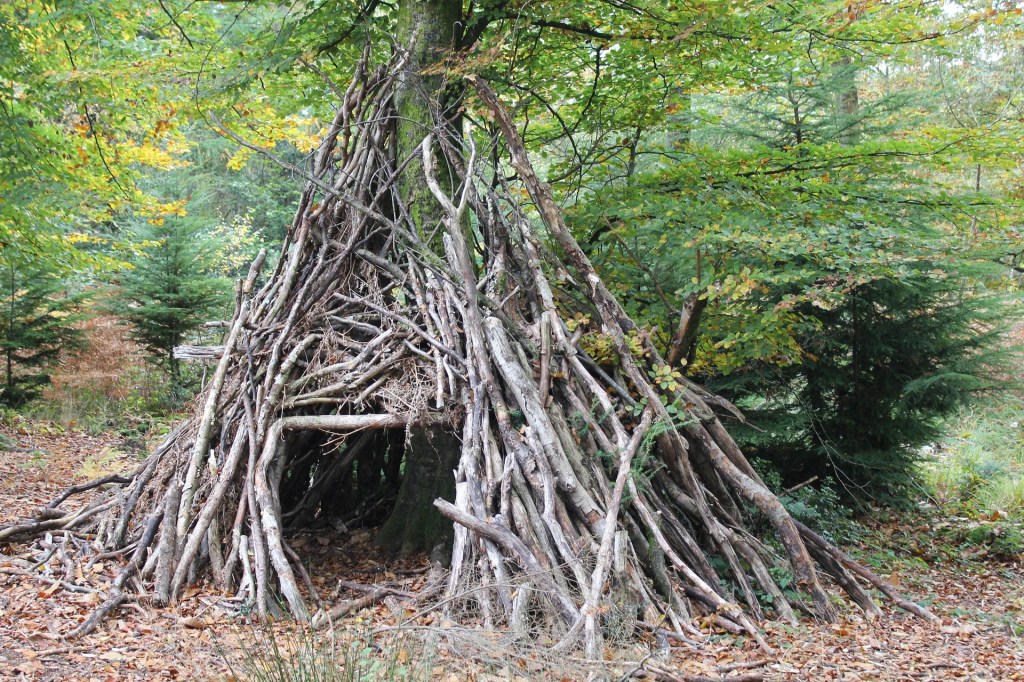
Other Bug-Out Shelter Options Worth Considering

Hammocks

  • Lightweight and stealthy
  • Excellent in wet or uneven terrain
  • Requires trees and insulation planning
  • Poor choice in cold or treeless environments

Tarp Shelters

  • Ultra-light and versatile
  • Highly dependent on skill
  • Minimal protection for inexperienced users

Pre-Staged Retreats

  • Cabins, sheds, or remote structures
  • High security if undiscovered
  • Requires long-term planning and maintenance
  • Not always accessible during emergencies

Experienced preppers often combine multiple shelter options rather than relying on a single solution.


Terrain Dictates Shelter More Than Preference

One of the most overlooked aspects of bug-out shelter selection is terrain.

  • Forested areas favor tents, hammocks, and tarps
  • Open plains expose ground shelters to wind and visibility
  • Urban environments limit camping options entirely
  • Mountain regions demand insulation and weather resistance

If your shelter doesn’t match your terrain, it becomes a liability instead of an asset.


Time and Distance Matter More Than Gear

Ask yourself:

  • How far do I realistically need to travel?
  • How fast will conditions deteriorate?
  • Will I be moving continuously or staying put?

Short evacuations favor vehicles and trailers. Long-distance or unpredictable evacuations favor lightweight, portable shelter.

A professional prepper plans for failure of the primary plan, not just success of the preferred one.


Layered Shelter Strategy: The Prepper Standard

Experienced preppers don’t choose one shelter—they choose layers.

A solid bug-out plan often includes:

  • Primary shelter (trailer or vehicle)
  • Secondary shelter (tent or hammock)
  • Emergency shelter (tarp or bivy)

This layered approach ensures that no single failure ends your ability to rest, recover, and survive.


Security Considerations Most People Ignore

Shelter choice affects:

  • Noise discipline
  • Light discipline
  • Visibility
  • Defensive positioning

Trailers and vehicles draw attention. Tents disappear. Choose based on threat level, not convenience.

In unstable environments, the best shelter is often the one no one notices.


Final Prepper Assessment: Which Should You Choose?

Choose a tent if:

  • You may need to travel on foot
  • Stealth is critical
  • Terrain limits vehicle access

Choose a trailer if:

  • You can evacuate early
  • Roads are reliable
  • Comfort supports long-term survival

Choose vehicle-based shelter if:

  • Mobility and speed are priorities
  • You want flexibility without towing
  • You expect short- to medium-term displacement

Most importantly, train with what you plan to use. Shelter that hasn’t been tested under stress is just theory.

Closing Thoughts from a Survival Prepper

Bugging out is not about gear—it’s about decisions made under pressure. Your shelter choice reflects your priorities, your environment, and your willingness to adapt when conditions change.

The right answer isn’t tent, trailer, or other.

The right answer is the one you’ve prepared for, practiced with, and can abandon without hesitation if survival demands it.

Plan accordingly.

The Stockpiler’s Survival Guide

In 2002, a man named Jack Whittaker from West Virginia hit the Powerball jackpot. It was the biggest prize of its time—hundreds of millions. Most folks would think he hit the ultimate jackpot. But if you dig deeper, you’ll find a cautionary tale that every prepper should take to heart.

Jack’s windfall didn’t bring joy. It brought chaos, greed, tragedy, and death. The moment people found out he was rich, they came out of the woodwork—begging, scheming, and circling like vultures. His house turned into a battleground of handouts and deception. He faced constant legal troubles, and worse, he lost both his daughter and granddaughter under tragic circumstances that many say were linked—directly or not—to the poison of sudden wealth.

Eventually, Jack said publicly that he wished he had torn up that lottery ticket.

CLICK HERE TO LEARN HOW TO NEVER STARVE WHEN DOOMSDAY HITS!

And that got me thinking.

As preppers, we’re not chasing lottery wins. But if you’re stockpiling wisely—if you’ve been planning for what others refuse to see coming—then in the eyes of the unprepared, you’re rich. Maybe not with cash, but with things that matter when the system collapses: food, water, fuel, skills, and know-how.

And just like Jack, if the wrong people find out, you become a target.

When SHTF, desperation turns good people bad. Neighbors turn into looters. Friends can become beggars. And strangers—well, don’t even count on mercy from them. It won’t matter if it’s your kid’s formula, your last bag of rice, or the meds you set aside for your spouse. If someone knows you have it, they will do anything to get it.

Lesson One: Conceal What You Have.

You don’t need to parade your supplies on social media. You don’t need to show off your stash in YouTube videos or brag about your “bug-out” plans at work. Loose lips sink ships. In a true crisis, every can of beans becomes gold. Every gallon of water becomes leverage.

Think about this: If every grocery store and supermarket shut down tonight, and folks knew you were stocked, your house might not survive the week. And that’s not paranoia—it’s math. Hungry people act fast. Starving people act violently.

Take a lesson from Jack Whittaker: if you have value—whether it’s dollars, gear, or provisions—keep it quiet. Because the more they know, the more they’ll take. And they won’t ask nicely.

Now, let’s talk about how to keep your prepping smart, quiet, and effective. Here are ten essential prepper tips every stockpiler should follow if they want to survive and stay off the radar.


10 Survival Prepper Tips for Smart Stockpiling and Stealth Survival

1. Don’t Tell, Don’t Show

It’s tempting to share your plans with friends or neighbors, especially if you’re proud of your setup. But limit your disclosures. Tell only those you trust with your life—and even then, keep details vague.

2. Diversify Your Stash

Don’t keep all your supplies in one place. Spread your stockpile across your home, vehicle, shed, and even hidden caches if possible. That way, if one area gets compromised, you’re not left high and dry.

3. Practice OPSEC

Operational Security (OPSEC) is a mindset. Don’t throw out packaging from large food purchases. Avoid bulk deliveries when neighbors are watching. Blend in. Be the “average Joe” who shops like everyone else.

4. Train, Don’t Just Store

All the gear in the world is worthless if you don’t know how to use it. Practice purifying water, making fire without matches, cooking off-grid, and self-defense. Build muscle memory.

5. Develop Community—but Quietly

Survival is easier in a group, but choose your circle carefully. Build quiet alliances with like-minded individuals. Barter, trade, and train together—but keep things low-key and never disclose your full inventory.

6. Gray Man Strategy

Look harmless, unprepared, and average. In public, don’t dress like you’re headed into the wild. When disaster strikes, don’t be the guy with the latest tactical gear walking down the street. Blend in to avoid attention.

7. Rotate and Maintain Supplies

Your food, fuel, and meds have expiration dates. Rotate stock, label everything, and use a spreadsheet if needed. The worst time to realize your food is spoiled is when your life depends on it.

8. Harden Your Home

Your house is your first line of defense. Reinforce doors, add security film to windows, set up motion lights, and consider solar cameras. You’re not being paranoid—you’re being ready.

9. Prepare for Power Loss

Most people think about food and water but forget energy. Stock up on batteries, solar chargers, hand-crank radios, and backup heating options. When the grid fails, you need to adapt quickly.

10. Have an Exit Plan

Sometimes you can’t shelter in place. Know where you’ll go, how you’ll get there, and what you’ll bring. Keep bug-out bags ready and have alternate routes. Never assume your first plan will work.


Survival Isn’t Just About Stuff—It’s About Mindset

Jack Whittaker’s story is more than a tragedy—it’s a mirror. When society collapses, the rules change. The rich won’t be the ones with stock portfolios—they’ll be the ones with clean water, warm meals, and working flashlights.

And just like Jack learned, if people know you’ve got something they don’t, they’ll come for it.

So stay sharp. Stay quiet. Stockpile smart. And remember: stealth is strength.

We prep not to boast, but to survive. And the best preppers don’t just prepare for disasters—they prepare to stay invisible when the world starts watching.

The Ultimate Survivalist In-Car Checklist: 7 Items You Need

Disaster doesn’t announce itself.

It strikes when you’re least ready—when your guard is down, and your mind is elsewhere. You might be thinking about dinner plans, your kids’ soccer game, or just getting home to a warm bed. But emergencies don’t care about your schedule.

CLICK HERE TO LEARN HOW TO NEVER STARVE WHEN DOOMSDAY HITS!

Picture this: It’s Friday evening. You’re finally off work. You’re cruising down a quiet stretch of road, miles away from the nearest gas station, thinking about how you’ll spend the weekend with your family. And then—BAM. A loud thud. Your car jerks violently. You lose control for a split second before steering to the shoulder. You get out, and there it is… a flat tire.

And just your luck—it’s raining sideways. Not a streetlamp in sight.

CLICK HERE TO LEARN HOW TO NEVER STARVE WHEN DOOMSDAY HITS!

Now let me ask you: Are you ready?

Because if you’re not, that flat tire could turn into a full-blown survival scenario. As any seasoned prepper will tell you, your vehicle isn’t just a means of transportation. It’s a mobile command center. It’s your lifeline when SHTF. Whether you’re evacuating due to wildfires, stranded in a snowstorm, or simply stuck with a mechanical failure, your car must be prepped for anything.

Here are the 7 essential items every survival-minded individual needs in their vehicle—and 10 additional prepper tips to keep you one step ahead when the unexpected hits.


1. Spare Tire, Jack, and Lug Wrench

Let’s start with the basics. A flat tire is more than just an inconvenience—it can leave you stranded for hours, or worse, overnight in the middle of nowhere. You need a fully inflated spare tire, a sturdy jack, and a reliable lug wrench.

Prepper Tip #1: Rotate and inspect your spare every three months. A flat spare is as useless as no spare at all.

Prepper Tip #2: Consider adding a tire plug kit and portable air compressor. Sometimes a quick patch and refill is all you need to get moving again.


2. Jumper Cables (or Jump Starter)

A dead battery is another common issue, especially in extreme temperatures. Having a solid pair of jumper cables can save you hours of waiting for help—or worse, being stuck in hostile conditions.

Prepper Tip #3: Upgrade to a lithium-ion jump starter. These compact power packs can jump your car without needing another vehicle. Plus, they usually have USB ports to charge your phone.


3. First-Aid Kit

This is non-negotiable. From minor cuts and scrapes to more serious injuries, a well-stocked first-aid kit can save lives.

Prepper Tip #4: Customize your kit. Add painkillers, antiseptics, trauma supplies (like a tourniquet), and allergy meds. Don’t forget a laminated card with CPR instructions and your personal medical info.


4. Flashlight and Extra Batteries

When darkness falls, you’ll need a dependable flashlight. Whether you’re checking under the hood, flagging down help, or navigating on foot, a solid light source is crucial.

Prepper Tip #5: Invest in a high-lumen LED flashlight with a strobe or SOS function. Keep extra batteries in a waterproof container, or go with a solar/crank-powered model for infinite power.


5. Emergency Blankets and Warm Clothing

Hypothermia can set in faster than you’d think, especially if your car won’t start and you’re trapped in cold weather. Emergency mylar blankets are compact, lightweight, and designed to reflect 90% of body heat.

Prepper Tip #6: Include a wool hat, gloves, socks, and a waterproof poncho. Hypothermia often starts with extremities, and you’ll be thankful for that added layer.


6. Non-Perishable Food and Water

If you’re stuck for hours—or days—you’ll need calories and hydration. Keep a stash of non-perishable, high-energy food and bottled water in your vehicle.

Prepper Tip #7: Use vacuum-sealed ration bars and emergency water pouches with a 5-year shelf life. They’re space-efficient and built for survival.

Prepper Tip #8: Toss in a LifeStraw or water purification tablets. If you run out of bottled water, these could keep you alive in a longer crisis.


7. Portable Charger or Power Bank

Your phone is your most powerful tool in a crisis—but only if it’s charged. A high-capacity portable power bank ensures you stay connected when your car battery isn’t an option.

Prepper Tip #9: Look for solar-powered models. Even if the grid’s down, you’ll still be able to charge your devices.


10 Bonus Survival Prepper Tips for Your Car

Now that you’ve got the 7 essentials, take it a step further. Hardcore preppers know that redundancy and versatility are key.

1. Multi-tool or Survival Knife

From cutting seatbelts to making repairs or defending yourself, a quality multi-tool is invaluable.

2. Duct Tape

Fix a hose, seal a window, secure gear, or even splint an injury. The uses are endless.

3. Maps and Compass

Don’t rely on GPS. If the grid’s down or you’re in a dead zone, paper maps and a compass will keep you on track.

4. Fire Starter Kit

Waterproof matches, ferro rods, or lighters—fire can provide warmth, boil water, signal for help, or keep predators away.

5. Reflective Triangle or Road Flares

Increase your visibility to other drivers, especially during night or low-visibility conditions.

6. Cash in Small Bills

ATMs might be down or inaccessible. Keep a stash of $1s, $5s, and $10s hidden in your car.

7. Toilet Paper and Hygiene Kit

Sanitation can be crucial. A small hygiene kit with TP, wipes, and hand sanitizer is easy to store and highly valuable.

8. Gloves and Safety Glasses

Whether fixing a tire or clearing debris, protect your hands and eyes.

9. Tow Strap

Help others—or get helped—without relying on a tow truck.

10. Notebook and Pencil

Record important details, leave a note if you have to leave your vehicle, or track resources. It’s old-school, but it works.


Final Word

Emergencies aren’t a matter of if, they’re a matter of when. Your vehicle is your mobile bug-out location—treat it like one. A well-stocked car can mean the difference between inconvenience and catastrophe.

So prep it now. Load it with gear. Check your supplies. Refresh items regularly.

Because when the moment comes—and it will—you won’t rise to the occasion.

You’ll fall back on your preparation.

And that, my fellow survivalist, is how you thrive when the rest of the world panics.

Buzz Off Naturally: Chemical-Free Mosquito Solutions

Buzz Off Naturally: Chemical-Free Mosquito Solutions for Preppers

It’s that time of year again, folks. The sun’s hanging longer in the sky, the air’s getting thick, and the bugs—especially the blood-sucking kind—are coming out in force.

I was sitting outside on my porch the other evening, enjoying a rare moment of peace. I had my gear packed by the door, the radio tuned in to emergency chatter, and a thermos of hot pine-needle tea in my hand. Everything was calm.

And then I heard it.

“BZZZZZZ.”

That high-pitched whine that cuts through the quiet like a bullet through a tarp. I didn’t even have to look. I knew what it was. A goddamn mosquito.

CLICK HERE TO LEARN HOW TO SURVIVE A FAMINE

Now, for the average person, that might just mean an itchy arm or two. But for those of us who live the prepper lifestyle—who plan, train, and prepare for what most people deny is coming—a mosquito is more than just a nuisance. It’s a threat. And in a true survival situation, it can be a deadly one.

Let’s break this down like survivalists should.

The Real Threat Mosquitoes Pose

Sure, they’re annoying. They bite, they itch, they buzz. But in a bug-out scenario, or even just extended time off-grid, they can do a hell of a lot more damage than that.

  • They contaminate food and water: One mosquito in your water stash or ration bag can render it unusable—or worse, dangerous.
  • They disrupt sleep: Try pulling night watch with a cloud of skeeters around your face. You’ll get no rest, and your reaction time the next day could cost you your life.
  • They carry disease: Zika, West Nile, malaria—mosquitoes are flying hypodermic needles loaded with disease. In a grid-down scenario, you won’t have access to hospitals, vaccines, or antibiotics.

That’s why I’ve spent years learning how to repel mosquitoes naturally, without relying on commercial sprays full of chemicals I can’t pronounce. In a survival situation, you might not have a store to run to. But you will have nature.

Let’s get into it.


1. Plant-Based Defenses

Nature gave us the tools. You just have to use ‘em.

Citronella, lavender, basil, lemongrass, peppermint, and marigolds are your front-line defense. These plants emit strong scents that mosquitoes absolutely hate. If you’re bugging in, plant these around your perimeter—windows, doors, and patios. If you’re bugging out, keep seeds in your go-bag or crush leaves to rub on your skin.

Prepper Tip #1: Keep heirloom seeds of mosquito-repelling plants in your survival seed vault. They’ll grow year after year without corporate dependence.


2. Essential Oils Aren’t Just for Hippies

Don’t let the aromatherapy crowd fool you—essential oils are a prepper’s secret weapon. Tea tree, eucalyptus, lemon balm, cedarwood, and clove oil are all potent mosquito repellents. Mix them with a carrier oil (like coconut or olive) and rub onto exposed skin.

Prepper Tip #2: Stash a few essential oils in your bug-out bag. They’re lightweight, multi-purpose, and last forever if sealed properly.

Prepper Tip #3: Use soaked cotton balls in film canisters (or spent shotgun shells) with a few drops of oil for on-the-go repellents.


3. Standing Water = Breeding Grounds

This one’s basic, but often overlooked. Mosquitoes lay eggs in still, stagnant water. That birdbath? That tarp sagging under rainwater? That forgotten bucket behind your shed? It’s a mosquito maternity ward.

Drain it. Flip it. Burn it if you have to.

Prepper Tip #4: In a bug-out camp, dig your gray water pit far from your sleeping area and cover it with leaves or brush.

Prepper Tip #5: Carry a small vial of Bacillus thuringiensis israelensis (BTI) tablets in your kit. It’s a natural bacteria that kills mosquito larvae without harming wildlife.


4. Garlic – Not Just for Vampires

Turns out, mosquitoes hate garlic almost as much as the undead do. Crush it, boil it, and spray it. You can mix a few cloves with water and spritz it on plants, clothes, or even around your tent.

Prepper Tip #6: Eat garlic regularly in the summer. It seeps out through your pores and makes your scent less attractive to bloodsuckers.


5. Smoke: The Old-School Method

Mosquitoes are weak flyers and even weaker when it comes to smoke. A campfire, a charcoal tin, or even smoldering herbs like sage and rosemary will keep them at bay. Bonus—it also masks your scent from other threats.

Prepper Tip #7: Pack dried herbs for burning. Sage and rosemary bundles are easy to make, store, and use.


6. DIY Mosquito Traps

Make your own bait traps using sugar water and yeast. The CO₂ emitted mimics human breath and draws them in. Once inside the bottle, they drown.

Prepper Tip #8: In a stationary camp, set multiple traps around your perimeter to draw mosquitoes away from your living quarters.


7. Natural Clothing Treatments

You don’t need DEET. Soak your clothes in permethrin before a trip—it’s derived from chrysanthemum flowers and lasts several washes. You can also add a few drops of essential oil to your laundry for lightweight protection.

Prepper Tip #9: Treat bandanas and neck gaiters with oils or permethrin. It’ll protect vital areas like your neck, face, and wrists.


8. Camp Hygiene = Fewer Bugs

Sweat, dirty socks, and food waste attract more than just bears. Stay clean. Bury waste. Use vinegar or lemon juice in your wash water to neutralize odors.

Prepper Tip #10: Sprinkle wood ash around your tent or bedroll—it helps absorb odors and deters insects.


Final Thoughts

Look, mosquitoes aren’t just annoying—they’re a legitimate threat to your survival. In the field, in the woods, or even in your own backyard, they can wreck your sleep, spread disease, and make an already tough situation unbearable.

But you don’t need to rely on a can of DEET and hope for the best. You can fight back, naturally, using the resources around you. Because if you’re serious about preparedness, you know the battle doesn’t end when the grid goes down—it just changes shape.

So this summer, take action. Build your mosquito defense plan. Stock the right oils, grow the right plants, treat your gear, and stay alert.

Because when the world’s gone sideways, the last thing you need is to be grounded by a damn mosquito.

Survival Hack: How a Plastic Bag Could Save Your Life When SHTF

Survival Hack: How a Plastic Bag Could Save Your Life When SHTF

If there’s one golden rule in the world of survival—it’s this:

Make do with what you’ve got.

When the grid goes down, when the trucks stop rolling, when the food supply vanishes and chaos takes root in the streets, it won’t be your fancy gadgets that keep you alive. It’ll be your mindset. It’ll be your ability to adapt, improvise, and see value in things that others would call trash.

And few things represent that mindset better than the humble plastic bag.

We’ve all got them. Stuffed in drawers, tucked in glove compartments, crammed into backpacks. Most people toss them aside without a second thought. But not us. Not real preppers. We know better.

Let me walk you through just how powerful this overlooked tool can be when the world goes sideways.

CLICK HERE TO LEARN HOW TO SURVIVE A FAMINE


1. Hauling and Carrying

Let’s start with the obvious.

Plastic bags are made for carrying—and when SHTF, you’ll be moving gear, supplies, food, firewood, or wild edibles across rough terrain. A strong plastic bag—especially a thicker one like a trash bag or contractor bag—can handle a surprising amount of weight.

Survival Tip #1:
Keep a few large contractor bags in your bug-out bag. They fold flat, take up virtually no space, and can carry over 50 pounds of supplies if needed.


2. Water Collection and Storage

Water is life. If you don’t have access to clean, drinkable water, your chances of survival plummet fast. And out in the wild, even a pristine mountain stream can carry invisible killers—giardia, E. coli, cryptosporidium.

A plastic bag gives you a container—one of the most valuable things in the wilderness. Scoop up water from a stream, pond, or rainfall, and purify it using tablets, boiling, or your water filter.

Survival Tip #2:
Line a hole in the ground with a plastic bag to catch rainwater or morning dew. Cover it with a tarp or another bag to reduce evaporation.


3. DIY Solar Still

Here’s one most folks overlook—making a solar still with a plastic bag. If you’re in a survival situation with no clean water around, you can extract moisture from plants or damp earth using the sun’s power.

Fill a clear plastic bag with green, non-toxic vegetation (like dandelion greens or clover), tie it shut, and place it in direct sunlight. Over time, condensation will form on the inside, collecting at the lowest point of the bag.

Survival Tip #3:
Add a small rock inside the bag to help direct the condensation toward a corner for easy collection.


4. Emergency Shelter or Poncho

Caught in the rain? Exposure is one of the deadliest threats in survival. Hypothermia can set in fast, even in mild temperatures if you’re wet and the wind picks up.

A large trash bag can become a makeshift poncho. Cut holes for your head and arms, and you’ve got instant rain protection.

You can also cut the bag open and use it as a tarp for an improvised shelter roof, windbreak, or ground barrier.

Survival Tip #4:
Line the inside of your shelter with plastic bags to keep body heat in and moisture out.


5. Insulation and Warmth

Plastic is waterproof, and when layered with natural materials (like dry leaves or pine needles), it can create excellent insulation.

Stuff a trash bag full of soft, dry materials and use it as a pillow, mattress, or blanket insulation layer.

Survival Tip #5:
Use two plastic bags—one filled with insulation and one around your feet—to create emergency foot warmers for cold nights.


6. Signal for Help

Black plastic bags, especially when inflated, create a sharp contrast against natural landscapes. You can tie one to a stick or toss it into an open field as a makeshift distress signal.

Some preppers even write SOS or HELP on them with white paint or duct tape.

Survival Tip #6:
Inflate a black bag, tie it off, and place it in a high, open area to catch attention from air or drone rescue units.


7. Waterproof Your Gear

Electronics, maps, fire-starting materials, and dry clothes are essential in a survival scenario. And they’re all useless if soaked.

Plastic bags are your first line of defense against rain, floods, or even accidental drops into rivers.

Survival Tip #7:
Double-bag your fire-starting kit (matches, lighters, tinder) and store it in a dry section of your pack.


8. Improvised Gloves or Footwear Protection

If you have to cross contaminated areas, like flood zones, or deal with waste, plastic bags over your hands and feet offer basic protection against bacteria or harsh terrain.

Survival Tip #8:
Duct tape plastic bags around your shoes or boots to keep them dry during water crossings.


9. Makeshift Floatation Aid

Need to cross a body of water? A large plastic bag filled with air and tied off can act as a flotation aid. It’s not a life jacket, but it can help you keep your pack above water or assist with buoyancy in a pinch.

Survival Tip #9:
Use multiple inflated plastic bags tied together inside a net or fabric wrap for added flotation support.


10. Waste Disposal and Sanitation

Sanitation is key when bugging out or hunkering down. Illness spreads quickly when waste isn’t handled properly. A plastic bag gives you a clean, temporary toilet option or a way to seal off contaminated materials.

Survival Tip #10:
Use a bag-lined bucket as a portable toilet. Cover waste with dirt or sawdust and seal the bag tightly to reduce odor and bacteria.


Final Thoughts

Listen—plastic bags won’t replace your knife, your firestarter, or your firearm. But when SHTF, you’ll find that the small things often make the biggest difference. A simple plastic bag can haul your gear, keep you dry, provide drinking water, signal for rescue, or insulate you from the cold.

The key is always the same: think creatively, act decisively, and never underestimate the ordinary.

Next time you see a plastic bag blowing across the road or jammed in a fence—don’t scoff. Pick it up. Tuck it away. When the lights go out and society crumbles, that piece of plastic might just save your life.

Are you seeing the survival potential in your everyday gear?

Dehydration Dangers: The 518,000-Case Wake-Up Call

518,000 Health Crises Later: Still Ignoring Dehydration?

Let me hit you with a cold, hard fact: over 518,000 Americans end up in the hospital every single year because of dehydration. And even more alarming—10,000 of them don’t walk back out.

Now if that number doesn’t stop you in your tracks, I don’t know what will. That’s 10,000 preventable deaths—from something as simple and essential as water.

As survival preppers, we spend our time thinking ahead, planning for the worst, and gearing up for the unexpected. We stockpile food, purify air, build bug-out bags, and plan for social collapse. But how many of us are truly ready to face a silent, creeping killer that’s already knocking on our door—right now, every summer, and in every disaster scenario?

You guessed it. Dehydration.


Don’t Be Fooled by a Sunny Day

Summer can fool the unprepared. Warm weather lulls folks into a false sense of comfort. The grills are fired up, beaches are packed, the kids are running through sprinklers—and right under our noses, people are dropping like flies from something that could’ve been fixed with a bottle of water and a little know-how.

But listen closely—dehydration doesn’t wait for you to feel thirsty. That’s right. By the time you’re thirsty, you’re already dehydrated.

Let me repeat that: thirst is not an early warning system—it’s a distress signal.


Dehydration Symptoms You Can’t Afford to Miss

If you’re building a prepper mindset, you need to know the early indicators. I’m not talking about some vague, optional side effects—these are battlefield-level warning signs that your body is running low on its most critical resource: water.

Here’s what to watch for—on the homestead, in the woods, or during the next grid-down scenario:

  • Fatigue or Dizziness – When you’re low on fluids, your blood volume drops, your pressure tanks, and next thing you know, you’re woozy and weak. That’s a liability in any emergency.
  • Infrequent Urination – Not peeing regularly? That’s a classic sign you’re drying up inside.
  • Dark-Colored Urine – If your urine looks like strong coffee, sound the alarm. You’re dehydrated.
  • Headaches – This isn’t just a nuisance; it’s your brain screaming that it’s running on low coolant.
  • Irritability or Confusion – If you or someone else starts acting out of sorts, don’t assume it’s stress. It could be dehydration impairing brain function.

These symptoms are red flags, and any one of them should have you reaching for water immediately.


Why This Matters More in Survival Situations

Now imagine this: the power grid goes down. It’s 100 degrees outside. The municipal water supply is compromised. You’re rationing food, the fridge is dead, and the only thing between your family and heat stroke is your emergency water reserve.

Dehydration becomes a life-or-death threat real fast.

And when that SHTF moment comes, there won’t be ambulances, IV fluids, or hospital beds waiting for you.

That’s why staying ahead of dehydration isn’t just smart—it’s survival.


10 Survival Prepper Tips to Combat Dehydration

Let’s get into some real prepper solutions—not just theory, but tactics that can help you and your family survive when clean water becomes a luxury.

1. Store More Water Than You Think You Need

FEMA recommends one gallon per person, per day. That’s a joke in a real emergency. Aim for three gallons per person, per day—minimum. Store it in food-grade containers, rotated every 6 months.

2. Invest in Water Filtration and Purification

A quality gravity-fed filter like a Berkey or Sawyer can turn sketchy river water into drinkable gold. Keep bleach drops, iodine tablets, and UV purifiers as backups.

3. Don’t Forget Electrolytes

Water alone won’t cut it. Salt, potassium, and magnesium are vital. Stock up on electrolyte powders or make your own rehydration mix with salt, sugar, and baking soda.

4. Monitor Urine Color Daily

Make this a family habit during hot months or crises. Light yellow = good. Dark yellow or amber = bad.

5. Drink Regularly—Not Just When Thirsty

Set a timer if you must. Sip water throughout the day—especially if you’re outside working, sweating, or exposed to the heat.

6. Eat Hydrating Foods

Canned fruits, cucumbers, tomatoes, and watermelon are high in water content. They also provide natural sugars and minerals that aid absorption.

7. Avoid Alcohol and Caffeine in Survival Scenarios

These are diuretics. They’ll drain your water reserves and leave you worse off. Save the whiskey for when the crisis is over.

8. Cool Your Body with Shade and Clothing

Reduce the need for water by keeping your core temperature down. Use tarps, wear light-colored clothing, and take breaks from the sun.

9. Educate Your Group or Family

Hold a 10-minute hydration drill. Teach everyone—from kids to elders—how to spot dehydration early and how to react fast.

10. Track Inventory and Rotate Supplies

Water and electrolyte supplies can go stale or expire. Log what you have, mark dates, and rotate stock like you would food.


Your Body Is Your First Survival Tool

Your knives, radios, and MREs won’t mean a thing if you collapse from heat exhaustion or dehydration. In every emergency, the first line of defense is your own health and awareness.

So while others are soaking up the sun this summer, let’s be the ones thinking two steps ahead. Let’s be the ones who teach our families that hydration is more than a habit—it’s an essential survival skill.


Final Word

Over half a million people every year in America alone suffer dehydration so severe it lands them in the hospital. 10,000 die. Most of them never saw it coming. Don’t be one of them. Don’t let your loved ones be one of them.

In uncertain times, we can’t afford to be reactive. We need to be proactive. Prepared. Trained. Aware.

Hydrate, stay alert, and stay alive.

Do This Before Your Neighbors Become Dangerous

Do This Before Your Neighbors Become Dangerous: A Survivalist’s Guide

In times of crisis, the greatest threat may not come from distant enemies but from those living closest to you. When societal structures begin to crumble, neighbors—once familiar faces—can quickly become unpredictable and even dangerous. As a survivalist, it’s imperative to prepare not only for external threats but also for the potential dangers lurking next door.

Understanding the Threat

The collapse of societal norms can lead to desperation. People who once adhered to the rule of law may resort to violence or theft to secure resources. In such scenarios, your immediate environment becomes a battleground. Recognizing this reality is the first step in fortifying your home and ensuring the safety of your loved ones.

1. Fortify Your Home’s Exterior

Your home’s perimeter is your first line of defense. Strengthen it by:

  • Reinforcing Doors and Windows: Install solid core doors and metal or reinforced frames. Use security film on windows to prevent easy break-ins.
  • Securing Entry Points: Add deadbolts, slide bolts, and security bars where appropriate. Ensure all gates are locked and consider adding a secondary locking mechanism.
  • Installing Motion-Sensing Lights: These can deter intruders and alert you to movement around your property.

2. Establish a Safe Room

A designated safe room can be a lifesaver. This should be a room with:

  • Reinforced Walls and Door: Use materials like steel or solid wood.
  • Communication Tools: Keep a charged phone and a two-way radio.
  • Supplies: Stock with water, non-perishable food, first-aid kit, and self-defense tools.

3. Develop a Neighborhood Watch

Community vigilance can be a powerful deterrent. Organize a neighborhood watch by:

  • Establishing Communication Channels: Use group messaging apps to stay informed.
  • Setting Up Regular Check-Ins: Regularly assess the well-being of neighbors, especially the elderly or those living alone.
  • Sharing Information: Report suspicious activities to local authorities and fellow neighbors promptly.

4. Maintain Situational Awareness

Always be aware of your surroundings. This includes:

  • Monitoring Local News: Stay updated on events that could impact your area.
  • Observing Unusual Activities: Note unfamiliar vehicles or people in your neighborhood.
  • Trusting Your Instincts: If something feels off, investigate further or alert others.

5. Secure Water and Food Sources

In times of crisis, access to clean water and food can become scarce. Prepare by:

  • Storing Water: Aim for at least one gallon per person per day for at least three days.
  • Stockpiling Non-Perishable Foods: Include items like canned goods, dried fruits, and grains.
  • Purification Methods: Have water purification tablets or filters on hand.

6. Arm Yourself Responsibly

While firearms can be an effective means of self-defense, they come with responsibilities. Ensure:

  • Proper Training: Take courses on firearm safety and usage.
  • Secure Storage: Keep weapons locked and out of reach of unauthorized individuals.
  • Legal Compliance: Adhere to all local and state laws regarding firearm ownership and use.

7. Create Diversion Strategies

In case of an intruder, having diversion tactics can buy you valuable time. Consider:

  • Noise Makers: Use alarms or whistles to disorient intruders.
  • Escape Routes: Plan and practice multiple exit strategies.
  • Decoy Items: Place valuables in less obvious locations.

8. Build Strong Relationships with Trusted Neighbors

Not all neighbors will pose a threat. Cultivate relationships with those you trust by:

  • Offering Help: Assist with tasks or share resources.
  • Sharing Information: Keep them informed about potential threats or emergencies.
  • Establishing Mutual Aid Agreements: Agree on how to support each other during crises.

9. Practice Regular Drills

Preparation is key. Conduct regular drills to:

  • Test Emergency Plans: Ensure everyone knows their role during a crisis.
  • Identify Weaknesses: Spot areas in your defense plan that need improvement.
  • Build Confidence: Familiarize everyone with procedures to reduce panic during real events.

10. Stay Informed and Adapt

The landscape of threats can change rapidly. Stay informed by:

  • Attending Workshops: Participate in survivalist and preparedness seminars.
  • Reading Relevant Literature: Keep updated with books and articles on home defense and survival tactics.
  • Networking: Join online forums or local groups to exchange knowledge and experiences.

Conclusion

The safety of your home and loved ones depends on proactive preparation. By fortifying your home, establishing strong community ties, and staying vigilant, you can mitigate the risks posed by dangerous neighbors in times of crisis. Remember, in the world of survivalism, it’s better to be over-prepared than caught off guard.

For further reading and resources on home defense and survival tactics, consider exploring the following:

Stay safe, stay prepared.

This Is The First Sign Society Is About To Collapse

When most people think about the start of the apocalypse

They usually picture something out of a dystopian movie. A sudden, widespread terror, or perhaps a catastrophic event.

But in reality, societal breakdowns don’t happen overnight.

The first sign is far subtler than that

It’s a shift in trust.

That’s right, folks.

Trust is the glue that holds our society together.

The belief that your neighbor will respect your property.

That the grocery store will have food..

That your funds are safe.

But when that trust begins to erode, we’re on a slippery slope.

When people start losing confidence in the institutions that uphold society

When faith in the authorities dwindles…

We start edging closer to a societal breakdown.

Imagine going to work one day, and noticing a huge crowd of worried individuals outside of the biggest local banks.

Everyone is suddenly trying to withdraw their funds

Why?

Are banks not to be trusted anymore?

Do you have to withdraw your savings too?

Or imagine if trust in law enforcement begins to falter, and individuals may take matters into their own hands

Leading to an increase in vigilante justice and public unrest.

I am not sharing this to scare you. Quite the opposite. Awareness is the first step towards preparation.

If we can spot the signs early enough, we can prepare, adapt, and survive.

So, what can we do?

We can keep a close eye on societal sentiment.

Pay close attention to current events, the rumblings on social media, and the worries and concerns of your neighbors and friends.

These can provide valuable insights into the state of societal trust.

Then, you can ensure you are prepared for self-sufficiency.

This means having a reliable stockpile, honing our survival skills, and fostering a close-knit community of like-minded individuals.

Societal collapse is a gradual process.

If we spot it early enough, it can give us the upper hand.

So let us stay vigilant and aware.

This Is Why Most People Will Not Make It When SHTF

Imagine you’re planning a road trip that will last a week.

You figure out where you’ll stay, what you’ll eat, and which sights you’ll see.

But what if this trip wouldn’t last a week, but an entire year

Would you be able to remain safe?

This is a real possibility, folks.

Emergencies can force us to transform our way of living for good.

Most people think about what they’ll do for an emergency that might last a couple of days or weeks.

But that’s just not enough.

To really thrive when SHTF, we need to think months, years, and even decades ahead.

The long-term, day-to-day living in a different world.

Canned food and bottled water will keep you safe for some time. Months even.

But what happens when those run out?

In the long run, skills like hunting, fishing, farming, preserving food, and sourcing clean water are essential.

This is why what we do is so important.

We constantly improve our prepping abilities and add to our skill set.

Just like our ancestors did.

They knew the land, the seasons, the plants, and the animals. They understood that prepping wasn’t a sprint, but a marathon.

We have to adopt this kind of mindset as well.

We need to think beyond the initial emergency, beyond the canned goods, and towards a future where we don’t just think about what we have, but about what we know and what we can do.

Prepping is a lifestyle.

For most people, this shift in thinking is not easy. For others, it isn’t even possible.

But you and I both know the peace of mind that comes from knowing you’re ready for anything.

So, let’s not be like most people. Let’s think ahead. Let’s stay prepared. And let’s keep improving.

“Preppers Don’t Have Fun”

Someone once accused me of taking things too seriously.

She said that since I’m always trying to prepare for the worst, I don’t ever enjoy the present moment.

When I heard about this, I couldn’t help but chuckle.

Yes, I’m focused on prepping.

Yes, I’m keen on making sure my family and I can weather any storm that comes our way.

But who’s to say that I don’t have fun doing it?

You see, there is a certain joy that comes with being prepared for anything that most people can’t ever understand

A joy that most people will not ever understand.

When you are constantly acquiring different skills that can help survive potential threats, it’s like solving an exciting puzzle.

Remember the excitement as a child, that spark of curiosity when you first learned to ride a bike or tie your shoelaces? 

This is how I feel every time I learn about a different way to purify water, start a fire, or build a survival shelter.

And the reason I created this newsletter is because I wanted to share my excitement with people like you.

People who appreciate the value of emergency preparedness.

But the fun of prepping doesn’t end with the thrill of learning different skills. 

It’s also about putting these skills to the test, challenging yourself, and celebrating those moments of achievement.

Imagine successfully building a survival shelter from scratch for the first time.

It’s not just a place with a roof. It’s a testament to your resilience and resourcefulness.

Or think about the feeling of triumph when you manage to start a fire using just flint and steel.

There’s an indescribable sense of fulfillment in these moments.

I know “fun” is not something we think about when we talk about survival situations.

But it’s an important topic.

It’s what makes prepping sustainable in the long run.

So if someone says you’re a “doomsayer” or accuses you of being too focused on bad situations, just ignore them.

Keep prepping, and enjoy the process.

How To Build A Sustainable Survival Shelter (Step-By-Step Instructions)

Extreme weather conditions can strike at any moment.

And there could be a time when your house might not be able to sustain them.

Most houses are not built to withstand extreme hurricanes, floods, or thunderstorms.

Having a sustainable shelter that can withstand the elements and provide protection is crucial for ensuring your survival in times of crisis.

But building such a shelter is no easy feat. 

It requires careful consideration, planning, and execution.

In this article, I will walk you through every step of the way – so you have no hesitation before start building your shelter.

You will be able to start working on this project with confidence.

Before you do this, however, there is something you need to consider…

Assess The Challenge

Creating a sustainable shelter involves overcoming several obstacles.

If you go into this unprepared, you will probably give up halfway through.

I am not saying this to scare you, but to make sure you are committed to completing this project the right way – without half-assing any step.

First things first, you need to ensure you don’t break your local building codes and regulations. 

Consult with local authorities and experts to ensure you’re following the rules.

If you are not careful, it can also be very expensive.

You need to be prepared to keep your ear to the ground, and look for eco-friendly or recycled materials that are readily available in your area to reduce expenses.

Does this sound too bothersome?

If not, then let’s dive into how you can start right away.

Pick The Right Spot

Selecting the right site for your sustainable shelter can make a huge difference in its effectiveness.

To make the decision, think of the type of terrain you’ll be building on. 

Look for areas that are flat and stable, and steer away from areas that are prone to flooding or erosion. 

You should also take the natural resources available into consideration.

Look for areas that are close to water sources or areas that have a lot of sun or wind.

Finally, consider accessibility.

Make sure the site is easy to reach, and not too far from your house.

Look for areas that are close to roads or other transportation options.

Once you’ve found your spot, you can move on to the next step:

Adhere To The 4 Sustainability Principles

The main difference between shelters and houses is that they are going to run on electricity.

We are building these things to have a way to survive when the grid goes down.

You need a different way to retain heat in the winter and stay cool in the summer.

The four key principles when creating a sustainable shelter are:

  1. Energy efficiency,
  2. Renewable energy,
  3. Water conservation,
  4. And waste management. 

To maximize energy efficiency, ensure proper insulation, and utilize passive solar design principles. 

Renewable energy sources can reduce dependence on non-renewable ones. 

Consider solar, wind, or micro-hydro power, and invest in energy storage solutions to ensure you always have power when you need it.

Harvesting and conserving water is also essential. Install a rainwater collection system, and make sure to use water-efficient appliances and fixtures.

Lastly, incorporate waste management strategies, such as composting and recycling, to minimize waste generation and promote a closed-loop system.

Make Sure It’s Stable

Your shelter has to be able to survive anything.

The foundation, walls, and roof must be robust and resilient to withstand extreme weather conditions. 

Begin with a strong foundation, using materials like reinforced concrete or stone. 

Reinforce walls and roofs with sturdy framing and sheathing materials, such as steel or engineered wood.

Design your shelter to resist wind by incorporating aerodynamic features and anchoring the structure firmly to the foundation. 

Earthquake-resistant construction techniques can include shear walls, moment-resisting frames, and base isolation systems.

These things can be complicated, especially if you haven’t ever done this before.

If you’re not 100 percent certain you will be able to complete this step safely, consult with a local expert.

And make sure they are aware of the appropriate techniques for the local regulations and soil.

Implement Passive Cooling and Heating

Passive cooling and heating techniques can help keep your shelter comfortable and livable year-round.

Building orientation and layout are particularly important.

Orient your shelter so that it receives maximum sun exposure in the winter, and minimum sun exposure in the summer. 

This can help keep your shelter warm in the winter and cool in the summer.

Using natural ventilation can also help keep your shelter comfortable year-round. 

Make sure to design your shelter with plenty of windows and doors to allow for natural airflow.

Another way to control the temperature without electricity is by incorporating thermal mass and insulation.

If you can, try to incorporate every option.

Ensure Security and Defense

Ensuring security and defense is crucial for any sustainable shelter. 

It might seem impossible for a shelter without electricity…but there are many ways to do that.

The first one is to make your shelter “invisible.”

In other words, to camouflage it and keep it concealed from potential threats.

Plant trees or shrubs around your shelter to help it blend in with the surrounding landscape.

Implementing perimeter security measures can also help keep your shelter safe. 

A simple fence can do wonders to protect you from intruders.

But if you want to go a step further, design a safe room inside your shelter.

Make sure the room is well-ventilated, has a secure door, and is stocked with emergency items such as food and water.

Final Thoughts

I understand that this is a lot to take in one go.

It took me a long time, and I consulted with many people to write this article.

Read this again and again if you have to.

Building a sustainable shelter requires careful planning, adaptability, and a commitment to environmentally responsible practices.

But you don’t have to feel overwhelmed.

Take this one step at a time.

And if you think you have to, consult with a local professional to make sure your shelter is stable.

Remember, you are not designing a second house – you are ensuring you have a place to survive in harsh conditions.

Keep this in mind and you will create an incredible shelter that will help you make it through anything.

Building Shelter: Do’s & Don’ts

I think there are as many different ideas on how to build a survival shelter as there are survivalists. I have spent my share of nights in the wild, many times without any shelter, but on occasion, a good shelter comes in handy.

When to Build
I think the biggest mistake a lost person who really needs a shelter makes is that they wait too long before they decide to make a shelter. Most people who die in the wilderness do so from exposure.

A lost person thinks they are going to find salvation just around the next bend, or just over the next rise. The problem is that this thinking keeps on until they notice darkness is falling and it is almost too late to put any kind of effective shelter together.

Location, Location, Location
The next problem is many people pick the wrong location for their shelter. By just looking ravines makes a nice location for a shelter, but are prone to flash flooding. Avoid them because they can be deadly. Many will fail to look overhead when building their shelter, and end up with a dead tree, or large rock that could come down on them in the middle of the night.

Depending on where you live, unless the forest has been logged you can’t completely get away from large trees that may come down or drop a big branch on you. The best bet here is to find a large downed tree and build your shelter against it. This way the tree will take the blow, and hopefully spare you if something does fall.

Wind Direction
One of the most annoying things is to get a nice shelter built and then put in your fire, only to have the smoke inundate your shelter because you didn’t take the wind into account when you built it. A good angle away from the wind is best.

If you place it directly away from the wind the lee will cause the smoke to eddy and back up into your shelter.

Fire Safety
So you have a nice shelter built and warm fire in front only to be awakened from a deep sleep by your shelter being on fire! Basic fire safety is important especially in a survival situation, where what would be an inconvenience in a normal situation, can be fatal if you are lost. There should be some thought put into building your shelter other than just the mechanics of building it.

It’s important that you are not only warm, fed, sheltered, but also safe. Fire, while providing you comfort, can be very dangerous. So, please make sure to respect the nature around you by caring for your fire properly. Do not start a forest fire. Your fire pit must have boundaries, and you must keep an eye on it. Also, as we mentioned previously, observe where there is a break in the tree canopy before you set your fire.