How To Stay Safe and Survive During a Riot in California (Especially LA)

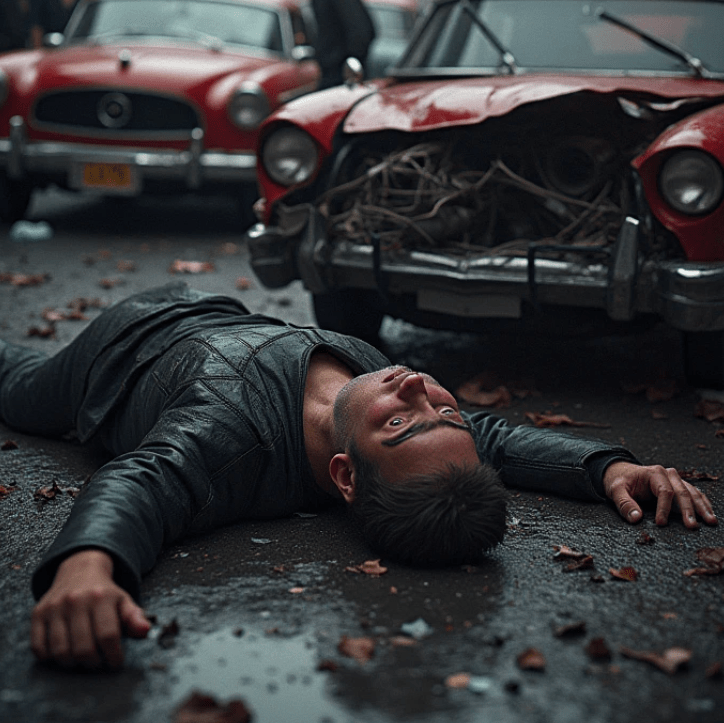
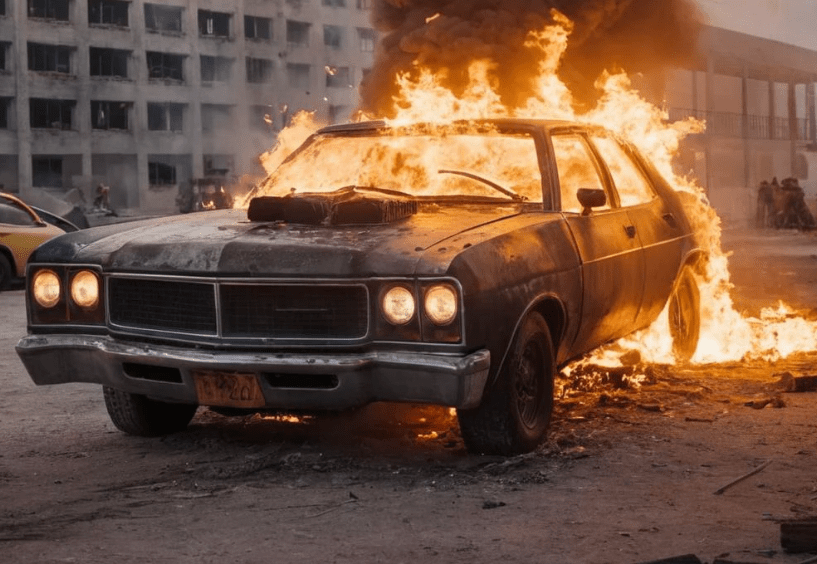
Riots are unpredictable, chaotic, and fast-moving. In a place like California—where cities are densely populated and political tensions run high—things can spiral out of control in an instant. I’ve spent years honing my survival and self-defense skills, not just for wilderness emergencies, but for exactly these kinds of urban disasters. If you’re reading this, you’re likely looking to protect yourself and your loved ones. You’re in the right place. Let me walk you through how to stay safe and survive during a riot in California, using practical strategies, real-world self-defense techniques, and a few DIY weapon skills that could save your life.


1. Stay Informed – Before It Hits the Fan

The first rule of survival is awareness. Riots don’t usually just explode without warning. There are always signs: heated protests, political turmoil, viral videos igniting public anger. Monitor news outlets, police scanners, and social media feeds. In California, apps like Citizen, Nextdoor, and local Reddit threads can give you real-time updates.

Keep a Get-Home Bag in your vehicle, especially if you’re traveling into a city like Los Angeles, San Francisco, or Sacramento. It should include essentials: water, energy bars, N95 mask, eye protection, gloves, a flashlight, multitool, and a burner phone with emergency contacts.


2. Avoid the Chaos If You Can

Let me be clear: your #1 strategy is to avoid confrontation. Don’t be a hero. Get out before things escalate. If you’re at work and see unrest brewing downtown, leave early. If you’re at home, fortify your entry points and stay inside.

Do NOT try to “watch” the riot or record it for social media clout. That kind of foolishness can get you targeted in seconds.


3. Situational Awareness is Your Best Defense

I can’t stress this enough: stay alert. Keep your head on a swivel. In a riot, threats don’t always come from the angry crowd—you could be ambushed by opportunists looting, mugging, or looking to cause harm.

Watch for exit points, safe zones (like police stations or fire departments), and stay away from choke points like bridges or alleys. Always have an escape route.


4. Learn and Master These 8 Self-Defense Skills

When escape is no longer an option, you’ll need to defend yourself. These eight self-defense skills could make the difference between life and death:

1. Situational De-escalation

Before you engage physically, try to de-escalate. Calm voice, hands visible, avoid aggressive posture. Many confrontations can be avoided with the right words and tone.

2. Palm-Heel Strike

Simple, effective. Aim for the nose or jaw. The base of your palm is strong and unlikely to injure you. Practice striking upward from a neutral position.

3. Elbow Strikes

If you’re in close quarters, elbows are powerful tools. Strike the side of the head, temple, or collarbone.

4. Escape from Wrist Grabs

Always pull toward the thumb. Practice breaking free from various grips. Pair it with a strike and run.

5. Knee Strikes

Deliver a strong knee to the groin or solar plexus. Even large attackers will drop if you hit with force and precision.

6. Tactical Flashlight Usage

A sturdy tactical flashlight can blind, distract, and serve as a blunt weapon. Shine it directly into the eyes and follow with a strike if necessary.

7. Ground Defense

If you’re taken down, protect your head and get to your feet quickly. Learn how to shrimp and kick upward if pinned.

8. Improvised Weapon Defense

You won’t always have a knife or baton—learn to defend using what’s around you: a backpack, a belt, a pen, or a water bottle.

Pro tip: train regularly. Muscle memory can save your life when adrenaline spikes.


5. Blending In – The Gray Man Strategy

Dress to blend. If you’re walking through an angry crowd, don’t stand out. No flashy clothes, no political logos, no bright colors. Go full “gray man”—neutral clothing, low profile, calm demeanor.

Avoid eye contact, keep your head low, and walk with purpose but without fear. Confidence without aggression makes you less of a target.


6. DIY Survival Weapons – When You Have to Improvise

In some riot situations, police and security are overwhelmed, and 911 might as well be out of service. You may need to build and arm yourself with improvised tools. Here are three DIY survival weapons you can make at home or in a pinch:

1. PVC Pipe Baton

  • Take a 1.5 ft length of 1-inch PVC pipe.
  • Fill it with sand or gravel for weight.
  • Seal both ends with duct tape.
  • Wrap the middle with paracord for grip.

It’s non-lethal but effective for crowd control or breaking windows in an emergency.

2. Tactical Sling Weapon

  • Use a strong sock or paracord pouch.
  • Fill it with heavy coins, ball bearings, or small rocks.
  • Whip it like a medieval flail.

Compact and silent, this weapon can deliver serious pain and force attackers to back off.

3. Makeshift Spear

  • Duct tape or lash a kitchen knife or sharpened stick to a broom handle or metal rod.
  • Use zip ties, paracord, or sturdy tape.

Great for defense at a distance and keeping attackers out of arm’s reach.

Note: these are last-resort tools. Don’t bring a weapon into a crowd unless you’re absolutely sure you need it—and understand the legal consequences under California law.


7. Shelter in Place – Fortify Your Home

If the riot is near your neighborhood, stay home and lock down.

  • Reinforce doors with a security bar or heavy furniture.
  • Close blinds and curtains to prevent visibility inside.
  • Keep lights off in front rooms.
  • Fill bathtubs with water (in case of power or water loss).
  • Charge all devices and power banks.
  • Have your defensive tools within arm’s reach.

And don’t answer the door for anyone except law enforcement, and even then, verify credentials if possible.


8. Know When and How to Bug Out

If your home becomes unsafe—fires spreading, mobs looting homes—you need to bug out fast.

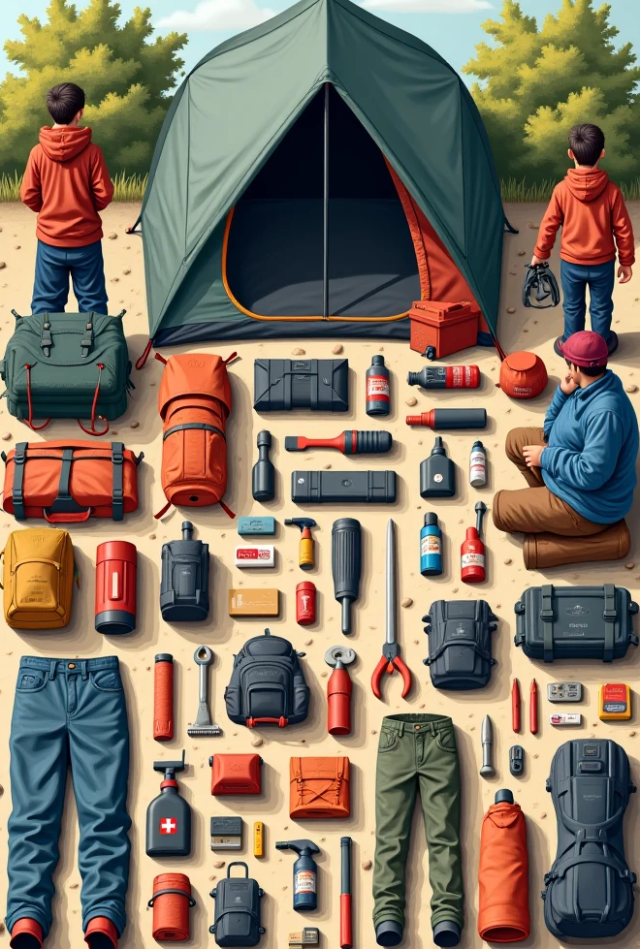
Have a Bug Out Bag ready:

  • Copies of ID
  • Cash in small bills
  • Water and purification tablets
  • Lightweight food
  • Knife/multitool
  • First-aid kit
  • Change of clothes
  • Flashlight
  • Emergency radio

Pre-plan multiple evacuation routes. Avoid highways if they’re clogged. Think like a scout: move silently, stick to the shadows, and trust no one unless you know them well.


9. Post-Riot Recovery

Even after the chaos dies down, danger still lingers—downed power lines, fires, civil unrest, and desperate people. Stay alert, continue monitoring communications, and only return home if it’s safe.

Document any damage for insurance, but be ready to defend your property if looters return. And take mental health seriously—what you experience in a riot can leave psychological scars. Talk to someone if you need to.


Final Words from One Prepper to Another

Surviving a riot in California—or anywhere—comes down to mindset, preparation, and adaptability. You don’t have to be a Navy SEAL to make it out alive. You just need to stay smart, stay calm, and be ready to act when others panic.

Remember: You are your own first responder.

Train. Prepare. Stay safe. And may you never need to use what you’ve learned—though it’s better to know it and not need it than the other way around.

Stay sharp out there.

North Dakota’s Worst Roads to Drive on During a Disaster

North Dakota’s Worst Roads to Drive on During a Disaster: Survival Driving Skills & DIY Hacks

Having logged thousands of miles in some of the most unforgiving terrains on the planet—from the slick mountain passes of the Rockies to the endless sand dunes of the Sahara—I’ve learned that no matter where you are, the roads you travel can make or break your chances in a disaster scenario. North Dakota, with its sprawling plains and unpredictable weather, offers a unique challenge that many overlook until they’re caught in the thick of it.

When disaster strikes—whether it’s a blizzard, flash flood, or wildfire—some roads become downright deadly. The sparse population and vast stretches of rural landscape in North Dakota can quickly turn familiar routes into traps. This is a survival guide for those who find themselves behind the wheel on North Dakota’s worst roads during a crisis, and it’s peppered with practical survival driving skills and hacks you can rely on when you’re running on empty—literally.

North Dakota’s Worst Roads to Drive on During a Disaster

1. Highway 85 through the Badlands
This stretch cuts through rough, eroded terrain with narrow lanes and sharp turns. In a disaster, it’s a nightmare—rockslides, sudden flooding, and poor cell reception make it a last-resort route.

2. County Road 6 near Devils Lake
Prone to flooding and ice during winter storms, this road can vanish under water or ice in hours. It’s a trap for the unwary and easy to get stuck on.

3. US-2 between Minot and Grand Forks
This main artery often faces winter whiteouts and heavy ice. The long stretches without rest stops or safe pull-offs make it dangerous during disasters.

4. ND-22 near the Missouri River
The proximity to the river means flood risks are high, and the road can get cut off quickly. Mud and debris wash onto the pavement during storms, hiding potholes and sinkholes.

5. ND-50 in the southwestern counties
This rural route is lightly maintained and often dotted with deep ruts and washouts after heavy rains or snowmelt.

Survival Driving Skills for North Dakota’s Worst Roads

I’ve distilled my experience into 15 survival driving skills that can help you navigate these treacherous paths safely.

1. Pre-Trip Recon
Always research your route before heading out. Use satellite maps and local weather reports to avoid roads prone to flooding or landslides.

2. Adjust Speed for Conditions
Speed kills, especially on icy or muddy roads. Slow down to maintain control and increase your stopping distance.

3. Use Low Gear on Slopes
On steep hills or slippery descents, use a low gear to control your speed without over-relying on brakes, which can cause skidding.

4. Avoid Sudden Movements
Steer and brake gently. Sudden jerks can cause loss of traction on ice or loose gravel.

5. Understand Traction Zones
Know which tires have the best grip depending on your vehicle type. For 4WD, front tires often steer, so keep them clean and clear of snow or mud.

6. Look for Alternative Routes
If a road looks unsafe, backtrack or take a detour—even if it means driving an extra 30 minutes. It’s better than getting stranded.

7. Maintain Tire Pressure
Underinflated tires are a liability in mud and snow. Check tire pressure frequently, especially before driving on rough roads.

8. Use Sand or Gravel for Traction
Carry a small bag of sand or gravel to pour under tires if you get stuck.

9. Know How to Rock Your Vehicle Free
If stuck in mud or snow, gently rock the vehicle back and forth by shifting between drive and reverse to gain traction.

10. Keep Momentum on Slippery Roads
Don’t stop suddenly on ice or snow. Maintain a steady pace to avoid losing traction.

11. Use Engine Braking on Descents
Let the engine slow the vehicle on downhill stretches instead of brakes to avoid skidding.

12. Keep Headlights and Taillights Clean
Visibility is everything during storms and dust clouds. Clean your lights regularly to be seen and see better.

13. Always Wear a Seatbelt
Simple, but often overlooked in emergency driving. It could save your life if you hit an obstacle.

14. Know How to Handle Hydroplaning
If you hydroplane, don’t slam on brakes. Ease off the accelerator and steer gently into the skid.

15. Communicate Your Location
Use a CB radio, GPS tracker, or satellite messenger to keep someone updated on your route and location.

DIY Survival Driving Hacks for Running Out of Gas

Now, what if disaster hits and you run out of fuel on these unforgiving roads? Here are three DIY survival driving hacks that have saved my skin more than once.

Hack #1: Use a Gravity-Fed Fuel Transfer
If you’re stuck near another vehicle or a fuel container, create a siphon with a clean hose or sturdy tubing. Start a slow flow of gas by sucking gently on the end until fuel begins to move through the tube, then place the hose end in your tank. Gravity will do the rest. Always be careful with fumes and avoid swallowing fuel.

Hack #2: Convert Your Vehicle to Run on Alternative Fuels (Temporary Measures)
Many vehicles can run on a mixture of gasoline and certain alcohol-based fuels (like ethanol or methanol) if gasoline runs out. If you can find small amounts of these alternative fuels at farms or remote stations, mixing them carefully can keep you moving. Research your vehicle’s tolerance ahead of time.

Hack #3: Use a Makeshift Hand-Push Starter
If your battery dies or you have no fuel to start the engine, you can sometimes push-start your vehicle. Get help from others to push the car uphill or on a flat surface, and then quickly engage second gear while releasing the clutch to start the engine. This works best on manual transmissions.


The Final Word

Driving North Dakota’s worst roads during a disaster demands respect, preparation, and calm nerves. The endless skies and wide-open spaces can lull you into a false sense of security—until a blizzard or flash flood changes the landscape overnight.

Survival on these roads means more than just brute driving skill. It’s about knowing the terrain, anticipating nature’s fury, and having the right survival driving skills up your sleeve. You have to be ready to switch gears—literally and figuratively—and keep a survival mindset through every mile.

Remember: If you don’t need to drive, don’t. Sometimes the best survival tactic is to stay put and wait out the storm. But when the road calls, let these tips guide you safely through North Dakota’s wildest roads.

Stay sharp, stay prepared, and above all—keep the rubber on the road.

Rhode Island’s Worst Roads to Drive on During a Disaster

Rhode Island’s Worst Roads to Drive on During a Disaster – and How to Survive Them

By a man who’s broken down in the Rockies, outrun a wildfire in California, and once crossed a frozen lake in Manitoba with nothing but a CB radio and a prayer, let me tell you something straight: driving during a disaster is a whole different beast. And if you’re in Rhode Island—small in size, dense in people, and loaded with pothole-riddled nightmares—you better be ready to adapt, react, and survive.

I’ve been through hurricanes, blizzards, and blackouts. And trust me, when the highways jam and the backroads crumble, knowing how to drive to stay alive is as vital as food and water.

Rhode Island’s Road Hazards in a Disaster

Rhode Island might be tiny, but it packs a punch in terms of infrastructure risk. Here’s a survivalist’s breakdown of the worst roads to avoid (or approach with extreme caution) during a disaster scenario:

  1. Route 95 through Providence – Traffic bottlenecks, overpasses, and congestion mean you’re sitting ducks in a bug-out situation. If it’s not gridlocked, it’s flooded.
  2. Route 10 Connector – Often under construction, and with poor visibility ramps, it becomes a chaos corridor during emergencies.
  3. Route 6 (Huntington Expressway) – Riddled with sharp curves and sudden exits, this road is a nightmare during high-stress evacuations.
  4. Post Road (Route 1) – Flood-prone and filled with commercial strip malls. Great for scavenging, terrible for escaping.
  5. Route 146 into North Smithfield – Lined with industrial traffic and overloaded bridges. Avoid it when supply trucks panic.
  6. Broad Street in Cranston/Pawtucket – Narrow, dense, and chaos incarnate when people start fleeing in masses.
  7. Hope Street in Bristol – Coastal, and the first to flood in a Nor’easter or storm surge.
  8. Putnam Pike (Route 44) – Beautiful, rural… and isolated. When tree limbs drop, you’re boxed in.
  9. West Main Road in Middletown – Connects to Navy installations, making it a prime security choke point during martial law or military lockdowns.
  10. Reservoir Avenue, Cranston – Urban traffic, tight intersections, and vulnerable power lines make this area high-risk.

15 Survival Driving Skills That’ll Save Your Life in a Disaster

When the time comes and you’re behind the wheel while the world burns, floods, or freezes, these 15 survival driving skills could make the difference between life and death:

  1. Situational Awareness – Constantly scan mirrors, gauges, and surroundings. Awareness buys time.
  2. Emergency Braking Control – Learn how to brake hard without skidding. Threshold braking on dry ground; pumping on wet.
  3. Navigating Without GPS – GPS dies, cell towers drop—so know your route by memory or use an offline map app.
  4. Driving with Blown Tires – Steer straight, ease off gas, don’t brake until speed drops. Then guide to a stop.
  5. Night Vision Tactics – Avoid high-beams in fog; use low beams and follow reflective markers or fog lines.
  6. Fuel Efficiency Driving – Feather the throttle, avoid sudden stops, and coast when safe. Every drop counts.
  7. Hand Signals and Horn Codes – In a convoy or with other survivors, use lights or horn taps to communicate.
  8. Underwater Escape – Unbuckle, roll down windows fast before electronics die. Kick windshield if submerged.
  9. Snow & Ice Maneuvers – Turn into the skid. Never slam brakes. Use snowbanks for controlled stops.
  10. Off-road Evasion – Know how to spot soft ground, use momentum to climb hills, and shift to low gear on declines.
  11. Avoiding Road Rage & Panic Drivers – Stay calm. Predict erratic movements. Don’t engage—evasion is your friend.
  12. Barricade Navigation – Reverse precision. Know how to three-point turn in tight quarters or go off-shoulder without getting stuck.
  13. Silent Movement – If needed, coast with the engine off on downhill terrain. Avoid noise to stay unnoticed.
  14. Improvised Lighting – Red LED headlamps or dimmed cabin lights help preserve night vision and avoid detection.
  15. Driving Through Floods – No more than six inches of water unless you know your air intake height. Go slow, steady—don’t create a wake.

3 DIY Survival Driving Hacks When You’re Out of Gas

You’re out of gas. Maybe siphoning stations got shut down, maybe your fuel cache got looted, or maybe you just pushed too far. Don’t panic. You still have options if you’ve got a brain, a toolkit, and a bit of know-how:

1. The Denatured Alcohol Boost (Alcohol Stove Fuel Hack)

If you have denatured alcohol (used in marine stoves or camping gear), you can use a small blend (ONLY in emergencies) to extend the remaining gasoline in a carbureted engine. Do not attempt this with fuel-injected or modern engines—older vehicles only.

  • Caution: This is extremely risky. Use only to limp to safety. Never exceed 10% mix. Filter everything.

2. Siphon from Lawn Equipment, Generators, or Boats

Emergency fuel isn’t just in cars. Mowers, snowblowers, backup generators, boats—all carry gasoline. Use a hand-siphon pump (avoid mouth siphoning) and a catch can. Keep a fuel transfer kit in your bug-out bag—small, cheap, priceless in a pinch.

3. Create a Gravity-Fed Drip Tank

If your vehicle fuel pump fails or you want to bypass a contaminated tank, rig a gravity-fed drip tank using a clean water jug, clear tubing, and a fuel filter. Mount it above the engine and feed it into the carburetor or fuel intake. This is makeshift, not efficient, but it can get your rig a few miles out of hell.


Surviving the Drive in Little Rhody

Driving through a disaster in Rhode Island is about threading the needle between panic, geography, and infrastructure failure. You’ve got bridges, tight urban corridors, a coastline that floods faster than your bathtub, and a population density that ensures traffic the minute the sirens wail.

So what do you do?

  • Pre-scout alternate routes—especially rural cut-throughs, utility paths, and even bike trails.
  • Keep a printed map in your glovebox. Mark fuel stations, water sources, and chokepoints.
  • Drive light. Weight kills speed and fuel economy. Strip non-essentials from your bug-out vehicle.
  • Keep a vehicle go-bag: Include fix-a-flat, siphon kit, battery jumper, headlamp, tire plug kit, and a collapsible fuel container.
  • Fill up every time you hit ¾ tank. Don’t wait till you’re low in a crisis zone.
  • Maintain your ride. That rusted-out ’98 Tacoma might be ugly, but if it runs clean and has high clearance, it’s better than a dead hybrid with a cracked battery.

When you know the roads like a survivalist knows his terrain, and you’ve trained behind the wheel as much as on the trail, you won’t need to hope—you’ll just drive. Smooth, quiet, and smart. Get out of Dodge—or Providence, in this case—and live to see another sunrise.

You’re not just driving. You’re surviving.


New York’s Worst Roads to Drive on During a Disaster

New York’s Worst Roads to Drive on During a Disaster—and How to Survive Them Behind the Wheel
By a Well-Traveled Survivalist

I’ve driven across deserts on three gallons of diesel, crawled through hurricane-flooded streets in Louisiana, and pushed a rusted-out pickup across half of Bolivia. But nothing quite tests your nerve like driving through New York during a full-blown disaster—be it a blackout, blizzard, flash flood, or something worse. The Empire State has beauty and bite in equal measure, and if you’re not prepared when things go sideways, you’re either stuck or someone else’s burden.

Let’s talk survival. Specifically, survival behind the wheel.

The Most Treacherous Roads in New York During a Disaster

Before I get into the skills and hacks that’ll keep your rig moving, you need to know which roads are a deathtrap when crisis hits.

1. BQE (Brooklyn-Queens Expressway)

This is a tight, crumbling mess in the best of times. During a disaster? It turns into a concrete coffin. It floods easily, has limited exits, and the elevated portions make for slow and exposed travel.

2. Major Deegan Expressway (I-87)

Running through the Bronx, this stretch clogs up with the smallest incident. Add an evacuation order or a flash flood, and you’re locked in.

3. Cross Bronx Expressway

I call this one “the artery of misery.” In gridlock, there’s no escape—bridges, overpasses, and concrete all around. It’s the first to freeze and the last to be cleared.

4. FDR Drive

Scenic, sure, but sandwiched between the East River and Manhattan’s east side, you’ve got water on one side, high-rises on the other. When the storm surge hits, it’s underwater faster than you can turn around.

5. I-278 Staten Island

A critical connector that’s exposed, easily bottlenecked, and prone to wind damage. If the bridges shut down, you’re stranded on the island.

6. Route 17 in the Catskills

Beautiful drive—until snow buries it or a landslide turns it into a hiking trail. Cell service is spotty and help is hours away.

7. Taconic State Parkway

This one’s narrow, winding, and has overpasses too low for trucks. Come winter, it’s a slippery chute lined with trees and ditches.

8. I-84

Heavy truck traffic, frequent fog, and icy hills. It’s a freight artery that jams fast in bad weather.

9. Southern State Parkway

Winding, fast, and crowded with commuters—when panic hits, this becomes a NASCAR track full of amateurs.

10. The Thruway (I-90) between Buffalo and Rochester

Snow, wind, and whiteout conditions make this stretch notorious in winter. If you’re not driving something with clearance and chains, you’re a hood ornament.

Now, just because you’re on one of these roads doesn’t mean you’re doomed. You’ve got the advantage of knowledge, and if you can master a few critical survival driving skills, you’ll do more than survive—you’ll thrive.


15 Survival Driving Skills for Disaster Scenarios

  1. Situational Awareness
    Always know what’s ahead, behind, and around you. Scan exits, spot alternative routes, and watch people—crowds give away danger.
  2. Off-Road Navigation
    Know how to steer a 2WD sedan through mud, fields, or gravel. In an emergency, the shoulder or forest trail might be your only option.
  3. Flood Water Judgment
    Six inches of water can stall a sedan. A foot can carry off a car. Learn to judge depth by fixed objects like mailboxes or tires on other vehicles.
  4. Manual Transmission Mastery
    If you ever have to steal—I mean, “borrow”—a vehicle in a crisis, it might be stick. Learn it.
  5. Driving Without Headlights
    Use parking lights or no lights at all during nighttime evasion. Stay unseen, avoid attracting trouble.
  6. Engine Cooling Tricks
    If you’re overheating and there’s no coolant? Crank the heater to full blast. It’ll draw heat off the engine enough to limp another mile or two.
  7. Tire Patch & Plug on the Go
    Learn to plug a tire with a kit—no jack needed. Saved me from spending the night in a ditch outside Syracuse.
  8. Hotwiring Basics
    I’m not saying break the law. But if it’s between you and freezing to death in a blizzard, a basic understanding of ignition wiring might save you.
  9. Driving in Reverse
    Some exits are only back the way you came. Practice controlled, confident reverse driving.
  10. Braking Without ABS
    If the system fails or you’re in an older vehicle, pump those brakes on ice or water. Learn cadence braking.
  11. Evading Roadblocks
    Know how to U-turn on narrow roads, cut across medians, or drive through soft barriers like fences or ditches.
  12. Fuel Efficiency Driving
    Learn hypermiling techniques. Coast in neutral. Minimize braking. Every drop counts in a gas-dead world.
  13. Reading Smoke and Sky
    Dark plumes mean fires. Yellow-gray? Chemical. Learn to read clouds, smoke direction, and wind. It’ll inform your next move.
  14. Quick Vehicle Concealment
    Know where to stash a vehicle: under tree canopy, behind structures, or under bridges. Visibility is vulnerability.
  15. Portable GPS with Topo Maps
    Cell towers die fast. GPS units with offline topographic maps are gold. Know how to use grid coordinates, not just “turn left at Starbucks.”

3 DIY Hacks When You Run Out of Gas

If you’re out of gas, you’re not out of options. I’ve used all three of these in the wild. They’re field-tested and road-worn.

1. Siphon from Abandoned Vehicles

Carry clear vinyl tubing, at least 6 feet. Push it into the tank of a vehicle parked nose-up. If you can’t get suction, use a squeeze bulb or create a siphon starter with a plastic bottle. Works best with older cars that don’t have anti-siphon filters.

2. DIY Ethanol Boost

If you can find pure grain alcohol or even high-proof vodka, you can mix it with your fuel in emergencies. Small engines will tolerate it in a pinch. Ratio? Start low—10% max.

3. Scavenge Small Engine Fuel

Lawnmowers, chainsaws, and generators often sit untouched. Their gas may be old, but if it’s not varnished or contaminated, it’ll burn. Filter through a T-shirt or coffee filter. Desperate? It’ll run.


Final Thoughts from the Road

Look, survival isn’t about gadgets and gear—it’s about grit, knowledge, and the will to move when others freeze. New York’s worst roads will chew up the unprepared. But you? You’ll see the jam and take the field. You’ll smell floodwater on the wind and know when to cut and run.

There’s no cavalry coming in a gridlocked city or a frozen mountain pass. You’re the cavalry. Your tires are your boots. Your car? It’s your last shelter, your battering ram, your ride-or-die.

Know your vehicle. Pack it like your life depends on it—because one day, it just might.


The Ultimate EDC Checklist: Are These Key Items in Your Kit?

Imagine this scenario for a moment—you’re heading out the door, running errands, or even just walking to the mailbox. Everything seems perfectly normal. Then, suddenly, the unexpected happens. A power outage. A car breakdown. An emergency situation where you need to think on your feet and act fast.

Now, ask yourself: Are you really prepared for the unexpected?

Most people go about their day with the bare minimum in their pockets or bags: a wallet, a smartphone, and a set of keys. But what if that wasn’t enough? What if you could make a few small changes to your everyday carry (EDC) that could help you in a survival situation or simply make life a little easier?

It’s time to think beyond the basics and upgrade your EDC. When disaster strikes—whether it’s a natural disaster, power outage, or even just an unexpected situation—you’ll want to be as prepared as possible. With the right EDC, you can navigate these events with confidence, without being caught off guard.

Let’s go over the crucial items every survivalist should have in their everyday carry kit. These tools could very well be the difference between surviving and being caught unprepared.

1) Multi-tool

A multi-tool is perhaps the most essential item in your EDC. This versatile tool is your Swiss Army knife for modern-day survival. From knives and screwdrivers to bottle openers and pliers, a quality multi-tool will serve you in nearly any situation. Whether you’re fixing a broken item, opening a package, or handling an unexpected repair on the go, having a multi-tool at your disposal is invaluable.

Survival Prepper Tip: Choose a multi-tool that’s compact, durable, and easy to carry. Look for one that includes a knife, scissors, pliers, and a few screwdrivers. Don’t forget about the weight – you want something that’s easy to carry without weighing you down.

2) Flashlight

When the lights go out, a flashlight is your best friend. Whether you’re facing a power outage at home, navigating through a dark area, or even just trying to find something in a poorly lit space, a flashlight is a must-have in your EDC. Opt for a small, durable, and powerful flashlight that can be easily carried in your bag or pocket. There’s nothing worse than fumbling around in the dark when you need light the most.

Survival Prepper Tip: Look for a flashlight that uses rechargeable batteries, which can save you money in the long run. Solar-powered models are an excellent choice for preppers who want a sustainable option. Always have spare batteries in your kit as well.

3) Fire Starter

When you’re caught in a situation where you need warmth, cooking, or a signal for help, a reliable fire starter can be a game-changer. A Ferro rod fire starter is compact and easy to carry, and it’s capable of igniting a fire even in wet conditions. You never know when you might need to create a fire to cook food, stay warm, or send out an emergency signal. Fire is also essential for purification, whether you’re boiling water for drinking or disinfecting something.

Survival Prepper Tip: Practice using your fire starter before you need it. The last thing you want is to struggle with it during an emergency. Keep a few fire-starting supplies, like cotton balls soaked in petroleum jelly or tinder, in your kit for easy ignition.

4) Water Bottle

Water is life, and in any survival scenario, access to clean drinking water is critical. Carrying a durable, reusable water bottle ensures you’re never without hydration when you need it. Additionally, a high-quality water bottle with a built-in filter can help you purify water from lakes, streams, or questionable sources. Having access to clean water is a fundamental survival skill, and carrying it with you makes it a part of your everyday readiness.

Survival Prepper Tip: Choose a stainless steel or BPA-free plastic water bottle. If you’re worried about contamination, consider one with a built-in filtration system. This ensures you can purify water from a variety of sources in the wild.

5) First Aid Kit

When you’re in a survival situation, injuries can happen fast—whether it’s a cut, burn, sprain, or something more serious. A small but well-stocked first aid kit is essential in your EDC. You should be able to address minor injuries and have supplies for more serious situations, like infection prevention or wound care.

Survival Prepper Tip: At the very least, your first aid kit should include antiseptic wipes, bandages, gauze, medical tape, tweezers, pain relievers, and any personal medications. Don’t forget to include an emergency whistle, as it can help you signal for help if you need it.

6) Paracord

Paracord is one of those items that you’ll be glad you packed, even though you might never need it. However, when you do, you’ll be amazed at its versatility. From building shelter, tying down gear, making repairs, to even using it for fire-starting (by stripping it), paracord is a survivalist’s go-to utility tool. Keep at least 10 feet of it in your EDC kit.

Survival Prepper Tip: Choose a high-quality, 550-paracord with a higher tensile strength. It should be durable enough to withstand harsh conditions. If possible, look for a paracord bracelet, so you have it easily accessible.

7) Survival Blanket (Mylar Blanket)

A Mylar survival blanket, also known as a space blanket, is a must-have in your EDC. It’s small, lightweight, and helps retain body heat in extreme temperatures. It can also be used as a reflective signaling device in emergencies. These blankets are an essential part of your kit because they protect you from hypothermia and other weather-related dangers.

Survival Prepper Tip: The reflective nature of Mylar blankets makes them ideal for signaling. Use them in survival situations to attract attention from rescuers. Consider carrying a small survival shelter or poncho for added protection.

8) Knife

A high-quality, folding pocket knife is essential for your EDC. From preparing food to cutting rope, a sharp knife can help you handle multiple survival tasks. Choose a compact, easy-to-carry knife that is capable of handling heavy-duty tasks. Make sure the blade is durable, and the handle is comfortable to grip.

Survival Prepper Tip: When selecting a knife, consider the lock mechanism for safety. Always sharpen your blade and check for rust to maintain optimal performance.

9) Compact Tool Kit

While a multi-tool is great, sometimes you need specialized tools for specific tasks. A small, compact tool kit with essentials like a small wrench, pliers, or even a screwdriver set can be a lifesaver. This can help you with repairs or minor fixes during your day-to-day life or in emergency situations.

Survival Prepper Tip: A lightweight, minimal tool kit with just a few essential tools will help you make repairs on the go without adding unnecessary bulk to your kit.

10) Tactical Pen

A tactical pen is another item that can be part of your EDC kit without drawing attention. While it functions as a regular pen, it also serves as a self-defense weapon, glass breaker, and even a tool for small repairs. It’s an inconspicuous but practical addition to your gear, and it could come in handy in a wide variety of scenarios.

Survival Prepper Tip: Choose a tactical pen made of heavy-duty materials, like aluminum or titanium, so it can withstand rugged use. Ensure it also has a reliable writing mechanism to make it functional as a regular pen.


Final Thoughts:

In a survival situation, your ability to adapt, improvise, and make use of the resources at hand is what will keep you alive. Your EDC is more than just a collection of random items. It’s a critical component of your overall preparedness strategy. The key to an effective EDC is to make sure you have the tools that you need to handle unexpected situations, whether that’s a minor inconvenience or a full-blown emergency.

By having these items in your kit, you’re setting yourself up for success. Keep refining your gear, add more items as necessary, and always stay alert. The world is unpredictable, but with the right tools in your pocket, you’ll be ready for whatever comes your way.

Survival Prepper Tip: Regularly review your EDC kit. Seasons change, your needs evolve, and new gear becomes available. Keeping your kit up to date will ensure that you’re always ready for whatever life throws your way.

The Wifi Trap: What Most Preppers Overlook When SHTF

As preppers, we’re always thinking about the “what ifs” — what if the power grid goes down? What if food becomes scarce? What if our security is compromised? But one thing that often gets overlooked in prepping is how we handle something as common as wifi when SHTF (Sh*t Hits The Fan).

Sure, most of us are used to having wifi at our fingertips. It’s something we take for granted in our daily lives, whether we’re at home, at a café, or even traveling. But when disaster strikes—whether it’s a natural disaster, an EMP, or some form of societal collapse—the wifi we rely on can become a huge liability.

Think about it: every time a major storm hits or an earthquake shakes things up, what happens? The power grid goes down, cell towers collapse, and suddenly, we’re cut off from the world. The internet disappears. But if you’re a prepper, you’ve probably planned ahead. You’ve got your own generator, and maybe even a backup power source for your wifi. You’re sitting pretty, right?

Well, not quite.


The Dangerous Wifi Mistake Most People Make

The truth is, while having wifi during a crisis can be a blessing—it can also make you a target. When you’ve got a working wifi signal in an otherwise digitally dead area, you’re sending out a beacon. A signal to anyone with a device searching for a connection. And when people are desperate—whether it’s for information, communication, or resources—they’ll stop at nothing to get to you. That includes the possibility of using force.

Picture this: a massive power outage or grid failure. You’re sitting in your home with your backup generator, using your wifi to access essential information or stay in touch with other preppers. But that signal, that tiny little wave bouncing off your router, is broadcasting to anyone nearby. And when resources are scarce, there are plenty of people who would be willing to do whatever it takes—perhaps even storm your house or break into your perimeter—to steal those resources.

This is a situation we must be prepared for. If you’ve got wifi set up for a SHTF scenario, there are a few things you need to understand to stay safe.


Reducing Your Wifi Range: A Smart Strategy

What’s the solution? Do we simply throw our routers out the window during a power outage? Of course not. But there are steps you can take to ensure your wifi doesn’t make you an easy target in an already dangerous situation.

One way to protect yourself is by reducing the range of your wifi signal. Most modern wifi routers allow you to adjust the power output—basically controlling how far your signal reaches. By lowering the power, you can restrict your wifi’s range and make it much less noticeable to anyone outside your immediate vicinity.

This is a smart strategy for preppers who don’t want to broadcast their presence to the wrong people.

Tip #1: Most wifi routers allow you to control the transmit power. Check your router’s settings and adjust the power output. You’ll want to reduce it to a level where only those inside your home or immediate property can access the signal.

Tip #2: Always refer to your router’s manual or interface to make sure you’re adjusting the correct settings. Each router model is different, but most will have an option to control the signal strength or transmit power.


How to Hide Your Wifi with Physical Barriers

Now, let’s say you’re not tech-savvy or don’t want to mess with your router settings. There’s another simple method you can use: physical barriers. You can reduce the range of your wifi signal by surrounding your router with dense materials like concrete or stones.

Think about it: wifi signals can only travel through certain materials. Concrete, metal, and stone are excellent at blocking signals. By placing your router in a space surrounded by these materials, you’re naturally limiting the range without having to adjust any settings. For example, if you have a basement or a sturdy, windowless room in your house, that could serve as a great space to keep your router safe.

Tip #3: A simple and effective method is placing your router in a room with thick concrete walls or a storage area made of dense materials. This will help shield the signal from reaching the outside world.


Prepping for Emergencies Beyond the Basics

As a prepper, it’s crucial to think outside the box, especially when you’re facing an unprecedented situation. Most people think of wifi as a convenience, not as a potential vulnerability. But in an emergency, your technology can become both a tool and a liability. The key is to adapt.

Tip #4: Don’t just prep for short-term scenarios. Plan for long-term sustainability. A few days without the grid is one thing; surviving for months or even years is something entirely different.


The Importance of Digital Security

Just as you would lock your doors and secure your home, you need to protect your digital space. In the chaos following a major disaster, people might go to extreme lengths to obtain your resources. You need to be aware of how much you’re broadcasting. This goes beyond just wifi—think about all the digital signals your devices are sending out. Cell phones, radios, and even Bluetooth can be tracked or intercepted if you aren’t careful.

Tip #5: Turn off Bluetooth, GPS, and Wi-Fi on devices when not in use. The fewer signals you send out, the less chance you’ll attract attention from those looking to exploit your resources.


Additional Wifi Safety Measures

Another smart move is to create a network that’s encrypted and secure. In a post-collapse world, information is power, and anyone who can hack into your system will have a major advantage. Set up a VPN (Virtual Private Network) to protect your online communications and data.

Tip #6: Always use a VPN on your devices. It encrypts your online activity and adds an extra layer of security when accessing the internet in a crisis.


Know Your Neighbors (But Keep Your Distance)

If you’re living in a close-knit neighborhood, don’t underestimate the value of knowing who is nearby. The stronger your community connections, the better prepared you’ll be to handle any situation. But even within a close community, you need to remain vigilant. Trust is built, not given.

Tip #7: Form a prepper group with trusted neighbors, but always remain cautious about who you allow into your circle. Trust, but verify.


Redundancy is Key to Prepper Success

While you’re reducing your wifi signal and securing your digital footprint, remember that redundancy is critical. You can’t rely on a single system. A backup communications plan is necessary, whether it’s a two-way radio or even an old-fashioned CB.

Tip #8: Invest in walkie-talkies or ham radios for backup communication in case the internet and cell towers fail completely.


Stay One Step Ahead

At the end of the day, the goal is to stay one step ahead of the game. By taking these simple but effective precautions, you reduce your exposure and keep your home from becoming a target when the chips go down.

Tip #9: Be proactive, not reactive. Anticipate problems before they occur, and stay prepared for any scenario that may unfold.


Conclusion: A Tactical Approach to Wifi in a Crisis

When SHTF, you’re going to face a whole new set of challenges. Wifi may be a tool, but it can also be a dangerous liability if you don’t handle it right. From adjusting power settings to using physical barriers, there are simple and effective ways to reduce the range of your wifi signal and avoid drawing attention to yourself.

Tip #10: Continuously reassess your preparedness plan. Emergencies evolve, and your prepping must evolve with them.

By being aware of the wifi mistake that many preppers overlook, you’re one step closer to ensuring that your home remains secure—and that you’re truly ready when the chips go down.

From Spark to Flame: 10 Essential Fire Starting Techniques

You think you’re ready for the collapse? You think those fancy gadgets and your YouTube education are going to save you when the grid goes dark, the food trucks stop rolling, and the weak start begging for warmth? Think again. Fire is life, and if you can’t conjure a flame out of cold dirt and sweat, you’re just another statistic waiting to happen.

Let me tell you something that’ll stick: Mastering fire isn’t optional. It’s mandatory. It’s the backbone of any real survival setup. You can’t purify water, cook food, stay warm, fend off predators, or signal for rescue without it.

So strap in, sit down, and shut up. This is the only fire-starting lesson you’re getting before the world chews you up.


🔥 10 Essential Fire Starting Techniques

1. Ferro Rod and Striker

This ain’t your grandpa’s Bic lighter. A ferrocerium rod throws sparks hot enough to melt steel—5,500°F. Pair it with a carbon steel striker or the back of your knife and aim for a decent tinder bundle. It’s weatherproof, idiot-proof, and guaranteed to work if you know how to use it.

Survival Skill #1: Know your ferro rod angles. 45-degree strike, consistent pressure, and keep that wrist steady.

2. Flint and Steel

Older than your bloodline and twice as reliable. Strike steel against flint to shower sparks onto char cloth or dry fungus. This is old-world firecraft, and if you can’t manage it, you’re not ready.

Survival Skill #2: Make char cloth at home using cotton scraps and an Altoids tin. If you can’t DIY that, go home.

3. Bow Drill

Yeah, it’s primitive. Yeah, it’s hard. But when your gear fails and your pack’s lost, this baby will still save your skin. You need spindle, hearthboard, bow, and bearing block. No room for weakness or laziness here.

Survival Skill #3: Learn wood types—poplar spindle, cedar board. Get it wrong and you’ll smoke without fire.

4. Fire Plough

Rub a softwood stick into a groove on a hardwood base. Friction builds. Ember forms. Labor-intensive? Hell yes. But in a survival pinch, it’s a lifesaver.

Survival Skill #4: Endurance. If your arms quit, so do you. Keep grinding.

5. Magnesium Block

Scrape off magnesium shavings, then hit it with a spark. It burns hotter than your ex’s temper. Windproof. Wet-proof. Apocalypse-proof.

Survival Skill #5: Always scrape into a pile. Don’t scatter like a fool.

6. Solar Fire (Magnifying Glass or Fresnel Lens)

Use the sun like the burning eye of judgment. Focus that beam onto dry tinder and wait. It’s clean, silent, and free—just like you should be.

Survival Skill #6: Understand sunlight angles. No sun? No dice. Back it up with other methods.

7. Battery and Steel Wool

Touch steel wool to both battery terminals and watch it ignite. Fast and furious. 9-volt works best, but AA will do in a pinch.

Survival Skill #7: Keep steel wool in a Ziploc. Moisture kills this method dead.

8. Lighter

Yeah, I said it. Carry a damn Bic. But don’t trust it. Lighters break. They leak. They lie. But as a backup, it’s a must.

Survival Skill #8: Refillable Zippos are better in the long haul. Learn to repack the cotton and replace the flint.

9. Matches (Stormproof Preferred)

Stockpile the good ones. Dip regular matches in wax for homemade stormproofing. Keep them dry, sealed, and accessible.

Survival Skill #9: Know how to strike with frozen fingers. Practice in the cold.

10. Fire Piston

Science meets caveman. Rapid air compression ignites char cloth in a sealed piston. It’s exotic, but efficient. Just don’t be the idiot who loses the O-ring.

Survival Skill #10: Practice piston technique. This tool punishes the clumsy.


🛠️ 3 DIY Survival Fire Hacks

Hack #1: Vaseline Cotton Balls

Cotton balls soaked in petroleum jelly. Stuff them in an old film canister or pill bottle. Light one spark and you’ve got a 10-minute firestarter. Cheap, lightweight, and rainproof.

Hack #2: Egg Carton Fire Bombs

Take a cardboard egg carton, fill each cup with dryer lint or sawdust, pour in melted wax. When cool, rip off a section and light it. Better than commercial cubes, and made from trash.

Hack #3: Crayon Candles

Out of candles? Break out the kid’s art kit. A single crayon burns 15–30 minutes. Stack three and wrap in foil with a wick, and boom—emergency heat source.


🔥 Why Fire Is Your First and Last Line of Defense

Let me be brutally clear: fire is the only thing between you and death in a real collapse. If you can’t start a fire in 60 seconds under pressure, cold rain, and exhaustion, you’re not a survivor—you’re a liability.

Think the government will save you? That your neighbors will share? That your bug-out bag will somehow work itself? Wake up. The wild doesn’t care. Fire does.

Fire signals to rescue. Fire sterilizes your water. Fire cooks the bacteria out of squirrel meat. Fire scares off predators—man and beast. Fire gives you light when the dark swallows everything.


💥 Final Warning from the Edge

You don’t rise to the occasion. You fall to your level of training. The time to practice isn’t when your fingers are numb and your lungs are wheezing from panic. It’s right now—before the grid fails, before the looters roam, before the cold comes creeping.

Master these 10 techniques like your life depends on it—because it does. Load your bag with the right tools. Memorize the hacks. Drill the skills until they’re muscle memory.

If you’re not building fires weekly, you’re playing with fantasy, not prepping for reality. Don’t be the guy with the $300 knife and no clue how to make a coal.

Get angry. Get obsessed. Get ready.

Caught to Survive: The Prepper’s Guide to Traps and Snares

Alright, listen up, because I’m only gonna say this once. If you’re dumb enough to think survival is just about stocking up on canned beans and pretending that’ll keep you alive when the world goes sideways, then this rant isn’t for you. Survival is about doing — using your brain, your hands, and yes, your grit — to catch what you can, snare what you need, and make it through whatever hellhole we find ourselves dropped into.

Welcome to Caught to Survive: The Prepper’s Guide to Traps and Snares — a no-BS blueprint for anyone who refuses to be just another dead body left behind when the grid goes dark. If you don’t know how to make a trap or a snare, you might as well start digging your grave now.


15 Survival Skills Every Prepper Should Master — Or Die Trying

1. Basic Knot Tying
If you don’t know a bowline from a granny knot, you’re already screwed. Traps and snares depend on strong, reliable knots. Practice until you can tie them blindfolded and with one hand tied behind your back.

2. Crafting Deadfall Traps
This ain’t your grandpa’s picnic. Knowing how to build a deadfall trap using logs and rocks can catch rabbits, squirrels, or whatever dumb critter walks into your line.

3. Snare Making
Wire snares are the backbone of stealth trapping. Know how to twist, set tension, and place snares where animals naturally run — otherwise, you’re wasting time.

4. Camouflage and Concealment
A trap that’s obvious gets disabled or avoided. Learn to hide your gear in plain sight with branches, leaves, or dirt. If your traps aren’t invisible, they’re useless.

5. Tracking Animal Behavior
Study animal trails, feeding spots, and habits. Set traps where animals will be, not where you wish they’d show up. If you’re just hoping for luck, you’ll be eating dirt.

6. Fire Starting Under Any Conditions
You’ll need fire to cook your catch, sterilize traps, and keep warm. Practice friction, flint, and modern methods until you can start a blaze in a rainstorm with nothing but grit.

7. Knotless Snares and Loop Placement
Sometimes animals are wary of wire loops with knots. Master creating smooth, sliding loops to increase your catch rate.

8. Butchering Small Game
Trapping isn’t just about capture — you’ve got to know how to clean and prepare your kill fast and sanitary. You’re not hunting dinner for fancy; you’re hunting survival.

9. Using Natural Materials for Traps
Wire might run out. Learn to use vines, strips of bark, and wood for snares and triggers.

10. Primitive Tools Making
Carve your own hooks, spears, and trap components from stone, bone, or wood. If you don’t have gear, make it. No excuses.

11. Emergency Shelter Building
Trapping is useless if you freeze to death. Know how to build shelters with minimal materials while you lay traps and prepare food.

12. Water Sourcing and Purification
Without water, you’re dead in 3 days. Find and purify water near your trap zones. Don’t poison your own food source with careless water mistakes.

13. First Aid for Trapping Injuries
Cut yourself setting a snare? Step on a rusty nail? Know basic first aid to keep infection from killing you.

14. Disguise Your Scent
Animals smell better than you think. Use mud, leaves, or natural scents to hide your human odor near trap lines.

15. Understanding Local Wildlife Laws and Ethics
Yeah, when society is functioning, respect the laws and the animals. But when survival’s on the line, knowing the legal boundaries beforehand saves you headaches later.


3 DIY Survival Hacks to Boost Your Trap and Snare Game

Hack #1: The “Tripwire Alarm”
Use a length of thin wire or strong cord connected to a can filled with rocks or anything noisy. Place it across a path where you expect an animal. When triggered, it alerts you without you having to stay glued to the trap all day. No more missing your catch because you were distracted or sleeping.

Hack #2: The “Improvised Spring Snare”
If you don’t have steel wire or springs, carve a Y-shaped flexible sapling branch. Attach a loop of vine or wire to the top and set the snare with the bent sapling tensioned. When the animal steps into the loop, the sapling snaps back, tightening the noose. It’s noisy but effective if you can’t get your hands on commercial gear.

Hack #3: The “Natural Glue Trap”
Mix pine resin with charcoal or crushed leaves to make a sticky, natural glue. Spread it on a flat surface or a small stick and place near bait. Small rodents get their paws stuck, making capture easier. It’s messy but works when you’re desperate and wire’s not an option.


Here’s Why This Matters — And Why You Should Be Mad Too

When disaster strikes, the entire system you rely on falls apart. Power? Gone. Grocery stores? Looted or empty. Police? Who knows. The only reliable source of food will be your hands and your wit. If you’re not trapping and snaring, you’re begging for scraps or starvation. And no one’s gonna hand you a sandwich when chaos rules the day.

Get angry. Get serious. This is not a game. Every second you waste scrolling your phone or buying more junk you don’t need, someone else is learning to survive without it. The animals don’t care about your excuses. If you can’t catch food, you die.

Traps and snares are the silent soldiers of survival — no loud guns, no wasting ammo, just pure skill and patience. They’re the tools that will keep your belly full when the world crumbles. Master them or prepare to be a statistic.


Final Warning: If You’re Not Willing to Get Dirty, Stay Home

Setting traps isn’t glamorous. It’s tedious, frustrating, and sometimes downright gross. You’ll get bitten by bugs, scratched by thorns, and spend hours just watching a snare you set. But that’s the price of survival — patience and resilience.

Get angry at the world for making survival necessary. Get angry at yourself for not preparing sooner. But channel that anger into action. Learn every skill, practice every hack, and build traps until they’re second nature.

Because when the grid goes dark and the streets fill with chaos, no one’s coming to save you. You’re on your own. And if you don’t catch to survive, you won’t.


There. Now stop whining and start doing. What do you want me to break down first — setting snares? Finding the best trap locations? Or maybe how to butcher a rabbit clean in under five minutes?

Built to Survive: Shelter Tactics Using Nature and Know-How

You think that store-bought tent is gonna save your sorry butt when the grid crashes? Think again. When the world turns upside-down—and trust me, it will—you better have more than a nylon cocoon and YouTube tutorials to protect you from Mother Nature’s full-blown wrath. If you’re not learning how to build your shelter from dirt, sticks, and brains, you’re not surviving—you’re delaying your expiration date.

Let me be blunt: your comfort zone is a kill zone. The wild doesn’t care about your feelings. The cold will strip the warmth from your bones like a butcher skinning a deer, and the rain will seep into your soul. Shelter isn’t optional—it’s survival Priority Number One right after you can breathe and not bleed out.

So listen up. You want to live? You better start learning like your life depends on it—because it does.


10 Survival Skills for Building Natural Shelters

1. Terrain Scouting

Don’t just plop down in a pretty clearing like some clueless city hiker. Learn to read the land. Avoid valleys where cold air pools and floods form. Stay clear of ridgelines where wind turns your tarp into a damn parachute. Pick elevated, flat ground near resources—but not too near water, unless you’re asking to be eaten alive by mosquitoes or flash-flooded into the afterlife.

2. Natural Windbreaks

Wind will suck the heat out of you faster than a thief in the night. Find natural windbreaks—thick brush, rock walls, or tree lines—or build your own using stacked logs, woven branches, or even your backpack if you’re desperate.

3. Insulation Gathering

Don’t build a shelter and sleep on bare earth like a fool. You need insulation—pine needles, leaves, moss, bark. Pile it thick—at least six inches—to keep ground chill from eating you alive. Better itchy than dead.

4. Framework Building

If you can’t build a solid frame, you’re gonna wake up with the roof on your chest or, worse, hypothermic. Learn to latch, lash, and lean. Use a basic A-frame or lean-to. No nails? No excuses. Use paracord, vines, inner bark strips—whatever it takes.

5. Water Runoff Management

Ever slept in a puddle? It’s a bad time. Angle your roof steep and make a trench around your shelter. Don’t be lazy unless you want rainwater spooning you at 2 a.m.

6. Camouflage Construction

Not every threat in the wild walks on four legs. Sometimes it walks on two—and it’s armed. Blend in. Use mud, foliage, bark. Don’t light up your shelter like a Vegas sign. Stay hidden, stay alive.

7. Fire Integration

Learn how to build a reflector wall to bounce fire heat into your shelter. And yeah, don’t set the damn place on fire. Keep flames at a safe distance, use a fire pit, and always have your fire on the windward side.

8. Moisture Barrier Creation

You want to stay dry? Layer bark and large leaves to create a water-resistant roof. Hell, you can even line the outside with trash bags if you’re lucky enough to find one. Smart survivors repurpose everything.

9. Emergency Cordage

Cordage isn’t a luxury—it’s a lifeline. If you didn’t bring paracord, shame on you. But you can make rope from inner tree bark (like basswood), dry grasses, or even plastic trash. Twist, braid, tie—it better hold your weight, or your broken leg will be the least of your problems.

10. Structural Adaptability

No two scenarios are the same. Snow cave in winter. Debris hut in the fall. Jungle platform in the wet season. Desert rock shelter when the sun’s trying to kill you. If you can’t adapt, nature’s going to crush you like a bug.


3 DIY Survival Hacks from a Realist, Not a Blogger

1. The Trash Tarp Trick

You ever find an old plastic sheet or trash bags in the woods? Jackpot. Stitch them together with thorny branches or tie with bark cordage to make a waterproof tarp. Reinforce the corners with stones or folded sticks. It’s ugly, but it keeps you dry—and that keeps you alive.

2. Pine Sap Glue

Need to stick something? Make glue. Heat pine sap over fire till it bubbles, mix with crushed charcoal and a bit of animal dung or powdered bark. Let it cool, and boom—you’ve got nature’s epoxy. Use it to patch holes, fix tools, even seal cracks in your shelter roof.

3. Bark Paneling

Got trees? You’ve got shelter walls. Use a sharp rock or knife to peel large bark sheets off dead trees (don’t kill healthy ones—you’re not a moron). Stack them like shingles, lash to your frame, and you’ve got windproof, semi-waterproof walls. Way better than freezing behind a blue tarp some weekend warrior left behind.


Hard Truth: You’re Not Ready

If your plan for “bugging out” includes a REI shopping spree and wishful thinking, you’re already dead. Gear fails. Batteries die. Comfort ends. You need knowledge that lives in your hands—not in your gear bag.

Start now. Practice in the woods. Sleep without your tent. Build with your hands, bleed a little, screw up, and fix it. Get your body and mind used to discomfort, cold, and exhaustion. Shelter building is dirty, it’s hard, and it’s necessary.

Don’t be the idiot who panics because their zipper broke or their app didn’t load. You want to survive? Learn to fight the cold, the rain, the wind—and your own softness.


Final Word

Shelter is more than a roof—it’s your battle line against the wild. If you can master nature’s tools, if you can build with sticks and instinct, you can endure damn near anything. But if you’re waiting for someone to come rescue you, you’re already part of the forest floor.

Get smart. Get skilled. Get angry enough to outlast anything. Because when it all goes down, it won’t be the richest, the strongest, or the best equipped who survive—it’ll be the ones who refused to die stupid.

So build like your life depends on it. Because one day, it just might.

Survival Gold: Highest Calorie Canned Goods to Stockpile Now

Listen up, you soft city dwellers and clueless suburbanites. If you’re still prancing around thinking a few cans of soup and a bag of rice will keep you alive when the world goes sideways, you’re dead wrong. You’re not prepping; you’re playing pretend. When the grid goes down, when the shelves are bare, and when the chaos hits, you better have the right fuel to keep your body running. And that fuel isn’t some low-calorie, nutrient-deficient nonsense. It’s high-calorie, shelf-stable, and packed with the energy you need to survive. So, let’s talk about the real survival gold: the highest calorie canned goods you should be hoarding right now.


🔥 1. SPAM – The Calorie Beast

Let’s start with the king of canned calories: SPAM. Each can packs a whopping 1,080 calories. That’s right—1,080 calories of pure, unadulterated energy. It’s compact, shelf-stable, and doesn’t require refrigeration. In a survival situation, that’s gold. Sure, it’s not gourmet, but when you’re hungry and the world’s gone to hell, you’ll be thankful for every greasy bite.


🥩 2. Libby’s Corned Beef – Protein Powerhouse

Next up, Libby’s Corned Beef. This isn’t just a salty snack; it’s a protein-packed powerhouse. With 2.1 calories per gram, it’s dense, filling, and perfect for long-term storage. It’s been a staple in American pantries since 1868, and for good reason. When you’re rationing food, you want something that sticks with you.


🐟 3. Tuna in Oil – Omega-3 and Calories

Don’t overlook canned tuna in oil. While tuna in water is leaner, tuna in oil is calorie-dense and provides essential omega-3 fatty acids. A 5-ounce can can deliver around 160 calories, and that’s before you even factor in the oil. It’s lightweight, easy to store, and doesn’t require cooking. In a pinch, that’s invaluable.


🌶️ 4. Chili with Beans – Comfort and Calories

Chili with beans is more than just a comfort food; it’s a survival staple. A 19-ounce can can pack up to 540 calories. It’s hearty, filling, and provides a good balance of protein and carbohydrates. Plus, it’s easy to eat cold if you don’t have a way to heat it up. When the world is falling apart, a warm meal can do wonders for morale.


🥩 5. Roast Beef – Ready-to-Eat Protein

Canned roast beef is a must-have for any serious prepper. A 15-ounce can can deliver around 400 calories. It’s ready to eat, requires no preparation, and is packed with protein. When you’re on the move or don’t have the luxury of a full kitchen, this is the kind of food that keeps you going.


🍗 6. Chunk Chicken Breast – Lightweight Protein

Canned chunk chicken breast is another excellent protein source. With around 240 calories per can, it’s lightweight, easy to store, and versatile. You can eat it straight from the can, mix it with other foods, or use it in recipes. In a survival situation, versatility is key.


🥫 7. Canned Beans – Carbs and Fiber

Don’t forget about canned beans. They’re not just for chili; they’re a great source of carbohydrates and fiber. A cup of canned black beans can deliver around 200 calories. They’re shelf-stable, easy to store, and can be eaten cold if necessary. In a long-term survival situation, you’ll need carbs to keep your energy up.


🥥 8. Coconut Milk – High-Calorie Liquid

Coconut milk is often overlooked, but it’s a high-calorie liquid that’s perfect for cooking or drinking. A cup can deliver around 552 calories. It’s also shelf-stable and can add variety to your meals. When you’re stuck eating the same things day after day, a little variety can make a big difference.


🍫 9. Dark Chocolate – Sweet Survival

Yes, dark chocolate. It’s not just a treat; it’s a survival food. An ounce can deliver around 150–170 calories. It’s also packed with antioxidants and can boost morale. In a survival situation, keeping your spirits up is just as important as keeping your body fueled.preppingprotips.com


🍜 10. Instant Noodles – Quick and Calorie-Dense

Instant noodles are a prepper’s best friend. A package can deliver around 380 calories. They’re lightweight, easy to store, and cook quickly. In a survival situation, time and energy are precious commodities. Anything that saves you both is worth its weight in gold.


🔧 15 Survival Skills You Better Master (continued)

Fire Starting – Without fire, you’re dead.

Water Purification – You can’t drink from just any stream.

Shelter Building – Hypothermia kills.

Foraging – Know what’s edible and what’s not.

Hunting and Trapping – Food doesn’t just appear.

Fishing – Rivers and lakes are full of food if you know how to catch it.

Self-Defense – Not everyone is friendly.

Navigation – A map and compass are your best friends.

First Aid – Injuries happen; know how to treat them.


🛠️ 3 DIY Survival Hacks That Actually Work

You don’t need fancy gear. You need grit, brains, and a little ingenuity. These three hacks could make the difference between dying cold in a ditch or seeing another sunrise.


1. DIY Rocket Stove (Out of Cans)

Forget lugging a propane burner. You can build a small rocket stove with just a large coffee can, a smaller soup can, and a knife. Cut an L-shaped channel in the sides, nest the smaller can inside, and boom—you’ve got a high-efficiency burner that uses sticks and dry leaves to boil water in minutes. Lightweight, compact, and hot as hell. That’s the kind of stove that saves lives.


2. Crayon Fire Starters

That’s right—those dumb crayons you gave your kids can burn for up to 30 minutes each. Wrap a few in foil, keep them in your bug-out bag, and when you need to get a fire going in wet weather or high wind, light the paper wrapper. You’ll thank me when your hands are frozen and your lighter’s sputtering.


3. Plastic Bottle Fishing Kit

Take a water bottle, wrap 10-15 feet of fishing line around it, tuck in a couple of hooks and sinkers, and seal the whole thing up. Now you’ve got a compact, waterproof fishing kit that can catch you dinner in any river, lake, or pond. Lightweight, stealthy, effective—like every survival tool should be.


🧭 Final Thoughts from an Angry Survivalist

Here’s the ugly truth: Most people aren’t gonna make it. They’ll run to the grocery store three days too late, get trampled for a loaf of bread, and starve in the comfort of their own panic.

But not you.

You’re here because you see the storm on the horizon. You know that survival isn’t about who has the nicest solar generator or the fanciest bug-out location. It’s about planning. It’s about discipline. And yes—it’s about calories.

Canned food isn’t just convenient—it’s currency, it’s fuel, and it’s life insurance. And every single can you stack today is a bullet dodged tomorrow.

So don’t listen to the soft voices telling you, “you don’t need that much food,” or “you’re being paranoid.” No, you’re being prepared. And when things go sideways—and they will—you’ll be alive, well-fed, and ready to rebuild while the rest are curled up in their living rooms, wondering where the Wi-Fi went.

Stock up. Train up. And for the love of survival—don’t wait.

This isn’t a game. It’s survival. And only the prepared will eat.