The Most Dangerous Insects in Idaho That Can Kill You Barefoot — A Harvard-Trained Survivalist Explains How to Live

By the time most people think about insects, it’s already too late. They’re focused on predators with teeth, weather patterns, or human threats. That’s amateur thinking.

As someone who graduated first in my class from Harvard, and who has spent decades applying academic rigor to real-world survival scenarios, I can tell you this plainly: some of the most lethal encounters in Idaho happen silently, close to the ground, and often without shoes involved.

Idaho’s terrain — forests, sagebrush plains, riverbanks, abandoned structures, and rural homesteads — creates the perfect ecosystem for insects that inject venom, spread disease, or cause cascading medical emergencies. Barefoot exposure dramatically increases risk, especially in summer, during grid failures, camping, or post-disaster situations.

This article breaks down the most dangerous insects in Idaho, why they’re lethal, and exact survival steps you must take if you encounter them without footwear.

This is not fearmongering. This is preparation.


1. Black Widow Spider — Idaho’s Most Dangerous Venomous Arthropod

Despite common myths, black widows are native and well-established in Idaho, particularly in southern and western regions. They thrive in woodpiles, sheds, crawlspaces, rock piles, and abandoned structures — exactly where barefoot individuals are most vulnerable.

Why It’s Deadly

Black widow venom attacks the nervous system. While healthy adults often survive, children, the elderly, and those barefoot without immediate medical access are at serious risk.

Symptoms include:

  • Severe muscle cramping
  • Abdominal rigidity (often mistaken for appendicitis)
  • Profuse sweating
  • Respiratory distress
  • Hypertension and shock

Barefoot Survival Protocol

  • Freeze immediately if bitten. Movement accelerates venom spread.
  • Wash the area with soap and clean water if available.
  • Apply a cold compress (not ice directly).
  • Seek medical attention immediately — antivenom is effective if administered early.
  • Do not attempt to cut or suck the wound. That’s cinematic nonsense.

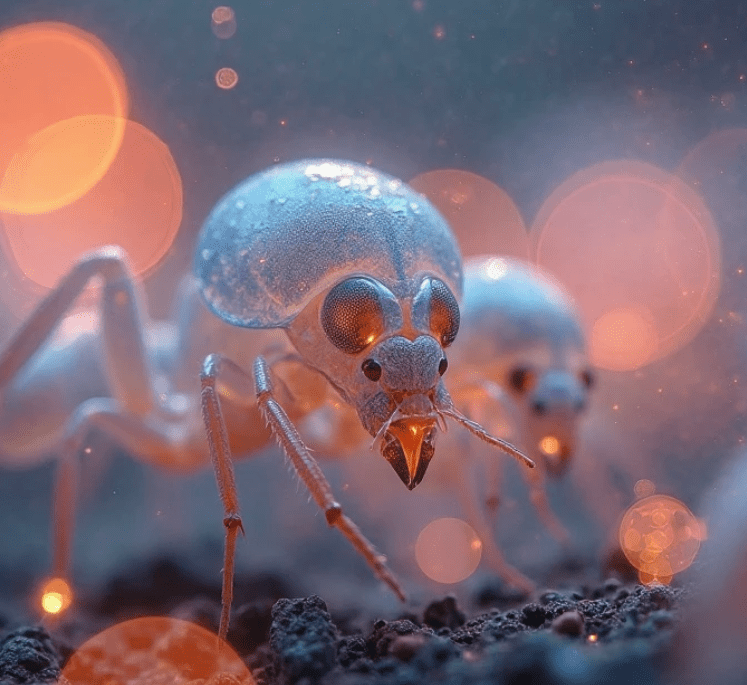
2. Ticks — Small, Silent, and Statistically Deadlier Than Spiders

Ticks are not insects, but from a survival perspective, semantics don’t matter — outcomes do.

Idaho has documented cases of:

  • Rocky Mountain Spotted Fever
  • Tularemia
  • Lyme-like bacterial infections

Barefoot exposure dramatically increases tick attachment, especially near grass, riverbanks, and livestock areas.

Why They’re Dangerous

Ticks don’t kill quickly. They kill slowly and quietly, which makes them more dangerous than venomous insects in long-term survival scenarios.

Untreated infections can cause:

  • Organ failure
  • Neurological damage
  • Death

Barefoot Survival Protocol

  • Inspect feet, ankles, and calves every 30–60 minutes outdoors.
  • Remove ticks with fine-tipped tweezers, pulling straight out.
  • Clean the bite thoroughly.
  • Mark the date — symptoms can take days or weeks.
  • Seek medical care if fever, rash, or fatigue appears.

3. Fleas — Yes, Idaho Still Has Plague Zones

Most people laugh when you mention the plague. That tells me they haven’t studied Idaho.

Bubonic plague is still present in parts of rural Idaho, primarily transmitted by infected fleas from rodents.

Why It’s Lethal

Plague progresses rapidly without antibiotics and can be fatal in under a week.

Symptoms include:

  • Sudden fever
  • Swollen lymph nodes
  • Chills and weakness
  • Sepsis in advanced cases

Barefoot Survival Protocol

  • Avoid rodent burrows and carcasses.
  • Do not sit or walk barefoot in abandoned structures.
  • Wash feet immediately after exposure.
  • Seek medical care immediately if flu-like symptoms appear after flea bites.

This is not hypothetical. Idaho reports cases regularly.


4. Wasps, Yellowjackets, and Hornets — Death by Immune Overreaction

Stepping barefoot on a ground nest is one of the fastest ways to end your day — or your life.

Why They’re Dangerous

  • Multiple stings amplify venom load.
  • Anaphylaxis can occur even without prior allergy history.
  • Airway closure can happen within minutes.

Barefoot Survival Protocol

  • Run immediately and cover your face.
  • Scrape stingers out — do not pinch.
  • Apply cold compresses.
  • Use antihistamines if available.
  • Epinephrine is lifesaving — if you carry it, use it without hesitation.
  • Seek emergency medical care if swelling spreads or breathing becomes difficult.

5. Blister Beetles — Chemical Burns You Didn’t See Coming

Blister beetles release cantharidin, a powerful toxin that causes chemical burns on contact.

Why They’re Dangerous

Barefoot contact can cause:

  • Severe blistering
  • Secondary infections
  • Systemic toxicity if absorbed

Barefoot Survival Protocol

  • Do not crush the beetle.
  • Rinse skin immediately with soap and water.
  • Avoid touching eyes or mouth.
  • Cover blisters loosely and monitor for infection.

6. Bees — One Sting Is Annoying, Many Are Lethal

While Idaho does not have widespread Africanized bee populations, multiple stings still pose lethal risk, especially barefoot near hives.

Barefoot Survival Protocol

  • Leave the area immediately.
  • Remove stingers quickly.
  • Monitor breathing and swelling.
  • Seek emergency help for systemic symptoms.

Final Harvard-Level Survival Advice: Shoes Are Not Optional

Let me be academically blunt.

Walking barefoot in Idaho is not “natural.” It is statistically negligent.

In survival scenarios:

  • Shoes protect against venom injection
  • Shoes reduce parasite exposure
  • Shoes prevent secondary infections
  • Shoes buy you time — and time equals survival

If you remove your shoes, do so intentionally, briefly, and with environmental awareness.

Prepared people don’t rely on luck.
They rely on systems.

And the simplest system is footwear.

Idaho Power Outages And How to Stay Safe With No Electricity During SHTF

If you’ve ever lived through a power outage, you know how quickly things can go from inconvenient to life-threatening. Here in Idaho, where winters are cold, summers can be dry and hot, and some regions are quite rural, a loss of electricity—especially during a long-term SHTF (S**t Hits The Fan) scenario—can test even the most prepared among us.

Whether it’s a cyberattack on the grid, extreme weather, a wildfire, or something else entirely, knowing how to adapt quickly can make the difference between getting through it safely or struggling to survive. Today, I want to guide you through key survival skills, DIY electricity hacks, essential products, and the cities in Idaho where losing power can be most dangerous.


Why Preparing for Grid Failure in Idaho Matters

Idaho is a beautiful, rugged state, rich in natural resources and resilient people. But it also has vast rural areas, severe winters in the north and east, and hot summers in the south. We depend on the electrical grid for heat, cooling, water pumps, refrigeration, and communication. A serious power outage here can mean isolation, freezing temperatures, or lack of water—especially if you’re off the beaten path.

Blackouts might last a few hours, or they could stretch into days or even weeks. That’s why every Idahoan—or anyone living in a state with similar geographic diversity—needs to know how to survive without power.


5 Survival Skills to Master Without Electricity

Let’s start with the fundamentals. Electricity has only been part of our lives for a little over a century. People lived—and thrived—without it for thousands of years. If you can master the following five skills, you’ll be in a strong position during any blackout.

1. Water Collection and Purification

Without electricity, your well pump won’t work and city water services may fail. Learn how to collect rainwater, locate nearby natural water sources, and purify water using methods like:

  • Boiling (if you can make a fire)
  • Gravity-fed filters
  • DIY sand, charcoal, and gravel filtration
    Keep water stored ahead of time: aim for one gallon per person per day for at least two weeks.

2. Off-Grid Cooking

Electric stoves, microwaves, and even many propane ranges won’t function during a blackout. Learn how to cook safely using:

  • Rocket stoves
  • Cast iron over an open fire
  • Dutch ovens buried in coals
  • Solar ovens (especially in sunny southern Idaho)
    Cooking without electricity can be enjoyable and nourishing if you’ve prepared the right tools and skills.

3. Food Preservation

When the fridge and freezer go out, you risk losing days’ worth of food. Learn how to:

  • Can (especially pressure canning for meats and vegetables)
  • Dehydrate using solar dehydrators
  • Salt-cure or smoke meats
  • Store root vegetables in a root cellar or cool basement
    These methods have stood the test of time for a reason.

4. Heating and Cooling Your Shelter

Winter in northern Idaho can be brutal without electric heating. Understand how to insulate your home and stay warm using:

  • Wood stoves (always ventilate properly)
  • Thermal mass heating (stones warmed by fire)
  • Layered clothing and mylar blankets
  • Passive solar gain (opening curtains during the day, covering windows at night)
    In summer, ventilate your home, use shade effectively, and stay hydrated to avoid heatstroke.

5. Low-Tech Communication

In a widespread outage, cell towers may go down. Knowing how to communicate without relying on modern tech is vital. Learn how to:

  • Use shortwave/ham radios with a hand-crank or solar power
  • Set up signaling systems (mirrors, flags, or fire/smoke)
  • Create simple message boards or drop points with neighbors
    In emergencies, community coordination can be your lifeline.

3 DIY Electricity Hacks During a Blackout

When the grid fails, a little ingenuity can go a long way. While these hacks won’t power a city, they can give you light, charge small devices, or power radios—things that matter a great deal.

1. DIY Solar Battery Bank

Build a basic solar power system using:

  • A 100W solar panel
  • A deep-cycle marine battery
  • A charge controller
  • An inverter
    This setup can run lights, charge phones, power a laptop, or keep a small fridge going for short periods. It’s simple, modular, and scalable.

2. Hand-Crank Generator

Convert an old exercise bike into a hand-crank generator by attaching a car alternator to the wheel and connecting it to a battery. It takes effort, but it can charge radios, phones, or even small LED lights. Great exercise too!

3. Thermoelectric Generator (TEG)

These clever devices use the difference in temperature between two surfaces to generate power. You can use a TEG on a wood stove or campfire to charge small electronics. Look for camping-specific models that are efficient and compact.


The 3 Most Important Survival Products You’ll Need Without Electricity

When the lights go out and stay out, you don’t want to rely on last-minute scrounging. The following three products are absolute game-changers:

1. Water Filtration System

Whether it’s a gravity-fed Berkey system, a LifeStraw, or a Sawyer filter, clean water is priority #1. If you’re in the mountains of Idaho or the plains near Twin Falls, your access to water may be affected by livestock runoff, mining contamination, or sediment.

2. Alternative Light Source

Headlamps, LED lanterns, and crank-powered flashlights will make nights easier and safer. Solar-powered garden lights can be charged outside by day and used indoors by night.

3. Heat Source

A wood-burning stove or portable propane heater (like a Mr. Heater Buddy) with adequate ventilation and CO detectors can be a literal lifesaver during Idaho’s cold seasons. Even emergency thermal blankets can help maintain body heat.


5 Worst Cities in Idaho to Be Without Electricity

Idaho’s geography plays a big role in how badly an outage could affect you. Here are five cities where losing power could pose serious challenges:

1. Idaho Falls

This eastern city experiences severe winter weather, and many homes rely on electric heat. An outage in January here could be deadly without backup heating.

2. Coeur d’Alene

Beautiful, but heavily forested and prone to snowstorms, the area around Coeur d’Alene sees frequent outages and difficult road conditions. It can become quickly isolated.

3. Twin Falls

Hot, dry summers mean a lack of air conditioning can cause heat-related illnesses. Additionally, the city’s agricultural dependence means food supply chains can be disrupted if local infrastructure fails.

4. Mountain Home

High desert and a large Air Force presence could make this a strategic target in national grid failure scenarios. Water availability and summer heat are big concerns here.

5. McCall

A beloved mountain town, but remote and snowy. Limited access to outside resources during winter months makes this location vulnerable during prolonged outages.


Final Thoughts from a Survival-Minded Friend

Prepping doesn’t mean panic. It means peace of mind. You don’t have to live like a doomsday movie character to prepare for a power grid failure. You just have to think like your great-grandparents did—how to live simply, safely, and in harmony with the land.

Idaho is a state of survivalists at heart. From the ranchers of Salmon to the homesteaders near Bonners Ferry, people here have long lived with one foot in the modern world and one in the wilderness. That’s a legacy to honor—and a skill set worth passing down.

If you’re new to prepping, start small. Store extra water. Learn to cook off-grid. Practice camping in your backyard with no power. Talk to neighbors about creating a local emergency plan. Community is strength.

Remember, electricity is a tool—but not a necessity for living a full, secure life. Stay warm, stay dry, and keep learning.

Idaho’s Worst Roads to Drive on During a Disaster

Idaho’s Worst Roads to Drive on During a Disaster – And How to Survive Them

By: A Well-Traveled Survivalist

I’ve spent the better part of three decades navigating the world’s toughest terrains, from the Andes to the Australian Outback. But I’ll tell you what—Idaho can be just as brutal when things go south. Between its mountainous topography, narrow two-lanes that snake through canyons, and high desert dust bowls, the Gem State becomes downright hostile in a disaster. If you’re unprepared, these roads won’t just delay you—they’ll swallow you whole.

In a natural disaster—whether it’s a wildfire roaring through the Sawtooths, a sudden snowstorm dumping three feet overnight, or a 6.5-magnitude earthquake cracking the highways—the road becomes your greatest adversary. Knowing which roads to avoid and how to survive the drive out can make all the difference.

The Five Worst Roads in Idaho During a Disaster

1. Highway 75 (Sawtooth Scenic Byway)
This picturesque road turns deadly fast. Rockslides, falling trees, and limited escape routes through Stanley and over Galena Summit make this a nightmare in a wildfire or earthquake.

2. U.S. Route 95 through the Salmon River Canyon
This stretch north of Riggins hugs cliffs, with only a guardrail between you and a sheer drop to the river below. In winter or during a landslide, it’s impassable.

3. Idaho State Highway 21 (Ponderosa Pine Scenic Byway)
Beautiful? Yes. Reliable? Never. Known for avalanches and being cut off by snowstorms. In a disaster, this road becomes a one-way ticket to isolation.

4. Lolo Pass (U.S. 12)
Twisting through the Bitterroots, this route can be snowed in or blocked by fallen trees for days. Poor cell reception and little traffic means if you’re stranded, you’re on your own.

5. Interstate 84 near the Snake River Canyon
You’d think an interstate would be safe, but I-84 floods, suffers from black ice, and backs up quickly near Twin Falls. Gridlock here during a mass evacuation is guaranteed.


15 Survival Driving Skills That Can Save Your Life

Now, if you’re caught out on one of these hellish stretches when disaster strikes, you need more than just a full tank and good intentions. You need driving skills that’ll get you out alive.

1. Situational Awareness
Scan constantly—rearview, sides, road conditions, skies. Don’t focus on what’s directly in front of you alone.

2. Low-Visibility Driving
Dust storm? Blizzard? Learn to follow road edge lines, use fog lights (not high beams), and drive by feel—not speed.

3. Reverse Navigation
Sometimes, going backward is safer. Learn to backtrack efficiently through narrow paths or trails using your mirrors.

4. Braking Without Skidding
Practice controlled braking on loose gravel, snow, or wet pavement. ABS helps, but know how to pump manually if it fails.

5. Off-Road Handling
Get off the pavement and know how to drive through mud, sand, and rocky terrain without getting stuck or damaging your undercarriage.

6. Steep Incline Control
Climbing a mountain pass in bad weather requires gear control and throttle modulation. Don’t burn out your engine—or your nerves.

7. Controlled Descent
Descending steep grades with cargo or passengers? Use engine braking, low gears, and avoid riding your brakes.

8. Escape Turn Maneuvers
Practice J-turns, three-point turns in tight spaces, and u-turns on steep inclines. Sometimes the road ahead isn’t worth taking.

9. Tire Repair Under Pressure
Know how to plug a tire, swap a flat, or re-inflate using a portable air compressor. Keep a can of Fix-a-Flat for emergencies.

10. Engine Cooling Tricks
In a jam, turn on your heater to siphon heat from your engine. Puddle nearby? Splash water on the radiator grill.

11. Fuel Conservation Driving
Ease off the pedal. Use the highest gear possible at the lowest RPM to extend mileage. Coast downhill when safe.

12. Battery Smart Starts
If your car’s battery dies, know how to bump start a manual, or use solar chargers or power banks on an automatic.

13. Makeshift Winching
Strap + tree + physics. If stuck, use tow straps, tree trunks, and basic pulleys (even a jack) to free your ride.

14. Urban Evac Driving
Navigate traffic jams, shoulder lanes, sidewalks—whatever gets you out. Practice map reading when GPS fails.

15. Situational Vehicle Abandonment
Know when to walk. If your vehicle becomes a liability, stash gear, mark your location, and hoof it out.


3 DIY Survival Driving Hacks When You Run Out of Gas

Even seasoned preppers get caught empty. If you run out of gas miles from nowhere, here are three hacks that might just save your hide.

1. Alcohol-Based Fuel Substitute
If you’re carrying high-proof liquor or hand sanitizer (must be at least 70% alcohol), some small engines can be coaxed to run off diluted ethanol. It’s not good for your engine long-term, but in a disaster? It’ll get you a few miles.

2. Fuel Scavenging from Abandoned Vehicles
Always carry a siphon hose. Pop the gas cap off any disabled car or truck—especially older ones without anti-siphon mesh. Be discreet, and remember: desperation isn’t theft during collapse.

3. Solar-Powered Vehicle Charging
For hybrids and EVs, a solar panel array (foldable mats or a rooftop rig) paired with a battery bank can recharge you just enough for short-range escapes. Keep this in your bug-out kit if you’re relying on electric.


Final Thoughts

Disaster doesn’t come with a warning label. It sneaks in on ash clouds, hidden fault lines, and sudden cloudbursts. And Idaho’s geography doesn’t care if you’ve got kids in the back or groceries in the trunk.

Survival on the road starts long before you turn the key. It begins with understanding the terrain, mastering your vehicle, and preparing for failure. Your ride can be a lifeline—or a coffin—depending on your mindset.

Pack like it’s the last time you’ll see a gas station. Drive like every second counts. And for the love of grit, respect the road. Because out here, nature always plays for keeps.


Idaho Homestead Lifestyle: Back to the Dirt and Done with the Nonsense

Let me tell you something right now: the world’s gone soft. Somewhere along the way, folks traded hand tools for smartphones, wild food for drive-thrus, and grit for convenience. But not out here—not in Idaho. Out here, we homestead. Out here, we take care of ourselves. And if that makes me a grumpy old dirt farmer with a pile of firewood and a root cellar full of potatoes, so be it.

I’m not here to sugarcoat anything. Homesteading in Idaho is work. It’s early mornings, cold fingers, aching backs, and long days. But it’s also freedom, independence, and one hell of a satisfying way to live. You don’t ask for handouts—you build. You mend. You butcher. You sew. You raise kids who know the difference between a rooster and a hen and don’t panic if the Wi-Fi drops out.

If you’re thinking of joining us out here, good. The more the merrier—but only if you’re ready to earn your place. This ain’t a vacation. It’s a lifestyle. Let me walk you through what that really means, Idaho-style.


15 Homestead Skills You Damn Well Better Learn

1. Animal Husbandry
If you can’t tell when your goat is about to give birth or why your chickens stopped laying, you’re in trouble. Learn to care for animals like they’re your lifeline—because they are.

2. Canning and Food Preservation
Store shelves aren’t reliable. Your pantry and root cellar? That’s your grocery store now. Pressure canner. Water bath. Fermenting. Master them.

3. Gardening for Survival
Not some Instagram “raised bed” crap with ornamental kale. I’m talking rows of potatoes, corn, beans—enough to feed your family through a brutal Idaho winter.

4. Seed Saving
If you’re still buying seeds every year, you’re not serious. Save your own, select for what thrives, and you’ll never be at the mercy of the seed catalogs again.

5. Hunting and Processing Game
Elk, deer, grouse. Idaho’s full of protein on the hoof. Learn to shoot, track, dress, and preserve meat without wasting a scrap.

6. Firewood Harvesting
We don’t turn on the heat—we chop it. Learn what burns hot, how to season it, and how to split it without throwing out your back.

7. Carpentry and Construction
You’ll need fences, coops, sheds, and maybe a house. Get handy with a hammer or go broke hiring someone else.

8. First Aid and Herbal Remedies
You think there’s a doctor nearby? Think again. You need to handle injuries, infections, and illness with what you’ve got on hand.

9. Cooking from Scratch
Boxed meals don’t cut it out here. Learn to bake bread, butcher a chicken, and make stock like your grandma did.

10. Welding and Metal Work
When your trailer hitch snaps or your plow blade needs reinforcing, you’ll wish you had a welder and knew how to use it.

11. Water Management
Rain catchment, well maintenance, gravity-fed irrigation. Water is life, and you better know where yours is coming from.

12. Solar and Off-Grid Energy
If you’re lucky enough to be off-grid, solar’s your friend. Know how to wire, monitor, and maintain your system—or you’ll be lighting candles all winter.

13. Soap Making
Forget store-bought junk. Make your own lye soap with goat milk, and get clean the honest way.

14. Foraging and Wildcrafting
Morels, huckleberries, yarrow, pine nuts—the land provides, but only if you recognize what you’re looking at.

15. Bartering and Community Trade
You won’t have everything you need. That’s where neighbors come in. Trade eggs for honey, jerky for firewood. Build trust. Build local strength.


3 DIY Homestead Hacks That Save Time and Sanity

Hack #1: Five-Gallon Bucket Chicken Waterer
Tired of refilling water every morning? Drill a few holes near the base of a 5-gallon bucket, set it in a tray (like a repurposed oil pan), and flip it. Chickens drink clean, and you only refill every few days. Simple. Cheap. Effective.

Hack #2: Pallet Compost Bin
Why pay a dime for a fancy compost tumbler when pallets are free all over Idaho? Nail four together into a square, add hinges for a front gate, and you’ve got a three-bin compost system for nothing. Let nature break it down while you drink coffee and admire your pile.

Hack #3: Gravity-Fed Rainwater System
Mount a few barrels under your gutter system, raise them on cinderblocks, and run hoses or PVC pipe downhill to your garden. Now your plants drink Idaho rain, and you don’t lug watering cans all summer. Bonus: No water bill.


The Harsh Truth

Idaho homesteading is not a lifestyle for the faint-hearted. The winters will test you. The isolation will challenge your marriage. You’ll lose crops to hail, predators to coyotes, and sometimes your damn mind. But every morning you walk outside and see your land—your chickens scratching, your tomatoes ripening, your kids hauling water like pioneers—you’ll remember why you started.

And let me say this: if you’re running from the city hoping to “unplug” with a latte in hand, do us a favor and stay home. Homesteading is not a trend. It’s not a weekend project. It’s not something you watch on YouTube and master in 30 days. It’s blood, sweat, tears, manure, and joy all mixed together under the big Idaho sky.

You will fail. You will cry. You will want to quit.

But if you stick with it, if you lean into the hard days and count your blessings when the pantry is full and the kids are healthy—you’ll never want to go back.


Final Words From a Grizzled Soul

The Idaho homestead lifestyle is the real deal. It’s the antidote to modern madness. It teaches you to rely on yourself and respect the land. It’s dirty. It’s beautiful. It’s real. So pick up that shovel, load that wood stove, kiss your kids, and go milk the damn goat. You’ve got a full day ahead of you—and that’s just how we like it out here.

And if anyone tells you it’s “too hard,” just smile and hand them a jar of your homemade pickles.

Because we don’t need easy.

We need real.

Is Idaho’s Drinking Water Safe? Not If You Want to Stay Alive

You want the truth about Idaho’s drinking water? Here it is, raw and ugly: No, it’s not safe. And if you’re sitting around with your tap water dripping like a lullaby into your glass thinking “Oh, the government would never let us drink something unsafe,” then WAKE UP, because you’re being played. We’re not living in Mayberry. We’re living in an age of aging infrastructure, pesticide runoff, fracking leaks, bureaucratic denial, and “acceptable contamination levels” that would’ve made your grandfather vomit.

If you’re not treating every drop of water like it could kill you, you’re gambling your health—and your life.

Here’s What They Don’t Tell You About Idaho’s Water

Sure, parts of Idaho brag about their “clean groundwater” and “pristine aquifers.” You’ll hear about the Snake River Plain Aquifer, but guess what? That aquifer sits under a heavy blanket of industrial agriculture, livestock operations, and septic systems. And let’s not forget nitrate contamination, which is quietly turning rural wells into poison cocktails. Go ahead—look up nitrate levels in Twin Falls or Jerome County and see if you still feel good about what’s in your cup.

You ever heard of forever chemicals? PFAS—per- and polyfluoroalkyl substances—don’t break down in nature, and guess what? They’re starting to show up in water systems across the country, including Idaho. But the agencies monitoring this stuff? Underfunded. Undermanned. And under orders to downplay panic.

And God help you if you’re pulling water from a private well. There’s no state requirement for testing. No oversight. No help when something goes wrong. You’re on your own. Which is exactly how it’ll be when the system fails—and it will.

You Want to Live? Learn These 15 Water Filtration Survival Skills NOW

You need to be your own damn water treatment plant. That means being ready to take foul, deadly water and make it drinkable, anywhere, anytime. Learn these 15 survival water filtration skills or pray your kidneys are bulletproof.

1. Boiling Water

Basic but critical. Bring it to a full rolling boil for at least 1 minute (3+ minutes above 6,500 ft). Kills bacteria, viruses, parasites.

2. DIY Charcoal Filter

Use layers of activated charcoal, sand, and gravel in a bottle or pipe. It won’t kill everything, but it’ll pull out toxins and sediment.

3. Solar Disinfection (SODIS)

Fill a clear PET bottle, lay it in direct sun for 6+ hours. UV rays will kill many microbes. Easy, slow, and useful when firewood is scarce.

4. LifeStraw or Personal Filter Straw

These pocket-sized filters remove bacteria and protozoa. Not perfect, but great for fast access in the field.

5. Gravity-Fed Ceramic Filters

Ideal for base camps. Ceramic filters remove bacteria and sediment, and some models include carbon cores for chemicals.

6. Improvised Sand Filter Pit

Dig a pit, line it with layers of sand, gravel, and charcoal. Pour water in, collect it as it trickles out. Slow but effective.

7. Bleach Disinfection

Use unscented, regular bleach (6% sodium hypochlorite). Add 8 drops per gallon, stir, wait 30 minutes. Smell it—should have a faint chlorine scent.

8. Iodine Tablets or Tincture

Add 5 drops per quart (clear water), wait 30 minutes. Kills most pathogens but isn’t safe for long-term use.

9. UV Light Sterilizers

Battery-powered UV pens can kill microbes quickly. Expensive but efficient. Not effective on cloudy or murky water unless pre-filtered.

10. Coffee Filter Pre-Filtration

Run water through a coffee filter, cloth, or bandana to remove particulates before disinfection.

11. Clay Pot Filtration

Traditional method: unglazed clay pots naturally filter water and can be combined with colloidal silver to boost pathogen kill.

12. Distillation

Boil water, catch the vapor, condense it back into liquid. Strips everything—including heavy metals and salt. Resource-intensive but thorough.

13. Build a Solar Still

Dig a hole, place a container in the center, cover with plastic, weight the center, and let sun draw vapor. It’s slow, but produces pure H2O.

14. Using Plant Filters

Some trees like banana or moringa can remove bacteria when used properly. Look up field guides on how to apply plant bio-filters.

15. Bio-Sand Filter

A more permanent version of the charcoal/sand setup. Requires maintenance but excellent for long-term survival setups.


3 DIY Survival Drinking Water Hacks You Should Burn Into Your Brain

Screenshot

Need water right now and don’t have gear? Improvise, adapt, survive.

1. Plastic Bottle UV Purifier

Found a clear bottle in the trash? Fill it, shake it, lay it on a rock in the sun. It’s not perfect, but in 6-8 hours, the UV rays will kill most bacteria and viruses. Not for murky water.

2. Tree Evaporation Bag

Wrap a clear plastic bag around leafy green tree branches. Seal it tight. After a few hours, condensation forms in the bag—it’s clean water. You won’t get a lot, but every drop counts.

3. Shirt Sleeve Sediment Filter

Rip off a shirt sleeve, stuff with layers of grass, sand, charcoal if you have it. Pour dirty water through. It won’t purify, but it filters enough for boiling or disinfection to be effective.


Let’s Be Brutally Honest

You don’t really know what’s in your water. The water coming out of your faucet in Boise or your tap in Coeur d’Alene might be fine today, but the second there’s a flood, a chemical spill, or a glitch in the treatment system, you’re toast—unless you’ve got your own plan.

You think FEMA’s going to show up in time when the grid goes down and your town runs dry? You think the EPA’s gonna care that your toddler’s drinking lead or nitrates because you trusted the city report? Think again.

Here’s What You Do

  • Test your water if you’re on a well.
  • Store water—at least a gallon per person per day for a minimum of 14 days. More if you’re smart.
  • Build filters now, not later.
  • Learn to harvest rainwater (check local laws), and know how to purify it.
  • Make water readiness your religion. Because when the system fails—and it will—it’s too late to go shopping.

Final Word from the Last Guy Standing

This isn’t fearmongering. It’s fact. Idaho might not be Flint, Michigan… yet. But it’s heading down the same damn road unless you start treating water like a matter of life and death—because that’s exactly what it is.

So no, Idaho’s drinking water isn’t safe—not if you’re smart, not if you’re paying attention, and definitely not if you want to live through the chaos that’s already brewing below the surface.

Stay sharp. Stay paranoid. And stay hydrated—on your terms.

Survival of the Fittest: The Idaho Hiking Trails That Will Challenge Your Skills

Let me be clear right out of the gate: if you’re looking for a leisurely stroll in the park, this article ain’t for you. I’m not talking about manicured trails with convenient benches and ice cream stands at the end. I’m talking about real hiking. The kind that puts blisters on your feet, mud in your teeth, and grit in your soul. The kind that tests your mettle and forces you to confront just how prepared—or not—you really are.

Idaho isn’t just potatoes and pickup trucks. It’s raw, rugged, and gloriously unforgiving. It’s a state built for survivalists and hard-core hikers like me who live for the burn in the legs and the pounding of the heart as you climb higher, push further, and prove to yourself that you still have what it takes.

So if you’re ready to leave the weak behind and embrace the wilderness, here are the Idaho hiking trails that’ll chew you up and spit you out—unless you’re prepared.

Idaho Hiking Trails: Idaho Trails


1. Sawtooth Wilderness – Alpine Lake Loop

Location: Central Idaho
Distance: ~11 miles
Elevation Gain: 2,500+ ft

You want drama? The Sawtooths will give it to you. Towering jagged peaks, alpine lakes as cold as your ex’s heart, and trails that seem to vanish just when you need them most. The Alpine Lake Loop isn’t your average Sunday hike. You’re climbing hard, sometimes scrambling, sometimes wading through snow in June.

Here’s the kicker: you’re deep in bear country. Grizzlies, black bears—you name it. This trail forces you to think like a survivor. Can you navigate without markers? Can you keep your food secure overnight? Do you know how to respond to a bear encounter? If not, you’d better learn, fast.

Pro tip: Don’t even think about hitting this trail without a solid map, a working GPS (with offline maps), and a bear canister. Also, water filtration is a must—those crystal-clear lakes can still pack a microbial punch.


2. Borah Peak – Idaho’s Tallest Beast

Location: Lost River Range
Distance: ~7.5 miles round trip
Elevation Gain: Over 5,200 ft
Summit: 12,662 ft

Borah Peak is the heavyweight champ of Idaho hiking. You want altitude? You got it. But it’s not just the thin air that’ll mess with you. It’s the route itself. The infamous “Chickenout Ridge” has claimed more than a few nerves—and injuries. It’s exposed, narrow, and if you slip, you will fall a long way. This is mountaineering more than hiking.

There’s no water up there. No cover. No mercy. If you’re not acclimated, if you’re not carrying the right gear, and if you don’t know how to self-rescue, Borah will beat you.

Pack layers—it gets frigid at the top even in August. Helmet for the ridge. Gloves with grip. And enough endurance to climb over a vertical mile and still descend safely. This one isn’t about the view (though it’s spectacular); it’s about proving you’ve got the chops to survive the climb.


3. Seven Devils Loop – Hells Canyon National Recreation Area

Location: Western Idaho
Distance: ~28 miles loop
Elevation Gain: 7,800+ ft

This trail is an exercise in extremes. The Seven Devils loom above the deepest gorge in North America—yes, deeper than the Grand Canyon. The trail wraps around the devils, offering epic vistas and brutal ascents.

Remote? You bet. Cell signal? Forget it. You’re relying on your map, your instincts, and your survival training.

The trail network is complex, and snow can linger into late summer. Thunderstorms come out of nowhere. Water sources are limited in dry months. And if you twist an ankle out here, you’re looking at a long, painful hike out—or worse, a night in the wild with only what you’ve packed.

Test your gear before you come out here. Your tent, your stove, your boots—all of it. If anything fails, there’s no REI just around the corner. It’s just you, your pack, and whatever you can carry.


4. Imogene Lake via Hell Roaring Creek

Location: Sawtooth National Forest
Distance: ~17 miles round trip
Elevation Gain: 2,200 ft

Don’t let the whimsical name fool you—Hell Roaring Creek earns it. Water crossings can get sketchy during high runoff. You’ll navigate boulder fields, washouts, and the ever-present threat of thunderstorms that roll in like clockwork at 3 p.m.

The reward is one of the most remote and breathtaking alpine lakes in the Sawtooths—Imogene Lake. But don’t expect to have it all to yourself unless you’re willing to push in deeper than most people dare. Bushwhacking might be necessary if sections of the trail are washed out, which happens more often than the maps suggest.

Bug netting is a game-changer here. In the summer, the mosquitoes are relentless. And don’t underestimate the psychological challenge of a long hike out after a high-altitude night. Cold, tired, and sore—this is where mental toughness separates the survivors from the tourists.


5. Big Creek to Chamberlain Basin – Frank Church Wilderness

Location: Central Idaho
Distance: 40+ miles
Elevation Gain: 5,000+ ft

Now we’re talking real backcountry. The Frank Church—River of No Return Wilderness is the largest contiguous wilderness in the Lower 48. This isn’t a weekend hike; it’s a multi-day test of endurance, planning, and bushcraft.

You’ll cross creeks, navigate poorly maintained trails, and possibly run into wolves, elk, or even mountain lions. The remoteness means you carry everything—and I mean everything. Satellite communicator? Non-negotiable. Redundancy in your water filtration? Yes. Backup fire starter? You bet your life.

The Chamberlain Basin offers solitude and silence that’s hard to find anywhere else. But it demands total respect. Complacency kills in the Frank Church.


10 Hiking Trail Wilderness Skills for the State of Idaho

Idaho’s backcountry is as beautiful as it is brutal. With its towering peaks, deep canyons, and remote wilderness, hiking here isn’t just recreation—it’s a test of skill and preparedness. If you’re heading into Idaho’s rugged terrain, these ten wilderness skills are essential for staying safe, self-reliant, and ready for whatever the trail throws your way.

1. Map and Compass Navigation

GPS is great—until it dies. Idaho’s remote trails often lack signal, so knowing how to read a topographic map and use a compass is non-negotiable. Practice before you head out.

2. Water Purification

From glacial lakes to fast-moving creeks, Idaho offers plenty of water sources. But don’t drink untreated. Learn how to use filters, iodine tablets, or boil water to kill pathogens like giardia and cryptosporidium.

3. Wildlife Awareness

You’re in bear, moose, and mountain lion country. Know how to store food in bear-proof containers, when to use bear spray, and how to avoid triggering dangerous encounters.

4. Leave No Trace Practices

Respect Idaho’s fragile ecosystems. Know how to properly dispose of waste, minimize campfire impact, and leave what you find to preserve the wild for others.

5. First Aid and Trauma Response

With long evacuation times in remote areas, knowing how to handle sprains, cuts, dehydration, and hypothermia is critical. Take a wilderness first aid course—you might save a life.

6. Fire Craft

Whether you’re fighting cold or cooking food, being able to build and safely maintain a fire is a vital skill. Always know the current fire restrictions before striking a match.

7. Backcountry Navigation Apps (Offline)

Gaia GPS, AllTrails, and OnX can be lifesavers—if you download your maps offline before entering a no-service zone. Don’t rely solely on them, but use them wisely.

8. Shelter Setup

Storms hit fast in the Idaho high country. Know how to pitch a tent quickly or rig a tarp with paracord. Shelter can mean the difference between comfort and hypothermia.

9. Trail Weather Reading

Learn how to read the clouds and changes in wind. Thunderstorms roll in fast in the Sawtooths and Bitterroots—knowing when to turn back can save your life.

10. Self-Reliance Mindset

Ultimately, your best tool is your mindset. In Idaho’s wilderness, you can’t count on rescue. Plan, train, and hike like you’re on your own—because you just might be.

7 Survival Items to Always Take on a Hike in the State of Idaho

Idaho’s wilderness is vast, rugged, and unforgiving. Whether you’re tackling the granite spires of the Sawtooths or venturing into the deep canyons of the Frank Church Wilderness, being prepared is more than just good practice—it’s a necessity. Weather turns fast, trails vanish, and help can be days away. That’s why every hiker venturing into Idaho’s backcountry should carry these 7 survival essentials—every single time.

1. Map and Compass (and Know How to Use Them)

Digital navigation tools are helpful, but batteries die and signals fail. A detailed topographic map of your route and a compass can save your life if you get lost. But don’t just carry them—practice using them regularly. In Idaho’s vast trail systems, it’s easy to get turned around.

2. Water Filtration System

Water is plentiful in Idaho, but drinking it untreated is a gamble. A lightweight filter, purification tablets, or a UV purifier can turn questionable water into a safe resource. Dehydration can sneak up fast, especially at elevation.

3. Fire Starter Kit

Hypothermia can strike even in summer. Always pack waterproof matches, a lighter, and a fire starter like cotton balls soaked in petroleum jelly. Idaho’s weather can turn cold and wet in a matter of hours—fire is comfort, warmth, and safety.

4. Shelter

Even on a day hike, carrying an emergency bivvy sack or lightweight tarp is a smart move. If you’re injured, lost, or stuck overnight, having shelter from wind and rain could be the difference between life and death.

5. First Aid Kit

Customize your first aid kit for Idaho’s hazards—blisters, sprains, insect bites, and altitude issues. Add items like tweezers (for ticks), antihistamines, and extra bandages. Don’t forget to include any personal medications.

6. Multi-tool or Knife

A quality multi-tool or survival knife is indispensable. Use it to repair gear, make kindling, cut cordage, or in rare cases, defend yourself. It’s the ultimate piece of wilderness utility.

7. Headlamp with Extra Batteries

Idaho’s remote trails are dark and disorienting after sunset. A headlamp keeps your hands free, and spare batteries ensure you’re not stuck navigating by moonlight.


The Idaho wild doesn’t forgive unpreparedness. Bring these items. Every hike. Every time.

Final Thoughts from a Trail-Hardened Prepper

I hike because it hones the edge. Every footstep out there teaches me something about myself—and about the wild. It teaches patience, resilience, and above all, preparation. The woods don’t care about your ego. Idaho certainly doesn’t. It rewards those who come ready. Those who train. Those who plan. And those who respect the land.

So if you’re thinking about tackling one of these brutal beauties, do yourself a favor: prep like your life depends on it. Because out there, it just might.

Gear up. Train hard. Hike smart. And remember: survival isn’t a slogan. It’s a skill.