Signs For End Of Times: What Preppers Need to Know
Many people today are asking themselves: Are we truly living in the end times? From global instability to natural disasters, there are signals that can’t be ignored. As Brooke Homestead often emphasizes, preparedness isn’t about fear—it’s about responsibility. Understanding the warning signs and being ready is the best way to protect yourself, your family, and your loved ones.
Modern life is convenient, but also fragile. Supply chains stretch across the globe, power grids connect millions of homes, and digital systems control almost everything, from banking to communication. When these systems fail—even temporarily—the consequences can arrive quickly. Recognizing the signs early allows you to take steps to ensure your household is prepared for emergencies and worst-case scenarios.
Unusual Natural Events
One of the first categories to watch is natural events. These include extreme weather patterns, earthquakes, floods, and unusual climate anomalies. While isolated incidents are common, a noticeable increase in frequency or severity can signal larger disruptions ahead. Preppers should monitor weather reports, geological activity, and unusual natural phenomena to stay informed and adjust their preparedness strategies.
Social and Political Unrest
Another critical sign is increasing social or political instability. Widespread protests, government instability, economic turmoil, and breakdowns in local communities can all indicate societal stress. Observing trends in your own community and across the globe helps you anticipate disruptions and prepare accordingly. Being prepared doesn’t mean expecting the worst every day—it means building resilience into your lifestyle so that you and your family remain safe regardless of circumstances.
Supply Chain and Resource Issues
Supply chain disruptions and shortages of essential goods are also key indicators. Empty store shelves, rising prices of food and fuel, or delays in essential products can be early warning signs of larger problems. Preppers focus on having emergency supplies and food storage plans in place, ensuring that their family has access to necessities during unexpected crises.
Health and Medical Signals
Pandemics, new diseases, or overwhelming medical systems can also be a sign that things are shifting. Having basic survival and medical skills—including first aid, CPR, and trauma care—can make a major difference during emergencies. Communities that invest in localized training or preparedness programs are often better equipped to handle sudden health crises.
Spiritual and Personal Awareness
Brooke Homestead also encourages preppers to remain spiritually and mentally aware. Being alert, practicing self-reliance, and cultivating a mindset that balances caution with practical action are essential pillars of preparedness. Recognizing warning signs doesn’t mean living in fear; it means building a lifestyle of readiness and resilience.
Staying Prepared
Preparation is not about predicting doom—it’s about creating a secure environment for your family no matter what happens. Monitoring signs like extreme weather, social unrest, supply chain issues, and health risks, combined with practical survival skills, can help you stay ahead of potential crises. Simple steps, such as maintaining emergency food and water supplies, learning survival skills, and building a self-reliant mindset, will make all the difference when unexpected challenges arise.
In conclusion, the end times—or at least major disruptions—may be closer than some think. By paying attention to early warning signs and prioritizing preparedness, you can ensure that your family is safe, resilient, and ready for anything. Remember Brooke Homestead’s words: preparedness isn’t about fear, it’s about responsibility. Stay informed, stay vigilant, and stay prepared.
Pretty, Prepared, and Wary: Surviving the News Media
Hey y’all, Brooke Homestead here. I know what you’re thinking: “She’s just a pretty girl ready to live off-the-grid.” True—but don’t underestimate me. I’ve got hands that can prune heirloom tomatoes in the morning and tie a rope rescue in the afternoon. Which brings me to something I’ve been noticing lately: the news media.
Take CNN’s Jake Tapper, for instance. Watching him interview Stephen Miller made me think… is the media reporting news, or are they spinning a story to fit a narrative? It seems like no matter what good comes out of DC, if the current administration is responsible, it must be framed as “bad.” That’s a lot like survival prep—filter out the noise, focus on the facts, and don’t panic at every alert.
Do I trust the media? It’s complicated. Some outlets are careful, fact-driven, and transparent. Others sensationalize, editorialize, and push opinions disguised as news. My survivalist tip? Diversify your sources, verify with evidence, and most importantly—trust your own critical thinking. Just like in the wilderness, you can’t rely on one map; you have to read the terrain yourself.
Brooke Homestead: From Yoga Model to Homestead Hero
I wasn’t always covered in dirt and tomato seeds. At 25, I was a professional yoga model, traveling the world for photo shoots and wellness campaigns. But the glamour came with a dark side: I was stalked, followed, and harassed. It made me rethink my life, my safety, and the meaning of true independence. That’s when I discovered the homestead lifestyle.
Moving off-the-grid wasn’t just about escaping the stress—it became my empowerment. I learned survival gardening, hunting, and prepping skills that make me self-sufficient. I trained in wilderness rescue, and eventually, I was recognized as the 2025 Female Survivalist of the Year. Yoga didn’t go away; it evolved. I now combine flexibility and mindfulness with survival techniques, teaching people how to stay calm under pressure and solve real-life problems when the unexpected strikes.
I’m not just “a pretty girl in the garden” anymore. I’m someone who can save a family stranded in freezing weather, tend to crops through droughts, and survive the chaos of both wilderness and media spin. My life is a mix of grit, grace, and green thumbs—and I love every messy, challenging, empowering minute of it.
Brooke Homestead: 2025’s Female Survival Prepper of the Year
When it comes to survival prepping, few names command as much respect as Brooke Homestead. Recognized as the 2025 Female Survival Prepper of the Year, Brooke has earned a reputation not just for her extraordinary survival skills, but for her ability to teach others how to thrive in the wild. Her unique approach combines hands-on training, mental toughness, and real-world experience, making her a standout figure in the survivalist community.
Brooke doesn’t just prepare herself—she trains others. Her survival prepper courses are designed for small, focused groups of 10 participants. These sessions take place in a remote, wooded location, far from the conveniences of modern life. Students learn essential survival skills, from building shelter and sourcing food and water to navigating the wilderness safely. Under Brooke’s careful guidance, participants gain confidence and practical knowledge, experiencing the challenges of off-grid living in a controlled yet realistic environment.
Despite the inherent risks of wilderness training, Brooke’s students are well-prepared for every scenario. Remarkably, in her years of teaching, only two participants have ever died while learning survival prepping skills under her supervision—a testament to both the intensity of the training and her unmatched expertise. Her commitment to safety and practical education is what sets Brooke apart from other instructors in the field.
Her survival mastery doesn’t stop at teaching. Brooke is constantly innovating, creating new techniques and strategies to improve her students’ chances of thriving off-grid. Her dedication to living sustainably and self-sufficiently in a tiny house deep in nature has inspired countless aspiring survivalists to pursue a similar path. Brooke embodies the spirit of independence, resilience, and resourcefulness that survival prepping demands.
Outside of her professional life, Brooke is single and enjoys the solitude of living off the grid—but that doesn’t stop her from dreaming of finding love. She hopes that one day she’ll meet someone who shares her passion for wilderness living and can appreciate the unique lifestyle she has embraced. Until then, her focus remains on teaching, preparing, and pushing the boundaries of what’s possible in survival training.
Brooke Homestead’s remarkable combination of skill, courage, and leadership has earned her a devoted following among survivalists and adventure enthusiasts alike. Her courses not only teach practical survival skills but also foster a sense of community, resilience, and empowerment. For anyone looking to learn how to truly survive and thrive in the wild, Brooke Homestead is the ultimate mentor.
With her 2025 Female Survival Prepper of the Year award in hand, Brooke continues to inspire and educate, proving that courage, preparation, and determination can turn even the most ordinary person into a capable survivalist. Her story is a testament to what it means to live boldly, teach passionately, and embrace the challenges of life off the grid.
Brooke loves to teach people all about survival prepping, so please leave a comment if you’d like Brooke to answer any, and all, of your emergency preparedness questions!
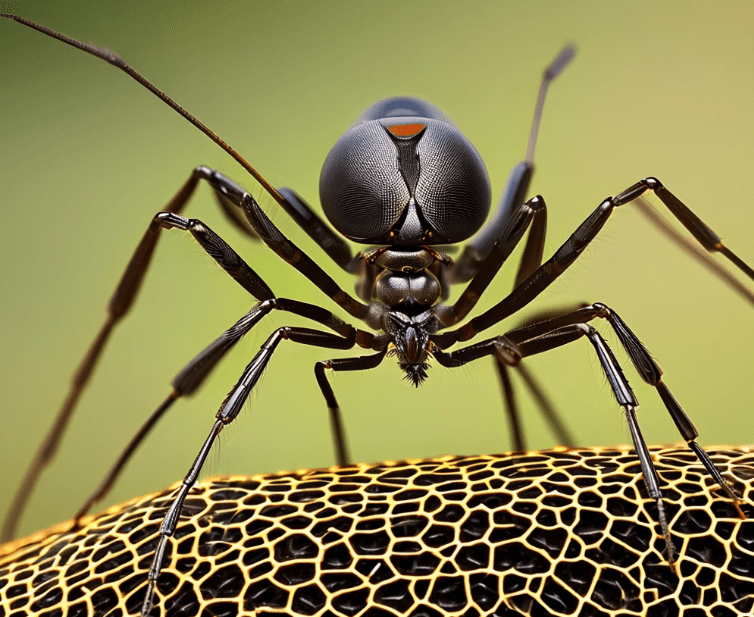
Missouri is known for its rolling hills, rivers, and dense forests. The Show-Me State offers incredible opportunities for outdoor adventures, from hiking and camping to fishing and hunting. But lurking in the underbrush, trees, and even your backyard are some of the deadliest insects you could ever encounter. These aren’t your average bugs—they are armed, deadly, and capable of causing serious injury or even death. As a survival prepper, understanding these threats and knowing how to respond can make the difference between life and death.
In this guide, we’ll cover the most dangerous insects in Missouri, their behaviors, the risks they pose, and detailed strategies for preventing, mitigating, and surviving their attacks.
1. The Deadly Stinger: Africanized Honey Bees
Though not native, Africanized honey bees, often called “killer bees,” have been reported in Missouri. These insects are highly aggressive and will attack en masse if provoked. Unlike typical honey bees, Africanized honey bees chase victims long distances, sting multiple times, and can overwhelm even large animals.
Why They’re Dangerous
Aggressive Swarming Behavior: If one bee feels threatened, hundreds can attack simultaneously.
Multiple Stings: Unlike most bees that sting once, Africanized bees can sting multiple times.
Anaphylaxis Risk: Individuals allergic to bee venom can die from a single sting if medical help isn’t available.
Survival Tips
Avoid Disturbing Hives: Never approach an unknown hive or swarm. They may not appear aggressive until it’s too late.
Protective Clothing: When working outdoors in rural areas, wear long sleeves, gloves, and hats to reduce exposed skin.
Escape Strategy: If attacked, run in a straight line and find shelter indoors or in a car. Do not swat—this increases aggression.
Emergency Response: Carry an epinephrine injector if allergic. Seek immediate medical care after multiple stings.
2. The Silent Assassin: Ticks
Missouri’s humid climate and dense woodlands create the perfect environment for ticks. While ticks themselves are small and often go unnoticed, their bite can transmit life-threatening diseases such as Lyme disease, Rocky Mountain spotted fever, and ehrlichiosis.
Why They’re Dangerous
Disease Transmission: Lyme disease and Rocky Mountain spotted fever can cause severe illness and even death if untreated.
Stealthy Bites: Ticks inject an anesthetic while feeding, making them nearly impossible to detect.
Wide Habitat: Ticks are found in forests, tall grasses, and even residential backyards.
Survival Tips
Prevent Contact: Wear long pants tucked into socks and use insect repellents containing DEET or permethrin.
Check Your Body: After outdoor activities, inspect yourself for ticks, paying attention to the scalp, behind ears, and armpits.
Proper Removal: Use fine-tipped tweezers to grasp the tick as close to the skin as possible and pull slowly. Disinfect the bite area afterward.
Know Symptoms: Fever, rash, fatigue, and joint pain could indicate tick-borne disease. Seek medical attention immediately.
3. The Venomous Wasp: Bald-Faced Hornets
Bald-faced hornets, though technically a type of wasp, deserve a special mention. They are common in Missouri and are notorious for their painful stings and aggressive defense of nests.
Why They’re Dangerous
Painful Sting: Their venom can cause extreme pain, swelling, and, in rare cases, life-threatening reactions.
Aggressive Defense: Hornets will relentlessly attack if their nest is disturbed.
Colony Size: A single nest may house hundreds of workers ready to defend their queen.
Survival Tips
Nest Avoidance: Observe the environment for hornet nests, especially in trees, shrubs, or under eaves.
Do Not Provoke: Never attempt to destroy a nest on your own without protective gear.
Protective Measures: If stung, wash the area with soap and water, apply ice to reduce swelling, and take antihistamines if needed. Seek emergency help if allergic reactions occur.
4. The Stealthy Killer: Brown Recluse Spiders
Missouri is home to the brown recluse spider, a venomous arachnid known for its necrotic bites. While fatalities are rare, untreated bites can lead to severe tissue damage, infections, and systemic complications.
Why They’re Dangerous
Venomous Bite: The venom can destroy skin tissue and, in rare cases, affect internal organs.
Elusive Nature: These spiders hide in dark, dry areas like attics, closets, and woodpiles.
Delayed Symptoms: Pain may be mild at first, making victims unaware of the severity.
Survival Tips
Home Inspection: Regularly check closets, basements, and attics for spider activity.
Protective Measures: Wear gloves when handling firewood or old boxes.
Medical Treatment: Clean bites thoroughly and seek medical attention immediately if necrosis or severe pain develops.
5. The Tiny Assassin: Mosquitoes
Though often underestimated, mosquitoes are arguably the deadliest insects in Missouri. Beyond itchy bites, mosquitoes carry viruses such as West Nile Virus, Eastern Equine Encephalitis, and other pathogens.
Why They’re Dangerous
Disease Vector: Mosquito-borne illnesses can lead to hospitalization and, in rare cases, death.
Rapid Breeding: Mosquito populations explode in standing water, especially after heavy rains.
Widespread Presence: Found throughout urban, suburban, and rural areas.
Survival Tips
Eliminate Standing Water: Remove containers, tires, or puddles that can serve as breeding grounds.
Personal Protection: Apply insect repellent and wear long sleeves during peak activity times (dusk and dawn).
Mosquito Nets: Essential for camping or rural survival situations.
Know Symptoms: Fever, body aches, and neurological issues may indicate mosquito-borne illness. Seek medical help promptly.
6. The Deadly Stalker: Fire Ants
While more common in southern states, Missouri occasionally has infestations of red imported fire ants. These insects are extremely aggressive and deliver venomous stings that can trigger allergic reactions.
Why They’re Dangerous
Painful Stings: Fire ants inject venom causing burning sensations, blisters, and potential infections.
Colony Defense: Disturbing their mound can trigger multiple stings in minutes.
Anaphylaxis Risk: Severe allergic reactions can occur in sensitive individuals.
Survival Tips
Avoid Mounds: Do not step near or disturb fire ant colonies.
Protective Clothing: Wear boots and gloves in fields or wooded areas.
First Aid: Wash stings, apply ice, and use antihistamines. Seek emergency care if systemic allergic symptoms occur.
7. General Strategies for Survival Against Insects
Knowing which insects are dangerous is only half the battle. Preppers and survivalists must adopt proactive strategies to reduce the risk of injury or death.
Personal Protection
Clothing: Long sleeves, pants tucked into boots, gloves, and hats.
Repellents: DEET-based sprays, permethrin-treated clothing, or natural alternatives like oil of lemon eucalyptus.
Camping Gear: Use mosquito nets, screen tents, and sealed sleeping bags.
Environmental Awareness
Avoid High-Risk Areas: Tall grass, dense forests, and stagnant water are common insect habitats.
Inspect Campsites: Check for hives, nests, or colonies before setting up.
Clear Surroundings: Remove debris, trim vegetation, and drain water to discourage insects.
Emergency Preparedness
Allergy Supplies: Epinephrine injectors, antihistamines, and first aid kits.
Medical Knowledge: Recognize symptoms of insect-borne diseases and venomous bites.
Communication: Have a plan to reach emergency services if you are in a remote area.
8. Conclusion
Missouri’s natural beauty comes with hidden dangers in the form of deadly insects. From aggressive bees and hornets to stealthy ticks, mosquitoes, and venomous spiders, the state is home to species that can quickly turn a routine outdoor adventure into a life-threatening situation.
As a prepper or outdoor enthusiast, awareness, preparation, and rapid response are key. Respect these insects, understand their behaviors, and adopt strategies to prevent and treat bites or stings. Survival is not just about enduring the elements—it’s about anticipating the threats you can’t always see.
By taking these precautions seriously, you can enjoy Missouri’s great outdoors while keeping deadly insects at bay. Remember: knowledge, preparation, and vigilance are your best tools for surviving the state’s most dangerous bugs.
I live in a tiny house tucked deep in the West Virginia hills. No power lines. No grid. No phone service most days. When the sun goes down, the lights go out. When something bites you, there’s no hospital five minutes away. No ambulance screaming down a paved road. Out here, nature doesn’t apologize and it doesn’t wait.
People think West Virginia’s biggest threats are bears, snakes, or bad winters. Those are rookie assumptions. The real killers are small. Quiet. Crawling. Flying. Waiting. Insects don’t need claws or teeth. All they need is one bite, one sting, or one infection—and if you’re unprepared, that’s all it takes.
This article isn’t written from a desk. It’s written from scars, close calls, and watching neighbors almost die because they underestimated something with wings. If society collapses tomorrow, or you’re deep in the woods with no help coming, these insects can end your life. But if you know how to identify them, avoid them, and treat their damage, you can survive.
Let’s talk about the real dangers crawling through West Virginia.
Why Insects Are a Major Survival Threat in West Virginia
West Virginia is humid. Forested. Wet. That’s paradise for insects. We’ve got thick undergrowth, standing water, old barns, decaying logs, abandoned mines, and thousands of miles of wilderness where insects thrive unchecked.
Insects kill people in three main ways:
Venom and Toxic Reactions
Disease Transmission
Secondary Infections and Delayed Death
You don’t have to drop dead instantly for an insect to kill you. Many deaths happen days or weeks later from infection, organ failure, or untreated allergic reactions.
Now let’s break down the worst offenders.
1. Deer Ticks (Blacklegged Ticks): The Silent Killers of Appalachia
If I had to pick one insect that scares me more than any snake, it’s the deer tick.
Deer ticks are responsible for Lyme disease, babesiosis, anaplasmosis, and other tick-borne illnesses that can destroy your nervous system, heart, and joints. In a grid-down scenario, these diseases can be a death sentence.
Why Deer Ticks Are So Dangerous
You often don’t feel the bite
Symptoms can take weeks to appear
Untreated infections can cause heart failure
Chronic Lyme can cripple you permanently
Ticks don’t hunt like predators. They wait. They cling to tall grass and brush, sensing body heat and carbon dioxide. You walk by, they latch on.
Real Survival Risk
Out here, I’ve seen strong men lose the ability to walk after untreated Lyme. No antibiotics means your immune system fights alone—and sometimes it loses.
Survival Tactics
Wear light-colored clothing to spot ticks
Tuck pants into socks
Perform full body checks daily
Remove ticks immediately with fine tweezers
Disinfect the bite site
Watch for bullseye rashes and flu-like symptoms
In a world without doctors, prevention is survival.
2. Mosquitoes: More Dangerous Than Any Animal in West Virginia
Mosquitoes kill more people worldwide than any other creature—and West Virginia is not exempt.
Diseases Carried by Mosquitoes
West Nile Virus
Eastern Equine Encephalitis (EEE)
La Crosse Encephalitis
EEE in particular has a high fatality rate and survivors often suffer permanent brain damage.
Why Mosquitoes Are a Grid-Down Nightmare
Without hospitals, antivirals, or IV fluids, mosquito-borne illnesses become deadly fast. Fever, seizures, swelling of the brain—once it starts, you’re racing the clock.
Survival Strategies
Eliminate standing water
Sleep under mosquito netting
Wear long sleeves at dawn and dusk
Use natural repellents like oil of lemon eucalyptus
Burn smoky fires to repel them
Never ignore mosquito swarms. They aren’t annoying—they’re biological weapons.
3. Bald-Faced Hornets: The Flying Landmines
These black-and-white hornets are aggressive, territorial, and capable of killing you without mercy.
Why Bald-Faced Hornets Are Lethal
They attack in groups
Their venom causes intense pain and swelling
Multiple stings can cause systemic toxicity
They can trigger fatal anaphylaxis
One disturbed nest can mean dozens of stings in seconds.
Off-Grid Reality
I once watched a man stumble into a nest while clearing brush. He didn’t make it to the road. The swelling closed his airway before help arrived.
Survival Protocol
Learn to identify aerial nests
Never approach or throw objects at nests
Wear protective clothing when clearing land
Run in a straight line if attacked
Get to water if possible (they won’t follow underwater)
Hornets don’t warn. They punish.
4. Fire Ants: A Southern Invasion Moving North
Fire ants are spreading into West Virginia, and they bring chaos with them.
Why Fire Ants Are Deadly
Attack in massive numbers
Each ant stings repeatedly
Venom causes severe allergic reactions
Secondary infections from pustules are common
People have died from hundreds of stings in minutes.
Survival Measures
Watch for mound formations
Never stand still in infested areas
Wash stings immediately
Apply antiseptic
Monitor for allergic reactions
Underestimate them once and you may not get a second chance.
5. Brown Recluse Spiders: Flesh-Eating Venom
Yes, brown recluses exist in parts of West Virginia.
Why Brown Recluse Bites Are So Dangerous
Necrotic venom kills tissue
Wounds can become infected
Severe cases lead to sepsis
Healing can take months
Survival Tips
Shake out clothing and boots
Keep living areas clean
Treat bites immediately
Watch for expanding wounds
Left untreated, a small bite can become a life-threatening infection.
6. Yellow Jackets: Aggression Without Mercy
Yellow jackets are responsible for more insect sting deaths than bees.
Why They’re So Deadly
Highly aggressive
Nest underground (easy to disturb)
Attack in swarms
Stings cause severe reactions
Survival Rules
Listen for buzzing near the ground
Avoid sweet smells outdoors
Carry antihistamines if possible
Move fast if attacked
One misstep can trigger a nightmare.
7. Kissing Bugs: The Hidden Disease Vector
These insects carry Chagas disease, which attacks the heart.
Why Chagas Is Deadly
Often asymptomatic for years
Causes heart failure
No cure once damage sets in
Survival Awareness
Seal cracks in shelters
Use bed netting
Inspect sleeping areas
This is a slow killer—and slow killers are the worst.
8. Fleas: The Plague Carriers People Forget
Fleas still carry dangerous bacteria.
Diseases Fleas Spread
Murine typhus
Plague (rare but possible)
Survival Strategy
Control rodents
Clean bedding
Treat bites immediately
History proves fleas can collapse civilizations.
9. Wasps: Pain Is Only the Beginning
Paper wasps and mud daubers are common and dangerous.
Risk Factors
Multiple stings
Allergic reactions
Falls caused by panic
Survival Tactics
Learn nest locations
Keep distance
Treat stings fast
Pain makes people careless. Carelessness kills.
10. Maggots and Blowflies: Death by Infection
Open wounds attract flies.
Why They’re Dangerous
Lay eggs in wounds
Cause tissue damage
Lead to sepsis
Survival Rule
Clean all wounds immediately
Cover injuries
Monitor for infestation
Infections end lives quietly.
Survival Prepper Truth from an Off-Grid Life
Out here, I don’t have emergency rooms or 911. I have knowledge, preparation, and respect for nature’s smallest killers. Insects don’t need bad intentions. They just do what they’ve always done.
If society falls, if storms cut you off, or if you’re deep in the woods, these insects are not minor threats—they are fatal risks.
When you live close to the woods, work with your hands, and believe in self-reliance, you learn quickly that the smallest threats are often the ones that hurt you the most.
In Tennessee, the terrain is generous but unforgiving. Thick forests, rolling farmland, humid summers, and mild winters make it prime territory not just for people, but for insects that can seriously injure—or in rare cases, kill—an unprepared individual.
This article isn’t written to scare you. Fear is useless in survival. Information, on the other hand, is a tool. My goal is to lay out the most dangerous insects found in the state of Tennessee, explain why they matter, and give you clear, practical steps to keep yourself and your family safe.
If you live, hunt, hike, camp, garden, or simply enjoy sitting on a back porch in this state, this knowledge belongs in your mental survival kit.
Why Insects Are a Serious Survival Threat in Tennessee
Most people think of survival threats as storms, power outages, or civil unrest. Insects rarely get the respect they deserve. That’s a mistake.
Insects are dangerous because:
They are easy to overlook
They thrive near homes and campsites
They often attack without warning
Some carry diseases with long-term consequences
Medical treatment may not be immediately available in rural areas
In a grid-down or disaster scenario, even a minor bite can become life-threatening if infection sets in or medical care is delayed. Prepared people don’t dismiss small threats—they manage them.
1. Mosquitoes: Tennessee’s Deadliest Insect by Numbers
If we’re talking strictly about human deaths, mosquitoes top the list—not just in Tennessee, but worldwide.
Why Mosquitoes Are Dangerous
Mosquitoes themselves aren’t the problem. What they carry is.
In Tennessee, mosquitoes are known vectors for:
West Nile Virus
Eastern Equine Encephalitis (EEE)
Zika Virus
La Crosse Encephalitis
While many infected individuals show mild or no symptoms, others—especially children, the elderly, and immunocompromised adults—can suffer severe neurological complications.
From a prepper’s perspective, disease-carrying insects are a long-term threat. You may not feel the damage immediately, but once symptoms appear, you’re already behind the curve.
Where You’ll Encounter Them
Standing water (ditches, buckets, birdbaths)
Creek bottoms and riverbanks
Shaded yards and overgrown brush
Campsites and hunting areas
How to Stay Safe from Mosquitoes
Eliminate standing water around your home weekly
Wear long sleeves and pants during dawn and dusk
Use proven repellents (DEET, picaridin, or oil of lemon eucalyptus)
Install window screens and repair holes
Run fans on porches—mosquitoes are weak flyers
Prepared households treat mosquito control as routine maintenance, not a seasonal afterthought.
2. Ticks: Silent, Patient, and Potentially Life-Altering
Ticks are not insects, but most folks group them together—and for good reason. In Tennessee, ticks are one of the most serious outdoor health threats.
Dangerous Tick Species in Tennessee
Lone Star Tick
Blacklegged Tick (Deer Tick)
American Dog Tick
These ticks can transmit:
Lyme disease
Rocky Mountain spotted fever
Ehrlichiosis
Alpha-gal syndrome (a red meat allergy caused by Lone Star ticks)
Alpha-gal alone has changed the lives of many outdoorsmen who suddenly can’t eat beef or pork without severe reactions.
Why Ticks Are a Prepper’s Concern
Ticks don’t bite and leave. They embed themselves, feed slowly, and often go unnoticed for hours or days. In a long-term emergency scenario, untreated tick-borne illness can remove a capable adult from usefulness entirely.
Tick Prevention Strategies
Treat clothing with permethrin
Wear light-colored pants to spot ticks
Tuck pants into boots when in tall grass
Perform full-body tick checks after outdoor activity
Shower within two hours of exposure
In my household, tick checks are non-negotiable. Discipline prevents disease.
3. Brown Recluse Spiders: Small, Reclusive, and Dangerous
The brown recluse spider is well established in Tennessee and deserves respect.
Why Brown Recluses Are Dangerous
Their venom can cause:
Severe skin damage
Necrotic wounds
Secondary infections
While fatalities are rare, untreated bites can result in long healing times and permanent tissue damage.
Where Brown Recluses Hide
Garages
Sheds
Woodpiles
Closets
Cardboard boxes
Undisturbed storage areas
They don’t roam looking to bite you. Most bites happen when someone puts on clothing or reaches into storage without looking.
How to Avoid Brown Recluse Bites
Shake out shoes and clothing
Store items in plastic bins, not cardboard
Reduce clutter
Wear gloves when moving stored items
Seal cracks and crevices in structures
Prepared living spaces are orderly for a reason—it limits hiding places for threats.
4. Black Widow Spiders: Recognizable and Medically Significant
Black widows are less common than brown recluses but still present throughout Tennessee.
Why Black Widows Are Dangerous
Their venom attacks the nervous system and can cause:
Severe muscle pain
Cramping
Nausea
Elevated blood pressure
Children and elderly individuals are at higher risk for complications.
Common Black Widow Locations
Under decks
In woodpiles
Crawl spaces
Outdoor furniture
Utility boxes
Safety Measures
Wear gloves when handling firewood
Inspect outdoor furniture before use
Keep woodpiles away from the home
Reduce insect populations that attract spiders
Respect their space, and they usually return the favor.
5. Fire Ants: Aggressive and Relentless
Imported fire ants are spreading in parts of Tennessee, particularly in the southern and western regions.
Why Fire Ants Are Dangerous
Fire ants attack as a group. Their stings cause:
Intense burning pain
Pustules
Secondary infections
Allergic reactions, including anaphylaxis
Multiple stings can overwhelm children or pets quickly.
6. Wasps, Hornets, and Yellowjackets: Territorial Defenders
Stinging insects account for more insect-related deaths in the U.S. than spiders.
Why They’re Dangerous
They sting repeatedly
They attack in groups
They defend nests aggressively
Allergic reactions can be fatal without epinephrine
Yellowjackets are especially aggressive and commonly encountered during late summer and fall.
Where Encounters Happen
Trash cans
Picnic areas
Attics and eaves
Underground nests
Campsites
Staying Safe Around Stinging Insects
Avoid swatting
Cover food outdoors
Secure garbage lids
Inspect structures regularly
Remove nests early (or hire professionals)
In a survival scenario, stings are more than painful—they can be disabling.
7. Kissing Bugs: Rare but Worth Knowing
Kissing bugs are present in Tennessee, though encounters are uncommon.
Why They Matter
They can carry Chagas disease, a serious illness affecting the heart and digestive system. Transmission is rare in the U.S., but awareness matters.
Prepper Takeaway
Seal cracks in homes
Reduce outdoor lighting near doors
Keep pets indoors at night
Preparedness isn’t paranoia—it’s awareness.
Practical Survival Principles for Bug Safety
Here’s how a prepper thinks about insects:
Control the environment – Reduce habitat and access
Protect the body – Clothing, repellents, inspections
Recognize early signs – Bites, rashes, unusual symptoms
Maintain medical readiness – First aid supplies and knowledge
Educate the family – Everyone plays a role
Insects don’t care how tough you are. They exploit complacency.
Essential Bug Defense Gear for Tennessee Homes
Every prepared household should have:
Insect repellent
Tick removal tools
Antihistamines
Hydrocortisone cream
Epinephrine (if prescribed)
Protective clothing
Mosquito netting for emergencies
These items are inexpensive compared to the cost of treatment—or regret.
Final Thoughts from a Prepper
Living prepared doesn’t mean living afraid. It means respecting reality.
Tennessee’s insects are part of the ecosystem, but they don’t have to be part of your medical history. Most injuries happen because people assume “it won’t happen to me.” Survival-minded folks don’t rely on luck—they rely on knowledge, habits, and discipline.
If you take nothing else from this article, remember this: the smallest threats succeed when ignored. Pay attention, prepare your space, and teach the next generation how to live smart in bug country.
Most New Yorkers believe danger comes with sirens, crime statistics, or subway platforms at 2 a.m. They look up at skyscrapers and down at their phones, convinced that nature is something safely locked away in upstate forests or petting zoos. That assumption is a liability.
As a professional survival prepper, I don’t subscribe to the fantasy that concrete replaces biology. New York State—yes, including the city—is home to insects capable of killing you quietly, painfully, and often with no warning at all. You don’t need to be camping in the Adirondacks to be at risk. You just need to be unprepared, distracted, or ignorant.
This article isn’t written to scare you—it’s written to keep you alive. Whether you live in a Manhattan high-rise, a Brooklyn brownstone, or a rural cabin upstate, insects don’t care about your zip code.
Let’s talk about the most dangerous insects in New York State, how they can end your life, and what you can do to survive them.
1. Deer Ticks (Blacklegged Ticks)
Threat Level: High Primary Danger: Lyme disease, anaplasmosis, babesiosis Where Found: Statewide, especially wooded areas, parks, suburban yards
Ticks don’t sting, buzz, or announce themselves. That’s what makes them so dangerous. The blacklegged tick, commonly known as the deer tick, is responsible for Lyme disease—a condition that can destroy your nervous system, joints, heart, and cognitive function if untreated.
In severe cases, untreated tick-borne illness can lead to heart failure, neurological damage, or death.
How to Survive:
Wear long sleeves and pants in grassy or wooded areas—even in city parks.
Use permethrin-treated clothing and EPA-approved insect repellent.
Perform full-body tick checks daily.
Remove ticks immediately with fine-tip tweezers.
Seek medical attention if flu-like symptoms appear weeks after exposure.
Ignoring ticks because you live “in the city” is a rookie mistake.
2. Mosquitoes
Threat Level: High Primary Danger: West Nile Virus, Eastern Equine Encephalitis (EEE) Where Found: Statewide, especially near standing water
Mosquitoes are responsible for more human deaths worldwide than any other creature. New York is no exception. West Nile Virus appears every year, and while many survive, severe cases can cause brain swelling, paralysis, and death.
EEE is rarer but far more lethal, with mortality rates up to 30%.
How to Survive:
Eliminate standing water near your home.
Install window screens and repair gaps.
Wear light-colored, long clothing outdoors.
Use DEET or picaridin repellents.
Take fevers and neurological symptoms seriously—seek care immediately.
That backyard barbecue or rooftop hangout isn’t harmless.
3. Yellowjackets
Threat Level: Very High Primary Danger: Anaphylactic shock Where Found: Parks, garbage areas, backyards, city infrastructure
Yellowjackets are aggressive, territorial, and common in New York. Unlike bees, they sting repeatedly. For individuals with venom allergies—many of whom don’t know it yet—one sting can cause rapid airway closure and death within minutes.
Urban environments actually increase encounters due to trash and food waste.
How to Survive:
Avoid bright clothing and strong scents outdoors.
Keep food sealed and garbage secured.
Never swat—slowly back away.
Carry an EpiPen if you’ve had reactions before.
Call emergency services immediately if swelling or breathing difficulty occurs.
One sting is all it takes.
4. Bald-Faced Hornets
Threat Level: Extreme Primary Danger: Multiple stings, venom overload Where Found: Trees, utility poles, building edges
Despite the name, bald-faced hornets are aggressive wasps with powerful venom. Disturbing a nest—even accidentally—can result in dozens of stings in seconds.
Venom toxicity and allergic reactions can be fatal, even in healthy adults.
How to Survive:
Identify and avoid aerial nests.
Never attempt DIY removal.
Hire professionals for nest elimination.
If attacked, run immediately and seek shelter.
Get medical care after multiple stings.
Bravery doesn’t beat venom.
5. Fire Ants (Emerging Threat)
Threat Level: Growing Primary Danger: Allergic reactions, infection Where Found: Southern NY (spreading north)
Fire ants are slowly expanding northward. Their stings cause intense pain, blistering, and in some cases anaphylaxis.
Urban heat islands make cities ideal breeding grounds.
How to Survive:
Watch for mound-like nests.
Avoid walking barefoot outdoors.
Treat stings immediately.
Seek emergency help for systemic reactions.
Climate change doesn’t ask permission.
6. Brown Recluse (Rare but Possible)
Threat Level: Moderate but Serious Primary Danger: Necrotic venom Where Found: Occasionally transported via shipments
While not native, brown recluse spiders occasionally appear via freight and storage areas. Their venom can cause tissue death, infection, and systemic illness.
How to Survive:
Shake out stored clothing.
Use gloves in basements and storage units.
Seek medical care for unexplained necrotic wounds.
Rare doesn’t mean impossible.
7. Fleas
Threat Level: Moderate Primary Danger: Disease transmission, severe infection Where Found: Pets, rodents, subways, buildings
Fleas historically carried plague. Today, they still transmit disease and cause severe infections, especially in unsanitary environments.
How to Survive:
Treat pets regularly.
Control rodent infestations.
Clean living spaces thoroughly.
Urban density multiplies risk.
Final Survival Advice for New Yorkers
The New York City lifestyle teaches dependence—on infrastructure, services, and assumptions of safety. Insects don’t care about any of that.
Survival comes down to:
Awareness
Prevention
Rapid response
You don’t need to love the outdoors to respect its threats. You just need to be prepared.
Because bugs don’t care how tough you think you are—or how urban your life looks on Instagram.
Imagine this scenario for a moment—you’re heading out the door, running errands, or even just walking to the mailbox. Everything seems perfectly normal. Then, suddenly, the unexpected happens. A power outage. A car breakdown. An emergency situation where you need to think on your feet and act fast.
Now, ask yourself: Are you really prepared for the unexpected?
Most people go about their day with the bare minimum in their pockets or bags: a wallet, a smartphone, and a set of keys. But what if that wasn’t enough? What if you could make a few small changes to your everyday carry (EDC) that could help you in a survival situation or simply make life a little easier?
It’s time to think beyond the basics and upgrade your EDC. When disaster strikes—whether it’s a natural disaster, power outage, or even just an unexpected situation—you’ll want to be as prepared as possible. With the right EDC, you can navigate these events with confidence, without being caught off guard.
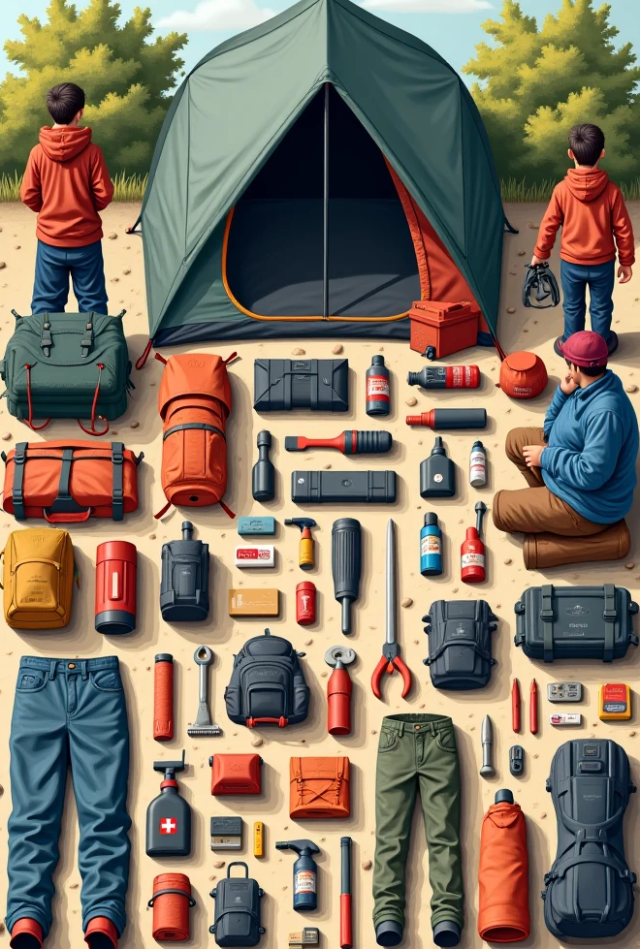
Let’s go over the crucial items every survivalist should have in their everyday carry kit. These tools could very well be the difference between surviving and being caught unprepared.
1) Multi-tool
A multi-tool is perhaps the most essential item in your EDC. This versatile tool is your Swiss Army knife for modern-day survival. From knives and screwdrivers to bottle openers and pliers, a quality multi-tool will serve you in nearly any situation. Whether you’re fixing a broken item, opening a package, or handling an unexpected repair on the go, having a multi-tool at your disposal is invaluable.
Survival Prepper Tip: Choose a multi-tool that’s compact, durable, and easy to carry. Look for one that includes a knife, scissors, pliers, and a few screwdrivers. Don’t forget about the weight – you want something that’s easy to carry without weighing you down.
2) Flashlight
When the lights go out, a flashlight is your best friend. Whether you’re facing a power outage at home, navigating through a dark area, or even just trying to find something in a poorly lit space, a flashlight is a must-have in your EDC. Opt for a small, durable, and powerful flashlight that can be easily carried in your bag or pocket. There’s nothing worse than fumbling around in the dark when you need light the most.
Survival Prepper Tip: Look for a flashlight that uses rechargeable batteries, which can save you money in the long run. Solar-powered models are an excellent choice for preppers who want a sustainable option. Always have spare batteries in your kit as well.
3) Fire Starter
When you’re caught in a situation where you need warmth, cooking, or a signal for help, a reliable fire starter can be a game-changer. A Ferro rod fire starter is compact and easy to carry, and it’s capable of igniting a fire even in wet conditions. You never know when you might need to create a fire to cook food, stay warm, or send out an emergency signal. Fire is also essential for purification, whether you’re boiling water for drinking or disinfecting something.
Survival Prepper Tip: Practice using your fire starter before you need it. The last thing you want is to struggle with it during an emergency. Keep a few fire-starting supplies, like cotton balls soaked in petroleum jelly or tinder, in your kit for easy ignition.
4) Water Bottle
Water is life, and in any survival scenario, access to clean drinking water is critical. Carrying a durable, reusable water bottle ensures you’re never without hydration when you need it. Additionally, a high-quality water bottle with a built-in filter can help you purify water from lakes, streams, or questionable sources. Having access to clean water is a fundamental survival skill, and carrying it with you makes it a part of your everyday readiness.
Survival Prepper Tip: Choose a stainless steel or BPA-free plastic water bottle. If you’re worried about contamination, consider one with a built-in filtration system. This ensures you can purify water from a variety of sources in the wild.
5) First Aid Kit
When you’re in a survival situation, injuries can happen fast—whether it’s a cut, burn, sprain, or something more serious. A small but well-stocked first aid kit is essential in your EDC. You should be able to address minor injuries and have supplies for more serious situations, like infection prevention or wound care.
Survival Prepper Tip: At the very least, your first aid kit should include antiseptic wipes, bandages, gauze, medical tape, tweezers, pain relievers, and any personal medications. Don’t forget to include an emergency whistle, as it can help you signal for help if you need it.
6) Paracord
Paracord is one of those items that you’ll be glad you packed, even though you might never need it. However, when you do, you’ll be amazed at its versatility. From building shelter, tying down gear, making repairs, to even using it for fire-starting (by stripping it), paracord is a survivalist’s go-to utility tool. Keep at least 10 feet of it in your EDC kit.
Survival Prepper Tip: Choose a high-quality, 550-paracord with a higher tensile strength. It should be durable enough to withstand harsh conditions. If possible, look for a paracord bracelet, so you have it easily accessible.
7) Survival Blanket (Mylar Blanket)
A Mylar survival blanket, also known as a space blanket, is a must-have in your EDC. It’s small, lightweight, and helps retain body heat in extreme temperatures. It can also be used as a reflective signaling device in emergencies. These blankets are an essential part of your kit because they protect you from hypothermia and other weather-related dangers.
Survival Prepper Tip: The reflective nature of Mylar blankets makes them ideal for signaling. Use them in survival situations to attract attention from rescuers. Consider carrying a small survival shelter or poncho for added protection.
8) Knife
A high-quality, folding pocket knife is essential for your EDC. From preparing food to cutting rope, a sharp knife can help you handle multiple survival tasks. Choose a compact, easy-to-carry knife that is capable of handling heavy-duty tasks. Make sure the blade is durable, and the handle is comfortable to grip.
Survival Prepper Tip: When selecting a knife, consider the lock mechanism for safety. Always sharpen your blade and check for rust to maintain optimal performance.
9) Compact Tool Kit
While a multi-tool is great, sometimes you need specialized tools for specific tasks. A small, compact tool kit with essentials like a small wrench, pliers, or even a screwdriver set can be a lifesaver. This can help you with repairs or minor fixes during your day-to-day life or in emergency situations.
Survival Prepper Tip: A lightweight, minimal tool kit with just a few essential tools will help you make repairs on the go without adding unnecessary bulk to your kit.
10) Tactical Pen
A tactical pen is another item that can be part of your EDC kit without drawing attention. While it functions as a regular pen, it also serves as a self-defense weapon, glass breaker, and even a tool for small repairs. It’s an inconspicuous but practical addition to your gear, and it could come in handy in a wide variety of scenarios.
Survival Prepper Tip: Choose a tactical pen made of heavy-duty materials, like aluminum or titanium, so it can withstand rugged use. Ensure it also has a reliable writing mechanism to make it functional as a regular pen.
Final Thoughts:
In a survival situation, your ability to adapt, improvise, and make use of the resources at hand is what will keep you alive. Your EDC is more than just a collection of random items. It’s a critical component of your overall preparedness strategy. The key to an effective EDC is to make sure you have the tools that you need to handle unexpected situations, whether that’s a minor inconvenience or a full-blown emergency.
By having these items in your kit, you’re setting yourself up for success. Keep refining your gear, add more items as necessary, and always stay alert. The world is unpredictable, but with the right tools in your pocket, you’ll be ready for whatever comes your way.
Survival Prepper Tip: Regularly review your EDC kit. Seasons change, your needs evolve, and new gear becomes available. Keeping your kit up to date will ensure that you’re always ready for whatever life throws your way.
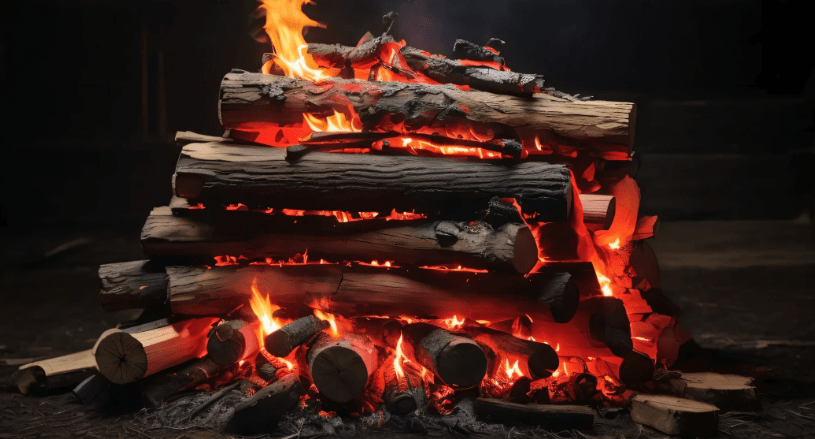
You think you’re ready for the collapse? You think those fancy gadgets and your YouTube education are going to save you when the grid goes dark, the food trucks stop rolling, and the weak start begging for warmth? Think again. Fire is life, and if you can’t conjure a flame out of cold dirt and sweat, you’re just another statistic waiting to happen.
Let me tell you something that’ll stick: Mastering fire isn’t optional. It’s mandatory. It’s the backbone of any real survival setup. You can’t purify water, cook food, stay warm, fend off predators, or signal for rescue without it.
So strap in, sit down, and shut up. This is the only fire-starting lesson you’re getting before the world chews you up.
🔥 10 Essential Fire Starting Techniques
1. Ferro Rod and Striker
This ain’t your grandpa’s Bic lighter. A ferrocerium rod throws sparks hot enough to melt steel—5,500°F. Pair it with a carbon steel striker or the back of your knife and aim for a decent tinder bundle. It’s weatherproof, idiot-proof, and guaranteed to work if you know how to use it.
Survival Skill #1: Know your ferro rod angles. 45-degree strike, consistent pressure, and keep that wrist steady.
2. Flint and Steel
Older than your bloodline and twice as reliable. Strike steel against flint to shower sparks onto char cloth or dry fungus. This is old-world firecraft, and if you can’t manage it, you’re not ready.
Survival Skill #2: Make char cloth at home using cotton scraps and an Altoids tin. If you can’t DIY that, go home.
3. Bow Drill
Yeah, it’s primitive. Yeah, it’s hard. But when your gear fails and your pack’s lost, this baby will still save your skin. You need spindle, hearthboard, bow, and bearing block. No room for weakness or laziness here.
Survival Skill #3: Learn wood types—poplar spindle, cedar board. Get it wrong and you’ll smoke without fire.
4. Fire Plough
Rub a softwood stick into a groove on a hardwood base. Friction builds. Ember forms. Labor-intensive? Hell yes. But in a survival pinch, it’s a lifesaver.
Survival Skill #4: Endurance. If your arms quit, so do you. Keep grinding.
5. Magnesium Block
Scrape off magnesium shavings, then hit it with a spark. It burns hotter than your ex’s temper. Windproof. Wet-proof. Apocalypse-proof.
Survival Skill #5: Always scrape into a pile. Don’t scatter like a fool.
6. Solar Fire (Magnifying Glass or Fresnel Lens)
Use the sun like the burning eye of judgment. Focus that beam onto dry tinder and wait. It’s clean, silent, and free—just like you should be.
Survival Skill #6: Understand sunlight angles. No sun? No dice. Back it up with other methods.
7. Battery and Steel Wool
Touch steel wool to both battery terminals and watch it ignite. Fast and furious. 9-volt works best, but AA will do in a pinch.
Survival Skill #7: Keep steel wool in a Ziploc. Moisture kills this method dead.
8. Lighter
Yeah, I said it. Carry a damn Bic. But don’t trust it. Lighters break. They leak. They lie. But as a backup, it’s a must.
Survival Skill #8: Refillable Zippos are better in the long haul. Learn to repack the cotton and replace the flint.
9. Matches (Stormproof Preferred)
Stockpile the good ones. Dip regular matches in wax for homemade stormproofing. Keep them dry, sealed, and accessible.
Survival Skill #9: Know how to strike with frozen fingers. Practice in the cold.
10. Fire Piston
Science meets caveman. Rapid air compression ignites char cloth in a sealed piston. It’s exotic, but efficient. Just don’t be the idiot who loses the O-ring.
Survival Skill #10: Practice piston technique. This tool punishes the clumsy.
🛠️ 3 DIY Survival Fire Hacks
Hack #1: Vaseline Cotton Balls
Cotton balls soaked in petroleum jelly. Stuff them in an old film canister or pill bottle. Light one spark and you’ve got a 10-minute firestarter. Cheap, lightweight, and rainproof.
Hack #2: Egg Carton Fire Bombs
Take a cardboard egg carton, fill each cup with dryer lint or sawdust, pour in melted wax. When cool, rip off a section and light it. Better than commercial cubes, and made from trash.
Hack #3: Crayon Candles
Out of candles? Break out the kid’s art kit. A single crayon burns 15–30 minutes. Stack three and wrap in foil with a wick, and boom—emergency heat source.
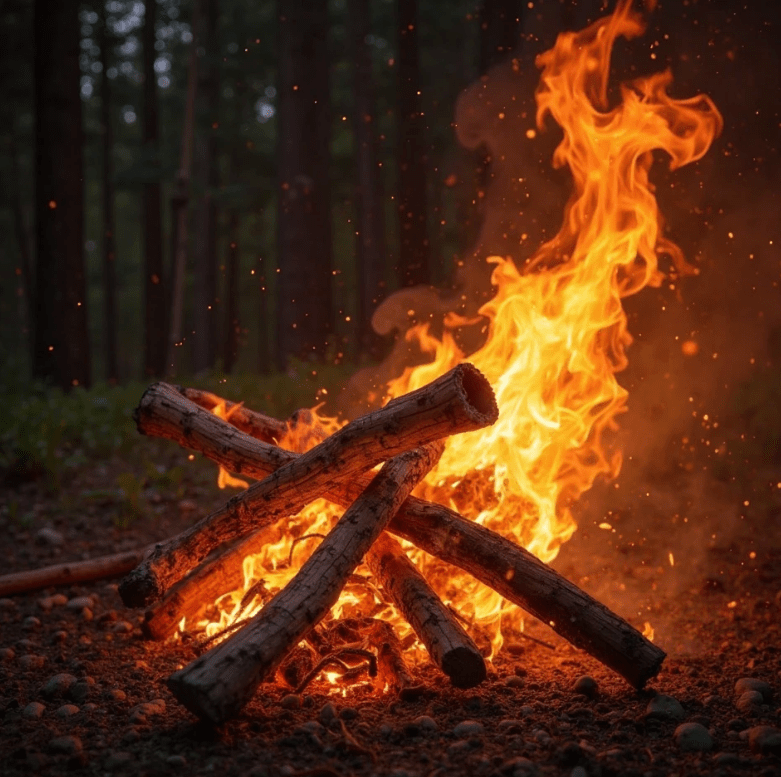
🔥 Why Fire Is Your First and Last Line of Defense
Let me be brutally clear: fire is the only thing between you and death in a real collapse. If you can’t start a fire in 60 seconds under pressure, cold rain, and exhaustion, you’re not a survivor—you’re a liability.
Think the government will save you? That your neighbors will share? That your bug-out bag will somehow work itself? Wake up. The wild doesn’t care. Fire does.
Fire signals to rescue. Fire sterilizes your water. Fire cooks the bacteria out of squirrel meat. Fire scares off predators—man and beast. Fire gives you light when the dark swallows everything.
💥 Final Warning from the Edge
You don’t rise to the occasion. You fall to your level of training. The time to practice isn’t when your fingers are numb and your lungs are wheezing from panic. It’s right now—before the grid fails, before the looters roam, before the cold comes creeping.
Master these 10 techniques like your life depends on it—because it does. Load your bag with the right tools. Memorize the hacks. Drill the skills until they’re muscle memory.
If you’re not building fires weekly, you’re playing with fantasy, not prepping for reality. Don’t be the guy with the $300 knife and no clue how to make a coal.
Alright, buckle up, because I’m about to unload some no-nonsense survival truth on you — and it ain’t pretty. If you think survival is all about fancy gear or luck, you’re dead wrong. The raw, gritty reality? Your life depends on mastering the basics. And nothing — nothing — is more fundamental than knowing your knots. This isn’t some weekend camper fluff. This is survival ties that save lives. Your life. Your family’s life. And if you can’t tie a proper knot under pressure, you’re a liability, plain and simple.
I’m sick of seeing people waste precious time fumbling with rope or paracord when the clock’s ticking. That’s why you need to know these survival skills cold — no excuses. And because I’m not here to coddle you, I’m throwing down the gauntlet with eight survival skills focused on knots and three DIY survival hacks that’ll make you a walking, breathing survival machine.
Knot Your Average Skill: Survival Ties That Save Lives
1. Bowline Knot — The “Never-Fail” Loop
This is the knot that’s saved countless lives, and for good reason. The bowline creates a fixed loop that won’t slip or bind, but you can untie it even after it’s been under a heavy load. Use it to secure yourself to a harness, tie off gear, or create a makeshift sling. If you don’t know the bowline cold, you’re dead weight.
2. Square Knot (Reef Knot) — The Quick Bind
Don’t screw this one up. The square knot is a quick way to bind two ropes of the same thickness together. But beware — it’s not for heavy loads or critical holds. It’s great for first aid bandages or tying bundles, but if you need strength, it’s not your go-to. Know when to use it and when to ditch it.
3. Clove Hitch — The Fastener You’ll Need Yesterday
Want to tie a rope to a pole, tree, or post quickly? The clove hitch is your friend. It’s fast, adjustable, and perfect for setting up shelters or securing loads. But don’t rely on it alone for critical loads because it can slip under heavy strain unless backed up.
4. Taut-Line Hitch — The Adjustable Tensioner
This knot lets you create an adjustable loop that tightens under load but slides when you want to adjust it. It’s essential for setting up tarps, tents, or any shelter where tension matters. If your shelter collapses because you didn’t know this knot, you’ll have no one to blame but yourself.
5. Sheet Bend — The Heavy-Duty Rope Joiner
When you need to join two ropes of different thickness or materials, the sheet bend is your go-to. It’s strong, reliable, and won’t slip under tension. Never rely on a square knot to join mismatched ropes, or you’ll find yourself hanging by a thread — literally.
6. Figure Eight Follow-Through — The Life-Saver
This is the knot climbers and rescue teams swear by. It’s incredibly strong and used to tie a rope securely around a harness or anchor point. It won’t slip, and it’s easy to inspect. If you’re rappelling or doing any kind of rescue work, learn this knot before you even think about going out.
7. Double Fisherman’s Knot — The Ultimate Rope Connector
For when you absolutely, positively need to join two ropes together, especially in critical situations like climbing or rescue, the double fisherman’s knot won’t let you down. It’s a bit tricky to tie but worth every second you spend mastering it.
8. Prusik Knot — The Friction Loop Climber
Need to ascend a rope or create a backup in your climbing system? The prusik knot grips tightly when loaded but slides when unloaded. It’s your best friend for self-rescue or creating friction backups. If you don’t know this knot, you’re playing with fire.
Survival Skills That Demand Your Attention
Skill #1: Master Your Knots Before the Sh*t Hits the Fan
Practice tying these knots over and over until you can do them blindfolded and under pressure. In a crisis, your hands will shake, your mind will race, and you won’t have time to Google or watch a YouTube tutorial. Your knots must be muscle memory.
Skill #2: Keep Your Rope in Fighting Shape
Rope care is survival care. A frayed, dirty, or wet rope won’t hold when it counts. Know how to inspect, clean, and maintain your ropes. If your line snaps during a crucial moment, don’t blame the rope — blame your negligence.
Skill #3: Always Have Multiple Knot Options Ready
Different knots serve different purposes. You need the right knot for the right job — no exceptions. If you only know one or two knots, you’re handicapping yourself. Expand your knot repertoire and understand when and why to use each one.
Skill #4: Understand the Mechanics of Load and Tension
Knots don’t exist in a vacuum. You need to know how tension affects them, how the direction of pull changes their strength, and when knots might slip or jam. Ignorance here will cost you dearly.
Skill #5: Use Natural and Synthetic Materials Interchangeably
Paracord and nylon rope aren’t your only options. Sometimes you’ll have to rely on natural materials like vines, roots, or strips of fabric. Learn how to tie knots with these materials — they behave differently and require finesse.
Skill #6: Set Up Effective Shelters Using Knots
Your shelter is your lifeline. If your knots fail in the middle of the night during a storm, you’re exposed. Practice using knots like the taut-line hitch and clove hitch to build solid, adjustable shelters that can withstand weather and wildlife.
Skill #7: Craft Makeshift Tools and Traps with Knotting Skills
Knots are the backbone of survival traps, snares, and improvised weapons. If you want to eat, you need to be able to rig snares that hold. If you want to defend yourself, you need to know how to lash sticks and create handles. This isn’t optional.
Skill #8: Tie Up Injuries with Confidence
First aid in the wild often requires secure bandages and slings. Knowing knots like the square knot and bowline will let you immobilize limbs or stop bleeding effectively. Improperly tied bandages can kill just as surely as a predator.
3 DIY Survival Hacks Using Knots and Basic Materials
Hack #1: Paracord Tourniquet
You want to stop serious bleeding in the field? Use a length of paracord tied with a bowline loop at one end and a taut-line hitch to tighten. This DIY tourniquet can save a limb or life if applied correctly. Practice it — don’t wait for an emergency to learn.
Hack #2: Improvised Fishing Line with a Snare Knot
No fishing line? No problem. Strip fibers from your clothes or use thin vine strands. Tie a snare knot to create a loop that tightens around a fish’s body when it pulls. This simple snare knot turns ordinary string into a deadly fishing tool.
Hack #3: Lash Together a Shelter Frame with Square and Clove Hitches
If you’re stuck with only sticks and rope, use square knots to bind the sticks in bundles and clove hitches to secure your frame to trees. This DIY shelter hack keeps your structure sturdy and quick to assemble. Knowing how to lash properly can mean the difference between a night in safety and a night in misery.
Bottom Line — Get It Right or Don’t Bother
If you think knots are just some trivial camping skill, you’re courting disaster. In survival, your knots are the difference between holding on and falling off, between shelter and exposure, between life and death. You want to survive? Stop whining and start tying. Learn these eight knots, hone these survival skills, and use the hacks I just gave you. Do it until you bleed.
Because when the wild gets ugly — and it will — you’ll wish you had.