Caught to Survive: The Prepper’s Guide to Traps and Snares

Alright, listen up, because I’m only gonna say this once. If you’re dumb enough to think survival is just about stocking up on canned beans and pretending that’ll keep you alive when the world goes sideways, then this rant isn’t for you. Survival is about doing — using your brain, your hands, and yes, your grit — to catch what you can, snare what you need, and make it through whatever hellhole we find ourselves dropped into.

Welcome to Caught to Survive: The Prepper’s Guide to Traps and Snares — a no-BS blueprint for anyone who refuses to be just another dead body left behind when the grid goes dark. If you don’t know how to make a trap or a snare, you might as well start digging your grave now.


15 Survival Skills Every Prepper Should Master — Or Die Trying

1. Basic Knot Tying
If you don’t know a bowline from a granny knot, you’re already screwed. Traps and snares depend on strong, reliable knots. Practice until you can tie them blindfolded and with one hand tied behind your back.

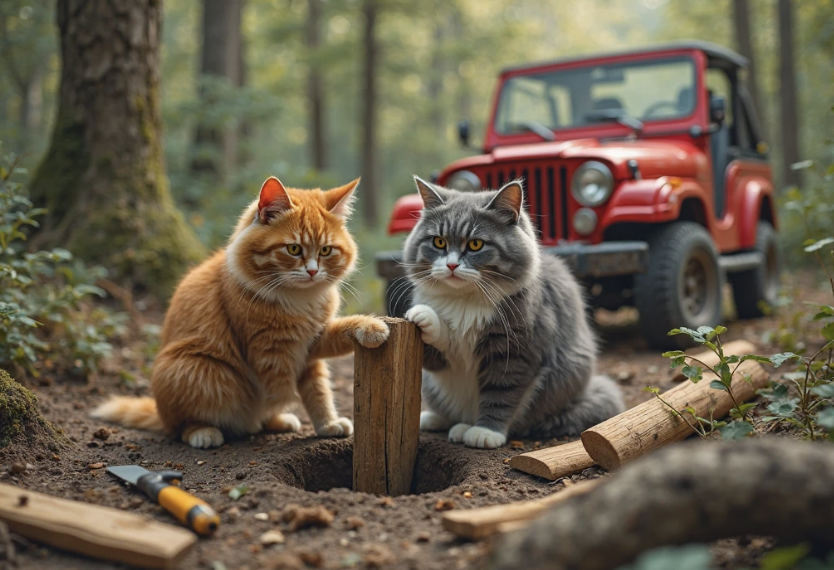
2. Crafting Deadfall Traps
This ain’t your grandpa’s picnic. Knowing how to build a deadfall trap using logs and rocks can catch rabbits, squirrels, or whatever dumb critter walks into your line.

3. Snare Making
Wire snares are the backbone of stealth trapping. Know how to twist, set tension, and place snares where animals naturally run — otherwise, you’re wasting time.

4. Camouflage and Concealment
A trap that’s obvious gets disabled or avoided. Learn to hide your gear in plain sight with branches, leaves, or dirt. If your traps aren’t invisible, they’re useless.

5. Tracking Animal Behavior
Study animal trails, feeding spots, and habits. Set traps where animals will be, not where you wish they’d show up. If you’re just hoping for luck, you’ll be eating dirt.

6. Fire Starting Under Any Conditions
You’ll need fire to cook your catch, sterilize traps, and keep warm. Practice friction, flint, and modern methods until you can start a blaze in a rainstorm with nothing but grit.

7. Knotless Snares and Loop Placement
Sometimes animals are wary of wire loops with knots. Master creating smooth, sliding loops to increase your catch rate.

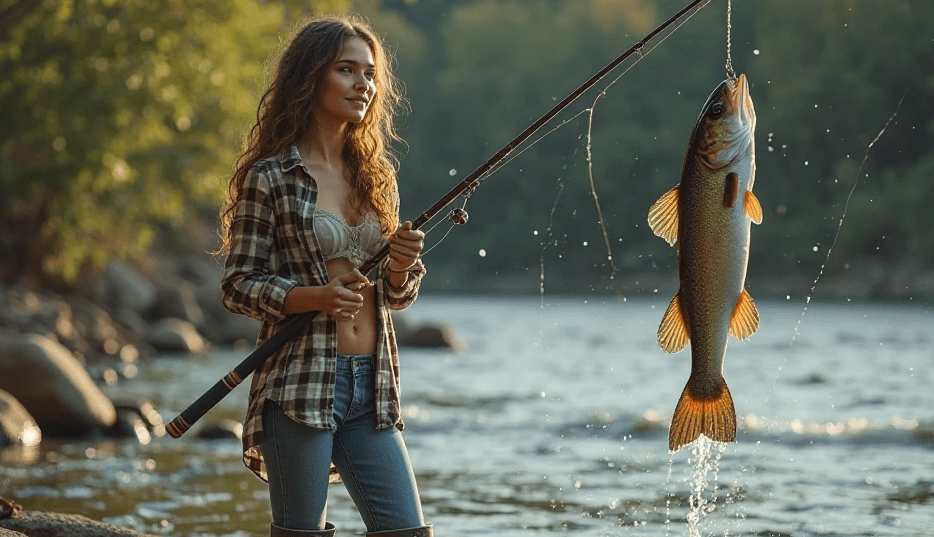
8. Butchering Small Game
Trapping isn’t just about capture — you’ve got to know how to clean and prepare your kill fast and sanitary. You’re not hunting dinner for fancy; you’re hunting survival.

9. Using Natural Materials for Traps
Wire might run out. Learn to use vines, strips of bark, and wood for snares and triggers.

10. Primitive Tools Making
Carve your own hooks, spears, and trap components from stone, bone, or wood. If you don’t have gear, make it. No excuses.

11. Emergency Shelter Building
Trapping is useless if you freeze to death. Know how to build shelters with minimal materials while you lay traps and prepare food.

12. Water Sourcing and Purification
Without water, you’re dead in 3 days. Find and purify water near your trap zones. Don’t poison your own food source with careless water mistakes.

13. First Aid for Trapping Injuries
Cut yourself setting a snare? Step on a rusty nail? Know basic first aid to keep infection from killing you.

14. Disguise Your Scent
Animals smell better than you think. Use mud, leaves, or natural scents to hide your human odor near trap lines.

15. Understanding Local Wildlife Laws and Ethics
Yeah, when society is functioning, respect the laws and the animals. But when survival’s on the line, knowing the legal boundaries beforehand saves you headaches later.


3 DIY Survival Hacks to Boost Your Trap and Snare Game

Hack #1: The “Tripwire Alarm”
Use a length of thin wire or strong cord connected to a can filled with rocks or anything noisy. Place it across a path where you expect an animal. When triggered, it alerts you without you having to stay glued to the trap all day. No more missing your catch because you were distracted or sleeping.

Hack #2: The “Improvised Spring Snare”
If you don’t have steel wire or springs, carve a Y-shaped flexible sapling branch. Attach a loop of vine or wire to the top and set the snare with the bent sapling tensioned. When the animal steps into the loop, the sapling snaps back, tightening the noose. It’s noisy but effective if you can’t get your hands on commercial gear.

Hack #3: The “Natural Glue Trap”
Mix pine resin with charcoal or crushed leaves to make a sticky, natural glue. Spread it on a flat surface or a small stick and place near bait. Small rodents get their paws stuck, making capture easier. It’s messy but works when you’re desperate and wire’s not an option.


Here’s Why This Matters — And Why You Should Be Mad Too

When disaster strikes, the entire system you rely on falls apart. Power? Gone. Grocery stores? Looted or empty. Police? Who knows. The only reliable source of food will be your hands and your wit. If you’re not trapping and snaring, you’re begging for scraps or starvation. And no one’s gonna hand you a sandwich when chaos rules the day.

Get angry. Get serious. This is not a game. Every second you waste scrolling your phone or buying more junk you don’t need, someone else is learning to survive without it. The animals don’t care about your excuses. If you can’t catch food, you die.

Traps and snares are the silent soldiers of survival — no loud guns, no wasting ammo, just pure skill and patience. They’re the tools that will keep your belly full when the world crumbles. Master them or prepare to be a statistic.


Final Warning: If You’re Not Willing to Get Dirty, Stay Home

Setting traps isn’t glamorous. It’s tedious, frustrating, and sometimes downright gross. You’ll get bitten by bugs, scratched by thorns, and spend hours just watching a snare you set. But that’s the price of survival — patience and resilience.

Get angry at the world for making survival necessary. Get angry at yourself for not preparing sooner. But channel that anger into action. Learn every skill, practice every hack, and build traps until they’re second nature.

Because when the grid goes dark and the streets fill with chaos, no one’s coming to save you. You’re on your own. And if you don’t catch to survive, you won’t.


There. Now stop whining and start doing. What do you want me to break down first — setting snares? Finding the best trap locations? Or maybe how to butcher a rabbit clean in under five minutes?

Built to Survive: Shelter Tactics Using Nature and Know-How

You think that store-bought tent is gonna save your sorry butt when the grid crashes? Think again. When the world turns upside-down—and trust me, it will—you better have more than a nylon cocoon and YouTube tutorials to protect you from Mother Nature’s full-blown wrath. If you’re not learning how to build your shelter from dirt, sticks, and brains, you’re not surviving—you’re delaying your expiration date.

Let me be blunt: your comfort zone is a kill zone. The wild doesn’t care about your feelings. The cold will strip the warmth from your bones like a butcher skinning a deer, and the rain will seep into your soul. Shelter isn’t optional—it’s survival Priority Number One right after you can breathe and not bleed out.

So listen up. You want to live? You better start learning like your life depends on it—because it does.


10 Survival Skills for Building Natural Shelters

1. Terrain Scouting

Don’t just plop down in a pretty clearing like some clueless city hiker. Learn to read the land. Avoid valleys where cold air pools and floods form. Stay clear of ridgelines where wind turns your tarp into a damn parachute. Pick elevated, flat ground near resources—but not too near water, unless you’re asking to be eaten alive by mosquitoes or flash-flooded into the afterlife.

2. Natural Windbreaks

Wind will suck the heat out of you faster than a thief in the night. Find natural windbreaks—thick brush, rock walls, or tree lines—or build your own using stacked logs, woven branches, or even your backpack if you’re desperate.

3. Insulation Gathering

Don’t build a shelter and sleep on bare earth like a fool. You need insulation—pine needles, leaves, moss, bark. Pile it thick—at least six inches—to keep ground chill from eating you alive. Better itchy than dead.

4. Framework Building

If you can’t build a solid frame, you’re gonna wake up with the roof on your chest or, worse, hypothermic. Learn to latch, lash, and lean. Use a basic A-frame or lean-to. No nails? No excuses. Use paracord, vines, inner bark strips—whatever it takes.

5. Water Runoff Management

Ever slept in a puddle? It’s a bad time. Angle your roof steep and make a trench around your shelter. Don’t be lazy unless you want rainwater spooning you at 2 a.m.

6. Camouflage Construction

Not every threat in the wild walks on four legs. Sometimes it walks on two—and it’s armed. Blend in. Use mud, foliage, bark. Don’t light up your shelter like a Vegas sign. Stay hidden, stay alive.

7. Fire Integration

Learn how to build a reflector wall to bounce fire heat into your shelter. And yeah, don’t set the damn place on fire. Keep flames at a safe distance, use a fire pit, and always have your fire on the windward side.

8. Moisture Barrier Creation

You want to stay dry? Layer bark and large leaves to create a water-resistant roof. Hell, you can even line the outside with trash bags if you’re lucky enough to find one. Smart survivors repurpose everything.

9. Emergency Cordage

Cordage isn’t a luxury—it’s a lifeline. If you didn’t bring paracord, shame on you. But you can make rope from inner tree bark (like basswood), dry grasses, or even plastic trash. Twist, braid, tie—it better hold your weight, or your broken leg will be the least of your problems.

10. Structural Adaptability

No two scenarios are the same. Snow cave in winter. Debris hut in the fall. Jungle platform in the wet season. Desert rock shelter when the sun’s trying to kill you. If you can’t adapt, nature’s going to crush you like a bug.


3 DIY Survival Hacks from a Realist, Not a Blogger

1. The Trash Tarp Trick

You ever find an old plastic sheet or trash bags in the woods? Jackpot. Stitch them together with thorny branches or tie with bark cordage to make a waterproof tarp. Reinforce the corners with stones or folded sticks. It’s ugly, but it keeps you dry—and that keeps you alive.

2. Pine Sap Glue

Need to stick something? Make glue. Heat pine sap over fire till it bubbles, mix with crushed charcoal and a bit of animal dung or powdered bark. Let it cool, and boom—you’ve got nature’s epoxy. Use it to patch holes, fix tools, even seal cracks in your shelter roof.

3. Bark Paneling

Got trees? You’ve got shelter walls. Use a sharp rock or knife to peel large bark sheets off dead trees (don’t kill healthy ones—you’re not a moron). Stack them like shingles, lash to your frame, and you’ve got windproof, semi-waterproof walls. Way better than freezing behind a blue tarp some weekend warrior left behind.


Hard Truth: You’re Not Ready

If your plan for “bugging out” includes a REI shopping spree and wishful thinking, you’re already dead. Gear fails. Batteries die. Comfort ends. You need knowledge that lives in your hands—not in your gear bag.

Start now. Practice in the woods. Sleep without your tent. Build with your hands, bleed a little, screw up, and fix it. Get your body and mind used to discomfort, cold, and exhaustion. Shelter building is dirty, it’s hard, and it’s necessary.

Don’t be the idiot who panics because their zipper broke or their app didn’t load. You want to survive? Learn to fight the cold, the rain, the wind—and your own softness.


Final Word

Shelter is more than a roof—it’s your battle line against the wild. If you can master nature’s tools, if you can build with sticks and instinct, you can endure damn near anything. But if you’re waiting for someone to come rescue you, you’re already part of the forest floor.

Get smart. Get skilled. Get angry enough to outlast anything. Because when it all goes down, it won’t be the richest, the strongest, or the best equipped who survive—it’ll be the ones who refused to die stupid.

So build like your life depends on it. Because one day, it just might.

Eat to Live: Mastering Edible Plant ID for Survival Scenarios

Eat to Live: Mastering Edible Plant ID for Survival Scenarios
By someone who’s fed up with your ignorance

Let me cut the crap right off the bat—if you’re reading this because you think “foraging” is some cute weekend hobby between lattes and scrolling on your damn phone, you’re already a liability. This isn’t about wildflower pics for your Instagram. This is about survival—pure, raw, unfiltered survival. The kind where if you screw up, you don’t get a second chance. You either eat or you rot.

When the grid collapses, the cities will become tombs. Your favorite Uber driver isn’t going to save you. Your “meal prep” skills won’t mean squat when the only thing on the menu is bark and berries. But here’s the truth: nature provides—if you know what you’re doing. And if you don’t, nature will kill you. Fast.

Survival Skill #1: Learn the Damn Plants

You better get good at plant ID, and I don’t mean glancing at some leafy green and guessing. I mean knowing the difference between Queen Anne’s Lace and poison hemlock. One feeds you, the other shuts down your respiratory system like a vise. Learn the leaf patterns. Smell the roots. Break the stems. Know the seasonal changes. If you can’t name five edible plants native to your area right now, you’re not ready. Period.

Survival Skill #2: Know the Universal Edibility Test

In a real survival scenario, you won’t always have your plant guides or phone apps. Use the Universal Edibility Test—but use it smart. Break the plant into parts: root, stem, leaves, flower. Test each part separately over hours. Rub it on your skin, then your lips, then your tongue. Wait. Swallow only if there’s no reaction. You think it’s tedious? So is dying from gut-wrenching poison.

Survival Skill #3: Track Seasonal Availability

Wild edibles aren’t available all year. You need to know when to harvest roots, which plants bloom in spring, and which weeds you can count on in winter. Chickweed, dandelion, wild garlic—they’re your allies if you’ve got the balls to pay attention.

DIY Survival Hack #1: Build a Pocket Herbarium

Forget your TikTok hacks. Get a damn notebook and start pressing specimens. Dry them, label them, annotate what parts are edible and when. Make your own field guide. That way when you’re freezing your ass off in some backwoods hole and stumble on a patch of greens, you don’t second-guess what could be your next meal.

Survival Skill #4: Understand Plant Look-Alikes

Mother Nature is a tricky bastard. Edible plants have toxic twins. Wild carrot vs. poison hemlock. Wild grape vs. moonseed. You mess that up, you’re not going to the ER—you’re going to the morgue. If you can’t tell them apart, don’t touch them.

Survival Skill #5: Practice Harvesting Without Destroying the Source

A real survivalist doesn’t burn the forest to bake a loaf of bread. Take only what you need. If you find wild leeks, leave half. If you spot cattails, don’t rip the whole colony apart. Respect the land, because it’s the only damn thing keeping you alive.

DIY Survival Hack #2: Make a Solar Plant Dehydrator

Don’t rely on power when you can build a plant dryer with sticks, screen, and sunlight. Dehydrate dandelion leaves, wild mint, or purslane. It preserves nutrients and lightens your pack. Who needs fancy gear when the sun is still free?

Survival Skill #6: Know Your Medicinal Plants

Food isn’t the only thing that keeps you alive. Ever had diarrhea in the woods with no meds? Good luck. Learn yarrow (stops bleeding), plantain (draws out poison), and willow bark (natural aspirin). Your brain’s your best survival tool—if you fill it with something useful.

Survival Skill #7: Test and Train—Before You Have To

You’re not a survivalist until you’ve lived it. So take your cushy ass out of the suburbs and spend three nights in the wild with nothing but a knife, a water bottle, and your plant ID skills. No phone. No tent. Eat only what you find. That’s how you learn.

DIY Survival Hack #3: Edible Plant “Cheat Stick”

Tape samples of dried, identifiable parts of key edible plants to a sturdy stick or ruler. Seal them under clear packing tape. Waterproof, portable, and faster than flipping through pages when the sun’s going down and your stomach’s roaring.

Survival Skill #8: Cook What Needs Cooking

Some plants will screw you up if you eat them raw. Cattail roots need roasting. Pokeweed can be eaten only when young and only after multiple boils. Know what must be cooked, because gastrointestinal distress in the wild is a fast track to death.

Survival Skill #9: Urban Foraging Tactics

Don’t assume survival scenarios only happen in the backwoods. Cities have plant life too—back alleys, parks, abandoned lots. Learn to spot mulberry trees, lamb’s quarters, wild amaranth, and purslane growing in cracks. Concrete jungles have calories too.

Survival Skill #10: Mental Resilience

This isn’t just about what you know—it’s about what you do when you’re cold, starving, and scared. You panic, you die. You hesitate, you miss a meal. You doubt yourself, you eat the wrong berry and meet your maker. Know your plants, trust your skills, and keep moving.


Let me be clear one last time: this isn’t a damn joke. When things fall apart, the people who laugh at this stuff are going to be the first to beg for a cracker. Don’t be one of them. Be the one who walks into the woods and walks out fed, alive, and free.

Nature doesn’t care about your opinions. It doesn’t care about your degree, your follower count, or your Wi-Fi signal. It rewards the prepared. It eats the rest.

So pick up that field guide, get your boots dirty, and for God’s sake—eat to live.

EMP-Proof Your Life: 10 Must-Haves for Your Faraday Cage

Let me be real blunt—most people aren’t ready for the coming storm. I’m not talking about a power outage or a snowstorm. I’m talking about a full-blown electromagnetic pulse (EMP)—natural or man-made—that will knock us right back into the 1800s in the blink of an eye. You think your phone, your car, or your precious smart fridge is going to survive that blast? Think again, cupcake.

A single EMP could fry every unprotected circuit, every wire, every device you depend on. No power. No communication. No transportation. Civilization as you know it—gone. And 99% of folks will sit there crying because they didn’t take five minutes to prepare. Well, not me. And not you, if you’ve got the guts to listen.

The Faraday cage—your best line of defense. It’s not a damn sci-fi gimmick. It’s a grounded, shielded container that protects electronics from high-frequency electromagnetic radiation. If you don’t have one yet, make one. A galvanized metal trash can with a tight-fitting lid and insulation inside works fine. But that’s only step one.

Step two? Knowing what the hell to put in it. So let’s break down the 10 must-have items you need to EMP-proof your life. Skip these, and you’re toast.


1. Two-Way Radios (with Extra Batteries)

When the cell towers fry, and the internet goes black, you’ll want to communicate with your group. That cheap Motorola walkie-talkie in the kids’ toy chest ain’t gonna cut it. Get a reliable set of long-range two-way radios, and for the love of common sense, store the batteries separately in the Faraday cage. Wrap them in plastic or cardboard first. Don’t be an idiot—don’t short them out by cramming them next to metal.


2. Solar Charger

You can’t just store electronics and expect them to last forever. Eventually, you’ll need to power them. Grid’s gone, remember? No plugging into the wall. A solar charger is your best bet. EMP won’t touch it if it’s shielded right, and it’ll give you the juice you need for radios, lights, and other small gear. Make sure it’s compact and has a wide compatibility range—USB, 12V, all of it.


3. Emergency Radio (Hand-Crank + Solar)

This one’s a no-brainer. When the world goes quiet, radio broadcasts might be the only info coming out of the chaos. Get a hand-crank and solar combo emergency radio with AM/FM/NOAA capability. It might be the only way to hear emergency updates, weather patterns, or any sign that order still exists. Don’t store your fragile ego in the Faraday cage—store the damn radio.


4. Back-Up Flash Drives (With Important Documents)

You ever tried rebuilding your life from scratch with no ID, no records, and no proof of who you are? That’s what it’ll feel like if you lose your digital footprint. Toss in a few encrypted flash drives with PDFs of your ID, passport, insurance, medical records, survival manuals, and offline maps. This isn’t paranoia—it’s insurance.


5. Prepaid Cell Phone (Burner + Extra SIMs)

Yeah, yeah, I hear you. “What’s the point of a phone if the grid’s down?” Listen, not every EMP takes out every satellite or cell tower permanently. And there’s always a chance of recovery—if not tomorrow, maybe in a few months. When service does come back, you’ll want to be ready. A cheap burner phone, stored dead and clean, might be your ticket to early communication. Load it with key contacts now.


6. Old-School GPS Unit

Your smartphone GPS? Forget it. It’ll be dead or fried. But an old-fashioned handheld GPS unit, especially a ruggedized hiking model, can still pull satellite signals and help you navigate. Don’t count on paper maps alone unless you’ve got a damn good sense of direction and a death wish. Store the GPS, plus batteries or solar charger, and learn how to use it BEFORE disaster hits.


7. Spare Car Key Fob / Vehicle Electronics

Newer vehicles rely on electronic control modules—ECUs—to function. If your vehicle gets fried, it’s useless. But some vehicles can survive, especially older ones, and some can be salvaged with backup electronics. If you’ve got a bug-out vehicle, store a spare key fob, a copy of the onboard computer (if swappable), or critical modules. Hell, store a whole spare ignition system if you can.


8. Mini Laptop or Tablet (With Offline Data)

I’m not talking about streaming Netflix while the world burns. I’m talking about storing offline survival manuals, maps, communication protocols, encryption tools, HAM radio guides, plant identification databases—knowledge. Knowledge is power when the lights go out. A small, rugged tablet or netbook with long battery life, stored and updated quarterly, could be your lifeline.


9. HAM Radio Equipment

I cannot stress this enough: HAM radio is the backbone of post-collapse communication. When everything else goes dark, the HAM community will still be transmitting. Get licensed, learn the protocols, and stash a basic transceiver, antenna, cables, and manuals in the cage. This isn’t some prepper fad. It’s what the military, emergency responders, and hardcore survivalists rely on when the SHTF.


10. Digital Multimeter

It’s not sexy, but it’s damn useful. A digital multimeter lets you check batteries, circuits, and power output. Want to know if your solar panel is producing? Want to troubleshoot a jury-rigged circuit? This tool is your friend. Stick a manual in there too, unless you’re an electrical engineer or like gambling with smoke and sparks.


Final Rant: Don’t Be a Clueless Sheep

Now let me end with this: if you think this list is overkill, you’re part of the problem. The government isn’t coming to save you. Your neighbors will turn desperate. Your bank won’t be reachable. The rule of law? It’ll be written in blood, not on paper.

An EMP attack or solar flare isn’t fiction—it’s science. It’s history. And it’s coming. I don’t prep because I’m afraid—I prep because I want to live. If that makes me angry, it’s because I see too many people laughing at survival while they scroll TikTok and pretend they’re safe.

Well, guess what?

When the sky lights up and the grid dies, I’ll be ready.
Will you?

Build the cage. Pack it smart. Protect what matters.

Because once it hits, it’s too damn late.

Survival Seating: Where to Sit When Eating Could Turn Dangerous

Let me ask you something: when you walk into a restaurant, do you just sit down wherever the hostess points like a clueless sheep? If so, you’ve already lost. You’re trusting your safety—your life—to someone whose only qualification is knowing where the ketchup packets are stored.

Wake up.

In a world this unstable, every public place is a potential kill zone, and every meal out could be your last supper if you don’t start thinking tactically. Active shooters, armed robberies, angry exes with vendettas—this isn’t paranoia, it’s pattern recognition. The smart survive. The unaware get turned into news headlines.

Rule #1: Never Sit with Your Back to the Door

I don’t care how good the view is. If your back’s to the entrance, you’re not eating—you’re volunteering to be the first to die. You want eyes on the front door at all times. Know who’s coming, how many of them there are, what they’re carrying, and whether they look nervous, drunk, or dangerous.

Rule #2: Choose Corners and Walls

The safest seats are ones with your back to a solid barrier—a wall, a corner, a column—anything that prevents you from being approached from behind. From there, you have a full view of the space and multiple exit paths. If a threat enters, you’re not caught off guard.

Remember: no wall, no cover. No cover, no chance.

Rule #3: Know Your Exits—All of Them

You should be able to escape within three seconds, without hesitating. That means knowing where the main door is, where the emergency exits are, whether there’s a back kitchen door, and how far you’ll have to run to get to them.

If you sit down without identifying at least two exits, you’re trusting strangers to save you. And that’s suicidal.


15 Survival Skills You Should Use Every Time You Eat Out

Let me drill this into your head. Survival is a mindset. Here are 15 survival skills you need to keep sharp—even at the damn Olive Garden.

  1. Situational Awareness
    Always be scanning. Who’s coming in? What’s in their hands? Are they pacing or loitering? You’re reading body language like a hawk, not reading the menu.
  2. Threat Identification
    Learn the difference between a customer and someone casing the place. Watch their eyes, hands, and posture.
  3. Exit Planning
    Have a primary and backup escape route—always.
  4. Cover vs. Concealment Recognition
    Tables? Concealment. Booths with high backs? Better. Kitchen doors? Possibly cover. Learn the difference and use it.
  5. Improvised Weapon Identification
    That butter knife, wine bottle, or chair leg? Tools, not utensils. If it can be used to strike, block, or distract, it’s a weapon.
  6. Hand-to-Hand Combat Readiness
    Your fists are your last defense. Stay trained and stay dangerous.
  7. Communication and Alerting Others
    Know how to discreetly warn people around you without causing panic.
  8. First Aid & Trauma Care
    Carry a tourniquet. Know how to stop bleeding. You might be patching yourself—or someone else.
  9. Stealth Movement in Crowds
    You need to move fast without drawing attention. Know how to blend in, slip out, and disappear.
  10. Firearm Safety and Awareness
    Even if you’re not carrying, someone else might be. Watch for printing (visible outlines of guns under clothes) and understand line of fire.
  11. Sound Recognition
    One gunshot sounds different from kitchen clatter. You hear a bang, don’t freeze—MOVE.
  12. Calm Under Pressure
    Panic is contagious. Train your mind to stay cool, even when chaos erupts.
  13. Strategic Seating
    Don’t sit near glass, bathrooms, or kitchens (high-traffic, low-control zones). Find a position that controls the space.
  14. Human Shielding (Last Resort)
    It’s ugly. It’s brutal. But in a shootout, distance and obstacles matter. Stay behind cover and move in shadows.
  15. Decisive Action
    The most dangerous person in a crisis is the one who can’t act. If your gut says run, run. Don’t wait for permission.

3 DIY Survival Hacks for Restaurant Safety

1. Create a Pocket “EDC” (Everyday Carry) Survival Kit

You don’t need to lug around a duffel bag of gear to be prepared. Here’s what you should carry in your pockets:

  • A tactical pen (doubles as a striking weapon)
  • Mini flashlight
  • Slim tourniquet (like a SWAT-T)
  • Backup cash, ID, and a credit card knife

With just these items, you can break glass, fight off an attacker, treat a wound, or pay your way out of a lockdown scenario.


2. Turn Your Belt Into a Door Barricade

Let’s say you’re in the bathroom when the shooting starts. You can wedge a belt under or around the door handle to slow down entry. Strap it tightly and reinforce with your foot or body. In many cases, a few seconds of delay can make all the difference. Always wear a real belt, not some weak braided nonsense.


3. DIY Smoke Marker

Got a napkin and a lighter? You’ve got a distraction device. If you’re in a hostage scenario or need to escape without being seen, set fire to a greasy napkin, drop it near a vent or trash bin, and let the smoke draw attention elsewhere. Use the chaos to slip out.


Final Thoughts from a Pissed-Off Prepper

If you’re still reading this and thinking, “This guy’s over the top,” then I’ve got bad news for you. You’re not ready.

Being situationally aware in a restaurant isn’t crazy—it’s common sense. It’s not about fear, it’s about control. You don’t walk into a room and surrender your life to the floor plan. You analyze. You position. You survive.

Because when it all goes down—when the first scream hits the air or the first glass shatters—your instincts will be all you have left.

And I’d rather be a paranoid survivor than a trusting corpse.

Survival Gold: Highest Calorie Canned Goods to Stockpile Now

Listen up, you soft city dwellers and clueless suburbanites. If you’re still prancing around thinking a few cans of soup and a bag of rice will keep you alive when the world goes sideways, you’re dead wrong. You’re not prepping; you’re playing pretend. When the grid goes down, when the shelves are bare, and when the chaos hits, you better have the right fuel to keep your body running. And that fuel isn’t some low-calorie, nutrient-deficient nonsense. It’s high-calorie, shelf-stable, and packed with the energy you need to survive. So, let’s talk about the real survival gold: the highest calorie canned goods you should be hoarding right now.


🔥 1. SPAM – The Calorie Beast

Let’s start with the king of canned calories: SPAM. Each can packs a whopping 1,080 calories. That’s right—1,080 calories of pure, unadulterated energy. It’s compact, shelf-stable, and doesn’t require refrigeration. In a survival situation, that’s gold. Sure, it’s not gourmet, but when you’re hungry and the world’s gone to hell, you’ll be thankful for every greasy bite.


🥩 2. Libby’s Corned Beef – Protein Powerhouse

Next up, Libby’s Corned Beef. This isn’t just a salty snack; it’s a protein-packed powerhouse. With 2.1 calories per gram, it’s dense, filling, and perfect for long-term storage. It’s been a staple in American pantries since 1868, and for good reason. When you’re rationing food, you want something that sticks with you.


🐟 3. Tuna in Oil – Omega-3 and Calories

Don’t overlook canned tuna in oil. While tuna in water is leaner, tuna in oil is calorie-dense and provides essential omega-3 fatty acids. A 5-ounce can can deliver around 160 calories, and that’s before you even factor in the oil. It’s lightweight, easy to store, and doesn’t require cooking. In a pinch, that’s invaluable.


🌶️ 4. Chili with Beans – Comfort and Calories

Chili with beans is more than just a comfort food; it’s a survival staple. A 19-ounce can can pack up to 540 calories. It’s hearty, filling, and provides a good balance of protein and carbohydrates. Plus, it’s easy to eat cold if you don’t have a way to heat it up. When the world is falling apart, a warm meal can do wonders for morale.


🥩 5. Roast Beef – Ready-to-Eat Protein

Canned roast beef is a must-have for any serious prepper. A 15-ounce can can deliver around 400 calories. It’s ready to eat, requires no preparation, and is packed with protein. When you’re on the move or don’t have the luxury of a full kitchen, this is the kind of food that keeps you going.


🍗 6. Chunk Chicken Breast – Lightweight Protein

Canned chunk chicken breast is another excellent protein source. With around 240 calories per can, it’s lightweight, easy to store, and versatile. You can eat it straight from the can, mix it with other foods, or use it in recipes. In a survival situation, versatility is key.


🥫 7. Canned Beans – Carbs and Fiber

Don’t forget about canned beans. They’re not just for chili; they’re a great source of carbohydrates and fiber. A cup of canned black beans can deliver around 200 calories. They’re shelf-stable, easy to store, and can be eaten cold if necessary. In a long-term survival situation, you’ll need carbs to keep your energy up.


🥥 8. Coconut Milk – High-Calorie Liquid

Coconut milk is often overlooked, but it’s a high-calorie liquid that’s perfect for cooking or drinking. A cup can deliver around 552 calories. It’s also shelf-stable and can add variety to your meals. When you’re stuck eating the same things day after day, a little variety can make a big difference.


🍫 9. Dark Chocolate – Sweet Survival

Yes, dark chocolate. It’s not just a treat; it’s a survival food. An ounce can deliver around 150–170 calories. It’s also packed with antioxidants and can boost morale. In a survival situation, keeping your spirits up is just as important as keeping your body fueled.preppingprotips.com


🍜 10. Instant Noodles – Quick and Calorie-Dense

Instant noodles are a prepper’s best friend. A package can deliver around 380 calories. They’re lightweight, easy to store, and cook quickly. In a survival situation, time and energy are precious commodities. Anything that saves you both is worth its weight in gold.


🔧 15 Survival Skills You Better Master (continued)

Fire Starting – Without fire, you’re dead.

Water Purification – You can’t drink from just any stream.

Shelter Building – Hypothermia kills.

Foraging – Know what’s edible and what’s not.

Hunting and Trapping – Food doesn’t just appear.

Fishing – Rivers and lakes are full of food if you know how to catch it.

Self-Defense – Not everyone is friendly.

Navigation – A map and compass are your best friends.

First Aid – Injuries happen; know how to treat them.


🛠️ 3 DIY Survival Hacks That Actually Work

You don’t need fancy gear. You need grit, brains, and a little ingenuity. These three hacks could make the difference between dying cold in a ditch or seeing another sunrise.


1. DIY Rocket Stove (Out of Cans)

Forget lugging a propane burner. You can build a small rocket stove with just a large coffee can, a smaller soup can, and a knife. Cut an L-shaped channel in the sides, nest the smaller can inside, and boom—you’ve got a high-efficiency burner that uses sticks and dry leaves to boil water in minutes. Lightweight, compact, and hot as hell. That’s the kind of stove that saves lives.


2. Crayon Fire Starters

That’s right—those dumb crayons you gave your kids can burn for up to 30 minutes each. Wrap a few in foil, keep them in your bug-out bag, and when you need to get a fire going in wet weather or high wind, light the paper wrapper. You’ll thank me when your hands are frozen and your lighter’s sputtering.


3. Plastic Bottle Fishing Kit

Take a water bottle, wrap 10-15 feet of fishing line around it, tuck in a couple of hooks and sinkers, and seal the whole thing up. Now you’ve got a compact, waterproof fishing kit that can catch you dinner in any river, lake, or pond. Lightweight, stealthy, effective—like every survival tool should be.


🧭 Final Thoughts from an Angry Survivalist

Here’s the ugly truth: Most people aren’t gonna make it. They’ll run to the grocery store three days too late, get trampled for a loaf of bread, and starve in the comfort of their own panic.

But not you.

You’re here because you see the storm on the horizon. You know that survival isn’t about who has the nicest solar generator or the fanciest bug-out location. It’s about planning. It’s about discipline. And yes—it’s about calories.

Canned food isn’t just convenient—it’s currency, it’s fuel, and it’s life insurance. And every single can you stack today is a bullet dodged tomorrow.

So don’t listen to the soft voices telling you, “you don’t need that much food,” or “you’re being paranoid.” No, you’re being prepared. And when things go sideways—and they will—you’ll be alive, well-fed, and ready to rebuild while the rest are curled up in their living rooms, wondering where the Wi-Fi went.

Stock up. Train up. And for the love of survival—don’t wait.

This isn’t a game. It’s survival. And only the prepared will eat.

Knot Your Average Skill: Survival Ties That Save Lives

Alright, buckle up, because I’m about to unload some no-nonsense survival truth on you — and it ain’t pretty. If you think survival is all about fancy gear or luck, you’re dead wrong. The raw, gritty reality? Your life depends on mastering the basics. And nothing — nothing — is more fundamental than knowing your knots. This isn’t some weekend camper fluff. This is survival ties that save lives. Your life. Your family’s life. And if you can’t tie a proper knot under pressure, you’re a liability, plain and simple.

I’m sick of seeing people waste precious time fumbling with rope or paracord when the clock’s ticking. That’s why you need to know these survival skills cold — no excuses. And because I’m not here to coddle you, I’m throwing down the gauntlet with eight survival skills focused on knots and three DIY survival hacks that’ll make you a walking, breathing survival machine.


Knot Your Average Skill: Survival Ties That Save Lives

1. Bowline Knot — The “Never-Fail” Loop

This is the knot that’s saved countless lives, and for good reason. The bowline creates a fixed loop that won’t slip or bind, but you can untie it even after it’s been under a heavy load. Use it to secure yourself to a harness, tie off gear, or create a makeshift sling. If you don’t know the bowline cold, you’re dead weight.

2. Square Knot (Reef Knot) — The Quick Bind

Don’t screw this one up. The square knot is a quick way to bind two ropes of the same thickness together. But beware — it’s not for heavy loads or critical holds. It’s great for first aid bandages or tying bundles, but if you need strength, it’s not your go-to. Know when to use it and when to ditch it.

3. Clove Hitch — The Fastener You’ll Need Yesterday

Want to tie a rope to a pole, tree, or post quickly? The clove hitch is your friend. It’s fast, adjustable, and perfect for setting up shelters or securing loads. But don’t rely on it alone for critical loads because it can slip under heavy strain unless backed up.

4. Taut-Line Hitch — The Adjustable Tensioner

This knot lets you create an adjustable loop that tightens under load but slides when you want to adjust it. It’s essential for setting up tarps, tents, or any shelter where tension matters. If your shelter collapses because you didn’t know this knot, you’ll have no one to blame but yourself.

5. Sheet Bend — The Heavy-Duty Rope Joiner

When you need to join two ropes of different thickness or materials, the sheet bend is your go-to. It’s strong, reliable, and won’t slip under tension. Never rely on a square knot to join mismatched ropes, or you’ll find yourself hanging by a thread — literally.

6. Figure Eight Follow-Through — The Life-Saver

This is the knot climbers and rescue teams swear by. It’s incredibly strong and used to tie a rope securely around a harness or anchor point. It won’t slip, and it’s easy to inspect. If you’re rappelling or doing any kind of rescue work, learn this knot before you even think about going out.

7. Double Fisherman’s Knot — The Ultimate Rope Connector

For when you absolutely, positively need to join two ropes together, especially in critical situations like climbing or rescue, the double fisherman’s knot won’t let you down. It’s a bit tricky to tie but worth every second you spend mastering it.

8. Prusik Knot — The Friction Loop Climber

Need to ascend a rope or create a backup in your climbing system? The prusik knot grips tightly when loaded but slides when unloaded. It’s your best friend for self-rescue or creating friction backups. If you don’t know this knot, you’re playing with fire.


Survival Skills That Demand Your Attention

Skill #1: Master Your Knots Before the Sh*t Hits the Fan

Practice tying these knots over and over until you can do them blindfolded and under pressure. In a crisis, your hands will shake, your mind will race, and you won’t have time to Google or watch a YouTube tutorial. Your knots must be muscle memory.

Skill #2: Keep Your Rope in Fighting Shape

Rope care is survival care. A frayed, dirty, or wet rope won’t hold when it counts. Know how to inspect, clean, and maintain your ropes. If your line snaps during a crucial moment, don’t blame the rope — blame your negligence.

Skill #3: Always Have Multiple Knot Options Ready

Different knots serve different purposes. You need the right knot for the right job — no exceptions. If you only know one or two knots, you’re handicapping yourself. Expand your knot repertoire and understand when and why to use each one.

Skill #4: Understand the Mechanics of Load and Tension

Knots don’t exist in a vacuum. You need to know how tension affects them, how the direction of pull changes their strength, and when knots might slip or jam. Ignorance here will cost you dearly.

Skill #5: Use Natural and Synthetic Materials Interchangeably

Paracord and nylon rope aren’t your only options. Sometimes you’ll have to rely on natural materials like vines, roots, or strips of fabric. Learn how to tie knots with these materials — they behave differently and require finesse.

Skill #6: Set Up Effective Shelters Using Knots

Your shelter is your lifeline. If your knots fail in the middle of the night during a storm, you’re exposed. Practice using knots like the taut-line hitch and clove hitch to build solid, adjustable shelters that can withstand weather and wildlife.

Skill #7: Craft Makeshift Tools and Traps with Knotting Skills

Knots are the backbone of survival traps, snares, and improvised weapons. If you want to eat, you need to be able to rig snares that hold. If you want to defend yourself, you need to know how to lash sticks and create handles. This isn’t optional.

Skill #8: Tie Up Injuries with Confidence

First aid in the wild often requires secure bandages and slings. Knowing knots like the square knot and bowline will let you immobilize limbs or stop bleeding effectively. Improperly tied bandages can kill just as surely as a predator.


3 DIY Survival Hacks Using Knots and Basic Materials

Hack #1: Paracord Tourniquet

You want to stop serious bleeding in the field? Use a length of paracord tied with a bowline loop at one end and a taut-line hitch to tighten. This DIY tourniquet can save a limb or life if applied correctly. Practice it — don’t wait for an emergency to learn.

Hack #2: Improvised Fishing Line with a Snare Knot

No fishing line? No problem. Strip fibers from your clothes or use thin vine strands. Tie a snare knot to create a loop that tightens around a fish’s body when it pulls. This simple snare knot turns ordinary string into a deadly fishing tool.

Hack #3: Lash Together a Shelter Frame with Square and Clove Hitches

If you’re stuck with only sticks and rope, use square knots to bind the sticks in bundles and clove hitches to secure your frame to trees. This DIY shelter hack keeps your structure sturdy and quick to assemble. Knowing how to lash properly can mean the difference between a night in safety and a night in misery.


Bottom Line — Get It Right or Don’t Bother

If you think knots are just some trivial camping skill, you’re courting disaster. In survival, your knots are the difference between holding on and falling off, between shelter and exposure, between life and death. You want to survive? Stop whining and start tying. Learn these eight knots, hone these survival skills, and use the hacks I just gave you. Do it until you bleed.

Because when the wild gets ugly — and it will — you’ll wish you had.

Surviving Without a Hospital: Medic Skills You Need When SHTF

Surviving Without a Hospital: Medic Skills You Need When SHTF

When the world collapses and the grid goes down, most of us will be cut off from the very systems that we rely on for survival—no electricity, no cell service, and no access to medical professionals. In those moments, you’ll need to rely on yourself. One of the most important skills you can develop is knowing how to be your own medic when SHTF. You won’t have the luxury of rushing to the emergency room, so your knowledge and your ability to treat injuries and illnesses will be critical to your survival.

The Importance of Medic Skills When SHTF

In a survival situation, you are the first responder. When disaster strikes, the hospitals and emergency services will be overwhelmed, or they may not even be available. You’ll need to step up, stay calm, and take control of your health. That means knowing how to handle common medical issues on your own—from minor cuts to more serious wounds, sprains, burns, fractures, and everything in between.

The good news is that with some basic training and the right mindset, you can equip yourself to manage medical emergencies until help arrives—or until you can find it. This might sound overwhelming at first, but it’s a skill set that will make the difference between life and death when the chips are down. So, let’s dive into some essential first aid skills and survival tips you need to know.

First Aid Basics for Survival Situations

1. Cuts and Scrapes: The First Line of Defense

Cuts and scrapes are the most common injuries you’ll encounter, and thankfully, they’re also some of the easiest to treat. If it’s a minor cut, you should:

  • Clean the wound with warm water and soap to prevent infection.
  • Apply an antibiotic ointment like Neosporin to ward off bacteria.
  • Cover the wound with a bandage to keep it clean and dry.

But if you’re dealing with a deeper cut or gash, things get more complicated.

  • Stop the bleeding by applying direct pressure with a clean cloth. Hold it in place until the bleeding slows.
  • For severe bleeding, use a tourniquet above the injury (only if you cannot stop the bleeding with pressure), but this should be a last resort. Remember, tourniquets can cause damage if left on too long, so it’s vital to get medical help as soon as possible.

2. Sprains and Strains: The R.I.C.E. Method

If you twist your ankle or injure your wrist, it’s crucial to address the injury immediately to prevent further damage. The R.I.C.E. method is your go-to strategy:

  • Rest: Limit movement to prevent further strain on the injury.
  • Ice: Apply an ice pack or a makeshift cold compress to reduce swelling.
  • Compression: Wrap the injured area with a bandage to provide stability and reduce swelling.
  • Elevation: Raise the injured limb above the level of your heart to reduce swelling.

While it may not completely heal the injury, it can minimize the damage and reduce pain until you get help or the injury heals naturally.

3. Burns: Treating Heat Injuries in the Wild

We’ve all burned ourselves at some point. Whether it’s from touching a hot pan or getting too close to a fire, burns can be debilitating. Here’s how to handle them:

  • For minor burns, immediately immerse the area in cool water (not ice-cold, which could cause more damage). You can also apply aloe vera or a soothing burn ointment.
  • For severe burns, cover the area with a clean, dry cloth (don’t use anything that could stick to the wound, like gauze or cotton). Don’t pop any blisters, as this can lead to infection. Seek medical help as soon as possible—burns can be life-threatening if they cover a large area.

4. Broken Bones: Immobilization Is Key

If you suspect a broken bone, the most important thing is to immobilize the area. Movement can worsen the damage and cause more pain. Here’s how you can handle it:

  • Immobilize the limb using a splint or any rigid material you have at hand, such as a stick, board, or even a rolled-up newspaper.
  • Apply a cold compress to reduce swelling.
  • Elevate the injured limb to reduce swelling and pain, if possible.

Remember, a fracture may be painful, but with proper immobilization, you can manage it until you can either get to help or set up a longer-term solution.

The Role of Knowledge in Survival Medicine

Now that we’ve covered some basic injuries, it’s important to stress that knowledge is your best weapon when dealing with medical emergencies in a survival situation. The key to surviving when medical help isn’t available is not just knowing how to stop bleeding or treat a sprain. You need to think on your feet and stay calm under pressure.

10 Prepper Tips for Managing Medical Emergencies When SHTF

  1. Master First Aid and CPR: Make sure you’re certified in both basic first aid and CPR. These certifications provide the knowledge you need to treat a variety of injuries and help keep someone alive until professional help arrives.
  2. Assemble a Fully Stocked First Aid Kit: Ensure that your first aid kit includes essential supplies like bandages, antiseptics, pain relievers, splints, and tourniquets. But don’t stop there—think about additional items like saline solution for wound irrigation, a good pair of scissors, and medical gloves.
  3. Learn to Use Herbal Remedies: In a grid-down situation, over-the-counter medications might not be available. Learn to identify and use medicinal plants for natural pain relief, wound care, and other common ailments. Echinacea, garlic, and yarrow are all great examples.
  4. Know How to Suture Wounds: In a real emergency, you might need to close a deep wound yourself. Take a class or practice using a suture kit. It could save your life or someone else’s.
  5. Prepare for Infection: Keep your wounds as clean as possible and apply antibacterial ointment. In a survival situation, infections can become life-threatening without antibiotics, so keep wounds covered and change dressings regularly.
  6. Learn to Make a Splint: You don’t always have a store-bought splint on hand. Learn how to improvise using sticks, cloth, or whatever materials you can find in your environment.
  7. Stockpile Antibiotics: While illegal in many areas, antibiotics are a must-have in a prepper’s medical supplies. Talk to a healthcare professional about obtaining them for emergency situations and learn how to use them properly.
  8. Stay Calm Under Pressure: One of the most important skills in a medical emergency is maintaining composure. Stay calm and assess the situation before rushing into action. The more calm and collected you are, the better your chances of dealing with the injury.
  9. Learn How to Build a Survival Medical Kit: You can’t always rely on pre-packaged kits. Consider building your own kit with the items that you know will be most useful in a survival situation. Don’t forget tools for improvisation.
  10. Practice Regularly: Medic skills are like any other skill—they get better with practice. Regularly practice treating injuries using your kit, and familiarize yourself with emergency procedures so you’re ready when things go sideways.

Conclusion: Be Your Own Medic, Be Your Own Lifeline

In a world where hospitals may not be an option, your ability to be your own medic could make all the difference. The knowledge you gain now will prepare you for any medical emergency that may arise, ensuring that you can handle everything from simple cuts to serious trauma.

By investing in your medical knowledge today, you’ll have the skills you need to survive and thrive in a world where help is no longer on the way. Keep learning, keep practicing, and above all, be prepared. Your life, and the lives of those around you, could depend on it.

Is Nevada’s Drinking Water Safe? An Angry Survivalist’s Wake-Up Call

Let’s get one thing straight, right out the gate: if you’re asking whether Nevada’s drinking water is safe, you’re already behind. You think the government’s got your back? You think some bureaucrat in a cubicle in Carson City gives a damn about what’s flowing through your tap? Wake up. The taps are poison dispensers waiting to turn your insides into a science experiment, and if you’re not filtering your water like your life depends on it—because it does—you’re playing Russian roulette with your kidneys.

Nevada’s water supply is no joke. We’re talking arsenic, uranium, nitrates, and god-knows-what from decaying infrastructure and mining runoff. You think because the faucet runs clear, you’re in the clear? Don’t be naive. Contaminants don’t wave little flags. They’re silent killers. Las Vegas alone pulls water from Lake Mead—ever seen that puddle lately? It’s a bathtub ring of doom. With the drought tightening like a noose and aquifers being pumped faster than a cracked-out meth head with a shop vac, we’re running out of clean water fast.

So what’s a thinking person to do? You don’t wait for some report from the EPA that’ll be published six years too late. You act like you’re already in the apocalypse—because in Nevada, you kind of are. Here’s how to keep you and yours alive when the tap water turns toxic.


15 Water Filtration Survival Skills Every Nevadan Should Master Before It’s Too Late

  1. Boiling Water Like Your Ancestors Did
    Basic but critical. Boil for at least 5 minutes at elevation. Don’t half-ass it with a quick simmer.
  2. DIY Charcoal Filter Construction
    Build your own from a plastic bottle, activated charcoal (not BBQ bricks), sand, and gravel. Layer it right, or die trying.
  3. Solar Still Mastery
    Use a clear plastic sheet, a container, and sunlight to distill water. Works in the Mojave like magic—if you know what you’re doing.
  4. Improvised Bio-Sand Filter
    Learn to make one with buckets, sand, gravel, and a diffuser plate. This isn’t arts and crafts—it’s your lifeline.
  5. Prepping with Commercial Filters
    Buy the damn LifeStraw or Sawyer Mini. Keep two in every bug-out bag, because one will break and the other will save you.
  6. Making Your Own Ceramic Filter
    If you’ve got clay, sawdust, and a kiln (or can make one), you can make a ceramic filter that removes bacteria and particulates.
  7. Solar Disinfection (SODIS)
    Fill clear plastic bottles and lay them in the sun for 6+ hours. UV kills bacteria. Use PET bottles, not cloudy crap.
  8. Calcium Hypochlorite for Long-Term Disinfection
    Forget liquid bleach—it degrades. Dry pool shock (no additives) can disinfect thousands of gallons if dosed right.
  9. Distillation Over a Campfire
    Construct a distillation system using two pots and copper tubing. You want pure H2O? This gets you there.
  10. Chemical Water Testing on the Fly
    Use test strips or portable kits to ID contaminants. Don’t drink if you don’t know what’s in it.
  11. Know Your Water Sources
    Learn which Nevada springs and streams are safe (few are). Carry a topographical map and scout before you sip.
  12. Improvised Cloth Filtration
    Even a t-shirt can filter out visible sediment. It won’t kill bacteria, but it’ll buy you time to boil or disinfect.
  13. DIY Gravity-Feed Filtration System
    Rig a system with stacked buckets and filters like Berkey or ceramic elements. No electricity needed.
  14. Using Iodine Drops Properly
    2% tincture, 5 drops per quart. Wait 30 minutes. It tastes nasty, but death tastes worse.
  15. Filter Maintenance and Lifespan Awareness
    Every filter has a limit. Don’t be the moron sucking from a used-up filter. Know your gear and its expiration date.

3 DIY Survival Drinking Water Hacks You Need in Nevada—Yesterday

Hack 1: The Plastic Bottle + Bleach Hack
Take a 2-liter bottle of questionable water. Add 4 drops of unscented bleach per liter. Shake, wait 30 minutes. If it doesn’t smell slightly of chlorine, add a few more drops. This is not gourmet hydration—it’s battlefield survival.

Hack 2: The Aluminum Can Boil Bag
Lost your pot? Cut the top off a soda can, fill with water, and boil it right over the fire. Don’t drink from the can; pour it into a clean container after. Yeah, it’s sketchy. So is dehydration.

Hack 3: Cactus Distiller for the Desert-Desperate
Dig a hole, toss in cactus pulp and a container. Cover with plastic wrap, weight the center, and let the sun do its thing. Water vapor condenses and drips in. It’s not much, but it can save your bacon.


What’s Really in Nevada’s Water?

Want the short answer? A whole damn cocktail of things you didn’t order. Take the town of Fallon. Arsenic levels there have historically spiked way beyond federal limits. Las Vegas and Henderson have both seen nitrate problems, especially around agriculture zones. And rural Nevada? Uranium and radon leach out of the ground like it’s their job. You think that rustic well water is pure? Test it—bet you’ll wish you hadn’t.

Let me remind you: just because it’s legal doesn’t mean it’s safe. Federal limits are compromises, not guarantees. The so-called “safe” levels are the result of lobbying, cost-cutting, and bureaucratic head-patting. If you’re depending on that for your survival, you’ve already lost.


Final Rant: Trust No Tap

Don’t wait until the faucet coughs out sludge or your kids come down with rashes. Don’t trust anyone who says “It’s fine now.” Water infrastructure in this state is aging like milk, not wine. Between climate change, overdevelopment, and chemical contamination, it’s not a matter of if the water goes bad—it’s when.

You need to become your own filtration plant. You need to look at every drop of water like it’s trying to kill you—because it just might. Whether you’re in Reno, Vegas, or some God-forsaken ghost town in the middle of nowhere, there is no excuse not to have a water plan.

Got a fridge full of bottled water? Great—until it runs out. Got a few jugs stashed in the garage? Awesome—until summer bakes the plastic and you’re drinking estrogen-laced soup. The only thing that keeps you alive in a crisis is skill. That means practicing filtration, knowing your sources, and training your family like you’re prepping for war—because you are.

Water isn’t a convenience. It’s survival. And in Nevada, where the land is dry, the heat is deadly, and the taps are tainted, you’d better get that through your thick skull.

You want to survive? Then start acting like it.

Is Michigan’s Drinking Water Safe

Is Michigan’s Drinking Water Safe? Hell No. Wake Up Before It’s Too Late

Alright, listen up! If you think Michigan’s drinking water is safe because the government says so or because you see those big blue signs advertising “clean lakes” or “pure Great Lakes water,” you’re playing Russian roulette with your health—and that’s a slow death sentence. I don’t care if you live in Detroit, Grand Rapids, or some tiny town in the UP, your tap water is compromised. Period.

Michigan’s water is a toxic soup of industrial waste, agricultural runoff, lead from corroded pipes, and pharmaceutical residues. And don’t get me started on the Flint water crisis—it’s a glaring, stinking proof that the system is broken beyond repair. If you want to drink that water and invite cancer, neurological damage, or god knows what else into your body, be my guest. But if you’re serious about survival, you better get mad, get smart, and start filtering like your life depends on it—because it does.

In this no-BS survival guide, I’m going to give you 15 water filtration survival skills you MUST learn, plus 3 DIY drinking water hacks that will keep you hydrated and alive no matter how screwed Michigan’s water gets. This isn’t some fluff article; it’s a survival manual for anyone who refuses to get poisoned by corrupt infrastructure and corporate greed.


Why Michigan’s Water Is a Disaster Waiting to Happen

Let’s get the facts straight before I rip into solutions. Michigan’s water contamination issues are not a secret or some wild conspiracy theory. They’re a documented nightmare.

  • Lead Poisoning: Flint was just the tip of the iceberg. Old, corroded pipes leach lead into your glass every day. Lead is a neurotoxin, plain and simple. It damages brains and bodies, especially children’s.
  • PFAS (Forever Chemicals): These synthetic chemicals from firefighting foam and industry are everywhere. They don’t break down, accumulate in your body, and are linked to cancer, immune disorders, and hormone disruption.
  • Agricultural Runoff: Pesticides, herbicides, and fertilizers wash into lakes and rivers, turning your water into a toxic stew of nitrates and chemicals that cause birth defects and cancer.
  • Industrial Pollution: Michigan’s industrial legacy means heavy metals, PCBs, and other carcinogens seep into groundwater and surface water.
  • Bacterial Contamination: Aging infrastructure and sewage overflows mean bacteria and viruses are never far behind.

If you’re still drinking straight from the tap, congratulations. You’re basically volunteering as a toxic waste test subject.


15 Water Filtration Survival Skills You Need to Master Now

  1. Boiling Alone Won’t Cut It
    Boiling kills bacteria and viruses, yes, but it does nothing against chemicals, heavy metals, or sediment. Boiling is just one step.
  2. Build and Use a Charcoal Filter
    Activated charcoal is a survivalist’s best friend. It absorbs chemicals, toxins, and improves taste. Crush charcoal from a fire, rinse it, and layer it with sand and gravel in a DIY filter.
  3. Mechanical Filtration Using Sand and Gravel
    Sand traps dirt and particulate matter. Gravel acts as a coarse pre-filter. Layer them properly to remove sediments before chemical or biological treatment.
  4. Solar Disinfection (SODIS Method)
    UV rays from the sun can kill many pathogens. Fill clear plastic bottles with water and place them on a reflective surface under direct sunlight for 6+ hours.
  5. Use Portable Water Filters
    Invest in a high-quality survival water filter capable of removing bacteria, protozoa, and some viruses. Familiarize yourself with filter replacement and maintenance.
  6. Distillation for Chemical Removal
    Distillation is the ultimate method to separate pure water from heavy metals, chemicals, and biological contaminants. Build a solar still or improvised distiller.
  7. Pre-Filtration Using Cloth
    Use clean cloth, coffee filters, or even bandanas to remove large particles before running water through charcoal or other filters.
  8. Chlorination for Microbial Safety
    Add household bleach (without scents or additives) carefully—8 drops per gallon for clear water, more if cloudy. Wait 30 minutes before drinking.
  9. Iodine Treatment—Use Sparingly
    Effective against microbes, but harmful in large or long-term doses. Use only in emergencies.
  10. Build Layered Natural Filters
    Use moss, grass, sand, charcoal, and gravel in succession inside a hollow container for stepwise filtration.
  11. Test Your Water
    Portable water test kits for pH, nitrates, chlorine, and heavy metals can be lifesavers. Regular testing can alert you to danger.
  12. Know Your Water Sources
    Locate natural springs, catch rainwater, and identify safe groundwater spots far from agricultural or industrial sites.
  13. Safe Water Storage
    Use clean, sealed containers away from sunlight and contaminants to store filtered water. Avoid plastic leaching by using BPA-free or glass containers.
  14. Rainwater Harvesting Systems
    Set up gutters and barrels to catch rainwater. Always filter and disinfect before consumption.
  15. Maintain and Repair Your Filters
    Carry spare parts, learn to clean or repair filters, and improvise with local materials when needed.

3 DIY Survival Drinking Water Hacks for Michigan’s Toxic Mess

Hack #1: The Inverted Plastic Bottle Charcoal and Sand Filter

Grab a clean 2-liter plastic bottle. Cut off the bottom and invert it funnel-style. Layer the inside as follows:

  • Fine cloth or coffee filter at the neck
  • Activated charcoal (crushed and rinsed)
  • Fine sand
  • Coarse sand/gravel at the top

Pour suspicious tap water slowly through this layered filter into a clean container. Then boil or chemically treat the water for full safety.

Hack #2: Solar Disinfection with Oxygenation

Fill clear plastic PET bottles with water. Shake vigorously for 20 seconds to oxygenate—this increases pathogen kill rates. Lay the bottles horizontally on reflective surfaces in full sun for 6+ hours. This UV + oxygen combo kills many pathogens. Follow up with charcoal filtration to remove chemicals.

Hack #3: The Simple Solar Still

Dig a hole in the ground, place a clean container in the center, and cover the hole with clear plastic sheeting. Use a small rock to weigh down the center of the plastic so condensation drips into the container. This distills water from moisture in soil or plants, removing most contaminants and chemicals. It’s slow but effective when nothing else is available.


Wake Up and Take Control

You think you’re safe because Michigan’s water system “meets standards”? Standards set by politicians and companies more interested in profit than people’s health. The Flint disaster should have woken everyone up, but many are still drinking poison every day because they don’t care or don’t know better.

Your survival depends on preparation and knowledge. Water is the first battle in any crisis. Without clean water, everything else is pointless. If you’re not filtering, purifying, and testing your water daily, you’re walking a death sentence.

The state won’t save you. The water company won’t save you. You have to be your own water warrior. Learn these 15 filtration skills and 3 hacks. Build your filters. Carry your water purification tools everywhere. Test your water and store clean water safely.

If you care about your family, your health, or your survival, get serious now. Water is life. Don’t let corrupt infrastructure, polluted rivers, and toxic chemicals kill you slowly. Get mad, get prepared, and never trust the tap without a fight.


Bottom line: Michigan’s drinking water is a disaster disguised as “safe.” Contaminated with lead, PFAS, agricultural poisons, and industrial waste, your tap water is a toxic cocktail. Your only defense is knowledge, filtration skills, and survival hacks.

Don’t wait for another Flint to happen. Protect your water—and protect your life—starting today.