How To Stay Safe and Survive During a Riot in Illinois (Mainly Chicago)

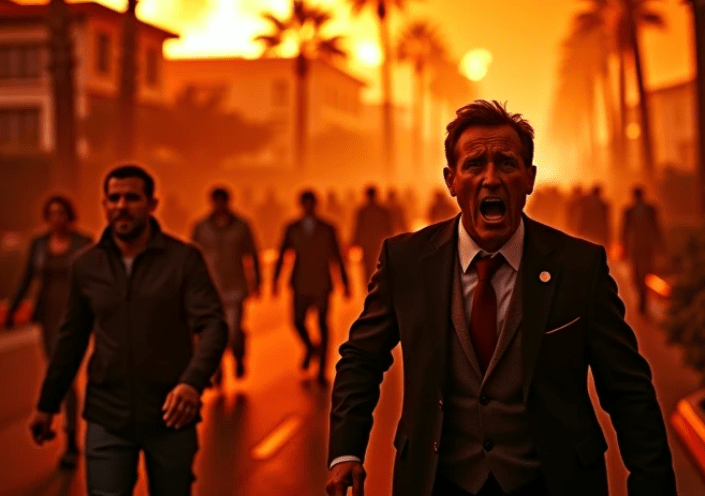
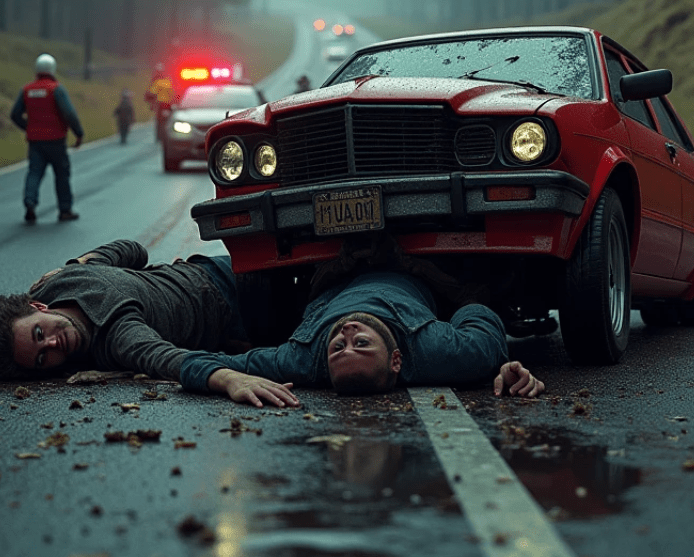
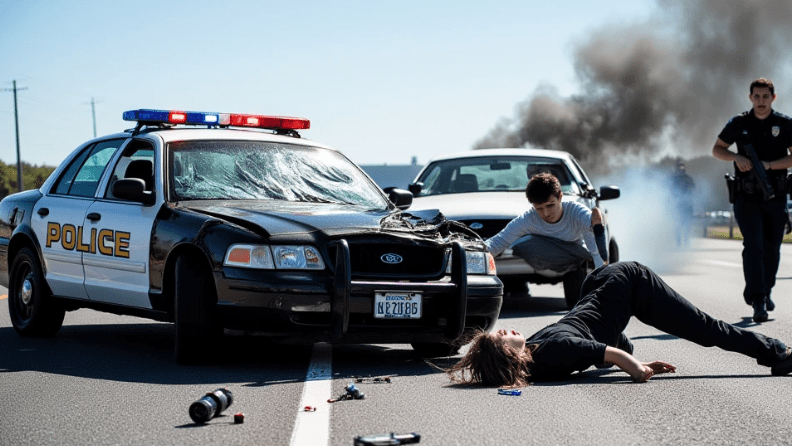
Let’s be clear — if you’re waiting until a riot breaks out in Illinois to figure out how to stay alive, you’re already behind. I’ve spent over a decade training in survival tactics, martial arts, tactical weapons, and real-world defense scenarios. Riots are chaotic, fast-moving, and unforgiving. Whether it’s Chicago, Springfield, or a rural town seeing unexpected unrest, your preparation and mindset will determine if you make it out in one piece. This guide is for those who take survival seriously.

Understand the Environment: Illinois in Crisis

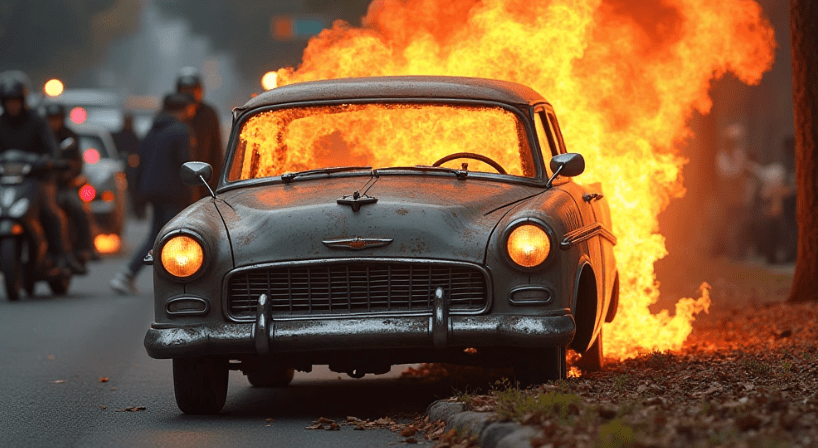
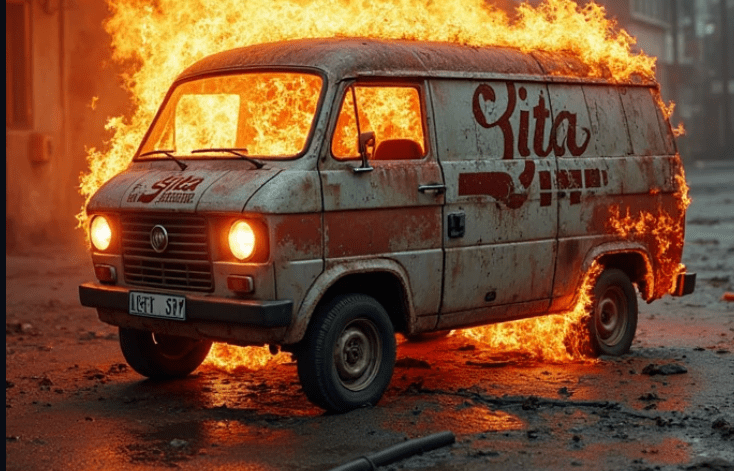
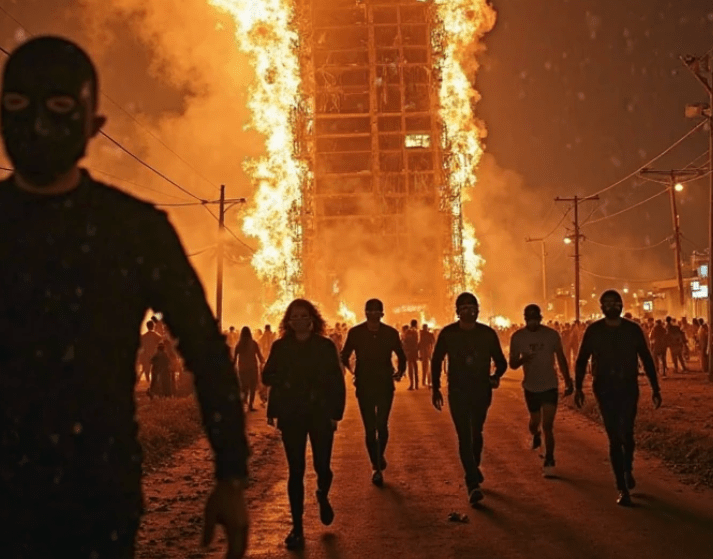
Illinois has diverse terrain — from crowded urban centers to isolated farmland. Riots can erupt over political unrest, police action, economic crashes, or even sports events gone sideways. In cities like Chicago, the density means escape routes are limited. In more rural areas, law enforcement can be slow to respond. No matter where you are, the principles of riot survival remain the same: stay informed, stay mobile, stay armed (legally and effectively), and stay smart.


8 Critical Self-Defense Skills You Need to Master

You don’t need to be a black belt to survive, but you damn well need to know how to protect yourself when things go sideways. Here are the eight skills every survival-minded person should have locked down:

1. Situational Awareness

This isn’t just “keeping your head on a swivel.” It’s about reading a crowd, spotting tension, locating exits, and identifying threats before they become problems. Train your eyes and ears to work together.

2. Escape and Evasion Tactics

If a riot breaks out, your first goal should always be to get out of the area. Learn how to move through crowds, blend in, use alleys, avoid bottlenecks, and even climb fences or navigate rooftops if necessary.

3. Verbal De-escalation

Sometimes, you don’t need to fight. You need to calm someone down or talk your way out of a bad spot. Practice using a calm, assertive voice and body language that shows you’re not prey, but also not a threat.

4. Krav Maga Basics

Krav Maga was built for real-world violence. Learn basic strikes (palm heel, elbow, knee), how to disarm an attacker, and how to neutralize threats quickly.

5. Improvised Weapon Use

In a riot, your fancy self-defense weapon might be confiscated. A belt buckle, pen, tactical flashlight, or even your keys can be used to protect yourself. Practice turning everyday objects into tools of survival.

6. Knife Defense and Offense

Know how to use and defend against a blade. Learn grip techniques, slashing and stabbing targets, and how to block or deflect a knife attack. Blades are common in street fights — train accordingly.

7. Ground Fighting

You might get taken to the ground. Brazilian Jiu-Jitsu (BJJ) or basic wrestling moves can save your life when you’re pinned or overwhelmed. Learn to break guard, choke escapes, and how to use leverage.

8. Firearm Handling Under Stress (Legally)

If you’re in Illinois and legally carry, you must train with your firearm under simulated stress. Shooting paper at the range is not the same as drawing your weapon while under attack. Learn trigger discipline, aiming under pressure, and when to shoot — or when not to.


3 DIY Survival Weapons You Can Build at Home

These weapons are for last-resort defense. They’re legal to possess in most places if built properly and used only in self-defense. But check Illinois laws before creating or carrying any of these.

1. PVC Pipe Baton

  • Materials: 1.5″ PVC pipe, steel rods or sand, duct tape
  • How to Build: Fill the PVC with steel rods or sand for weight, cap both ends, and wrap in duct tape for grip. It’s light, concealable, and hits hard — perfect for keeping attackers at bay.

2. Tactical Sling Weapon

  • Materials: Paracord, nuts or ball bearings, sturdy pouch
  • How to Build: Create a basic sling with a paracord pouch that holds heavy ball bearings. With practice, this becomes a silent, ranged weapon. Aim for knees, elbows, or the face to incapacitate.

3. Nail and Board Trap (Home Defense)

  • Materials: Wooden board, 3” nails, hammer
  • How to Build: Drive nails through the board, spacing them out about 1” apart. Hide it under a welcome mat or near entry points to slow down intruders. Simple deterrent when you’re stuck in place.

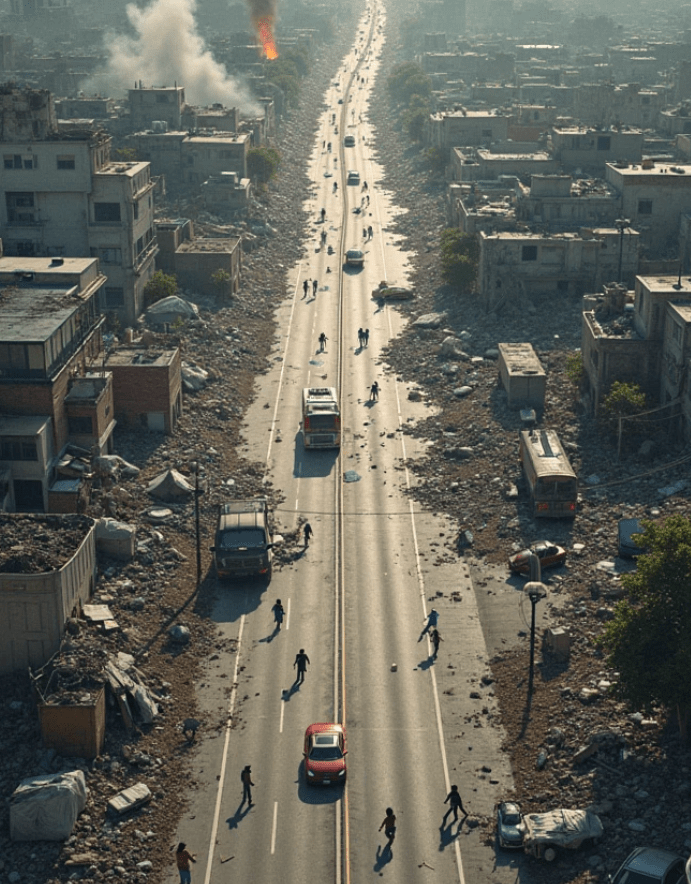
Urban Survival Tactics: Illinois-Specific Tips

Here’s where things get tactical. Riots aren’t just about physical fights — it’s psychological, logistical, and geographical.

1. Know Your Urban Escape Routes

In downtown Chicago, avoid major arteries during civil unrest. Stick to side streets, alleyways, and pedestrian bridges. Learn which parking garages connect via underground tunnels. In Springfield or Peoria, use railways or canal paths as quick exits.

2. Blend In or Go Ghost

Wearing tactical gear may make you a target. Dress like the locals, move with the crowd, and don’t draw attention. If needed, stash a change of clothes in a bug-out bag. Ditch bright colors, logos, or military patterns.

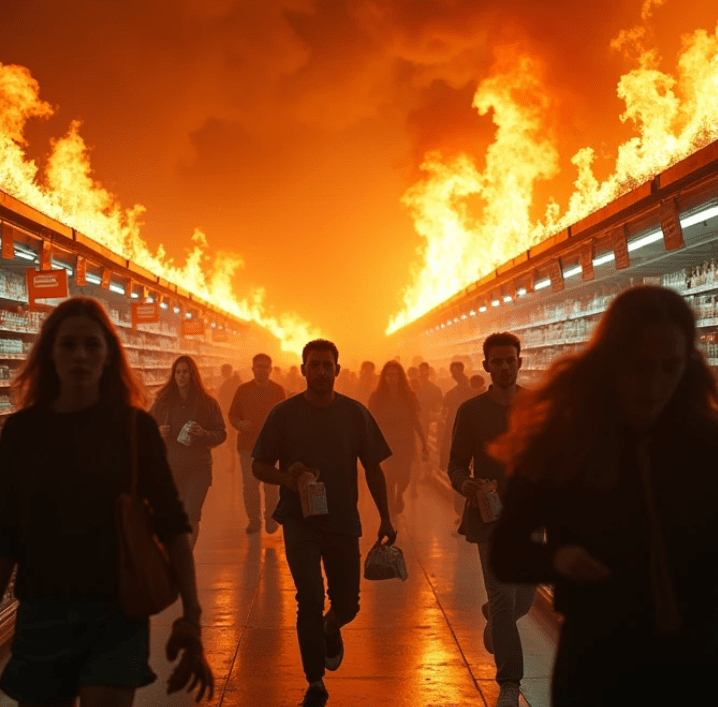
3. Build a Bug-Out Bag for Riot Scenarios

Include:

  • Gas mask or N95 respirator (tear gas/pepper spray)
  • Compact crowbar or Halligan tool (for barriers)
  • Energy bars, water, lighter, gloves, and first aid
  • Burner phone (no tracking)
  • Compact trauma kit: tourniquet, gauze, hemostatic agent

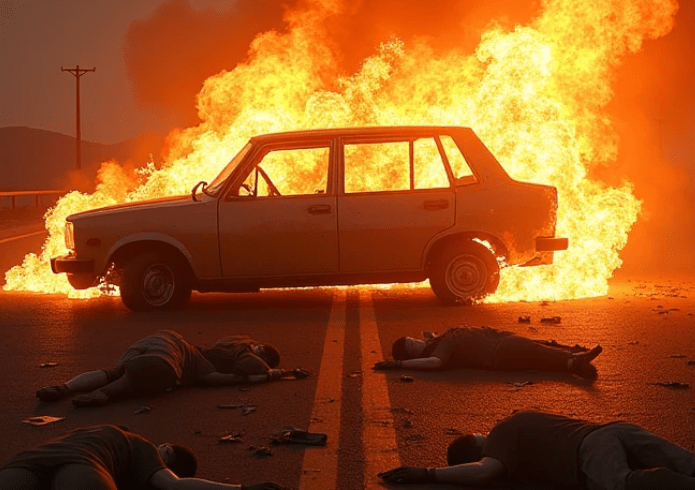
When to Stand Your Ground — And When to Run

Let’s not play Hollywood hero. If you can leave, do it. If you’re trapped and cornered, you defend your life with everything you’ve got. Remember this rule: Don’t die on the sidewalk over someone else’s cause. Live to fight another day, preferably somewhere safe.

If you’re protecting your family or property and cannot flee:

  • Fortify entrances with furniture, cords, and makeshift barriers
  • Cut power and silence electronics to avoid detection
  • Arm yourself with legally allowed weapons and know how to use them effectively
  • Keep lights off, stay silent, and use shadows to your advantage

Psychological Warfare: Controlling Your Fear

Fear is natural — but panic is fatal. Train your body through stress drills. Run with a weighted bag. Do pushups after holding your breath. Learn to control adrenaline. If your heart’s pounding and hands are shaking, your survival chances drop fast.

Practice staying calm by rehearsing “what if” scenarios. The more your brain runs simulations, the less it freaks out under pressure. Mindset isn’t fluff — it’s your most powerful weapon.


Final Thoughts from a Prepared Mind

Surviving a riot in Illinois isn’t about being paranoid — it’s about being prepared. You don’t get a second chance when chaos comes to your door. Know the law, train your body, sharpen your mind, and keep your gear ready.

You can’t stop a riot. But you can survive one. And for those of us who live by the code of self-reliance, that’s what matters most.

How To Stay Safe and Survive During a Riot in Louisiana (Especially New Orleans)

If you’re reading this, there’s a good chance you’re worried about the growing tension, unrest, and chaos spreading across cities—including right here in Louisiana. Whether it’s New Orleans, Baton Rouge, Lafayette, or a smaller parish town, no place is truly off-limits when society boils over.

I’ve been in this game for over 20 years. Former Marine, lifelong prepper, and self-defense instructor. I don’t sugarcoat things: when a riot kicks off, you’ve got two choices—be prepared or be prey. The goal isn’t to fight every battle—it’s to survive and protect what matters most: your life, your family, and your home.

Let’s get into the nitty-gritty. Below, I’ll lay out the top 8 self-defense skills you need to survive a riot, along with 3 DIY survival weapons you can build fast using what you’ve already got. But before that, I want you to understand the mindset: don’t panic—prepare.


First, Know the Nature of a Riot

Riots move fast and unpredictably. What begins as a peaceful protest can escalate in minutes with one bad actor. Fires, looting, and armed aggression can erupt out of nowhere. And in Louisiana, where gun laws are loose and tempers are fiery, things escalate fast.

You won’t have time to think in the moment. You’ll only have time to react. That’s why training and preparation save lives.


8 Self-Defense Skills You MUST Know Before a Riot

1. Situational Awareness

This is your #1 weapon—awareness beats strength. Always know your exits, keep an eye on crowd behavior, and trust your gut. If people start pushing, shouting, or moving aggressively, leave immediately. Watch hands, not faces—that’s where the danger comes from.

2. De-escalation Techniques

Sometimes your mouth can save your life. Know how to use calm, confident speech to avoid confrontation. Back away slowly, speak clearly, and avoid threatening posture. Your tone should be firm, not fearful.

3. Escape and Evasion Tactics

Move like a ghost. Stick to the edges of crowds, never the middle. Learn how to use alleyways, stairwells, parking garages, and even rooftops as exit routes. Blend in—don’t draw attention. Carry a hoodie, change your appearance quickly if needed.

4. Striking Vital Points

If it comes to a fight, go for the vitals: eyes, throat, knees, and groin. A good palm strike to the nose or throat can end a fight before it starts. This isn’t MMA—it’s survival. You’re buying time to escape, not win a trophy.

5. Improvised Weapons Training

You don’t need a gun to defend yourself. A flashlight, tactical pen, belt buckle, or even a steel water bottle can become a devastating weapon in the right hands. Train with what you carry every day.

6. Ground Defense

If you get knocked down, fight like hell to get up. Protect your head and vital organs, and know how to shrimp (escape from underneath) and post (create space). Learn basic BJJ escapes—they save lives.

7. Knife Defense & Use

Know both how to defend against a blade and how to use one. A fixed-blade knife is easier to deploy than a folding one in high-stress situations. Aim for disabling—not killing. Slash tendons, stab center mass, and get out.

8. Firearm Handling (If Legal and Trained)

Louisiana allows open and concealed carry, but only carry a gun during a riot if you’re fully trained. Understand escalation of force, legal consequences, and keep your finger off the trigger until you’re ready to shoot. Never brandish unless you intend to use it.


3 DIY Survival Weapons You Can Make at Home

When supply chains shut down or stores are looted, you’ll need to rely on your own resourcefulness. Here are three quick, brutal DIY weapons anyone can make.

1. The Pipe Baton

Find a metal or PVC pipe, about 1.5 to 2 feet long. Wrap the handle with paracord or duct tape for grip. Fill it with sand or small metal nuts to increase the weight. This is a blunt force tool that can break bones and end a confrontation fast.

2. The Slingbow (Modified Slingshot)

Take a high-tension slingshot and modify it to shoot arrows. Use surgical tubing for stronger draw, and fashion simple arrows from carbon rods or wooden dowels. It’s silent, reusable, and surprisingly accurate at short range.

3. The Weighted Sap Cap

Take a ball cap and sew lead fishing weights or metal washers into the rim of the hat. Looks normal—but swing it in a pinch, and it hits like a blackjack. Easy to carry, quick to use.


Additional Riot Survival Tips (Specific to Louisiana)

  1. Know Your Exits – Downtown New Orleans or Baton Rouge? Know where the bridges, tunnels, and back roads are. Avoid interstates during riots—they get jammed fast.
  2. Keep Your Vehicle Riot-Ready – Full tank of gas, bug-out bag in the trunk, and always park facing out for a quick escape.
  3. Stay Off Main Streets – Rioters gravitate toward popular streets, government buildings, and shopping centers. Avoid these areas at the first sign of unrest.
  4. Use Police Scanners or Local Apps – Get real-time updates. Apps like Scanner Radio, Citizen, or local Facebook groups can tell you where the chaos is happening.
  5. Avoid Confrontation – Your ego can get you killed. If someone challenges you, ignore and exit. Pride is the luxury of peace—not war.

Mental Toughness: Your Greatest Asset

In a survival scenario like a riot, your mindset is 80% of your success. You have to stay calm under chaos, make quick decisions, and protect your own. That includes understanding when to fight and when to flee.

Train regularly. Not just physically, but mentally. Simulate what you’d do in a riot. Go through “what-if” scenarios. Practice bugging out from your home. Rehearse using your DIY weapons.

Train like your life depends on it—because it might.


Final Words

I don’t write this to scare you—I write it to prepare you. I’ve seen what happens when good people get caught in bad situations. And I’ve seen how quickly the rule of law disappears when the fire starts spreading.

Louisiana is a beautiful state—but she’s wild, proud, and unpredictable. That means you can’t rely on the government, the police, or your neighbors when the lights go out and the crowd turns angry. You’ve got to rely on yourself.

Survival isn’t luck—it’s training.

How To Stay Safe and Survive During a Riot in Florida (Especially Miami)

Riot situations can spark off in a flash—especially in high-tension environments like Florida, where political tensions, natural disasters, and cultural divides can stir the pot quickly. If you’re not prepared when the chaos ignites, you could find yourself trapped, vulnerable, or worse. This guide is written not by a theorist or keyboard warrior, but by someone who’s trained, tested, and lived the prepper life. I’m going to walk you through real, tactical knowledge—not fluff—on how to survive a riot, defend yourself and your family, and even build your own survival tools if the grid fails or law enforcement is overwhelmed.

Let’s break it down into essential areas: self-defense skills, DIY survival weapon builds, and practical tips for riot survival in Florida’s urban and suburban settings.


Understanding the Threat

Florida is a hot zone in more ways than one. You’ve got densely populated metro areas like Miami, Tampa, and Orlando, combined with racial, political, and economic friction. A major protest can turn violent in hours. When it does, roads clog, police are spread thin, and looters target homes and businesses. Knowing how to react—and when—is your edge.


8 Crucial Self-Defense Skills for Riot Survival

1. Situational Awareness

The number one self-defense skill isn’t a punch or a weapon—it’s awareness. Keep your head on a swivel. Don’t get tunnel vision. Always scan exits, observe crowd behavior, and listen for shifts in tone—chants getting louder, police forming lines, people suddenly running. These are your cues to move.

2. Verbal De-escalation

Most threats can be avoided by staying calm and using the right words. Avoid eye contact with aggressive individuals. Speak clearly, with a low tone. Avoid insults. Say things like, “I don’t want trouble,” or “Let’s just keep moving.” Being able to defuse tension can keep you off someone’s radar.

3. Open-Hand Combat Techniques

You don’t need to be a black belt to defend yourself. Master three basics: palm strikes to the chin/nose, elbows to the jaw or ribs, and knee strikes to the midsection. These are powerful, quick, and can drop an attacker long enough for you to escape.

4. Escape and Evasion Tactics

Learn how to blend in with the crowd, take alternate routes, and stay out of choke points (like alleyways and dead-end streets). Avoid police frontlines and looter groups alike. Carry a map, not just a phone, in case GPS fails.

5. Improvised Weapon Use

If you’re not carrying a legal self-defense weapon, look around. A tactical flashlight, metal water bottle, belt buckle, or even a rolled-up magazine can be used for defense. Train your mind to see ordinary items as tools or weapons.

6. Ground Defense

If someone takes you down, don’t panic. Keep your chin tucked, bring your knees in, and cover your head. From your back, use your legs to create distance. Kick at the knees, shins, or groin to buy space to get back up.

7. Group Movement Tactics

If you’re with family or a small group, assign roles. One leads, one watches the rear, one keeps visual on surroundings. Stay close but not huddled—move like a team. Have a rally point if separated.

8. Adrenaline Control

Train your breathing. When adrenaline spikes, your motor control drops. Use box breathing: inhale for 4 seconds, hold for 4, exhale for 4, hold for 4. It keeps your mind sharp and reactions clear during chaos.


3 DIY Survival Weapons You Can Build Fast

If things escalate and you’re cut off from help, you may need to craft weapons from materials around you. These are not for intimidation—they are for last-resort defense. Be smart, know the laws, and only use if legally and morally justified.

1. PVC Pipe Baton

Grab a 2-foot section of PVC pipe (1-inch diameter), fill it with sand or concrete mix, and seal both ends with duct tape or rubber caps. Wrap it in paracord or grip tape. You now have a powerful blunt weapon that doubles as a walking stick.

2. Slingshot from Surgical Tubing

Using a Y-shaped tree branch or sturdy plastic forked handle, attach surgical tubing (or bike inner tube strips) and a leather patch. Use it to launch ball bearings, small rocks, or even marbles. Quiet, compact, and effective.

3. Spear with a Kitchen Knife

Lash a sturdy kitchen knife to a broomstick or closet dowel rod using paracord, duct tape, or zip ties. Sharpen the end of the pole if no knife is available. This extends your reach and gives you a stand-off advantage in close encounters.


Florida-Specific Riot Survival Tips

Florida’s landscape, laws, and climate play a big role in how you prepare:

  • Heat and Humidity: Always carry water purification tablets and electrolyte packs. Dehydration and heatstroke will ruin your mobility.
  • Hurricane-Prone Seasons: Riots often spike during or after disasters. Stock a bug-out bag year-round and rotate supplies every 90 days.
  • Castle Doctrine State: Know your rights. Florida law supports self-defense in your home and even your vehicle. But outside your home, use restraint—courtrooms aren’t forgiving just because you’re armed.
  • Transportation Routes: Avoid highways and interstates during riots. Use secondary roads and have backup routes planned. Always keep a half tank of gas minimum.
  • Curfews and Checkpoints: These often pop up during civil unrest. Have printed ID, a calm story, and keep any weapons legally carried and out of reach.

What to Pack: Quick Riot Survival Kit

  • Compact trauma first-aid kit
  • Tactical flashlight (1000+ lumens)
  • N95 or gas mask (if tear gas is deployed)
  • Portable radio (battery or hand-crank)
  • Knife (fixed blade or folding, legal length)
  • Cash (ATMs often go down)
  • Water filter straw
  • Compact food (MREs or protein bars)
  • Local paper maps
  • Emergency whistle

Keep it in your car, your backpack, or by the door—wherever it’s ready to grab fast.


Final Word: Mental Fortitude

Riots are not games. People die. People get traumatized. If you’ve trained your body but not your mind, you’ll freeze when it counts. Mental resilience comes from preparation, scenario planning, and building confidence through training. Don’t wait for it to happen to “start thinking like a survivor.” The time is now.

I’m not here to tell you to go full commando in the suburbs. I’m telling you to be prepared enough that when things hit the fan in Florida—whether from a protest gone violent, a collapsed supply chain, or a disaster aftermath—you’re the calm one. The protector. The survivor.

How To Stay Safe and Survive During a Riot in Georgia (Especially in Atlanta)

If you’re reading this, you’re already ahead of the pack. You understand that survival isn’t about panic—it’s about preparation. In times of social unrest, especially during a riot, staying safe demands a blend of street smarts, calm decision-making, self-defense training, and practical survival know-how. Living in Georgia, where protests and civil unrest have occasionally escalated into full-blown riots, makes understanding how to navigate this type of chaos not just useful—but necessary.

First Rule: Avoidance Is Victory

The first step in any survival situation is avoidance. Don’t play the hero. You’re not there to take sides. You’re there to get yourself and your loved ones home safe. Situational awareness is your most powerful ally.

Keep up with local news, police scanners, and community alerts. If you hear about demonstrations turning volatile in Atlanta, Macon, Augusta, or any major city, change your route or stay put. Avoid bottlenecked roads, city centers, and anywhere there’s a chance of getting trapped.

But if you’re already caught in a riot, here’s how to survive—and how to protect yourself.


8 Self-Defense Skills Every Urban Survivor Must Know

1. The Fence (Verbal and Physical Boundary Setting)

Before things turn physical, you need to manage the space between you and an aggressor. The Fence is a stance that places your hands non-threateningly in front of your torso, giving you a barrier to block, strike, or push off if needed. It also sends a clear message: Back off.

2. Close-Quarter Striking (Palm Strikes & Elbows)

Forget fancy martial arts kicks. In a riot, space is tight. Learn to deliver powerful palm strikes to the nose or chin, and sharp elbow strikes to vulnerable areas like the temple or throat. These techniques are quick, devastating, and don’t damage your hands like punching might.

3. Escape and Evasion Footwork

Riots are mobile. If you’re stationary, you’re a target. Train your footwork to move through crowds, avoid stampedes, and navigate obstacles. Zigzag, stay low when needed, and don’t run in straight lines when being chased. Learn the terrain like a ghost.

4. Clinch Defense

If someone grabs you, you need to control the clinch. A basic overhook or underhook can help you break the hold or control their body. Head control is key—push their head down and away to break their balance and escape.

5. Improvised Weapons Training

Learn how to use what’s around you. A belt with a heavy buckle becomes a flail. A tactical flashlight blinds and bludgeons. A pen? That’s a spike. Look at your environment as an arsenal, not an obstacle.

6. Knife Defense and Offense

You don’t need to be a Navy SEAL, but you must understand the basics of blade work. Know how to defend against slashes and thrusts, and more importantly—how to use a knife as a deterrent or tool. Keep a fixed-blade or quality folding knife accessible.

7. Ground Survival (Getting Back Up)

You may get knocked down. Your ability to get back up could save your life. Practice “technical stand-ups” and rolling maneuvers to regain your footing. Never stay on the ground in a riot. You’re vulnerable there.

8. Mental Conditioning

Your mind is your ultimate weapon. Practice controlled breathing, visualization, and scenario planning. Staying calm under pressure allows you to think clearly while everyone else is panicking. Panic kills—mental prep saves.


DIY Survival Weapon Skills: When You Need More Than Your Hands

When chaos reigns and law enforcement is overwhelmed, it’s your responsibility to protect yourself. These simple DIY weapons can give you the upper hand if things go south.

1. The Pipe Baton

Grab a 12-18 inch section of galvanized steel pipe, wrap the grip with paracord or duct tape, and you’ve got a riot-ready baton. Keep it in a go-bag or vehicle. Compact, brutal, and easy to carry.

Pro Tip: Use a hollow pipe and stuff the inside with lead fishing weights to give it more density. Secure with end caps.

2. The Survival Spear

Lash a knife or sharpened steel rod onto a broomstick or sturdy wooden pole. Use paracord, zip ties, or duct tape to secure it. A spear extends your reach and gives you a major advantage in keeping aggressors at a distance.

Bonus: In rural Georgia or wooded areas, this also serves for hunting small game.

3. Pepper Slingshot with Glass Beads

Take a heavy-duty slingshot and load it with marbles or steel/glass beads. Easy to aim, silent, and painful. If you want non-lethal deterrence, fill balloons with powdered cayenne or crushed peppercorns—when they burst on impact, they irritate eyes and lungs.

Warning: Practice accuracy before relying on it.


Strategic Tips: Before, During, and After the Riot

Before the Riot

  • Stock up: Water, food, first-aid, batteries, and comms gear.
  • Harden your home: Reinforce doors, install security cameras, and set up motion lights.
  • Plan multiple escape routes out of your neighborhood.
  • Build a Go-Bag: First aid, fire-starting tools, knife, flashlight, spare clothes, cash, radio, mask, gloves, ID copies.

During the Riot

  • Stay off main roads. Take backstreets or service alleys.
  • Avoid police lines and aggressive crowds alike.
  • Carry a mask and goggles to protect against tear gas and smoke.
  • If you’re in your vehicle, avoid confrontation—turn around or abandon it if you’re surrounded.
  • Stay silent, stay gray. Don’t film. Don’t yell. Don’t attract attention.

After the Riot

  • Document any damage to property for insurance.
  • Restock supplies.
  • Debrief your family or group. What worked, what didn’t?
  • Train harder. Get better. Adapt your gear and skills.

Know Georgia’s Unique Risks

In Georgia, weather can change fast—riots during high heat can cause mass dehydration and faster escalation. Also, gun ownership here is common. That means you must assume others are armed.

Stay legal. Know Georgia’s stand-your-ground and concealed carry laws. If you use force in self-defense, it must be justified. Learn when to fight and when to walk.

Also, the urban/rural divide in Georgia is real. What works in downtown Atlanta won’t help you in the Georgia backwoods. Adapt accordingly.


Final Words from a Survivalist

Riot survival is 30% gear and 70% mindset. Gear breaks. Batteries die. But your awareness, training, and willpower? That sticks. Teach your kids. Train your spouse. Don’t hope for the best—prepare for the worst.

Always remember: When the system breaks down, your preparation is your only safety net. Be smart, stay light on your feet, and never stop learning.

How To Stay Safe and Survive During a Riot in California (Especially LA)

Riots are unpredictable, chaotic, and fast-moving. In a place like California—where cities are densely populated and political tensions run high—things can spiral out of control in an instant. I’ve spent years honing my survival and self-defense skills, not just for wilderness emergencies, but for exactly these kinds of urban disasters. If you’re reading this, you’re likely looking to protect yourself and your loved ones. You’re in the right place. Let me walk you through how to stay safe and survive during a riot in California, using practical strategies, real-world self-defense techniques, and a few DIY weapon skills that could save your life.


1. Stay Informed – Before It Hits the Fan

The first rule of survival is awareness. Riots don’t usually just explode without warning. There are always signs: heated protests, political turmoil, viral videos igniting public anger. Monitor news outlets, police scanners, and social media feeds. In California, apps like Citizen, Nextdoor, and local Reddit threads can give you real-time updates.

Keep a Get-Home Bag in your vehicle, especially if you’re traveling into a city like Los Angeles, San Francisco, or Sacramento. It should include essentials: water, energy bars, N95 mask, eye protection, gloves, a flashlight, multitool, and a burner phone with emergency contacts.


2. Avoid the Chaos If You Can

Let me be clear: your #1 strategy is to avoid confrontation. Don’t be a hero. Get out before things escalate. If you’re at work and see unrest brewing downtown, leave early. If you’re at home, fortify your entry points and stay inside.

Do NOT try to “watch” the riot or record it for social media clout. That kind of foolishness can get you targeted in seconds.


3. Situational Awareness is Your Best Defense

I can’t stress this enough: stay alert. Keep your head on a swivel. In a riot, threats don’t always come from the angry crowd—you could be ambushed by opportunists looting, mugging, or looking to cause harm.

Watch for exit points, safe zones (like police stations or fire departments), and stay away from choke points like bridges or alleys. Always have an escape route.


4. Learn and Master These 8 Self-Defense Skills

When escape is no longer an option, you’ll need to defend yourself. These eight self-defense skills could make the difference between life and death:

1. Situational De-escalation

Before you engage physically, try to de-escalate. Calm voice, hands visible, avoid aggressive posture. Many confrontations can be avoided with the right words and tone.

2. Palm-Heel Strike

Simple, effective. Aim for the nose or jaw. The base of your palm is strong and unlikely to injure you. Practice striking upward from a neutral position.

3. Elbow Strikes

If you’re in close quarters, elbows are powerful tools. Strike the side of the head, temple, or collarbone.

4. Escape from Wrist Grabs

Always pull toward the thumb. Practice breaking free from various grips. Pair it with a strike and run.

5. Knee Strikes

Deliver a strong knee to the groin or solar plexus. Even large attackers will drop if you hit with force and precision.

6. Tactical Flashlight Usage

A sturdy tactical flashlight can blind, distract, and serve as a blunt weapon. Shine it directly into the eyes and follow with a strike if necessary.

7. Ground Defense

If you’re taken down, protect your head and get to your feet quickly. Learn how to shrimp and kick upward if pinned.

8. Improvised Weapon Defense

You won’t always have a knife or baton—learn to defend using what’s around you: a backpack, a belt, a pen, or a water bottle.

Pro tip: train regularly. Muscle memory can save your life when adrenaline spikes.


5. Blending In – The Gray Man Strategy

Dress to blend. If you’re walking through an angry crowd, don’t stand out. No flashy clothes, no political logos, no bright colors. Go full “gray man”—neutral clothing, low profile, calm demeanor.

Avoid eye contact, keep your head low, and walk with purpose but without fear. Confidence without aggression makes you less of a target.


6. DIY Survival Weapons – When You Have to Improvise

In some riot situations, police and security are overwhelmed, and 911 might as well be out of service. You may need to build and arm yourself with improvised tools. Here are three DIY survival weapons you can make at home or in a pinch:

1. PVC Pipe Baton

  • Take a 1.5 ft length of 1-inch PVC pipe.
  • Fill it with sand or gravel for weight.
  • Seal both ends with duct tape.
  • Wrap the middle with paracord for grip.

It’s non-lethal but effective for crowd control or breaking windows in an emergency.

2. Tactical Sling Weapon

  • Use a strong sock or paracord pouch.
  • Fill it with heavy coins, ball bearings, or small rocks.
  • Whip it like a medieval flail.

Compact and silent, this weapon can deliver serious pain and force attackers to back off.

3. Makeshift Spear

  • Duct tape or lash a kitchen knife or sharpened stick to a broom handle or metal rod.
  • Use zip ties, paracord, or sturdy tape.

Great for defense at a distance and keeping attackers out of arm’s reach.

Note: these are last-resort tools. Don’t bring a weapon into a crowd unless you’re absolutely sure you need it—and understand the legal consequences under California law.


7. Shelter in Place – Fortify Your Home

If the riot is near your neighborhood, stay home and lock down.

  • Reinforce doors with a security bar or heavy furniture.
  • Close blinds and curtains to prevent visibility inside.
  • Keep lights off in front rooms.
  • Fill bathtubs with water (in case of power or water loss).
  • Charge all devices and power banks.
  • Have your defensive tools within arm’s reach.

And don’t answer the door for anyone except law enforcement, and even then, verify credentials if possible.


8. Know When and How to Bug Out

If your home becomes unsafe—fires spreading, mobs looting homes—you need to bug out fast.

Have a Bug Out Bag ready:

  • Copies of ID
  • Cash in small bills
  • Water and purification tablets
  • Lightweight food
  • Knife/multitool
  • First-aid kit
  • Change of clothes
  • Flashlight
  • Emergency radio

Pre-plan multiple evacuation routes. Avoid highways if they’re clogged. Think like a scout: move silently, stick to the shadows, and trust no one unless you know them well.


9. Post-Riot Recovery

Even after the chaos dies down, danger still lingers—downed power lines, fires, civil unrest, and desperate people. Stay alert, continue monitoring communications, and only return home if it’s safe.

Document any damage for insurance, but be ready to defend your property if looters return. And take mental health seriously—what you experience in a riot can leave psychological scars. Talk to someone if you need to.


Final Words from One Prepper to Another

Surviving a riot in California—or anywhere—comes down to mindset, preparation, and adaptability. You don’t have to be a Navy SEAL to make it out alive. You just need to stay smart, stay calm, and be ready to act when others panic.

Remember: You are your own first responder.

Train. Prepare. Stay safe. And may you never need to use what you’ve learned—though it’s better to know it and not need it than the other way around.

Stay sharp out there.

North Carolina’s Worst Roads to Drive on During a Disaster

When the storm clouds gather and the ground starts to tremble, your vehicle becomes more than just a mode of transportation—it’s your lifeline. But not all roads are created equal when it comes to survival. In North Carolina, certain routes are particularly treacherous during disaster scenarios, especially when floods, landslides, or infrastructure failures strike. As a seasoned survivalist, I’ve traversed these perilous paths and learned firsthand which roads to avoid when the SHTF.

1. Interstate 40 – Pigeon River Gorge

The Pigeon River Gorge section of I-40, stretching from the Tennessee border to Waynesville, is notorious for its narrow lanes, steep grades, and frequent fog. This area has seen numerous fatal accidents due to limited maneuvering space and challenging weather conditions. In disaster scenarios, such as landslides or flooding, this stretch becomes even more hazardous, with limited escape routes and high traffic congestion. dangerousroads.org+2en.wikipedia.org+2southernliving.com+2

2. U.S. Highway 129 – Tail of the Dragon

The Tail of the Dragon, an 11-mile stretch of U.S. Highway 129 near the Tennessee border, is infamous for its 318 curves. While popular among motorcyclists and sports car enthusiasts, this road is perilous during disasters. The tight turns and lack of guardrails make it especially dangerous in adverse conditions, leading to a high rate of accidents. dangerousroads.org

3. Blue Ridge Parkway

While the Blue Ridge Parkway offers breathtaking views, its steep drops, sharp turns, and frequent fog, especially at higher elevations, pose significant risks during disasters. In winter, the road can become icy and treacherous, leading to numerous closures and accidents. The narrow roadways and unpredictable weather make it a challenging route to navigate in emergency situations. dangerousroads.org

4. Cherohala Skyway

Connecting North Carolina with Tennessee, the Cherohala Skyway climbs to elevations over 5,400 feet. The high altitude leads to rapidly changing weather conditions, including fog and icy patches, making it perilous during disasters. The road is long and isolated, with few guardrails and minimal cell service, increasing the difficulty of emergency response. dangerousroads.org+1southernliving.com+1

5. North Carolina Highway 12 – Outer Banks Scenic Byway

Highway 12, running along the Outer Banks, is vulnerable to flooding, especially during nor’easters and hurricanes. Sections of the road have been washed away in severe storms, isolating residents and travelers. The combination of wet pavement, strong storms, and potential washouts makes this route dangerous during disaster scenarios. charlotteinjurylawyersblog.com+1injury.arnoldsmithlaw.com+1

6. Interstate 85

Interstate 85, connecting North Carolina with surrounding states, is heavily trafficked by large commercial trucks. The high volume of vehicles, combined with sections lacking adequate lighting, increases the risk of accidents, particularly during nighttime or adverse weather conditions. In disaster situations, the potential for multi-vehicle pile-ups and delays in emergency response is significant. injury.arnoldsmithlaw.com

7. U.S. Highway 64 – Franklin to Highlands

This stretch of U.S. Highway 64 is known for its narrow lanes and high rate of fatal crashes. The combination of truck traffic and challenging terrain makes it particularly dangerous during disasters. Sections of the highway can become impassable due to landslides or flooding, complicating evacuation and emergency response efforts. charlotteinjurylawyersblog.com

8. Secondary Roads in Eastern Carolina

In the aftermath of winter storms, secondary roads in Eastern Carolina remain hazardous due to ice and snow accumulation. For instance, Highway 102 in Pitt County was covered with a sheet of ice, making it a slippery drive. These backroads are often not maintained promptly, increasing the risk of accidents and delays in emergency services. witn.com

9. Private Roads in Rural Western North Carolina

In rural areas like Yancey County, many private roads remain impassable months after disasters due to lack of maintenance and repair. For example, Green Leaf Road became nearly undrivable after a storm, delaying emergency medical care and isolating residents. The poor condition of these roads can hinder evacuation and emergency response efforts. washingtonpost.com

10. Interstate 95

Interstate 95, a major north-south corridor, is heavily used by commercial trucks and travelers. The high volume of traffic, combined with sections lacking adequate lighting, increases the risk of accidents, particularly during nighttime or adverse weather conditions. In disaster situations, the potential for multi-vehicle pile-ups and delays in emergency response is significant. injury.arnoldsmithlaw.com


15 Survival Driving Skills to Help You Drive Your Way Out of a Disaster Scenario

When disaster strikes, your ability to drive safely and effectively can mean the difference between life and death. Here are 15 survival driving skills every well-prepared individual should master:

1. Situational Awareness

Always be aware of your surroundings. Monitor weather conditions, road signs, and the behavior of other drivers. This awareness allows you to anticipate hazards and make informed decisions.

2. Defensive Driving

Maintain a safe following distance, anticipate potential hazards, and always be prepared to react to the unexpected. This proactive approach reduces the risk of accidents.

3. Off-Road Navigation

In disaster scenarios, paved roads may become impassable. Learning to drive on unpaved surfaces, including mud, gravel, and sand.

4. Vehicle Recovery Techniques

When stuck in mud, sand, or snow, knowing how to recover your vehicle using traction boards, winches, or even sticks and rocks can get you out when help isn’t coming.

5. Fuel Efficiency Driving

In a crisis, fuel is gold. Learn to coast when safe, avoid hard braking or acceleration, and keep RPMs low. These habits stretch every last drop of gas.

6. Night Driving Under Stress

Your headlights won’t show everything. Practice driving without relying on high beams and scan side to side to detect movement. Reducing your speed at night is not a weakness—it’s a survival tactic.

7. Navigating Without GPS

In a grid-down scenario, GPS might be useless. Get comfortable reading paper maps, recognizing topography, and using the sun, stars, or a compass to find your way.

8. Evasive Maneuvering

If civil unrest or ambushes are a threat, learn how to execute controlled skids, J-turns, and evasive lane changes. Knowing how to lose a tail may save your life.

9. Road Hazard Recognition

Learn to identify signs of weakened bridges, downed power lines, sinkholes, and flash flood zones. If the road ahead looks sketchy, assume it is.

10. Engine Troubleshooting Under Pressure

Know how to check fuses, clean battery terminals, patch coolant leaks, and diagnose overheating. Keep tools and spare fluids in your rig.

11. Tire Repair and Maintenance

Know how to plug a puncture, reinflate a tire with a portable compressor, and even drive short distances on a flat without destroying your rim.

12. Load Balancing

Keep your bug-out gear low and centered in your vehicle. A top-heavy SUV handles poorly and may roll in tight turns or over broken ground.

13. Wading Through Water

Water crossings can end your trip—or your life. Know your vehicle’s fording depth. Enter slowly, don’t create a bow wave, and test current strength with a stick before crossing.

14. Camouflaging and Parking for Safety

If you must hide, know how to use natural cover. Avoid parking near treelines where limbs can fall or in valleys where floodwaters collect.

15. Driving in Convoy Formation

If traveling with others, learn spacing, hand signals, and contingency protocols. A tight convoy is a moving target. A loose one falls apart.


3 DIY Survival Driving Hacks When You Run Out of Gas

Running out of gas in a disaster zone isn’t just inconvenient—it’s potentially fatal. Here are three field-tested hacks that can keep you going just a little longer:

1. Siphon Gas from Abandoned Vehicles (Legally and Morally Cautiously)

Carry a siphon pump or clear plastic tubing. Insert it deep into a vehicle’s tank (best from the fuel line under the car if they have anti-siphon valves), suck to start the flow, and collect fuel in a jerry can. Always double-check the fuel type—diesel in a gas engine will ruin it.

2. DIY Alcohol/Ethanol Mix Fuel

In extreme emergencies, small amounts of denatured alcohol (like marine stove fuel), rubbing alcohol (90%+), or even high-proof liquor can be mixed with gasoline to extend range. Use no more than 10-15% alcohol per tank and only on older, non-fuel-injected engines. Filter carefully with cloth to remove contaminants.

3. Fuel Vapor Ignition Trick (Advanced Survival Hack)

If completely out of liquid fuel, and you’re driving an older carbureted engine, a tiny amount of gasoline vapor can keep it running at idle or low RPM. This requires jury-rigging a warm metal canister with a fuel-soaked rag that slowly releases vapors into the intake (not for amateurs—fire hazard is extreme). Use only as a last resort and only if you understand the mechanics.


Real-World Lessons from a Well-Traveled Survivalist

I’ve driven from the Yukon to the Yucatán and back, across deserts, through flooded jungles, and along mountain passes that would make your teeth ache. But nothing humbles you like a North Carolina disaster. Roads buckle, bridges vanish, and the humidity itself seems to thicken the fear.

I remember Hurricane Florence—watching floodwaters rise over the Tar River while locals clung to roofs and state troopers rerouted everyone west. I made the mistake of taking Highway 12 the day after. A 30-foot section had vanished overnight. One poor soul had to be chopper-lifted from his vehicle half-buried in sand.

Lesson? Always recon the route—even your exit route. Trusting a road to be there in a disaster is like trusting a candle to burn in the rain.

Keep your rig ready. Not mall-crawler ready—survival ready. Fluids topped off, spare tire aired up, cargo secured. I keep a tire repair kit, a 5-gallon jerry can, and a bug-out bag behind my seat. When the sirens wail or the skies darken, I don’t wonder where my gear is—I’m already moving.

And remember this: The best driving skill isn’t about horsepower or trick moves—it’s judgment. Know when to floor it. Know when to stop. Know when to turn around.


Final Thoughts: The Road Less Traveled May Be Your Only Option

When disaster hits, roads become lifelines—or death traps. North Carolina, with its mountainous western ridges and flood-prone coastal plains, demands respect. The worst roads during calm weather become impassable nightmares under duress. Whether you’re escaping a storm surge or evading civil unrest, your driving skills, preparation, and knowledge of the terrain will determine your fate.

So practice. Prepare. Pray, if that’s your thing. But most of all—drive like your life depends on it. Because someday, it will.

North Dakota’s Worst Roads to Drive on During a Disaster

North Dakota’s Worst Roads to Drive on During a Disaster: Survival Driving Skills & DIY Hacks

Having logged thousands of miles in some of the most unforgiving terrains on the planet—from the slick mountain passes of the Rockies to the endless sand dunes of the Sahara—I’ve learned that no matter where you are, the roads you travel can make or break your chances in a disaster scenario. North Dakota, with its sprawling plains and unpredictable weather, offers a unique challenge that many overlook until they’re caught in the thick of it.

When disaster strikes—whether it’s a blizzard, flash flood, or wildfire—some roads become downright deadly. The sparse population and vast stretches of rural landscape in North Dakota can quickly turn familiar routes into traps. This is a survival guide for those who find themselves behind the wheel on North Dakota’s worst roads during a crisis, and it’s peppered with practical survival driving skills and hacks you can rely on when you’re running on empty—literally.

North Dakota’s Worst Roads to Drive on During a Disaster

1. Highway 85 through the Badlands
This stretch cuts through rough, eroded terrain with narrow lanes and sharp turns. In a disaster, it’s a nightmare—rockslides, sudden flooding, and poor cell reception make it a last-resort route.

2. County Road 6 near Devils Lake
Prone to flooding and ice during winter storms, this road can vanish under water or ice in hours. It’s a trap for the unwary and easy to get stuck on.

3. US-2 between Minot and Grand Forks
This main artery often faces winter whiteouts and heavy ice. The long stretches without rest stops or safe pull-offs make it dangerous during disasters.

4. ND-22 near the Missouri River
The proximity to the river means flood risks are high, and the road can get cut off quickly. Mud and debris wash onto the pavement during storms, hiding potholes and sinkholes.

5. ND-50 in the southwestern counties
This rural route is lightly maintained and often dotted with deep ruts and washouts after heavy rains or snowmelt.

Survival Driving Skills for North Dakota’s Worst Roads

I’ve distilled my experience into 15 survival driving skills that can help you navigate these treacherous paths safely.

1. Pre-Trip Recon
Always research your route before heading out. Use satellite maps and local weather reports to avoid roads prone to flooding or landslides.

2. Adjust Speed for Conditions
Speed kills, especially on icy or muddy roads. Slow down to maintain control and increase your stopping distance.

3. Use Low Gear on Slopes
On steep hills or slippery descents, use a low gear to control your speed without over-relying on brakes, which can cause skidding.

4. Avoid Sudden Movements
Steer and brake gently. Sudden jerks can cause loss of traction on ice or loose gravel.

5. Understand Traction Zones
Know which tires have the best grip depending on your vehicle type. For 4WD, front tires often steer, so keep them clean and clear of snow or mud.

6. Look for Alternative Routes
If a road looks unsafe, backtrack or take a detour—even if it means driving an extra 30 minutes. It’s better than getting stranded.

7. Maintain Tire Pressure
Underinflated tires are a liability in mud and snow. Check tire pressure frequently, especially before driving on rough roads.

8. Use Sand or Gravel for Traction
Carry a small bag of sand or gravel to pour under tires if you get stuck.

9. Know How to Rock Your Vehicle Free
If stuck in mud or snow, gently rock the vehicle back and forth by shifting between drive and reverse to gain traction.

10. Keep Momentum on Slippery Roads
Don’t stop suddenly on ice or snow. Maintain a steady pace to avoid losing traction.

11. Use Engine Braking on Descents
Let the engine slow the vehicle on downhill stretches instead of brakes to avoid skidding.

12. Keep Headlights and Taillights Clean
Visibility is everything during storms and dust clouds. Clean your lights regularly to be seen and see better.

13. Always Wear a Seatbelt
Simple, but often overlooked in emergency driving. It could save your life if you hit an obstacle.

14. Know How to Handle Hydroplaning
If you hydroplane, don’t slam on brakes. Ease off the accelerator and steer gently into the skid.

15. Communicate Your Location
Use a CB radio, GPS tracker, or satellite messenger to keep someone updated on your route and location.

DIY Survival Driving Hacks for Running Out of Gas

Now, what if disaster hits and you run out of fuel on these unforgiving roads? Here are three DIY survival driving hacks that have saved my skin more than once.

Hack #1: Use a Gravity-Fed Fuel Transfer
If you’re stuck near another vehicle or a fuel container, create a siphon with a clean hose or sturdy tubing. Start a slow flow of gas by sucking gently on the end until fuel begins to move through the tube, then place the hose end in your tank. Gravity will do the rest. Always be careful with fumes and avoid swallowing fuel.

Hack #2: Convert Your Vehicle to Run on Alternative Fuels (Temporary Measures)
Many vehicles can run on a mixture of gasoline and certain alcohol-based fuels (like ethanol or methanol) if gasoline runs out. If you can find small amounts of these alternative fuels at farms or remote stations, mixing them carefully can keep you moving. Research your vehicle’s tolerance ahead of time.

Hack #3: Use a Makeshift Hand-Push Starter
If your battery dies or you have no fuel to start the engine, you can sometimes push-start your vehicle. Get help from others to push the car uphill or on a flat surface, and then quickly engage second gear while releasing the clutch to start the engine. This works best on manual transmissions.


The Final Word

Driving North Dakota’s worst roads during a disaster demands respect, preparation, and calm nerves. The endless skies and wide-open spaces can lull you into a false sense of security—until a blizzard or flash flood changes the landscape overnight.

Survival on these roads means more than just brute driving skill. It’s about knowing the terrain, anticipating nature’s fury, and having the right survival driving skills up your sleeve. You have to be ready to switch gears—literally and figuratively—and keep a survival mindset through every mile.

Remember: If you don’t need to drive, don’t. Sometimes the best survival tactic is to stay put and wait out the storm. But when the road calls, let these tips guide you safely through North Dakota’s wildest roads.

Stay sharp, stay prepared, and above all—keep the rubber on the road.

South Dakota’s Worst Roads to Drive on During a Disaster

South Dakota’s Worst Roads to Drive on During a Disaster: A Survivalist’s Guide to Driving Your Way Out

I’ve spent decades on the road—across continents, through unforgiving terrain, and in every imaginable disaster scenario. Whether navigating flooded highways, treacherous mountain passes, or icy backroads, one truth stands firm: your vehicle can be your lifeline—or your coffin. South Dakota is no exception. Its wide-open prairies hide some dangerous choke points and stretches that become death traps when disaster strikes.

If you ever find yourself needing to bug out or escape a disaster in South Dakota, knowing which roads to avoid—and how to drive like your life depends on it—is crucial. I’ve mapped out some of the worst roads for disaster driving here, along with survival driving skills you need to master, and a few DIY hacks for when you run out of fuel. Buckle up; this is not a ride for the faint of heart.


The Worst Roads in South Dakota to Avoid in Disaster Scenarios

South Dakota’s terrain may look gentle, but disaster turns it into a death zone quickly. These roads are notoriously difficult during floods, ice storms, or structural failures:

  1. Highway 34 through the Badlands
    Narrow, winding, and often exposed to high winds and sudden rockslides, this highway can become a nightmare when disaster strikes. The Badlands are known for unpredictable weather and limited cell service, meaning if you get stuck here, help could be days away.
  2. Interstate 90 near the Missouri River Bridges
    During floods, these bridges can be compromised or closed without warning. Traffic congestion becomes a death trap in disaster evacuations, and the surrounding lowlands flood fast, trapping vehicles.
  3. Highway 79 south of Belle Fourche
    This stretch is exposed prairie with few alternative routes and is prone to heavy snow drifts in winter storms. In a disaster, this road can quickly become impassable, with limited places to pull over safely.
  4. State Route 34 between Huron and Mitchell
    Flood plains dominate this region, making it vulnerable to flash floods. The flat terrain means water pools quickly, and drainage systems can be overwhelmed.
  5. County Roads near the Black Hills National Forest
    Rugged, poorly maintained, and winding through dense forest, these roads are prone to landslides and fallen trees during storms or wildfires.

Survival Driving Skills for Disaster Scenarios in South Dakota

When the stakes are life or death, normal driving techniques won’t cut it. Here are 15 survival driving skills I swear by when navigating disaster zones on South Dakota’s worst roads:

  1. Controlled Skid Recovery
    When ice or mud takes the wheel from you, don’t slam the brakes. Steer into the skid and gently ease off the accelerator until control is regained.
  2. Throttle Modulation
    Smooth throttle application prevents wheel spin on slippery surfaces like ice or loose gravel.
  3. Defensive Scanning
    Constantly scan the horizon and roadside for obstacles, fallen trees, animals, or sudden drops. This also helps you anticipate road collapses or flood zones.
  4. Weight Transfer Management
    Understanding how your vehicle’s weight shifts during turns and braking helps prevent rollovers on narrow roads like Highway 34 through the Badlands.
  5. Emergency Braking Without ABS
    If your vehicle doesn’t have ABS, pump the brakes to avoid skidding. ABS systems behave differently; learn your vehicle’s braking response before disaster hits.
  6. High-Centering Avoidance
    When driving on uneven gravel roads or flood debris, know how to navigate to avoid your vehicle getting stuck high on an obstacle.
  7. Low-Speed Manoeuvring
    Master slow, precise steering to navigate tight, damaged, or obstructed roads.
  8. Hill Start Control
    On steep, icy inclines, use clutch control or the parking brake to prevent rollback.
  9. Use of Engine Braking
    On steep descents, downshift instead of relying solely on brakes to avoid overheating.
  10. Crosswind Stability
    South Dakota’s open plains expose vehicles to fierce crosswinds; keep a firm grip and slight steering correction to maintain lane control.
  11. Night Driving Preparedness
    Disasters often strike without warning; keep your night vision sharp and drive with minimal light pollution—use high beams only when safe.
  12. Water Fording Judgement
    Know the depth and current of floodwaters before crossing. Water above the axle is almost always a no-go.
  13. Tire Pressure Adjustments
    Lowering tire pressure can increase traction on soft surfaces like mud or sand, but be ready to reinflate as soon as possible.
  14. Vehicle Positioning for Escape Routes
    Always park or stop your vehicle so you can drive out quickly in any direction, especially on roads prone to sudden closures or blockages.
  15. Emergency Communication Readiness
    Keep a charged radio or satellite communicator to receive updates on road closures or hazards.

DIY Survival Driving Hacks When You Run Out of Gas

Running out of fuel during a disaster is a nightmare, but being a survivalist means preparing for the worst and improvising solutions. Here are three hacks that can keep you moving—or at least help you escape:

  1. Create a Gravity-Fed Fuel Transfer System
    If you find a fuel source in a nearby container (a damaged vehicle, storage tank, or jerrycan), use a clean hose or even a sturdy, flexible tube to siphon fuel. Gravity-fed siphoning is safer and more effective than mouth suction. Remember: always filter fuel through a clean cloth to avoid clogging your fuel lines.
  2. Use Dry Wood or Charcoal Briquettes to Generate Heat and Signal
    If you can’t move your vehicle, use dry wood or charcoal to create a controlled fire nearby. This can serve multiple purposes: keeping you warm, signaling rescuers, and deterring predators. Don’t leave your vehicle unguarded while you gather materials.
  3. Build a Makeshift Pulley or Tow System
    If your vehicle is stuck and fuel is low, rig a pulley system from sturdy branches or vehicle parts. Use your tow straps, rope, or even seat belts to leverage moving your vehicle to safer ground or toward a known fuel source. This requires some muscle and ingenuity but can save hours waiting for rescue.

Putting It All Together: Preparing for South Dakota’s Roads in Disaster

In my travels, I’ve learned that knowledge combined with preparation is survival’s foundation. South Dakota may seem calm, but when disaster hits, these roads become high-risk zones. Always:

  • Scout your route beforehand.
  • Pack extra fuel, emergency repair kits, and communication devices.
  • Know your vehicle’s limits.
  • Practice the survival driving skills until they become second nature.

When roads narrow or floodwaters rise, your mindset will determine if you’re just another statistic—or the one who makes it through.


Final Thoughts

South Dakota’s rural and sometimes wild landscape tests every driver, but especially in disaster scenarios. Your vehicle is a tool—one that requires skill, respect, and constant readiness. Learn the terrain, anticipate hazards, and never rely solely on modern conveniences like GPS or mobile networks. These will fail when you need them most.

Remember: disaster driving isn’t about speed; it’s about control, patience, and survival instincts honed by experience. If you master these 15 survival driving skills and know the worst roads to avoid, you’ll dramatically increase your chances of bugging out safely.

And if you do run out of gas, those three DIY hacks might just be the difference between staying stranded and making it home.

Stay sharp, stay ready, and drive smart.

New Hampshire’s Worst Roads to Drive on During a Disaster

New Hampshire’s Worst Roads to Drive on During a Disaster: A Survivalist’s Guide to Driving Out Alive

I’ve been around the globe, traversing jungles, deserts, mountains, and urban jungles alike. If there’s one thing I’ve learned, it’s that the terrain and road conditions during a disaster dictate your survival chances behind the wheel. New Hampshire, with its rugged landscapes, winding roads, and unpredictable weather, poses unique challenges when disaster strikes.

From flash floods washing out highways to ice-covered mountain passes, the Granite State’s roads can turn from familiar routes to survival trials in moments. When everything’s at stake, your ability to drive smart and resourceful is a life-saving skill. Here’s my rundown on the worst roads to navigate in New Hampshire during a disaster—and how to survive them, including survival driving skills and some off-the-grid hacks to keep you rolling.


The Worst Roads to Drive in New Hampshire During a Disaster

1. Kancamagus Highway (NH-112):
This scenic byway is stunning in good weather but deadly when disaster hits. Narrow, winding, and surrounded by dense forest, this road is prone to landslides, fallen trees, and flash flooding during storms. Snow and ice in winter only add to the peril.

2. Route 302 through Crawford Notch:
A vital corridor through the White Mountains, Route 302 is a rocky, narrow path with steep cliffs. Rockslides, avalanches, and ice can turn this route into a nightmare, cutting off escape routes.

3. Route 16 in the Ossipee Mountains:
Often used as a major north-south artery, this highway gets slick and treacherous with heavy rain or snow. Flooding can easily wash out sections, stranding drivers.

4. Bear Notch Road:
A steep, unpaved, and narrow mountain road often used for hiking access. It’s the kind of place that’s beautiful but unforgiving if you get caught during a disaster—mudslides and falling rocks are common.

5. Mount Washington Auto Road:
Though mostly for tourists, this road is the epitome of danger in bad weather—extreme weather can come fast, and the road has sheer drops with no guardrails in many spots.


Survival Driving Skills to Drive Your Way Out of Disaster

You might think just knowing how to drive is enough. It isn’t. You’ve got to be adaptable, calm, and technically skilled. Here are 15 survival driving skills I rely on:

1. Situational Awareness: Constantly scan the road, weather, and surroundings for hazards like falling rocks, sudden flooding, or stranded vehicles.

2. Controlled Braking: Avoid sudden stops. Use gentle, consistent pressure on brakes to maintain control, especially on slippery roads.

3. Threshold Braking: When emergency stopping, brake just before the wheels lock, maximizing stopping power without losing traction.

4. Off-Road Maneuvering: Know how to safely drive through mud, gravel, or dirt if roads are washed out or blocked.

5. Controlled Skid Recovery: When you lose traction, steer into the skid to regain control rather than overcorrecting.

6. Defensive Driving: Anticipate what other drivers or obstacles might do and plan escape routes.

7. Hill Climbing and Descending: Use low gears to control speed on steep inclines or declines, avoiding brake overheating or loss of control.

8. Tire Pressure Management: Lowering tire pressure slightly can increase traction in mud or snow but be cautious not to go too low.

9. Emergency Lane Usage: Be prepared to use shoulders or off-road areas to bypass blockages.

10. Night Driving in Poor Visibility: Use fog lights and low beams, avoid high beams in fog, and reduce speed.

11. Water Hazard Navigation: Know how to cross shallow floodwaters safely; avoid fast-moving water deeper than six inches.

12. Vehicle Weight Distribution: Understand how cargo placement affects handling, especially on slippery or uneven terrain.

13. Maintaining Momentum: When stuck in mud or snow, avoid spinning tires; gentle, consistent throttle helps keep traction.

14. Manual Transmission Mastery: Knowing how to control your vehicle without relying on automatic transmission aids in tricky spots.

15. Emergency Evacuation Route Planning: Always have alternate routes mapped out and avoid relying on GPS alone, which can fail or reroute dangerously during disasters.


3 DIY Survival Driving Hacks When You Run Out of Gas

Getting stranded without fuel is a worst-case scenario. In a disaster, help might be hours or days away. Here’s how to keep moving:

1. Use a DIY Gravity Fuel Feed:
If you have any extra gasoline in a container, you can rig a gravity feed line from the container to your fuel tank filler neck. Elevate the container above your car’s gas tank and use a flexible tube (like a cleaned-out garden hose). Open the fuel cap, insert the tube, and let gravity slowly feed the fuel into your tank. This is a slow process but can give you enough to limp to safety.

2. Create a Charcoal Briquette Starter for Emergency Heat:
When stuck and cold, keep charcoal briquettes in a small metal container inside your car, along with a small amount of dry kindling. This can be ignited carefully (outside the vehicle, with ventilation) to provide heat or help you start a small fire to melt snow for water, which could indirectly help you survive until rescue.

3. Convert Household Alcohol to Emergency Fuel (With Extreme Caution):
If you’re desperate and have access to high-proof alcohol (like ethanol-based hand sanitizer or spirits), it can be used as a fuel additive or emergency fuel in some vehicles. This requires careful mixing and knowledge of your engine type. Not ideal, but in a pinch, this can keep a vehicle running enough to escape immediate danger.


Additional Survival Tips for Driving New Hampshire’s Disaster-Prone Roads

  • Keep a Comprehensive Survival Kit in Your Vehicle: Include extra fuel, food, water, first aid, flares, a multi-tool, tire repair kit, and a portable air compressor.
  • Use All-Wheel or Four-Wheel Drive if Possible: New Hampshire’s roads during disaster demand the traction these provide.
  • Practice Off-Road Driving: Before disaster hits, get familiar with how your vehicle handles off-road conditions; many escape routes won’t be paved.
  • Learn Basic Vehicle Repairs: Knowing how to change a tire, fix a broken belt, or jump-start your battery can be the difference between life and death.
  • Stay Informed: Use weather radios and disaster apps to stay ahead of road closures or hazards.
  • Travel During Daylight: Visibility is critical; avoid night driving when possible.
  • Drive with a Buddy: If possible, travel with another vehicle for mutual aid.

Final Thoughts

New Hampshire’s natural beauty can quickly turn into a survival gauntlet during disasters. The roads that twist through the White Mountains and winding byways demand more than just a steady hand—they require knowledge, skill, and preparation. Driving yourself to safety isn’t just about having a reliable vehicle; it’s about mastering survival driving techniques and being resourceful when things go sideways.

I’ve driven in deserts where sand swallowed cars, jungles where mud dragged tires, and mountains where ice shattered vehicles. What’s common everywhere is this: preparation plus skill equals survival. Equip yourself, train yourself, and respect the roads—because in a disaster, your vehicle might just be your last lifeline.

Tennessee’s Worst Roads to Drive on During a Disaster

Tennessee’s Worst Roads to Drive on During a Disaster (And How to Survive Them)
By: A Well-Traveled Survivalist

When you’ve spent decades chasing storms, crawling through flash-flooded passes, and navigating highways turned to chaos, you learn one thing fast: the road is rarely your friend in a disaster. Especially in Tennessee.

Now, I’ve driven all over this country—rockslides in Colorado, hurricanes in Florida, ice storms in Maine—but Tennessee? It’s got its own flavor of trouble. The combination of winding mountain passes, crumbling infrastructure, sudden weather shifts, and bottlenecked urban sprawl makes it one of the trickiest states to navigate during a crisis. Whether you’re escaping a tornado, dodging wildfires, or trying to outrun the first signs of societal collapse, understanding the roads—and how to outsmart them—might just be what keeps you alive.

Tennessee’s Most Dangerous Roads During a Disaster

Let’s get specific. If you’re in Tennessee and the grid goes dark or a twister touches down, avoid these roads like the plague:

  1. I-24 Through Monteagle Mountain
    A steep, fog-prone stretch with frequent rockslides and sudden weather shifts. During a disaster, this becomes a deathtrap.
  2. I-40 Through Downtown Nashville
    Gridlocked in the best of times. In a crisis? It’s a parking lot with panicked drivers and no clear escape route.
  3. US-129 (Tail of the Dragon)
    318 curves in 11 miles—thrilling on a Sunday ride, deadly when you’re trying to flee with a vehicle full of supplies.
  4. I-75 Through Chattanooga
    Prone to major pileups and susceptible to flash flooding. Bridges and underpasses can trap you like a rat.
  5. SR-64 Through Franklin County
    Low visibility, poor maintenance, and sharp elevation changes. When every second counts, this road turns into a gauntlet.
  6. I-440 Loop in Nashville
    Short, poorly designed, and overloaded. A minor fender bender can stall traffic for hours, especially during an emergency.
  7. State Route 68 Through Tellico Plains
    Narrow, winding, and prone to fallen trees. In rural areas like this, you’re on your own.
  8. US-70S Through Murfreesboro
    Suburban chaos with high traffic density. Once panic sets in, forget about getting anywhere fast.
  9. I-81 in Northeast Tennessee
    Notorious for black ice and bad weather. Add in a panicked population and you’ve got a dangerous mix.
  10. SR-111 Near Cookeville
    Steep gradients and limited guardrails. Night driving here is hazardous—don’t even try it during a blackout.

15 Survival Driving Skills That Could Save Your Life

Now, let’s say you’re caught in a disaster scenario. Roads are jammed, GPS is fried, and cell towers are down. Here’s what you need to know to survive:

  1. Situational Awareness
    Scan far ahead for brake lights, smoke, or roadblocks. Keep your head on a swivel—danger rarely comes from just one direction.
  2. Off-Road Maneuvering
    Know how to take your vehicle off pavement. Even a two-wheel drive can manage a field or ditch if you pick your line carefully.
  3. Engine Braking
    Use your gears to control speed downhill—especially in the Appalachians. Burn out your brakes and you’re a rolling coffin.
  4. Navigating Without GPS
    Keep a physical map. Learn to read topography so you can identify passes, rivers, and high ground.
  5. Controlled Skidding
    Practice steering into a skid. Whether it’s rain, ice, or gravel, knowing how to recover might save your life.
  6. Driving Blackout
    Learn to drive with your lights off using only your night vision in low-profile getaways. Don’t do it often, but know it.
  7. Vehicle Field Repair
    From changing a tire to bypassing a starter relay, basic vehicle mechanics can get you out of a jam.
  8. Fuel Rationing Techniques
    Feather the gas, coast downhill, and limit idling. In a crisis, every drop matters.
  9. Using the Shoulder and Median
    These are legal gray zones during a crisis. Use them wisely—but avoid getting stuck in a soft shoulder.
  10. Barricade Breaching
    Keep a tow strap, winch, or even bolt cutters. Sometimes survival means clearing your own way.
  11. Convoy Driving
    In numbers there is safety—but it takes coordination. Establish signals, routes, and fallback points.
  12. Escape Route Planning
    Always have two exits: your main route and a backup. Practice both.
  13. Water Crossing Techniques
    Know your vehicle’s clearance. Never cross fast-moving water—six inches can sweep you off the road.
  14. Defensive Driving
    Aggression gets people killed. Keep space, stay calm, and anticipate others’ panic.
  15. Silent Starts and Idles
    Know how to shut down accessories and keep a low profile. Sometimes, quiet is your best ally.

3 DIY Survival Driving Hacks When You Run Out of Gas

Now for the brutal truth—eventually, you’re going to run out of fuel. Whether it’s panic-buying or supply chain collapse, it’s coming. But don’t throw in the towel just yet. Here are three DIY survival driving hacks that might buy you critical miles:

1. Ethanol Siphoning from Outdoor Equipment
Gas cans dry up fast—but lawnmowers, ATVs, boats, and even chainsaws often contain small amounts of fuel. It may be ethanol-blended, but it’ll burn in most engines if you’re desperate.

  • Tip: Use clear tubing and gravity to siphon safely. Avoid ingesting vapors.

2. Emergency Biofuel Additives
In certain engines, you can extend your gas with high-proof alcohol (like Everclear). It’s not ideal and not recommended long-term, but it can get you to the next stop.

  • Warning: Only for fuel-injected systems designed to tolerate ethanol blends. This is a last-resort move.

3. Human-Powered Flat Tow
If you’re completely out of fuel but not out of manpower, use tow straps and a bike, ATV, or even another person on foot to pull your vehicle downhill or out of the kill zone.

  • Pro Tip: Lighten the load, remove excess gear, and use neutral gear. It won’t be fast—but it might save your life.

Final Thoughts

I’ve survived by being prepared, staying calm, and adapting fast. That’s what driving through a disaster demands. Roads in Tennessee are beautiful but brutal. The mountains don’t care. The floods don’t care. Panic sure as hell doesn’t care.

So next time you’re driving down I-24 and the skies go green, ask yourself:
Do I know my vehicle?
Do I know this road?
Do I know how to get out alive?

Because if you don’t, it might be time to learn.