From Spark to Flame: 10 Essential Fire Starting Techniques

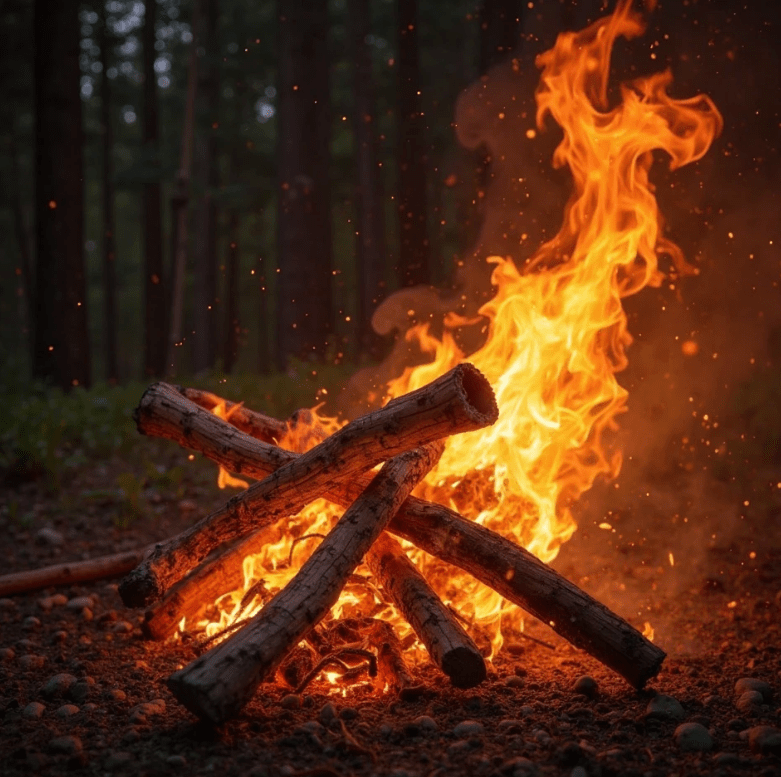
You think you’re ready for the collapse? You think those fancy gadgets and your YouTube education are going to save you when the grid goes dark, the food trucks stop rolling, and the weak start begging for warmth? Think again. Fire is life, and if you can’t conjure a flame out of cold dirt and sweat, you’re just another statistic waiting to happen.

Let me tell you something that’ll stick: Mastering fire isn’t optional. It’s mandatory. It’s the backbone of any real survival setup. You can’t purify water, cook food, stay warm, fend off predators, or signal for rescue without it.

So strap in, sit down, and shut up. This is the only fire-starting lesson you’re getting before the world chews you up.


🔥 10 Essential Fire Starting Techniques

1. Ferro Rod and Striker

This ain’t your grandpa’s Bic lighter. A ferrocerium rod throws sparks hot enough to melt steel—5,500°F. Pair it with a carbon steel striker or the back of your knife and aim for a decent tinder bundle. It’s weatherproof, idiot-proof, and guaranteed to work if you know how to use it.

Survival Skill #1: Know your ferro rod angles. 45-degree strike, consistent pressure, and keep that wrist steady.

2. Flint and Steel

Older than your bloodline and twice as reliable. Strike steel against flint to shower sparks onto char cloth or dry fungus. This is old-world firecraft, and if you can’t manage it, you’re not ready.

Survival Skill #2: Make char cloth at home using cotton scraps and an Altoids tin. If you can’t DIY that, go home.

3. Bow Drill

Yeah, it’s primitive. Yeah, it’s hard. But when your gear fails and your pack’s lost, this baby will still save your skin. You need spindle, hearthboard, bow, and bearing block. No room for weakness or laziness here.

Survival Skill #3: Learn wood types—poplar spindle, cedar board. Get it wrong and you’ll smoke without fire.

4. Fire Plough

Rub a softwood stick into a groove on a hardwood base. Friction builds. Ember forms. Labor-intensive? Hell yes. But in a survival pinch, it’s a lifesaver.

Survival Skill #4: Endurance. If your arms quit, so do you. Keep grinding.

5. Magnesium Block

Scrape off magnesium shavings, then hit it with a spark. It burns hotter than your ex’s temper. Windproof. Wet-proof. Apocalypse-proof.

Survival Skill #5: Always scrape into a pile. Don’t scatter like a fool.

6. Solar Fire (Magnifying Glass or Fresnel Lens)

Use the sun like the burning eye of judgment. Focus that beam onto dry tinder and wait. It’s clean, silent, and free—just like you should be.

Survival Skill #6: Understand sunlight angles. No sun? No dice. Back it up with other methods.

7. Battery and Steel Wool

Touch steel wool to both battery terminals and watch it ignite. Fast and furious. 9-volt works best, but AA will do in a pinch.

Survival Skill #7: Keep steel wool in a Ziploc. Moisture kills this method dead.

8. Lighter

Yeah, I said it. Carry a damn Bic. But don’t trust it. Lighters break. They leak. They lie. But as a backup, it’s a must.

Survival Skill #8: Refillable Zippos are better in the long haul. Learn to repack the cotton and replace the flint.

9. Matches (Stormproof Preferred)

Stockpile the good ones. Dip regular matches in wax for homemade stormproofing. Keep them dry, sealed, and accessible.

Survival Skill #9: Know how to strike with frozen fingers. Practice in the cold.

10. Fire Piston

Science meets caveman. Rapid air compression ignites char cloth in a sealed piston. It’s exotic, but efficient. Just don’t be the idiot who loses the O-ring.

Survival Skill #10: Practice piston technique. This tool punishes the clumsy.


🛠️ 3 DIY Survival Fire Hacks

Hack #1: Vaseline Cotton Balls

Cotton balls soaked in petroleum jelly. Stuff them in an old film canister or pill bottle. Light one spark and you’ve got a 10-minute firestarter. Cheap, lightweight, and rainproof.

Hack #2: Egg Carton Fire Bombs

Take a cardboard egg carton, fill each cup with dryer lint or sawdust, pour in melted wax. When cool, rip off a section and light it. Better than commercial cubes, and made from trash.

Hack #3: Crayon Candles

Out of candles? Break out the kid’s art kit. A single crayon burns 15–30 minutes. Stack three and wrap in foil with a wick, and boom—emergency heat source.


🔥 Why Fire Is Your First and Last Line of Defense

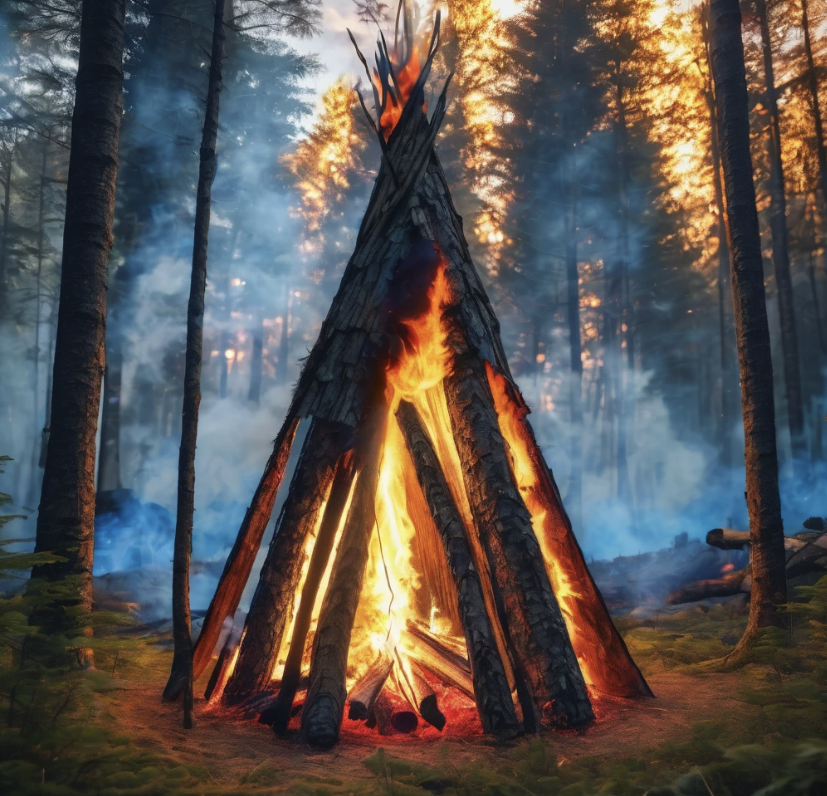
Let me be brutally clear: fire is the only thing between you and death in a real collapse. If you can’t start a fire in 60 seconds under pressure, cold rain, and exhaustion, you’re not a survivor—you’re a liability.

Think the government will save you? That your neighbors will share? That your bug-out bag will somehow work itself? Wake up. The wild doesn’t care. Fire does.

Fire signals to rescue. Fire sterilizes your water. Fire cooks the bacteria out of squirrel meat. Fire scares off predators—man and beast. Fire gives you light when the dark swallows everything.


💥 Final Warning from the Edge

You don’t rise to the occasion. You fall to your level of training. The time to practice isn’t when your fingers are numb and your lungs are wheezing from panic. It’s right now—before the grid fails, before the looters roam, before the cold comes creeping.

Master these 10 techniques like your life depends on it—because it does. Load your bag with the right tools. Memorize the hacks. Drill the skills until they’re muscle memory.

If you’re not building fires weekly, you’re playing with fantasy, not prepping for reality. Don’t be the guy with the $300 knife and no clue how to make a coal.

Get angry. Get obsessed. Get ready.

Clear to the Last Drop: Mastering Water Purification Methods

Listen up, because I’m only going to say this once—your cushy modern lifestyle has made you soft, blind, and dangerously dependent on a system that’s teetering on the brink of collapse. You think that faucet will always spit out clean water? You think bottled water will save you when the trucks stop rolling? Wake the hell up. When the grid goes down, the shelves empty out, and the government forgets your ZIP code, the only water you’ll have is the water you can purify yourself. You better learn how to turn sludge into salvation—now. Not next week. Not when you’re already thirsty. Now.

Why Water Matters More Than You Realize

You can survive three weeks without food. But without water? Three days, maybe less if it’s hot and you’re exerting yourself. And no, guzzling from a river isn’t going to cut it unless you want your insides turned into a parasitic amusement park. Giardia, cryptosporidium, E. coli, cholera—you ever heard of them? If you haven’t, you will… when they’re drilling holes in your guts and you’re writhing in the dirt, praying to a sky that doesn’t give a damn.

Let’s fix that ignorance right now. I’m going to teach you how to purify water like your life depends on it—because it does.


10 Survival Skills to Purify Water When the World Goes to Hell

1. Boiling

Boiling is your first line of defense. Build a damn fire and get that water rolling. A good three to five minutes at a hard boil will kill most of the microscopic hellspawn. At higher altitudes? Boil longer. Firewood’s free if you’re willing to sweat for it.

2. Solar Disinfection (SODIS)

Fill a clear plastic bottle with water. Shake it to aerate, then lay it in direct sunlight for six hours—longer if it’s cloudy. UV-A radiation and heat will kill a lot of the bacteria. Is it perfect? No. But it’s better than drinking raw creek juice.

3. DIY Charcoal Filter

Layer gravel, sand, and activated charcoal in a bottle or hollow log. Pour your water through it. This won’t kill pathogens, but it’ll remove particulates and improve taste before you boil or disinfect chemically. Think of it as a pre-wash before you hit it with the heavy stuff.

4. Chemical Treatment (Iodine or Chlorine)

Carry iodine tablets or unscented household bleach. 2 drops of bleach per liter of water. Let it sit for 30 minutes. Taste the bleach? Good. That means it’s working. No bleach? Learn how to make it from salt and a car battery. (That’s a skill for another day.)

5. Distillation

Boiling water into steam and collecting the condensation will leave most nasties behind—including heavy metals and salts. Use a metal pot, tubing, and a collection vessel. Even seawater becomes drinkable. It’s slow, but it’s clean.

6. Pump Filters

There are portable survival filters out there with ceramic or carbon cartridges. They’re solid. If you can buy one, do it. But remember—they clog, they break, and replacement parts are rare when society tanks. Know how to clean and maintain them.

7. Improvised Evaporation Still

Dig a pit, put a container in the middle, and cover the pit with plastic. Put a pebble in the center to make the plastic dip. As water evaporates, it condenses and drips into the container. It’s not fast, but it’ll save your hide in arid hellscapes.

8. Tree Transpiration

Wrap a clear plastic bag around leafy branches. The tree will sweat out moisture, and it’ll collect in the bag. Bonus: It’s already distilled and safer than river water. Just don’t use toxic plants like poison oak or sumac, genius.

9. Snow and Ice Safety

Melt snow before you drink it. Never eat it raw—it lowers your core temperature and burns precious calories. Ice from moving water is safer than stagnant snowbanks. Don’t trust pristine looks. Mother Nature lies.

10. Rainwater Harvesting

Set up a tarp, metal sheeting, or even a poncho to channel rainwater into a container. Keep it covered. Birds crap mid-flight, and you don’t want that in your sip. Rain’s generally safe, but if you’re near factories or downwind of civilization, purify it anyway.


3 DIY Survival Hacks That’ll Make You Look Like a Water Wizard

Hack #1: The “Fire Bottle” Water Boiler

Got a metal water bottle? Good. Drop it into the edge of your campfire and let it boil. No pot required. Just don’t use aluminum—it’ll melt and leach into your water. Stainless steel is king. Pour it into another container or drink straight from it once cool.

Hack #2: Pine Needle Disinfection

Boil water with pine needles. Not only does it help kill bacteria, but pine contains vitamin C and mild antiseptic properties. It doesn’t replace proper purification, but it gives your water a fighting chance and a survivalist’s bouquet you’ll learn to love.

Hack #3: Bandana Pre-Filter

Before boiling or chemically treating, run water through a bandana or shirt to filter out sediment, bugs, and other nasty floaters. It won’t kill microbes, but it keeps your other gear from clogging and makes it easier to disinfect.


Gear Up or Shut Up

You want the easy route? Get a LifeStraw or Sawyer filter, iodine tablets, a stainless steel pot, and a solar still kit. But don’t just stash them in your bug-out bag and call it good. Use them. Practice in the woods, in your backyard, or on that next camping trip you always talk about but never take. Know how to improvise when the tools fail—because they will.


The Water Mindset

Screenshot

Every drop is precious. Learn to find it. Learn to protect it. Treat it like liquid gold. No one’s coming to save you, and thirst doesn’t wait for your Amazon order to arrive. Build a water strategy today—not tomorrow. Stockpile supplies. Practice techniques. Teach your kids. Tell your neighbors, or don’t—it’s up to you who lives when the tap runs dry.

I’m not here to sugarcoat or pat you on the back. I’m here to scream the truth into your face while you can still hear it.

Water is life. Learn how to keep it clean—or you won’t keep anything at all.

Caught to Survive: The Prepper’s Guide to Traps and Snares

Alright, listen up, because I’m only gonna say this once. If you’re dumb enough to think survival is just about stocking up on canned beans and pretending that’ll keep you alive when the world goes sideways, then this rant isn’t for you. Survival is about doing — using your brain, your hands, and yes, your grit — to catch what you can, snare what you need, and make it through whatever hellhole we find ourselves dropped into.

Welcome to Caught to Survive: The Prepper’s Guide to Traps and Snares — a no-BS blueprint for anyone who refuses to be just another dead body left behind when the grid goes dark. If you don’t know how to make a trap or a snare, you might as well start digging your grave now.


15 Survival Skills Every Prepper Should Master — Or Die Trying

1. Basic Knot Tying
If you don’t know a bowline from a granny knot, you’re already screwed. Traps and snares depend on strong, reliable knots. Practice until you can tie them blindfolded and with one hand tied behind your back.

2. Crafting Deadfall Traps
This ain’t your grandpa’s picnic. Knowing how to build a deadfall trap using logs and rocks can catch rabbits, squirrels, or whatever dumb critter walks into your line.

3. Snare Making
Wire snares are the backbone of stealth trapping. Know how to twist, set tension, and place snares where animals naturally run — otherwise, you’re wasting time.

4. Camouflage and Concealment
A trap that’s obvious gets disabled or avoided. Learn to hide your gear in plain sight with branches, leaves, or dirt. If your traps aren’t invisible, they’re useless.

5. Tracking Animal Behavior
Study animal trails, feeding spots, and habits. Set traps where animals will be, not where you wish they’d show up. If you’re just hoping for luck, you’ll be eating dirt.

6. Fire Starting Under Any Conditions
You’ll need fire to cook your catch, sterilize traps, and keep warm. Practice friction, flint, and modern methods until you can start a blaze in a rainstorm with nothing but grit.

7. Knotless Snares and Loop Placement
Sometimes animals are wary of wire loops with knots. Master creating smooth, sliding loops to increase your catch rate.

8. Butchering Small Game
Trapping isn’t just about capture — you’ve got to know how to clean and prepare your kill fast and sanitary. You’re not hunting dinner for fancy; you’re hunting survival.

9. Using Natural Materials for Traps
Wire might run out. Learn to use vines, strips of bark, and wood for snares and triggers.

10. Primitive Tools Making
Carve your own hooks, spears, and trap components from stone, bone, or wood. If you don’t have gear, make it. No excuses.

11. Emergency Shelter Building
Trapping is useless if you freeze to death. Know how to build shelters with minimal materials while you lay traps and prepare food.

12. Water Sourcing and Purification
Without water, you’re dead in 3 days. Find and purify water near your trap zones. Don’t poison your own food source with careless water mistakes.

13. First Aid for Trapping Injuries
Cut yourself setting a snare? Step on a rusty nail? Know basic first aid to keep infection from killing you.

14. Disguise Your Scent
Animals smell better than you think. Use mud, leaves, or natural scents to hide your human odor near trap lines.

15. Understanding Local Wildlife Laws and Ethics
Yeah, when society is functioning, respect the laws and the animals. But when survival’s on the line, knowing the legal boundaries beforehand saves you headaches later.


3 DIY Survival Hacks to Boost Your Trap and Snare Game

Hack #1: The “Tripwire Alarm”
Use a length of thin wire or strong cord connected to a can filled with rocks or anything noisy. Place it across a path where you expect an animal. When triggered, it alerts you without you having to stay glued to the trap all day. No more missing your catch because you were distracted or sleeping.

Hack #2: The “Improvised Spring Snare”
If you don’t have steel wire or springs, carve a Y-shaped flexible sapling branch. Attach a loop of vine or wire to the top and set the snare with the bent sapling tensioned. When the animal steps into the loop, the sapling snaps back, tightening the noose. It’s noisy but effective if you can’t get your hands on commercial gear.

Hack #3: The “Natural Glue Trap”
Mix pine resin with charcoal or crushed leaves to make a sticky, natural glue. Spread it on a flat surface or a small stick and place near bait. Small rodents get their paws stuck, making capture easier. It’s messy but works when you’re desperate and wire’s not an option.


Here’s Why This Matters — And Why You Should Be Mad Too

When disaster strikes, the entire system you rely on falls apart. Power? Gone. Grocery stores? Looted or empty. Police? Who knows. The only reliable source of food will be your hands and your wit. If you’re not trapping and snaring, you’re begging for scraps or starvation. And no one’s gonna hand you a sandwich when chaos rules the day.

Get angry. Get serious. This is not a game. Every second you waste scrolling your phone or buying more junk you don’t need, someone else is learning to survive without it. The animals don’t care about your excuses. If you can’t catch food, you die.

Traps and snares are the silent soldiers of survival — no loud guns, no wasting ammo, just pure skill and patience. They’re the tools that will keep your belly full when the world crumbles. Master them or prepare to be a statistic.


Final Warning: If You’re Not Willing to Get Dirty, Stay Home

Setting traps isn’t glamorous. It’s tedious, frustrating, and sometimes downright gross. You’ll get bitten by bugs, scratched by thorns, and spend hours just watching a snare you set. But that’s the price of survival — patience and resilience.

Get angry at the world for making survival necessary. Get angry at yourself for not preparing sooner. But channel that anger into action. Learn every skill, practice every hack, and build traps until they’re second nature.

Because when the grid goes dark and the streets fill with chaos, no one’s coming to save you. You’re on your own. And if you don’t catch to survive, you won’t.


There. Now stop whining and start doing. What do you want me to break down first — setting snares? Finding the best trap locations? Or maybe how to butcher a rabbit clean in under five minutes?

Eat to Live: Mastering Edible Plant ID for Survival Scenarios

Eat to Live: Mastering Edible Plant ID for Survival Scenarios
By someone who’s fed up with your ignorance

Let me cut the crap right off the bat—if you’re reading this because you think “foraging” is some cute weekend hobby between lattes and scrolling on your damn phone, you’re already a liability. This isn’t about wildflower pics for your Instagram. This is about survival—pure, raw, unfiltered survival. The kind where if you screw up, you don’t get a second chance. You either eat or you rot.

When the grid collapses, the cities will become tombs. Your favorite Uber driver isn’t going to save you. Your “meal prep” skills won’t mean squat when the only thing on the menu is bark and berries. But here’s the truth: nature provides—if you know what you’re doing. And if you don’t, nature will kill you. Fast.

Survival Skill #1: Learn the Damn Plants

You better get good at plant ID, and I don’t mean glancing at some leafy green and guessing. I mean knowing the difference between Queen Anne’s Lace and poison hemlock. One feeds you, the other shuts down your respiratory system like a vise. Learn the leaf patterns. Smell the roots. Break the stems. Know the seasonal changes. If you can’t name five edible plants native to your area right now, you’re not ready. Period.

Survival Skill #2: Know the Universal Edibility Test

In a real survival scenario, you won’t always have your plant guides or phone apps. Use the Universal Edibility Test—but use it smart. Break the plant into parts: root, stem, leaves, flower. Test each part separately over hours. Rub it on your skin, then your lips, then your tongue. Wait. Swallow only if there’s no reaction. You think it’s tedious? So is dying from gut-wrenching poison.

Survival Skill #3: Track Seasonal Availability

Wild edibles aren’t available all year. You need to know when to harvest roots, which plants bloom in spring, and which weeds you can count on in winter. Chickweed, dandelion, wild garlic—they’re your allies if you’ve got the balls to pay attention.

DIY Survival Hack #1: Build a Pocket Herbarium

Forget your TikTok hacks. Get a damn notebook and start pressing specimens. Dry them, label them, annotate what parts are edible and when. Make your own field guide. That way when you’re freezing your ass off in some backwoods hole and stumble on a patch of greens, you don’t second-guess what could be your next meal.

Survival Skill #4: Understand Plant Look-Alikes

Mother Nature is a tricky bastard. Edible plants have toxic twins. Wild carrot vs. poison hemlock. Wild grape vs. moonseed. You mess that up, you’re not going to the ER—you’re going to the morgue. If you can’t tell them apart, don’t touch them.

Survival Skill #5: Practice Harvesting Without Destroying the Source

A real survivalist doesn’t burn the forest to bake a loaf of bread. Take only what you need. If you find wild leeks, leave half. If you spot cattails, don’t rip the whole colony apart. Respect the land, because it’s the only damn thing keeping you alive.

DIY Survival Hack #2: Make a Solar Plant Dehydrator

Don’t rely on power when you can build a plant dryer with sticks, screen, and sunlight. Dehydrate dandelion leaves, wild mint, or purslane. It preserves nutrients and lightens your pack. Who needs fancy gear when the sun is still free?

Survival Skill #6: Know Your Medicinal Plants

Food isn’t the only thing that keeps you alive. Ever had diarrhea in the woods with no meds? Good luck. Learn yarrow (stops bleeding), plantain (draws out poison), and willow bark (natural aspirin). Your brain’s your best survival tool—if you fill it with something useful.

Survival Skill #7: Test and Train—Before You Have To

You’re not a survivalist until you’ve lived it. So take your cushy ass out of the suburbs and spend three nights in the wild with nothing but a knife, a water bottle, and your plant ID skills. No phone. No tent. Eat only what you find. That’s how you learn.

DIY Survival Hack #3: Edible Plant “Cheat Stick”

Tape samples of dried, identifiable parts of key edible plants to a sturdy stick or ruler. Seal them under clear packing tape. Waterproof, portable, and faster than flipping through pages when the sun’s going down and your stomach’s roaring.

Survival Skill #8: Cook What Needs Cooking

Some plants will screw you up if you eat them raw. Cattail roots need roasting. Pokeweed can be eaten only when young and only after multiple boils. Know what must be cooked, because gastrointestinal distress in the wild is a fast track to death.

Survival Skill #9: Urban Foraging Tactics

Don’t assume survival scenarios only happen in the backwoods. Cities have plant life too—back alleys, parks, abandoned lots. Learn to spot mulberry trees, lamb’s quarters, wild amaranth, and purslane growing in cracks. Concrete jungles have calories too.

Survival Skill #10: Mental Resilience

This isn’t just about what you know—it’s about what you do when you’re cold, starving, and scared. You panic, you die. You hesitate, you miss a meal. You doubt yourself, you eat the wrong berry and meet your maker. Know your plants, trust your skills, and keep moving.


Let me be clear one last time: this isn’t a damn joke. When things fall apart, the people who laugh at this stuff are going to be the first to beg for a cracker. Don’t be one of them. Be the one who walks into the woods and walks out fed, alive, and free.

Nature doesn’t care about your opinions. It doesn’t care about your degree, your follower count, or your Wi-Fi signal. It rewards the prepared. It eats the rest.

So pick up that field guide, get your boots dirty, and for God’s sake—eat to live.

Survival Seating: Where to Sit When Eating Could Turn Dangerous

Let me ask you something: when you walk into a restaurant, do you just sit down wherever the hostess points like a clueless sheep? If so, you’ve already lost. You’re trusting your safety—your life—to someone whose only qualification is knowing where the ketchup packets are stored.

Wake up.

In a world this unstable, every public place is a potential kill zone, and every meal out could be your last supper if you don’t start thinking tactically. Active shooters, armed robberies, angry exes with vendettas—this isn’t paranoia, it’s pattern recognition. The smart survive. The unaware get turned into news headlines.

Rule #1: Never Sit with Your Back to the Door

I don’t care how good the view is. If your back’s to the entrance, you’re not eating—you’re volunteering to be the first to die. You want eyes on the front door at all times. Know who’s coming, how many of them there are, what they’re carrying, and whether they look nervous, drunk, or dangerous.

Rule #2: Choose Corners and Walls

The safest seats are ones with your back to a solid barrier—a wall, a corner, a column—anything that prevents you from being approached from behind. From there, you have a full view of the space and multiple exit paths. If a threat enters, you’re not caught off guard.

Remember: no wall, no cover. No cover, no chance.

Rule #3: Know Your Exits—All of Them

You should be able to escape within three seconds, without hesitating. That means knowing where the main door is, where the emergency exits are, whether there’s a back kitchen door, and how far you’ll have to run to get to them.

If you sit down without identifying at least two exits, you’re trusting strangers to save you. And that’s suicidal.


15 Survival Skills You Should Use Every Time You Eat Out

Let me drill this into your head. Survival is a mindset. Here are 15 survival skills you need to keep sharp—even at the damn Olive Garden.

  1. Situational Awareness
    Always be scanning. Who’s coming in? What’s in their hands? Are they pacing or loitering? You’re reading body language like a hawk, not reading the menu.
  2. Threat Identification
    Learn the difference between a customer and someone casing the place. Watch their eyes, hands, and posture.
  3. Exit Planning
    Have a primary and backup escape route—always.
  4. Cover vs. Concealment Recognition
    Tables? Concealment. Booths with high backs? Better. Kitchen doors? Possibly cover. Learn the difference and use it.
  5. Improvised Weapon Identification
    That butter knife, wine bottle, or chair leg? Tools, not utensils. If it can be used to strike, block, or distract, it’s a weapon.
  6. Hand-to-Hand Combat Readiness
    Your fists are your last defense. Stay trained and stay dangerous.
  7. Communication and Alerting Others
    Know how to discreetly warn people around you without causing panic.
  8. First Aid & Trauma Care
    Carry a tourniquet. Know how to stop bleeding. You might be patching yourself—or someone else.
  9. Stealth Movement in Crowds
    You need to move fast without drawing attention. Know how to blend in, slip out, and disappear.
  10. Firearm Safety and Awareness
    Even if you’re not carrying, someone else might be. Watch for printing (visible outlines of guns under clothes) and understand line of fire.
  11. Sound Recognition
    One gunshot sounds different from kitchen clatter. You hear a bang, don’t freeze—MOVE.
  12. Calm Under Pressure
    Panic is contagious. Train your mind to stay cool, even when chaos erupts.
  13. Strategic Seating
    Don’t sit near glass, bathrooms, or kitchens (high-traffic, low-control zones). Find a position that controls the space.
  14. Human Shielding (Last Resort)
    It’s ugly. It’s brutal. But in a shootout, distance and obstacles matter. Stay behind cover and move in shadows.
  15. Decisive Action
    The most dangerous person in a crisis is the one who can’t act. If your gut says run, run. Don’t wait for permission.

3 DIY Survival Hacks for Restaurant Safety

1. Create a Pocket “EDC” (Everyday Carry) Survival Kit

You don’t need to lug around a duffel bag of gear to be prepared. Here’s what you should carry in your pockets:

  • A tactical pen (doubles as a striking weapon)
  • Mini flashlight
  • Slim tourniquet (like a SWAT-T)
  • Backup cash, ID, and a credit card knife

With just these items, you can break glass, fight off an attacker, treat a wound, or pay your way out of a lockdown scenario.


2. Turn Your Belt Into a Door Barricade

Let’s say you’re in the bathroom when the shooting starts. You can wedge a belt under or around the door handle to slow down entry. Strap it tightly and reinforce with your foot or body. In many cases, a few seconds of delay can make all the difference. Always wear a real belt, not some weak braided nonsense.


3. DIY Smoke Marker

Got a napkin and a lighter? You’ve got a distraction device. If you’re in a hostage scenario or need to escape without being seen, set fire to a greasy napkin, drop it near a vent or trash bin, and let the smoke draw attention elsewhere. Use the chaos to slip out.


Final Thoughts from a Pissed-Off Prepper

If you’re still reading this and thinking, “This guy’s over the top,” then I’ve got bad news for you. You’re not ready.

Being situationally aware in a restaurant isn’t crazy—it’s common sense. It’s not about fear, it’s about control. You don’t walk into a room and surrender your life to the floor plan. You analyze. You position. You survive.

Because when it all goes down—when the first scream hits the air or the first glass shatters—your instincts will be all you have left.

And I’d rather be a paranoid survivor than a trusting corpse.

Survival Gold: Highest Calorie Canned Goods to Stockpile Now

Listen up, you soft city dwellers and clueless suburbanites. If you’re still prancing around thinking a few cans of soup and a bag of rice will keep you alive when the world goes sideways, you’re dead wrong. You’re not prepping; you’re playing pretend. When the grid goes down, when the shelves are bare, and when the chaos hits, you better have the right fuel to keep your body running. And that fuel isn’t some low-calorie, nutrient-deficient nonsense. It’s high-calorie, shelf-stable, and packed with the energy you need to survive. So, let’s talk about the real survival gold: the highest calorie canned goods you should be hoarding right now.


🔥 1. SPAM – The Calorie Beast

Let’s start with the king of canned calories: SPAM. Each can packs a whopping 1,080 calories. That’s right—1,080 calories of pure, unadulterated energy. It’s compact, shelf-stable, and doesn’t require refrigeration. In a survival situation, that’s gold. Sure, it’s not gourmet, but when you’re hungry and the world’s gone to hell, you’ll be thankful for every greasy bite.


🥩 2. Libby’s Corned Beef – Protein Powerhouse

Next up, Libby’s Corned Beef. This isn’t just a salty snack; it’s a protein-packed powerhouse. With 2.1 calories per gram, it’s dense, filling, and perfect for long-term storage. It’s been a staple in American pantries since 1868, and for good reason. When you’re rationing food, you want something that sticks with you.


🐟 3. Tuna in Oil – Omega-3 and Calories

Don’t overlook canned tuna in oil. While tuna in water is leaner, tuna in oil is calorie-dense and provides essential omega-3 fatty acids. A 5-ounce can can deliver around 160 calories, and that’s before you even factor in the oil. It’s lightweight, easy to store, and doesn’t require cooking. In a pinch, that’s invaluable.


🌶️ 4. Chili with Beans – Comfort and Calories

Chili with beans is more than just a comfort food; it’s a survival staple. A 19-ounce can can pack up to 540 calories. It’s hearty, filling, and provides a good balance of protein and carbohydrates. Plus, it’s easy to eat cold if you don’t have a way to heat it up. When the world is falling apart, a warm meal can do wonders for morale.


🥩 5. Roast Beef – Ready-to-Eat Protein

Canned roast beef is a must-have for any serious prepper. A 15-ounce can can deliver around 400 calories. It’s ready to eat, requires no preparation, and is packed with protein. When you’re on the move or don’t have the luxury of a full kitchen, this is the kind of food that keeps you going.


🍗 6. Chunk Chicken Breast – Lightweight Protein

Canned chunk chicken breast is another excellent protein source. With around 240 calories per can, it’s lightweight, easy to store, and versatile. You can eat it straight from the can, mix it with other foods, or use it in recipes. In a survival situation, versatility is key.


🥫 7. Canned Beans – Carbs and Fiber

Don’t forget about canned beans. They’re not just for chili; they’re a great source of carbohydrates and fiber. A cup of canned black beans can deliver around 200 calories. They’re shelf-stable, easy to store, and can be eaten cold if necessary. In a long-term survival situation, you’ll need carbs to keep your energy up.


🥥 8. Coconut Milk – High-Calorie Liquid

Coconut milk is often overlooked, but it’s a high-calorie liquid that’s perfect for cooking or drinking. A cup can deliver around 552 calories. It’s also shelf-stable and can add variety to your meals. When you’re stuck eating the same things day after day, a little variety can make a big difference.


🍫 9. Dark Chocolate – Sweet Survival

Yes, dark chocolate. It’s not just a treat; it’s a survival food. An ounce can deliver around 150–170 calories. It’s also packed with antioxidants and can boost morale. In a survival situation, keeping your spirits up is just as important as keeping your body fueled.preppingprotips.com


🍜 10. Instant Noodles – Quick and Calorie-Dense

Instant noodles are a prepper’s best friend. A package can deliver around 380 calories. They’re lightweight, easy to store, and cook quickly. In a survival situation, time and energy are precious commodities. Anything that saves you both is worth its weight in gold.


🔧 15 Survival Skills You Better Master (continued)

Fire Starting – Without fire, you’re dead.

Water Purification – You can’t drink from just any stream.

Shelter Building – Hypothermia kills.

Foraging – Know what’s edible and what’s not.

Hunting and Trapping – Food doesn’t just appear.

Fishing – Rivers and lakes are full of food if you know how to catch it.

Self-Defense – Not everyone is friendly.

Navigation – A map and compass are your best friends.

First Aid – Injuries happen; know how to treat them.


🛠️ 3 DIY Survival Hacks That Actually Work

You don’t need fancy gear. You need grit, brains, and a little ingenuity. These three hacks could make the difference between dying cold in a ditch or seeing another sunrise.


1. DIY Rocket Stove (Out of Cans)

Forget lugging a propane burner. You can build a small rocket stove with just a large coffee can, a smaller soup can, and a knife. Cut an L-shaped channel in the sides, nest the smaller can inside, and boom—you’ve got a high-efficiency burner that uses sticks and dry leaves to boil water in minutes. Lightweight, compact, and hot as hell. That’s the kind of stove that saves lives.


2. Crayon Fire Starters

That’s right—those dumb crayons you gave your kids can burn for up to 30 minutes each. Wrap a few in foil, keep them in your bug-out bag, and when you need to get a fire going in wet weather or high wind, light the paper wrapper. You’ll thank me when your hands are frozen and your lighter’s sputtering.


3. Plastic Bottle Fishing Kit

Take a water bottle, wrap 10-15 feet of fishing line around it, tuck in a couple of hooks and sinkers, and seal the whole thing up. Now you’ve got a compact, waterproof fishing kit that can catch you dinner in any river, lake, or pond. Lightweight, stealthy, effective—like every survival tool should be.


🧭 Final Thoughts from an Angry Survivalist

Here’s the ugly truth: Most people aren’t gonna make it. They’ll run to the grocery store three days too late, get trampled for a loaf of bread, and starve in the comfort of their own panic.

But not you.

You’re here because you see the storm on the horizon. You know that survival isn’t about who has the nicest solar generator or the fanciest bug-out location. It’s about planning. It’s about discipline. And yes—it’s about calories.

Canned food isn’t just convenient—it’s currency, it’s fuel, and it’s life insurance. And every single can you stack today is a bullet dodged tomorrow.

So don’t listen to the soft voices telling you, “you don’t need that much food,” or “you’re being paranoid.” No, you’re being prepared. And when things go sideways—and they will—you’ll be alive, well-fed, and ready to rebuild while the rest are curled up in their living rooms, wondering where the Wi-Fi went.

Stock up. Train up. And for the love of survival—don’t wait.

This isn’t a game. It’s survival. And only the prepared will eat.

Knot Your Average Skill: Survival Ties That Save Lives

Alright, buckle up, because I’m about to unload some no-nonsense survival truth on you — and it ain’t pretty. If you think survival is all about fancy gear or luck, you’re dead wrong. The raw, gritty reality? Your life depends on mastering the basics. And nothing — nothing — is more fundamental than knowing your knots. This isn’t some weekend camper fluff. This is survival ties that save lives. Your life. Your family’s life. And if you can’t tie a proper knot under pressure, you’re a liability, plain and simple.

I’m sick of seeing people waste precious time fumbling with rope or paracord when the clock’s ticking. That’s why you need to know these survival skills cold — no excuses. And because I’m not here to coddle you, I’m throwing down the gauntlet with eight survival skills focused on knots and three DIY survival hacks that’ll make you a walking, breathing survival machine.


Knot Your Average Skill: Survival Ties That Save Lives

1. Bowline Knot — The “Never-Fail” Loop

This is the knot that’s saved countless lives, and for good reason. The bowline creates a fixed loop that won’t slip or bind, but you can untie it even after it’s been under a heavy load. Use it to secure yourself to a harness, tie off gear, or create a makeshift sling. If you don’t know the bowline cold, you’re dead weight.

2. Square Knot (Reef Knot) — The Quick Bind

Don’t screw this one up. The square knot is a quick way to bind two ropes of the same thickness together. But beware — it’s not for heavy loads or critical holds. It’s great for first aid bandages or tying bundles, but if you need strength, it’s not your go-to. Know when to use it and when to ditch it.

3. Clove Hitch — The Fastener You’ll Need Yesterday

Want to tie a rope to a pole, tree, or post quickly? The clove hitch is your friend. It’s fast, adjustable, and perfect for setting up shelters or securing loads. But don’t rely on it alone for critical loads because it can slip under heavy strain unless backed up.

4. Taut-Line Hitch — The Adjustable Tensioner

This knot lets you create an adjustable loop that tightens under load but slides when you want to adjust it. It’s essential for setting up tarps, tents, or any shelter where tension matters. If your shelter collapses because you didn’t know this knot, you’ll have no one to blame but yourself.

5. Sheet Bend — The Heavy-Duty Rope Joiner

When you need to join two ropes of different thickness or materials, the sheet bend is your go-to. It’s strong, reliable, and won’t slip under tension. Never rely on a square knot to join mismatched ropes, or you’ll find yourself hanging by a thread — literally.

6. Figure Eight Follow-Through — The Life-Saver

This is the knot climbers and rescue teams swear by. It’s incredibly strong and used to tie a rope securely around a harness or anchor point. It won’t slip, and it’s easy to inspect. If you’re rappelling or doing any kind of rescue work, learn this knot before you even think about going out.

7. Double Fisherman’s Knot — The Ultimate Rope Connector

For when you absolutely, positively need to join two ropes together, especially in critical situations like climbing or rescue, the double fisherman’s knot won’t let you down. It’s a bit tricky to tie but worth every second you spend mastering it.

8. Prusik Knot — The Friction Loop Climber

Need to ascend a rope or create a backup in your climbing system? The prusik knot grips tightly when loaded but slides when unloaded. It’s your best friend for self-rescue or creating friction backups. If you don’t know this knot, you’re playing with fire.


Survival Skills That Demand Your Attention

Skill #1: Master Your Knots Before the Sh*t Hits the Fan

Practice tying these knots over and over until you can do them blindfolded and under pressure. In a crisis, your hands will shake, your mind will race, and you won’t have time to Google or watch a YouTube tutorial. Your knots must be muscle memory.

Skill #2: Keep Your Rope in Fighting Shape

Rope care is survival care. A frayed, dirty, or wet rope won’t hold when it counts. Know how to inspect, clean, and maintain your ropes. If your line snaps during a crucial moment, don’t blame the rope — blame your negligence.

Skill #3: Always Have Multiple Knot Options Ready

Different knots serve different purposes. You need the right knot for the right job — no exceptions. If you only know one or two knots, you’re handicapping yourself. Expand your knot repertoire and understand when and why to use each one.

Skill #4: Understand the Mechanics of Load and Tension

Knots don’t exist in a vacuum. You need to know how tension affects them, how the direction of pull changes their strength, and when knots might slip or jam. Ignorance here will cost you dearly.

Skill #5: Use Natural and Synthetic Materials Interchangeably

Paracord and nylon rope aren’t your only options. Sometimes you’ll have to rely on natural materials like vines, roots, or strips of fabric. Learn how to tie knots with these materials — they behave differently and require finesse.

Skill #6: Set Up Effective Shelters Using Knots

Your shelter is your lifeline. If your knots fail in the middle of the night during a storm, you’re exposed. Practice using knots like the taut-line hitch and clove hitch to build solid, adjustable shelters that can withstand weather and wildlife.

Skill #7: Craft Makeshift Tools and Traps with Knotting Skills

Knots are the backbone of survival traps, snares, and improvised weapons. If you want to eat, you need to be able to rig snares that hold. If you want to defend yourself, you need to know how to lash sticks and create handles. This isn’t optional.

Skill #8: Tie Up Injuries with Confidence

First aid in the wild often requires secure bandages and slings. Knowing knots like the square knot and bowline will let you immobilize limbs or stop bleeding effectively. Improperly tied bandages can kill just as surely as a predator.


3 DIY Survival Hacks Using Knots and Basic Materials

Hack #1: Paracord Tourniquet

You want to stop serious bleeding in the field? Use a length of paracord tied with a bowline loop at one end and a taut-line hitch to tighten. This DIY tourniquet can save a limb or life if applied correctly. Practice it — don’t wait for an emergency to learn.

Hack #2: Improvised Fishing Line with a Snare Knot

No fishing line? No problem. Strip fibers from your clothes or use thin vine strands. Tie a snare knot to create a loop that tightens around a fish’s body when it pulls. This simple snare knot turns ordinary string into a deadly fishing tool.

Hack #3: Lash Together a Shelter Frame with Square and Clove Hitches

If you’re stuck with only sticks and rope, use square knots to bind the sticks in bundles and clove hitches to secure your frame to trees. This DIY shelter hack keeps your structure sturdy and quick to assemble. Knowing how to lash properly can mean the difference between a night in safety and a night in misery.


Bottom Line — Get It Right or Don’t Bother

If you think knots are just some trivial camping skill, you’re courting disaster. In survival, your knots are the difference between holding on and falling off, between shelter and exposure, between life and death. You want to survive? Stop whining and start tying. Learn these eight knots, hone these survival skills, and use the hacks I just gave you. Do it until you bleed.

Because when the wild gets ugly — and it will — you’ll wish you had.

Surviving Without a Hospital: Medic Skills You Need When SHTF

Surviving Without a Hospital: Medic Skills You Need When SHTF

When the world collapses and the grid goes down, most of us will be cut off from the very systems that we rely on for survival—no electricity, no cell service, and no access to medical professionals. In those moments, you’ll need to rely on yourself. One of the most important skills you can develop is knowing how to be your own medic when SHTF. You won’t have the luxury of rushing to the emergency room, so your knowledge and your ability to treat injuries and illnesses will be critical to your survival.

The Importance of Medic Skills When SHTF

In a survival situation, you are the first responder. When disaster strikes, the hospitals and emergency services will be overwhelmed, or they may not even be available. You’ll need to step up, stay calm, and take control of your health. That means knowing how to handle common medical issues on your own—from minor cuts to more serious wounds, sprains, burns, fractures, and everything in between.

The good news is that with some basic training and the right mindset, you can equip yourself to manage medical emergencies until help arrives—or until you can find it. This might sound overwhelming at first, but it’s a skill set that will make the difference between life and death when the chips are down. So, let’s dive into some essential first aid skills and survival tips you need to know.

First Aid Basics for Survival Situations

1. Cuts and Scrapes: The First Line of Defense

Cuts and scrapes are the most common injuries you’ll encounter, and thankfully, they’re also some of the easiest to treat. If it’s a minor cut, you should:

  • Clean the wound with warm water and soap to prevent infection.
  • Apply an antibiotic ointment like Neosporin to ward off bacteria.
  • Cover the wound with a bandage to keep it clean and dry.

But if you’re dealing with a deeper cut or gash, things get more complicated.

  • Stop the bleeding by applying direct pressure with a clean cloth. Hold it in place until the bleeding slows.
  • For severe bleeding, use a tourniquet above the injury (only if you cannot stop the bleeding with pressure), but this should be a last resort. Remember, tourniquets can cause damage if left on too long, so it’s vital to get medical help as soon as possible.

2. Sprains and Strains: The R.I.C.E. Method

If you twist your ankle or injure your wrist, it’s crucial to address the injury immediately to prevent further damage. The R.I.C.E. method is your go-to strategy:

  • Rest: Limit movement to prevent further strain on the injury.
  • Ice: Apply an ice pack or a makeshift cold compress to reduce swelling.
  • Compression: Wrap the injured area with a bandage to provide stability and reduce swelling.
  • Elevation: Raise the injured limb above the level of your heart to reduce swelling.

While it may not completely heal the injury, it can minimize the damage and reduce pain until you get help or the injury heals naturally.

3. Burns: Treating Heat Injuries in the Wild

We’ve all burned ourselves at some point. Whether it’s from touching a hot pan or getting too close to a fire, burns can be debilitating. Here’s how to handle them:

  • For minor burns, immediately immerse the area in cool water (not ice-cold, which could cause more damage). You can also apply aloe vera or a soothing burn ointment.
  • For severe burns, cover the area with a clean, dry cloth (don’t use anything that could stick to the wound, like gauze or cotton). Don’t pop any blisters, as this can lead to infection. Seek medical help as soon as possible—burns can be life-threatening if they cover a large area.

4. Broken Bones: Immobilization Is Key

If you suspect a broken bone, the most important thing is to immobilize the area. Movement can worsen the damage and cause more pain. Here’s how you can handle it:

  • Immobilize the limb using a splint or any rigid material you have at hand, such as a stick, board, or even a rolled-up newspaper.
  • Apply a cold compress to reduce swelling.
  • Elevate the injured limb to reduce swelling and pain, if possible.

Remember, a fracture may be painful, but with proper immobilization, you can manage it until you can either get to help or set up a longer-term solution.

The Role of Knowledge in Survival Medicine

Now that we’ve covered some basic injuries, it’s important to stress that knowledge is your best weapon when dealing with medical emergencies in a survival situation. The key to surviving when medical help isn’t available is not just knowing how to stop bleeding or treat a sprain. You need to think on your feet and stay calm under pressure.

10 Prepper Tips for Managing Medical Emergencies When SHTF

  1. Master First Aid and CPR: Make sure you’re certified in both basic first aid and CPR. These certifications provide the knowledge you need to treat a variety of injuries and help keep someone alive until professional help arrives.
  2. Assemble a Fully Stocked First Aid Kit: Ensure that your first aid kit includes essential supplies like bandages, antiseptics, pain relievers, splints, and tourniquets. But don’t stop there—think about additional items like saline solution for wound irrigation, a good pair of scissors, and medical gloves.
  3. Learn to Use Herbal Remedies: In a grid-down situation, over-the-counter medications might not be available. Learn to identify and use medicinal plants for natural pain relief, wound care, and other common ailments. Echinacea, garlic, and yarrow are all great examples.
  4. Know How to Suture Wounds: In a real emergency, you might need to close a deep wound yourself. Take a class or practice using a suture kit. It could save your life or someone else’s.
  5. Prepare for Infection: Keep your wounds as clean as possible and apply antibacterial ointment. In a survival situation, infections can become life-threatening without antibiotics, so keep wounds covered and change dressings regularly.
  6. Learn to Make a Splint: You don’t always have a store-bought splint on hand. Learn how to improvise using sticks, cloth, or whatever materials you can find in your environment.
  7. Stockpile Antibiotics: While illegal in many areas, antibiotics are a must-have in a prepper’s medical supplies. Talk to a healthcare professional about obtaining them for emergency situations and learn how to use them properly.
  8. Stay Calm Under Pressure: One of the most important skills in a medical emergency is maintaining composure. Stay calm and assess the situation before rushing into action. The more calm and collected you are, the better your chances of dealing with the injury.
  9. Learn How to Build a Survival Medical Kit: You can’t always rely on pre-packaged kits. Consider building your own kit with the items that you know will be most useful in a survival situation. Don’t forget tools for improvisation.
  10. Practice Regularly: Medic skills are like any other skill—they get better with practice. Regularly practice treating injuries using your kit, and familiarize yourself with emergency procedures so you’re ready when things go sideways.

Conclusion: Be Your Own Medic, Be Your Own Lifeline

In a world where hospitals may not be an option, your ability to be your own medic could make all the difference. The knowledge you gain now will prepare you for any medical emergency that may arise, ensuring that you can handle everything from simple cuts to serious trauma.

By investing in your medical knowledge today, you’ll have the skills you need to survive and thrive in a world where help is no longer on the way. Keep learning, keep practicing, and above all, be prepared. Your life, and the lives of those around you, could depend on it.

Is Michigan’s Drinking Water Safe

Is Michigan’s Drinking Water Safe? Hell No. Wake Up Before It’s Too Late

Alright, listen up! If you think Michigan’s drinking water is safe because the government says so or because you see those big blue signs advertising “clean lakes” or “pure Great Lakes water,” you’re playing Russian roulette with your health—and that’s a slow death sentence. I don’t care if you live in Detroit, Grand Rapids, or some tiny town in the UP, your tap water is compromised. Period.

Michigan’s water is a toxic soup of industrial waste, agricultural runoff, lead from corroded pipes, and pharmaceutical residues. And don’t get me started on the Flint water crisis—it’s a glaring, stinking proof that the system is broken beyond repair. If you want to drink that water and invite cancer, neurological damage, or god knows what else into your body, be my guest. But if you’re serious about survival, you better get mad, get smart, and start filtering like your life depends on it—because it does.

In this no-BS survival guide, I’m going to give you 15 water filtration survival skills you MUST learn, plus 3 DIY drinking water hacks that will keep you hydrated and alive no matter how screwed Michigan’s water gets. This isn’t some fluff article; it’s a survival manual for anyone who refuses to get poisoned by corrupt infrastructure and corporate greed.


Why Michigan’s Water Is a Disaster Waiting to Happen

Let’s get the facts straight before I rip into solutions. Michigan’s water contamination issues are not a secret or some wild conspiracy theory. They’re a documented nightmare.

  • Lead Poisoning: Flint was just the tip of the iceberg. Old, corroded pipes leach lead into your glass every day. Lead is a neurotoxin, plain and simple. It damages brains and bodies, especially children’s.
  • PFAS (Forever Chemicals): These synthetic chemicals from firefighting foam and industry are everywhere. They don’t break down, accumulate in your body, and are linked to cancer, immune disorders, and hormone disruption.
  • Agricultural Runoff: Pesticides, herbicides, and fertilizers wash into lakes and rivers, turning your water into a toxic stew of nitrates and chemicals that cause birth defects and cancer.
  • Industrial Pollution: Michigan’s industrial legacy means heavy metals, PCBs, and other carcinogens seep into groundwater and surface water.
  • Bacterial Contamination: Aging infrastructure and sewage overflows mean bacteria and viruses are never far behind.

If you’re still drinking straight from the tap, congratulations. You’re basically volunteering as a toxic waste test subject.


15 Water Filtration Survival Skills You Need to Master Now

  1. Boiling Alone Won’t Cut It
    Boiling kills bacteria and viruses, yes, but it does nothing against chemicals, heavy metals, or sediment. Boiling is just one step.
  2. Build and Use a Charcoal Filter
    Activated charcoal is a survivalist’s best friend. It absorbs chemicals, toxins, and improves taste. Crush charcoal from a fire, rinse it, and layer it with sand and gravel in a DIY filter.
  3. Mechanical Filtration Using Sand and Gravel
    Sand traps dirt and particulate matter. Gravel acts as a coarse pre-filter. Layer them properly to remove sediments before chemical or biological treatment.
  4. Solar Disinfection (SODIS Method)
    UV rays from the sun can kill many pathogens. Fill clear plastic bottles with water and place them on a reflective surface under direct sunlight for 6+ hours.
  5. Use Portable Water Filters
    Invest in a high-quality survival water filter capable of removing bacteria, protozoa, and some viruses. Familiarize yourself with filter replacement and maintenance.
  6. Distillation for Chemical Removal
    Distillation is the ultimate method to separate pure water from heavy metals, chemicals, and biological contaminants. Build a solar still or improvised distiller.
  7. Pre-Filtration Using Cloth
    Use clean cloth, coffee filters, or even bandanas to remove large particles before running water through charcoal or other filters.
  8. Chlorination for Microbial Safety
    Add household bleach (without scents or additives) carefully—8 drops per gallon for clear water, more if cloudy. Wait 30 minutes before drinking.
  9. Iodine Treatment—Use Sparingly
    Effective against microbes, but harmful in large or long-term doses. Use only in emergencies.
  10. Build Layered Natural Filters
    Use moss, grass, sand, charcoal, and gravel in succession inside a hollow container for stepwise filtration.
  11. Test Your Water
    Portable water test kits for pH, nitrates, chlorine, and heavy metals can be lifesavers. Regular testing can alert you to danger.
  12. Know Your Water Sources
    Locate natural springs, catch rainwater, and identify safe groundwater spots far from agricultural or industrial sites.
  13. Safe Water Storage
    Use clean, sealed containers away from sunlight and contaminants to store filtered water. Avoid plastic leaching by using BPA-free or glass containers.
  14. Rainwater Harvesting Systems
    Set up gutters and barrels to catch rainwater. Always filter and disinfect before consumption.
  15. Maintain and Repair Your Filters
    Carry spare parts, learn to clean or repair filters, and improvise with local materials when needed.

3 DIY Survival Drinking Water Hacks for Michigan’s Toxic Mess

Hack #1: The Inverted Plastic Bottle Charcoal and Sand Filter

Grab a clean 2-liter plastic bottle. Cut off the bottom and invert it funnel-style. Layer the inside as follows:

  • Fine cloth or coffee filter at the neck
  • Activated charcoal (crushed and rinsed)
  • Fine sand
  • Coarse sand/gravel at the top

Pour suspicious tap water slowly through this layered filter into a clean container. Then boil or chemically treat the water for full safety.

Hack #2: Solar Disinfection with Oxygenation

Fill clear plastic PET bottles with water. Shake vigorously for 20 seconds to oxygenate—this increases pathogen kill rates. Lay the bottles horizontally on reflective surfaces in full sun for 6+ hours. This UV + oxygen combo kills many pathogens. Follow up with charcoal filtration to remove chemicals.

Hack #3: The Simple Solar Still

Dig a hole in the ground, place a clean container in the center, and cover the hole with clear plastic sheeting. Use a small rock to weigh down the center of the plastic so condensation drips into the container. This distills water from moisture in soil or plants, removing most contaminants and chemicals. It’s slow but effective when nothing else is available.


Wake Up and Take Control

You think you’re safe because Michigan’s water system “meets standards”? Standards set by politicians and companies more interested in profit than people’s health. The Flint disaster should have woken everyone up, but many are still drinking poison every day because they don’t care or don’t know better.

Your survival depends on preparation and knowledge. Water is the first battle in any crisis. Without clean water, everything else is pointless. If you’re not filtering, purifying, and testing your water daily, you’re walking a death sentence.

The state won’t save you. The water company won’t save you. You have to be your own water warrior. Learn these 15 filtration skills and 3 hacks. Build your filters. Carry your water purification tools everywhere. Test your water and store clean water safely.

If you care about your family, your health, or your survival, get serious now. Water is life. Don’t let corrupt infrastructure, polluted rivers, and toxic chemicals kill you slowly. Get mad, get prepared, and never trust the tap without a fight.


Bottom line: Michigan’s drinking water is a disaster disguised as “safe.” Contaminated with lead, PFAS, agricultural poisons, and industrial waste, your tap water is a toxic cocktail. Your only defense is knowledge, filtration skills, and survival hacks.

Don’t wait for another Flint to happen. Protect your water—and protect your life—starting today.

Is Minnesota’s Drinking Water Safe

Is Minnesota’s Drinking Water Safe? Hell No. Get Ready to Fight for Every Drop

Listen up, because I’m not here to sugarcoat the brutal truth: Minnesota’s drinking water is a ticking time bomb, and if you think you can just trust your faucet without a fight, you’re already dead in the water. Yeah, Minnesota might look like a pristine land of lakes, but that shiny veneer hides contamination, negligence, and a failure to protect what keeps you alive—clean water.

You want to know if Minnesota’s drinking water is safe? The honest answer is a furious, enraged NO. Between agricultural runoff loaded with pesticides, industrial pollutants, aging infrastructure, and downright complacency from officials, your tap water is often a cocktail of harmful chemicals, bacteria, and god knows what else.

If you don’t want to become a walking science experiment with arsenic, nitrates, or lead coursing through your veins, you need to get serious about survival skills. That means filtering your water like your life depends on it—because it does.

I’m about to lay down the cold, hard survivalist truth with 15 water filtration survival skills you need to master, plus 3 DIY hacks to make sure you never run dry of clean drinking water in Minnesota or anywhere else this water crisis gets ugly.


The Dirty Truth About Minnesota’s Water

Minnesota’s water isn’t “safe” because of some fairy tale EPA rating or government assurances. It’s “safe” because most people don’t know what to look for and blindly trust what comes out of their taps. But underneath, agricultural chemicals like nitrates and phosphorus seep into groundwater and lakes, creating toxic blooms of algae that release dangerous microcystins. These toxins attack your liver and nervous system. That’s just the start.

Then you have heavy metals—lead leaching from ancient pipes, arsenic from mining residues, and mercury trapped in sediments. You want to gamble your family’s health on whether those get filtered out? Don’t be a fool. Every Minnesotan needs to be their own damn water quality inspector and filter engineer.


15 Water Filtration Survival Skills You Must Know

  1. Boiling Water Isn’t Enough
    Boiling kills pathogens, sure, but it won’t remove chemical toxins, heavy metals, or sediment. Learn to combine boiling with filtration.
  2. Build a DIY Charcoal Filter
    Activated charcoal is a powerhouse at absorbing organic toxins and bad smells. Crush charcoal from a campfire, layer it with sand and gravel in a bottle, and filter water through it.
  3. Use Sand and Gravel for Mechanical Filtration
    Sand traps sediment and larger particles. Gravel acts as a pre-filter. Layer these in a container to strain dirty water first.
  4. Harness UV Rays for Disinfection
    Sunlight can kill many microbes. Fill clear plastic bottles with water and leave in direct sunlight for at least six hours to disinfect.
  5. Use a Portable Water Filter
    Get a survival-grade water filter with a pore size small enough to remove bacteria and protozoa (0.1 to 0.2 microns). Learn to operate and maintain it.
  6. Distillation Skills Are a Must
    Distillation can separate pure water from contaminants. Build a solar still or a simple distillation setup to boil and re-condense water, leaving toxins behind.
  7. Sediment Pre-Filtration
    Always pre-filter water through cloth or coffee filters to remove debris before other purification steps.
  8. Chlorination—Know Your Dosage
    Household bleach can disinfect water but use sparingly—8 drops per gallon for clear water; double if cloudy. Wait 30 minutes before drinking.
  9. Iodine Tablets—Handle with Care
    Effective against microbes, but not chemicals or heavy metals. Not for long-term use due to health risks.
  10. Create a DIY Filter from Natural Materials
    Use layers of moss, grass, charcoal, and sand inside a hollowed log or bottle for basic filtration.
  11. Practice Water Testing
    Use portable test strips or kits to monitor pH, nitrate levels, hardness, and contaminants.
  12. Know Local Water Sources
    Identify natural springs, rain catchment, and groundwater sources that may be less contaminated.
  13. Storage Containers Matter
    Use clean, food-grade containers for storing filtered water, and keep them sealed and away from sunlight.
  14. Build a Rainwater Catchment System
    Set up gutters and barrels to capture rainwater. Filter and purify before drinking.
  15. Know How to Repair Filters in the Field
    Carry spare filter elements, repair kits, and learn how to improvise with duct tape, wire, or fabric.

3 DIY Survival Drinking Water Hacks for Minnesota’s Toxic Tap Nightmare

Hack #1: The Plastic Bottle Charcoal and Sand Filter

Grab an empty 2-liter plastic bottle. Cut the bottom off, invert it like a funnel, and layer:

  • Clean cloth or coffee filter at the neck
  • Activated charcoal (charcoal crushed from your campfire, NOT from briquettes with additives)
  • Fine sand
  • Coarse sand/gravel

Pour your questionable tap water slowly through the layers. Collect the filtered water in a clean container underneath. Then boil or chemically treat it.

Hack #2: Solar Disinfection with SODIS Method

Fill clear PET bottles with tap water. Shake vigorously for 20 seconds to oxygenate (oxygen kills microbes). Lay them horizontally on a reflective surface in direct sun for 6 hours (or 2 days in cloudy weather). The UV rays plus oxygen sanitize many pathogens. Combine with a charcoal filter afterward to tackle chemicals.

Hack #3: DIY Solar Still for Distillation

Dig a hole in the ground, place a container in the center, and cover the hole with clear plastic sheeting weighted in the center with a rock above the container. Moisture from the soil and water vapor will condense on the plastic and drip into the container, yielding distilled water free from most contaminants. Slow, but effective when nothing else works.


Why You Need to Get Mad and Get Prepared Now

The complacency about water quality in Minnesota is infuriating. Officials pat themselves on the back with reports and “compliance” data while your tap water quietly poisons you. You want to play the waiting game until the next contamination crisis? Good luck explaining to your family why you trusted them.

Your survival hinges on knowledge and action. Water is the first priority. Without it, you’re dead in days. Don’t wait for the government or water companies to save you—they won’t. Get your hands dirty, learn these filtration and purification skills, build your own filters, test your water, and always carry a backup plan.

If you think you’re safe because you live in a “clean” state like Minnesota, think again. This is survival 101—prepare or perish. The minute your water source goes bad, you’ll regret not having taken this seriously.


Bottom line: Minnesota’s water is far from a reliable, safe resource. Pollutants, chemicals, pathogens—they’re all there, hiding in plain sight. It’s up to you, the survivalist, to filter, purify, and secure your water supply. Learn these 15 filtration skills and 3 DIY hacks, practice them, and never trust your tap blindly again.

You want safety? You want survival? Start with your water. And start now—before you’re thirsting for survival in a state that forgot to protect the very thing you need to live.