How to Survive in the Wilderness When SHTF (And Everything You Love is Gone)

Let’s get one thing damn clear: when the world burns, your smartphone won’t save you. Amazon ain’t dropping packages in the forest, and nobody’s coming to rescue your soft, GPS-dependent backside. You either learn to live or lie down and rot. That’s the brutal truth. Now pull your head out of your ass and listen up.

Out there in the wilderness, everything is trying to kill you: the weather, the wildlife, and most of all, your own ignorance. If you don’t know what the hell you’re doing, nature will chew you up and spit your bones into the dirt. But if you learn the skills — real survival skills — you can make it. You can thrive. You can be the last one standing when SHTF.

Here’s how. This is survival, not a damn camping trip.


🔥 15 WILDERNESS SURVIVAL SKILLS YOU’D BETTER KNOW IF YOU WANT TO STAY ALIVE:

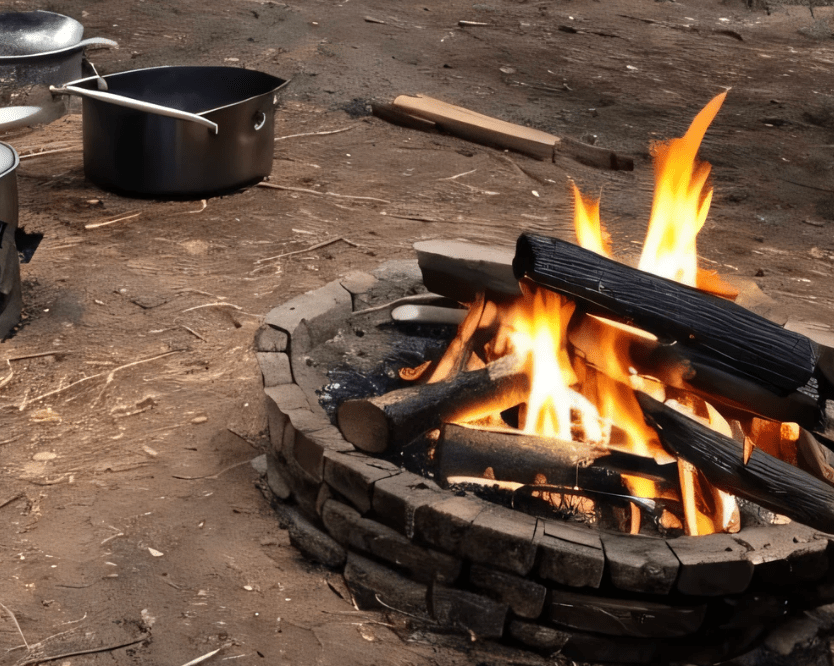
  1. Fire Starting (Without a Lighter)
    Your Bic won’t last forever, cupcake. Learn how to start a fire with flint and steel, a bow drill, or even a battery and steel wool. Fire is warmth, food, safety, and morale.
  2. Water Purification
    If you drink straight from a river, you’re inviting giardia and dysentery to your apocalypse party. Boil it. Filter it. Solar still it. Know your options or die thirsty with a belly full of parasites.
  3. Shelter Building
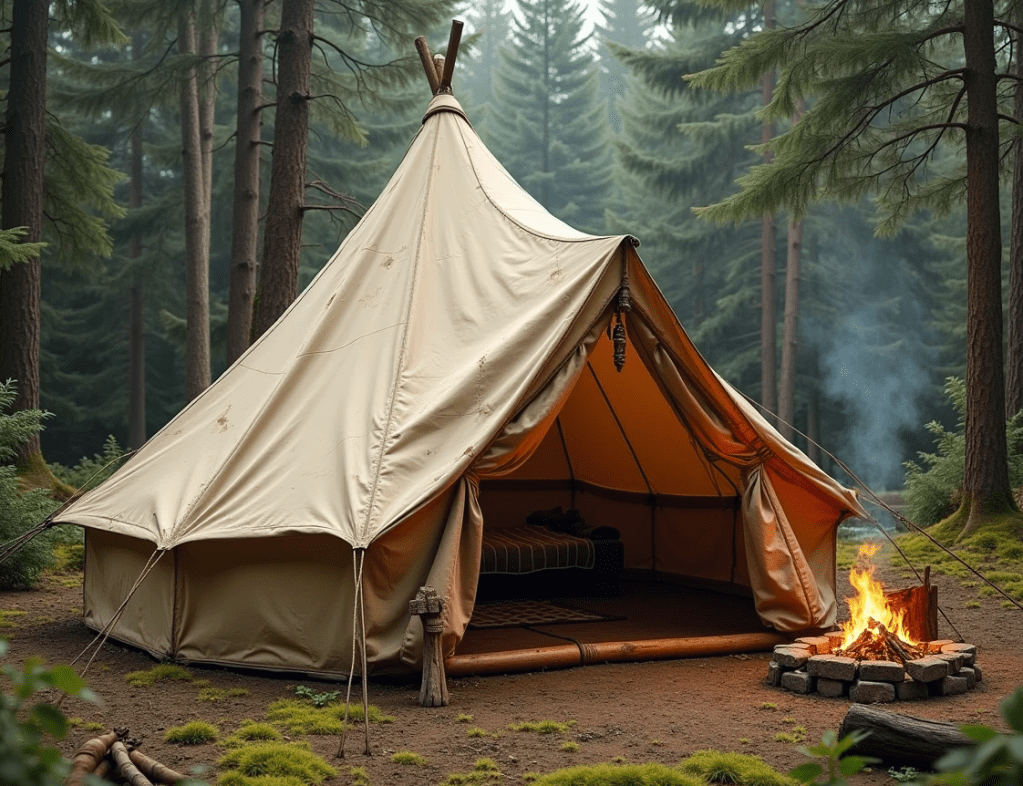
    Tarps rip. Tents rot. Know how to build a debris hut, a lean-to, or a log shelter. Hypothermia is a silent, smug son of a bitch.
  4. Navigating Without Tech
    Compasses don’t need batteries. Learn celestial navigation and terrain association. Don’t trust landmarks — memorize the land itself.
  5. Hunting and Trapping
    No more Uber Eats. Set snares. Make deadfall traps. Know how to gut and clean game without puking your guts up.
  6. Fishing Without Gear
    Improvised hooks, fish traps, spearfishing. Learn it. You can’t live off berries forever — unless you enjoy starvation and hallucinations.
  7. Edible Plant Identification
    One wrong leaf and you’re crapping blood for days. Learn what’s safe to eat in your region. Make a damn notebook and memorize it.
  8. Improvised First Aid
    Nobody’s coming with morphine and a gurney. Learn how to close wounds, stop bleeding, and fight infection with natural resources and basic kits.
  9. Stealth and Camouflage
    You’ll need to hide — from people, from animals, from your own mistakes. Learn how to move unseen and build camo shelters.
  10. Signaling for Help
    If you do want rescue, you’d better know smoke signals, mirrored flashes, and ground-to-air symbols. Yelling won’t cut it.
  11. Tool Making
    Can’t buy a new knife out here. Learn to knap stone, carve wood, lash together gear. Primitive tools keep you alive.
  12. Cordage Crafting
    Paracord runs out. Learn to twist plant fibers into strong cord. Without rope, you’re just a well-fed caveman.
  13. Food Preservation
    Salt. Smoke. Drying. Fermentation. Without preservation, every good kill goes rotten before you can say “wasted calories.”
  14. Mental Fortitude
    You will be cold, tired, scared, and alone. Crying won’t help. Mental toughness is as critical as any blade on your belt.
  15. Weather Prediction
    If you can’t read the sky, you’ll freeze in your sleep or get swept downriver. Clouds, winds, bird movement — nature whispers before it screams.

🔧 3 DIY WILDERNESS SURVIVAL HACKS

  1. Soda Can Rocket Stove
    Don’t waste time or fuel. Cut a soda can, create a rocket stove with just a few snips and a nail. Efficient. Light. Packs easy. Great for boiling water or cooking game in tight spots.
  2. Char Cloth Fire Starter
    Take old cotton cloth (yes, your ratty T-shirt), char it over a flame in a tin until it’s black but not burned. That stuff will catch the smallest spark. Gold in wet conditions.
  3. Pine Sap Bandages
    Got a wound? Pine sap is nature’s antiseptic glue. Slap it on, cover with clean cloth or moss. It stops bleeding and helps heal. You’re welcome.

WHY YOU NEED TO TAKE THIS SERIOUSLY

Let me say this loud for the folks in the back who still think DoorDash is gonna work when the grid goes down: You are on your own.

No police.
No hospitals.
No grocery stores.
No laws except the ones you enforce yourself.

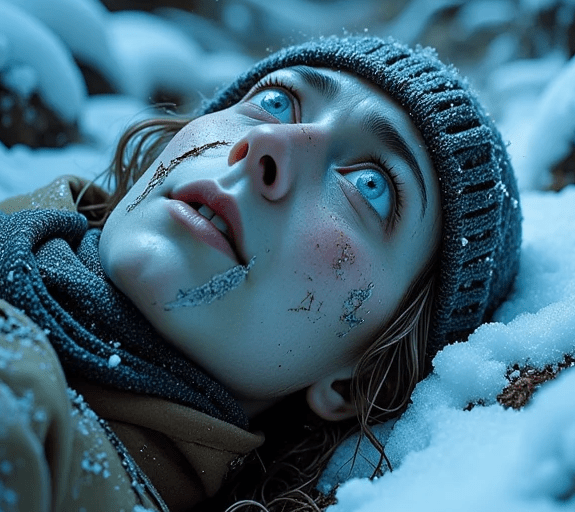
People will turn on each other faster than a pack of wild dogs. And the weak — the clueless, the ones who never practiced a damn thing, who thought “roughing it” meant no WiFi — they’ll die first. Not maybe. Definitely.

You think a three-day REI survival course makes you a bush god? Think again. You need months in the wild, not weekends. You need cuts, bruises, freezing nights, burnt food, failed shelters, and near-death experiences to even start learning what it really takes.


YOU WANT A FIGHTING CHANCE? THEN DO THIS:

  • Train. Every week. Go outside. Practice fire making in the rain. Sleep in your DIY shelter. Cook a squirrel over an open flame. Live the way you’ll need to.
  • Stock up, but train without it. Yes, buy gear. But assume it’ll all break or vanish. Know how to survive with nothing.
  • Build your mental armor. This isn’t about six-pack abs. It’s about grit. Fearless, furious, never-quit grit.

Final Words Before the World Ends (Again)

This isn’t a hobby. It’s not a YouTube trend or something you learn from a TikTok prepper doing spoon reviews. This is life and death. This is teeth-gritting, frostbitten, gut-rumbling SURVIVAL in its rawest form.

The wilderness doesn’t give a damn about your excuses. But if you respect it, if you learn its rules and play harder, smarter, meaner than it does — you can beat it.

When SHTF, the soft will cry. The wise will run. But the prepared?
The prepared will rule.

So sharpen that blade, strip off your weakness, and get to work.

You’ve been warned.

Old-School Navigation: How to Read Maps and Use a Compass Like a Pro

Old-School Navigation: How to Read Maps and Use a Compass Like a Dang Pro
(An Angry Survivalist’s No-BS Guide to Not Getting Lost )


Listen up, you soft modern-day wimps addicted to GPS and your goddamn smartphones. When the grid goes down—because trust me, it will—all your fancy gadgets will be about as useful as a screen door on a submarine. If you don’t know how to navigate old-school with nothing but a paper map and a compass, you might as well kiss your survival chances goodbye.

This is a brutal reality check. Nature doesn’t care about your tech, your signals, or your selfies. Nature demands respect and knowledge. So, if you want to survive the wild, you better get off your ass and learn how to read maps and use a compass like a pro—no whining, no shortcuts, no excuses.

Here’s a no-nonsense crash course with seven survival skills and three DIY hacks to keep you from wandering lost in the hellscape that is the wild.


Survival Skill #1: Understand Your Map—Topographic Maps Are Your Bible

First, ditch those crappy road maps or tourist pamphlets. You want topographic maps—those beauties show elevation, terrain features, water sources, trails, and every knoll and valley you might crawl through. Learn to read contour lines: close lines mean steep terrain, wide lines mean gentle slopes. Know the symbols: trees, rivers, cliffs, roads, and trails.

If you can’t interpret your map’s legend, you’re dead meat. This isn’t a joke. Without a clear understanding, you might be aiming for a deadly cliff instead of a river crossing.


Survival Skill #2: Master Your Compass—Know Your Needle and Dial Like Your Life Depends On It

That needle doesn’t spin for fun. It points to magnetic north, which isn’t the same as true north, so you gotta learn the difference—declination—and adjust for it on your compass. If you just blindly follow the needle without accounting for declination, you’ll get lost faster than a squirrel in a maze.

Practice holding the compass flat, lining up the direction-of-travel arrow, and turning the bezel until the orienting arrow matches the magnetic needle. When that’s done, you’ve got a bearing to follow—simple but deadly effective if you screw it up.


Survival Skill #3: Taking a Bearing From the Map—Don’t Guess, Calculate

If you want to get somewhere, first figure out its bearing from your current position. Put the compass on the map with the edge connecting your position and the target. Rotate the bezel until the orienting lines align with the map’s north-south grid. Then, take that bearing off the compass and follow it.

If you skip this and just wander toward “the hill over there,” you’ll be walking in circles and starving before sunset.


Survival Skill #4: Using Landmarks to Confirm Your Position—Trust Your Eyes and Brain

Maps and compasses are useless if you don’t pay attention to the environment. Pick out landmarks—distinct hills, rivers, ridges, or roads—and match them to the map. Confirm your location often, don’t just blindly march forward.

If you’re not checking your surroundings constantly, you’re inviting disaster. Get lost once, and you’ll be lucky if you live to see a rescue.


Survival Skill #5: Pace Counting—Measure Your Distance Without Fancy Gadgets

Without GPS, you need a way to measure how far you’ve gone. Learn to count your paces—a survivalist’s best friend. Count every step for a set distance, then use that to estimate your stride length.

Yes, it’s annoying, but when you’re exhausted and starving, knowing you’ve gone two miles or ten can be the difference between hope and hopelessness.


Survival Skill #6: Back Bearings and Triangulation—Don’t Wander Blind

If you’re lost, don’t panic. Use back bearings to retrace your steps. Point your compass in the direction you came from, turn 180 degrees, and follow that bearing back.

Even better, use triangulation: take bearings on two or three distinct landmarks, draw lines on the map, and where they intersect is where you are. This is survival math—learn it or die trying.


Survival Skill #7: Night and Low-Visibility Navigation—Be Prepared to Improvise

Nightfall or fog doesn’t mean you stop moving. Know how to navigate by the stars or the moon if you lose your compass. Use natural indicators: moss growing on the north side of trees, the sun’s position at dawn or dusk.

Don’t wait for perfect conditions. The wild doesn’t care if you want to rest—it’s relentless. Keep moving with a plan.


DIY Survival Hack #1: Make Your Own Compass—Magnetize a Needle on the Fly

No compass? No problem. Find a sewing needle or small steel piece, rub it vigorously against silk, wool, or your hair to magnetize it, then float it on a leaf in still water. That needle will align north-south.

It’s crude but better than walking blind. Test this method at home before you actually need it—practice saves lives.


DIY Survival Hack #2: Create a Sundial to Approximate Direction

If you have a stick and some sun, you can create a simple sundial. Stick the stick upright in the ground, mark the tip of the shadow. Wait 15-30 minutes and mark the new position of the shadow tip. Draw a line between the two marks—this line runs approximately west-east.

From there, you can orient yourself roughly north-south. It’s not perfect but can save your ass in a pinch.


DIY Survival Hack #3: Use Natural Features as a Map Legend

When you have no map or compass, turn your environment into one. Sketch the terrain with sticks, stones, or in the dirt. Mark streams, hills, and campsites you’ve passed.

This rough “map” helps keep track of your route and prevents doubling back into dangerous spots or traps.


Final Word From the Gritty Trenches of Survival

If you think you can survive with just a phone app and a trust fall into Mother Nature’s arms, wake up. You’ll die cold, lost, and hungry. Old-school navigation isn’t just a skill—it’s a sacred survival rite.

Every survivalist worth their salt swears by the map and compass combo. It’s the purest, most reliable method known to mankind. No batteries, no satellites, just your brain, your eyes, and your hands.

Practice these skills until they’re as natural as breathing. Train yourself to respect the wilderness, to read its cues, and to never wander aimlessly. When the modern world crumbles, only the prepared will thrive.

So get off your lazy butt, print out a topo map, buy a real compass, and start drilling these skills hard. Because when the day comes, and it will come, you’ll either navigate like a pro or perish like the clueless fool you’ve been.

Explore New Jersey’s Hiking Trails—But Know This: They Can Turn Deadly in an Instant

Explore New Jersey’s Hiking Trails—But Know This: They Can Turn Deadly in an Instant

Look, I’ve been hiking for over 30 years and prepping even longer. I’ve seen people set out on what they think is a quick walk in the woods and not come back. This isn’t about fearmongering—it’s about respecting nature and understanding that every hike, no matter how “easy” it looks on a brochure, has the potential to turn deadly in a heartbeat.

New Jersey, despite what some outsiders might think, is a goldmine for hikers. From the rugged ridgelines of the northwest to the pine-scented barrens in the south, it’s a state brimming with natural beauty and serious terrain. It’s one of the best-kept secrets for hikers on the East Coast—but only for those prepared to handle what the trails can throw at them.

You’re out there walking through old-growth forests, climbing moss-covered rocks, and wading across unpredictable creeks. But if you’re not thinking ahead—if you don’t have the right gear, a decent topo map, a compass, or even a backup firestarter—you’re setting yourself up for trouble.

Why Hiking Can Be Dangerous—Even in New Jersey

Hiking Trails: New Jersey Hiking

People underestimate New Jersey’s wildlands. They think, “It’s just Jersey, how bad can it be?” I’ll tell you how bad. Rapid weather changes, sudden temperature drops, flooded trails, venomous snakes, ticks loaded with Lyme, and some of the most unforgiving terrain east of the Mississippi.

Cell signal? Spotty at best. Rescue services? Good, but not magical. And depending on where you are—say, deep in the Pine Barrens—you could go hours without seeing another human.

So before I give you the list of the Top 20 Hiking Trails in New Jersey, I want you to take this advice from someone who’s bivvied in snowstorms, filtered water from beaver ponds, and seen helicopter rescues happen in real-time:

  • Never hike without a way to purify water.
  • Layer your clothing, even in summer. Hypothermia doesn’t care about the season.
  • Mark your trail or carry a GPS with backup batteries.
  • Don’t rely solely on your phone.
  • Leave a trip plan with someone you trust.
  • Carry more food than you think you’ll need. Energy bars weigh nothing and can save your life.
  • If you’re going alone, tell someone. If you’re going in a group, have a designated leader.

Alright, now that I’ve said my piece, let’s get into why we’re here—the top 20 hiking trails in New Jersey. These are not just scenic; they’re some of the most challenging, historic, and breathtaking routes in the Garden State.


Top 20 Hiking Trails in New Jersey (Ranked by Experience & Challenge)

  1. Appalachian Trail (NJ Section) – 72 miles of pure grit. It runs through High Point State Park to the Delaware Water Gap. Expect rocky ridges, black bears, and unparalleled views.
  2. Mount Tammany – Delaware Water Gap – Don’t be fooled by the short distance (3.5 miles round trip). The Red Dot Trail is steep, tough, and offers one of the best overlooks in the state.
  3. Stairway to Heaven – Wawayanda State Park – About 7.3 miles round trip. You’ll climb the Pochuck Boardwalk, cross cow pastures, and ascend to Pinwheel Vista. Jaw-dropping views, especially at sunrise.
  4. Buttermilk Falls to Crater Lake – A strenuous loop that links NJ’s tallest waterfall to remote glacial lakes. Rocks, roots, and steep switchbacks galore.
  5. Palisades Interstate Park Trails – Trails like the Shore Trail offer steep climbs, river views, and even some bouldering. Don’t underestimate the Hudson-facing cliffs.
  6. Pyramid Mountain Natural Historic Area – Known for Tripod Rock, this trail is a geological wonder and deceptively tough. Some routes are over 7 miles with serious elevation.
  7. Bearfort Ridge via Appalachian Trail – A rugged ridge hike with views over Greenwood Lake. If you like scrambling and solitude, this is your jam.
  8. High Point Monument Trail Loop – You’ll hit the highest point in New Jersey at 1,803 feet, but don’t let the number fool you—this loop can wear you down with its wind and exposed terrain.
  9. Hacklebarney State Park Trails – Easy to moderate, but slick rocks and fast river currents make this more dangerous than it looks.
  10. Jenny Jump State Forest – Don’t skip the Ghost Lake Trail. It’s remote, eerie, and beautiful—with sudden drop-offs and a creepy vibe that’ll keep your senses sharp.
  11. Wharton State Forest – Batona Trail (53 miles total) – Through the heart of the Pine Barrens. Flat, but psychologically challenging. Navigation is critical. Great for thru-hikers.
  12. Watchung Reservation Sierra Trail – Rolling hills and dense forest make this a solid mid-level trail with some tricky navigation if you lose the blaze.
  13. South Mountain Reservation – Hemlock Falls Loop – Popular but still wild in sections. Especially dangerous in spring when trails wash out.
  14. Norvin Green State Forest – Wyanokie High Point – Remote, rocky, and steep. The scramble is intense, and the views are worth every drop of sweat.
  15. Ramapo Valley County Reservation – Vista Loop Trail – A good mix of lake, river, and mountain. Great for conditioning, but slippery sections can mess you up fast.
  16. Teetertown Ravine Nature Preserve – A hidden gem with ravines, meadows, and backcountry vibes. Rarely crowded, so bring your own safety net.
  17. Kittatinny Valley State Park Trails – Don’t let the gentle terrain fool you; icy winters and boggy summers can make this park treacherous underfoot.
  18. Splitrock Reservoir Loop Trail – Remote and rugged. If you want to test your compass skills and resilience, this is a prime spot.
  19. Allaire State Park – Nature & Mountain Bike Trails – The terrain shifts from soft sand to hard-packed forest. Not technical, but disorienting without proper mapping.
  20. Island Beach State Park Trails – More coastal and lowland, but storms can flood the area fast. Also—sand sucks to hike in. Don’t underestimate the drag.

Final Words from the Trail

Every time I lace up my boots, pack my gear, and head into the woods, I’m reminded of something simple but sacred: Mother Nature doesn’t care how much you love her—she’ll kill you if you’re not ready.

That’s not to scare you. It’s to prepare you.

Because when you’re standing on top of Mount Tammany at dawn with the Delaware River glistening below you, or navigating the eerie stillness of the Pine Barrens under a full moon, it’s all worth it—if you’re smart. If you’ve planned. If you’ve respected the trail.

So get out there. Hike New Jersey. Explore it like a seasoned survivalist, even if you’re just starting out. Bring your gear. Trust your instincts. And remember—every trail is beautiful, but every trail demands respect.

Stay sharp out there.

California’s Deadliest Hiking Trails: Popular Routes That Could Be Your Last Hike

As a seasoned survival prepper and avid hiker, I’ve traversed many of California’s rugged terrains. While the state’s trails offer breathtaking views and challenging adventures, some paths come with inherent dangers that demand respect and preparation. Here’s a comprehensive guide to the top 20 most perilous hiking trails in California—routes that could very well be your last hike if you’re not adequately prepared.


1. Cactus to Clouds Trail – San Jacinto Peak

Starting from Palm Springs at 520 feet, this 21-mile trail ascends over 10,000 feet to San Jacinto Peak. It’s one of the steepest and most grueling hikes in the U.S., with extreme temperature variations and seasonal hazards like snow and ice. Summer heat can exceed 110°F, while early spring still has icy, dangerous conditions at higher elevations. Rescue operations are frequent due to heat-related incidents.


2. Half Dome – Yosemite National Park

The final 400-foot ascent involves a steep climb using steel cables. Since 1919, there have been 10 confirmed deaths on this section, with the latest fatality occurring in July 2024. Most accidents happen when the rock is wet, and hikers are advised to check the weather before attempting the summit.


3. Tenaya Canyon – Yosemite National Park

This route is notorious for its steep, polished granite walls and fast-moving water. Hiking here involves dangerous exposure to heights, mandatory swims, and slippery surfaces. The canyon has claimed lives due to its challenging conditions. Wikipedia


4. Mist Trail – Yosemite National Park

While popular, this trail is treacherous during spring runoff. The mist from Vernal and Nevada Falls creates slippery conditions, leading to numerous falls and fatalities. Hikers should exercise extreme caution, especially when the trail is wet.


5. Sam Merrill Trail – San Gabriel Mountains

This trail has seen multiple fatalities, including hikers who collapsed or fell off the trail. Its steep terrain and challenging conditions make it a hazardous route for the unprepared.


6. John Muir Trail – Sierra Nevada

Spanning 211 miles through high-altitude wilderness, this trail poses risks such as altitude sickness, swift water crossings, and unpredictable weather. Thru-hikers must be well-prepared for extended isolation and challenging conditions. Wikipedia


7. Rubicon Trail – Lake Tahoe

Known for its challenging terrain, the Rubicon Trail has been the site of search and rescue operations due to its difficult access and technical nature. A recent incident involved a 70-year-old man going missing after venturing off-trail. People.com


8. Mossbrae Falls – Northern California

Despite its beauty, accessing Mossbrae Falls involves walking along active train tracks, leading to fatalities from train collisions. The lack of a legal trail makes this a dangerous and illegal route. New York Post


9. Mount Baldy – San Gabriel Mountains

The Baldy Bowl Trail is steep and exposed, with high winds and rapidly changing weather conditions. Several hikers have died here due to falls and exposure.


10. Mount Whitney – Eastern Sierra

As the highest peak in the contiguous U.S., Mount Whitney attracts many hikers. The trail is long and strenuous, with risks including altitude sickness, dehydration, and sudden weather changes.Wikipedia


11. Devil’s Backbone – Santa Monica Mountains

This narrow ridge trail offers steep drop-offs and limited shade. Heat-related illnesses and falls are common hazards.


12. Mount Shasta – Avalanche Gulch Route

A popular route for climbers, Avalanche Gulch is prone to avalanches and sudden storms. Climbers have died due to falls and exposure.


13. Lost Coast Trail – Humboldt County

This remote coastal trail is challenging due to its isolation, unpredictable tides, and lack of water sources. Hikers must be self-sufficient and prepared for emergencies.


14. Glen Alpine Trail – Desolation Wilderness

This trail involves steep ascents and descents, with risks including water crossings and exposure. Hikers have reported accidents due to slippery rocks and swift currents.New York Post+1Wikipedia+1


15. Big Sur Coast Trail – Ventana Wilderness

The rugged terrain and unpredictable weather make this trail hazardous. Hikers have faced challenges with navigation and exposure to the elements.


16. Mount Langley – Eastern Sierra

A high-altitude peak, Mount Langley presents risks such as altitude sickness and sudden weather changes. Climbers should be prepared for strenuous conditions.


17. Bishop Pass Trail – Eastern Sierra

This trail involves steep ascents and high elevations, with risks including altitude sickness and rapid weather changes. Proper acclimatization is essential.


18. Cottonwood Lakes Trail – Inyo National Forest

While scenic, this trail presents challenges such as water crossings and exposure. Hikers should be cautious of slippery rocks and swift currents.


19. Kearsarge Pass Trail – Inyo National Forest

This trail involves steep climbs and high elevations, with risks including altitude sickness and sudden weather changes. Proper preparation is crucial.

20. Mount Tom – Eastern Sierra

This relatively lesser-known peak in the Eastern Sierra can be deceptively dangerous due to its remote nature and rugged terrain. While the ascent is challenging and strenuous, what makes it particularly hazardous is the unpredictable weather and lack of easy access for rescue teams. The steep rock faces, narrow ridgelines, and frequent rockfall make it a trail that demands respect. Several hikers have encountered trouble here due to poor route-finding or sudden storms, and it’s not uncommon for people to become disoriented in the high-altitude environment.


Preparing for the Worst: A Survivalist’s Mindset

While these trails are undeniably breathtaking and offer unparalleled adventure, they also present very real and dangerous risks that should not be underestimated. As a survival prepper, I always approach these trails with the mindset that my life may depend on the gear I carry, my knowledge of the terrain, and my ability to make decisions under pressure. Here are some survival prepper tips that could very well save your life if you find yourself on one of these deadly hiking trails:

1. Know Your Limits

Don’t overestimate your abilities. These trails aren’t the places to push your boundaries. Many of these hikes require expert-level fitness, endurance, and mental toughness. If you’re not in peak physical condition, you might want to reconsider or choose a less challenging trail.

2. Weather Check

Weather can be your worst enemy, especially on California’s most deadly trails. Check forecasts not only for the day of your hike but for several days before. Some trails are in areas prone to sudden, severe weather changes—like Mount Whitney, where storms can brew quickly.

3. Proper Gear

Your gear can mean the difference between life and death. Waterproof clothing, layered outfits, emergency blankets, a first-aid kit, and adequate food and water are all necessities. I always recommend carrying more than you think you’ll need. A lightweight survival kit with fire-starting tools, an emergency whistle, and a headlamp can be lifesavers in an unexpected situation.

4. Water Management

Many of these trails, such as the Lost Coast Trail or Tenaya Canyon, lack reliable water sources. Carry enough water to last you the entire hike, and always bring a portable water filter or purification tablets in case you need to rely on streams or lakes.

5. Track Your Progress

There’s no shame in using a GPS device or a trail map. In remote areas, like the Rubicon Trail or Bishop Pass Trail, getting lost can be a death sentence. Many hikers underestimate the importance of navigation skills and end up in dangerous situations due to disorientation.

6. Tell Someone Your Plan

Before tackling one of these hikes, make sure someone knows your planned route and expected return time. Having a point of contact can be crucial if you get into trouble. I always make it a point to check in every 12-24 hours on long hikes to ensure that help can be dispatched if something goes wrong.

7. Altitude Awareness

Many of California’s deadliest hiking trails are in high-altitude areas, such as Mount Whitney or Mount Baldy. Altitude sickness can incapacitate you without warning. If you’re not accustomed to hiking at high elevations, take the time to acclimatize. This will give your body the time it needs to adjust to the reduced oxygen levels.

8. Know When to Turn Back

No matter how close you are to the summit, or how determined you are to complete the hike, always know when to turn back. The descent is often more dangerous than the ascent, and pushing too hard can lead to exhaustion, dehydration, or even fatal mistakes.

9. Safety in Numbers

Hiking with a partner is a good idea, especially on longer or more hazardous trails. If something goes wrong, having someone with you can make all the difference in the world. Additionally, if you’re inexperienced, consider hiking with someone who has more knowledge of the terrain.

10. Search and Rescue Awareness

Even in areas where Search and Rescue (SAR) teams are common, getting help isn’t always guaranteed. Many of the most perilous trails, like the Half Dome or Cactus to Clouds, are located in remote areas, and SAR operations can take hours or even days. Make sure you have the means to help yourself out of dangerous situations. Know how to use your gear effectively, and always err on the side of caution.


Conclusion: Respecting the Terrain

Hiking in California is a rite of passage for many outdoor enthusiasts, but it’s crucial to understand that not all trails are created equal. The rugged beauty of trails like Yosemite’s Half Dome, the Mount Whitney ascent, or the brutal climb up San Jacinto Peak may be alluring, but these routes should be taken seriously. Don’t let the call of adventure override your instinct to stay safe. With proper planning, gear, and mindset, you can experience the majesty of these trails without falling victim to their deadly challenges.

Remember: it’s not just about surviving the trail, but knowing when to turn back. No summit is worth risking your life for. Plan accordingly, prepare diligently, and always hike with respect for the unforgiving landscapes of California. Your life might depend on it.

Survive These Hiking Trails in North Dakota, or Don’t Survive at All

Let me be clear: hiking isn’t just a hobby—it’s a test. A crucible. A simulation of survival, wrapped up in the illusion of leisure. And when it comes to North Dakota? You’d better come prepared, because these trails don’t play nice. The wind cuts, the terrain shifts under your feet, and the sun doesn’t care how far you are from the next water source. These aren’t your gentle strolls through the woods. These are battlegrounds. And I’m here to walk you through them.

I’ve hiked across most of the Lower 48, and I’ve bugged out in more states than some people have even driven through. But North Dakota… it gets under your skin. Wide skies, rugged land, and North Dakota Hiking that will chew you up and spit you out if you come unprepared. So lace up your boots, pack like it’s the end of days, and pay attention.


1. Maah Daah Hey Trail — 144 Miles of Character Building

You want a challenge? This is it. One hundred and forty-four miles through the heart of the Badlands, where rattlesnakes sunbathe on your path and the wind will strip the moisture from your bones. The Maah Daah Hey isn’t just long—it’s relentless. Expect rolling buttes, deep coulees, river crossings, and solitude so thick you’ll forget the rest of the world exists.

There are designated campgrounds, sure—but don’t count on them. Learn to dig a cat hole. Filter every drop you drink. Carry iodine tabs even if you’ve got a Sawyer filter, because redundancy isn’t optional—it’s survival.

Pro Tip: Wildfires can sweep through here in the summer like hell on wheels. Bring a radio, keep your head on a swivel, and know your exit points. This trail weeds out the soft.


2. Theodore Roosevelt National Park Trails — Beauty with Teeth

This park is split into North and South Units, both riddled with trails that snake through some of the wildest terrain in the state. You’ll see bison, you’ll see feral horses, and if you’re unlucky, you might just step between a cow and her calf. That’s a mistake you won’t make twice—if you make it at all.

My go-to? The Petrified Forest Loop. It’s about 10 miles and features terrain that swings from desolate moon-crater badlands to eerie stands of fossilized wood. You’ll feel like you’re walking through ancient history—and maybe you are. But don’t lose focus. A twisted ankle out here with no cell service is a one-way ticket to a real-life evacuation.

Gear Checklist:

  • GPS with offline maps
  • Satellite communicator (I use a Garmin InReach—worth every penny)
  • 3 liters of water minimum
  • High-calorie trail food (jerky, nuts, and pemmican—none of that energy gel crap)

3. North Country National Scenic Trail (ND Segment) — For the Long-Haulers

Most folks don’t even know the North Country Trail exists, let alone that it runs through North Dakota. But it does—over 400 miles of it, winding through the Sheyenne National Grassland and beyond. This trail will test your mental game more than your legs. Endless prairie. Minimal shade. Monotonous terrain that can turn your brain to mush if you’re not grounded.

But that’s where the survivalist thrives. Boredom is a killer just like dehydration or exposure. If you can hike this stretch solo and keep your wits, you’re a cut above. Bring a journal. Sharpen your awareness. Practice mental discipline.

Warning: Lightning storms roll in fast here, and there’s nowhere to hide. Get low, stay off ridgelines, and never be the tallest thing in the field.


4. Pembina Gorge — North Dakota’s Secret Weapon

Most people think of North Dakota as flat and dry. But then they stumble across the Pembina Gorge, up in the northeast, and it flips their script. Think forested hills, steep ravines, and rivers that don’t care if your boots are waterproof. It’s lush. It’s wild. And it’s a perfect place to lose your bearings if you’re not tracking every step.

The Pembina Gorge State Recreation Area has about 12 miles of designated trails, but the real training starts when you step off them. This is bushcraft territory. Test your fire-making skills, practice shelter-building, and track game sign—not to hunt, but to understand the land. You never know when the lessons will matter.


5. Little Missouri State Park — Erosion as a Lifestyle

If erosion had a capital city, it’d be here. This place is a maze of steep, cracked trails and deep drainages carved by the Little Missouri River. Horses use these trails too, so don’t be surprised if you step into a hoof print big enough to swallow your boot.

The park has over 45 miles of trail, and most of them feel like you’re hiking on the spine of a giant fossil. One wrong step and you’re sliding 40 feet into a ravine. I recommend trekking poles and a sense of humility. This isn’t a park that forgives arrogance.

Situational Awareness Tip: Weather turns quick out here. A dry trail in the morning turns into a clay slip-n-slide by afternoon. If the clouds roll in, bail early. Pride doesn’t taste as good as dinner back at basecamp.


Final Thoughts: The Prepper’s Mindset Wins

If you take one thing away from this, let it be this: Hiking in North Dakota is less about scenery and more about strategy. The views are a bonus. Survival is the mission.

Don’t trust your phone. Bring a compass, and know how to use it. Don’t trust the weather. Bring a poncho, an emergency bivy, and a change of socks in a dry bag. Don’t trust your body. Bring blister kits, spare laces, and enough electrolytes to revive a camel.

I don’t hike to escape the world. I hike to prepare for it. Every step on these trails is a step toward self-reliance, grit, and readiness. North Dakota’s wilderness doesn’t coddle—it clarifies. It strips away the noise and leaves only the truth: Can you survive this?

If yes, you earn the view. If no? Well, the land doesn’t care. It was here before you. It’ll be here after.

So pack right, tread smart, and respect the terrain.

Survive these hiking trails in North Dakota—or don’t survive at all.

The Safest Seats in a Movie Theatre During an Emergency

Let me guess—you think the movie theatre is a place to relax, check your phone, drown in popcorn, and escape reality for two hours. WRONG. That kind of soft, head-in-the-sand thinking will get you dead. If you walk into any enclosed public space—like a movie theatre—without knowing your exits, your cover options, and your defensive posture, you’ve already lost.

I’m not here to scare you. I’m here to wake you up.

Emergency situations—including active shooters, fires, structural collapse, or crowd panic—can and DO happen in theatres. You don’t get to control if it happens, but you sure as hell can control how prepared you are.

Let’s talk about where to sit—and how to think—so you walk out alive if it all goes to hell.


🎯 First Rule of Survival: Get Your Head on a Swivel

Complacency kills. That’s not a catchphrase. That’s a fact. If you’re walking into a theatre with your eyes glued to your phone and your AirPods in, you’re a liability to yourself and everyone around you. Situational awareness is your best friend. Act like it.


🪑 Where to Sit: The Only Seats That Make Sense

🔻Back Row, Aisle Seat (Exit Side)

This is your throne. You’ve got your back to the wall, a full view of the audience, and quick access to the exit. You’re not boxed in, and nobody can sneak up behind you. In a threat scenario, this position allows observation, escape, and even ambush if needed.

🔻Mid-Theatre, Aisle Seat Near Emergency Exit

If the back row is full or doesn’t exist, go for an aisle seat in the mid-section, near the emergency doors. Not only can you GTFO fast, but you can also drag others with you if you’re trained and willing.

🚫Avoid:

  • Dead center of the theatre. You’ll be trapped like a rat in a maze.
  • Front rows. Limited view, slow to react, you’re first in the line of fire if anything comes in from the front.
  • Middle of any row. Slows your escape. You’ll be crawling over weaklings frozen in fear.

🎒15 Survival Movie Theatre Skills You Need to Master

  1. Situational Awareness Drills
    Clock every exit. Watch people. Spot the loners. Recognize body language that says “I’m about to snap.”
  2. Pathfinding Under Pressure
    Know multiple paths to the exit, including crawling routes under seats.
  3. Use of Improvised Cover
    Seats, trash cans, stair rails—use anything to shield yourself or others from line of sight.
  4. Low Light Navigation
    Memorize your seat path on the way in. Phones might not work when panic breaks out.
  5. Rapid Exit Without Causing Stampede
    Move fast but smart. Yelling “FIRE!” creates chaos. Lead by example, not hysteria.
  6. Hand-to-Hand Combat in Tight Spaces
    If you’re trained, be ready. Tight quarters mean elbows, knees, and improvised weapons.
  7. Self-Tourniquet Application
    Bleeding out from a leg wound in row 8 is preventable—if you practiced.
  8. People Herding
    Can you calm the people around you and move them fast? That’s leadership.
  9. Improvised Weapon Use
    Belt buckles, keys, flashlight, or your damn soda cup lid—anything can be a weapon.
  10. Silent Communication
    Finger-pointing, hand signals. Talking makes noise. Learn quiet teamwork.
  11. Quick Inventory Assessment
    What do you have on you that’s useful? What does your group have? Check mentally.
  12. Cover vs. Concealment Differentiation
    A movie seat hides you. It doesn’t stop bullets. Learn the damn difference.
  13. Emergency Aid for Strangers
    CPR, pressure bandaging, or at least dragging someone out who’s frozen.
  14. Panic Response Control
    You can’t help anyone if you’re screaming. Train your breath, train your mind.
  15. Exit Dominance
    If you’re first to the door, secure it. Don’t let others funnel you into a worse situation.

🔧3 DIY Survival Theatre Hacks

1. The Tactical Popcorn Bucket

Line your popcorn bucket with a folded mylar blanket, a tourniquet, mini flashlight, and earplugs. It looks innocent, but you’ve just smuggled a micro go-bag past security. Boom.

2. Shoelace Rescue Tool

Your laces? Not just for fashion. Use them to tie off wounds, trip hazards, or as hand ties if someone’s a threat. Paracord shoelaces? Even better.

3. The Jacket Decoy

Leave your jacket on a seat as a decoy if you’re being hunted or followed. Gives them a false lead. Bonus: heavy jackets can also act as low-level cover or distraction tools if thrown.


💣What You’re Up Against

Let’s be blunt: active shooters go for soft targets, and theatres are prime real estate. Dark, loud, distracted people. That’s candyland for a psycho. You’ve got seconds to react, and your training—or lack of it—makes the difference.

Most people freeze. You? You don’t get that luxury. You move. You assess. You lead. Or at least, you get the hell out without making it someone else’s job to drag you.


🧠Mindset Is Survival

The average American has lost the survival instinct. Spoiled by climate control and delivery apps, they’ve forgotten that danger doesn’t care how comfortable you are. If you think I’m being “paranoid,” good. That means you’re still soft. Harden up.

There’s a difference between living in fear and living with awareness. You can eat your popcorn and still be watching those exit doors. You can enjoy a film and still plan the path out. It’s not paranoia. It’s preparedness.


🔚Final Word

If you remember one thing, remember this: You’re your own first responder.

In the time it takes law enforcement to breach the building, identify the threat, and reach you, you’ll either be:

  • Alive and helping others,
  • Crawling and bleeding, or
  • A damn statistic.

Choose. Train. Sit smart. Be ready.

You don’t get to schedule emergencies—but you sure as hell get to be prepared for them.


Naked in the Cold: How to Survive Freezing Temperatures Without Clothes

Let me paint a scenario for you, and don’t you dare shrug it off like it’s some movie plot. You’re out in the woods. Maybe you fell into a river, maybe your gear burned up in a freak accident, maybe some psycho stripped you and left you for dead. Doesn’t matter how it happened. The point is: you’re naked, it’s freezing, and you’ve got one job—stay alive.

And I hate to break it to you, but most of you wouldn’t last more than an hour. You’d panic, cry, curl into a ball, and die like a damn amateur. Not because nature is cruel (it is), but because you never trained for rock-bottom scenarios. You thought your gear would save you. You thought “that’ll never happen to me.” Well guess what? Nature doesn’t care about your fantasies. You either adapt, or you die.

So here it is. The hard, cold truth about how to survive when you’ve got nothing. No gear, no clothes, and death breathing down your neck.


First Rule: Panic Kills

You panic, you die. Simple as that. When you start hyperventilating, wasting energy pacing, or screaming for help that’s not coming—you’re burning calories and losing heat. STOP. BREATHE. ASSESS.

Your body is a machine. The moment you’re exposed to freezing temps, it goes into triage mode. Blood rushes to your core to protect vital organs. Your fingers and toes? They’re already expendable. You need to act, not freak out.


Step 1: Get Out of the Wind

Wind is the silent killer. It steals your body heat ten times faster than still air. Find a windbreak—fast. Rock outcroppings, dense bushes, downed trees, snowdrifts—use whatever you can. Dig into the earth or snow if you have to. Create a trench or burrow like your life depends on it, because it does.


Step 2: Insulate Yourself with Nature

No clothes? Fine. Nature’s full of insulation—if you’re not too soft to use it.

Stuff your body with:

  • Dead leaves
  • Dry grass
  • Pine needles
  • Moss
  • Bark shavings

Pack it everywhere: under your arms, between your legs, down your back. Build layers between you and the air. You look like a swamp monster? Who cares? Ugly people survive. Dead people don’t.


Step 3: Fire Is Non-Negotiable

If you can make fire, you make fire. I don’t care if it takes an hour. I don’t care if your hands are bleeding. Fire is warmth. Fire is life.

No tools? Then you’d better have the mental grit to make a bow drill or hand drill. Use dry wood only. Dead standing wood—not fallen, not wet.

DIY Survival Hack #1: Bark Tinder

Strip birch bark or cedar bark into fine fibers and crumple it up. It lights even when damp and burns hot.


Step 4: Shelter—Your First Home is Your Body

You can’t build a mansion out there, but you can make a microclimate.

  • Dig a pit shelter, about 2–3 feet deep.
  • Line the bottom with leaves or pine needles.
  • Build a roof with branches and more debris.
  • If you’ve got snow, use it—snow insulates, moron.

Trap your body heat. Sleep curled up in the fetal position. Don’t sprawl out like you’re on a damn beach.


Step 5: Move, But Not Too Much

You need to generate heat, but not burn calories recklessly. Marching around naked in sub-zero temps? That’s suicide.

  • Do short bursts of exercise: jumping jacks, squats, or arm circles.
  • Keep blood flowing to your extremities.
  • But don’t sweat—sweat is death in the cold. Once you’re wet, you’re done.

15 Cold Survival Skills You’d Better Learn Yesterday:

  1. Fire from friction – Make a bow drill, hand drill, or even fire plow.
  2. Primitive insulation – How to find, dry, and use natural materials to trap heat.
  3. Deadfall shelter building – Quick shelters from branches and snow.
  4. Understanding hypothermia – Recognize signs: slurred speech, shivering stops, confusion = you’re already in danger.
  5. Water purification – Snow isn’t clean; boil or filter it, or risk parasites.
  6. Snow melting without fire – Use body heat or dark containers to melt it slowly.
  7. Cold weather first aid – Treat frostbite and trench foot without a kit.
  8. Tracking wildlife – You may need to hunt or trap. Know the prints and patterns.
  9. Primitive snares – Use vines, shoelaces (if you’ve got ‘em), or bark strips.
  10. Navigating in snow – Landmarks vanish; learn sun and shadow tricks.
  11. Improvised footwear – Bark, grass, or thick moss tied with vines—protect your feet!
  12. Stone blade crafting – Shatter rocks to make usable edges.
  13. Snow cave construction – Done right, a snow cave keeps you at 32°F even if it’s -10°F outside.
  14. Mental survival conditioning – Training yourself to push through panic, pain, and despair.
  15. Signal making in snow – Contrasts with debris, fire smoke, or body tracks.

DIY Survival Hack #1: Body Heat Battery

If you’re freezing and alone, dig a depression in the snow and line it with dry material. Curl up, pee if you have to, and trap your own heat. Human urine, gross as it sounds, is warm and sterile and can raise core temp briefly. You’re not too good for it. Use everything.


DIY Survival Hack #2: Makeshift Mittens and Socks

No gloves? Wrap your hands and feet in multiple layers of natural debris, then cover that with bark or strips of flexible wood. Bind with vines or twisted grasses. It’s not pretty—but it buys you time.


Eat or Die Trying

Calories = heat. You need fat and protein, period. Look for:

  • Grubs under logs (yes, eat the damn bug)
  • Squirrels, rabbits (trap ‘em or club ‘em)
  • Edible bark (inner bark of pine and birch is chewable)
  • Fish (use sharpened sticks as spears)

If you’re too squeamish to eat a raw grub, you don’t deserve to survive. Sorry, but that’s the truth.


Final Word: This Ain’t Hollywood

You’re not Bear Grylls, and no one’s coming with a helicopter. When you’re naked in the cold, it’s just you, your wits, and your will to live.

Most people would rather die than crawl through mud, eat bugs, or sleep in a pile of leaves. They want dignity. Guess what? Dignity is for funerals. Out here, you either fight for every shivering second, or you freeze to death while whispering regrets.

So memorize this: You are not fragile. You are not helpless. You are not dead—until you give up.

You want to survive the cold with nothing? Then start acting like someone who deserves to survive.

And don’t wait for disaster to find you. Go out, strip down, and test yourself. Train. Prepare. Because the next time you’re naked in the cold, there won’t be a second chance.

You either make it out… or you become one more frozen idiot people tell stories about.

The Ultimate Guide to Preparing for Oklahoma’s Worst Natural Disasters

Oklahoma is a beautiful, often unpredictable state with vast plains, wide-open skies, and stunning landscapes. But with all that beauty comes a big risk: natural disasters. Tornadoes, wildfires, severe thunderstorms, floods, and ice storms are just a few of the challenges residents face. As a prepper, you need to be ready for anything, and that means understanding the risks and taking the right steps to ensure you and your loved ones stay safe in the face of disaster.

CLICK HERE TO LEARN HOW TO SURVIVE A FAMINE

When it comes to preparing for natural disasters, Oklahomans need to take into account the extreme weather conditions that can hit at any time. With the state’s location right in the heart of “Tornado Alley,” as well as its vulnerability to flooding, wildfires, and ice storms, the need for preparation has never been more critical. I’ve learned over the years that being prepared is not just about having a few extra cans of beans or water stored away—it’s about having the right mindset and a comprehensive plan in place.

Here’s a closer look at how Oklahoma residents prepare for the worst, and what you can do to keep your family safe.

1. Tornado Preparedness

Oklahoma is notorious for its tornadoes. The state is smack dab in the middle of Tornado Alley, and it’s not unusual to hear about multiple tornadoes touching down in one day during peak storm season, from late spring to early summer. To prepare for tornadoes, your number one goal should be creating a safe, accessible shelter. A basement or storm cellar is ideal, but if that’s not an option, a small interior room on the lowest level of your home with no windows, like a closet or bathroom, will do.

Make sure to have a weather radio with battery backup to stay up-to-date with any emergency alerts, and keep it in your safe space. Also, have a well-stocked emergency kit that includes first aid supplies, non-perishable food, extra water, flashlights, and a spare battery. Tornadoes can strike with little warning, so it’s critical to have these supplies on hand.

Prepper Tip #1: Secure your home by reinforcing windows and doors, and consider investing in a storm shelter or safe room. The strength of a tornado can easily tear through a house, so having a reliable shelter could be the difference between life and death.

2. Flooding Preparation

Flooding is another major concern in Oklahoma, particularly in the spring months when heavy rains fall, quickly causing rivers and streams to overflow. It’s important to know if you live in a flood-prone area and have a plan in place. Flooding can happen quickly, and roads can be impassable in minutes. If you’re at risk, ensure your house is elevated, if possible, and that your sump pump is working.

Prepper Tip #2: Invest in sandbags, which are useful for blocking water from entering your home. Also, keep important documents in waterproof containers or sealed bags. In the event of evacuation, you won’t lose your essential papers.

3. Severe Thunderstorms and Lightning

Thunderstorms are a frequent occurrence in Oklahoma, and they can quickly escalate into dangerous conditions. High winds, hail, and lightning strikes are all part of the package. Severe thunderstorms can turn deadly, and lightning is a real risk to both people and structures.

Prepper Tip #3: When a storm is coming, stay inside, away from windows and doors. Make sure your home has a lightning rod or surge protectors to safeguard electrical equipment.

4. Wildfire Preparation

While wildfires are more common in western Oklahoma, they can spread quickly through dry grasslands and forests in all parts of the state. During periods of drought, fire risk increases. To prepare, clear any brush or dry vegetation around your property and keep fire-resistant materials handy. Have a fire extinguisher in the home and know how to use it.

Prepper Tip #4: Create defensible space by maintaining at least 30 feet of cleared space around your home. This can help prevent wildfires from spreading to your property and gives you a chance to evacuate safely.

5. Ice Storms

Oklahoma ice storms are notorious for their ability to disrupt daily life. Ice can accumulate on power lines and trees, leading to widespread power outages and dangerous driving conditions. If you’re stuck at home during an ice storm, make sure you have enough supplies to get you through the cold. A generator can be a lifesaver when the power goes out, but only use it outside, as they can release deadly carbon monoxide if used indoors.

Prepper Tip #5: Keep blankets, extra clothing, and warm hats to make sure everyone stays warm during power outages. If you’re relying on a space heater, ensure that it’s not blocking any ventilation.

6. Extreme Heat and Droughts

Oklahoma is no stranger to extreme heat and drought conditions, especially in the summer. Water supplies can become scarce, and crops may fail. When you know a drought is coming, it’s important to store water and keep your air conditioning in good working order. Stay hydrated, limit outdoor activity during the hottest part of the day, and check on elderly neighbors who may struggle in the heat.

Prepper Tip #6: Invest in water storage systems, like large rain barrels or tanks, to catch and store rainwater. During a drought, this water can be invaluable for keeping your garden alive or flushing toilets.

7. Emergency Plans for Evacuation

Whether you’re facing a wildfire, flooding, or tornado, it’s crucial to have an evacuation plan. Know at least two routes out of your neighborhood and have a “go bag” packed with essentials—important documents, clothes, cash, and your emergency kit.

Prepper Tip #7: Have a family meeting place that’s outside of the danger zone, in case your home is unreachable. This ensures everyone knows where to go and avoids confusion during a disaster.

8. First Aid and Medical Preparedness

In a state like Oklahoma, you might find yourself a few miles away from emergency services in the event of a disaster. That’s why learning basic first aid skills and stocking a comprehensive first aid kit is essential.

Prepper Tip #8: Learn CPR and first aid, and keep a medical kit that includes prescription medications, bandages, antiseptics, pain relievers, and any necessary medical supplies. Make sure the whole family knows where the kit is and how to use it.

9. Survival Communication

Communication during a natural disaster can be a challenge. Cell towers may be down, and power lines may be cut. Make sure you have alternate ways to communicate, such as a battery-powered radio, satellite phone, or walkie-talkies.

Prepper Tip #9: Pre-program emergency contacts into your phone and create a printed list of important phone numbers to keep in your emergency kit. This way, even if your phone dies, you’ll still have access to vital contact information.

10. Stay Informed and Weather-Wise

As a prepper in Oklahoma, you need to stay informed. Watch the weather forecasts and sign up for local weather alerts. Technology has made it easier than ever to stay in the loop, but you need to act quickly when a warning is issued.

Prepper Tip #10: Download weather apps, and consider investing in a weather radio or NOAA radio. In emergencies, this is your direct link to critical updates and alerts, ensuring you’re always in the know.

By staying alert and prepared, you can face Oklahoma’s natural disasters head-on. Being a prepper isn’t about being paranoid—it’s about being smart and ready. With these survival tips, you’ll have a plan in place to handle the worst that Mother Nature can throw at you.

You said:

continue

ChatGPT said:

By staying prepared, you not only increase your chances of survival during an emergency, but you also give your loved ones peace of mind knowing that you’ve taken the necessary steps to keep them safe. The key is to think ahead and be proactive. If you wait until disaster is imminent, you may find yourself scrambling and unprepared, which can be dangerous.

In Oklahoma, it’s not a matter of if a disaster will strike, but when. Whether you’re dealing with tornadoes tearing through your town, floods turning streets into rivers, or wildfires consuming dry grasslands, the more prepared you are, the better off you’ll be.

It’s also important to stay connected with your community. Many Oklahomans band together when disaster strikes. Whether it’s a neighbor helping you clear debris or local volunteers providing food and water after a storm, the spirit of camaraderie in this state can be a vital lifeline when things get tough. So, build relationships with your neighbors and local emergency response teams. Knowing who to turn to can make all the difference when disaster strikes.

In addition to your immediate family, think about your pets. Animals rely on you for safety, food, and water during an emergency. Keep a pet emergency kit with food, water, medication, and other supplies, and always make sure you have a plan for them in case you need to evacuate.

Lastly, keep an eye on your mental health. Surviving a natural disaster is not just a physical challenge, but an emotional one. The stress of losing your home, possessions, or even loved ones can take a toll. Be sure to reach out to mental health professionals or support groups if you find yourself struggling to cope. Psychological resilience is just as important as physical preparedness in the face of a disaster.

In the end, preparedness is not about living in fear. It’s about living with confidence. When you know you’ve done everything you can to protect yourself, your family, and your community, you can face Oklahoma’s worst natural disasters with calm and purpose. Whether you’re a seasoned prepper or just getting started, the most important thing is to keep learning, stay flexible, and adapt your plan as you gain new knowledge and experience.

Remember: Survival is about more than just weathering the storm—it’s about thriving despite it. In Oklahoma, where the storms and natural disasters are relentless, the true strength of a prepper is measured not by the gear you have, but by the mindset you carry. Stay vigilant, stay informed, and most importantly, stay safe.

Arizona’s Most Strategic Campsites for Preppers: 20 Spots You Can’t Miss!

The Best Campsites for Arizona Survival Preppers

As a survival prepper living in the rugged desert landscapes of Arizona, it’s crucial to know where you can establish a stronghold when the SHTF (stuff hits the fan). Arizona’s diverse topography, with everything from dense forests to dry, harsh deserts, offers a variety of terrain that can test your survival skills and provide the solitude you need to thrive. Whether you’re stockpiling resources, practicing wilderness survival skills, or preparing for an emergency situation, the right campsite can make all the difference.

In this article, I’ll cover 30 of the best campsites in Arizona that cater to preppers, outdoor enthusiasts, and those who simply need to disconnect and practice self-sufficiency. These locations will give you access to water sources, strategic locations for shelter, and the type of solitude needed to hone your survival skills.

1. Tonto National Forest

Located in central Arizona, Tonto National Forest is a prepper’s dream. With over 2.9 million acres of desert and mountain terrain, you can find areas that are remote enough for long-term camping. The high desert provides ample opportunities to practice fire-starting, foraging, and shelter-building. The forest’s proximity to major water sources, such as the Salt River, makes it an ideal spot for setting up camp.

2. Mogollon Rim

The Mogollon Rim, stretching over 200 miles through the state’s northern region, is a prime spot for those who enjoy a mix of elevation and isolation. The Rim offers pine forests, alpine lakes, and cooler temperatures, which can be vital for extended survival situations. Camping in this area also offers access to dense woods that are perfect for camouflage and finding food sources.

3. Coconino National Forest

This forest, located near Flagstaff, is known for its towering pine trees and volcanic rock formations. It’s perfect for preppers seeking both shelter-building opportunities and forage. There are also several remote camping sites in Coconino, where water sources like Oak Creek can be found. It’s a haven for anyone looking to escape the desert heat.

4. Grand Canyon National Park

While it may be one of the most iconic locations in Arizona, the Grand Canyon also serves as a great prepper destination. Its vastness offers plenty of remote and isolated campsites, and the rugged terrain makes it perfect for honing your survival skills. Just remember, water is scarce in the Canyon itself, so bring your own or plan your routes to fetch it from reliable sources. The Colorado River runs along the park’s edge, providing a significant water source.

5. Saguaro National Park

If you’re a desert survivalist, Saguaro National Park offers the ultimate opportunity to practice desert navigation, shelter-building, and bushcraft. The park, located in southern Arizona, is home to the famous saguaro cacti and offers a unique blend of desert and mountain environments. Prepare for hot temperatures and minimal shade, so bring plenty of water and practice desert survival skills.

6. Lake Pleasant Regional Park

This 1,400-acre park near Phoenix is a great location for preppers who need to stay near civilization but still want a remote area to practice their skills. Lake Pleasant offers fishing, boating, and access to water, which makes it a reliable spot for long-term survivalists who want to keep a low profile while staying prepared.

7. Apache-Sitgreaves National Forest

This massive forest, located in northeastern Arizona, is the perfect place for any prepper looking to test their skills in both a forest and a high-desert environment. The dense woodlands provide ample shelter-building materials, and the many lakes in the area can supply water. This forest is more remote and less crowded, providing an opportunity for extended stays in a secluded environment.

8. Sedona Campgrounds

Sedona is known for its breathtaking views and spiritual vibe, but it’s also a fantastic location for preppers who want to learn wilderness survival in a beautiful setting. The area has multiple campsites with access to water sources, especially Oak Creek, and the surrounding red rock formations make it an excellent environment for shelter-building and stealth camping.

9. White Mountains

The White Mountains are ideal for preppers looking for high-altitude survival training. The area is remote, with thick forests and cold temperatures, which can serve as an ideal location to practice cold-weather survival. The forests offer cover for stealth camping, and the nearby lakes and streams provide an essential water source.

10. Kofa National Wildlife Refuge

Located in southwestern Arizona, Kofa is a vast wilderness area offering isolation and rugged terrain. The landscape is harsh, with temperatures rising well above 100°F in the summer months, making it the perfect place to practice extreme desert survival tactics. This area is remote, so make sure you have enough water and food stored up.

11. Catalina State Park

Situated at the base of the Santa Catalina Mountains, this park offers some of the best desert and mountain camping in the state. The area provides opportunities to practice desert survival while also allowing you to explore forests, streams, and canyons. Catalina State Park is ideal for preppers who want to mix desert survival with cooler mountain climates.

12. Sycamore Canyon Wilderness

The Sycamore Canyon Wilderness area offers rugged terrain with little human activity. This remote location provides an excellent opportunity for preppers to practice navigation, shelter-building, and resource management. The area also contains several creeks and springs that will provide vital water sources for survivalists.

13. Petrified Forest National Park

The Petrified Forest National Park, located in northeastern Arizona, offers a unique camping experience. The desert terrain and fascinating geological formations make it an excellent place to practice survival tactics in an arid environment. The park’s remoteness and lack of resources make it a great test of your self-sufficiency skills.

14. Tombstone Mountains Wilderness Area

For the hardcore prepper looking to experience Arizona’s untamed wilds, the Tombstone Mountains Wilderness area is perfect. Remote and rugged, this area offers an opportunity to live off the land and test your wilderness survival skills in the desert’s harsh conditions. It’s a place where few venture, making it a prime location for low-profile camping.

15. Lake Havasu State Park

Located along the Colorado River, Lake Havasu State Park offers preppers access to water, along with a relatively remote location to practice camping and survival techniques. The area is less crowded than many other state parks, which provides more solitude and opportunities for honing your skills.

16. Alpine Campground

Located in the White Mountains, Alpine Campground is a great spot for preppers who want to experience a higher altitude, forested environment. The area provides cool temperatures, wildlife, and water sources from nearby streams. It’s perfect for testing your cold-weather survival tactics and building shelters.

17. Baboquivari Peak Wilderness

This area offers steep mountain terrain and desert environments for an advanced survivalist who wants to test their physical endurance and tactical camping skills. The isolation here is intense, and access to water is limited, so it’s important to come fully prepared.

18. Bonita Creek Campground

Located in the southeastern part of the state, Bonita Creek offers quiet camping in a lush area of the Chiricahua Mountains. With nearby creek access, the area offers a perfect spot for practicing water purification and basic survival techniques.

19. Grand Canyon Caverns

For those who want to practice survival with a unique twist, the Grand Canyon Caverns provide a remote environment with underground camping options. It’s a great place to test your skills in an environment that is starkly different from the usual outdoor terrain.

20. Madera Canyon

Located in the Santa Rita Mountains, Madera Canyon offers diverse wildlife, cool mountain air, and a variety of hiking and camping opportunities. It’s a fantastic spot for preppers who want to practice their wilderness survival skills while enjoying cooler temperatures compared to Arizona’s desert landscapes.

Survivalist’s Guide to Connecticut’s 30 Best Campsites for Preppers

The Best Campsites for Connecticut Survival Preppers

Living in Connecticut as a survival prepper means being constantly ready to face any emergency or natural disaster. Whether you’re planning for winter storms, hurricanes, or flooding, knowing how to live off the land, stay self-sufficient, and get familiar with the terrain can be lifesaving. And for that, nothing beats getting out into the wild to practice your survival skills.

Luckily, Connecticut offers a wealth of camping options that allow preppers to get hands-on with their emergency training. From dense forests to peaceful lakesides, here are the 30 best campsites in Connecticut that every prepper should know about. These locations give you the opportunity to practice skills such as fire starting, shelter building, foraging, and even testing out your bug-out gear.

1. Hammonasset Beach State Park (Madison)
A gem along the Connecticut shoreline, Hammonasset is perfect for preppers who want to practice coastal survival techniques. Whether you’re interested in saltwater fishing or testing out your ability to secure freshwater, this spot has it all.

2. Sleeping Giant State Park (Hamden)
For those who love to hike and want to test their endurance in rocky, hilly terrain, Sleeping Giant is an ideal choice. The park offers multiple trails and plenty of wilderness for learning navigation and survival techniques.

3. Peoples State Forest (Barkhamsted)
This forest offers over 1,000 acres of wooded trails, perfect for solo camping and practicing survival skills. Its seclusion also makes it a fantastic place for stealth camping drills and bug-out practice.

CLICK HERE TO LEARN HOW TO SURVIVE A FAMINE

4. Black Rock State Park (Watertown)
With its beautiful 437-acre grounds, Black Rock offers plenty of wooded areas for camping. The park’s elevation and rugged landscape make it an excellent location for testing shelter building and survival gear.

5. Kettletown State Park (Southbury)
Located near the Housatonic River, Kettletown is known for its hiking trails and quiet campsites. This park is great for practicing survival tactics near water, whether it’s purifying the river water or testing your fishing skills.

6. Rocky Neck State Park (East Lyme)
Another coastal park, Rocky Neck provides ample opportunities for beach camping and testing out your wilderness survival techniques along the shoreline. If you’re prepping for coastal flooding, this spot offers valuable experience.

7. Meshomasic State Forest (East Hampton)
Located deep in the woods, Meshomasic offers a true backcountry camping experience. The forest’s isolation makes it ideal for long-term survival practice, including learning to build shelter from natural materials.

8. Devils Hopyard State Park (East Haddam)
For preppers who want a more rugged experience, Devils Hopyard is ideal. The park is home to waterfalls, deep woods, and varied terrain, giving you the chance to practice orienteering and building emergency shelters.

9. Stratton Brook State Park (Simsbury)
If you’re looking for a peaceful, low-traffic campsite to hone your survival skills without the distractions of crowds, Stratton Brook is a solid choice. It’s a great spot for practicing fire-starting and small-scale wilderness cooking.

10. Bluff Point State Park (Groton)
Bluff Point offers both woodland and coastal camping, providing an opportunity to practice multiple survival strategies in one place. Whether you need to find fresh water or figure out how to navigate along a coastline, this park has it all.

11. Lake Waramaug State Park (Kent)
This peaceful, quiet park features a large freshwater lake, making it a prime spot for fishing and water purification practice. It’s also a great place to practice setting up camp and cooking over a campfire.

12. Camp Columbia State Park (Columbia)
Camp Columbia offers remote wooded areas that are perfect for more extended survival practice. The park is great for learning about shelter construction, fire building, and other off-grid skills.

13. Appalachian Trail (various locations)
The Appalachian Trail runs through Connecticut, and if you want a serious survival challenge, the section through this state offers plenty of tough, rugged terrain to practice your skills. You can camp at various trailheads, working on things like navigation, water sourcing, and foraging.

14. Bigelow Hollow State Park (Union)
Located near the quiet town of Union, Bigelow Hollow offers secluded camping experiences, making it perfect for a survival prepper’s retreat. This area is known for its dense forests, quiet atmosphere, and abundant wildlife.

15. Silver Sands State Park (Milford)
Silver Sands is perfect for preppers who want to practice both coastal and wilderness survival. You’ll find tidal flats for learning about marine survival, along with quiet woods for honing your basic outdoor skills.

16. Shenipsit State Forest (Tolland)
Shenipsit is one of the largest state forests in Connecticut, and it’s a great place for campers who want to get away from the crowds and really immerse themselves in nature. Perfect for extended wilderness survival trips.

17. Saugatuck Reservoir (Weston)
The Saugatuck Reservoir offers camping along the water, which is perfect for practicing fishing, water purification, and survival swimming techniques.

18. Connecticut Audubon Society Centers (various locations)
The Connecticut Audubon Society has several centers, such as the Greenwich Audubon Center, that provide great opportunities for preppers who are interested in learning about local ecosystems, wildlife, and foraging.

19. Fort Trumbull State Park (New London)
For a mix of historical interest and practical survival skills, Fort Trumbull is a great site. You can practice shelter building and fire-starting while also enjoying the area’s rich history.

20. Housatonic Meadows State Park (Sharon)
If you’re looking to work on river survival skills, Housatonic Meadows is an ideal campsite. Learn water purification techniques and try your hand at fishing for your meals.

21. Goodwin State Forest (East Hampton)
This park provides over 800 acres of forest, perfect for backwoods camping. It’s a place where you can test your long-term survival gear and practice fire-starting skills, navigation, and trapping.

22. State Forests in Litchfield County
Litchfield County has a number of lesser-known state forests that are perfect for preppers looking to get off the beaten path. These forests are excellent for stealth camping, scouting, and wildlife tracking.

23. Natchaug State Forest (Eastford)
Located in the northeastern part of the state, Natchaug is a vast wilderness perfect for practicing navigation and stealth camping. The park is dense with trees, making it ideal for learning how to build temporary shelters.

24. Town Forest (Lyme)
The Lyme Town Forest offers a quiet, peaceful place for preppers to test out their outdoor survival skills. This is a great spot for light camping or even just day trips to practice wilderness skills.

25. Pine Acres Campground (East Killingly)
Pine Acres provides more developed camping sites but still allows preppers to practice essential survival skills, especially if you want to test your ability to live off the grid in a slightly more controlled environment.

26. Wells State Park (Sturbridge)
Though technically just outside of Connecticut, Wells State Park is a perfect location for anyone prepping for an extended wilderness adventure. The park offers multiple camping sites and backcountry areas to test your long-term survival strategies.

27. Lake McDonough Recreation Area (New Hartford)
This park offers pristine lakeside camping perfect for preppers who want to practice water purification, fishing, and shelter-building in a semi-wilderness environment.

28. Candlewood Lake (Danbury)
Candlewood Lake offers fantastic opportunities for camping and practicing water-based survival skills, including fishing and water purification. It’s also an excellent place for learning navigation techniques.

29. Clinton Crossing State Forest (Clinton)
This small, quiet forest offers perfect seclusion for prepper camping. It’s not as well-known as other parks, so it’s ideal for solo campers looking to work on their skills in isolation.

30. Mount Tom State Park (Litchfield)
If you’re up for a challenge, the steep trails and elevation changes of Mount Tom provide an excellent test for your endurance and hiking skills. This park is perfect for practicing navigation, long-distance hiking, and building shelters in varied terrain.