Deadly Bugs of Big Sky Country: Montana’s Most Dangerous Insects and How to Survive Them

If you live in Montana long enough, you learn one simple truth: nature here doesn’t need to chase you to kill you. Between the weather, the terrain, and the wildlife, Big Sky Country rewards those who prepare and punishes those who assume they’re untouchable.

Most folks worry about bears and wolves. That’s fair. But as a professional Montana survival prepper who’s spent decades hunting, hiking, trapping, and teaching emergency readiness across this state, I can tell you something that surprises people:

The smallest threats are often the most dangerous.

Insects don’t roar. They don’t give warnings. They don’t respect experience. And under the wrong conditions, a bite or sting from the wrong bug can absolutely end your life—especially if you’re unprepared, alone, allergic, or hours from medical help.

Let’s talk about the insects in Montana that matter most, why they’re dangerous, and exactly what you can do to survive an encounter.


1. Ticks: Montana’s Quietest Killers

Ticks are, without question, the most dangerous insects in Montana—not because of pain, but because of disease.

Why They’re Deadly

Montana is home to several tick species, including:

  • Rocky Mountain wood tick
  • American dog tick
  • Blacklegged tick (deer tick)

These ticks can transmit:

  • Rocky Mountain Spotted Fever
  • Tularemia
  • Lyme disease
  • Colorado tick fever

Left untreated, some of these illnesses can cause organ failure, neurological damage, or death.

Survival Prepper Advice

  • Wear light-colored clothing so ticks are easier to spot.
  • Treat boots and pants with permethrin.
  • Do full-body tick checks every evening—no exceptions.
  • Remove ticks immediately using fine-tipped tweezers.
  • If symptoms appear (fever, rash, joint pain), seek medical care immediately.

Ticks don’t rush. They wait. And that’s what makes them dangerous.


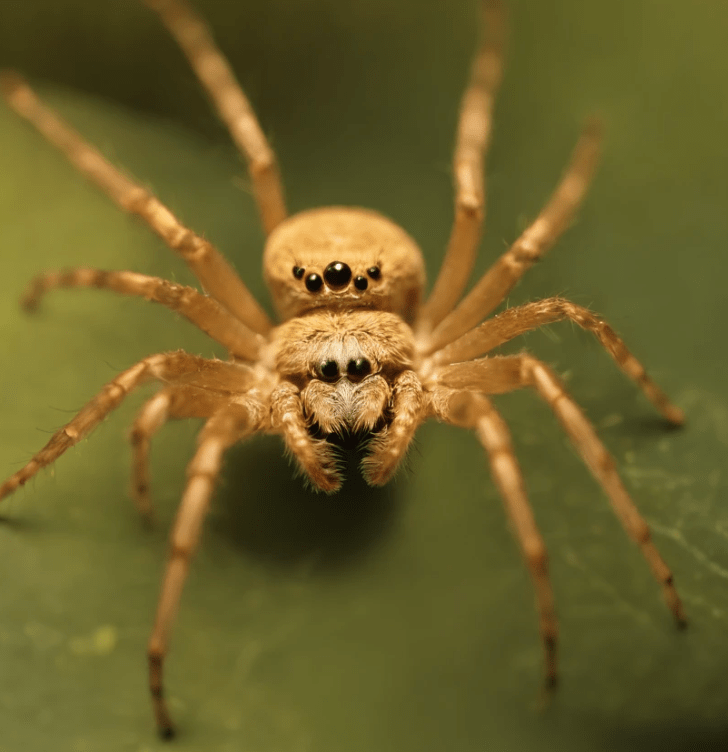
2. Black Widow Spiders: Small Bite, Big Consequences

Yes, black widows live in Montana. I’ve found them in woodpiles, sheds, barns, and old equipment more times than I can count.

Why They’re Dangerous

Black widow venom attacks the nervous system. While fatalities are rare, severe reactions can be life-threatening, especially for:

  • Children
  • Elderly individuals
  • People with heart conditions

Symptoms include muscle spasms, chest pain, nausea, and difficulty breathing.

Survival Prepper Advice

  • Always wear gloves when moving wood or debris.
  • Shake out boots and clothing stored in garages or sheds.
  • Seek medical help immediately after a confirmed bite.
  • Do not attempt home remedies beyond basic first aid.

In Montana, we respect spiders—but we don’t ignore them.


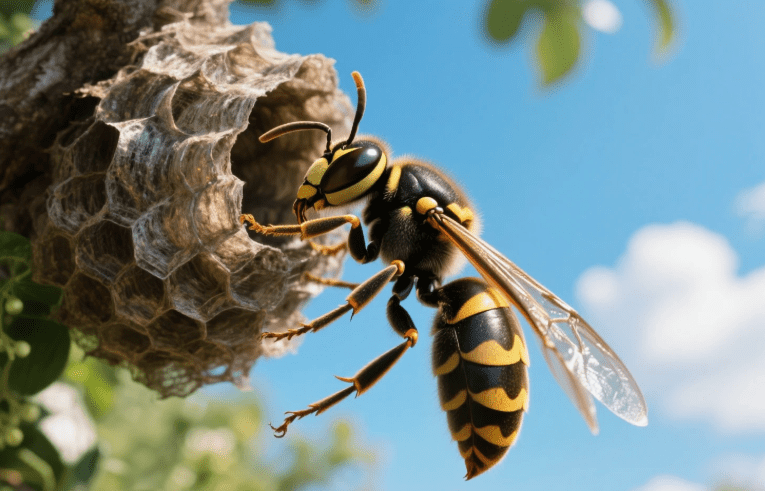
3. Wasps, Hornets, and Yellow Jackets: Aggression with Wings

If you’ve ever stumbled onto a yellow jacket nest while hiking or working land, you already know how fast things can go sideways.

Why They Can Kill

For most people, stings hurt. For others, one sting can trigger anaphylaxis, a rapid allergic reaction that can shut down breathing and cause death within minutes.

Multiple stings can also be fatal, even without allergies.

Survival Prepper Advice

  • Never swat—move calmly and leave the area.
  • Learn to identify ground nests.
  • Carry an EpiPen if you have known allergies.
  • Ice, antihistamines, and medical care should follow any severe reaction.

Insect aggression plus Montana isolation is a dangerous combination.


4. Mosquitoes: Disease on a Whine

Montana mosquitoes aren’t just annoying—they’re capable of spreading serious illnesses.

Why They Matter

Mosquitoes in Montana can transmit:

  • West Nile Virus
  • Western equine encephalitis

While rare, severe cases can result in brain inflammation, long-term neurological damage, or death.

Survival Prepper Advice

  • Use insect repellent with DEET or picaridin.
  • Eliminate standing water near your home.
  • Wear long sleeves at dusk and dawn.
  • Install proper screens in cabins and homes.

Never underestimate an insect that shows up by the thousands.


5. Biting Flies: Blood Loss and Infection Risks

Horse flies and deer flies are aggressive biters found throughout Montana’s wetlands and ranch country.

Why They’re Dangerous

Their bites:

  • Tear skin instead of puncturing it
  • Can cause excessive bleeding
  • Increase risk of infection

In survival situations, untreated infections are a major killer.

Survival Prepper Advice

  • Cover exposed skin when working outdoors.
  • Clean bites immediately.
  • Monitor for signs of infection.
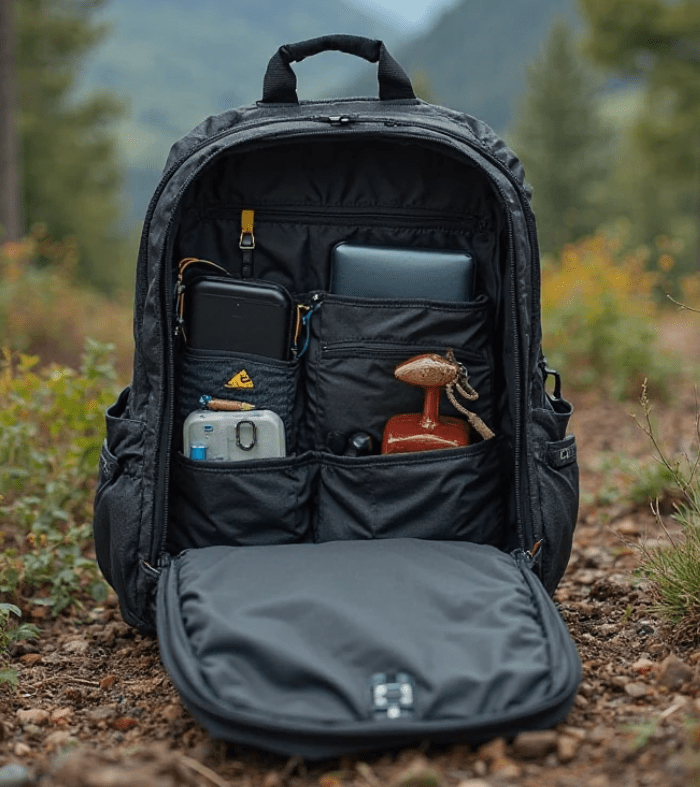
  • Carry antiseptic in your field kit.

In the wild, infection kills more people than trauma.


6. Fire Ants (Rare but Spreading)

While not widespread yet, fire ants are slowly expanding northward, and Montana isn’t immune.

Why They’re Dangerous

  • Multiple stings
  • Risk of allergic reactions
  • Secondary infections from scratching

Survival Prepper Advice

  • Learn to identify mounds.
  • Avoid barefoot exposure outdoors.
  • Treat stings promptly and monitor reactions.

Preparedness means staying ahead of trends—not reacting too late.


Final Survival Lessons from a Montana Prepper

Here’s the truth most people don’t like hearing:

You don’t need to be weak, reckless, or stupid to die from an insect.
You just need to be unprepared.

In Montana, survival comes down to:

  • Awareness
  • Prevention
  • Rapid response

Respect the land. Respect the risks. And prepare like help may not come quickly—because out here, it often doesn’t.

If you do that, you won’t just survive Montana’s most dangerous insects.

You’ll thrive in Big Sky Country.

Deadly Bugs of New Jersey – A New Jersey Survival Prepper’s Guide to Staying Alive

When most people think of New Jersey, they picture shorelines, forests, small towns, diners, and hardworking people who know how to get things done. What they don’t usually picture is danger lurking in the grass, the woods, or even their own backyard. As an optimistic professional New Jersey survival prepper, I’m here to tell you something important: you don’t need to fear nature—but you absolutely must respect it.

New Jersey may not have deserts or jungles, but it does have insects capable of causing severe injury, permanent damage, or even death under the wrong circumstances. The good news? With the right mindset, awareness, and preparation, every one of these threats is survivable.

Let’s break down the most dangerous insects in New Jersey, how they can kill you, and—more importantly—exactly what you can do to stay alive and thriving.


1. Ticks: New Jersey’s Most Lethal Insect Threat

If there is one insect that has quietly earned the title of most dangerous in New Jersey, it’s the tick. Ticks don’t kill you with venom or stingers. They kill through disease, and New Jersey is a hotspot.

Why Ticks Are So Dangerous

Ticks in New Jersey can transmit:

  • Lyme disease
  • Anaplasmosis
  • Babesiosis
  • Powassan virus (rare but often fatal)

Left untreated, these diseases can cause neurological damage, heart failure, organ damage, and death.

Survival Strategy

  • Wear light-colored clothing to spot ticks easily
  • Tuck pants into socks when hiking or working outdoors
  • Use permethrin-treated clothing and EPA-approved repellents
  • Perform full-body tick checks after outdoor activity
  • Shower within two hours of coming indoors

Prepper mindset: Early detection saves lives. Pull ticks quickly and correctly using fine-tipped tweezers.


2. Mosquitoes: Small Wings, Big Consequences

Mosquitoes are everywhere in New Jersey, especially in summer. Most bites are annoying—but some carry life-threatening viruses.

Diseases Spread by NJ Mosquitoes

  • West Nile virus
  • Eastern Equine Encephalitis (EEE)
  • Zika virus (rare but possible)

EEE, in particular, has a high fatality rate and can cause brain swelling.

Survival Strategy

  • Eliminate standing water around your home
  • Use window screens and fans
  • Wear long sleeves at dusk and dawn
  • Apply insect repellent with DEET or picaridin

Optimistic truth: Mosquito control is one of the easiest survival wins—small actions drastically reduce risk.


3. Bald-Faced Hornets and Yellow Jackets: Aggressive and Dangerous

These insects aren’t just painful—they’re strategic attackers. Bald-faced hornets and yellow jackets are common across New Jersey and will attack in groups.

Why They Can Kill

  • Multiple stings can cause toxic venom overload
  • Allergic reactions (anaphylaxis) can be fatal within minutes
  • Attacks often target the face and neck

Survival Strategy

  • Never disturb nests—especially in trees or under eaves
  • Move away calmly; don’t swat or flail
  • Carry an epinephrine injector if you’re allergic
  • Seek emergency care after multiple stings

Prepper rule: Avoidance beats confrontation every time.


4. Fire Ants: An Expanding Threat

Fire ants are slowly expanding northward, and sightings in southern New Jersey are increasing.

Why Fire Ants Are Dangerous

  • Swarm attacks
  • Repeated venom injections
  • Risk of infection and allergic reaction

Survival Strategy

  • Watch where you step, especially near sandy soil
  • Avoid disturbing mounds
  • Wash stings immediately with soap and water
  • Apply cold packs and monitor for allergic response

Preparedness isn’t panic—it’s paying attention.


5. Kissing Bugs: Rare but Deadly

Kissing bugs are uncommon in New Jersey, but climate changes have increased sightings.

Why They’re Dangerous

They can transmit Chagas disease, which damages the heart over time and can be fatal if untreated.

Survival Strategy

  • Seal cracks in homes
  • Reduce outdoor lighting that attracts insects
  • Seek medical testing if bitten and symptoms develop

Low probability does not mean zero risk—preppers plan for both.


6. Spiders That Aren’t Insects (But Still Matter)

While technically arachnids, spiders often get lumped into insect threats—and for good reason.

Venomous Spiders in NJ

  • Black widow (rare but present)
  • Brown recluse (extremely rare, usually imported)

Survival Strategy

  • Shake out shoes and gloves
  • Keep storage areas clean
  • Seek medical help for severe reactions

Knowledge removes fear—and fear causes mistakes.


What to Do If You’re Bitten or Stung

A true New Jersey survival prepper keeps a calm head:

  1. Assess the situation
  2. Remove the insect safely
  3. Clean the wound immediately
  4. Monitor symptoms
  5. Seek medical help early

Never “tough it out” when symptoms escalate. Survival isn’t about ego—it’s about living to see tomorrow.


The Optimistic Prepper’s Mindset

Here’s the truth: New Jersey is not out to kill you. These insects exist whether you notice them or not. Prepared people don’t live in fear—they live in confidence.

By learning your environment, using common-sense protection, and staying alert, you dramatically reduce risk. Preparedness is not paranoia—it’s responsibility.


New Jersey Survival Prepper’s Final Thoughts: Stay Ready, Stay Positive

The most dangerous insects in New Jersey don’t need to end your life. With awareness, preparation, and a steady mindset, you can enjoy everything this state offers—from forests to shorelines—safely and confidently.

Survival is about adapting, learning, and staying optimistic. And in New Jersey, that mindset will carry you a long way.

Stay ready. Stay smart. And take care of each other.

Florida’s Deadliest Insects That Do Not Play Nice With Anyone

I love Florida. I love the heat, the humidity, the storms, the swamps, the pine flats, and the fact that nature here doesn’t apologize for being dangerous. Florida is honest. It tells you up front: pay attention, or pay the price.

What Florida does not do well is babysit people who move here from colder states and think sunscreen is the only survival gear they’ll ever need. If you’re coming down from New York believing the biggest threat is traffic or bad pizza, you’re already behind the curve.

As a lifelong prepper and outdoorsman in the Sunshine State, let me be clear: Florida insects are not annoying—they’re potentially lethal. Most won’t kill you outright, but the wrong bite, sting, or infection—combined with ignorance or arrogance—absolutely can end your life.

This article isn’t meant to scare you. It’s meant to keep you alive.


1. Mosquitoes: Florida’s Silent Killers

If you think mosquitoes are just itchy nuisances, congratulations—you’ve already underestimated the deadliest animal on Earth.

Florida mosquitoes are capable of transmitting:

  • West Nile Virus
  • Eastern Equine Encephalitis (EEE)
  • Zika Virus
  • Dengue Fever

You don’t feel most infections immediately. That’s the danger. By the time symptoms show up, you may already be in serious trouble.

How Mosquitoes Can Kill You

It’s not the bite—it’s the disease. Severe neurological damage, organ failure, or overwhelming infection can occur, especially in children, seniors, or anyone with a weakened immune system.

Survival Strategy

  • Wear permethrin-treated clothing
  • Use EPA-approved insect repellent
  • Eliminate standing water around your home
  • Avoid dawn and dusk exposure when possible
  • Install window screens and repair tears immediately

Mosquitoes don’t care how tough you think you are. They care how unprotected you are.


2. Fire Ants: Small Bodies, Serious Consequences

Fire ants are aggressive, organized, and absolutely unforgiving. Step into a mound and you’ll know instantly—because dozens will attack at once.

How Fire Ants Can Kill You

  • Anaphylactic shock from venom (especially in allergic individuals)
  • Secondary infections from multiple stings
  • Dangerous falls or accidents caused by panic reactions

Florida fire ants don’t sting once. They sting repeatedly, injecting venom each time.

Survival Strategy

  • Learn to identify fire ant mounds
  • Wear boots and thick socks outdoors
  • Never stand still if ants begin swarming—move fast
  • Seek immediate medical help if you experience swelling, breathing trouble, or dizziness

Fire ants don’t announce themselves. They ambush.


3. Africanized Honey Bees: Death by Swarm

Often called “killer bees,” Africanized honey bees are present in parts of Florida and behave very differently than standard honey bees.

How They Can Kill You

  • Massive envenomation from hundreds of stings
  • Airway swelling
  • Cardiac stress from venom overload

Even non-allergic individuals can be killed if stung enough times.

Survival Strategy

  • Never disturb hives or nests
  • If attacked, run immediately and seek shelter
  • Cover your face—especially eyes and mouth
  • Do not jump into water; bees will wait

Standing your ground is not bravery. It’s stupidity.


4. Kissing Bugs: The Slow Burn Threat

Kissing bugs are stealthy, nocturnal insects that feed on blood and can transmit Chagas disease—a long-term, often undetected killer.

How They Can Kill You

Chagas disease can cause:

  • Heart failure
  • Severe digestive complications
  • Sudden cardiac arrest years after infection

You won’t connect the dots unless you know what to look for.

Survival Strategy

  • Seal cracks in walls and roofs
  • Keep outdoor lights away from sleeping areas
  • Use bed nets in high-risk zones
  • Seek medical testing if bitten

Florida survival isn’t just about what happens today—it’s about what sneaks up on you later.


5. Fleas: Plague Isn’t Ancient History

Yes, fleas. And no, the danger didn’t disappear with medieval Europe.

Florida fleas can carry:

  • Murine typhus
  • Plague (rare, but documented in the U.S.)

How Fleas Can Kill You

Untreated flea-borne illnesses can progress rapidly and overwhelm the body, especially without early diagnosis.

Survival Strategy

  • Keep pets on flea prevention year-round
  • Control rodents near your home
  • Treat infestations immediately
  • Don’t ignore unexplained fever after flea exposure

If you think fleas are just a pet problem, you’re thinking like someone who hasn’t lived through Florida summer.


6. Giant Water Bugs: Pain That Can Turn Dangerous

Often misnamed “toe-biters,” these insects are aggressive and pack one of the most painful bites in the insect world.

How They Can Kill You

While not venomous in a lethal sense, their bite can cause:

  • Severe pain leading to shock
  • Secondary infection
  • Dangerous reactions in vulnerable individuals

Survival Strategy

  • Avoid handling aquatic insects
  • Wear footwear near freshwater
  • Clean and monitor any bite immediately

Pain alone doesn’t kill—but panic and infection absolutely can.


Final Survival Truths from a Florida Prepper

Florida doesn’t reward ignorance. It rewards preparation.

If you:

  • Respect the environment
  • Learn the threats
  • Prepare your home, clothing, and habits

You’ll thrive here.

If you don’t? Well… Florida has been quietly handling people like that for centuries.

And to anyone coming down from New York thinking this is all exaggerated—welcome to the Sunshine State. The bugs don’t care where you’re from.

They only care if you’re ready.

Don’t Cry When Your House Gets Ransacked If You Didn’t Reinforce Your Windows With Plywood

Let me guess—you’re one of those people who thinks your cute little vinyl windows are going to protect you when everything finally collapses? You probably think your double-pane glass is tough. Maybe you think your HOA-approved shutters are going to keep the chaos out. Well, let me be the one to slap you verbally across the face: your windows are the weakest, most laughably fragile point in your entire home, and if you haven’t already figured that out, then I sincerely hope you enjoy being a future cautionary tale.

I’m not writing this because I care whether you make it through the next disaster, blackout, riot, hurricane, or whatever insanity is coming down the pipeline next. Frankly, I’ve been warning people for years and I’m tired of wasting breath. But every now and then some poor soul with two brain cells still rubbing together asks me how to keep their home from becoming an open buffet for intruders and flying debris when things go bad. And despite being furious at society as a whole, I don’t want to watch every clueless homeowner get swallowed by chaos.

So here it is. Plywood window barriers—your last-minute, low-tech, brutally effective line of defense when the world turns stupid (which at this point is practically every Tuesday). If you don’t build them now, you’ll wish you had.


Why Plywood Window Barriers Matter (Assuming You Still Care About Living)

Look, I get it. The hardware store isn’t glamorous. A sheet of plywood doesn’t sparkle. It’s not a magical electronic security system that talks to your phone. Instead it’s a giant slab of dead tree—heavy, ugly, and absolutely essential when people (or Mother Nature) are about to come crashing through your windows.

Your glass windows were designed for “normal civilization.” That means none of these:

  • Angry mobs
  • Looters
  • Hurricane winds
  • Flying debris
  • Idiots throwing bricks
  • The general collapse of law and order

Plywood doesn’t care about any of that. It laughs in the face of chaos.

You slap up a solid 5/8″ or 3/4″ sheet over your window frame, and suddenly that breakable, flimsy portal into your home becomes a wall. Sure, it’s not perfect. Nothing is. But compared to bare glass? It’s the difference between getting hit by a pickup truck versus getting hit by a Nerf ball. One ruins your week. The other ruins your life.

And don’t even start with, “I’ll put it up when I need it.” No, you won’t. Because you’ll be the one running to Home Depot with a crowd of panicked civilians, fighting over the last sheets like it’s Black Friday at the apocalypse. And then—shocker—there won’t be any left.


What Kind of Plywood You Should Use (If You Want It to Actually Work)

Most people wouldn’t know the difference between OSB and plywood if their survival depended on it—which, ironically, someday it might. So listen up:

Use real plywood, not OSB.

OSB flakes apart when exposed to rain or moisture for too long. It’s cheaper, sure. But we’re talking about emergency security here, not crafting a treehouse. Get exterior-grade plywood.

Thickness matters.

  • 1/2″ is the bare minimum.
  • 5/8″ or 3/4″ is ideal.

If you can’t lift a sheet without struggling, congratulations—you’re on the right track.

Pre-cut it before you need it.

But hey, if you want to be that person trying to measure windows during a storm warning, don’t let me stop you from winning a Darwin Award.


Anchoring the Plywood: Do NOT Half-Do This

I swear, the number of people who think they can just “nail it to the siding” makes me lose sleep. That’s not how this works, and if that’s your plan, you might as well tape a “Please Break In Here” sign to your window.

Screw it into the framing.

Yes, the actual structural framing around the window—not the flimsy molding. Use heavy-duty exterior screws. If you don’t hit stud wood, you’re just screwing plywood into air and praying it holds. Great strategy if you’re an optimist. I’m not.

Use washers.

Without washers, your screws can rip through the plywood under stress. And if that happens during a storm or riot, I hope you have good insurance.

Hurricane clips or brackets are even better.

Not required, but if you want your plywood to stay put even when someone’s pushing on it, kicking it, or the wind is trying to tear it off, brackets turn a flimsy board into a shield.


Advanced Reinforcement for People Who Actually Want to Survive

Most of you won’t bother doing any of this, but here’s what the smarter (or more paranoid) among us do:

1. Pre-drill and label everything

Every board gets:

  • A label (“Kitchen Window Left,” etc.)
  • Pre-drilled screw holes
  • Marked orientation

This shaves minutes off installation time. Minutes matter when the world is falling apart.

2. Add a crossbeam brace inside your home

Not everyone can do this, but if you want next-level reinforcement, place a 2×4 inside the window frame, pushing against the plywood from the interior. It adds insane resistance to forced entry without violating any laws or going full bunker mode.

3. Store the plywood INSIDE, not in your damp garage

Moisture warps wood. Warped plywood doesn’t fit. Then you cry. End of story.


When Should You Install Your Plywood Barriers?

If your answer is, “When things start getting bad,” then congratulations—you’re already too late. The whole point of preparedness is doing things before the crisis, not during it while your neighbors are panicking and your dog is eating drywall from stress.

Here are times when you should already have your boards ready to go:

  • Hurricane season
  • Widespread civil unrest
  • Extended power outages
  • Bad weather warnings
  • Empty store shelves
  • Basically any time society looks shakier than usual, which lately is always

You don’t have to mount them permanently (unless you want your home to look like a fortress, which honestly might be an upgrade). But at least pre-cut them, store them, and have the screws and drill ready.

People panic when the world wobbles. You shouldn’t.


Final Thoughts (You Won’t Like Them)

Look, if you’re the type who thinks “things will work themselves out,” then you probably won’t make it through the next major crisis anyway. Life rewards the prepared and punishes the complacent. I’m not here to coddle anyone. I’m here to tell you what works.

Plywood window barriers WORK.
They’re cheap. They’re fast. They’re strong.
And they can turn your fragile suburban fishbowl into something resembling a defensible structure.

If you want to ignore this advice, go ahead. But don’t come crying when your windows explode inward and the world invites itself right into your living room. Some of us will be fine—because we prepared. The rest can learn the hard way.

The Best Burglar Deterrents Your Home Needs Before the World Gets Worse

Crime is rising in places where it never used to exist, criminals are getting bolder, and society keeps acting shocked every time something awful happens, as if the writing hasn’t been smeared all over the wall for the last decade. Maybe you still cling to the fantasy that calling the police will magically solve everything. Well, I hate to break it to you—but by the time help arrives, the criminals will already be gone, and they’ll likely be holding half your belongings and your sense of security hostage.

If you want to keep your home—and your sanity—intact, you need deterrents. Not hopes. Not wishes. Not naïve trust in your ZIP code. You need real, physical, tactical strategies that send a crystal-clear message: Go bother someone else.
Below are the best burglar deterrents that actually work in this collapsing world.


1. Outdoor Lighting That Doesn’t Apologize for Existing

People talk about “warm,” “welcoming,” or “eco-friendly” outdoor lighting. Forget that nonsense. You need lighting that burns brighter than your disappointment in modern society—lights that flip on the moment a would-be intruder so much as breathes near your property line.

Motion-activated floodlights are one of the simplest deterrents you can install. Criminals rely on shadows, darkness, and people pretending not to notice them. When a floodlight blasts them in the face like a stadium spotlight, they rethink their life choices real fast.

Look for:

  • LED bulbs (long life, high brightness)
  • Wide-angle sensors
  • Waterproof housings
  • Placement higher than 9 feet so they can’t be smashed easily

You’d be amazed how many criminals abandon their brilliant plans the moment they’re confronted by a wall of blinding illumination. It’s almost poetic, really—rotting intentions exposed by light.


2. Security Cameras—Yes, Even the Fake Ones Work

We live in a surveillance era whether you like it or not. Cameras are everywhere except, ironically, on the homes of the people who actually need them the most. Criminals hate being recorded. They want to slither around unnoticed like the bottom-feeders they are.

You need cameras that are:

  • Visible
  • Weatherproof
  • Night-vision capable
  • Cloud-backed (so they can’t destroy the evidence)

Place them where they’re obvious—above entrances, near garages, overlooking walkways. You’re not trying to be subtle. You’re sending a message.

And here’s the kicker: Even dummy cameras help. A burglar sees a lens and a blinking LED and instantly starts questioning whether your house is worth the trouble. Sure, a seasoned professional might know the difference—but most people breaking into homes aren’t “professionals.” They’re desperate, sloppy opportunists hoping the universe will hand them something for free.

Not today. Not from your home.


3. Reinforced Doors and Windows—Because Builders Don’t Care About You

You’d think the front door—the main barrier between your life and the chaos outside—would be built strong. But no. Most doors are so flimsy they might as well be made of cardboard and optimism. The average door frame can be kicked in by anyone with working legs and bad intentions.

You need:

  • Reinforced strike plates
  • 3-inch screws
  • Solid-core or steel doors
  • Window security film
  • Anti-lift devices on sliding doors

When some intruder tries kicking in your door and it doesn’t budge, they get confused. Criminals panic when things don’t go as planned. That’s where deterrence becomes protection.

Your windows? Same deal. Most are so easy to breach it’s insulting. Add security film so they don’t shatter like your hope for society’s future.


4. Alarms—The Loud, Obnoxious Kind

A burglar wants silence. They want time. They want a sense of control.

So your job is to remove all three.

A screaming alarm that sounds like a mechanical banshee is one of the most effective deterrents on Earth. The moment that shriek hits, the criminal knows every second increases the chance someone will notice them.

You don’t need a fancy subscription service or a contract that traps you like a mortgage. Even standalone alarms work:

  • Window alarms
  • Door alarms
  • Glass-break sensors
  • Smart alarms that alert your phone

Once that thing wails, criminals usually bolt. Nobody wants to get caught—especially not burglars who barely have functioning plans to begin with.


5. Dogs—The Original Security System

Forget what the commercials tell you. Forget the cutesy anecdotes. A barking dog is one of the most proven burglar deterrents in existence.

Criminals don’t want unpredictability. Dogs are unpredictable. They make noise. They draw attention. They bite.

Even a medium-size dog is enough to make a burglar reconsider their life choices. And if you happen to have a larger breed? Congratulations—your home just jumped several tiers on the “not worth the risk” list.

But don’t rely on the dog alone. You need overlapping layers. Dogs are wonderful, but they sleep. They get distracted. Technology doesn’t.

Combine the two and you’ve got a fortress.


6. Signs—Because Humans Fear Warnings More Than Reality

Does a sign stop a truly determined criminal? No. But it absolutely stops the lazy, opportunistic ones. And those are the majority.

Use signs like:

  • “24-Hour Video Surveillance”
  • “Beware of Dog”
  • “Security System Installed”
  • “Private Property – No Trespassing”

Some people say warning signs are “aggressive.” Good. Let them think that. You’re not running a daycare—you’re protecting your home from vultures.


7. Neighborhood Awareness—Even If You Hate People

Let’s be honest: Most preppers aren’t exactly thrilled about mingling with neighbors. But here’s the cold truth: Criminals thrive where nobody pays attention.

You don’t have to bake cookies together or exchange holiday cards. Just:

  • Learn their faces
  • Know what cars belong on your street
  • Pay attention when something feels “off”

You don’t need community spirit. You just need community awareness. Even the most pessimistic prepper can benefit from a quick text message warning them a suspicious individual was lurking around the mailboxes.


The Harsh Reality: Security Is Your Responsibility

No one is coming to save you. Not your city. Not your state. Not your neighbors. Not the system that keeps telling you everything is fine.

If you want security, you build it yourself.

The best burglar deterrents aren’t complicated—they’re layered. Combine lighting, cameras, reinforcing materials, alarms, signs, and situational awareness, and suddenly your home becomes the hardest target on the block.

Criminals don’t want a challenge. They want easy prey.

Make sure that’s never you.

How To Stay Safe and Survive During a Riot in New Jersey

How To Stay Safe and Survive During a Riot in New Jersey
By a Skilled Survival Prepper

When chaos hits your doorstep, especially in a densely populated place like New Jersey, your survival depends on preparation, quick thinking, and decisive action. Riots aren’t just distant news stories—they can ignite in your neighborhood in a matter of hours. I’ve lived through civil unrest before. I’ve seen what happens when the power grid flickers, the police are overwhelmed, and people panic.

If you’re not prepared, you become a target. But if you take the time to train, plan, and stay sharp, you’ll not only survive a riot—you’ll come out stronger and more aware.

Let me walk you through what you need to know.


Understand the Nature of Riots

Riots are unpredictable, emotional surges of violence and destruction. They can start from political unrest, police incidents, or even after sports events. New Jersey’s urban centers—Newark, Jersey City, Camden, Trenton—can become flashpoints due to their population density and social dynamics.

When a riot breaks out, the goal isn’t to be a hero. Your only mission is to survive and protect your loved ones.


The 8 Self-Defense Skills You Must Master

Whether you’re caught on the street or defending your home, these skills are critical.

1. Situational Awareness

Your best defense is always being aware. Before a riot even starts, know your surroundings—routes in and out, crowd behavior, and potential threats. Listen, watch, and keep your phone charged with a scanner or citizen-reporting app.

2. Verbal De-escalation

You’d be surprised how far a calm voice and firm posture can go. Learn to manage a confrontation before it becomes physical. Practice phrases that redirect or de-escalate hostile intent.

3. Escape and Evasion

Can you disappear in a crowd? Do you know how to change your appearance fast? Learn basic disguise techniques, like using reversible jackets, hats, or sunglasses. Blend in or slip away unnoticed.

4. Basic Striking and Blocking

Train in boxing or Krav Maga. A solid jab, cross, and elbow strike can disable an attacker. Learn to block and deflect blows, especially from blunt weapons.

5. Joint Locks and Control Holds

If you’re grabbed, you need to know how to break free. Wrist locks, arm bars, and finger manipulation give you the upper hand without needing to be the strongest person.

6. Ground Defense

If you’re taken to the ground, many untrained people panic. Practice defensive ground positions like guard and shrimping. Learn how to get back up quickly without exposing your back.

7. Improvised Weapons

Know how to use what’s around you—keys, pens, belts, a rolled-up magazine. These everyday items can become effective weapons in a pinch. Practice using them safely and effectively.

8. Multiple Opponent Tactics

In a riot, you may face more than one threat. Never get surrounded. Use angles and movement to keep attackers on one side. Always look for escape routes, not victories.


How to React When Riots Break Out in New Jersey

  1. Don’t Wait for the News
    Have a trusted app or radio tuned to local law enforcement frequencies. By the time a riot is televised, it’s already too late.
  2. Bug-In or Bug-Out?
    If you’re in a high-risk area like Newark or Paterson and live in an apartment building, it may be safer to bug out early. If you’re in a suburban or fortified home, bugging in and defending may be smarter. Know which option fits your environment and plan both.
  3. Create a Safe Room
    One room in your home should be fortified with strong locks, minimal windows, supplies, and communication tools. It’s where you regroup, rest, or make your last stand if needed.
  4. Dress for Urban Survival
    Wear muted colors, comfortable shoes, and bring a backpack with essentials: water, snacks, gloves, flashlight, and basic first aid. Leave no jewelry or flashy items on you.
  5. Avoid Choke Points
    Stay away from bridges, tunnels, and crowded highways. New Jersey has lots of them, and they’re the first places to clog or turn hostile.
  6. Protect Your Vehicle
    If you’re using your car to escape, fill the tank early, tint the windows, and remove any identifying bumper stickers. Keep a getaway kit in the trunk—tools, maps, jumper cables, and a fire extinguisher.

3 DIY Survival Weapon Builds

You don’t need to be a blacksmith to protect your home. Here are three practical DIY weapon builds:

1. PVC Pipe Baton

Take a 24-inch length of 1-inch PVC pipe, fill it with sand or lead shot for weight, and wrap the ends in duct tape or paracord for grip. It’s lightweight, concealable, and can deliver serious stopping power.

2. Nail Bat

Get an old wooden baseball bat. Drill holes through the top and hammer in large nails, then bend them slightly outward with pliers. It’s a brutal deterrent and sends a clear message: your home is not an easy target.

3. Slingbow

With a sturdy slingshot frame and some elastic tubing, you can convert it into a slingbow capable of firing arrows. Add a whisker biscuit to hold arrows in place and you’ve got a silent, reusable ranged weapon. Perfect for defending at range without attracting attention.


Mental Strength and Leadership

During civil unrest, panic is as deadly as violence. You must stay calm. Your family or group will look to you for strength. Build trust before the crisis. Establish a communication plan. Give roles to each member—guard, lookout, medic, communicator.

And remember: self-defense doesn’t end when the threat passes. There’s often looting, fires, and injuries that come after the riot. Be ready for prolonged instability—especially if supply chains get disrupted or law enforcement is pulled back.


Post-Riot Recovery and Threat Assessment

Once the initial riot is over, don’t assume it’s safe. Stay alert. Some of the most dangerous moments happen in the aftermath when emergency services are stretched thin, and criminals feel emboldened.

  • Check perimeter security: Barricade broken doors, replace locks, and create noise traps.
  • Assist only if safe: Help neighbors or others only if you can do so without exposing your group.
  • Debrief and improve: After it’s over, review what worked and what didn’t. Sharpen your weaknesses.

Final Words from a Fellow Prepper

New Jersey is no stranger to unrest—between political protests, economic tensions, and dense population centers, the potential for riots is real. You don’t have to live in fear, but you do have to live prepared.

Take the time to build skills, gather tools, and fortify your mindset. When the storm comes, you won’t be just another person running scared. You’ll be ready. You’ll lead. You’ll survive.

This Is How Colorado Residents Prepare for the State’s Worst Natural Disasters

How Colorado Residents Prepare for the State’s Worst Natural Disasters

Living in Colorado can feel like a blessing, especially with the picturesque mountains, expansive forests, and rich wildlife. But, as anyone who’s been here for any length of time knows, it’s not all about snow-capped peaks and stunning vistas. Colorado is also home to some of the most intense and unpredictable natural disasters in the United States. As a survival prepper in Colorado, you’ve got to be ready for everything—from wildfires to blizzards and everything in between.

1. Wildfires: A Growing Threat

Colorado has been on the frontlines of some of the most devastating wildfires in history. The state’s dry climate, combined with seasonal winds, makes it ripe for catastrophic wildfires that can spread with terrifying speed. As a prepper, it’s essential to be ready for this possibility year-round. The fires don’t just happen in the summer, either. Wildfires can flare up any time there’s dry vegetation and the right conditions, and they can spread rapidly, threatening not just homes but entire communities.

Survival Tip #1: Always have an evacuation plan. Know multiple routes out of your neighborhood or town and make sure your vehicle is stocked with essentials, including a first-aid kit, extra water, and your emergency bug-out bag.

2. Snowstorms and Blizzards: The Danger of the Winter Months

If you live in Colorado, you’ve likely experienced the frustration of being snowed in. The state’s high elevation and unpredictable weather patterns make it susceptible to heavy snowstorms and blizzards, particularly in the mountains. These can make roads impassable, isolate communities, and cause power outages for days, or even weeks.

In Colorado’s mountainous areas, snowstorms can hit at any time, but they’re most common from October through April. If you’re up in the higher elevations, you need to be especially mindful of blizzards, which can drop several feet of snow and drastically reduce visibility in mere minutes.

Survival Tip #2: Keep a well-stocked emergency supply kit in your home, including extra blankets, warm clothing, flashlights, batteries, non-perishable food, and a portable generator.

Survival Tip #3: When traveling during the winter, always have a shovel, ice scraper, and extra supplies like blankets, a firestarter, and a portable stove to cook food if you get stuck.

3. Flooding: Flash Floods and Overflowing Rivers

In the spring and early summer, Colorado can experience sudden and intense rainfall that causes flash floods. These floods can happen quickly, especially in the foothills and along the many rivers that snake through the state. Flash floods can inundate entire neighborhoods in a matter of minutes, washing away vehicles, homes, and even entire stretches of roads.

As a prepper, you should always know whether you live in a flood-prone area. Areas near rivers, streams, or urban drainage systems are especially susceptible. But remember, flash floods aren’t always predictable, and they can strike anywhere, including in regions that typically experience drier weather.

Survival Tip #4: Know your flood zone. If you live in a flood-prone area, keep important documents in a waterproof container and be ready to evacuate at a moment’s notice.

Survival Tip #5: If flash flooding is possible, move to higher ground immediately. Don’t wait for an evacuation order, as roads can become impassable very quickly.

4. Tornadoes: A Silent Threat in Eastern Colorado

Tornadoes are most commonly associated with the Midwest, but Colorado is no stranger to these powerful, destructive storms. Tornadoes are more common in the eastern plains of Colorado, where conditions are ideal for these storms to form. In fact, Colorado sees an average of 50 tornadoes a year, making it one of the top 10 states for tornado activity.

The storms usually develop during the late spring and summer, often in the late afternoon or early evening. Tornadoes in Colorado tend to be smaller and shorter-lived than those in places like Kansas, but they can still cause significant damage and pose a serious risk to life and property.

Survival Tip #6: Keep an emergency weather radio on hand so you can receive timely tornado warnings. Have a designated safe space in your home, such as a basement or interior room, where you can seek shelter if a tornado warning is issued.

5. Earthquakes: Not as Common, But Possible

While not as frequent as wildfires or blizzards, earthquakes can and do happen in Colorado. The state has seen several notable earthquakes over the years, and they’re most common along the state’s western edge near the Colorado Plateau. Though Colorado’s earthquakes are typically small, they can still cause significant damage, especially to older buildings and infrastructure.

Though the risk of a major earthquake is lower compared to places like California, it’s always a good idea to be prepared for the unexpected.

Survival Tip #7: If you’re in a building when an earthquake strikes, drop to the ground, take cover under something sturdy, and hold on until the shaking stops. Always keep a set of sturdy shoes and a flashlight near your bed in case of a quake at night.

6. Droughts: Managing Water in Arid Conditions

CLICK HERE TO LEARN HOW TO SURVIVE A FAMINE

Colorado’s semi-arid climate means that droughts are a regular occurrence. These dry spells can last for months or even years, and they can have devastating effects on the state’s agriculture, water supply, and wildfires. As a prepper, it’s important to conserve water and be mindful of how long your water supplies might last during times of drought.

Survival Tip #8: Stockpile water—at least one gallon per person per day for a week—and learn how to filter and purify water from local sources if necessary.

Survival Tip #9: Grow a drought-resistant garden with native plants, and use water-efficient techniques like drip irrigation to make the most of your water supply.

7. Preparing for the Unexpected

While wildfires, snowstorms, floods, and tornadoes are the most well-known threats, Colorado can throw a variety of other natural disasters at you, including hailstorms, landslides, and even extreme heat waves. The best way to prepare for the unpredictable is to think ahead and prepare for every possibility.

Survival Tip #10: Always have a bug-out bag ready with essentials like food, water, a first-aid kit, and tools. Make sure you have a plan for communicating with loved ones during a disaster, and have a list of emergency contacts.

Conclusion: Stay Ready, Stay Safe

Living in Colorado means embracing the beauty of the landscape—and understanding that with that beauty comes a variety of risks. Whether it’s the raging wildfires, the heavy snowstorms, or the flash floods, being a survival prepper here requires vigilance, foresight, and a commitment to always being ready for what’s next.

By taking the time to prepare and learn how to react in any given situation, you can ensure the safety and security of yourself and your family, no matter what natural disaster comes your way.


Vermont’s Best Campsites for Off-Grid Survival Training

The Best Campsites for Vermont Survival Preppers: Top 30 Hidden Gems to Know

As a Vermont survival prepper, it’s essential to have a keen eye for locations that not only provide peace and solitude but also offer a wealth of resources for self-sufficiency. Whether you’re planning for an extended off-grid stay or just want to get away from it all, Vermont has some of the best campsites that offer everything from dense forests and flowing rivers to mountains that promise strategic vantage points. These sites are perfect for preppers who want to practice essential skills like fire starting, water purification, trapping, and navigation, all while keeping an eye on their preparedness plans.

Vermont is a state that’s ripe for prepping, with its rugged terrain and abundance of natural resources. The state offers an ideal blend of beautiful landscapes, safety, and isolation. If you’re ready to tap into Vermont’s survival potential, here are 30 of the best campsites for preppers, along with some key tips on why these sites should be your go-to for both training and relaxation.

1. Green Mountain National Forest

Let’s start with the crown jewel of Vermont’s outdoor experience. Green Mountain National Forest stretches across a vast area, filled with dense woods, hidden trails, and pristine lakes. Perfect for bugging out, it’s one of the best locations to practice wilderness survival skills. The area has countless campsites, ranging from established to primitive sites, where you can practice everything from bushcraft to long-term camping strategies.

CLICK HERE TO LEARN HOW TO SURVIVE A FAMINE

2. Smuggler’s Notch State Park

This one is perfect for learning about terrain navigation and survival in mountainous regions. Smuggler’s Notch is known for its steep cliffs and dense forest, making it a challenge for anyone who wants to test their skills in tough conditions. The park has a number of campgrounds that cater to preppers looking to escape and practice their off-grid living techniques.

3. Mount Mansfield State Forest

For those wanting a higher elevation experience, Mount Mansfield offers breathtaking views and tough terrain. It’s Vermont’s highest peak, so it’s a prime spot for honing navigation and shelter-building skills while you take in the incredible vistas.

4. Lake Willoughby

This hidden gem in the Northeast Kingdom provides some of the clearest water in the state, making it perfect for fishing, water purification training, and even just enjoying some fresh water in the wild. The surrounding forests and hiking trails offer ample opportunities to learn primitive skills, and the area is isolated enough for a peaceful retreat.

5. Silver Lake State Park

Silver Lake offers opportunities for water-based survival skills. From fishing and boating to learning how to purify water, you’ll find plenty of natural resources here. Plus, the surrounding woods are home to an array of edible plants and wildlife to practice foraging.

6. Camel’s Hump State Park

A prime spot for a rugged, survivalist experience, Camel’s Hump State Park offers rugged, rocky terrain and thick woods. You can practice tracking, shelter-building, and identifying edible plants and animals. It’s also great for honing your ability to move stealthily through the wilderness.

7. Lake Champlain Islands

Situated along Vermont’s border with New York, the Lake Champlain Islands offer access to both water and land resources. Perfect for preppers who want to practice fishing, trapping, and wilderness navigation, this area is an ideal spot for a long-term survival test.

8. Elmore State Park

A peaceful and quiet location, Elmore State Park offers an opportunity for preppers to practice stealth camping. The wooded areas and lake offer various ways to learn about living off the land, and its isolation ensures a less crowded environment for prepper-style camping.

9. Underhill State Park

Underhill is one of the more rugged parks in Vermont. This park is perfect for climbing, survival skills training, and tactical movements. Its mountainous terrain and dense forest make it an excellent location to practice bushcraft and self-sufficiency.

10. The Long Trail

Stretching from Massachusetts to Canada, the Long Trail is a famed hiking route, but it also offers plenty of remote areas to practice wilderness survival. With primitive campsites scattered along the way, it’s ideal for those looking to hone their skills in a more isolated environment.

11. Moscow Woods

Moscow Woods offers a more isolated experience for those wanting to learn skills like hunting, foraging, and building shelters. The dense forest provides cover, and its proximity to the Lamoille River means water access is easily within reach.

12. Gifford Woods State Park

Gifford Woods is a great place for preppers to get back to basics. The park is dense with trees and wildlife, offering plenty of foraging and hunting opportunities. It’s also a great spot for practicing shelter-building and learning how to make use of the natural resources around you.

13. State Forests Near Brandon

Brandon’s state forests are rich in flora and fauna, making it an ideal environment for preppers who want to practice gathering wild food. It also has streams and ponds that offer water purification opportunities.

14. Niquette Bay State Park

This park offers easy access to Lake Champlain and is perfect for preppers who want to practice water-based survival tactics. It also offers plenty of land resources, such as berries and game, and is close to Burlington for any supplies you may need.

15. Big Basin Campground

Located in the heart of Vermont, Big Basin Campground offers a secluded environment perfect for learning all the aspects of wilderness living, from fire-starting techniques to food preservation. It’s ideal for those wishing to train with minimal distractions.

16. Quechee State Park

Situated along the Ottauquechee River, Quechee offers a more tranquil camping experience. It’s a fantastic place for practicing navigation and finding shelter in a mixed forest and riverine landscape. The proximity to water makes it an ideal location for testing your water purification and fishing skills.

17. Brighton State Park

Brighton’s remote location in the Northeast Kingdom provides ample space for camping and practicing wilderness survival. It’s an excellent spot for fishing, wildlife tracking, and learning how to forage for wild food in Vermont’s northern woods.

18. Woodford State Park

Located near the Green Mountains, this park offers opportunities for both water and woodland survival techniques. Its remote location makes it great for secluded training, and it’s known for its wildlife, including deer and wild turkey.

19. Lye Brook Falls Wilderness Area

For the more advanced prepper, Lye Brook Falls offers challenging terrain, waterfalls, and a variety of wildlife. It’s perfect for survivalists looking for tough conditions to train in and develop a variety of outdoor skills.

20. North Beach Campground

Located near Burlington, North Beach offers a unique blend of lakefront camping and wooded areas. This is a great place for water survivalists looking to practice kayaking or canoeing in Vermont’s waterways.

21. Kettle Pond State Park

This park offers a mix of woodland and water-based survival opportunities, including fishing, water purification, and boat-building. It’s a peaceful and secluded place to practice these skills without interference.

22. Harriman Reservoir

Harriman Reservoir offers a fantastic location for preppers who want to combine survival skills with water-based activities. It’s remote enough to provide the necessary privacy for long-term camping and practicing your wilderness survival skills.

23. Woods Hill State Forest

For those looking for complete isolation, Woods Hill State Forest offers a rare opportunity to practice being completely off-grid. The forest is dense with vegetation, and its steep terrain offers unique challenges for preppers to overcome.

24. Moose Bog

Moose Bog offers a unique combination of marshland and forest, providing a variety of skills for the survivalist to learn, from navigating wetlands to building natural shelters. It’s also a good spot for tracking and observing wildlife.

25. New Discovery State Park

Known for its pristine forests and proximity to nearby mountain ranges, New Discovery offers many opportunities for backwoods survival training. The park’s isolation makes it an ideal spot for preppers to test their skills in true wilderness conditions.

26. Pine Hill Park

This park is located near Middlebury and offers both wooded areas and access to the Otter Creek, a great resource for preppers to practice water purification and fishing techniques.

27. Mount Philo State Park

With its panoramic views and wooded terrain, Mount Philo offers an ideal spot for learning shelter-building, fire-making, and map reading. It’s a perfect training ground for beginners and experienced preppers alike.

28. Warren Falls

Known for its scenic beauty, Warren Falls is a great place to practice water-based survival skills. The falls are surrounded by dense woods, providing an opportunity for stealthy camping and survival skill practice.

29. Bolton Valley Resort

For the more adventurous prepper, Bolton Valley Resort provides a great mixture of alpine terrain and deep woods, perfect for building winter survival skills. It’s a great place to practice shelter-building in harsh conditions.

30. Stowe Mountain Resort

Not only is it a popular tourist destination, but Stowe offers incredible opportunities for those looking to practice winter survival techniques. Its mountainous environment is ideal for testing cold-weather gear and practicing emergency winter survival tactics.


Conclusion:

Vermont is home to countless beautiful and remote campsites that cater to preppers looking to practice their survival skills. Whether you’re focused on water purification, shelter building, hunting, or foraging, these locations offer unparalleled opportunities for both beginners and seasoned survivalists alike.

By choosing the right spot, you can sharpen your skills, learn new techniques, and immerse yourself in the wild. Remember, always prioritize safety, carry the right equipment, and respect the environment while you prepare for the challenges ahead.

Bugging Out Gone Wrong and The Hidden Hazards You Can’t Afford to Ignore

As preppers, we plan for the worst-case scenario. We stockpile supplies, create bug-out bags, and rehearse evacuation plans. But in the heat of the moment, with panic and adrenaline running high, things can go terribly wrong. And if you’re not careful, even the best-prepared bug-out plan can quickly turn into a nightmare.

The truth is, there are hidden hazards when bugging out—dangers that many people overlook when creating their survival strategies. These aren’t just the obvious risks like bad weather, wild animals, or hostile individuals. The real threats are often things we don’t expect, the hazards that are easy to dismiss, but which can be just as deadly in a collapse situation.

The Hidden Hazards When Bugging Out

When the time comes to bug out, you need to be prepared for more than just getting from point A to point B. The hazards of the journey and survival in the wild can be numerous, and even the smallest oversight can lead to disaster. Let’s break down some of the often-forgotten risks that can make bugging out much more dangerous than you anticipate.


1. Overpacking Your Bug-Out Bag

Prepper Tip #1: Don’t overpack your bug-out bag. Focus on lightweight, high-utility items. Prioritize quality over quantity.

It’s easy to get excited and pack everything you think you’ll need, but this is one of the most common mistakes preppers make. A heavy, overstuffed bug-out bag can slow you down and wear you out faster than you think. You might be carrying extra weight that you don’t need, making it harder to move efficiently or even causing physical injury if you’re not used to carrying heavy loads over long distances.

When bugging out, your goal should be mobility and endurance. Focus on essential survival gear that serves multiple purposes. Choose lightweight, compact tools and space-efficient items that you can rely on. If your bag is too heavy, you’re less likely to reach your destination—and you’ll waste valuable energy and time.


2. Failing to Consider Terrain and Route

Prepper Tip #2: Scout multiple routes and plan for terrain challenges. Always have a secondary escape route.

When you’re bugging out, the route you take is just as important as the gear you carry. Terrain can be one of the most dangerous hidden hazards when you’re trying to escape from danger. You might think you know the land around you, but terrain can change drastically depending on weather, local geography, or even human interference.

Hiking through dense forests, crossing rivers, or scaling steep hills can take more time and energy than you anticipate. These challenges can not only delay your travel, but they can also exhaust you or lead to injury.

Tip: Plan your routes carefully. Avoid areas with difficult terrain, and always have a secondary route in case you run into unforeseen obstacles. When scouting, look for natural barriers like mountains or swamps that could either help you or hinder your progress, and always account for the distance and time it will take to travel through each area.


3. Not Taking into Account Wildlife Risks

Prepper Tip #3: Learn to identify dangerous wildlife and practice defensive tactics. Know which animals to avoid and how to deal with them.

Wildlife can be both a source of food and a deadly threat during a bug-out. In a survival situation, animals like deer, wild boar, and rabbits may seem like an easy food source, but you need to understand the dangers that come with interacting with wildlife. Dangerous animals—like bears, mountain lions, and wolves—can be an immediate threat if you’re not prepared to defend yourself.

Additionally, animals may carry diseases like rabies, ticks that spread Lyme disease, or parasites that can seriously affect your health. When bugging out, always be cautious of the wildlife in your surroundings. Keep a safe distance, avoid provoking animals, and know the proper defensive measures for any encounters.


4. Underestimating the Importance of Water Sources

Prepper Tip #4: Always carry a water filtration system and know how to purify natural water sources.

You can survive for weeks without food, but only a few days without water. That’s why ensuring you have access to clean, safe drinking water is one of the most critical components of a successful bug-out plan. Many preppers make the mistake of underestimating the importance of water sources and assume they’ll be able to find it when they need it.

While it’s true that there are plenty of natural water sources—rivers, streams, lakes, and springs—many of these are contaminated with bacteria, parasites, or harmful chemicals. Even if the water looks clean, it may still be unsafe to drink. Without proper filtration, you risk drinking contaminated water, which could lead to severe illness or even death.

Always carry a high-quality water filtration system in your bug-out bag, such as a LifeStraw or a portable water filter, and know how to purify water using boiling or chemical treatments if necessary.


5. Not Accounting for Food and Caloric Needs

Prepper Tip #5: Have high-calorie, lightweight food in your bug-out bag and know how to forage or hunt for more.

Food is another hidden hazard in the bug-out equation. While you may have a bug-out bag full of supplies, your food may not last as long as you think. Rationing becomes critical when you’re on the move for extended periods of time. And relying solely on packed food without considering the possibility of foraging or hunting can limit your options.

By the time you run out of food, you may find yourself stuck in an area with few edible plants or animals. Carry a variety of high-calorie, lightweight food items like energy bars, dried fruits, and trail mix. And make sure you have fishing gear or small game hunting tools like snares or traps to supplement your food supply.


6. Ignoring Medical Risks and First Aid

Prepper Tip #6: Always carry a comprehensive first aid kit and know basic wilderness medicine to treat injuries and illness on the spot.

In the wilderness, injuries or illnesses can escalate quickly. Without proper medical care, even a small cut or scrape can turn into a serious infection. Bugging out without a first aid kit is a critical mistake that could cost you your survival.

A well-stocked first aid kit is an essential part of your bug-out gear. Make sure it includes antibiotics, bandages, splints, painkillers, burn creams, and antiseptic wipes. Learn basic first aid skills like wound care, splinting fractures, and performing CPR.


7. Not Having a Good Shelter Plan

Prepper Tip #7: Pack portable shelter such as a tarp, emergency bivy sack, or tent to ensure a safe place to sleep each night.

When bugging out, you may not be able to find shelter right away. Building a fire and finding a place to sleep in the wild requires careful planning. If you don’t have a pre-made shelter, such as a tent or tarp, you may find yourself exposed to the elements, which can lead to hypothermia, dehydration, and exhaustion.

Plan ahead for shelter construction, and always have a weather-resistant shelter option that will keep you protected from the elements, particularly in colder climates.


8. Underestimating the Psychological Impact

Prepper Tip #8: Mentally prepare for the psychological stress of bugging out and have a plan to stay calm under pressure.

Bugging out isn’t just physically demanding—it’s mentally exhausting. The emotional toll of leaving your home, traveling through unfamiliar territory, and dealing with constant danger can be overwhelming. Fear, panic, and anxiety can cloud your judgment, leading to rash decisions or mistakes that could cost you dearly.

Prepare your mind as much as you prepare your body. Practice mindfulness, stress management techniques, and focus on staying calm in emergency situations. Keep a positive attitude and have a clear mental strategy for handling challenges along the way.


9. Misjudging the Threat of Hostile Individuals

Prepper Tip #9: Be aware of your surroundings and always be ready for potential conflict with other survivors.

In a post-collapse scenario, other people might pose a bigger threat than wildlife. Roving bands of hostile individuals, other desperate preppers, or even those who are simply unprepared could target you for your resources. These threats can escalate quickly if you’re caught off guard.

Be mindful of your surroundings, traveling in groups if possible, and keep defensive weapons at the ready. Always be prepared to handle a confrontation—either through negotiation or force if necessary.


10. Failure to Stay Low-Key and Stealthy

Prepper Tip #10: Move quietly and avoid drawing attention to your location. Stealth is your best defense against both nature and hostile individuals.

One of the best ways to avoid drawing attention to yourself is by moving quietly and subtly. Making noise or being too flashy with your gear can alert others to your presence, making you a target. Blend in with nature and stay as discreet as possible.


Conclusion

When bugging out, the hazards are everywhere. The obvious risks like wild animals or dangerous terrain are easy to spot, but it’s the hidden dangers that can be your undoing. From underestimating the psychological toll to failing to account for wildlife or terrain risks, you must consider every aspect of your survival strategy. By preparing for the unexpected, you can increase your chances of making it to safety and surviving long enough to rebuild.

Bugging out is a risky endeavor, but with careful planning and vigilance, you can minimize the threats and maximize your chances of success.

Stay smart. Stay prepared. Stay alive.

Blackout Preparedness: How to Stay Secure When the Lights Go Out

Blackout Survival: 10 Crucial Steps to Stay Safe in a Nationwide Power Outage

When the power goes out across the entire country, it’s not just an inconvenience—it’s a critical survival situation. A nationwide blackout can lead to widespread chaos, leaving you and your family vulnerable to everything from extreme temperatures to civil unrest. The question isn’t whether you’ll survive the blackout—it’s how prepared you are to face the dangers it brings.

We’re all familiar with the basic concept of a power outage—lights go out, appliances stop working, and we’re forced to revert to older methods of doing things. But what happens when that outage lasts days, weeks, or even longer? When the grid goes down across the entire country, there’s a ripple effect that impacts nearly every aspect of our lives. That’s why, as preppers, it’s absolutely crucial that we’re ready not just for short-term power loss, but for long-term survival in the face of a widespread blackout.

In this guide, I’ll walk you through 10 critical steps to ensure you and your loved ones stay safe and secure during a nationwide blackout.


1. Secure Your Water Supply

Prepper Tip #1: Always have a minimum of one gallon per person per day for drinking and hygiene. Store it in water-tight containers, and consider adding water purification tablets or a filter to ensure your water stays clean.

In a blackout, water is often the first thing people forget to secure. Water supplies are typically dependent on power to pump and treat water, and in the event of a nationwide blackout, you might lose access to clean water. Don’t rely on local utilities to maintain water availability during a prolonged power outage.

Tip: Fill up your bathtubs, sinks, and any other containers that can hold water when you know a blackout is imminent. You should also have a supply of bottled water stored, and a water filter (such as a LifeStraw or Berkey filter) is invaluable in case you need to source water from rivers or lakes.


2. Create a Backup Power Plan

Prepper Tip #2: Invest in solar-powered chargers, portable generators, and battery banks for essential electronics. Have extra fuel stored for backup generators if you rely on one.

When the grid fails, your lights, electronics, and even heating/cooling systems will likely stop working. A backup power plan can make the difference between comfort and disaster. You don’t need to go off the grid completely, but having a small, off-grid solar system or battery-powered lights and chargers will help keep your family safe, informed, and connected.

For critical needs like a medical device, communication, or security, ensure you have a backup power source that is independent of the grid. A solar-powered generator is an excellent option for recharging important items.


3. Maintain Communication with Trusted Contacts

Prepper Tip #3: Invest in a battery-powered or hand-crank radio for emergency broadcasts and stay connected to any news updates.

Without electricity, your usual communication methods—cell phones, landlines, internet—may be down. Staying connected with neighbors, loved ones, and other preppers is essential for coordination, especially during a nationwide blackout.

Tip: Have an emergency radio (battery-powered or hand-cranked) that can pick up AM/FM and NOAA weather broadcasts. These stations often provide critical updates about the blackout’s duration, local conditions, and even government advisories.


4. Stay Secure with Alternative Lighting

Prepper Tip #4: Avoid open flames for lighting, as they can be a fire hazard. Instead, use battery-powered LED lanterns, solar lights, or hand-crank flashlights to light your home safely.

The first thing most people think about during a blackout is lighting. But in the chaos of survival, you want to avoid the risk of candles or open flames, which are a fire hazard. LED lanterns, solar-powered lights, or flashlights powered by rechargeable batteries or hand cranks are much safer and longer-lasting.

Store extra batteries and consider solar-powered lights for outdoor spaces, as well. Having multiple light sources can make a significant difference in reducing stress and maintaining safety at night.


5. Keep Your Food Safe and Fresh

Prepper Tip #5: Have a cooler with ice packs on hand for food preservation. Consider investing in a 12V DC cooler that can run on a solar panel or backup generator.

Without electricity, your refrigerator and freezer will stop working. While this isn’t an immediate problem, the longer the blackout lasts, the greater the risk of food spoilage. If you don’t have a solar-powered fridge or backup generator, the next best option is to have a cooler filled with ice packs and non-perishable foods like canned goods, freeze-dried meals, and vacuum-sealed meats.

Tip: You can also learn to preserve food using methods like canning, dehydrating, or fermenting so you can avoid relying on refrigerated items during long-term outages.


6. Defend Your Home from Looters

Prepper Tip #6: Invest in high-quality locks, security cameras, and motion-detecting lights to keep your home safe. Have self-defense tools ready, such as a baton, pepper spray, or firearm if legal.

Unfortunately, blackouts can trigger panic buying and looting. When society’s infrastructure crumbles, some individuals may turn to crime in desperation. Having a security plan is vital to protecting your home and your supplies.

Screenshot

Tip: Fortify your entry points—secure windows and doors with heavy-duty locks and consider adding motion-sensor lights around your property. Keep a weapon for personal protection if you’re trained to use it safely.


7. Stay Aware of Health Risks

Prepper Tip #7: Always have a well-stocked first aid kit, and ensure you have essential medications stored. Know how to administer basic first aid and CPR.

With hospitals overwhelmed or without power, healthcare can become a distant thought during a nationwide blackout. You must be prepared to manage your health in these situations. Ensure you have a stocked first aid kit with bandages, medications, and antiseptics. Know how to treat minor injuries, manage illness, and recognize medical emergencies that could arise in a power-deprived environment.

Tip: Keep a two-week supply of any essential medications for family members who rely on them, and create an emergency medical plan for handling health issues when help is far away.


8. Know How to Stay Cool or Warm

Prepper Tip #8: Stockpile thermal blankets and sleeping bags for cold weather. In hot weather, have battery-powered fans and hydration supplies to stay cool.

Depending on the time of year, a blackout can either leave you freezing or overheating. In winter, you’ll need to be prepared to stay warm with thermal blankets, insulated clothing, and possibly a wood stove or kerosene heater if you’re equipped for it. In the summer, heat can be just as deadly. Keep hydration packs and cooling towels available to avoid dehydration and heatstroke.


9. Protect Your Food Sources

Prepper Tip #9: Consider setting up a garden with drought-resistant plants, and store seeds for when you need to grow your own food. Learn basic foraging and hunting skills to supplement your supply.

While canned and freeze-dried foods are great for short-term survival, you also need to think long-term. If the power is out for months, your food supply will eventually dwindle. Having a garden, growing perennials, and being able to forage in your area will be key to surviving through extended blackouts.

Tip: Make sure you know how to preserve your harvest by canning, freezing, or drying foods, so you can stockpile for the future.


10. Stay Calm and Rational

Prepper Tip #10: In high-stress situations, stay calm, assess your surroundings, and take time to plan your next steps. Always prioritize safety and self-reliance.

Finally, one of the most important survival tips during any emergency—especially a blackout—is to stay calm. Stress and panic cloud your judgment, which could lead to bad decisions. It’s vital to remain calm, think logically, and carefully consider your next move. Keep your mind clear, your plans flexible, and stay self-reliant.


Conclusion

Surviving a nationwide blackout isn’t just about enduring the inconvenience of no power—it’s about being prepared for the cascading impacts that follow. From losing access to clean water and food to dealing with the dangers of an unpredictable environment, each step you take to prepare will increase your chances of surviving and thriving during a widespread power outage.

By securing your resources, maintaining communication, and staying calm, you can protect yourself and your family from the chaos that often follows a nationwide blackout.

Remember, the key to survival is not just preparation—it’s action. Be ready, stay focused, and adapt to the challenges that come your way.