Clear to the Last Drop: Mastering Water Purification Methods

Listen up, because I’m only going to say this once—your cushy modern lifestyle has made you soft, blind, and dangerously dependent on a system that’s teetering on the brink of collapse. You think that faucet will always spit out clean water? You think bottled water will save you when the trucks stop rolling? Wake the hell up. When the grid goes down, the shelves empty out, and the government forgets your ZIP code, the only water you’ll have is the water you can purify yourself. You better learn how to turn sludge into salvation—now. Not next week. Not when you’re already thirsty. Now.

Why Water Matters More Than You Realize

You can survive three weeks without food. But without water? Three days, maybe less if it’s hot and you’re exerting yourself. And no, guzzling from a river isn’t going to cut it unless you want your insides turned into a parasitic amusement park. Giardia, cryptosporidium, E. coli, cholera—you ever heard of them? If you haven’t, you will… when they’re drilling holes in your guts and you’re writhing in the dirt, praying to a sky that doesn’t give a damn.

Let’s fix that ignorance right now. I’m going to teach you how to purify water like your life depends on it—because it does.


10 Survival Skills to Purify Water When the World Goes to Hell

1. Boiling

Boiling is your first line of defense. Build a damn fire and get that water rolling. A good three to five minutes at a hard boil will kill most of the microscopic hellspawn. At higher altitudes? Boil longer. Firewood’s free if you’re willing to sweat for it.

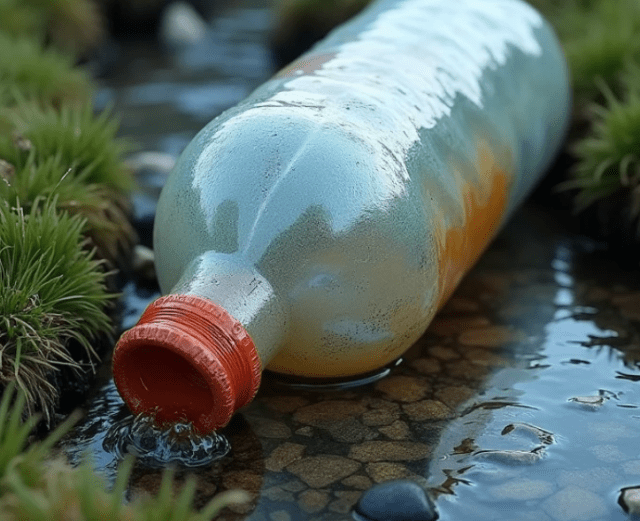
2. Solar Disinfection (SODIS)

Fill a clear plastic bottle with water. Shake it to aerate, then lay it in direct sunlight for six hours—longer if it’s cloudy. UV-A radiation and heat will kill a lot of the bacteria. Is it perfect? No. But it’s better than drinking raw creek juice.

3. DIY Charcoal Filter

Layer gravel, sand, and activated charcoal in a bottle or hollow log. Pour your water through it. This won’t kill pathogens, but it’ll remove particulates and improve taste before you boil or disinfect chemically. Think of it as a pre-wash before you hit it with the heavy stuff.

4. Chemical Treatment (Iodine or Chlorine)

Carry iodine tablets or unscented household bleach. 2 drops of bleach per liter of water. Let it sit for 30 minutes. Taste the bleach? Good. That means it’s working. No bleach? Learn how to make it from salt and a car battery. (That’s a skill for another day.)

5. Distillation

Boiling water into steam and collecting the condensation will leave most nasties behind—including heavy metals and salts. Use a metal pot, tubing, and a collection vessel. Even seawater becomes drinkable. It’s slow, but it’s clean.

6. Pump Filters

There are portable survival filters out there with ceramic or carbon cartridges. They’re solid. If you can buy one, do it. But remember—they clog, they break, and replacement parts are rare when society tanks. Know how to clean and maintain them.

7. Improvised Evaporation Still

Dig a pit, put a container in the middle, and cover the pit with plastic. Put a pebble in the center to make the plastic dip. As water evaporates, it condenses and drips into the container. It’s not fast, but it’ll save your hide in arid hellscapes.

8. Tree Transpiration

Wrap a clear plastic bag around leafy branches. The tree will sweat out moisture, and it’ll collect in the bag. Bonus: It’s already distilled and safer than river water. Just don’t use toxic plants like poison oak or sumac, genius.

9. Snow and Ice Safety

Melt snow before you drink it. Never eat it raw—it lowers your core temperature and burns precious calories. Ice from moving water is safer than stagnant snowbanks. Don’t trust pristine looks. Mother Nature lies.

10. Rainwater Harvesting

Set up a tarp, metal sheeting, or even a poncho to channel rainwater into a container. Keep it covered. Birds crap mid-flight, and you don’t want that in your sip. Rain’s generally safe, but if you’re near factories or downwind of civilization, purify it anyway.


3 DIY Survival Hacks That’ll Make You Look Like a Water Wizard

Hack #1: The “Fire Bottle” Water Boiler

Got a metal water bottle? Good. Drop it into the edge of your campfire and let it boil. No pot required. Just don’t use aluminum—it’ll melt and leach into your water. Stainless steel is king. Pour it into another container or drink straight from it once cool.

Hack #2: Pine Needle Disinfection

Boil water with pine needles. Not only does it help kill bacteria, but pine contains vitamin C and mild antiseptic properties. It doesn’t replace proper purification, but it gives your water a fighting chance and a survivalist’s bouquet you’ll learn to love.

Hack #3: Bandana Pre-Filter

Before boiling or chemically treating, run water through a bandana or shirt to filter out sediment, bugs, and other nasty floaters. It won’t kill microbes, but it keeps your other gear from clogging and makes it easier to disinfect.


Gear Up or Shut Up

You want the easy route? Get a LifeStraw or Sawyer filter, iodine tablets, a stainless steel pot, and a solar still kit. But don’t just stash them in your bug-out bag and call it good. Use them. Practice in the woods, in your backyard, or on that next camping trip you always talk about but never take. Know how to improvise when the tools fail—because they will.


The Water Mindset

Screenshot

Every drop is precious. Learn to find it. Learn to protect it. Treat it like liquid gold. No one’s coming to save you, and thirst doesn’t wait for your Amazon order to arrive. Build a water strategy today—not tomorrow. Stockpile supplies. Practice techniques. Teach your kids. Tell your neighbors, or don’t—it’s up to you who lives when the tap runs dry.

I’m not here to sugarcoat or pat you on the back. I’m here to scream the truth into your face while you can still hear it.

Water is life. Learn how to keep it clean—or you won’t keep anything at all.

Caught to Survive: The Prepper’s Guide to Traps and Snares

Alright, listen up, because I’m only gonna say this once. If you’re dumb enough to think survival is just about stocking up on canned beans and pretending that’ll keep you alive when the world goes sideways, then this rant isn’t for you. Survival is about doing — using your brain, your hands, and yes, your grit — to catch what you can, snare what you need, and make it through whatever hellhole we find ourselves dropped into.

Welcome to Caught to Survive: The Prepper’s Guide to Traps and Snares — a no-BS blueprint for anyone who refuses to be just another dead body left behind when the grid goes dark. If you don’t know how to make a trap or a snare, you might as well start digging your grave now.


15 Survival Skills Every Prepper Should Master — Or Die Trying

1. Basic Knot Tying
If you don’t know a bowline from a granny knot, you’re already screwed. Traps and snares depend on strong, reliable knots. Practice until you can tie them blindfolded and with one hand tied behind your back.

2. Crafting Deadfall Traps
This ain’t your grandpa’s picnic. Knowing how to build a deadfall trap using logs and rocks can catch rabbits, squirrels, or whatever dumb critter walks into your line.

3. Snare Making
Wire snares are the backbone of stealth trapping. Know how to twist, set tension, and place snares where animals naturally run — otherwise, you’re wasting time.

4. Camouflage and Concealment
A trap that’s obvious gets disabled or avoided. Learn to hide your gear in plain sight with branches, leaves, or dirt. If your traps aren’t invisible, they’re useless.

5. Tracking Animal Behavior
Study animal trails, feeding spots, and habits. Set traps where animals will be, not where you wish they’d show up. If you’re just hoping for luck, you’ll be eating dirt.

6. Fire Starting Under Any Conditions
You’ll need fire to cook your catch, sterilize traps, and keep warm. Practice friction, flint, and modern methods until you can start a blaze in a rainstorm with nothing but grit.

7. Knotless Snares and Loop Placement
Sometimes animals are wary of wire loops with knots. Master creating smooth, sliding loops to increase your catch rate.

8. Butchering Small Game
Trapping isn’t just about capture — you’ve got to know how to clean and prepare your kill fast and sanitary. You’re not hunting dinner for fancy; you’re hunting survival.

9. Using Natural Materials for Traps
Wire might run out. Learn to use vines, strips of bark, and wood for snares and triggers.

10. Primitive Tools Making
Carve your own hooks, spears, and trap components from stone, bone, or wood. If you don’t have gear, make it. No excuses.

11. Emergency Shelter Building
Trapping is useless if you freeze to death. Know how to build shelters with minimal materials while you lay traps and prepare food.

12. Water Sourcing and Purification
Without water, you’re dead in 3 days. Find and purify water near your trap zones. Don’t poison your own food source with careless water mistakes.

13. First Aid for Trapping Injuries
Cut yourself setting a snare? Step on a rusty nail? Know basic first aid to keep infection from killing you.

14. Disguise Your Scent
Animals smell better than you think. Use mud, leaves, or natural scents to hide your human odor near trap lines.

15. Understanding Local Wildlife Laws and Ethics
Yeah, when society is functioning, respect the laws and the animals. But when survival’s on the line, knowing the legal boundaries beforehand saves you headaches later.


3 DIY Survival Hacks to Boost Your Trap and Snare Game

Hack #1: The “Tripwire Alarm”
Use a length of thin wire or strong cord connected to a can filled with rocks or anything noisy. Place it across a path where you expect an animal. When triggered, it alerts you without you having to stay glued to the trap all day. No more missing your catch because you were distracted or sleeping.

Hack #2: The “Improvised Spring Snare”
If you don’t have steel wire or springs, carve a Y-shaped flexible sapling branch. Attach a loop of vine or wire to the top and set the snare with the bent sapling tensioned. When the animal steps into the loop, the sapling snaps back, tightening the noose. It’s noisy but effective if you can’t get your hands on commercial gear.

Hack #3: The “Natural Glue Trap”
Mix pine resin with charcoal or crushed leaves to make a sticky, natural glue. Spread it on a flat surface or a small stick and place near bait. Small rodents get their paws stuck, making capture easier. It’s messy but works when you’re desperate and wire’s not an option.


Here’s Why This Matters — And Why You Should Be Mad Too

When disaster strikes, the entire system you rely on falls apart. Power? Gone. Grocery stores? Looted or empty. Police? Who knows. The only reliable source of food will be your hands and your wit. If you’re not trapping and snaring, you’re begging for scraps or starvation. And no one’s gonna hand you a sandwich when chaos rules the day.

Get angry. Get serious. This is not a game. Every second you waste scrolling your phone or buying more junk you don’t need, someone else is learning to survive without it. The animals don’t care about your excuses. If you can’t catch food, you die.

Traps and snares are the silent soldiers of survival — no loud guns, no wasting ammo, just pure skill and patience. They’re the tools that will keep your belly full when the world crumbles. Master them or prepare to be a statistic.


Final Warning: If You’re Not Willing to Get Dirty, Stay Home

Setting traps isn’t glamorous. It’s tedious, frustrating, and sometimes downright gross. You’ll get bitten by bugs, scratched by thorns, and spend hours just watching a snare you set. But that’s the price of survival — patience and resilience.

Get angry at the world for making survival necessary. Get angry at yourself for not preparing sooner. But channel that anger into action. Learn every skill, practice every hack, and build traps until they’re second nature.

Because when the grid goes dark and the streets fill with chaos, no one’s coming to save you. You’re on your own. And if you don’t catch to survive, you won’t.


There. Now stop whining and start doing. What do you want me to break down first — setting snares? Finding the best trap locations? Or maybe how to butcher a rabbit clean in under five minutes?

Built to Survive: Shelter Tactics Using Nature and Know-How

You think that store-bought tent is gonna save your sorry butt when the grid crashes? Think again. When the world turns upside-down—and trust me, it will—you better have more than a nylon cocoon and YouTube tutorials to protect you from Mother Nature’s full-blown wrath. If you’re not learning how to build your shelter from dirt, sticks, and brains, you’re not surviving—you’re delaying your expiration date.

Let me be blunt: your comfort zone is a kill zone. The wild doesn’t care about your feelings. The cold will strip the warmth from your bones like a butcher skinning a deer, and the rain will seep into your soul. Shelter isn’t optional—it’s survival Priority Number One right after you can breathe and not bleed out.

So listen up. You want to live? You better start learning like your life depends on it—because it does.


10 Survival Skills for Building Natural Shelters

1. Terrain Scouting

Don’t just plop down in a pretty clearing like some clueless city hiker. Learn to read the land. Avoid valleys where cold air pools and floods form. Stay clear of ridgelines where wind turns your tarp into a damn parachute. Pick elevated, flat ground near resources—but not too near water, unless you’re asking to be eaten alive by mosquitoes or flash-flooded into the afterlife.

2. Natural Windbreaks

Wind will suck the heat out of you faster than a thief in the night. Find natural windbreaks—thick brush, rock walls, or tree lines—or build your own using stacked logs, woven branches, or even your backpack if you’re desperate.

3. Insulation Gathering

Don’t build a shelter and sleep on bare earth like a fool. You need insulation—pine needles, leaves, moss, bark. Pile it thick—at least six inches—to keep ground chill from eating you alive. Better itchy than dead.

4. Framework Building

If you can’t build a solid frame, you’re gonna wake up with the roof on your chest or, worse, hypothermic. Learn to latch, lash, and lean. Use a basic A-frame or lean-to. No nails? No excuses. Use paracord, vines, inner bark strips—whatever it takes.

5. Water Runoff Management

Ever slept in a puddle? It’s a bad time. Angle your roof steep and make a trench around your shelter. Don’t be lazy unless you want rainwater spooning you at 2 a.m.

6. Camouflage Construction

Not every threat in the wild walks on four legs. Sometimes it walks on two—and it’s armed. Blend in. Use mud, foliage, bark. Don’t light up your shelter like a Vegas sign. Stay hidden, stay alive.

7. Fire Integration

Learn how to build a reflector wall to bounce fire heat into your shelter. And yeah, don’t set the damn place on fire. Keep flames at a safe distance, use a fire pit, and always have your fire on the windward side.

8. Moisture Barrier Creation

You want to stay dry? Layer bark and large leaves to create a water-resistant roof. Hell, you can even line the outside with trash bags if you’re lucky enough to find one. Smart survivors repurpose everything.

9. Emergency Cordage

Cordage isn’t a luxury—it’s a lifeline. If you didn’t bring paracord, shame on you. But you can make rope from inner tree bark (like basswood), dry grasses, or even plastic trash. Twist, braid, tie—it better hold your weight, or your broken leg will be the least of your problems.

10. Structural Adaptability

No two scenarios are the same. Snow cave in winter. Debris hut in the fall. Jungle platform in the wet season. Desert rock shelter when the sun’s trying to kill you. If you can’t adapt, nature’s going to crush you like a bug.


3 DIY Survival Hacks from a Realist, Not a Blogger

1. The Trash Tarp Trick

You ever find an old plastic sheet or trash bags in the woods? Jackpot. Stitch them together with thorny branches or tie with bark cordage to make a waterproof tarp. Reinforce the corners with stones or folded sticks. It’s ugly, but it keeps you dry—and that keeps you alive.

2. Pine Sap Glue

Need to stick something? Make glue. Heat pine sap over fire till it bubbles, mix with crushed charcoal and a bit of animal dung or powdered bark. Let it cool, and boom—you’ve got nature’s epoxy. Use it to patch holes, fix tools, even seal cracks in your shelter roof.

3. Bark Paneling

Got trees? You’ve got shelter walls. Use a sharp rock or knife to peel large bark sheets off dead trees (don’t kill healthy ones—you’re not a moron). Stack them like shingles, lash to your frame, and you’ve got windproof, semi-waterproof walls. Way better than freezing behind a blue tarp some weekend warrior left behind.


Hard Truth: You’re Not Ready

If your plan for “bugging out” includes a REI shopping spree and wishful thinking, you’re already dead. Gear fails. Batteries die. Comfort ends. You need knowledge that lives in your hands—not in your gear bag.

Start now. Practice in the woods. Sleep without your tent. Build with your hands, bleed a little, screw up, and fix it. Get your body and mind used to discomfort, cold, and exhaustion. Shelter building is dirty, it’s hard, and it’s necessary.

Don’t be the idiot who panics because their zipper broke or their app didn’t load. You want to survive? Learn to fight the cold, the rain, the wind—and your own softness.


Final Word

Shelter is more than a roof—it’s your battle line against the wild. If you can master nature’s tools, if you can build with sticks and instinct, you can endure damn near anything. But if you’re waiting for someone to come rescue you, you’re already part of the forest floor.

Get smart. Get skilled. Get angry enough to outlast anything. Because when it all goes down, it won’t be the richest, the strongest, or the best equipped who survive—it’ll be the ones who refused to die stupid.

So build like your life depends on it. Because one day, it just might.

Eat to Live: Mastering Edible Plant ID for Survival Scenarios

Eat to Live: Mastering Edible Plant ID for Survival Scenarios
By someone who’s fed up with your ignorance

Let me cut the crap right off the bat—if you’re reading this because you think “foraging” is some cute weekend hobby between lattes and scrolling on your damn phone, you’re already a liability. This isn’t about wildflower pics for your Instagram. This is about survival—pure, raw, unfiltered survival. The kind where if you screw up, you don’t get a second chance. You either eat or you rot.

When the grid collapses, the cities will become tombs. Your favorite Uber driver isn’t going to save you. Your “meal prep” skills won’t mean squat when the only thing on the menu is bark and berries. But here’s the truth: nature provides—if you know what you’re doing. And if you don’t, nature will kill you. Fast.

Survival Skill #1: Learn the Damn Plants

You better get good at plant ID, and I don’t mean glancing at some leafy green and guessing. I mean knowing the difference between Queen Anne’s Lace and poison hemlock. One feeds you, the other shuts down your respiratory system like a vise. Learn the leaf patterns. Smell the roots. Break the stems. Know the seasonal changes. If you can’t name five edible plants native to your area right now, you’re not ready. Period.

Survival Skill #2: Know the Universal Edibility Test

In a real survival scenario, you won’t always have your plant guides or phone apps. Use the Universal Edibility Test—but use it smart. Break the plant into parts: root, stem, leaves, flower. Test each part separately over hours. Rub it on your skin, then your lips, then your tongue. Wait. Swallow only if there’s no reaction. You think it’s tedious? So is dying from gut-wrenching poison.

Survival Skill #3: Track Seasonal Availability

Wild edibles aren’t available all year. You need to know when to harvest roots, which plants bloom in spring, and which weeds you can count on in winter. Chickweed, dandelion, wild garlic—they’re your allies if you’ve got the balls to pay attention.

DIY Survival Hack #1: Build a Pocket Herbarium

Forget your TikTok hacks. Get a damn notebook and start pressing specimens. Dry them, label them, annotate what parts are edible and when. Make your own field guide. That way when you’re freezing your ass off in some backwoods hole and stumble on a patch of greens, you don’t second-guess what could be your next meal.

Survival Skill #4: Understand Plant Look-Alikes

Mother Nature is a tricky bastard. Edible plants have toxic twins. Wild carrot vs. poison hemlock. Wild grape vs. moonseed. You mess that up, you’re not going to the ER—you’re going to the morgue. If you can’t tell them apart, don’t touch them.

Survival Skill #5: Practice Harvesting Without Destroying the Source

A real survivalist doesn’t burn the forest to bake a loaf of bread. Take only what you need. If you find wild leeks, leave half. If you spot cattails, don’t rip the whole colony apart. Respect the land, because it’s the only damn thing keeping you alive.

DIY Survival Hack #2: Make a Solar Plant Dehydrator

Don’t rely on power when you can build a plant dryer with sticks, screen, and sunlight. Dehydrate dandelion leaves, wild mint, or purslane. It preserves nutrients and lightens your pack. Who needs fancy gear when the sun is still free?

Survival Skill #6: Know Your Medicinal Plants

Food isn’t the only thing that keeps you alive. Ever had diarrhea in the woods with no meds? Good luck. Learn yarrow (stops bleeding), plantain (draws out poison), and willow bark (natural aspirin). Your brain’s your best survival tool—if you fill it with something useful.

Survival Skill #7: Test and Train—Before You Have To

You’re not a survivalist until you’ve lived it. So take your cushy ass out of the suburbs and spend three nights in the wild with nothing but a knife, a water bottle, and your plant ID skills. No phone. No tent. Eat only what you find. That’s how you learn.

DIY Survival Hack #3: Edible Plant “Cheat Stick”

Tape samples of dried, identifiable parts of key edible plants to a sturdy stick or ruler. Seal them under clear packing tape. Waterproof, portable, and faster than flipping through pages when the sun’s going down and your stomach’s roaring.

Survival Skill #8: Cook What Needs Cooking

Some plants will screw you up if you eat them raw. Cattail roots need roasting. Pokeweed can be eaten only when young and only after multiple boils. Know what must be cooked, because gastrointestinal distress in the wild is a fast track to death.

Survival Skill #9: Urban Foraging Tactics

Don’t assume survival scenarios only happen in the backwoods. Cities have plant life too—back alleys, parks, abandoned lots. Learn to spot mulberry trees, lamb’s quarters, wild amaranth, and purslane growing in cracks. Concrete jungles have calories too.

Survival Skill #10: Mental Resilience

This isn’t just about what you know—it’s about what you do when you’re cold, starving, and scared. You panic, you die. You hesitate, you miss a meal. You doubt yourself, you eat the wrong berry and meet your maker. Know your plants, trust your skills, and keep moving.


Let me be clear one last time: this isn’t a damn joke. When things fall apart, the people who laugh at this stuff are going to be the first to beg for a cracker. Don’t be one of them. Be the one who walks into the woods and walks out fed, alive, and free.

Nature doesn’t care about your opinions. It doesn’t care about your degree, your follower count, or your Wi-Fi signal. It rewards the prepared. It eats the rest.

So pick up that field guide, get your boots dirty, and for God’s sake—eat to live.

Survival Gold: Highest Calorie Canned Goods to Stockpile Now

Listen up, you soft city dwellers and clueless suburbanites. If you’re still prancing around thinking a few cans of soup and a bag of rice will keep you alive when the world goes sideways, you’re dead wrong. You’re not prepping; you’re playing pretend. When the grid goes down, when the shelves are bare, and when the chaos hits, you better have the right fuel to keep your body running. And that fuel isn’t some low-calorie, nutrient-deficient nonsense. It’s high-calorie, shelf-stable, and packed with the energy you need to survive. So, let’s talk about the real survival gold: the highest calorie canned goods you should be hoarding right now.


🔥 1. SPAM – The Calorie Beast

Let’s start with the king of canned calories: SPAM. Each can packs a whopping 1,080 calories. That’s right—1,080 calories of pure, unadulterated energy. It’s compact, shelf-stable, and doesn’t require refrigeration. In a survival situation, that’s gold. Sure, it’s not gourmet, but when you’re hungry and the world’s gone to hell, you’ll be thankful for every greasy bite.


🥩 2. Libby’s Corned Beef – Protein Powerhouse

Next up, Libby’s Corned Beef. This isn’t just a salty snack; it’s a protein-packed powerhouse. With 2.1 calories per gram, it’s dense, filling, and perfect for long-term storage. It’s been a staple in American pantries since 1868, and for good reason. When you’re rationing food, you want something that sticks with you.


🐟 3. Tuna in Oil – Omega-3 and Calories

Don’t overlook canned tuna in oil. While tuna in water is leaner, tuna in oil is calorie-dense and provides essential omega-3 fatty acids. A 5-ounce can can deliver around 160 calories, and that’s before you even factor in the oil. It’s lightweight, easy to store, and doesn’t require cooking. In a pinch, that’s invaluable.


🌶️ 4. Chili with Beans – Comfort and Calories

Chili with beans is more than just a comfort food; it’s a survival staple. A 19-ounce can can pack up to 540 calories. It’s hearty, filling, and provides a good balance of protein and carbohydrates. Plus, it’s easy to eat cold if you don’t have a way to heat it up. When the world is falling apart, a warm meal can do wonders for morale.


🥩 5. Roast Beef – Ready-to-Eat Protein

Canned roast beef is a must-have for any serious prepper. A 15-ounce can can deliver around 400 calories. It’s ready to eat, requires no preparation, and is packed with protein. When you’re on the move or don’t have the luxury of a full kitchen, this is the kind of food that keeps you going.


🍗 6. Chunk Chicken Breast – Lightweight Protein

Canned chunk chicken breast is another excellent protein source. With around 240 calories per can, it’s lightweight, easy to store, and versatile. You can eat it straight from the can, mix it with other foods, or use it in recipes. In a survival situation, versatility is key.


🥫 7. Canned Beans – Carbs and Fiber

Don’t forget about canned beans. They’re not just for chili; they’re a great source of carbohydrates and fiber. A cup of canned black beans can deliver around 200 calories. They’re shelf-stable, easy to store, and can be eaten cold if necessary. In a long-term survival situation, you’ll need carbs to keep your energy up.


🥥 8. Coconut Milk – High-Calorie Liquid

Coconut milk is often overlooked, but it’s a high-calorie liquid that’s perfect for cooking or drinking. A cup can deliver around 552 calories. It’s also shelf-stable and can add variety to your meals. When you’re stuck eating the same things day after day, a little variety can make a big difference.


🍫 9. Dark Chocolate – Sweet Survival

Yes, dark chocolate. It’s not just a treat; it’s a survival food. An ounce can deliver around 150–170 calories. It’s also packed with antioxidants and can boost morale. In a survival situation, keeping your spirits up is just as important as keeping your body fueled.preppingprotips.com


🍜 10. Instant Noodles – Quick and Calorie-Dense

Instant noodles are a prepper’s best friend. A package can deliver around 380 calories. They’re lightweight, easy to store, and cook quickly. In a survival situation, time and energy are precious commodities. Anything that saves you both is worth its weight in gold.


🔧 15 Survival Skills You Better Master (continued)

Fire Starting – Without fire, you’re dead.

Water Purification – You can’t drink from just any stream.

Shelter Building – Hypothermia kills.

Foraging – Know what’s edible and what’s not.

Hunting and Trapping – Food doesn’t just appear.

Fishing – Rivers and lakes are full of food if you know how to catch it.

Self-Defense – Not everyone is friendly.

Navigation – A map and compass are your best friends.

First Aid – Injuries happen; know how to treat them.


🛠️ 3 DIY Survival Hacks That Actually Work

You don’t need fancy gear. You need grit, brains, and a little ingenuity. These three hacks could make the difference between dying cold in a ditch or seeing another sunrise.


1. DIY Rocket Stove (Out of Cans)

Forget lugging a propane burner. You can build a small rocket stove with just a large coffee can, a smaller soup can, and a knife. Cut an L-shaped channel in the sides, nest the smaller can inside, and boom—you’ve got a high-efficiency burner that uses sticks and dry leaves to boil water in minutes. Lightweight, compact, and hot as hell. That’s the kind of stove that saves lives.


2. Crayon Fire Starters

That’s right—those dumb crayons you gave your kids can burn for up to 30 minutes each. Wrap a few in foil, keep them in your bug-out bag, and when you need to get a fire going in wet weather or high wind, light the paper wrapper. You’ll thank me when your hands are frozen and your lighter’s sputtering.


3. Plastic Bottle Fishing Kit

Take a water bottle, wrap 10-15 feet of fishing line around it, tuck in a couple of hooks and sinkers, and seal the whole thing up. Now you’ve got a compact, waterproof fishing kit that can catch you dinner in any river, lake, or pond. Lightweight, stealthy, effective—like every survival tool should be.


🧭 Final Thoughts from an Angry Survivalist

Here’s the ugly truth: Most people aren’t gonna make it. They’ll run to the grocery store three days too late, get trampled for a loaf of bread, and starve in the comfort of their own panic.

But not you.

You’re here because you see the storm on the horizon. You know that survival isn’t about who has the nicest solar generator or the fanciest bug-out location. It’s about planning. It’s about discipline. And yes—it’s about calories.

Canned food isn’t just convenient—it’s currency, it’s fuel, and it’s life insurance. And every single can you stack today is a bullet dodged tomorrow.

So don’t listen to the soft voices telling you, “you don’t need that much food,” or “you’re being paranoid.” No, you’re being prepared. And when things go sideways—and they will—you’ll be alive, well-fed, and ready to rebuild while the rest are curled up in their living rooms, wondering where the Wi-Fi went.

Stock up. Train up. And for the love of survival—don’t wait.

This isn’t a game. It’s survival. And only the prepared will eat.

Knot Your Average Skill: Survival Ties That Save Lives

Alright, buckle up, because I’m about to unload some no-nonsense survival truth on you — and it ain’t pretty. If you think survival is all about fancy gear or luck, you’re dead wrong. The raw, gritty reality? Your life depends on mastering the basics. And nothing — nothing — is more fundamental than knowing your knots. This isn’t some weekend camper fluff. This is survival ties that save lives. Your life. Your family’s life. And if you can’t tie a proper knot under pressure, you’re a liability, plain and simple.

I’m sick of seeing people waste precious time fumbling with rope or paracord when the clock’s ticking. That’s why you need to know these survival skills cold — no excuses. And because I’m not here to coddle you, I’m throwing down the gauntlet with eight survival skills focused on knots and three DIY survival hacks that’ll make you a walking, breathing survival machine.


Knot Your Average Skill: Survival Ties That Save Lives

1. Bowline Knot — The “Never-Fail” Loop

This is the knot that’s saved countless lives, and for good reason. The bowline creates a fixed loop that won’t slip or bind, but you can untie it even after it’s been under a heavy load. Use it to secure yourself to a harness, tie off gear, or create a makeshift sling. If you don’t know the bowline cold, you’re dead weight.

2. Square Knot (Reef Knot) — The Quick Bind

Don’t screw this one up. The square knot is a quick way to bind two ropes of the same thickness together. But beware — it’s not for heavy loads or critical holds. It’s great for first aid bandages or tying bundles, but if you need strength, it’s not your go-to. Know when to use it and when to ditch it.

3. Clove Hitch — The Fastener You’ll Need Yesterday

Want to tie a rope to a pole, tree, or post quickly? The clove hitch is your friend. It’s fast, adjustable, and perfect for setting up shelters or securing loads. But don’t rely on it alone for critical loads because it can slip under heavy strain unless backed up.

4. Taut-Line Hitch — The Adjustable Tensioner

This knot lets you create an adjustable loop that tightens under load but slides when you want to adjust it. It’s essential for setting up tarps, tents, or any shelter where tension matters. If your shelter collapses because you didn’t know this knot, you’ll have no one to blame but yourself.

5. Sheet Bend — The Heavy-Duty Rope Joiner

When you need to join two ropes of different thickness or materials, the sheet bend is your go-to. It’s strong, reliable, and won’t slip under tension. Never rely on a square knot to join mismatched ropes, or you’ll find yourself hanging by a thread — literally.

6. Figure Eight Follow-Through — The Life-Saver

This is the knot climbers and rescue teams swear by. It’s incredibly strong and used to tie a rope securely around a harness or anchor point. It won’t slip, and it’s easy to inspect. If you’re rappelling or doing any kind of rescue work, learn this knot before you even think about going out.

7. Double Fisherman’s Knot — The Ultimate Rope Connector

For when you absolutely, positively need to join two ropes together, especially in critical situations like climbing or rescue, the double fisherman’s knot won’t let you down. It’s a bit tricky to tie but worth every second you spend mastering it.

8. Prusik Knot — The Friction Loop Climber

Need to ascend a rope or create a backup in your climbing system? The prusik knot grips tightly when loaded but slides when unloaded. It’s your best friend for self-rescue or creating friction backups. If you don’t know this knot, you’re playing with fire.


Survival Skills That Demand Your Attention

Skill #1: Master Your Knots Before the Sh*t Hits the Fan

Practice tying these knots over and over until you can do them blindfolded and under pressure. In a crisis, your hands will shake, your mind will race, and you won’t have time to Google or watch a YouTube tutorial. Your knots must be muscle memory.

Skill #2: Keep Your Rope in Fighting Shape

Rope care is survival care. A frayed, dirty, or wet rope won’t hold when it counts. Know how to inspect, clean, and maintain your ropes. If your line snaps during a crucial moment, don’t blame the rope — blame your negligence.

Skill #3: Always Have Multiple Knot Options Ready

Different knots serve different purposes. You need the right knot for the right job — no exceptions. If you only know one or two knots, you’re handicapping yourself. Expand your knot repertoire and understand when and why to use each one.

Skill #4: Understand the Mechanics of Load and Tension

Knots don’t exist in a vacuum. You need to know how tension affects them, how the direction of pull changes their strength, and when knots might slip or jam. Ignorance here will cost you dearly.

Skill #5: Use Natural and Synthetic Materials Interchangeably

Paracord and nylon rope aren’t your only options. Sometimes you’ll have to rely on natural materials like vines, roots, or strips of fabric. Learn how to tie knots with these materials — they behave differently and require finesse.

Skill #6: Set Up Effective Shelters Using Knots

Your shelter is your lifeline. If your knots fail in the middle of the night during a storm, you’re exposed. Practice using knots like the taut-line hitch and clove hitch to build solid, adjustable shelters that can withstand weather and wildlife.

Skill #7: Craft Makeshift Tools and Traps with Knotting Skills

Knots are the backbone of survival traps, snares, and improvised weapons. If you want to eat, you need to be able to rig snares that hold. If you want to defend yourself, you need to know how to lash sticks and create handles. This isn’t optional.

Skill #8: Tie Up Injuries with Confidence

First aid in the wild often requires secure bandages and slings. Knowing knots like the square knot and bowline will let you immobilize limbs or stop bleeding effectively. Improperly tied bandages can kill just as surely as a predator.


3 DIY Survival Hacks Using Knots and Basic Materials

Hack #1: Paracord Tourniquet

You want to stop serious bleeding in the field? Use a length of paracord tied with a bowline loop at one end and a taut-line hitch to tighten. This DIY tourniquet can save a limb or life if applied correctly. Practice it — don’t wait for an emergency to learn.

Hack #2: Improvised Fishing Line with a Snare Knot

No fishing line? No problem. Strip fibers from your clothes or use thin vine strands. Tie a snare knot to create a loop that tightens around a fish’s body when it pulls. This simple snare knot turns ordinary string into a deadly fishing tool.

Hack #3: Lash Together a Shelter Frame with Square and Clove Hitches

If you’re stuck with only sticks and rope, use square knots to bind the sticks in bundles and clove hitches to secure your frame to trees. This DIY shelter hack keeps your structure sturdy and quick to assemble. Knowing how to lash properly can mean the difference between a night in safety and a night in misery.


Bottom Line — Get It Right or Don’t Bother

If you think knots are just some trivial camping skill, you’re courting disaster. In survival, your knots are the difference between holding on and falling off, between shelter and exposure, between life and death. You want to survive? Stop whining and start tying. Learn these eight knots, hone these survival skills, and use the hacks I just gave you. Do it until you bleed.

Because when the wild gets ugly — and it will — you’ll wish you had.

Is Michigan’s Drinking Water Safe

Is Michigan’s Drinking Water Safe? Hell No. Wake Up Before It’s Too Late

Alright, listen up! If you think Michigan’s drinking water is safe because the government says so or because you see those big blue signs advertising “clean lakes” or “pure Great Lakes water,” you’re playing Russian roulette with your health—and that’s a slow death sentence. I don’t care if you live in Detroit, Grand Rapids, or some tiny town in the UP, your tap water is compromised. Period.

Michigan’s water is a toxic soup of industrial waste, agricultural runoff, lead from corroded pipes, and pharmaceutical residues. And don’t get me started on the Flint water crisis—it’s a glaring, stinking proof that the system is broken beyond repair. If you want to drink that water and invite cancer, neurological damage, or god knows what else into your body, be my guest. But if you’re serious about survival, you better get mad, get smart, and start filtering like your life depends on it—because it does.

In this no-BS survival guide, I’m going to give you 15 water filtration survival skills you MUST learn, plus 3 DIY drinking water hacks that will keep you hydrated and alive no matter how screwed Michigan’s water gets. This isn’t some fluff article; it’s a survival manual for anyone who refuses to get poisoned by corrupt infrastructure and corporate greed.


Why Michigan’s Water Is a Disaster Waiting to Happen

Let’s get the facts straight before I rip into solutions. Michigan’s water contamination issues are not a secret or some wild conspiracy theory. They’re a documented nightmare.

  • Lead Poisoning: Flint was just the tip of the iceberg. Old, corroded pipes leach lead into your glass every day. Lead is a neurotoxin, plain and simple. It damages brains and bodies, especially children’s.
  • PFAS (Forever Chemicals): These synthetic chemicals from firefighting foam and industry are everywhere. They don’t break down, accumulate in your body, and are linked to cancer, immune disorders, and hormone disruption.
  • Agricultural Runoff: Pesticides, herbicides, and fertilizers wash into lakes and rivers, turning your water into a toxic stew of nitrates and chemicals that cause birth defects and cancer.
  • Industrial Pollution: Michigan’s industrial legacy means heavy metals, PCBs, and other carcinogens seep into groundwater and surface water.
  • Bacterial Contamination: Aging infrastructure and sewage overflows mean bacteria and viruses are never far behind.

If you’re still drinking straight from the tap, congratulations. You’re basically volunteering as a toxic waste test subject.


15 Water Filtration Survival Skills You Need to Master Now

  1. Boiling Alone Won’t Cut It
    Boiling kills bacteria and viruses, yes, but it does nothing against chemicals, heavy metals, or sediment. Boiling is just one step.
  2. Build and Use a Charcoal Filter
    Activated charcoal is a survivalist’s best friend. It absorbs chemicals, toxins, and improves taste. Crush charcoal from a fire, rinse it, and layer it with sand and gravel in a DIY filter.
  3. Mechanical Filtration Using Sand and Gravel
    Sand traps dirt and particulate matter. Gravel acts as a coarse pre-filter. Layer them properly to remove sediments before chemical or biological treatment.
  4. Solar Disinfection (SODIS Method)
    UV rays from the sun can kill many pathogens. Fill clear plastic bottles with water and place them on a reflective surface under direct sunlight for 6+ hours.
  5. Use Portable Water Filters
    Invest in a high-quality survival water filter capable of removing bacteria, protozoa, and some viruses. Familiarize yourself with filter replacement and maintenance.
  6. Distillation for Chemical Removal
    Distillation is the ultimate method to separate pure water from heavy metals, chemicals, and biological contaminants. Build a solar still or improvised distiller.
  7. Pre-Filtration Using Cloth
    Use clean cloth, coffee filters, or even bandanas to remove large particles before running water through charcoal or other filters.
  8. Chlorination for Microbial Safety
    Add household bleach (without scents or additives) carefully—8 drops per gallon for clear water, more if cloudy. Wait 30 minutes before drinking.
  9. Iodine Treatment—Use Sparingly
    Effective against microbes, but harmful in large or long-term doses. Use only in emergencies.
  10. Build Layered Natural Filters
    Use moss, grass, sand, charcoal, and gravel in succession inside a hollow container for stepwise filtration.
  11. Test Your Water
    Portable water test kits for pH, nitrates, chlorine, and heavy metals can be lifesavers. Regular testing can alert you to danger.
  12. Know Your Water Sources
    Locate natural springs, catch rainwater, and identify safe groundwater spots far from agricultural or industrial sites.
  13. Safe Water Storage
    Use clean, sealed containers away from sunlight and contaminants to store filtered water. Avoid plastic leaching by using BPA-free or glass containers.
  14. Rainwater Harvesting Systems
    Set up gutters and barrels to catch rainwater. Always filter and disinfect before consumption.
  15. Maintain and Repair Your Filters
    Carry spare parts, learn to clean or repair filters, and improvise with local materials when needed.

3 DIY Survival Drinking Water Hacks for Michigan’s Toxic Mess

Hack #1: The Inverted Plastic Bottle Charcoal and Sand Filter

Grab a clean 2-liter plastic bottle. Cut off the bottom and invert it funnel-style. Layer the inside as follows:

  • Fine cloth or coffee filter at the neck
  • Activated charcoal (crushed and rinsed)
  • Fine sand
  • Coarse sand/gravel at the top

Pour suspicious tap water slowly through this layered filter into a clean container. Then boil or chemically treat the water for full safety.

Hack #2: Solar Disinfection with Oxygenation

Fill clear plastic PET bottles with water. Shake vigorously for 20 seconds to oxygenate—this increases pathogen kill rates. Lay the bottles horizontally on reflective surfaces in full sun for 6+ hours. This UV + oxygen combo kills many pathogens. Follow up with charcoal filtration to remove chemicals.

Hack #3: The Simple Solar Still

Dig a hole in the ground, place a clean container in the center, and cover the hole with clear plastic sheeting. Use a small rock to weigh down the center of the plastic so condensation drips into the container. This distills water from moisture in soil or plants, removing most contaminants and chemicals. It’s slow but effective when nothing else is available.


Wake Up and Take Control

You think you’re safe because Michigan’s water system “meets standards”? Standards set by politicians and companies more interested in profit than people’s health. The Flint disaster should have woken everyone up, but many are still drinking poison every day because they don’t care or don’t know better.

Your survival depends on preparation and knowledge. Water is the first battle in any crisis. Without clean water, everything else is pointless. If you’re not filtering, purifying, and testing your water daily, you’re walking a death sentence.

The state won’t save you. The water company won’t save you. You have to be your own water warrior. Learn these 15 filtration skills and 3 hacks. Build your filters. Carry your water purification tools everywhere. Test your water and store clean water safely.

If you care about your family, your health, or your survival, get serious now. Water is life. Don’t let corrupt infrastructure, polluted rivers, and toxic chemicals kill you slowly. Get mad, get prepared, and never trust the tap without a fight.


Bottom line: Michigan’s drinking water is a disaster disguised as “safe.” Contaminated with lead, PFAS, agricultural poisons, and industrial waste, your tap water is a toxic cocktail. Your only defense is knowledge, filtration skills, and survival hacks.

Don’t wait for another Flint to happen. Protect your water—and protect your life—starting today.

Is Minnesota’s Drinking Water Safe

Is Minnesota’s Drinking Water Safe? Hell No. Get Ready to Fight for Every Drop

Listen up, because I’m not here to sugarcoat the brutal truth: Minnesota’s drinking water is a ticking time bomb, and if you think you can just trust your faucet without a fight, you’re already dead in the water. Yeah, Minnesota might look like a pristine land of lakes, but that shiny veneer hides contamination, negligence, and a failure to protect what keeps you alive—clean water.

You want to know if Minnesota’s drinking water is safe? The honest answer is a furious, enraged NO. Between agricultural runoff loaded with pesticides, industrial pollutants, aging infrastructure, and downright complacency from officials, your tap water is often a cocktail of harmful chemicals, bacteria, and god knows what else.

If you don’t want to become a walking science experiment with arsenic, nitrates, or lead coursing through your veins, you need to get serious about survival skills. That means filtering your water like your life depends on it—because it does.

I’m about to lay down the cold, hard survivalist truth with 15 water filtration survival skills you need to master, plus 3 DIY hacks to make sure you never run dry of clean drinking water in Minnesota or anywhere else this water crisis gets ugly.


The Dirty Truth About Minnesota’s Water

Minnesota’s water isn’t “safe” because of some fairy tale EPA rating or government assurances. It’s “safe” because most people don’t know what to look for and blindly trust what comes out of their taps. But underneath, agricultural chemicals like nitrates and phosphorus seep into groundwater and lakes, creating toxic blooms of algae that release dangerous microcystins. These toxins attack your liver and nervous system. That’s just the start.

Then you have heavy metals—lead leaching from ancient pipes, arsenic from mining residues, and mercury trapped in sediments. You want to gamble your family’s health on whether those get filtered out? Don’t be a fool. Every Minnesotan needs to be their own damn water quality inspector and filter engineer.


15 Water Filtration Survival Skills You Must Know

  1. Boiling Water Isn’t Enough
    Boiling kills pathogens, sure, but it won’t remove chemical toxins, heavy metals, or sediment. Learn to combine boiling with filtration.
  2. Build a DIY Charcoal Filter
    Activated charcoal is a powerhouse at absorbing organic toxins and bad smells. Crush charcoal from a campfire, layer it with sand and gravel in a bottle, and filter water through it.
  3. Use Sand and Gravel for Mechanical Filtration
    Sand traps sediment and larger particles. Gravel acts as a pre-filter. Layer these in a container to strain dirty water first.
  4. Harness UV Rays for Disinfection
    Sunlight can kill many microbes. Fill clear plastic bottles with water and leave in direct sunlight for at least six hours to disinfect.
  5. Use a Portable Water Filter
    Get a survival-grade water filter with a pore size small enough to remove bacteria and protozoa (0.1 to 0.2 microns). Learn to operate and maintain it.
  6. Distillation Skills Are a Must
    Distillation can separate pure water from contaminants. Build a solar still or a simple distillation setup to boil and re-condense water, leaving toxins behind.
  7. Sediment Pre-Filtration
    Always pre-filter water through cloth or coffee filters to remove debris before other purification steps.
  8. Chlorination—Know Your Dosage
    Household bleach can disinfect water but use sparingly—8 drops per gallon for clear water; double if cloudy. Wait 30 minutes before drinking.
  9. Iodine Tablets—Handle with Care
    Effective against microbes, but not chemicals or heavy metals. Not for long-term use due to health risks.
  10. Create a DIY Filter from Natural Materials
    Use layers of moss, grass, charcoal, and sand inside a hollowed log or bottle for basic filtration.
  11. Practice Water Testing
    Use portable test strips or kits to monitor pH, nitrate levels, hardness, and contaminants.
  12. Know Local Water Sources
    Identify natural springs, rain catchment, and groundwater sources that may be less contaminated.
  13. Storage Containers Matter
    Use clean, food-grade containers for storing filtered water, and keep them sealed and away from sunlight.
  14. Build a Rainwater Catchment System
    Set up gutters and barrels to capture rainwater. Filter and purify before drinking.
  15. Know How to Repair Filters in the Field
    Carry spare filter elements, repair kits, and learn how to improvise with duct tape, wire, or fabric.

3 DIY Survival Drinking Water Hacks for Minnesota’s Toxic Tap Nightmare

Hack #1: The Plastic Bottle Charcoal and Sand Filter

Grab an empty 2-liter plastic bottle. Cut the bottom off, invert it like a funnel, and layer:

  • Clean cloth or coffee filter at the neck
  • Activated charcoal (charcoal crushed from your campfire, NOT from briquettes with additives)
  • Fine sand
  • Coarse sand/gravel

Pour your questionable tap water slowly through the layers. Collect the filtered water in a clean container underneath. Then boil or chemically treat it.

Hack #2: Solar Disinfection with SODIS Method

Fill clear PET bottles with tap water. Shake vigorously for 20 seconds to oxygenate (oxygen kills microbes). Lay them horizontally on a reflective surface in direct sun for 6 hours (or 2 days in cloudy weather). The UV rays plus oxygen sanitize many pathogens. Combine with a charcoal filter afterward to tackle chemicals.

Hack #3: DIY Solar Still for Distillation

Dig a hole in the ground, place a container in the center, and cover the hole with clear plastic sheeting weighted in the center with a rock above the container. Moisture from the soil and water vapor will condense on the plastic and drip into the container, yielding distilled water free from most contaminants. Slow, but effective when nothing else works.


Why You Need to Get Mad and Get Prepared Now

The complacency about water quality in Minnesota is infuriating. Officials pat themselves on the back with reports and “compliance” data while your tap water quietly poisons you. You want to play the waiting game until the next contamination crisis? Good luck explaining to your family why you trusted them.

Your survival hinges on knowledge and action. Water is the first priority. Without it, you’re dead in days. Don’t wait for the government or water companies to save you—they won’t. Get your hands dirty, learn these filtration and purification skills, build your own filters, test your water, and always carry a backup plan.

If you think you’re safe because you live in a “clean” state like Minnesota, think again. This is survival 101—prepare or perish. The minute your water source goes bad, you’ll regret not having taken this seriously.


Bottom line: Minnesota’s water is far from a reliable, safe resource. Pollutants, chemicals, pathogens—they’re all there, hiding in plain sight. It’s up to you, the survivalist, to filter, purify, and secure your water supply. Learn these 15 filtration skills and 3 DIY hacks, practice them, and never trust your tap blindly again.

You want safety? You want survival? Start with your water. And start now—before you’re thirsting for survival in a state that forgot to protect the very thing you need to live.

Is Mississippi’s Drinking Water Safe

Let’s not sugarcoat it: if you’re living in Mississippi and blindly trusting what’s coming out of your tap, you’re playing Russian roulette with your kidneys. Time and again, headlines scream about boil water notices, brown sludge coming out of kitchen faucets, lead levels creeping past EPA limits, and entire towns forced to rely on FEMA water deliveries. But you still think, “It can’t be that bad.”

WAKE UP.

The water infrastructure in Mississippi is a ticking time bomb—corroded pipes, underfunded treatment plants, poor oversight, and government agencies more concerned with optics than outcomes. If you want your family to stay healthy, if you want to live through the collapse when it comes (and it will come), you need to take water purification into your own damn hands.

You can’t survive more than 72 hours without water. So let’s cut through the BS and talk about what you must know to stay alive.


15 Water Filtration Survival Skills You’d Better Learn (Or Die Thirsty)

1. Boiling Water

The oldest and most foolproof method—bring it to a rolling boil for at least one minute (three at high elevations). Kills viruses, bacteria, and parasites. But it won’t remove chemicals or heavy metals—both of which you’ll find in Mississippi water.

2. Solar Still Construction

Dig a pit, place a container in the center, surround it with green vegetation, cover it with plastic, and weight the center. Sun heats it, vapor condenses, and bam, you’ve got distilled water. Not fast, but effective when there’s nothing else.

3. DIY Charcoal Filter

Layer sand, gravel, and activated charcoal in a container. Pour water through and let gravity do the work. It removes particulates and some chemicals—but don’t trust it alone.

4. Learning Reverse Osmosis

Buy a portable RO unit or learn how to make one from pressure pumps and special membranes. RO removes almost everything—salts, metals, microbes. Expensive, but it works. You want safe water, not cheap water.

5. Chemical Purification Knowledge (Iodine/Chlorine)

Iodine tablets, bleach, or chlorine dioxide drops can kill pathogens. Remember: 8 drops of bleach per gallon of clear water (double for cloudy). Wait 30 minutes. Don’t overdose or you’ll poison yourself instead.

6. Sediment Pre-Filtration

Always filter large particles out first using cloth, coffee filters, or even a bandana. Keeps your main filters from clogging up and failing when you need them most.

7. UV Water Purification (SODIS)

Expose clear PET bottles filled with water to direct sunlight for 6+ hours. UV-A rays kill bacteria and viruses. Easy, passive, but you need full sun and time.

8. Well Inspection & Maintenance

If you’ve got a private well, test it quarterly. Install filters, inspect the casing and pump. No one’s coming to fix it for you when the grid goes down.

9. Rainwater Harvesting

Set up barrels with a fine mesh screen and gutter diverter. Rain is relatively pure—filter and boil before drinking. It’s free and falls from the damn sky. Use it.

10. Biosand Filtration

Layered sand and gravel column, with a biological layer forming on top that devours pathogens. Great for long-term home use—can last years if maintained.

11. Learn Waterborne Illness Symptoms

Know what Giardia, Cryptosporidium, and E. coli infections look like. The sooner you know, the sooner you can treat. Diarrhea in a crisis = dehydration = death.

12. Use of Natural Coagulants (Moringa Seeds)

Crushed moringa seeds can act as a natural flocculant, pulling solids and bacteria out of water. A bit of prep work, but effective in emergencies.

13. Multi-Stage Filtration

Never rely on a single method. Filter, then purify. Sediment > charcoal > UV or chemical. This redundancy keeps you alive when one layer fails.

14. Portable Filters (Lifestraw, Sawyer Mini)

Every bug-out bag should have one. Light, cheap, and powerful enough to filter 99.9999% of bacteria and protozoa. Don’t wait for FEMA to hand you one.

15. Distillation Know-How

Use heat to turn water into steam, collect it, and condense it back. Leaves behind everything—salts, metals, toxins. It’s slow, but in Mississippi, where lead is your enemy, it’s essential.


3 DIY Survival Drinking Water Hacks You Need in Mississippi

1. Plastic Bottle UV Purifier

Take a 2-liter bottle, fill it with clear water, shake it to oxygenate, then lay it on a reflective surface in full sun. Six hours later (more if cloudy), you’ve got safe drinking water. Cheap, effective, and damn simple.

2. DIY Gravity Filter with Buckets

Stack two food-grade buckets. Drill a hole in the bottom one and install a ceramic or carbon filter (Berkey-style). Pour dirty water on top—gravity does the rest. Good for households, off-grid cabins, and long-term preppers.

3. Coffee Filter + Bleach

Strain water through a coffee filter (or even a T-shirt) to remove debris. Then add 8 drops of plain, unscented bleach per gallon. Wait 30 minutes. It’s not gourmet, but it’s better than cholera.


Mississippi: The Canary in the Water Crisis Coal Mine

Let’s talk about Jackson. You know, the state capital that went weeks without drinkable water in 2022. Pipes ruptured, entire neighborhoods had no pressure, and sludge oozed out of taps when the system was working. EPA reports showed violations of the Safe Drinking Water Act stretching back years—and no one did a damn thing.

Lead levels in some schools tested above federal limits. Kids drinking brain-damaging neurotoxins while politicians play budget games. What does that tell you about the rest of the state?

And it’s not just Jackson. Rural areas face arsenic from groundwater, nitrate runoff from farms, and God knows what from aging septic systems.

Let me make this clear: no one is coming to save you. Not the EPA, not your city water department, and sure as hell not your governor. If you want clean water, YOU have to make it.


Final Word from a Pissed-Off Prepper

Stop pretending we’re living in 1955. This isn’t your granddaddy’s America. This is 2025, where infrastructure’s failing, corruption runs deep, and “boil water notice” might as well be the state motto. Mississippi is a test case in what happens when a government lets critical systems rot—and folks, the test results are in.

Get your water plan together NOW.

Learn how to filter, purify, and test your water. Teach your kids. Stockpile filters, tablets, containers, bleach, and fire sources. Make water your first prepping priority—because if you don’t, you’ll join the long line of people waiting for bottled salvation.

By then, it might already be too late.

Is Nebraska’s Drinking Water Safe? Read This Before You Take Another Sip

You ever wonder what’s in your glass of water? Go ahead—look at it. Seems clear, right? Cold, refreshing, like it’s safe because it came out of a faucet. But let me tell you something you probably don’t want to hear: Nebraska’s drinking water is NOT safe. Not if you’re serious about survival. Not if you’re serious about staying alive when the system collapses—or even now, before it does.

I’ve spent 20 years out in the wild, living off the land, filtering my own water from streams and rain barrels. And you know what? That water’s probably cleaner than what’s coming out of your tap in Lincoln, Omaha, or Grand Island.

The sad truth is, Nebraska has a massive nitrate problem. You don’t need to believe me—go look it up. Agricultural runoff from decades of over-fertilizing the land is leaching into your groundwater. That’s the same groundwater that fills your tap. Ever heard of blue baby syndrome? That’s caused by nitrates. Think it’s only babies who are affected? Think again.

And don’t even get me started on pesticides, industrial waste, and God-knows-what seeping into shallow wells. You want a cocktail of atrazine and arsenic? No? Then keep reading, because I’m going to teach you how to protect yourself and your family when the system inevitably fails—or if you just want to avoid drinking poison today.


15 Water Filtration Survival Skills Every Nebraskan Needs Yesterday

  1. Boil It Like Your Life Depends On It
    Boiling is the simplest, oldest trick in the book. Heat water to a rolling boil for at least one full minute. At higher altitudes, go for three. It won’t remove chemicals, but it’ll kill bacteria and parasites like Giardia and Cryptosporidium.
  2. Master the Gravity Filter
    Use two buckets—one with a hole and a ceramic filter screwed in, draining into another. It takes time, but you can purify gallons overnight while you sleep.
  3. DIY Biofilter
    Sand, charcoal, and gravel layered in a 2-liter bottle can act as a crude filter. It won’t remove nitrates, but it can pull out sediment and bacteria in a pinch.
  4. Learn Solar Disinfection (SODIS)
    Fill clear PET bottles with water, place them on a reflective surface in full sun for 6 hours. UV rays kill most microorganisms. It’s not perfect, but it’s better than nothing.
  5. Use Activated Charcoal Like a Pro
    Activated charcoal removes many chemical contaminants, including some pesticides. Make your own by heating hardwood in a low-oxygen environment and crushing it.
  6. Build a Rainwater Harvest System
    Get barrels, gutters, and a mesh screen. Rainwater is generally cleaner than groundwater—as long as it doesn’t hit a dirty roof.
  7. Know Your Filters
    Those Brita filters? Might make your water taste better, but they don’t do squat for nitrates or serious contaminants. You need a ceramic, carbon-block, or reverse osmosis system.
  8. Test Your Water Regularly
    Use nitrate and bacteria test kits. If you’re on a private well, you are your own EPA. The government doesn’t care. Prove me wrong.
  9. DIY Reverse Osmosis System
    Yes, you can build one, but it requires knowledge and parts. Learn now, while Amazon still delivers.
  10. Distill for Ultimate Purity
    Distilling removes almost everything—boil water, capture steam, and condense it. Time-consuming, but safe.
  11. Use Iodine Drops (When You’re Desperate)
    Five drops per liter, wait 30 minutes. Tastes like hell and doesn’t kill Cryptosporidium, but it’s better than raw cow runoff.
  12. Bleach in Small Doses
    Unscented bleach: 2 drops per liter, stir, wait 30 minutes. Don’t make this your go-to, but it’ll do in emergencies.
  13. Build a Clay Pot Filter
    Unglazed clay pots can filter pathogens slowly. Line with silver nanoparticles if you want bonus disinfection.
  14. Portable Survival Straws
    LifeStraw, Sawyer Mini—keep one in your glove box, one in your bug-out bag. Trust me.
  15. Find a Spring—And Map It
    Natural springs can offer clean water, but test them before you trust them. And for the love of all things good, don’t tell anyone where it is.

3 DIY Survival Drinking Water Hacks You Should Already Know

  1. Solar Still Hack (Desert or Drought Approved)
    Dig a hole, place a container in the center, cover with plastic sheeting, weigh down the center with a rock. As moisture evaporates, it condenses on the plastic and drips into the container. You can even add plants or urine around the edge to boost production. Desperate times…
  2. Turn Dew Into Drinking Water
    Tie clean cloths around your legs and walk through wet grass at dawn. Wring them out into a container. It’s slow, but it adds up—and it’s free.
  3. DIY Charcoal Pipe Filter
    Take a metal or bamboo pipe, fill it with activated charcoal and fine sand, cap it, and let gravity do the rest. It’s primitive, but it can take out the worst of the visible junk and some pesticides.

Nebraska’s Water Isn’t Getting Better

Don’t let the smiling politicians or local news fluff pieces fool you. The nitrate levels in Nebraska’s water aren’t decreasing. They’re rising. Wells in the central and eastern parts of the state are especially vulnerable. Private wells are unregulated, under-tested, and over-exposed.

The state’s agricultural economy runs on fertilizer—and that fertilizer seeps into your drinking water, year after year. They’re not going to stop. You have to take control.

And don’t think this problem is isolated. When the grid fails, when the trucks stop, when bottled water disappears from the shelves—you’ll be glad you didn’t rely on Uncle Sam’s infrastructure to keep your family hydrated.


Don’t Wait for a Crisis—Start Filtering Today

Clean water is life. It’s non-negotiable. You can stockpile food, ammo, and batteries all day long, but without safe water, you’re dead in three days. So what’s your plan?

Don’t trust the faucet. Don’t trust the headlines. Trust your own skills.

The government’s not coming to save you. Not when the contaminants are invisible and the profits are tied to the very industries polluting your aquifer.

If you’re still sitting in your suburban home sipping nitrate-laced tap water thinking “It won’t happen to me,” just remember: every survivalist was once a skeptic.

Until the water turned brown.