Is Washington’s Drinking Water Safe

Is Washington’s Drinking Water Safe? An Angry Survivalist’s Reality Check

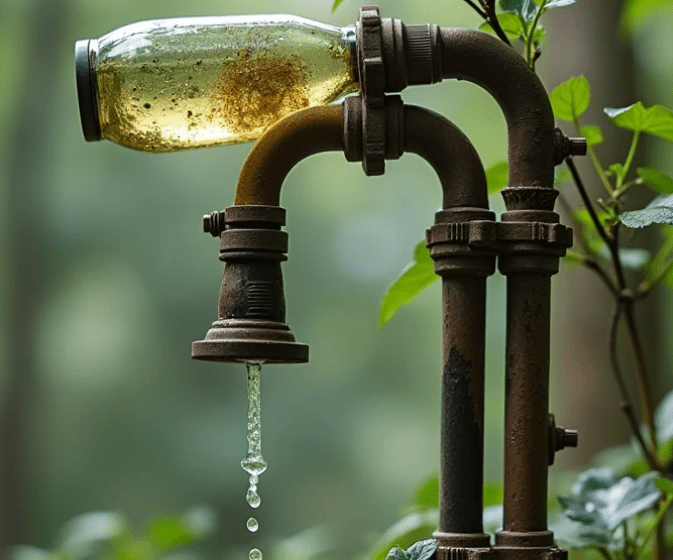
Let me give it to you straight — no sugarcoating, no bureaucratic BS. If you’re still trusting your tap water just because you live in Washington State, you’re playing Russian roulette with your kidneys. Yeah, that’s right. I’m talking to you — the average, unprepared, “it’ll be fine” kind of person sipping municipal tap water like it’s Evian. Wake up. Washington’s drinking water isn’t as clean or safe as they’d like you to believe. And if you’re not prepared to filter your own water, you’re one bad infrastructure day away from sucking down parasites, heavy metals, or worse — chemical runoff from a broken sewage pipe upstream.

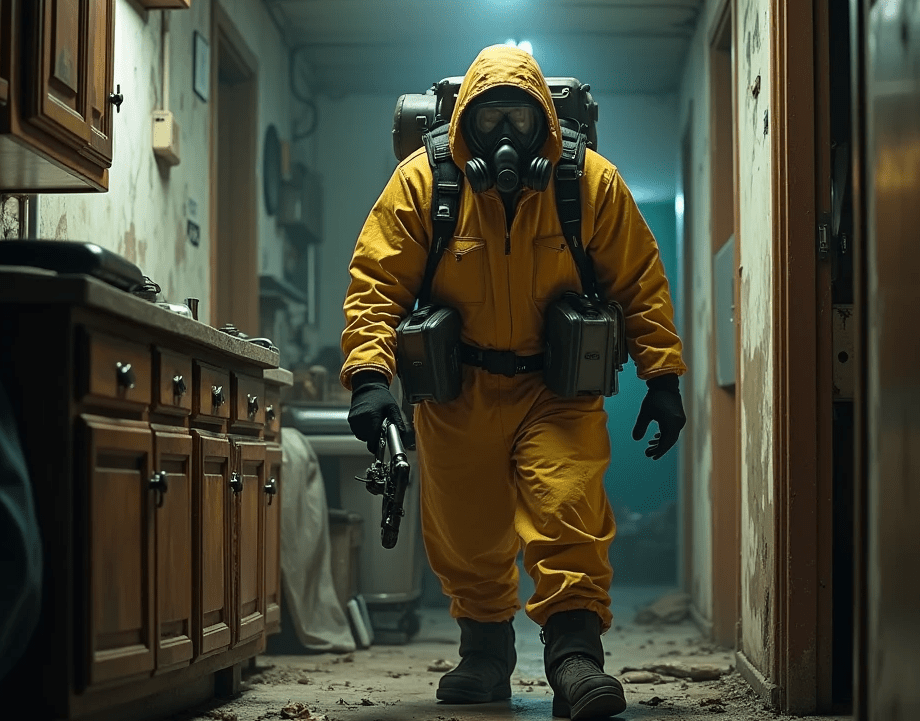
Look, I didn’t crawl out of the backwoods of Cascadia with a backpack full of gear and 15 years of prepping experience to pat you on the head and tell you everything’s going to be okay. I’m here to light a fire under your complacent backside and arm you with survival-grade knowledge.

Because when the tap runs brown — and it will — you’ll wish you took water seriously.


Why You Can’t Trust Washington’s Water

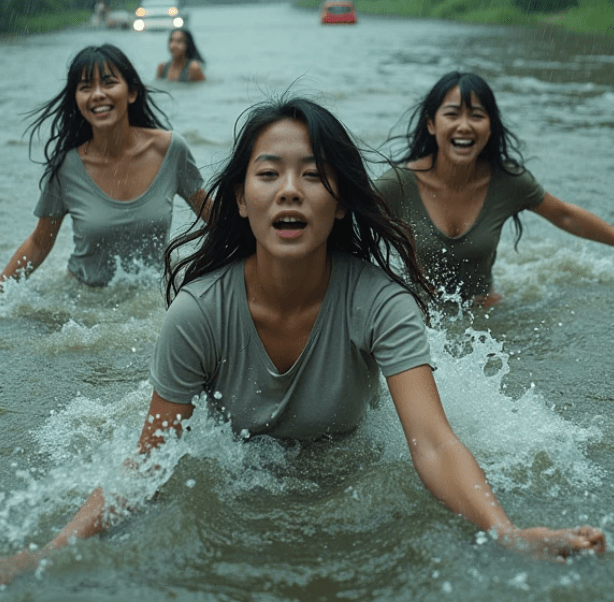
Here’s the cold, hard truth: Washington’s water system is a patchwork of over 6,000 water providers, and not all of them are created equal. Flint, Michigan didn’t think it had a water problem either — until it did. And Washington’s urban sprawl, aging pipes, agricultural runoff, and growing industrial zones mean contamination is just one flood, earthquake, or bureaucratic oversight away.

Sure, Seattle’s water comes from protected mountain reservoirs. That sounds great until you realize all it takes is one wildfire or landslide to send ash, debris, and pathogens straight into your drinking supply. Meanwhile, rural areas often rely on groundwater — and guess what? That groundwater is getting hit with pesticide leaching, septic system leaks, and even PFAS (aka “forever chemicals”) from industrial waste. These toxins don’t ask permission to seep into aquifers.

Oh, and let’s not forget Legionella outbreaks, E. coli alerts, and lead warnings from old pipes in places like Tacoma and Spokane. Think those are “one-offs”? Keep dreaming. In a system this big and this old, you can bet your boots that for every contaminated water source you hear about, there are five more festering under the radar.


The 15 Survival Water Filtration Skills You’d Better Master — Now

I’ve seen people boil spaghetti in swamp water and call it “fine.” Don’t be that person. If you want to live when the grid goes down or a storm knocks out water treatment, you need to know how to purify and filter water like your life depends on it — because it does.

Here are 15 skills you need in your survival playbook:

  1. Boiling Water Properly
    Boil for at least 1 full minute (3 minutes above 6,500 ft). Don’t guess. Use a watch. Undercooked water is bacteria soup.
  2. DIY Gravity Filter Setup
    Use buckets, activated charcoal, sand, and gravel to make a slow-drip gravity filter. Works with pond water. Takes time, but it’s effective.
  3. Solar Disinfection (SODIS)
    Fill clear plastic bottles and let the sun UV-blast them for 6+ hours. Free. No fuel. Slow but effective against viruses and bacteria.
  4. Building a Charcoal Filter
    Learn how to make charcoal and use it to trap chemicals and impurities. Combine with cloth and gravel.
  5. Pre-Filtering with Cloth
    Always run turbid water through a t-shirt or bandana before further filtration. Removes sediment and large particles.
  6. Using Iodine or Bleach Drops
    Know your dosages: 2 drops of 8.25% bleach per quart. Shake, wait 30 minutes. Works — but not on chemical pollutants.
  7. Portable Water Filters (LifeStraw, Sawyer Mini)
    Always carry one. Lightweight. Fast. Filters out 99.999% of pathogens.
  8. Learning to Identify Safe Water Sources
    Flowing water is better than stagnant. Spring-fed creeks are gold. Avoid near agriculture, industry, or roads.
  9. DIY Ceramic Filter Knowledge
    These slow-drip filters last forever and are easy to build if you know pottery or can get your hands on a setup.
  10. Rainwater Harvesting Setup
    Use tarps, roofs, or plastic sheeting. Collect. Filter. Store in food-grade containers. Add bleach if storing long-term.
  11. UV Pen Purification
    Great for hiking or emergency bug-outs. Fast UV light zap kills bacteria and viruses. Doesn’t filter sediment.
  12. Pressure Filtering Systems (Berkey, Katadyn)
    Set one up at your base. Efficient. Handles larger volumes of water with multi-stage filtration.
  13. Distillation Techniques
    Boil, capture steam, condense. Strips nearly everything, including salt and heavy metals. Slow but ultra-effective.
  14. Making a Water Filter with a Plastic Bottle
    Cut in half. Add layers of sand, charcoal, gravel. Fast and dirty — better than nothing.
  15. Storage Sanitation and Rotation
    Treat stored water. Label with date. Rotate every 6 months. Clean containers with bleach solution beforehand.

3 DIY Survival Drinking Water Hacks

Let’s say you’re stuck. No filter, no stove, no fancy gear. You’ve still got options. Here are three MacGyver-tier hacks that can save your life:

  1. Tree Transpiration Hack
    Wrap a clear plastic bag around a leafy branch. Seal it. Let the sun draw out the moisture. Drink the condensed droplets. It’s slow, but it’s pure.
  2. Condom Canteen & Shirt Filter Combo
    Use a condom (unlubed!) to store water in an emergency. Stretchy and compact. Pre-filter through your shirt first. Then sanitize with bleach or iodine.
  3. Sand Pit Solar Still
    Dig a hole, put a cup in the center. Cover with plastic, seal the edges, and put a rock in the middle to make a drip point. The sun evaporates groundwater, condensing it into the cup. Labor-intensive, but works in deserts and coasts.

Final Warning: Don’t Wait for the Tap to Run Dry

I’m not saying you have to live in the woods with a knife in your teeth (though you should be capable of it). But if you’re relying on “normal” to stay normal, you’re already a liability — to yourself and anyone counting on you.

Washington’s water might be mostly safe today. But the world isn’t getting more stable. Climate change, wildfires, earthquakes, cyberattacks — take your pick. One good disaster and the same city officials who told you the water’s fine will be on TV stammering apologies while you’re rationing half a gallon for your family.

So don’t trust the faucet. Don’t trust the politicians. Trust your skills.

Get trained. Get geared. Get water-wise.

Or get sick.

Because in the end, there are two types of people in a water crisis: those who drink clean water, and those who wish they had listened.

Is West Virginia’s Drinking Water Safe

Is West Virginia’s Drinking Water Safe? Hell No. And Here’s What You Better Know Before It’s Too Late.

Listen up, because I’m only going to say this once—and you better not be sipping any tap water while you’re reading it. Is West Virginia’s drinking water safe? No, and it hasn’t been for years. You think just because it comes out of the faucet and smells “okay” that you’re not slowly poisoning yourself? Think again.

Do a little digging—and not the kind you do in your nice, pesticide-soaked suburban lawn—and you’ll find a history of contamination, corporate negligence, and government lip service in this state. Remember the 2014 Elk River chemical spill? Over 300,000 people were told not to use the water, not even to bathe in it. That wasn’t ancient history. That was just the warning shot.

If you’re depending on the system to protect you, then you’re already dead.

They’ll tell you the water’s “within acceptable limits.” That’s government talk for “it’s just below what might kill you fast.” But long-term exposure? That’s your organs slowly pickling in toxins. Lead, PFAS, chlorine byproducts, cryptosporidium—it’s all there, especially if you’re on a well or a rural water system. Don’t even get me started on the outdated infrastructure that looks like it was built with rust and prayer.

Now, I’m not just going to yell at you. I’m going to train you. I’ve been living off-grid in the Appalachian backwoods long enough to know how to drink from a damn puddle and walk away stronger. If you want to live when the grid fails—or even just when your local treatment plant screws up—you need to learn how to filter, purify, and hack your way to clean water.

Here are 15 critical water filtration survival skills you need to burn into your brain now, before you’re begging some FEMA camp worker for a bottle of Dasani:


🔪 15 Water Filtration Survival Skills (No Excuses)

  1. Boiling – Basic but effective. Bring your water to a rolling boil for at least 1 full minute (3 minutes above 6,500 feet elevation). Kills bacteria, protozoa, and viruses.
  2. DIY Charcoal Filter – Layer sand, charcoal (from hardwood), and gravel in a bottle. Run your water through. It won’t kill pathogens, but it’ll take out sediment and some chemicals.
  3. Solar Disinfection (SODIS) – Fill clear PET bottles with water, shake them, and leave them in the sun for 6 hours. UV rays will do their job. Weak method, but better than nothing.
  4. Lifestraw or Sawyer Filter – Carry one on you always. These personal filters are gold in a crisis. No excuses.
  5. Bleach Drops – 8 drops of regular, unscented bleach per gallon. Mix it, let it sit 30 minutes. Not tasty, but it’ll kill the bugs.
  6. Iodine Tablets – Portable, reliable, and shelf-stable. Tastes like hell, but again—you want taste or life?
  7. Build a Slow Sand Filter – 3 layers: gravel at the bottom, fine sand in the middle, and activated charcoal on top. It takes time, but creates clear, decent water.
  8. Distillation – Capture steam, leave the crap behind. Build a solar still with a tarp, cup, and sunlight—or use fire and tubing if you’re mobile. Nothing beats this for salt or heavy metals.
  9. Use Cloth as Pre-Filter – Even a dirty sock is better than nothing. Removes big chunks before finer filtration.
  10. Know Your Water Sources – Running water is safer than still water. Springs beat creeks. Avoid water near mining sites, farms, or roads.
  11. Build a Biosand Filter – Like a slow sand filter but better structured. Bacteria layer forms at the top to help eliminate pathogens.
  12. Use Potassium Permanganate – A few crystals per liter. Turns purple. Strong oxidizer. Also works for disinfecting gear, but use it right or it’ll poison you.
  13. Carry Coffee Filters – Lightweight and can pre-filter your water to keep your main system from clogging.
  14. Learn to Identify Tannin-Stained Water – Tea-colored doesn’t always mean bad. If it’s from decaying leaves and running fast, it might just be a gift from the woods.
  15. Know How to Spot Contamination – If it smells like fuel, tastes metallic, or has a rainbow sheen—leave it. Trust your instincts.

⚒️ 3 DIY Survival Drinking Water Hacks

Now, for when you’re truly up the creek without a filter:

1. The Tree Branch Filter Hack

Use a piece of pine tree branch about 4 inches long. Strip the bark, stick it into a bottle neck or tube, pour water through. The wood’s xylem tissues can trap bacteria. It’s slow—but it works in a pinch.

2. The Sock + Charcoal Hack

No fancy gear? Grab a sock, stuff it with crushed charcoal, sand, and gravel. Layer it. Hang it and pour water through. Use another sock to catch the output. Double filter if you can.

3. Plastic Bottle Solar Still

Cut a bottle in half, fill the bottom with dirty water. Place a small cup in the center. Seal the top back on with clear plastic wrap and put it in the sun. The heat evaporates clean water, which condenses and drips into the cup.


Final Warning

If you think the government or some company’s going to warn you before the next chemical spill hits your water supply, let me paint you a picture: They’ll tell you “everything is under control” while you’re puking blood in your bathroom.

West Virginia’s waterways are surrounded by chemical plants, abandoned coal mines, fracking operations, and corporate waste dumps. There are over 1,500 documented water violations across the state in just the past decade. And how many of those got real action? Almost none. You think a filter in your fridge is enough for that?

You’re not safe. Your family’s not safe. You need to treat every drop of water like it’s trying to kill you—because it might be.

This isn’t fearmongering. It’s preparedness. Look at your faucet. Think of it as a Russian roulette chamber, and every time you turn that handle, you spin it. That’s the gamble you take if you don’t start learning these skills right now.

And let me tell you—when the next big one hits and people are lined up begging for clean water, you’ll be the one holding the knowledge and the gear. Or you’ll be one of the desperate ones, drinking poison and praying it’s just a stomach bug.

The choice is yours.

Trust the tap? Not in West Virginia. Not in my house. Not ever.

Is Arkansas’ Drinking Water Safe


Is Arkansas’ Drinking Water Safe? Hell No—and You’d Be a Fool to Think Otherwise.

Let me make one thing damn clear: if you’re trusting the government or your city utilities to keep your water clean in Arkansas, you’re playing Russian roulette with your health. Maybe it hasn’t hit the headlines yet, but if you’re waiting for the feds to warn you before your tap starts coughing up poison, you’ll be six feet under before they file the report. I’m not here to scare you. I’m here to wake you up. Because in a world that’s circling the drain, clean water isn’t a privilege—it’s a survival skill.

Look around. Between industrial runoff, aging infrastructure, agricultural waste, and good ol’ government negligence, Arkansas’ water supply is just one natural disaster or chemical spill away from being a death sentence. You think a boiling advisory on your local news is gonna save your kids from cryptosporidium or arsenic buildup? Think again.

It’s time to stop hoping and start preparing.

Here’s what every red-blooded Arkansan—or anyone with half a brain—needs to learn to stay alive when the taps go toxic.


🔥 15 Water Filtration Survival Skills You’d Better Learn Before It’s Too Late:

1. Know Your Sources

Surface water is riddled with bacteria. Groundwater can be filled with heavy metals. Before you filter, know what the hell you’re dealing with. A water test kit (available at any hardware store) can give you a basic rundown.

2. Boil Like Your Life Depends on It

Because it does. Bring water to a rolling boil for at least 1 full minute—3 minutes if you’re above 6,500 feet. This kills most pathogens. But boiling won’t remove chemicals or heavy metals. That’s where filtration comes in.

3. Build a Bio-Filter

Layer gravel, sand, and activated charcoal in a 2-liter bottle. Let the water trickle down through each layer. It’s slow—but it’s a lifeline when you’ve got nothing else.

4. Make Activated Charcoal

Burn hardwood in a low-oxygen environment. Crush the charcoal. Rinse it. Bam—homemade activated charcoal. Filters out a ton of chemical nasties.

5. Solar Still Magic

Dig a hole, place a container in the center, cover with plastic, and put a rock on top. Condensation drips clean water into the cup. It’s slow, but in the Arkansas heat, it works.

6. DIY Sedimentation Setup

Let muddy water sit in a container for hours. Heavy particles settle. Scoop the clean water off the top—then filter it, for the love of all that’s holy.

7. Use a Bandana Pre-Filter

It won’t purify anything, but it’ll keep out bugs, leaves, and muck that can clog your better filters.

8. Know How to Use a Lifestraw or Sawyer

You’d be amazed how many people buy one and never learn how to use it. Practice before SHTF.

9. Harvest Rainwater

Set up barrels with mesh screens. Make sure they’re food-grade plastic. Rainwater is surprisingly clean—until it hits your filthy roof.

10. Learn the Bleach Ratio

8 drops of unscented household bleach per gallon of clear water. Double it for cloudy water. Shake. Wait 30 minutes. If it doesn’t smell faintly of bleach after that—repeat or toss it.

11. Make a Slow-Drip Sand Filter

PVC pipe + layers of sand, gravel, and charcoal = one badass filtration system. Just be ready to maintain it.

12. Distillation Setup with Pots

Boil water in one pot, catch steam in a clean container using a funnel or tubing. This strips out metals and pathogens. Great for saltwater too.

13. Portable Water Filters

Invest in a solid gravity-fed filter like the Berkey or Katadyn. It’s not cheap—but neither is dialysis from heavy metal poisoning.

14. Use UV Light Purifiers

SteriPens or DIY UV-C LEDs kill bacteria and viruses. But don’t rely on them alone—combine with other methods.

15. Know the Signs of Contamination

Smell, color, taste—none of these are reliable. But know the symptoms of waterborne illness: diarrhea, vomiting, cramps. And if multiple people in your area are sick at the same time? It’s not a coincidence. It’s your water.


💥 3 DIY Survival Drinking Water Hacks You Should Burn Into Your Brain:

Hack #1: Charcoal Coffee Filter Rig

Take an old coffee maker (no electricity needed), load it with activated charcoal instead of coffee, and run collected rainwater or river water through it. Double up with a boil afterwards. Turns trash into treasure.

Hack #2: Penny Trick for Bacterial Disinfection

Copper kills microbes. Drop a clean penny in a gallon of water (pre-1982 pennies are 95% copper). Let it sit for 24 hours. Don’t drink it straight—filter it afterwards—but it knocks down the bug load.

Hack #3: Bottle in the Sun (SODIS Method)

Fill clear PET bottles with water, shake to oxygenate, and lay them in direct sun for 6 hours. The UV light cooks most bacteria and viruses. It’s not 100%, but when you’re stuck between Giardia and dehydration, it’ll do.


Arkansas: A Powder Keg Waiting to Blow

Now back to Arkansas. Think you’re safe because you’re on city water in Little Rock or Fayetteville? Wrong. The Beaver Water District has had nitrate issues before. Smaller rural systems? Don’t even get me started—many of them rely on aging pipes and open reservoirs.

In 2021, over 25 Arkansas public water systems violated EPA safety standards—and those are just the ones that got caught. Between pesticides, fertilizer runoff, PFAS (aka “forever chemicals”), and livestock waste—yeah, you’re sipping on a cocktail of cancer and cow piss. And if a flood, tornado, or sabotage takes out a treatment plant? You’ll be scrambling like everyone else.

The question isn’t “Is Arkansas’ water safe?”
The real question is “How prepared are you when it’s not?”


Final Word from a Pissed-Off Prepper

Let’s cut the crap: the cavalry isn’t coming. If you’re waiting for FEMA or the local water authority to rescue you, don’t bother. The people who survive what’s coming are the ones who train now, prepare early, and trust no one with their water supply.

Get your filters. Build your systems. Teach your kids.

Because when Arkansas’ taps run brown—and mark my words, they will—you won’t have time to Google “how to purify water.” You’ll either already know, or you’ll be in the back of the line, fighting over a bottle of Aquafina.

Get smart. Get angry. Get ready.


Is Delaware’s Drinking Water Safe

Is Delaware’s Drinking Water Safe? You’d Better Start Prepping Now.

Let me hit you with the hard truth right out the gate: if you’re trusting your government, your city, or some bureaucrat in a tie to deliver clean, safe drinking water in Delaware—or anywhere, for that matter—you’re gambling with your life. I don’t care what the reports say. “Compliant with federal standards” doesn’t mean jack when it comes to the sludge they pump into your pipes.

Delaware’s drinking water? Yeah, it’s been on the hot seat for decades. Don’t let a few smiling officials or a shiny website tell you otherwise. The water in parts of the state—especially around New Castle County and Sussex—has tested positive for everything from PFAS (a.k.a. “forever chemicals”) to nitrates, lead, and who knows what else they’re not telling you. And that’s during a “normal” year. Throw in a flood, a power outage, or an industrial spill, and you’re one pipe burst away from drinking poison.

And here’s the kicker: they still call it “safe.”

Safe? For who? Rats? Roaches? Corporate profits? Certainly not for the people trying to survive off the grid, or anyone with half a brain who actually tests their tap water.

Let me lay it out for you straight, because the system won’t: if you’re not actively filtering your own water—right now—you’re already behind. If you’re waiting until the taps run dry or smell like a gas station bathroom, you’ll be too late.

So, whether you’re holed up in the backwoods of Sussex County or stuck in an apartment in Wilmington, you need water filtration survival skills. Not tomorrow. Not when the next disaster hits. TODAY.

15 Water Filtration Survival Skills Every Delawarean (and Patriot) Must Know:

1. Learn to Boil and Let Cool.
Simple but effective. Boiling kills bacteria, viruses, and protozoa. Let it cool in a clean, covered container. Use this method as your base survival skill.

2. DIY Sand and Gravel Filter.
Layer fine sand, activated charcoal, and gravel in a plastic bottle. Pour dirty water in the top and let gravity do the work. Not perfect, but it buys time.

3. Build a Solar Still.
Dig a hole, line it with plastic, place a container in the center, and cover with clear plastic. Let the sun condense pure water into the container. Science and sweat.

4. Use Activated Charcoal.
This stuff is the black gold of filtration. It absorbs toxins and improves taste. You can make your own from burned hardwoods.

5. Master Chemical Disinfection.
Bleach (unscented, no additives). Use 8 drops per gallon of water, shake it, wait 30 minutes. Chlorine dioxide tablets also work wonders.

6. Learn How to Use a LifeStraw.
This little tool filters bacteria and protozoa on the go. Lightweight, lifesaving. Carry one in every bug-out bag and glove box.

7. Gravity Fed Filtration Systems.
Berkey-style filters aren’t just for “preppers”—they’re for anyone with common sense. Build your own if needed: stackable buckets, ceramic filters, and patience.

8. Purify with UV Light.
UV pens can sterilize clear water fast. No electricity? Use the sun—Solar UV disinfection (SODIS) works by leaving clear PET bottles in direct sunlight for 6 hours.

9. Use the Cloth Pre-Filter Method.
Wrap a T-shirt or coffee filter around your container to catch large debris before filtration. A dirty cloth today can mean clean water tomorrow.

10. Dig a Seep Well.
If you’re near a contaminated source, dig a few feet away and let the water seep in naturally. The ground acts as a crude pre-filter.

11. Distillation Setup.
Capture clean steam by boiling water and funneling the vapor into a cool container. Tedious, but it removes everything—including heavy metals.

12. Master the Use of Natural Filters.
Plants like banana peels, moringa seeds, and even certain mosses can remove impurities. Know your biology—or carry a guidebook.

13. Identify Water Sources by Terrain.
Learn where water gathers—valleys, rock beds, tree roots. Knowing where to look is half the battle.

14. Carry Redundant Filters.
Two is one, one is none. Always carry backups—compact pump filters, ceramic units, or iodine tablets. Gear breaks; your need doesn’t.

15. Test Water Regularly.
If you’re not testing, you’re guessing. Use at-home water testing kits to check for lead, nitrates, and pathogens—especially in Delaware, where pollution knows no bounds.


3 DIY Survival Drinking Water Hacks (That Could Save Your Life)

1. Pine Tree Water Collector
Delaware has pines in spades. Tie a plastic bag over green pine branches in direct sunlight. Water vapor will collect in the bag through transpiration. It’s slow—but drinkable.

2. Emergency Tin Can Boiler
No pot? No problem. Take an empty food can, fill with water, and heat it over a fire. Sterilized water in 10 minutes. Add rocks to stabilize or improvise a handle with wire.

3. Wild Grape Vine Tap
Cut a mature wild grapevine (thick and green), about 3 feet from the ground. Tilt the vine down and let it drip into a container. Fresh, potable water, but make sure it’s the right vine or you’re drinking death.


Why Trusting Delaware’s Tap is a Deadly Gamble

Let me remind you: Delaware has over 90 water systems. The biggest ones—like the City of Wilmington and Artesian Water Company—have faced scrutiny and violations over the years. We’re talking lead, PFAS, disinfection byproducts, and more. And don’t think bottled water is your golden ticket either—half of that stuff is glorified tap in a plastic coffin.

Go ahead. Look up the EPA violations. See how long they’ve let nitrates fester in the farm runoff zones. Investigate the “acceptable” PFAS levels the state tolerates, despite studies linking them to cancer, infertility, and immune dysfunction.

And when the lights go out—during the next hurricane, or cyberattack, or chemical spill—guess who’s NOT bringing you a bottle of clean water? The government. You’re on your own, and if you haven’t prepared, you’re already prey.


Final Word from a Man Who Trusts No Tap

Delaware’s water isn’t just questionable—it’s a warning shot. If you’re not ready, you’re vulnerable. The comforts of city plumbing can vanish overnight. The guy next door with a well and a filtration system? He’ll be just fine. You? You’ll be boiling puddles in a rusty can.

So get angry. Get smart. Get self-reliant.

Because when it comes to clean water, hope is not a survival strategy.

Is Colorado’s Drinking Water Safe

Is Colorado’s Drinking Water Safe? An Angry Survivalist’s Guide to Filtering What the Government Won’t

Let me tell you something right now: if you’re relying solely on the government to provide you with clean, safe drinking water in Colorado—or anywhere else, for that matter—you’re one busted pipe or bureaucratic lie away from poisoning yourself and your family. If you’re asking whether Colorado’s drinking water is safe, the short answer is: it depends. The long answer? Not unless you take matters into your own damn hands.

I don’t care how many “Water Quality Reports” they publish or how many toothy officials smile on TV and tell you everything’s “within limits.” Those “limits” are set by people who wouldn’t last two days off-grid, and whose careers depend on keeping you calm, not alive.

Let’s rip off the Band-Aid.


What’s in Colorado’s Water?

Colorado’s water sources might look pristine—mountain springs, glacial runoff, and crystal-clear rivers—but don’t let appearances fool you. The second that meltwater hits human infrastructure, it’s game over. Between agricultural runoff, industrial waste, mining remnants, lead pipes in old buildings, and “acceptable” levels of uranium in certain counties, you’re gambling every time you turn on the tap.

And then there’s the chlorine. Yeah, it’s there to kill pathogens, but drink too much of it and you’re killing your gut flora instead. Want a nice side of PFAS “forever chemicals” with your morning coffee? They’re in there too—especially around military bases and airports, thanks to firefighting foam. And let’s not forget aging water infrastructure that would crumble if you sneezed hard enough.

So, no. Colorado’s water isn’t safe—not in any long-term, trust-your-life-on-it kind of way. You want safety? You make it yourself.


15 Water Filtration Survival Skills Every Prepared Person Needs

When the grid fails, the water stops. When the pipes burst, contamination flows. When the politicians lie, your filter is your last line of defense. Master these 15 skills or be ready to drink poison with the rest of the clueless herd.

1. Boiling Water—The First Line

It’s basic, but effective. Boil your water for at least one full minute (three if you’re above 6,500 feet—hello, Colorado). This kills bacteria, viruses, and protozoa. Doesn’t fix chemicals or heavy metals, though. That’s just round one.

2. Gravity-Fed Filtration Systems

Get yourself a quality gravity-fed filter system like a Berkey or build your own using activated charcoal, sand, and gravel. It’s low-tech, long-term, and effective against pathogens and particulates.

3. Solar Still Construction

Dig a pit, put a container in the middle, cover with plastic sheeting, and use the sun to condense clean water. Works in arid areas, and Colorado’s got plenty of sun.

4. DIY Charcoal Filter

Burn hardwood, crush the charcoal, and layer it between cloth, sand, and gravel. Great for removing toxins and improving taste.

5. Identifying Safe Natural Sources

Know your terrain. Fast-moving water from a spring is probably safer than a stagnant pond. But don’t trust any source 100%. Always purify.

6. Solar Disinfection (SODIS)

Fill a clear PET plastic bottle with water and leave it in direct sunlight for 6+ hours. UV rays kill pathogens. Not perfect, but it’s something.

7. Chemical Purification

Stock iodine tablets, chlorine dioxide drops, or household bleach (unscented, 4–6% sodium hypochlorite). Know your ratios. Don’t eyeball it unless you like vomiting.

8. Building a Bio-Sand Filter

Layer sand, gravel, and activated charcoal in a barrel. Add a slow-drip system. Excellent for long-term setups and removing pathogens.

9. Improvised Cloth Filters

Use clean t-shirts or bandanas to pre-filter dirty water. Won’t purify, but removes debris and extends your primary filter’s life.

10. Rainwater Harvesting

Set up rain catchment systems with food-grade barrels. Add mesh screens to keep debris and insects out. This is illegal in some places—because the state thinks it owns your water—so be discreet.

11. Distillation (Fire + Coil Method)

Boil water and run steam through copper tubing into a clean container. Strips out virtually everything, including heavy metals. Requires heat and setup, but gold standard.

12. Assessing Water by Sight & Smell

Learn to identify water that looks and smells wrong. Oil slicks, unnatural colors, dead animals nearby? Hard pass.

13. Using a LifeStraw or Sawyer Filter

These compact filters are a must for any bug-out bag. They won’t remove chemicals, but they’re lifesavers for biological threats.

14. Filter Maintenance and Backflushing

A filter is only as good as its condition. Clean, dry, backflush, and rotate. If you let mold or gunk build up, it’s worse than useless.

15. Caching Emergency Water Supplies

Bury water storage in food-grade containers. Freeze-dried meals won’t matter if you’ve got nothing to rehydrate them with.


3 DIY Survival Drinking Water Hacks

Need water now and don’t have a high-end setup? Get resourceful.

Hack 1: Bleach Bottle Purification

Add 8 drops (about 1/8 teaspoon) of unscented household bleach to one gallon of clear water. Shake well, wait 30 minutes. If it smells slightly of chlorine, it’s good. If not, repeat. Do not overdo it—this isn’t the time to guess.

Hack 2: Plastic Bottle UV Disinfection

Use a clear plastic bottle and fill it with suspect water. Lay it on a reflective surface (like foil or a metal roof) in direct sunlight for 6+ hours. Works best when water is clear. UV does the killing; heat helps.

Hack 3: Tree Transpiration Bag

Tie a clear plastic bag over a leafy branch. The tree transpires clean water vapor, which condenses inside the bag. Drinkable. Slow, but genius. Works in dry, sunny Colorado forests.


Why You Should Never Trust “Safe” Labels Again

Here’s the brutal truth: “safe” is a political word, not a scientific one. Flint, Michigan was “safe.” Camp Lejeune was “safe.” The Animas River spill in Colorado dumped 3 million gallons of toxic sludge into the water system in 2015. That was “monitored.” Spoiler: monitoring doesn’t mean fixing.

Ask any old-timer living near the mining zones of Silverton or Durango if they drink straight from the tap. They’ll laugh in your face—then show you the brown stains in their sinks.

And don’t think bottled water saves you either. Microplastics, chemical leaching from hot transport conditions, and price gouging in emergencies make that a short-term solution, not a strategy.


Bottom Line

If you want to live—really live—through a natural disaster, power grid failure, terrorist attack, EMP, or just a careless city engineer, you need to control your own water.

Colorado is beautiful, rugged, and full of wild, untamed nature. But its infrastructure isn’t built to last, and its water sources are increasingly compromised. You’re either prepared—or you’re prey.

So stop asking if Colorado’s water is safe. Ask if your water plan is.

Because when the taps run dry and the rivers run foul, it’s not going to be the government knocking on your door with a solution.

It’ll be your neighbors.

And they’ll be thirsty.

Is Illinois’s Drinking Water Safe

Let me be real with you. If you’re living in Illinois and still trusting your tap water to be “safe,” then you’re either asleep at the wheel or brainwashed by bureaucrats who care more about budgets than bodies.

You think just because water comes out of your faucet, it’s drinkable? You think Chicago’s water is clean just because they throw some chlorine and fluoride into Lake Michigan and call it a day? Wake up.

Illinois’s water supply is crawling with contaminants—lead, PFAS, nitrates, bacteria, industrial waste, agricultural runoff, and God-knows-what from those rotting underground pipes running beneath every town from Rockford to Cairo. Just because it looks clear doesn’t mean it won’t kill you slowly.

Here’s the cold, hard truth: your water has to pass through decades-old infrastructure, across chemically soaked farmland, and through some of the most poorly maintained treatment systems in the Midwest. And you’re supposed to just drink it and smile?

No. Hell no.


What’s Really in Illinois Tap Water?

Ever hear of lead poisoning? Guess what—it’s not just Flint. Hundreds of towns in Illinois, especially in Chicago and older suburban areas, still have lead service lines buried underground. A 2023 report estimated over 600,000 lead lines still in use across the state. That’s not “concerning.” That’s criminal.

Now add PFAS chemicals (the so-called “forever chemicals” that don’t break down and have been linked to cancer, immune system suppression, and developmental problems) detected in more than 300 water systems across Illinois.

Don’t forget the nitrates seeping into wells from farm runoff in rural areas. Or the bacteria in small towns with outdated sewage systems. Or the chromium-6, the same cancer-causing toxin Erin Brockovich fought over.

Still think Illinois water is safe?

You’d be a fool to rely on a state that can’t balance a budget, can’t patch a pothole, and sure as hell can’t keep its water clean.


15 Water Filtration Survival Skills You Better Learn Before the Grid Goes Down

You want to stay alive when the system collapses—or just when the tap runs brown? Then learn these. Drill them into your brain like your life depends on it. Because it does.

1. Boil Everything

Always start with boiling. 3–5 minutes at a rolling boil will kill bacteria, viruses, and parasites. But it won’t remove chemicals—so don’t stop here.

2. Make a DIY Charcoal Filter

Use a two-liter bottle, layer in gravel, sand, and activated charcoal. It removes particulates and some toxins. Cheap. Portable. Effective.

3. Distill Water with Heat

Use a metal pot, a glass bowl, and a lid. Collect the steam. That steam is your pure water. Removes everything: heavy metals, bacteria, and poisons.

4. Rainwater Harvesting

Set up barrels, tarp systems, or gutter-fed tanks. In Illinois, you’ll get plenty—filter it and store it for droughts or grid-down scenarios.

5. Gravity-Fed Multi-Stage Filters

Use two buckets. Upper one filled with filter media: gravel, sand, charcoal. Let gravity do the work. Clean, no power needed.

6. Know the Taste of Trouble

Learn to recognize off-smells, discoloration, and cloudiness. If your water tastes metallic, smells like sulfur, or feels slimy—filter or ditch it.

7. Solar Water Disinfection (SODIS)

Fill a clear plastic bottle, lay it in the sun for 6+ hours. UV rays will kill pathogens. Works when you’re low on fuel.

8. Portable Filters—Always Carry One

Sawyer Mini, LifeStraw, Katadyn. Keep one in your car, one in your bag, one at home. Don’t leave water purification to chance.

9. Ceramic Filters for Long-Term Use

Set up ceramic filters with silver-impregnated cores. Great for home use or homestead life. Lasts for thousands of liters.

10. Learn to Use Bleach Safely

Use 8 drops of 6% bleach per gallon of water. Stir and wait 30 minutes. Know your ratios—too much and you’ll poison yourself. Too little and you’ll just get sick anyway.

11. Use Moringa Seeds to Coagulate Crap

Crushed moringa seeds bind to particles in dirty water and help them settle. Clearer water = easier filtration.

12. DIY Bio-Filter in a 5-Gallon Bucket

Layer cloth, charcoal, sand, and gravel in a bucket with a spout. Maintain it. Clean it. It can give you weeks of clean water on the move.

13. Make a Fire Pit Still

Dig a fire pit, boil water in a covered pot, channel steam to a container using copper tubing. It’s crude but gives you distilled water in the wild.

14. Identify Safe Natural Sources

Fast-moving streams in wooded areas are better than ponds near towns or farmland. Never trust standing water without treating it.

15. Know the Warning Signs of Water Illness

Cramping, diarrhea, vomiting, and fatigue after drinking water? You screwed up. Learn the signs. Respond fast. Dehydration kills.


3 DIY Survival Water Hacks to Save Your Ass When Illinois Water Turns to Sludge

Hack #1: Trash Bag Solar Still

Dig a hole. Add wet grass or dirty water. Place a cup in the center. Cover with a clear trash bag and place a rock in the middle. Water evaporates, condenses, and drips into the cup. Boom—survival distilled water.

Hack #2: Tin Can Charcoal Filter

Make charcoal from a campfire (use hardwood). Crush it. Pack it into a tin can with cloth, gravel, and sand. Punch holes in the bottom. It’s crude but filters a lot of nastiness.

Hack #3: Bandana + Bleach Emergency Method

Pour water through a bandana to get rid of big debris. Then treat with bleach. It’s a two-step last-resort method when all else fails.


Illinois Is a Powder Keg of Water Problems—Prepare Now or Pay Later

You want to trust that smiling politician in Springfield? Go ahead. You want to wait for the EPA to do something useful? Be my guest.

But when the next big storm floods the treatment plants… when the aging pipes finally give out… when the chemicals spread from the next industrial “accident”… you’ll remember this warning.

Because you’re not just fighting bacteria anymore. You’re fighting corporate greed, crumbling infrastructure, and environmental collapse—all pouring out of your kitchen faucet.


Final Word: Own Your Water or Die Without It

Don’t wait for help. Don’t trust the tap. Don’t trust the system. Take control of your water supply today. Master filtration. Build your backup systems. Store bleach, charcoal, filters, and buckets. Stockpile water like it’s ammunition—because in the next disaster, that’s exactly what it will be.

Water is life. And in Illinois? It’s a life you have to fight for.

Is Kentucky’s Drinking Water Safe

Is Kentucky’s Drinking Water Safe? Hell No—And Here’s What You Need to Do About It

Let’s cut the crap.

You think just because your tap turns on and water comes out that it’s safe? You think because some suit at the Department of Water Resources says “everything is within limits” that you can trust it? You think a state that’s been dumping coal slurry, fertilizer runoff, and industrial waste into its rivers for decades is going to give you clean drinking water?

Wake. Up.

This isn’t a conspiracy theory. This is observable, measurable, documented reality. Kentucky has over 400,000 people relying on private wells, millions more on aging public water systems, and a long history of toxic spills in the Ohio and Kentucky River basins. You want a crash course in betrayal? Look no further than your kitchen faucet.

The System Is Failing You—And It’s Been Failing You for Years

Let’s talk numbers. In 2023, the Environmental Working Group detected over 250 contaminants in U.S. tap water, including known carcinogens like arsenic, lead, PFAS (those “forever chemicals”), and nitrates. Kentucky didn’t escape that list. In fact, parts of Kentucky scored above the national average in multiple toxic categories.

We’re talking cancer-causing crap in municipal water.

You live in Louisville? Ever check the water reports? Chlorination byproducts through the roof. Pikeville? You’re sucking on heavy metals from mining runoff. Eastern Kentucky’s been getting hammered for decades, and no one’s doing a damn thing about it because it’s “just coal country.”

Yeah. Let that sink in while you sip your sweet tea.

Now let’s say you’re not even on city water. Let’s say you’ve got your own well—your own little slice of independence. That doesn’t mean you’re safe. Not even close. Agricultural pesticides, herbicides, and God-knows-what else leach through soil like ghosts. Unless you’re testing that well quarterly and filtering like your life depends on it—because it does—you’re drinking poison.


15 Water Filtration Survival Skills Every Kentuckian Needs to Learn Yesterday

If the grid goes down, if your well gets contaminated, or if the city shuts off the tap, you better have these water filtration survival skills locked down:

  1. Boiling Water – 1 minute at a rolling boil (3 at elevation) kills most pathogens. If you can’t boil water, you don’t deserve to drink it.
  2. Solar Still Construction – Use the sun to evaporate and collect clean water. Works with vegetation and dirty water alike.
  3. DIY Sand and Charcoal Filter – Layered filter made from sand, activated charcoal, and gravel in a bottle or bucket.
  4. Building a Biosand Filter – A longer-term solution using multiple sediment layers and slow-drip filtration.
  5. Making Activated Charcoal – Burn hardwood in a low-oxygen environment. Crush and rinse. This stuff absorbs toxins like a champ.
  6. Using a LifeStraw or Sawyer Mini Filter – Portable filters that can save your life in a pinch. Never leave home without one.
  7. UV Disinfection with Sunlight – Fill a clear plastic bottle and leave it in the sun for 6 hours. The UV kills bacteria. Not perfect, but better than cholera.
  8. Bleach Purification – 2 drops of plain, unscented bleach per liter of water. Wait 30 minutes. Stir and sniff. Smells like a pool? It’s safe.
  9. Potassium Permanganate Drops – A tiny crystal turns water pink and kills off germs. But be careful: too much and you’ll poison yourself.
  10. Cloth Filtering for Sediment – Simple but effective. Pre-filter water through a clean cloth to remove big debris.
  11. Making a Ceramic Filter – Clay and sawdust kiln-fired to create porous ceramic. It filters most pathogens and lasts for years.
  12. DIY Slow Drip Gravity Filter – Buckets, hoses, and a ceramic or carbon filter. Works great off-grid.
  13. Rainwater Harvesting Systems – Collect rain from your roof. Use a first-flush diverter and filter before drinking.
  14. Testing Water with DIY Kits – Don’t guess. Test. Regularly. Especially if your water has a weird taste, smell, or color.
  15. Distillation Over Fire – Use a pot, lid, and a collection container. Boil and collect steam. It’s pure and safe—just slow.

3 DIY Survival Drinking Water Hacks

Don’t have a Berkey? Can’t afford a fancy system? Fine. Get scrappy. Here are three water hacks straight out of the survival playbook.

Hack #1: The Plastic Bottle Solar Disinfection Trick (SODIS)

  1. Take clear PET bottles (1 or 2-liter soda bottles).
  2. Fill them with water.
  3. Lay them in full sun for 6 hours (more if it’s cloudy).
  4. UV rays will neutralize most bacteria and viruses.

Bonus tip: Place them on reflective foil or corrugated metal roofing to maximize heat and UV exposure.

Hack #2: The Shirt-and-Sand Filter

  1. Cut the bottom off a two-liter bottle.
  2. Flip it upside down.
  3. Layer: clean cloth, gravel, sand, charcoal, repeat.
  4. Pour water through. It’s not sterile, but it’s much cleaner.
  5. Boil or bleach afterward.

Use this in a crisis when your water looks like chocolate milk.

Hack #3: Emergency Pine Filter

  1. Harvest some pine bark and needles (avoid treated trees).
  2. Boil them to extract tannins—natural antimicrobials.
  3. Pour water through pine needle-packed filter layers.
  4. Follow up with boiling or bleach for best results.

Nature’s giving you tools. Don’t be too soft or stupid to use them.


Final Words from the Edge

You can sit around sipping bourbon in your recliner, pretending the EPA is looking out for you. Or you can take control of your own water security like your life depends on it—because it DOES.

Kentucky’s water isn’t safe. Not because it’s always toxic, but because you can’t trust it to stay clean. Aging infrastructure, industrial pollution, mining runoff, chemical spills, and lazy oversight are coming for your tap—slowly, invisibly.

The next train derailment, flood, or chemical dump could take your entire town off the map. Will you be ready, or will you be standing in line at the fire station with a plastic jug like a fool?

Don’t count on the government.
Don’t count on bottled water.
Count on skills, tools, and grit.

Filter everything.
Test often.
Prepare always.

This isn’t fearmongering.

This is reality.

First Aid & Medical Preparedness – Building a trauma kit, treating wounds, and long-term health without hospitals.

Listen up, because I’m not going to sugarcoat a damn thing. When the grid goes down, when the sirens stop wailing, and when the hospitals lock their doors—you’re on your own. There’s no 911, no nurse with a clipboard, no Walgreens down the road. Just you, your gear, your grit, and the skills you’ve either learned or failed to. If you’ve been living soft, playing pretend that society will always cradle your sorry hide, you’re in for a rude awakening.

First Aid and Medical Preparedness isn’t a luxury—it’s your damn lifeline. Pain, injury, infection, sickness—those things won’t stop just because civilization did. You better be ready to deal with them, or you’re a dead man walking.


The Cold, Hard Reality

When society collapses, modern medicine disappears faster than bottled water at a panic sale. Pharmacies will be looted. EMTs will stay home. Hospitals will become disease-ridden death traps if they don’t close outright. Forget your HMO. Your health insurance policy won’t buy you squat in a barter economy. What WILL keep you alive is your trauma kit, medical knowledge, improvisational skill, and the will to survive.

Let’s get down to it.


15 Survival Skills for Medical Preparedness

1. Building a Trauma Kit from the Ground Up

Your trauma kit isn’t a cute little pouch of Band-Aids. This is your mobile ER, and it better include:

  • Tourniquets (CAT or SOF-T)
  • Israeli bandages
  • Hemostatic gauze (like QuikClot)
  • Nitrile gloves
  • Trauma shears
  • Nasopharyngeal airways
  • Chest seals (for sucking chest wounds)
  • Burn gel
  • Painkillers and antibiotics
    Don’t buy pre-packaged crap. Learn what each item does and build your kit accordingly.

2. Controlling Bleeding

Massive blood loss will kill you in minutes. Learn how to apply a tourniquet, pack a wound, and use pressure dressings. Practice on meat or a dummy. Muscle memory saves lives.

3. Treating Puncture Wounds and Lacerations

These are common in a survival scenario—think knife slips, broken glass, jagged metal. Clean thoroughly, debride dead tissue, close with steri-strips, butterfly bandages, or even suture if you must. Infection is your enemy.

4. Fracture and Dislocation Management

You won’t be walking off a busted leg. Learn how to make splints with sticks, cordage, and rags. Know how to reduce simple dislocations. If you can’t keep the limb immobilized, you’ve just doomed yourself.

5. Burn Treatment

Flames, boiling water, scalding steam—they’ll all be real threats without modern conveniences. Know how to treat burns with sterile dressings, cool water (NOT ice), and burn creams. Infection is a constant threat here too.

6. CPR and Rescue Breathing

Yeah, even out here. Knowing how to restart someone’s ticker or give rescue breaths can turn you from a bystander into a damn hero.

7. Recognizing Shock

Hypovolemic, septic, or anaphylactic—shock kills. If someone’s pale, clammy, confused, with a rapid pulse and shallow breathing, you better know how to act: elevate legs, stop bleeding, keep them warm, administer epinephrine if it’s allergic.

8. Making Saline Solution

Boil clean water, add non-iodized salt (9 grams per liter), cool it—bam, you’ve got sterile saline for irrigating wounds. Don’t guess; measure accurately.

9. Improvised Stretcher Construction

When someone can’t walk and you have to move them, build a stretcher from blankets, tarp, or shirts between two poles. Test it before you need it.

10. Herbal Medicine Basics

When the meds run out, the plants step in. Learn how to use yarrow for bleeding, plantain for stings, willow bark for pain, and echinacea for immune support. Know what works and what’s woo-woo garbage.

11. Dental Emergency Management

Tooth infections can kill. Learn how to extract a bad tooth, treat abscesses with warm salt water soaks, and use clove oil for pain. Dental kits aren’t optional.

12. Water Purification Techniques

If your water’s dirty, your insides will follow. Boil it. Filter it. Purify it with iodine or bleach (8 drops per gallon of clear water, wait 30 mins). Dysentery is not a joke.

13. Administering Injections

You may need to inject antibiotics, insulin, or pain meds. Learn proper intramuscular injection sites and techniques. Practice on fruit or animal carcasses.

14. Recognizing and Treating Infections

Redness, swelling, pus, heat, fever. If you see them, act fast. Open the wound, drain it, and use antiseptics and antibiotics. Delay = death.

15. Stockpiling and Rotating Medications

Antibiotics, antidiarrheals, antihistamines, painkillers. Get fish antibiotics—they’re often the same thing (Amoxicillin, Ciprofloxacin, etc.). Label and rotate them. Know expiration risks.


3 DIY Survival Medical Hacks

1. Tampon-as-a-Wound-Packer

A tampon isn’t just for feminine hygiene—it’s a sterile, compact wound packer for deep punctures. Shove it in, tape it down, and it’ll help control bleeding until you can do better.

2. Duct Tape Butterfly Bandages

Got a gash? Cut duct tape into strips and fold them into DIY butterfly closures to pull wound edges together. Combine with superglue if needed (on dry, cleaned wounds ONLY).

3. Plastic Bag Chest Seal

You get a punctured lung, you’re leaking air into your chest cavity. That’s called a sucking chest wound. Take plastic (Ziplock, cling film), tape on three sides to create a flutter valve. That could literally keep someone breathing.


Final Words from a Man Who’s Seen the Edge

Look, I’m not writing this to make friends or stroke egos. I’ve patched wounds in the dark, boiled water for hours to keep someone from going septic, and carried men miles on busted legs. I’ve seen what happens when people don’t prepare—they cry, they panic, they die.

You don’t want to be one of them.

Start practicing these skills now. Build your kit, learn your herbs, memorize wound care, and practice until it’s muscle memory. Buy books—not Kindle files, real paper. Build a library. Print diagrams. Watch tutorials and take notes. Store meds in cool, dry places. Teach your family. Test yourself.

Because when hell breaks loose and the doctors are gone, you’re the only medic you’ve got.

So, ask yourself: Are you ready to stop being a soft, helpless liability and start being the one who keeps people alive?

If not, you better damn well get there fast.

No more excuses. No more tomorrow. Get to work.

How Preppers in Arkansas Prepare for Natural Disasters: A Complete Guide

How Arkansas Residents Prepare for the State’s Worst Natural Disasters

As a prepper living in Arkansas, you understand the importance of being prepared for anything Mother Nature throws your way. In this state, we deal with a wide range of natural disasters, from tornadoes and severe thunderstorms to floods, wildfires, and even the occasional ice storm. Whether you’ve lived here your whole life or are just settling in, it’s critical to have a solid survival plan in place to weather these unpredictable events.

In this article, I’ll walk you through the types of natural disasters we face in Arkansas, how local preppers get ready for them, and most importantly, 10 survival tips that will help you stay safe and self-sufficient when disaster strikes.

CLICK HERE TO LEARN HOW TO SURVIVE A FAMINE

1. Tornadoes – The King of Arkansas Disasters

Tornadoes are, without a doubt, the most terrifying natural disaster we face in Arkansas. They can pop up without warning, especially during spring and early summer, wreaking havoc across towns and rural areas alike. In fact, Arkansas is in “Tornado Alley,” meaning we’re right in the path of severe storms that can produce destructive twisters.

When it comes to prepping for tornadoes, time is of the essence. The best way to survive a tornado is to be prepared ahead of time. Know the safest place in your home to seek shelter. Typically, the basement is your best option, but if you don’t have one, head to an interior room on the lowest floor, away from windows and exterior walls.

Prepper Tip #1: Get a weather radio. Tornadoes can form quickly, and having a battery-powered NOAA weather radio will alert you to an impending storm long before it hits.

Prepper Tip #2: Create a tornado kit. Your kit should include essentials like water, non-perishable food, first aid supplies, a flashlight, a multi-tool, and important documents.

2. Flooding – A Persistent Threat

Flooding is another major threat in Arkansas, especially during the wet season. Heavy rainfall can cause rivers to overflow, while flash floods can occur within hours. Arkansas has numerous rivers, including the Arkansas River, White River, and Ouachita River, all of which pose a risk during periods of excessive rain.

Preppers in Arkansas need to understand the flooding risks in their area. Flood-prone zones are more common than you might think, especially around river valleys or low-lying areas. One of the best ways to stay safe is to elevate your home, or at the very least, keep your survival gear in waterproof containers that won’t get ruined in the event of a flood.

Prepper Tip #3: Know the flood zones. If you live in a floodplain, have a plan for evacuation. Keep emergency bags packed and ready to go at all times.

Prepper Tip #4: Install sump pumps. If your home is in a low-lying area, consider installing a sump pump to prevent water from infiltrating your basement.

3. Severe Thunderstorms and Hail – Common But Dangerous

It’s no surprise that Arkansas experiences frequent thunderstorms, especially in the warmer months. These storms often bring heavy rain, lightning, high winds, and hail—sometimes large enough to cause significant damage. While we can predict thunderstorms, the severity and timing are often less predictable.

Prepper Tip #5: Fortify your home. Invest in storm shutters or window protection to minimize damage from high winds or hail.

Prepper Tip #6: Have a lightning safety plan. Lightning is a serious risk during thunderstorms. Stay indoors and avoid electrical appliances during the storm. If you’re outdoors, avoid tall trees and open fields.

4. Wildfires – A Growing Concern

Although Arkansas isn’t typically associated with wildfires, dry conditions combined with high winds can lead to the rapid spread of flames. In recent years, wildfires have become more common in certain regions, particularly in the Ozarks. Preppers need to be aware of fire risks, especially during prolonged periods of dry weather.

Prepper Tip #7: Create defensible space around your property. Clear dead vegetation, leaves, and other fire-prone debris from your yard to minimize the chance of a wildfire reaching your home.

Prepper Tip #8: Invest in a fire extinguisher. Keep multiple fire extinguishers around your property—inside your home and near the outdoor areas that could catch fire. If you’re in a rural area, it’s also smart to have a water source available for firefighting.

5. Ice Storms and Winter Weather – The Silent Killer

Arkansas isn’t known for heavy snowfall, but when we do get snow and ice, it can cause chaos. Ice storms are particularly dangerous. Power outages are common, and roads become treacherous. During these storms, staying warm and safe is a priority.

Prepper Tip #9: Stockpile firewood. If you live in a rural area, consider installing a wood-burning stove or fireplace for heat during power outages. Stockpile firewood so that you can stay warm when the grid goes down.

Prepper Tip #10: Keep extra blankets and warm clothing. If the power goes out, having enough blankets, sleeping bags, and layers of clothing can keep you and your family safe from the cold. A camp stove or propane heater can also be life-saving.

How Arkansans Are Preparing for the Worst

In Arkansas, preppers aren’t just sitting around waiting for a disaster to strike. We’re actively working to make sure we’re ready for anything. Many of us are involved in local prepper groups, where we share information and resources. We’re learning about sustainable living, emergency first aid, and how to grow our own food. We also focus on off-grid living solutions—because let’s face it, when the power goes out, it might not be back on for days.

The survival mindset here is about being self-reliant. Preppers in Arkansas have long recognized that we can’t always rely on the government or emergency responders to bail us out. Whether it’s learning how to purify water, build a shelter, or hunt and fish for food, we know that every little bit of knowledge helps when the grid goes down.

Some Arkansans are even fortifying their homes against natural disasters with storm shelters, backup generators, and solar power systems. And with a large rural population, we know that being able to live off the land can make the difference between life and death when supply chains break down.

Conclusion

Being a prepper in Arkansas means constantly thinking ahead. Whether it’s preparing for tornadoes, floods, or wildfires, we make it a point to be ready for the worst. The tips shared here will give you a strong foundation to build on as you create your own emergency plan. Remember, the key to survival isn’t just about having gear—it’s about having the knowledge and mindset to endure whatever disaster comes your way.

Top 30 Survivalist-Friendly Campsites in North Carolina

The Best Campsites for North Carolina Survival Preppers

As a prepper living in North Carolina, you know that being ready for any situation, whether it’s a natural disaster, a power outage, or just a need for some personal space, is key. What better way to ensure you’re prepared than by learning the land, understanding the environment, and honing your survival skills in the wild? North Carolina, with its diverse terrain from the mountains to the coast, offers some of the best campsites in the nation for preppers like us. Here’s a guide to 30 of the best camping sites for survival training and prepping in North Carolina.

Whether you’re testing your bug-out bag, practicing fire-starting techniques, or just getting familiar with local flora and fauna, these campsites are perfect for a variety of outdoor activities. From deep forests to rugged mountain terrain, North Carolina has it all.


1. Pisgah National Forest

Known for its vast stretches of wilderness, Pisgah National Forest offers miles of hiking trails, waterfalls, and secluded campsites. This place is ideal for preppers who want to test their wilderness skills and see what they can forage, hunt, and gather in the wild. The forest provides plenty of opportunity for stealth camping and learning to live off the land.

2. Great Smoky Mountains National Park

This park is one of the most well-known in the country, and for good reason. It’s filled with diverse ecosystems, and its remote areas make it perfect for extended survival training. As a prepper, you’ll want to spend some time here learning about the flora and fauna, as well as getting comfortable with primitive shelter-building.

3. Chattahoochee-Oconee National Forest

Part of the Appalachian Mountains, the Chattahoochee-Oconee National Forest is great for those who enjoy rugged terrain. This forest provides great opportunities for shelter-building, testing your gear, and hiking through challenging terrain. The combination of creeks, rivers, and forests will keep any prepper occupied.

4. Morrow Mountain State Park

With over 1,000 acres of land and beautiful scenic views, Morrow Mountain State Park is perfect for prepping and practicing wilderness survival skills. It offers great opportunities for fishing, hunting, and other vital outdoor skills. The area also offers peaceful lakeside campsites.

5. Hanging Rock State Park

Located in the Sauratown Mountains, Hanging Rock is a great place for prepping and connecting with nature. With dramatic rock formations, this park offers challenging terrain for those who want to push their limits. It’s also a perfect spot for learning how to navigate rough terrain or just test your fire-starting skills in remote locations.

6. Uwharrie National Forest

This forest is full of ancient mountains, with dense woods and creeks. It’s an excellent location for survivalists looking for a challenge, offering secluded campsites, primitive campsites, and a variety of flora and fauna to explore.

7. Crowders Mountain State Park

For those who enjoy mountain terrain, Crowders Mountain is a must-see. The views are amazing, but the real draw is the opportunity to test your skills in a variety of outdoor survival situations. Whether you need to practice building shelters or hone your hiking endurance, this park is ideal.

8. Bodie Island Campground

If you’re looking to practice prepping along the coastline, Bodie Island is a great option. This campground offers access to the Outer Banks, where you can learn survival skills that might be different from those you’d use in mountainous terrain, such as coastal fishing and saltwater navigation.

9. Nantahala National Forest

With over 500,000 acres of rugged mountains, rivers, and wilderness, Nantahala National Forest is a prepper’s dream. Whether you’re training for wilderness survival, learning to hunt, or just exploring the environment, this is a fantastic place to sharpen your skills.

10. Lake James State Park

If you’re more into lakeside prepping, Lake James State Park provides a peaceful environment for preppers looking to practice water-based survival skills. It offers opportunities for both boating and hiking, with plenty of secluded areas to test your survival tactics.


11. Gorges State Park

Known for its dramatic waterfalls and rugged terrain, Gorges State Park provides an excellent setting for more advanced survivalists. If you’re looking to truly test your abilities, this is a great spot for deep woods exploration and endurance training.

12. South Mountains State Park

With over 20 miles of hiking trails, South Mountains offers a perfect place for long-term survival training. The park’s remote nature allows you to test your skills without the distractions of modern life, offering a chance to practice long-distance hiking and endurance.

13. Stone Mountain State Park

Located near the Blue Ridge Mountains, Stone Mountain offers challenging terrain, incredible views, and numerous camping opportunities for preppers. It’s a great spot for practicing shelter-building, map-reading, and surviving in diverse terrain.

14. Linville Gorge Wilderness Area

For those who truly want to test their wilderness survival skills, the Linville Gorge Wilderness Area is a must-visit. This area offers rugged cliffs, deep ravines, and remote campsites, making it ideal for preppers looking to experience the harsh realities of survival.

15. Jockey’s Ridge State Park

Jockey’s Ridge is the tallest natural sand dune system in the eastern United States. It’s a unique spot for preppers looking to practice survival in a different environment. Learn how to navigate sand dunes, use the wind for navigation, and find your bearings in coastal areas.

16. Kerr Lake State Recreation Area

For those interested in lakefront prepping, Kerr Lake is the perfect spot. This large reservoir offers great opportunities for water-based survival skills, including fishing and water navigation, along with miles of trails for land-based training.

17. Pocosin Lakes National Wildlife Refuge

If you’re a prepper interested in wetland survival skills, this is the place to be. With expansive swamps and forested wetlands, Pocosin Lakes provides a unique environment to practice water and wetland survival techniques.

18. Harris Lake County Park

For those closer to the Raleigh area, Harris Lake offers a quieter, more controlled environment to practice survival techniques. It’s ideal for short camping trips where you can practice fire-making, cooking over an open flame, and wildlife tracking.

19. Elk Knob State Park

A remote park with high mountain peaks, Elk Knob provides a more solitary and rugged experience. It’s great for preppers who want to escape the crowds and test their skills in extreme environments.

20. Cape Hatteras National Seashore

Perfect for coastal preppers, Cape Hatteras offers a mix of beach and wooded terrain, ideal for testing various survival tactics, from building shelters in sand to fishing from the shore.


21. Badin Lake

Surrounded by the Uwharrie National Forest, Badin Lake offers a peaceful setting for preppers looking for a serene place to practice survival skills. The lake itself is perfect for learning water navigation techniques, while the surrounding forests are excellent for woodcraft and foraging.

22. Holly Shelter Game Land

Located in coastal North Carolina, Holly Shelter Game Land provides the perfect environment for hunting, fishing, and practicing wilderness skills in a somewhat untamed environment.

23. Tennessee Valley Authority Lands

If you’re looking for more isolated spaces to practice, check out the TVA lands near the NC/Tennessee border. These lands have vast wilderness areas, perfect for learning to live off the land and practicing long-term survival techniques.

24. Mount Mitchell State Park

The highest peak east of the Mississippi, Mount Mitchell offers challenging mountain terrain for prepping. Learn how to use higher elevations to your advantage, test your endurance, and practice long-term camping.

25. Reedy Creek Park

For those close to the Charlotte area, Reedy Creek Park offers a great mix of trails and peaceful camping grounds, perfect for honing survival skills without leaving the urban area far behind.

26. Junaluska Campground

Situated in the Appalachian Mountains, Junaluska offers a quiet getaway perfect for preppers looking to test their wilderness knowledge in rugged, challenging terrain.

27. N.C. Game Lands at Roanoke River

For those who enjoy hunting and fishing as part of their prepper lifestyle, Roanoke River’s game lands offer a haven for practice. The swampy areas and rich wildlife provide an excellent test of your outdoor knowledge.

28. Mills River Recreation Area

Just outside of Asheville, this area offers the perfect mix of proximity to city amenities and wild terrain for prepping. It’s a great place to practice navigation, shelter-building, and fire-starting skills.

29. Blue Ridge Parkway

The famed Blue Ridge Parkway runs through North Carolina, and the surrounding camping areas are ideal for prepping. With a combination of mountainous terrain, lakes, and forest, this is an area where you can get serious about survival practice.

30. Yadkin River State Trail

This trail runs along the Yadkin River and offers a great opportunity to explore river-based survival techniques. Whether you prefer hiking, canoeing, or simply testing gear in a variety of environments, Yadkin offers something for every prepper.