Do This Before Your Neighbors Become Dangerous

Do This Before Your Neighbors Become Dangerous: A Survivalist’s Guide

In times of crisis, the greatest threat may not come from distant enemies but from those living closest to you. When societal structures begin to crumble, neighbors—once familiar faces—can quickly become unpredictable and even dangerous. As a survivalist, it’s imperative to prepare not only for external threats but also for the potential dangers lurking next door.

Understanding the Threat

The collapse of societal norms can lead to desperation. People who once adhered to the rule of law may resort to violence or theft to secure resources. In such scenarios, your immediate environment becomes a battleground. Recognizing this reality is the first step in fortifying your home and ensuring the safety of your loved ones.

1. Fortify Your Home’s Exterior

Your home’s perimeter is your first line of defense. Strengthen it by:

  • Reinforcing Doors and Windows: Install solid core doors and metal or reinforced frames. Use security film on windows to prevent easy break-ins.
  • Securing Entry Points: Add deadbolts, slide bolts, and security bars where appropriate. Ensure all gates are locked and consider adding a secondary locking mechanism.
  • Installing Motion-Sensing Lights: These can deter intruders and alert you to movement around your property.

2. Establish a Safe Room

A designated safe room can be a lifesaver. This should be a room with:

  • Reinforced Walls and Door: Use materials like steel or solid wood.
  • Communication Tools: Keep a charged phone and a two-way radio.
  • Supplies: Stock with water, non-perishable food, first-aid kit, and self-defense tools.

3. Develop a Neighborhood Watch

Community vigilance can be a powerful deterrent. Organize a neighborhood watch by:

  • Establishing Communication Channels: Use group messaging apps to stay informed.
  • Setting Up Regular Check-Ins: Regularly assess the well-being of neighbors, especially the elderly or those living alone.
  • Sharing Information: Report suspicious activities to local authorities and fellow neighbors promptly.

4. Maintain Situational Awareness

Always be aware of your surroundings. This includes:

  • Monitoring Local News: Stay updated on events that could impact your area.
  • Observing Unusual Activities: Note unfamiliar vehicles or people in your neighborhood.
  • Trusting Your Instincts: If something feels off, investigate further or alert others.

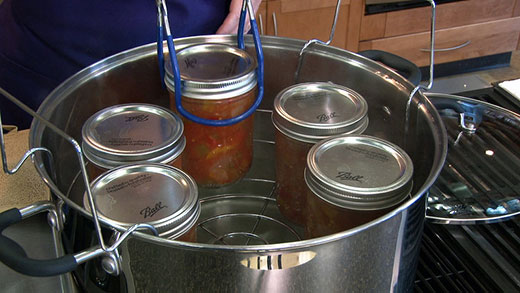
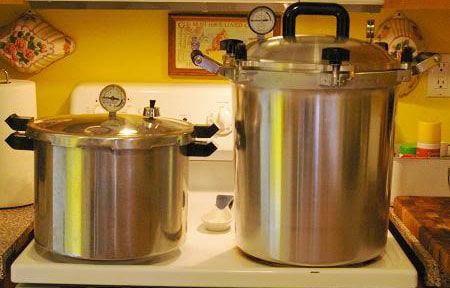
5. Secure Water and Food Sources

In times of crisis, access to clean water and food can become scarce. Prepare by:

  • Storing Water: Aim for at least one gallon per person per day for at least three days.
  • Stockpiling Non-Perishable Foods: Include items like canned goods, dried fruits, and grains.
  • Purification Methods: Have water purification tablets or filters on hand.

6. Arm Yourself Responsibly

While firearms can be an effective means of self-defense, they come with responsibilities. Ensure:

  • Proper Training: Take courses on firearm safety and usage.
  • Secure Storage: Keep weapons locked and out of reach of unauthorized individuals.
  • Legal Compliance: Adhere to all local and state laws regarding firearm ownership and use.

7. Create Diversion Strategies

In case of an intruder, having diversion tactics can buy you valuable time. Consider:

  • Noise Makers: Use alarms or whistles to disorient intruders.
  • Escape Routes: Plan and practice multiple exit strategies.
  • Decoy Items: Place valuables in less obvious locations.

8. Build Strong Relationships with Trusted Neighbors

Not all neighbors will pose a threat. Cultivate relationships with those you trust by:

  • Offering Help: Assist with tasks or share resources.
  • Sharing Information: Keep them informed about potential threats or emergencies.
  • Establishing Mutual Aid Agreements: Agree on how to support each other during crises.

9. Practice Regular Drills

Preparation is key. Conduct regular drills to:

  • Test Emergency Plans: Ensure everyone knows their role during a crisis.
  • Identify Weaknesses: Spot areas in your defense plan that need improvement.
  • Build Confidence: Familiarize everyone with procedures to reduce panic during real events.

10. Stay Informed and Adapt

The landscape of threats can change rapidly. Stay informed by:

  • Attending Workshops: Participate in survivalist and preparedness seminars.
  • Reading Relevant Literature: Keep updated with books and articles on home defense and survival tactics.
  • Networking: Join online forums or local groups to exchange knowledge and experiences.

Conclusion

The safety of your home and loved ones depends on proactive preparation. By fortifying your home, establishing strong community ties, and staying vigilant, you can mitigate the risks posed by dangerous neighbors in times of crisis. Remember, in the world of survivalism, it’s better to be over-prepared than caught off guard.

For further reading and resources on home defense and survival tactics, consider exploring the following:

Stay safe, stay prepared.

What NOT to do in a Blackout

I’ve talked a lot about our unstable power grid before.

And what you should do the next time the power grid fails.

But what’s equally important is what NOT to do.

Because some mistakes are more dangerous than most people think.

  1. Opening the fridge for no reason.

Look, I understand, the first thing you might think about is whether your food’s going to spoil.

But every time you look inside that fridge, you’re letting out precious cold air.

Keep it shut, and your food will stay safe for up to 4 hours in the fridge and 48 hours in the freezer, provided you don’t go peeking!

If this time has passed already, and you want to test if your food is still safe to eat, follow these instructions.

And the same goes for your exterior doors.

Keep your doors and windows shut to maintain your house’s current temperature as much as possible. This is especially crucial in extreme weather conditions.

  1. Put down the candles.

Candles might seem like the obvious go-to for light, but they’re a fire hazard if you have children running around in the dark.

And especially in a prolonged outage, when we tend to forget about them.

It’s wiser to stick to solar flashlights or LED lanterns.

If you want to use candles, go ahead, but be very careful.

And don’t let your children near ‘em.

  1. Trying to use the elevator.

This one might seem like a no-brainer, but you’d be shocked by how many folks forget the elevator doesn’t work during power outages.

When the power’s out, those metal boxes turn into death traps.

If the elevator stops working when you’re already inside of it, stick to these 4 steps.

  1. Using generators indoors

Generators are a godsend during a blackout, but they’re also a source of carbon monoxide.

Don’t ever use them indoors or close to windows and doors. Keep them outside and away from your living spaces to escape any risks.

  1. Not staying put

This one’s for your children.

Unless it’s unsafe to stay in your house, the safest place to be during a blackout is exactly where they are.

Venturing outside can expose them to unnecessary hazards when streetlights and road signals are out.

Remember, folks, staying informed and prepared is your best defense against the challenges a blackout can bring.

Keep these tips in mind and you’ll navigate through the darkness like a pro.

Survival Prepper: Perserving Your Favorite Meals

Being prepared for a disaster of some sorts is one thing, being prepped with your favorite foods is another!

Canning food has been a long standing method to storing food in your food storage. Instead of only stocking up on canned soup and whatever is left at a grocery store during a crisis, why not take it a step up by creating and preserving your favoirite foods that will be able to store on your shelf for years to come.

When you preserve food, you are either trying to freeze time or to encourage specific bacteria to proliferate and crowd out harmful bacteria. Canning is all about freezing time.

Canning is one of those things that seems intimidating at first, especially with all the warnings about spoiled food and the unfamiliar terminology used with many canning recipes. But I promise, it gets easier the more you do it!

Water-bath canning

Water-bath canning—also called “boiling water bath”— is basically a big pot with a lid and a rack in the bottom. This easier method of canning that is used for high-acid foods (like many fruits), which naturally resist bacteria growth. By processing jars in boiling water at the end of the recipe, you lock in the fresh flavor for a full year.

  • Sanitize your jars. After washing them with water and soap, place the canning rack in your stock pot and put the jars on the rack. Fill about two inches, and bring it to a boil. Leave boiling for 15 minutes. Wipe everything with a clean towel.
  • Wash your desired fruit.
  • Prepare bowls of water. Bring several cups of water to boil in your kettle. Pour the boiling water into one of your large bowls. Fill the other with cold water.
  •  Dip each fruit into the hot bowl. Let them sit for 30-60 seconds. Use a slotted spoon to avoid burning yourself.
  • Dunk each fruit in cold water. Let it sit for around 30 seconds and then remove its skin.
  • Cut your fruit. Using a cutting board and take your knife to slice them in any desired size.
  • Carefully remove each jar from the boiling water bath. Use the jar lifter to grasp firmly around the narrowest part.Place each jar open-side down on a clean towel to avoid contamination while you work.
  •  Boil another kettle full of water.
  • Boil the water in the pot. Remove your lids and bands from the large stock pot if you haven’t already done so, and bring the water within back up to a rolling boil.
  • Boil the water in the pot. Remove your lids and bands from the large stock pot if you haven’t already done so, and bring the water within back up to a rolling boil.
  • Flip the jars right-side up. Add ¼ teaspoon of citric acid or one tablespoon of bottled lemon juice to each jar. Then, using your funnel, fill each jar with sliced fruit. Leave at least half an inch of space at the top of each jar.
  •  Pour boiling water from the kettle into each jar. You may need to poke around with a narrow spatula to get rid of air pockets. Wipe the rim of each jar.
  • Seal the jars. Carefully place a flat lid on top of each jar, making sure to line up their edges. Screw a band onto each, but not too tight.

Pressure canning

Pressure canning involves the use of a pressure canner, which is a device that consists of a large pot, a rack insert, and a fitted lid with a dial or pressure valve. Pressure canning is the only safe method of preserving low-acid foods. Low-acid foods include vegetables, meats, fish, and poultry. Pressurized steam creates the needed temperature of 240 degrees Fahrenheit or higher that kills off any harmful bacteria, toxins, molds and yeasts. As the jars cool, a vacuum is formed, sealing the food in the jars and preventing any new microorganisms from entering and spoiling the food. 

  • Put three inches of hot water in the pressure canner. Place filled jars on the rack in canner and secure lid as directed by canner manufacturer.
  • Leave vent port off, turn heat to highest setting and heat canner until steam flows from the vent port.
  • Once steam pours steadily from the vent, let it escape for 10 minutes to drive air out of canner.
  • Place weight on vent port and allow canner to raise to the proper pressure.
  • Start counting processing times once the dial gauge or weighted gauge has reached the recommended pressure (see manufacturer’s directions).
  • Regulate heat to maintain steady pressure. If reading decreases from the recommended pressure, bring pressure back up and start timing process again.
  • When timed processing is complete, turn off heat and wait until canner returns to zero on a dial gauge and 30 to 45 minutes for weighted gauge (see manufacturer’s directions).
  • Remove jars with a jar lifter and place on a towel or cooling rack.
  • Leave jars on the counter, undisturbed for 12 to 24 hours. 
  • After cooling, check that all lids have properly sealed.
  • If a jar has not sealed, the contents can be reprocessed according to recipe directions or the jar must be refrigerated and eaten immediately.

Using Butter Powder for Daily Cooking & Emergency Prep – Survival Mom — The Right News

Some of the links in this post may contain affiliate links for your convenience. As an Amazon associate I earn from qualifying purchases. Most food storage products purchased from food storage companies are pretty much the same all across the board. Foods like wheat and freeze-fried fruit are all very similar no matter what brand you […]

Using Butter Powder for Daily Cooking & Emergency Prep – Survival Mom — The Right News

Doomsday and The End of Days Approaching

Doomsday, end of times, end of days. Call it what you will, but as Christians, we look forward to it.

Why?

Because it means Jesus is coming to save us.

He’ll rescue us from this scorched Earth and we’ll ascend into Heaven, to live out our days together with God.

And to be honest, it may be closer than you think.

Geopolitical tensions are rising with the threat of Russia’s invasion.

Food shortages are affecting modern America as well as third-world Africa.

And you only have to look at the Capitol Hill riots to see how easy a civil war could break out.

So let me ask you this:

How will you protect your family from this chaos?

Because of the rise into Heaven with Jesus, we must first survive the end days. Only then will He take us to The Promised Land.

Does that mean living on tinned rations in underground bunkers? Or sleeping with an AK47 under your pillow? I don’t believe so.

All you actually need is a simple, homemade device crafted from parts you can pick up for pennies on the dollar.

It’s likely you even have most of them sitting in your kitchen drawers already!

This video presentation reveals exactly how to survive after the fall and thrive.

And in my opinion, that’s essential to make it through alive, ready, and waiting to rise into Heaven with Our Lord Jesus Christ.

Members of my flock, rest assured, this new survival revelation comes with my divine blessing.

I hope you heed my advice and you’re ready for when He comes.

I’m all set, are you?

Defend your family, and rise with Jesus