Arizona Homestead Lifestyle: A Survivalist’s Manifesto

Listen up, because I’m not going to sugarcoat this. If you’re thinking about homesteading in Arizona, you better be ready to fight. Not with fists, not with firearms—though you’d damn well better know how to use both—but with grit, sweat, and a raw-boned kind of determination most folks nowadays don’t have the spine for. This isn’t some Instagram-filtered fantasy where you prance around in a straw hat and harvest peaches. This is Arizona. The sun will try to kill you. The land doesn’t care if you live or die. And the government? They’ll either tax you into the dirt or regulate your freedom to death.

But I’m not here to coddle. I’m here to tell you what it takes to thrive.


The Arizona Advantage (and Curse)

Arizona’s got a brutal beauty. It’s dry, hot, and unforgiving—like a rattlesnake that doesn’t warn before it strikes. But it also means low humidity, long growing seasons (if you’re smart), and enough land still available to carve out something real. You can live free here—if you’re ready to work harder than most people have ever dreamed.

Water is the lifeblood out here, and it’s scarce. If you can’t figure out how to manage water, you’re screwed. I don’t care how nice your cabin is or how many solar panels you slap on the roof. If you can’t hydrate your land and your livestock, you’re done before you start.

So you want to live the homestead lifestyle in Arizona? Here’s what you must learn, do, and never forget.


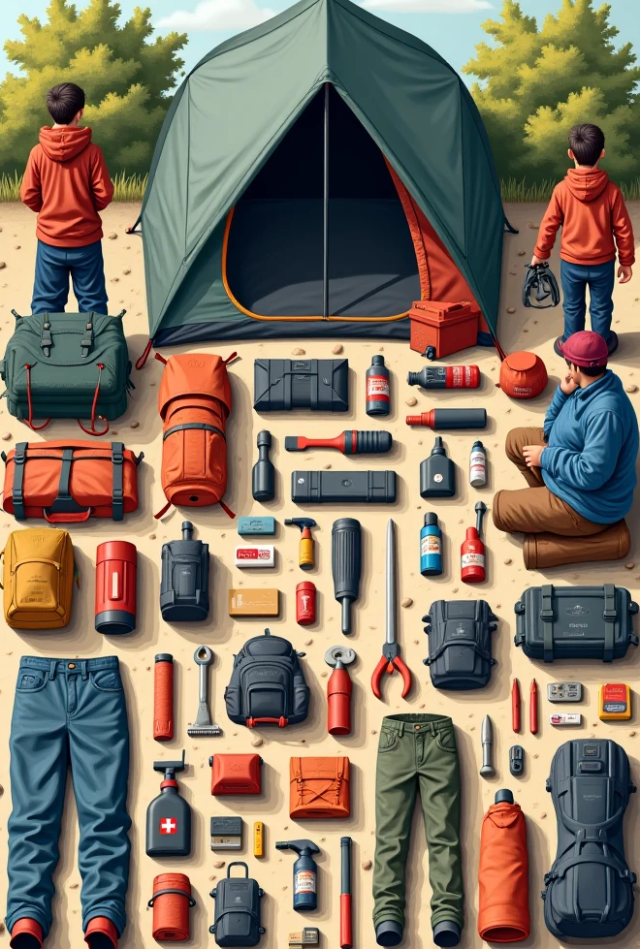
15 Essential Homestead Skills for Arizona Survivalists

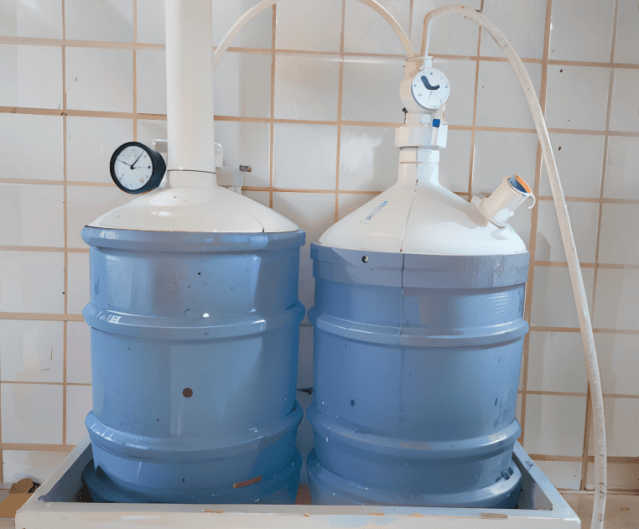
  1. Rainwater Harvesting – Capture every damn drop. Set up barrels, gutters, underground cisterns—whatever it takes. It’s legal in Arizona, so use it to your advantage before that changes.
  2. Drip Irrigation Systems – Wasting water in Arizona is idiocy. Learn to run a drip system from rainwater catchment. Mulch deep. Keep that ground moist or your crops will die screaming.
  3. Solar Power Setup and Maintenance – The sun’s brutal, but it’s also your best friend. Invest in a solid off-grid solar system and understand how to maintain it yourself. No excuses.
  4. Desert Gardening – You’re not in Kansas. Learn what grows here: mesquite, prickly pear, tepary beans, amaranth. Native, drought-resistant, calorie-dense crops are your lifeline.
  5. Canning and Food Preservation – When harvest comes, it all comes fast. You better know how to can, dehydrate, smoke, and root cellar or you’ll rot right along with your veggies.
  6. Animal Husbandry – Goats, chickens, rabbits. These are your protein producers. Know how to breed, butcher, and keep them alive when the temps hit 110.
  7. Butchering and Processing Meat – No, the store isn’t coming to save you. You better know how to skin, gut, and preserve meat or you’ll be wasting life—and lunch.
  8. Composting and Soil Building – Arizona dirt is garbage. You’ll need to turn it into something alive. Compost every scrap, use worms, and know how to read soil like a book.
  9. Firearm Handling and Marksmanship – It’s not just your right—it’s your responsibility. Predators, trespassers, and two-legged varmints don’t wait for a call to the sheriff.
  10. Basic First Aid and Herbal Remedies – Closest hospital might be 50 miles away. Know how to stitch a wound, set a bone, and use wild herbs to stop bleeding or cure infection.
  11. Blacksmithing and Tool Repair – When things break (and they will), you need to fix them. Weld. Sharpen. Forge. Don’t be a tool-less fool.
  12. Cob and Adobe Construction – You don’t need fancy lumber when you’ve got dirt. Learn how to build with cob, adobe, and earthbags. Cool in the summer, warm in the winter.
  13. Barter and Trade Skills – In a real crisis, cash is trash. Skills and goods matter. Learn how to trade like your life depends on it—because it might.
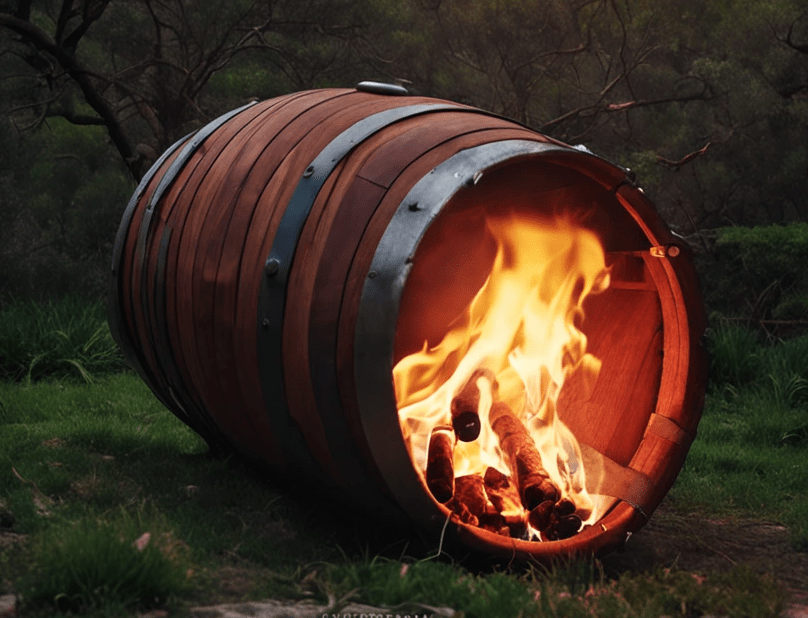
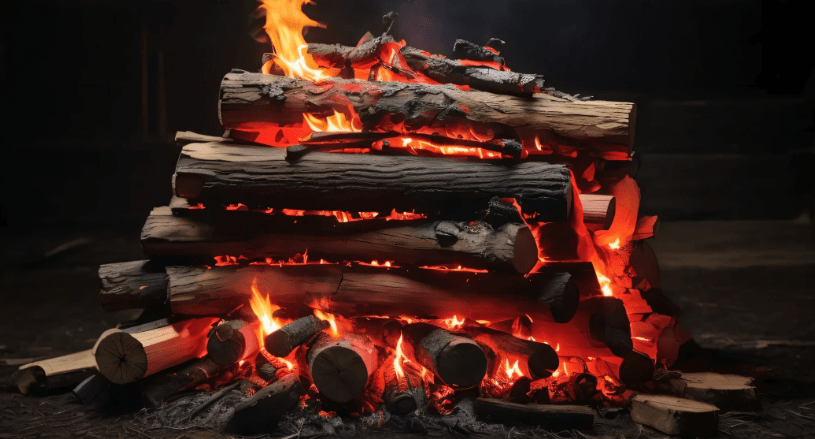
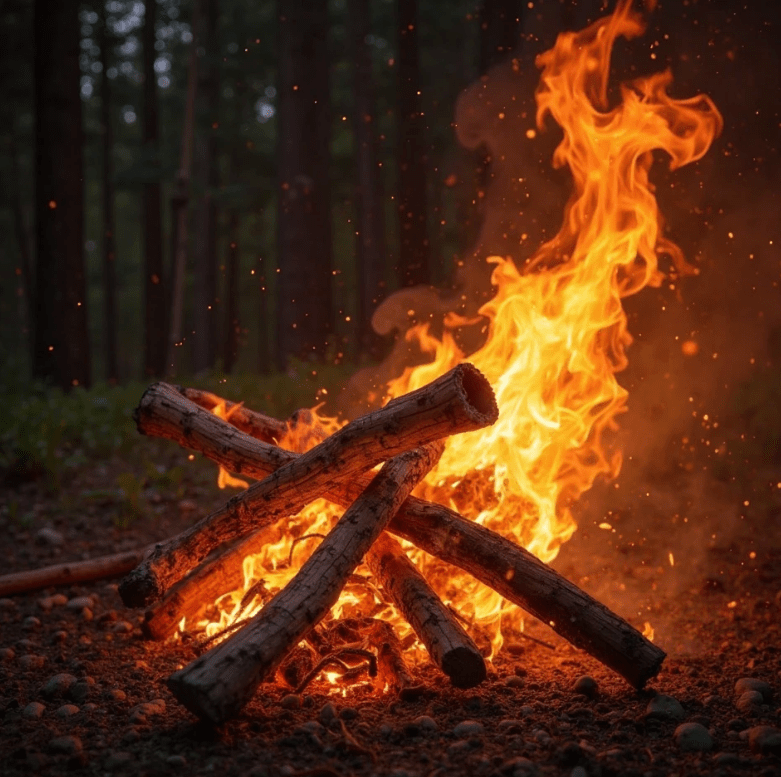
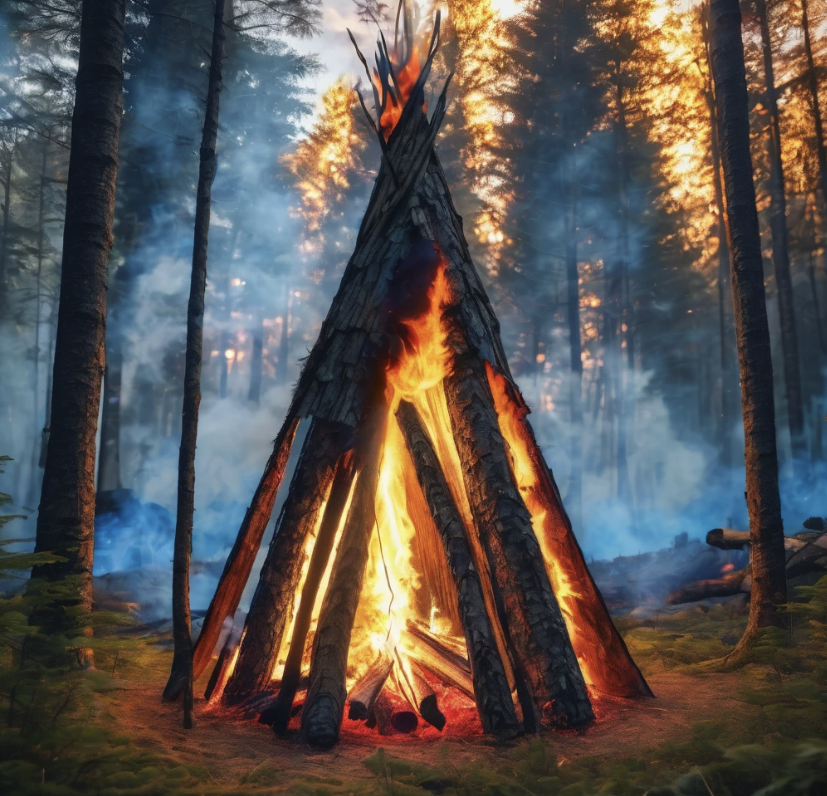
  14. Fuel and Wood Harvesting – Even in desert country, you’ll need fire. Learn where and how to gather wood legally and efficiently. Mesquite and juniper are your friends.
  15. Homeschooling and Self-Education – If you’ve got kids, it’s your job to raise ‘em smart and tough. Teach them truth, math, and survival—not the state’s propaganda.

3 DIY Homestead Hacks (Because Clever Beats Rich)

  1. Evaporative Cooling Jug Fridge (Zeer Pot)
    In Arizona heat, keeping food from spoiling is critical. Build a zeer pot with two unglazed clay pots (one inside the other), fill the gap with wet sand, and cover it with a wet cloth. Place it in a shady, breezy spot. It’ll drop temps by 20-30°F—no electricity required.
  2. Rocket Stove From Scrap Metal
    Stop relying on propane. Build a rocket stove from leftover metal piping or bricks. Efficient as hell, burns twigs, and can cook a full meal or boil water without wasting fuel. Great for backup or everyday use.
  3. Wicking Beds From Old Tubs or Troughs
    Use a busted bathtub, livestock trough, or even a plastic tote. Line it, fill with gravel, lay a perforated pipe, and top with soil. Water from the bottom up—it saves tons of water and keeps plants hydrated longer.

Final Warning and Encouragement (Yeah, I’m Contradictory—Get Used to It)

If you think you’ll “try” homesteading in Arizona, don’t bother. This ain’t a try thing. This is all-in, bleed-and-sweat, die-if-you-quit living. Your neighbors will either be tough as rawhide or totally useless. Pick your friends like you pick your firearms: reliable, rugged, and ready when needed.

But here’s the hard truth: there is nothing—I mean nothing—more rewarding than taking your independence back from a system that wants you docile and desperate. Every chicken egg you gather, every tomato you can, every gallon of water you pull from the sky is a middle finger to the technocratic parasites who want you enslaved to convenience.

Homesteading in Arizona is war. A war against the elements, the calendar, the consumer lifestyle, and the lie that you can’t survive without the system.

Well guess what?

You can.

And if you’re crazy, stubborn, and hungry enough—you will.

Welcome to the fight. Welcome to the land. Welcome to the life.

Let the desert burn away what’s weak. What’s left? That’s your real self.

Live hard. Homestead harder.

The Ultimate EDC Checklist: Are These Key Items in Your Kit?

Imagine this scenario for a moment—you’re heading out the door, running errands, or even just walking to the mailbox. Everything seems perfectly normal. Then, suddenly, the unexpected happens. A power outage. A car breakdown. An emergency situation where you need to think on your feet and act fast.

Now, ask yourself: Are you really prepared for the unexpected?

Most people go about their day with the bare minimum in their pockets or bags: a wallet, a smartphone, and a set of keys. But what if that wasn’t enough? What if you could make a few small changes to your everyday carry (EDC) that could help you in a survival situation or simply make life a little easier?

It’s time to think beyond the basics and upgrade your EDC. When disaster strikes—whether it’s a natural disaster, power outage, or even just an unexpected situation—you’ll want to be as prepared as possible. With the right EDC, you can navigate these events with confidence, without being caught off guard.

Let’s go over the crucial items every survivalist should have in their everyday carry kit. These tools could very well be the difference between surviving and being caught unprepared.

1) Multi-tool

A multi-tool is perhaps the most essential item in your EDC. This versatile tool is your Swiss Army knife for modern-day survival. From knives and screwdrivers to bottle openers and pliers, a quality multi-tool will serve you in nearly any situation. Whether you’re fixing a broken item, opening a package, or handling an unexpected repair on the go, having a multi-tool at your disposal is invaluable.

Survival Prepper Tip: Choose a multi-tool that’s compact, durable, and easy to carry. Look for one that includes a knife, scissors, pliers, and a few screwdrivers. Don’t forget about the weight – you want something that’s easy to carry without weighing you down.

2) Flashlight

When the lights go out, a flashlight is your best friend. Whether you’re facing a power outage at home, navigating through a dark area, or even just trying to find something in a poorly lit space, a flashlight is a must-have in your EDC. Opt for a small, durable, and powerful flashlight that can be easily carried in your bag or pocket. There’s nothing worse than fumbling around in the dark when you need light the most.

Survival Prepper Tip: Look for a flashlight that uses rechargeable batteries, which can save you money in the long run. Solar-powered models are an excellent choice for preppers who want a sustainable option. Always have spare batteries in your kit as well.

3) Fire Starter

When you’re caught in a situation where you need warmth, cooking, or a signal for help, a reliable fire starter can be a game-changer. A Ferro rod fire starter is compact and easy to carry, and it’s capable of igniting a fire even in wet conditions. You never know when you might need to create a fire to cook food, stay warm, or send out an emergency signal. Fire is also essential for purification, whether you’re boiling water for drinking or disinfecting something.

Survival Prepper Tip: Practice using your fire starter before you need it. The last thing you want is to struggle with it during an emergency. Keep a few fire-starting supplies, like cotton balls soaked in petroleum jelly or tinder, in your kit for easy ignition.

4) Water Bottle

Water is life, and in any survival scenario, access to clean drinking water is critical. Carrying a durable, reusable water bottle ensures you’re never without hydration when you need it. Additionally, a high-quality water bottle with a built-in filter can help you purify water from lakes, streams, or questionable sources. Having access to clean water is a fundamental survival skill, and carrying it with you makes it a part of your everyday readiness.

Survival Prepper Tip: Choose a stainless steel or BPA-free plastic water bottle. If you’re worried about contamination, consider one with a built-in filtration system. This ensures you can purify water from a variety of sources in the wild.

5) First Aid Kit

When you’re in a survival situation, injuries can happen fast—whether it’s a cut, burn, sprain, or something more serious. A small but well-stocked first aid kit is essential in your EDC. You should be able to address minor injuries and have supplies for more serious situations, like infection prevention or wound care.

Survival Prepper Tip: At the very least, your first aid kit should include antiseptic wipes, bandages, gauze, medical tape, tweezers, pain relievers, and any personal medications. Don’t forget to include an emergency whistle, as it can help you signal for help if you need it.

6) Paracord

Paracord is one of those items that you’ll be glad you packed, even though you might never need it. However, when you do, you’ll be amazed at its versatility. From building shelter, tying down gear, making repairs, to even using it for fire-starting (by stripping it), paracord is a survivalist’s go-to utility tool. Keep at least 10 feet of it in your EDC kit.

Survival Prepper Tip: Choose a high-quality, 550-paracord with a higher tensile strength. It should be durable enough to withstand harsh conditions. If possible, look for a paracord bracelet, so you have it easily accessible.

7) Survival Blanket (Mylar Blanket)

A Mylar survival blanket, also known as a space blanket, is a must-have in your EDC. It’s small, lightweight, and helps retain body heat in extreme temperatures. It can also be used as a reflective signaling device in emergencies. These blankets are an essential part of your kit because they protect you from hypothermia and other weather-related dangers.

Survival Prepper Tip: The reflective nature of Mylar blankets makes them ideal for signaling. Use them in survival situations to attract attention from rescuers. Consider carrying a small survival shelter or poncho for added protection.

8) Knife

A high-quality, folding pocket knife is essential for your EDC. From preparing food to cutting rope, a sharp knife can help you handle multiple survival tasks. Choose a compact, easy-to-carry knife that is capable of handling heavy-duty tasks. Make sure the blade is durable, and the handle is comfortable to grip.

Survival Prepper Tip: When selecting a knife, consider the lock mechanism for safety. Always sharpen your blade and check for rust to maintain optimal performance.

9) Compact Tool Kit

While a multi-tool is great, sometimes you need specialized tools for specific tasks. A small, compact tool kit with essentials like a small wrench, pliers, or even a screwdriver set can be a lifesaver. This can help you with repairs or minor fixes during your day-to-day life or in emergency situations.

Survival Prepper Tip: A lightweight, minimal tool kit with just a few essential tools will help you make repairs on the go without adding unnecessary bulk to your kit.

10) Tactical Pen

A tactical pen is another item that can be part of your EDC kit without drawing attention. While it functions as a regular pen, it also serves as a self-defense weapon, glass breaker, and even a tool for small repairs. It’s an inconspicuous but practical addition to your gear, and it could come in handy in a wide variety of scenarios.

Survival Prepper Tip: Choose a tactical pen made of heavy-duty materials, like aluminum or titanium, so it can withstand rugged use. Ensure it also has a reliable writing mechanism to make it functional as a regular pen.


Final Thoughts:

In a survival situation, your ability to adapt, improvise, and make use of the resources at hand is what will keep you alive. Your EDC is more than just a collection of random items. It’s a critical component of your overall preparedness strategy. The key to an effective EDC is to make sure you have the tools that you need to handle unexpected situations, whether that’s a minor inconvenience or a full-blown emergency.

By having these items in your kit, you’re setting yourself up for success. Keep refining your gear, add more items as necessary, and always stay alert. The world is unpredictable, but with the right tools in your pocket, you’ll be ready for whatever comes your way.

Survival Prepper Tip: Regularly review your EDC kit. Seasons change, your needs evolve, and new gear becomes available. Keeping your kit up to date will ensure that you’re always ready for whatever life throws your way.

The Wifi Trap: What Most Preppers Overlook When SHTF

As preppers, we’re always thinking about the “what ifs” — what if the power grid goes down? What if food becomes scarce? What if our security is compromised? But one thing that often gets overlooked in prepping is how we handle something as common as wifi when SHTF (Sh*t Hits The Fan).

Sure, most of us are used to having wifi at our fingertips. It’s something we take for granted in our daily lives, whether we’re at home, at a café, or even traveling. But when disaster strikes—whether it’s a natural disaster, an EMP, or some form of societal collapse—the wifi we rely on can become a huge liability.

Think about it: every time a major storm hits or an earthquake shakes things up, what happens? The power grid goes down, cell towers collapse, and suddenly, we’re cut off from the world. The internet disappears. But if you’re a prepper, you’ve probably planned ahead. You’ve got your own generator, and maybe even a backup power source for your wifi. You’re sitting pretty, right?

Well, not quite.


The Dangerous Wifi Mistake Most People Make

The truth is, while having wifi during a crisis can be a blessing—it can also make you a target. When you’ve got a working wifi signal in an otherwise digitally dead area, you’re sending out a beacon. A signal to anyone with a device searching for a connection. And when people are desperate—whether it’s for information, communication, or resources—they’ll stop at nothing to get to you. That includes the possibility of using force.

Picture this: a massive power outage or grid failure. You’re sitting in your home with your backup generator, using your wifi to access essential information or stay in touch with other preppers. But that signal, that tiny little wave bouncing off your router, is broadcasting to anyone nearby. And when resources are scarce, there are plenty of people who would be willing to do whatever it takes—perhaps even storm your house or break into your perimeter—to steal those resources.

This is a situation we must be prepared for. If you’ve got wifi set up for a SHTF scenario, there are a few things you need to understand to stay safe.


Reducing Your Wifi Range: A Smart Strategy

What’s the solution? Do we simply throw our routers out the window during a power outage? Of course not. But there are steps you can take to ensure your wifi doesn’t make you an easy target in an already dangerous situation.

One way to protect yourself is by reducing the range of your wifi signal. Most modern wifi routers allow you to adjust the power output—basically controlling how far your signal reaches. By lowering the power, you can restrict your wifi’s range and make it much less noticeable to anyone outside your immediate vicinity.

This is a smart strategy for preppers who don’t want to broadcast their presence to the wrong people.

Tip #1: Most wifi routers allow you to control the transmit power. Check your router’s settings and adjust the power output. You’ll want to reduce it to a level where only those inside your home or immediate property can access the signal.

Tip #2: Always refer to your router’s manual or interface to make sure you’re adjusting the correct settings. Each router model is different, but most will have an option to control the signal strength or transmit power.


How to Hide Your Wifi with Physical Barriers

Now, let’s say you’re not tech-savvy or don’t want to mess with your router settings. There’s another simple method you can use: physical barriers. You can reduce the range of your wifi signal by surrounding your router with dense materials like concrete or stones.

Think about it: wifi signals can only travel through certain materials. Concrete, metal, and stone are excellent at blocking signals. By placing your router in a space surrounded by these materials, you’re naturally limiting the range without having to adjust any settings. For example, if you have a basement or a sturdy, windowless room in your house, that could serve as a great space to keep your router safe.

Tip #3: A simple and effective method is placing your router in a room with thick concrete walls or a storage area made of dense materials. This will help shield the signal from reaching the outside world.


Prepping for Emergencies Beyond the Basics

As a prepper, it’s crucial to think outside the box, especially when you’re facing an unprecedented situation. Most people think of wifi as a convenience, not as a potential vulnerability. But in an emergency, your technology can become both a tool and a liability. The key is to adapt.

Tip #4: Don’t just prep for short-term scenarios. Plan for long-term sustainability. A few days without the grid is one thing; surviving for months or even years is something entirely different.


The Importance of Digital Security

Just as you would lock your doors and secure your home, you need to protect your digital space. In the chaos following a major disaster, people might go to extreme lengths to obtain your resources. You need to be aware of how much you’re broadcasting. This goes beyond just wifi—think about all the digital signals your devices are sending out. Cell phones, radios, and even Bluetooth can be tracked or intercepted if you aren’t careful.

Tip #5: Turn off Bluetooth, GPS, and Wi-Fi on devices when not in use. The fewer signals you send out, the less chance you’ll attract attention from those looking to exploit your resources.


Additional Wifi Safety Measures

Another smart move is to create a network that’s encrypted and secure. In a post-collapse world, information is power, and anyone who can hack into your system will have a major advantage. Set up a VPN (Virtual Private Network) to protect your online communications and data.

Tip #6: Always use a VPN on your devices. It encrypts your online activity and adds an extra layer of security when accessing the internet in a crisis.


Know Your Neighbors (But Keep Your Distance)

If you’re living in a close-knit neighborhood, don’t underestimate the value of knowing who is nearby. The stronger your community connections, the better prepared you’ll be to handle any situation. But even within a close community, you need to remain vigilant. Trust is built, not given.

Tip #7: Form a prepper group with trusted neighbors, but always remain cautious about who you allow into your circle. Trust, but verify.


Redundancy is Key to Prepper Success

While you’re reducing your wifi signal and securing your digital footprint, remember that redundancy is critical. You can’t rely on a single system. A backup communications plan is necessary, whether it’s a two-way radio or even an old-fashioned CB.

Tip #8: Invest in walkie-talkies or ham radios for backup communication in case the internet and cell towers fail completely.


Stay One Step Ahead

At the end of the day, the goal is to stay one step ahead of the game. By taking these simple but effective precautions, you reduce your exposure and keep your home from becoming a target when the chips go down.

Tip #9: Be proactive, not reactive. Anticipate problems before they occur, and stay prepared for any scenario that may unfold.


Conclusion: A Tactical Approach to Wifi in a Crisis

When SHTF, you’re going to face a whole new set of challenges. Wifi may be a tool, but it can also be a dangerous liability if you don’t handle it right. From adjusting power settings to using physical barriers, there are simple and effective ways to reduce the range of your wifi signal and avoid drawing attention to yourself.

Tip #10: Continuously reassess your preparedness plan. Emergencies evolve, and your prepping must evolve with them.

By being aware of the wifi mistake that many preppers overlook, you’re one step closer to ensuring that your home remains secure—and that you’re truly ready when the chips go down.

From Spark to Flame: 10 Essential Fire Starting Techniques

You think you’re ready for the collapse? You think those fancy gadgets and your YouTube education are going to save you when the grid goes dark, the food trucks stop rolling, and the weak start begging for warmth? Think again. Fire is life, and if you can’t conjure a flame out of cold dirt and sweat, you’re just another statistic waiting to happen.

Let me tell you something that’ll stick: Mastering fire isn’t optional. It’s mandatory. It’s the backbone of any real survival setup. You can’t purify water, cook food, stay warm, fend off predators, or signal for rescue without it.

So strap in, sit down, and shut up. This is the only fire-starting lesson you’re getting before the world chews you up.


🔥 10 Essential Fire Starting Techniques

1. Ferro Rod and Striker

This ain’t your grandpa’s Bic lighter. A ferrocerium rod throws sparks hot enough to melt steel—5,500°F. Pair it with a carbon steel striker or the back of your knife and aim for a decent tinder bundle. It’s weatherproof, idiot-proof, and guaranteed to work if you know how to use it.

Survival Skill #1: Know your ferro rod angles. 45-degree strike, consistent pressure, and keep that wrist steady.

2. Flint and Steel

Older than your bloodline and twice as reliable. Strike steel against flint to shower sparks onto char cloth or dry fungus. This is old-world firecraft, and if you can’t manage it, you’re not ready.

Survival Skill #2: Make char cloth at home using cotton scraps and an Altoids tin. If you can’t DIY that, go home.

3. Bow Drill

Yeah, it’s primitive. Yeah, it’s hard. But when your gear fails and your pack’s lost, this baby will still save your skin. You need spindle, hearthboard, bow, and bearing block. No room for weakness or laziness here.

Survival Skill #3: Learn wood types—poplar spindle, cedar board. Get it wrong and you’ll smoke without fire.

4. Fire Plough

Rub a softwood stick into a groove on a hardwood base. Friction builds. Ember forms. Labor-intensive? Hell yes. But in a survival pinch, it’s a lifesaver.

Survival Skill #4: Endurance. If your arms quit, so do you. Keep grinding.

5. Magnesium Block

Scrape off magnesium shavings, then hit it with a spark. It burns hotter than your ex’s temper. Windproof. Wet-proof. Apocalypse-proof.

Survival Skill #5: Always scrape into a pile. Don’t scatter like a fool.

6. Solar Fire (Magnifying Glass or Fresnel Lens)

Use the sun like the burning eye of judgment. Focus that beam onto dry tinder and wait. It’s clean, silent, and free—just like you should be.

Survival Skill #6: Understand sunlight angles. No sun? No dice. Back it up with other methods.

7. Battery and Steel Wool

Touch steel wool to both battery terminals and watch it ignite. Fast and furious. 9-volt works best, but AA will do in a pinch.

Survival Skill #7: Keep steel wool in a Ziploc. Moisture kills this method dead.

8. Lighter

Yeah, I said it. Carry a damn Bic. But don’t trust it. Lighters break. They leak. They lie. But as a backup, it’s a must.

Survival Skill #8: Refillable Zippos are better in the long haul. Learn to repack the cotton and replace the flint.

9. Matches (Stormproof Preferred)

Stockpile the good ones. Dip regular matches in wax for homemade stormproofing. Keep them dry, sealed, and accessible.

Survival Skill #9: Know how to strike with frozen fingers. Practice in the cold.

10. Fire Piston

Science meets caveman. Rapid air compression ignites char cloth in a sealed piston. It’s exotic, but efficient. Just don’t be the idiot who loses the O-ring.

Survival Skill #10: Practice piston technique. This tool punishes the clumsy.


🛠️ 3 DIY Survival Fire Hacks

Hack #1: Vaseline Cotton Balls

Cotton balls soaked in petroleum jelly. Stuff them in an old film canister or pill bottle. Light one spark and you’ve got a 10-minute firestarter. Cheap, lightweight, and rainproof.

Hack #2: Egg Carton Fire Bombs

Take a cardboard egg carton, fill each cup with dryer lint or sawdust, pour in melted wax. When cool, rip off a section and light it. Better than commercial cubes, and made from trash.

Hack #3: Crayon Candles

Out of candles? Break out the kid’s art kit. A single crayon burns 15–30 minutes. Stack three and wrap in foil with a wick, and boom—emergency heat source.


🔥 Why Fire Is Your First and Last Line of Defense

Let me be brutally clear: fire is the only thing between you and death in a real collapse. If you can’t start a fire in 60 seconds under pressure, cold rain, and exhaustion, you’re not a survivor—you’re a liability.

Think the government will save you? That your neighbors will share? That your bug-out bag will somehow work itself? Wake up. The wild doesn’t care. Fire does.

Fire signals to rescue. Fire sterilizes your water. Fire cooks the bacteria out of squirrel meat. Fire scares off predators—man and beast. Fire gives you light when the dark swallows everything.


💥 Final Warning from the Edge

You don’t rise to the occasion. You fall to your level of training. The time to practice isn’t when your fingers are numb and your lungs are wheezing from panic. It’s right now—before the grid fails, before the looters roam, before the cold comes creeping.

Master these 10 techniques like your life depends on it—because it does. Load your bag with the right tools. Memorize the hacks. Drill the skills until they’re muscle memory.

If you’re not building fires weekly, you’re playing with fantasy, not prepping for reality. Don’t be the guy with the $300 knife and no clue how to make a coal.

Get angry. Get obsessed. Get ready.

Clear to the Last Drop: Mastering Water Purification Methods

Listen up, because I’m only going to say this once—your cushy modern lifestyle has made you soft, blind, and dangerously dependent on a system that’s teetering on the brink of collapse. You think that faucet will always spit out clean water? You think bottled water will save you when the trucks stop rolling? Wake the hell up. When the grid goes down, the shelves empty out, and the government forgets your ZIP code, the only water you’ll have is the water you can purify yourself. You better learn how to turn sludge into salvation—now. Not next week. Not when you’re already thirsty. Now.

Why Water Matters More Than You Realize

You can survive three weeks without food. But without water? Three days, maybe less if it’s hot and you’re exerting yourself. And no, guzzling from a river isn’t going to cut it unless you want your insides turned into a parasitic amusement park. Giardia, cryptosporidium, E. coli, cholera—you ever heard of them? If you haven’t, you will… when they’re drilling holes in your guts and you’re writhing in the dirt, praying to a sky that doesn’t give a damn.

Let’s fix that ignorance right now. I’m going to teach you how to purify water like your life depends on it—because it does.


10 Survival Skills to Purify Water When the World Goes to Hell

1. Boiling

Boiling is your first line of defense. Build a damn fire and get that water rolling. A good three to five minutes at a hard boil will kill most of the microscopic hellspawn. At higher altitudes? Boil longer. Firewood’s free if you’re willing to sweat for it.

2. Solar Disinfection (SODIS)

Fill a clear plastic bottle with water. Shake it to aerate, then lay it in direct sunlight for six hours—longer if it’s cloudy. UV-A radiation and heat will kill a lot of the bacteria. Is it perfect? No. But it’s better than drinking raw creek juice.

3. DIY Charcoal Filter

Layer gravel, sand, and activated charcoal in a bottle or hollow log. Pour your water through it. This won’t kill pathogens, but it’ll remove particulates and improve taste before you boil or disinfect chemically. Think of it as a pre-wash before you hit it with the heavy stuff.

4. Chemical Treatment (Iodine or Chlorine)

Carry iodine tablets or unscented household bleach. 2 drops of bleach per liter of water. Let it sit for 30 minutes. Taste the bleach? Good. That means it’s working. No bleach? Learn how to make it from salt and a car battery. (That’s a skill for another day.)

5. Distillation

Boiling water into steam and collecting the condensation will leave most nasties behind—including heavy metals and salts. Use a metal pot, tubing, and a collection vessel. Even seawater becomes drinkable. It’s slow, but it’s clean.

6. Pump Filters

There are portable survival filters out there with ceramic or carbon cartridges. They’re solid. If you can buy one, do it. But remember—they clog, they break, and replacement parts are rare when society tanks. Know how to clean and maintain them.

7. Improvised Evaporation Still

Dig a pit, put a container in the middle, and cover the pit with plastic. Put a pebble in the center to make the plastic dip. As water evaporates, it condenses and drips into the container. It’s not fast, but it’ll save your hide in arid hellscapes.

8. Tree Transpiration

Wrap a clear plastic bag around leafy branches. The tree will sweat out moisture, and it’ll collect in the bag. Bonus: It’s already distilled and safer than river water. Just don’t use toxic plants like poison oak or sumac, genius.

9. Snow and Ice Safety

Melt snow before you drink it. Never eat it raw—it lowers your core temperature and burns precious calories. Ice from moving water is safer than stagnant snowbanks. Don’t trust pristine looks. Mother Nature lies.

10. Rainwater Harvesting

Set up a tarp, metal sheeting, or even a poncho to channel rainwater into a container. Keep it covered. Birds crap mid-flight, and you don’t want that in your sip. Rain’s generally safe, but if you’re near factories or downwind of civilization, purify it anyway.


3 DIY Survival Hacks That’ll Make You Look Like a Water Wizard

Hack #1: The “Fire Bottle” Water Boiler

Got a metal water bottle? Good. Drop it into the edge of your campfire and let it boil. No pot required. Just don’t use aluminum—it’ll melt and leach into your water. Stainless steel is king. Pour it into another container or drink straight from it once cool.

Hack #2: Pine Needle Disinfection

Boil water with pine needles. Not only does it help kill bacteria, but pine contains vitamin C and mild antiseptic properties. It doesn’t replace proper purification, but it gives your water a fighting chance and a survivalist’s bouquet you’ll learn to love.

Hack #3: Bandana Pre-Filter

Before boiling or chemically treating, run water through a bandana or shirt to filter out sediment, bugs, and other nasty floaters. It won’t kill microbes, but it keeps your other gear from clogging and makes it easier to disinfect.


Gear Up or Shut Up

You want the easy route? Get a LifeStraw or Sawyer filter, iodine tablets, a stainless steel pot, and a solar still kit. But don’t just stash them in your bug-out bag and call it good. Use them. Practice in the woods, in your backyard, or on that next camping trip you always talk about but never take. Know how to improvise when the tools fail—because they will.


The Water Mindset

Screenshot

Every drop is precious. Learn to find it. Learn to protect it. Treat it like liquid gold. No one’s coming to save you, and thirst doesn’t wait for your Amazon order to arrive. Build a water strategy today—not tomorrow. Stockpile supplies. Practice techniques. Teach your kids. Tell your neighbors, or don’t—it’s up to you who lives when the tap runs dry.

I’m not here to sugarcoat or pat you on the back. I’m here to scream the truth into your face while you can still hear it.

Water is life. Learn how to keep it clean—or you won’t keep anything at all.

Caught to Survive: The Prepper’s Guide to Traps and Snares

Alright, listen up, because I’m only gonna say this once. If you’re dumb enough to think survival is just about stocking up on canned beans and pretending that’ll keep you alive when the world goes sideways, then this rant isn’t for you. Survival is about doing — using your brain, your hands, and yes, your grit — to catch what you can, snare what you need, and make it through whatever hellhole we find ourselves dropped into.

Welcome to Caught to Survive: The Prepper’s Guide to Traps and Snares — a no-BS blueprint for anyone who refuses to be just another dead body left behind when the grid goes dark. If you don’t know how to make a trap or a snare, you might as well start digging your grave now.


15 Survival Skills Every Prepper Should Master — Or Die Trying

1. Basic Knot Tying
If you don’t know a bowline from a granny knot, you’re already screwed. Traps and snares depend on strong, reliable knots. Practice until you can tie them blindfolded and with one hand tied behind your back.

2. Crafting Deadfall Traps
This ain’t your grandpa’s picnic. Knowing how to build a deadfall trap using logs and rocks can catch rabbits, squirrels, or whatever dumb critter walks into your line.

3. Snare Making
Wire snares are the backbone of stealth trapping. Know how to twist, set tension, and place snares where animals naturally run — otherwise, you’re wasting time.

4. Camouflage and Concealment
A trap that’s obvious gets disabled or avoided. Learn to hide your gear in plain sight with branches, leaves, or dirt. If your traps aren’t invisible, they’re useless.

5. Tracking Animal Behavior
Study animal trails, feeding spots, and habits. Set traps where animals will be, not where you wish they’d show up. If you’re just hoping for luck, you’ll be eating dirt.

6. Fire Starting Under Any Conditions
You’ll need fire to cook your catch, sterilize traps, and keep warm. Practice friction, flint, and modern methods until you can start a blaze in a rainstorm with nothing but grit.

7. Knotless Snares and Loop Placement
Sometimes animals are wary of wire loops with knots. Master creating smooth, sliding loops to increase your catch rate.

8. Butchering Small Game
Trapping isn’t just about capture — you’ve got to know how to clean and prepare your kill fast and sanitary. You’re not hunting dinner for fancy; you’re hunting survival.

9. Using Natural Materials for Traps
Wire might run out. Learn to use vines, strips of bark, and wood for snares and triggers.

10. Primitive Tools Making
Carve your own hooks, spears, and trap components from stone, bone, or wood. If you don’t have gear, make it. No excuses.

11. Emergency Shelter Building
Trapping is useless if you freeze to death. Know how to build shelters with minimal materials while you lay traps and prepare food.

12. Water Sourcing and Purification
Without water, you’re dead in 3 days. Find and purify water near your trap zones. Don’t poison your own food source with careless water mistakes.

13. First Aid for Trapping Injuries
Cut yourself setting a snare? Step on a rusty nail? Know basic first aid to keep infection from killing you.

14. Disguise Your Scent
Animals smell better than you think. Use mud, leaves, or natural scents to hide your human odor near trap lines.

15. Understanding Local Wildlife Laws and Ethics
Yeah, when society is functioning, respect the laws and the animals. But when survival’s on the line, knowing the legal boundaries beforehand saves you headaches later.


3 DIY Survival Hacks to Boost Your Trap and Snare Game

Hack #1: The “Tripwire Alarm”
Use a length of thin wire or strong cord connected to a can filled with rocks or anything noisy. Place it across a path where you expect an animal. When triggered, it alerts you without you having to stay glued to the trap all day. No more missing your catch because you were distracted or sleeping.

Hack #2: The “Improvised Spring Snare”
If you don’t have steel wire or springs, carve a Y-shaped flexible sapling branch. Attach a loop of vine or wire to the top and set the snare with the bent sapling tensioned. When the animal steps into the loop, the sapling snaps back, tightening the noose. It’s noisy but effective if you can’t get your hands on commercial gear.

Hack #3: The “Natural Glue Trap”
Mix pine resin with charcoal or crushed leaves to make a sticky, natural glue. Spread it on a flat surface or a small stick and place near bait. Small rodents get their paws stuck, making capture easier. It’s messy but works when you’re desperate and wire’s not an option.


Here’s Why This Matters — And Why You Should Be Mad Too

When disaster strikes, the entire system you rely on falls apart. Power? Gone. Grocery stores? Looted or empty. Police? Who knows. The only reliable source of food will be your hands and your wit. If you’re not trapping and snaring, you’re begging for scraps or starvation. And no one’s gonna hand you a sandwich when chaos rules the day.

Get angry. Get serious. This is not a game. Every second you waste scrolling your phone or buying more junk you don’t need, someone else is learning to survive without it. The animals don’t care about your excuses. If you can’t catch food, you die.

Traps and snares are the silent soldiers of survival — no loud guns, no wasting ammo, just pure skill and patience. They’re the tools that will keep your belly full when the world crumbles. Master them or prepare to be a statistic.


Final Warning: If You’re Not Willing to Get Dirty, Stay Home

Setting traps isn’t glamorous. It’s tedious, frustrating, and sometimes downright gross. You’ll get bitten by bugs, scratched by thorns, and spend hours just watching a snare you set. But that’s the price of survival — patience and resilience.

Get angry at the world for making survival necessary. Get angry at yourself for not preparing sooner. But channel that anger into action. Learn every skill, practice every hack, and build traps until they’re second nature.

Because when the grid goes dark and the streets fill with chaos, no one’s coming to save you. You’re on your own. And if you don’t catch to survive, you won’t.


There. Now stop whining and start doing. What do you want me to break down first — setting snares? Finding the best trap locations? Or maybe how to butcher a rabbit clean in under five minutes?

Built to Survive: Shelter Tactics Using Nature and Know-How

You think that store-bought tent is gonna save your sorry butt when the grid crashes? Think again. When the world turns upside-down—and trust me, it will—you better have more than a nylon cocoon and YouTube tutorials to protect you from Mother Nature’s full-blown wrath. If you’re not learning how to build your shelter from dirt, sticks, and brains, you’re not surviving—you’re delaying your expiration date.

Let me be blunt: your comfort zone is a kill zone. The wild doesn’t care about your feelings. The cold will strip the warmth from your bones like a butcher skinning a deer, and the rain will seep into your soul. Shelter isn’t optional—it’s survival Priority Number One right after you can breathe and not bleed out.

So listen up. You want to live? You better start learning like your life depends on it—because it does.


10 Survival Skills for Building Natural Shelters

1. Terrain Scouting

Don’t just plop down in a pretty clearing like some clueless city hiker. Learn to read the land. Avoid valleys where cold air pools and floods form. Stay clear of ridgelines where wind turns your tarp into a damn parachute. Pick elevated, flat ground near resources—but not too near water, unless you’re asking to be eaten alive by mosquitoes or flash-flooded into the afterlife.

2. Natural Windbreaks

Wind will suck the heat out of you faster than a thief in the night. Find natural windbreaks—thick brush, rock walls, or tree lines—or build your own using stacked logs, woven branches, or even your backpack if you’re desperate.

3. Insulation Gathering

Don’t build a shelter and sleep on bare earth like a fool. You need insulation—pine needles, leaves, moss, bark. Pile it thick—at least six inches—to keep ground chill from eating you alive. Better itchy than dead.

4. Framework Building

If you can’t build a solid frame, you’re gonna wake up with the roof on your chest or, worse, hypothermic. Learn to latch, lash, and lean. Use a basic A-frame or lean-to. No nails? No excuses. Use paracord, vines, inner bark strips—whatever it takes.

5. Water Runoff Management

Ever slept in a puddle? It’s a bad time. Angle your roof steep and make a trench around your shelter. Don’t be lazy unless you want rainwater spooning you at 2 a.m.

6. Camouflage Construction

Not every threat in the wild walks on four legs. Sometimes it walks on two—and it’s armed. Blend in. Use mud, foliage, bark. Don’t light up your shelter like a Vegas sign. Stay hidden, stay alive.

7. Fire Integration

Learn how to build a reflector wall to bounce fire heat into your shelter. And yeah, don’t set the damn place on fire. Keep flames at a safe distance, use a fire pit, and always have your fire on the windward side.

8. Moisture Barrier Creation

You want to stay dry? Layer bark and large leaves to create a water-resistant roof. Hell, you can even line the outside with trash bags if you’re lucky enough to find one. Smart survivors repurpose everything.

9. Emergency Cordage

Cordage isn’t a luxury—it’s a lifeline. If you didn’t bring paracord, shame on you. But you can make rope from inner tree bark (like basswood), dry grasses, or even plastic trash. Twist, braid, tie—it better hold your weight, or your broken leg will be the least of your problems.

10. Structural Adaptability

No two scenarios are the same. Snow cave in winter. Debris hut in the fall. Jungle platform in the wet season. Desert rock shelter when the sun’s trying to kill you. If you can’t adapt, nature’s going to crush you like a bug.


3 DIY Survival Hacks from a Realist, Not a Blogger

1. The Trash Tarp Trick

You ever find an old plastic sheet or trash bags in the woods? Jackpot. Stitch them together with thorny branches or tie with bark cordage to make a waterproof tarp. Reinforce the corners with stones or folded sticks. It’s ugly, but it keeps you dry—and that keeps you alive.

2. Pine Sap Glue

Need to stick something? Make glue. Heat pine sap over fire till it bubbles, mix with crushed charcoal and a bit of animal dung or powdered bark. Let it cool, and boom—you’ve got nature’s epoxy. Use it to patch holes, fix tools, even seal cracks in your shelter roof.

3. Bark Paneling

Got trees? You’ve got shelter walls. Use a sharp rock or knife to peel large bark sheets off dead trees (don’t kill healthy ones—you’re not a moron). Stack them like shingles, lash to your frame, and you’ve got windproof, semi-waterproof walls. Way better than freezing behind a blue tarp some weekend warrior left behind.


Hard Truth: You’re Not Ready

If your plan for “bugging out” includes a REI shopping spree and wishful thinking, you’re already dead. Gear fails. Batteries die. Comfort ends. You need knowledge that lives in your hands—not in your gear bag.

Start now. Practice in the woods. Sleep without your tent. Build with your hands, bleed a little, screw up, and fix it. Get your body and mind used to discomfort, cold, and exhaustion. Shelter building is dirty, it’s hard, and it’s necessary.

Don’t be the idiot who panics because their zipper broke or their app didn’t load. You want to survive? Learn to fight the cold, the rain, the wind—and your own softness.


Final Word

Shelter is more than a roof—it’s your battle line against the wild. If you can master nature’s tools, if you can build with sticks and instinct, you can endure damn near anything. But if you’re waiting for someone to come rescue you, you’re already part of the forest floor.

Get smart. Get skilled. Get angry enough to outlast anything. Because when it all goes down, it won’t be the richest, the strongest, or the best equipped who survive—it’ll be the ones who refused to die stupid.

So build like your life depends on it. Because one day, it just might.

Eat to Live: Mastering Edible Plant ID for Survival Scenarios

Eat to Live: Mastering Edible Plant ID for Survival Scenarios
By someone who’s fed up with your ignorance

Let me cut the crap right off the bat—if you’re reading this because you think “foraging” is some cute weekend hobby between lattes and scrolling on your damn phone, you’re already a liability. This isn’t about wildflower pics for your Instagram. This is about survival—pure, raw, unfiltered survival. The kind where if you screw up, you don’t get a second chance. You either eat or you rot.

When the grid collapses, the cities will become tombs. Your favorite Uber driver isn’t going to save you. Your “meal prep” skills won’t mean squat when the only thing on the menu is bark and berries. But here’s the truth: nature provides—if you know what you’re doing. And if you don’t, nature will kill you. Fast.

Survival Skill #1: Learn the Damn Plants

You better get good at plant ID, and I don’t mean glancing at some leafy green and guessing. I mean knowing the difference between Queen Anne’s Lace and poison hemlock. One feeds you, the other shuts down your respiratory system like a vise. Learn the leaf patterns. Smell the roots. Break the stems. Know the seasonal changes. If you can’t name five edible plants native to your area right now, you’re not ready. Period.

Survival Skill #2: Know the Universal Edibility Test

In a real survival scenario, you won’t always have your plant guides or phone apps. Use the Universal Edibility Test—but use it smart. Break the plant into parts: root, stem, leaves, flower. Test each part separately over hours. Rub it on your skin, then your lips, then your tongue. Wait. Swallow only if there’s no reaction. You think it’s tedious? So is dying from gut-wrenching poison.

Survival Skill #3: Track Seasonal Availability

Wild edibles aren’t available all year. You need to know when to harvest roots, which plants bloom in spring, and which weeds you can count on in winter. Chickweed, dandelion, wild garlic—they’re your allies if you’ve got the balls to pay attention.

DIY Survival Hack #1: Build a Pocket Herbarium

Forget your TikTok hacks. Get a damn notebook and start pressing specimens. Dry them, label them, annotate what parts are edible and when. Make your own field guide. That way when you’re freezing your ass off in some backwoods hole and stumble on a patch of greens, you don’t second-guess what could be your next meal.

Survival Skill #4: Understand Plant Look-Alikes

Mother Nature is a tricky bastard. Edible plants have toxic twins. Wild carrot vs. poison hemlock. Wild grape vs. moonseed. You mess that up, you’re not going to the ER—you’re going to the morgue. If you can’t tell them apart, don’t touch them.

Survival Skill #5: Practice Harvesting Without Destroying the Source

A real survivalist doesn’t burn the forest to bake a loaf of bread. Take only what you need. If you find wild leeks, leave half. If you spot cattails, don’t rip the whole colony apart. Respect the land, because it’s the only damn thing keeping you alive.

DIY Survival Hack #2: Make a Solar Plant Dehydrator

Don’t rely on power when you can build a plant dryer with sticks, screen, and sunlight. Dehydrate dandelion leaves, wild mint, or purslane. It preserves nutrients and lightens your pack. Who needs fancy gear when the sun is still free?

Survival Skill #6: Know Your Medicinal Plants

Food isn’t the only thing that keeps you alive. Ever had diarrhea in the woods with no meds? Good luck. Learn yarrow (stops bleeding), plantain (draws out poison), and willow bark (natural aspirin). Your brain’s your best survival tool—if you fill it with something useful.

Survival Skill #7: Test and Train—Before You Have To

You’re not a survivalist until you’ve lived it. So take your cushy ass out of the suburbs and spend three nights in the wild with nothing but a knife, a water bottle, and your plant ID skills. No phone. No tent. Eat only what you find. That’s how you learn.

DIY Survival Hack #3: Edible Plant “Cheat Stick”

Tape samples of dried, identifiable parts of key edible plants to a sturdy stick or ruler. Seal them under clear packing tape. Waterproof, portable, and faster than flipping through pages when the sun’s going down and your stomach’s roaring.

Survival Skill #8: Cook What Needs Cooking

Some plants will screw you up if you eat them raw. Cattail roots need roasting. Pokeweed can be eaten only when young and only after multiple boils. Know what must be cooked, because gastrointestinal distress in the wild is a fast track to death.

Survival Skill #9: Urban Foraging Tactics

Don’t assume survival scenarios only happen in the backwoods. Cities have plant life too—back alleys, parks, abandoned lots. Learn to spot mulberry trees, lamb’s quarters, wild amaranth, and purslane growing in cracks. Concrete jungles have calories too.

Survival Skill #10: Mental Resilience

This isn’t just about what you know—it’s about what you do when you’re cold, starving, and scared. You panic, you die. You hesitate, you miss a meal. You doubt yourself, you eat the wrong berry and meet your maker. Know your plants, trust your skills, and keep moving.


Let me be clear one last time: this isn’t a damn joke. When things fall apart, the people who laugh at this stuff are going to be the first to beg for a cracker. Don’t be one of them. Be the one who walks into the woods and walks out fed, alive, and free.

Nature doesn’t care about your opinions. It doesn’t care about your degree, your follower count, or your Wi-Fi signal. It rewards the prepared. It eats the rest.

So pick up that field guide, get your boots dirty, and for God’s sake—eat to live.

EMP-Proof Your Life: 10 Must-Haves for Your Faraday Cage

Let me be real blunt—most people aren’t ready for the coming storm. I’m not talking about a power outage or a snowstorm. I’m talking about a full-blown electromagnetic pulse (EMP)—natural or man-made—that will knock us right back into the 1800s in the blink of an eye. You think your phone, your car, or your precious smart fridge is going to survive that blast? Think again, cupcake.

A single EMP could fry every unprotected circuit, every wire, every device you depend on. No power. No communication. No transportation. Civilization as you know it—gone. And 99% of folks will sit there crying because they didn’t take five minutes to prepare. Well, not me. And not you, if you’ve got the guts to listen.

The Faraday cage—your best line of defense. It’s not a damn sci-fi gimmick. It’s a grounded, shielded container that protects electronics from high-frequency electromagnetic radiation. If you don’t have one yet, make one. A galvanized metal trash can with a tight-fitting lid and insulation inside works fine. But that’s only step one.

Step two? Knowing what the hell to put in it. So let’s break down the 10 must-have items you need to EMP-proof your life. Skip these, and you’re toast.


1. Two-Way Radios (with Extra Batteries)

When the cell towers fry, and the internet goes black, you’ll want to communicate with your group. That cheap Motorola walkie-talkie in the kids’ toy chest ain’t gonna cut it. Get a reliable set of long-range two-way radios, and for the love of common sense, store the batteries separately in the Faraday cage. Wrap them in plastic or cardboard first. Don’t be an idiot—don’t short them out by cramming them next to metal.


2. Solar Charger

You can’t just store electronics and expect them to last forever. Eventually, you’ll need to power them. Grid’s gone, remember? No plugging into the wall. A solar charger is your best bet. EMP won’t touch it if it’s shielded right, and it’ll give you the juice you need for radios, lights, and other small gear. Make sure it’s compact and has a wide compatibility range—USB, 12V, all of it.


3. Emergency Radio (Hand-Crank + Solar)

This one’s a no-brainer. When the world goes quiet, radio broadcasts might be the only info coming out of the chaos. Get a hand-crank and solar combo emergency radio with AM/FM/NOAA capability. It might be the only way to hear emergency updates, weather patterns, or any sign that order still exists. Don’t store your fragile ego in the Faraday cage—store the damn radio.


4. Back-Up Flash Drives (With Important Documents)

You ever tried rebuilding your life from scratch with no ID, no records, and no proof of who you are? That’s what it’ll feel like if you lose your digital footprint. Toss in a few encrypted flash drives with PDFs of your ID, passport, insurance, medical records, survival manuals, and offline maps. This isn’t paranoia—it’s insurance.


5. Prepaid Cell Phone (Burner + Extra SIMs)

Yeah, yeah, I hear you. “What’s the point of a phone if the grid’s down?” Listen, not every EMP takes out every satellite or cell tower permanently. And there’s always a chance of recovery—if not tomorrow, maybe in a few months. When service does come back, you’ll want to be ready. A cheap burner phone, stored dead and clean, might be your ticket to early communication. Load it with key contacts now.


6. Old-School GPS Unit

Your smartphone GPS? Forget it. It’ll be dead or fried. But an old-fashioned handheld GPS unit, especially a ruggedized hiking model, can still pull satellite signals and help you navigate. Don’t count on paper maps alone unless you’ve got a damn good sense of direction and a death wish. Store the GPS, plus batteries or solar charger, and learn how to use it BEFORE disaster hits.


7. Spare Car Key Fob / Vehicle Electronics

Newer vehicles rely on electronic control modules—ECUs—to function. If your vehicle gets fried, it’s useless. But some vehicles can survive, especially older ones, and some can be salvaged with backup electronics. If you’ve got a bug-out vehicle, store a spare key fob, a copy of the onboard computer (if swappable), or critical modules. Hell, store a whole spare ignition system if you can.


8. Mini Laptop or Tablet (With Offline Data)

I’m not talking about streaming Netflix while the world burns. I’m talking about storing offline survival manuals, maps, communication protocols, encryption tools, HAM radio guides, plant identification databases—knowledge. Knowledge is power when the lights go out. A small, rugged tablet or netbook with long battery life, stored and updated quarterly, could be your lifeline.


9. HAM Radio Equipment

I cannot stress this enough: HAM radio is the backbone of post-collapse communication. When everything else goes dark, the HAM community will still be transmitting. Get licensed, learn the protocols, and stash a basic transceiver, antenna, cables, and manuals in the cage. This isn’t some prepper fad. It’s what the military, emergency responders, and hardcore survivalists rely on when the SHTF.


10. Digital Multimeter

It’s not sexy, but it’s damn useful. A digital multimeter lets you check batteries, circuits, and power output. Want to know if your solar panel is producing? Want to troubleshoot a jury-rigged circuit? This tool is your friend. Stick a manual in there too, unless you’re an electrical engineer or like gambling with smoke and sparks.


Final Rant: Don’t Be a Clueless Sheep

Now let me end with this: if you think this list is overkill, you’re part of the problem. The government isn’t coming to save you. Your neighbors will turn desperate. Your bank won’t be reachable. The rule of law? It’ll be written in blood, not on paper.

An EMP attack or solar flare isn’t fiction—it’s science. It’s history. And it’s coming. I don’t prep because I’m afraid—I prep because I want to live. If that makes me angry, it’s because I see too many people laughing at survival while they scroll TikTok and pretend they’re safe.

Well, guess what?

When the sky lights up and the grid dies, I’ll be ready.
Will you?

Build the cage. Pack it smart. Protect what matters.

Because once it hits, it’s too damn late.

Survival Seating: Where to Sit When Eating Could Turn Dangerous

Let me ask you something: when you walk into a restaurant, do you just sit down wherever the hostess points like a clueless sheep? If so, you’ve already lost. You’re trusting your safety—your life—to someone whose only qualification is knowing where the ketchup packets are stored.

Wake up.

In a world this unstable, every public place is a potential kill zone, and every meal out could be your last supper if you don’t start thinking tactically. Active shooters, armed robberies, angry exes with vendettas—this isn’t paranoia, it’s pattern recognition. The smart survive. The unaware get turned into news headlines.

Rule #1: Never Sit with Your Back to the Door

I don’t care how good the view is. If your back’s to the entrance, you’re not eating—you’re volunteering to be the first to die. You want eyes on the front door at all times. Know who’s coming, how many of them there are, what they’re carrying, and whether they look nervous, drunk, or dangerous.

Rule #2: Choose Corners and Walls

The safest seats are ones with your back to a solid barrier—a wall, a corner, a column—anything that prevents you from being approached from behind. From there, you have a full view of the space and multiple exit paths. If a threat enters, you’re not caught off guard.

Remember: no wall, no cover. No cover, no chance.

Rule #3: Know Your Exits—All of Them

You should be able to escape within three seconds, without hesitating. That means knowing where the main door is, where the emergency exits are, whether there’s a back kitchen door, and how far you’ll have to run to get to them.

If you sit down without identifying at least two exits, you’re trusting strangers to save you. And that’s suicidal.


15 Survival Skills You Should Use Every Time You Eat Out

Let me drill this into your head. Survival is a mindset. Here are 15 survival skills you need to keep sharp—even at the damn Olive Garden.

  1. Situational Awareness
    Always be scanning. Who’s coming in? What’s in their hands? Are they pacing or loitering? You’re reading body language like a hawk, not reading the menu.
  2. Threat Identification
    Learn the difference between a customer and someone casing the place. Watch their eyes, hands, and posture.
  3. Exit Planning
    Have a primary and backup escape route—always.
  4. Cover vs. Concealment Recognition
    Tables? Concealment. Booths with high backs? Better. Kitchen doors? Possibly cover. Learn the difference and use it.
  5. Improvised Weapon Identification
    That butter knife, wine bottle, or chair leg? Tools, not utensils. If it can be used to strike, block, or distract, it’s a weapon.
  6. Hand-to-Hand Combat Readiness
    Your fists are your last defense. Stay trained and stay dangerous.
  7. Communication and Alerting Others
    Know how to discreetly warn people around you without causing panic.
  8. First Aid & Trauma Care
    Carry a tourniquet. Know how to stop bleeding. You might be patching yourself—or someone else.
  9. Stealth Movement in Crowds
    You need to move fast without drawing attention. Know how to blend in, slip out, and disappear.
  10. Firearm Safety and Awareness
    Even if you’re not carrying, someone else might be. Watch for printing (visible outlines of guns under clothes) and understand line of fire.
  11. Sound Recognition
    One gunshot sounds different from kitchen clatter. You hear a bang, don’t freeze—MOVE.
  12. Calm Under Pressure
    Panic is contagious. Train your mind to stay cool, even when chaos erupts.
  13. Strategic Seating
    Don’t sit near glass, bathrooms, or kitchens (high-traffic, low-control zones). Find a position that controls the space.
  14. Human Shielding (Last Resort)
    It’s ugly. It’s brutal. But in a shootout, distance and obstacles matter. Stay behind cover and move in shadows.
  15. Decisive Action
    The most dangerous person in a crisis is the one who can’t act. If your gut says run, run. Don’t wait for permission.

3 DIY Survival Hacks for Restaurant Safety

1. Create a Pocket “EDC” (Everyday Carry) Survival Kit

You don’t need to lug around a duffel bag of gear to be prepared. Here’s what you should carry in your pockets:

  • A tactical pen (doubles as a striking weapon)
  • Mini flashlight
  • Slim tourniquet (like a SWAT-T)
  • Backup cash, ID, and a credit card knife

With just these items, you can break glass, fight off an attacker, treat a wound, or pay your way out of a lockdown scenario.


2. Turn Your Belt Into a Door Barricade

Let’s say you’re in the bathroom when the shooting starts. You can wedge a belt under or around the door handle to slow down entry. Strap it tightly and reinforce with your foot or body. In many cases, a few seconds of delay can make all the difference. Always wear a real belt, not some weak braided nonsense.


3. DIY Smoke Marker

Got a napkin and a lighter? You’ve got a distraction device. If you’re in a hostage scenario or need to escape without being seen, set fire to a greasy napkin, drop it near a vent or trash bin, and let the smoke draw attention elsewhere. Use the chaos to slip out.


Final Thoughts from a Pissed-Off Prepper

If you’re still reading this and thinking, “This guy’s over the top,” then I’ve got bad news for you. You’re not ready.

Being situationally aware in a restaurant isn’t crazy—it’s common sense. It’s not about fear, it’s about control. You don’t walk into a room and surrender your life to the floor plan. You analyze. You position. You survive.

Because when it all goes down—when the first scream hits the air or the first glass shatters—your instincts will be all you have left.

And I’d rather be a paranoid survivor than a trusting corpse.