Is Maryland’s Drinking Water Safe

Is Maryland’s Drinking Water Safe?

Listen up, because I’m not here to sugarcoat things or lull you into a false sense of security. Maryland’s drinking water safety? Hell, don’t trust it with your life — because I mean your life. The government, the water companies, and the so-called experts want you to sip from their poisoned fountains, but I’m here to tell you the cold, harsh truth: that water is riddled with contaminants, toxins, and chemicals that can screw you up before you even realize it.

You want safe drinking water in Maryland? You’re going to have to fight tooth and nail for it. You can’t just twist a tap handle and assume it’s pure. No way. That water’s got nitrates, pesticides, industrial waste, pharmaceuticals, heavy metals, and god knows what else flowing in the veins of your rivers and reservoirs. The Chesapeake Bay area might look pristine from afar, but look closer — it’s a toxic soup, courtesy of decades of industrial negligence and urban sprawl.

And if you think boiling that stuff fixes everything, wake up! Boiling water only kills germs; it doesn’t remove chemicals or heavy metals. That poison stays in the water like a ticking time bomb waiting to explode in your gut. The truth is: if you rely on Maryland’s tap water without filtration, you’re rolling the dice with your health every damn day.


15 Water Filtration Survival Skills You Need NOW

  1. Know Your Enemy: Contaminants Identification
    Understand what you’re filtering out. Bacteria, protozoa, viruses, chemicals, heavy metals, sediment, and microplastics all lurk in water. Know how to spot signs of contamination in natural sources.
  2. Basic Boiling – Not a Panacea
    Boil water for at least 1 minute to kill pathogens. At higher altitudes, boil for 3 minutes. But remember, boiling won’t remove chemicals or metals.
  3. Use a Cloth to Pre-Filter
    Always filter water through a clean cloth to remove sediment and debris before any other treatment. It’s the first line of defense.
  4. DIY Charcoal Filter Construction
    Burn hardwood to make charcoal, crush it, and use it in a homemade filter to trap chemicals and improve taste. Activated charcoal is a warrior against toxins.
  5. Portable Water Filters
    Get your hands on reliable portable filters like Sawyer or Katadyn. These will remove bacteria, protozoa, and some viruses, but NOT chemicals.
  6. Chemical Purification Tablets
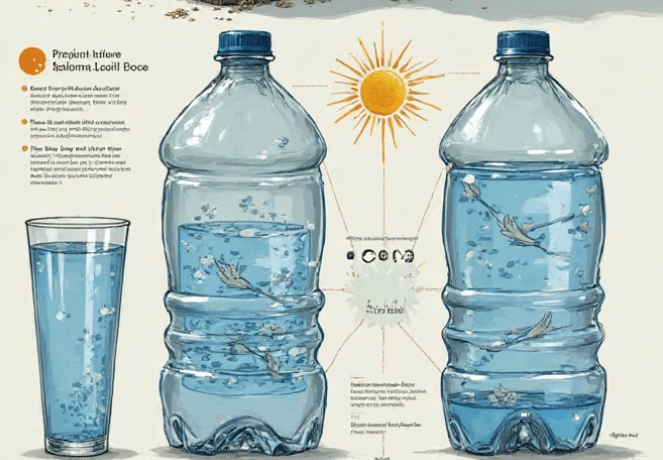
    Iodine and chlorine dioxide tablets kill pathogens, but again, they won’t touch chemical pollutants.
  7. Solar Water Disinfection (SODIS)
    Fill clear bottles and expose them to direct sunlight for 6+ hours to kill viruses and bacteria. Slow but effective in survival situations.
  8. Distillation Using Simple DIY Setup
    Collect steam from boiling contaminated water, then condense it into a clean container. Distillation removes nearly all impurities, including chemicals and salts.
  9. Know Your Water Sources
    Runoff from farms, industrial waste, and urban contaminants hit rivers and lakes fast. Avoid stagnant water, and always seek flowing, clear water.
  10. Sand Filtration Method
    Layer sand and gravel to create a homemade filter that removes sediment and some pathogens.
  11. Freeze-Thaw Purification
    Freeze water in clean containers; impurities settle or get separated. Thaw the clean ice and discard remaining water with contaminants.
  12. DIY Solar Still
    Dig a hole, place a container at the bottom, cover with plastic, and let the sun distill water from the soil and plants. A lifesaver if surface water is contaminated.
  13. Use a UV Purifier Device
    Handheld UV purifiers zap pathogens instantly. They don’t remove chemicals, but they’re great for biological threats.
  14. Regular Maintenance of Filtration Gear
    Keep your filters clean and replace them as recommended. A clogged or old filter is worthless and potentially dangerous.
  15. Testing Water Quality on the Fly
    Carry simple water testing kits for pH, chlorine, nitrates, and bacteria. Don’t just trust your gut or appearance.

3 DIY Survival Drinking Water Hacks You Need to Master

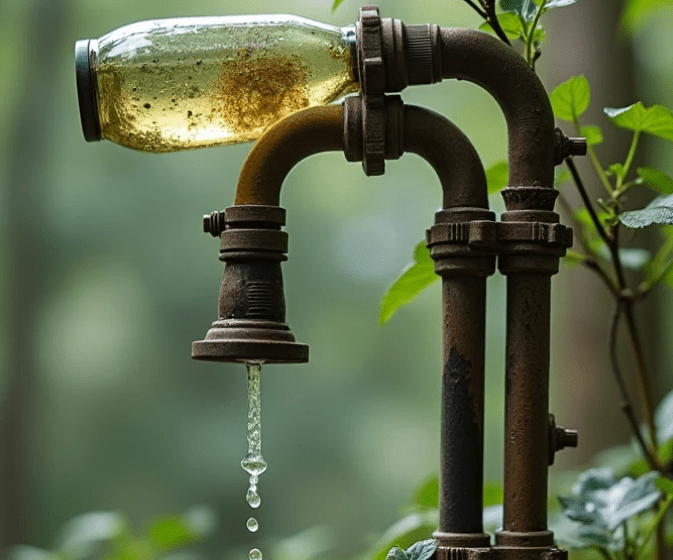
Hack #1: Charcoal and Sand Bucket Filter
Take a clean bucket. Drill holes at the bottom. Layer the bottom with a cloth, then charcoal (activated by heating hardwood), then sand, then gravel on top. Pour dirty water through this homemade filter and catch the cleaner water coming out. It won’t be perfect, but it will remove sediments, some chemicals, and improve taste drastically.

Hack #2: Solar Still for Distilled Water
Dig a hole, place a small container in the center, cover the hole with clear plastic, and weight down the edges with rocks to seal it. Place a small rock in the center of the plastic to create a low point where condensation will drip into your container. This method distills water, leaving behind most contaminants. You can do this anywhere — no fancy tools required.

Hack #3: Boiling + Iodine Combo
If you suspect biological contamination and chemical pollution, first boil the water to kill germs. Let it cool, then add iodine tablets to kill remaining pathogens. This double whammy isn’t perfect, but it’s better than nothing if you lack equipment. Just remember, iodine is toxic in excess—use sparingly.


Why You Should NEVER Take Maryland’s Water at Face Value

Let’s get real: every damn day, news breaks about lead pipes, cryptosporidium outbreaks, PFAS (forever chemicals), and industrial dumping in Maryland. The Chesapeake Bay, the mighty Potomac River, and the Susquehanna watershed all get slammed with pollution. And the bureaucrats? They keep assuring you “it’s safe,” while quietly slipping in higher contaminant limits or pushing blame downstream.

You think your city water treatment fixes all this? It doesn’t. Water treatment plants don’t remove everything — especially not modern-day industrial chemicals. They’re designed for old-school bacteria and sediment, not the cocktail of pharmaceuticals, microplastics, and toxic metals coursing through the system.

If you want to survive a prolonged crisis or even daily exposure, you need to act like a survivalist — because the “safe” water you drink today might just be ticking poison time bombs for your kidneys, liver, and brain.


Bottom Line? Fight For Your Water, Or Die Trying

Maryland’s drinking water isn’t “safe.” Not in the pristine, crystal-clear, survival-ready sense. If you’re relying solely on your tap, you’re a sitting duck.

Take matters into your own hands:

  • Learn water filtration skills like your life depends on it—because it does.
  • Carry portable water filters and chemical tablets.
  • Build DIY filtration systems with charcoal and sand.
  • Master solar stills and distillation.
  • Always test your water before drinking.

Your survival is your responsibility. Don’t trust the system. Don’t trust the government. Don’t trust the water company.

Prepare. Filter. Purify. Survive.

Is Louisiana’s Drinking Water Safe

Alright, buckle up. You want the truth about Louisiana’s drinking water? You want it raw, unfiltered, no sugarcoating? Then listen up, because I’m about to lay it down straight, survivalist style—angry, unapologetic, and armed with the cold hard facts and skills you need to keep your family from becoming a bunch of sick, water-poisoned zombies.


Is Louisiana’s Drinking Water Safe? Hell No.

You’ve probably heard the official line: “Our water meets EPA standards.” Yeah, right. That’s bureaucratic bullshit designed to keep you calm while you’re drinking chemicals, heavy metals, pesticides, and god knows what else. Louisiana’s water infrastructure is a ticking time bomb, riddled with old pipes, contamination, and pollution from oil refineries, agricultural runoff, and industrial waste. You don’t need me to tell you the state has had numerous boil-water advisories and contamination incidents. The Mississippi River, which supplies a huge chunk of Louisiana’s water, is one of the most polluted rivers in America.

So if you think you’re safe just filling up your glass and sipping away, you’re dead wrong. You’re gambling with your health and the health of your loved ones. If you care even one bit about survival and self-reliance, you better learn how to filter, purify, and secure your water NOW.


15 Water Filtration Survival Skills You Need to Master NOW

  1. Boiling Water — The simplest and oldest method. Boil water for at least 1 minute (3 minutes if you’re above 6,500 feet) to kill bacteria, viruses, and parasites. No fancy gear needed, just fire and a pot.
  2. Using a Portable Water Filter — Get a solid survival filter like the Sawyer Mini or LifeStraw. These remove protozoa and bacteria, but remember: most don’t kill viruses.
  3. DIY Charcoal Filter — Crush hardwood charcoal, layer it with sand and gravel in a container. Pour water through to reduce chemicals and improve taste. It’s basic, but effective for sediment and some impurities.
  4. Solar Disinfection (SODIS) — Fill clear plastic bottles with water, place them in direct sunlight for 6 hours. UV rays kill pathogens. It’s slow, but a good backup.
  5. Chemical Purification with Iodine or Chlorine Tablets — Lightweight and portable, tablets kill most pathogens. But beware of taste and allergies.
  6. Distillation — Boil water and capture the steam on a cold surface, collecting pure water. It removes almost everything, including heavy metals and salts.
  7. Using Coffee Filters or Bandanas — Not for purification but for removing large sediments and debris before filtering or boiling.
  8. Creating a Sand and Gravel Filter — Layer sand, fine gravel, and coarse gravel in a container to remove suspended particles. This is a good pre-filter.
  9. Using Zeolite or Activated Carbon — These materials bind chemicals and heavy metals. Activated carbon filters are essential to remove chlorine, pesticides, and VOCs.
  10. Making a Solar Still — Dig a hole, place a container in the center, cover the hole with plastic, and place a rock to create a low point. Condensation collects pure water. Great for emergency situations.
  11. Water Bag Filtration — Use specialized survival water bags with built-in filters when hiking or bugging out.
  12. DIY Ceramic Filters — Porous ceramic blocks filter out bacteria and protozoa. They require regular cleaning but can be made at home if you know how.
  13. Magnetic Water Treatment — Some survivalists swear by magnets to reduce scale and contaminants; it’s controversial but worth researching.
  14. Finding and Using Natural Spring Water — Locate and test natural springs. Spring water is usually cleaner but must still be filtered.
  15. Using UV Water Purifiers — Battery-powered UV purifiers zap pathogens. They’re fast but rely on power, so keep backup options.

3 DIY Survival Drinking Water Hacks to Save Your Life

Hack 1: Make Your Own Water Filter from a Plastic Bottle

Cut the bottom off a clean plastic bottle. Invert it like a funnel. Layer the inside with cotton balls, activated charcoal (charcoal from a campfire will work if crushed), sand, and gravel—top to bottom. Pour murky water through it slowly. This filters out sediment and some toxins. It won’t purify water, so boil or chemically treat it afterward. This simple hack turns trash into life-saving tech.

Hack 2: Use Household Bleach as a Water Purifier

In a survival pinch, plain unscented household bleach can disinfect water. Add 8 drops (about 1/8 teaspoon) of bleach per gallon of clear water. Stir and let it sit for 30 minutes. If the water smells strongly of bleach after that, let it air out. This kills most pathogens. Don’t use scented or splashless bleach — those have chemicals that can poison you.

Hack 3: Solar Still from Household Items

If you’re stuck with salty or contaminated water, create a solar still. Use a wide bowl, put a cup in the center, cover with plastic wrap, and place a small weight in the center to create a dip. Sunlight evaporates the water; condensation drips into the cup. This produces drinkable water even from swampy or salty sources. It’s slow but reliable.


Why You Can’t Trust Louisiana’s Tap Water

Let’s get real: Louisiana’s tap water has been exposed to everything from industrial pollution, agricultural chemicals, lead leaching from old pipes, to algal blooms fueled by nutrient runoff. The Gulf Coast’s flooding disasters regularly contaminate municipal water supplies with sewage and chemical waste. And the state’s infrastructure? Aging, underfunded, and vulnerable.

Don’t expect the government or water companies to admit these problems openly or fix them fast. Your survival depends on your readiness to take water filtration and purification into your own hands. Nobody else is coming to save you when the water turns toxic.


How to Prepare NOW

  • Stock up on filtration gear. No excuses.
  • Learn how to boil and distill water.
  • Gather materials for DIY filters: charcoal, sand, gravel, cotton.
  • Keep bleach and iodine tablets handy.
  • Scout natural water sources near you and test them.
  • Practice water purification methods regularly. In a real crisis, you won’t have time to fumble.

Final Warning

If you don’t have survival water skills, you’re playing Russian roulette with your health. Louisiana’s drinking water is not a sure bet — it’s a gamble with serious consequences. Prepare to filter, purify, and treat your water every single time you drink it. Otherwise, you’re inviting sickness, disease, and disaster.

I don’t sugarcoat this because people die when they ignore the truth. Be smart. Be ready. Be self-reliant.


If you want, I can help you make a full survival water kit checklist, or guide you step-by-step through building your own filters and purification setups. Just say the word.

Stay sharp and stay hydrated—the right way.

Is Maine’s Drinking Water Safe

Is Maine’s Drinking Water Safe? Hell No—Not for the Prepared Survivalist!

Listen up, because I’m about to tell you exactly why Maine’s drinking water—despite what the so-called “experts” say—is NOT safe enough for you or your family, especially if you’re serious about survival. I don’t care what the glowing brochures from some government agency or utility company say. You want the truth? Here it is, raw and unfiltered:

Maine’s water system is a ticking time bomb. You got aging infrastructure, contamination from industrial runoff, agricultural chemicals, and even hidden pathogens that slip through the cracks. This isn’t some conspiracy; it’s the reality of a state with beautiful lakes and rivers that have been poisoned by careless human activity.

You think because the water tastes “fine” or meets EPA standards it’s safe? I’ve been in the trenches of survival prepping long enough to know that “safe” is a relative term. When the grid goes down, or when a natural disaster hits, your pristine tap water can turn into a biological nightmare in seconds.

If you’re serious about staying alive, you better learn how to filter, purify, and make that water safe with your own hands, without relying on anyone else’s system or fancy labels. So buckle up—I’m giving you 15 critical water filtration survival skills you NEED, plus 3 DIY survival drinking water hacks you can whip up with stuff in your own home or out in the wild.


15 Water Filtration Survival Skills Every Prepared Person MUST Know

  1. Boiling Water Correctly: Don’t just simmer, bring water to a full, rolling boil for at least 1 minute (3 minutes above 6,500 ft elevation) to kill bacteria, viruses, and parasites.
  2. Using a Portable Water Filter: Know how to use a reliable ceramic, hollow fiber, or carbon water filter that removes protozoa and bacteria but realize most don’t filter out viruses.
  3. Improvised Sand and Charcoal Filter: Layer sand, charcoal (activated if possible), and gravel in a container to create a basic filter that removes sediments and some contaminants.
  4. Solar Disinfection (SODIS): Fill clear plastic bottles with water and leave them in direct sunlight for 6+ hours; UV rays kill pathogens but don’t remove chemicals.
  5. Chemical Purification: Use water purification tablets or household bleach (unscented, 8 drops per gallon, stir and wait 30 minutes) to disinfect water.
  6. Distillation: Use a homemade solar still or boil water and collect condensed steam to remove heavy metals and salts, not just pathogens.
  7. Using Cloth for Pre-Filtering: Pour water through a clean cloth or bandana to remove large debris and sediment before further treatment.
  8. Finding Natural Water Sources: Learn to identify reliable sources like springs, moving streams, or rainwater rather than stagnant ponds.
  9. Recognizing Contaminated Water: Know the warning signs—cloudiness, foul smell, dead animals nearby, or chemical odors mean avoid unless you can treat it properly.
  10. Testing Water with DIY Kits: Carry or make simple water testing kits for pH, turbidity, or bacteria presence for quick assessments.
  11. Using Bio-Sand Filters: Build a slow sand filter that uses biological layers to reduce pathogens over time.
  12. Emergency Water Collection: Learn to harvest dew, rainwater, or even plant transpiration in survival situations.
  13. Understanding Filtration Limits: Know what your filtration method can and can’t remove (viruses, heavy metals, chemical toxins) and combine methods accordingly.
  14. Storage of Filtered Water: Use clean, sealed containers to store water after filtration and purification to prevent recontamination.
  15. Portable UV Purifiers: Utilize handheld UV light devices that zap viruses and bacteria instantly when batteries hold up.

3 DIY Survival Drinking Water Hacks You Can Use TODAY

Hack #1: The Charcoal Coffee Filter Trick

Take some clean charcoal from your campfire or barbecue grill. Crush it into small pieces but not dust. Place it inside a clean coffee filter or cloth pouch. Pour suspicious water slowly through it. The charcoal adsorbs chemicals, bad odors, and some pathogens. Follow this with boiling or chemical purification.

Hack #2: The Plastic Bottle Solar Purifier

Fill a clear plastic bottle with water. Place it on a reflective surface (like a piece of aluminum foil or a car hood) in direct sunlight. Leave it there for 6+ hours. The sun’s UV rays kill off pathogens without any gear. Great when you’ve got nothing but a bottle and the sun.

Hack #3: The DIY Solar Still

Dig a hole about 3 feet wide and 2 feet deep in the dirt. Place a container in the center to catch distilled water. Cover the hole with a plastic sheet, anchor it down with dirt, and place a small rock in the center to create a dip so condensed water drips into the container. You can extract moisture from soil or plants this way when no water source is available.


Why You Can’t Trust Maine’s Water System Blindly

Maine is famous for its pristine wilderness, but the reality is far messier under the surface. You’ve got towns and cities dumping industrial pollutants into rivers, agricultural nitrates seeping into groundwater, and more recently, reports of PFAS (per- and polyfluoroalkyl substances)—the so-called “forever chemicals”—showing up in local wells. These aren’t your garden-variety contaminants. PFAS are linked to serious health problems, and they do NOT just go away by boiling or simple filtration.

Municipal water treatment plants are limited in their capability to deal with such advanced contaminants. They focus on bacteria and common chemicals, not long-term toxins that accumulate in your body. That’s why you need to be your own first line of defense.

Natural disasters? You bet. Maine faces heavy rains, floods, and freezing winters that stress pipes and water systems. After any disaster, the water quality can plummet overnight. You don’t want to be caught drinking water with sewage or chemical runoff when every drop counts.


How To Protect Yourself and Your Family

The solution? Don’t rely on the city or the tap. Prepare NOW. Train yourself in the filtration survival skills above, get the right gear (portable filters, UV purifiers, chemical tablets), and learn how to create your own DIY filtration devices from what’s available around you.

When disaster strikes or the grid fails, you don’t want to be the one scrambling to figure out how to make water safe. This is basic survival, and frankly, anyone who ignores water safety is courting sickness, dehydration, or worse.


Final Warning

Maine’s water may look clear, but that’s only skin deep. There’s a battlefield underneath filled with microscopic enemies and invisible toxins. Trusting the government or utility companies with your health? That’s a fool’s game.

Be angry if you want, be skeptical if you must, but be prepared. Your life depends on it.

Remember these words:

Safe water isn’t given—it’s earned through skill, preparation, and relentless vigilance.

Is Kansas’ Drinking Water Safe

Is Kansas’s Drinking Water Safe? A Survivalist’s Wake-Up Call

Let me make this real clear, right out the gate—NO, Kansas’s drinking water is not safe. Not if you’re the kind of person who doesn’t trust bureaucrats in suits who think “acceptable contamination levels” are just fine for your kids to drink. You want the truth? The truth is, if you’re not filtering your water in Kansas—or anywhere else for that matter—you’re just gambling with your health like it’s a slot machine in Vegas.

You think the government’s gonna save you when the pipes go dry or when a chemical spill leaks into your groundwater? You think the EPA, with its revolving door of industry lobbyists, is your friend? Wake up. It’s time to take control of your own survival, especially when it comes to the most critical element of life—clean water.


The Dirty Reality of Kansas Water

From nitrates in agricultural runoffs to PFAS forever chemicals from industrial waste, Kansas is sitting on a powder keg of pollution. And let’s not even get started on the crumbling infrastructure—half the rural water systems in Kansas haven’t seen a proper upgrade in 50 years.

Multiple towns across the state have tested positive for high nitrate levels, lead, and arsenic. In Haysville and parts of Wichita, residents have been advised to boil water due to E. coli outbreaks more than once in the last decade. Meanwhile, small farming communities are drinking straight from wells laced with farm runoff—fertilizers, herbicides, pesticides, you name it.


You Can’t Trust the Tap – What You CAN Do

It’s time to take matters into your own calloused hands. Whether you live in a city, on a homestead, or you’re bugging out in the Flint Hills, you need to know how to filter, purify, and secure safe drinking water.

Here are 15 essential water filtration survival skills every Kansan—and every American—ought to know before the next drought, blackout, or chemical spill turns your tap into a death trap.


15 Water Filtration Survival Skills You Better Learn Fast

1. Boiling

Boiling kills most bacteria, viruses, and parasites. Bring it to a rolling boil for at least 1 minute, or 3 minutes at higher elevations.

2. Charcoal Filtration

Homemade filters using activated charcoal remove many chemical impurities. Make one using a plastic bottle, charcoal, sand, and gravel.

3. Solar Disinfection (SODIS)

Use clear PET bottles and full sunlight for at least 6 hours. UV rays and heat kill pathogens—primitive but effective.

4. Portable Water Filters

Invest in Lifestraw, Sawyer Mini, or similar. These pocket-sized tools are lifesavers—literally. Always keep one in your bug-out bag.

5. DIY Slow Sand Filter

A 3-bucket system with sand, gravel, and activated charcoal. Slow, but removes bacteria and particulates over time.

6. Bleach Treatment

Unscented household bleach (6–8 drops per gallon). Let it sit for 30 minutes. The water should smell slightly of chlorine—no smell means add more.

7. UV Purifiers

Battery-powered or crank-operated UV pens (like SteriPen) zap waterborne microbes. Lightweight and deadly efficient.

8. Distillation

Heat water, capture the steam, and condense it. Removes everything—including heavy metals and salt. You can build one from pots and tubing or even a solar still.

9. Rainwater Collection

Catch rain off your roof. Use first-flush diverters to avoid debris. Store in food-grade barrels and filter before drinking.

10. Clay Pot Filters

Porous ceramic pots filter bacteria and particulates. Some are impregnated with silver for added antimicrobial properties.

11. Moss Filtration

Use sphagnum moss—a natural antimicrobial—to filter small volumes in an emergency. Better than nothing.

12. Pine Tree Filters

Pine sapwood’s xylem can filter bacteria at a microscopic level. Research from MIT shows it works. Cut, whittle, and rig it up.

13. Copper Storage

Store purified water in copper vessels. It kills bacteria and viruses slowly over time—useful for storage, not instant purification.

14. Bio-sand Filters

Layered gravel, fine sand, and charcoal create a long-lasting, low-tech filter. Requires maintenance but can serve a whole family.

15. Test Strips and Meters

Know what’s in your water. Test for nitrates, pH, chlorine, lead, and bacteria. Don’t guess—KNOW what poison you’re trying to filter out.


3 DIY Survival Drinking Water Hacks for the Mad Max Future We’re Heading Toward

1. Plastic Bottle Distiller

Take a clear plastic bottle, fill it halfway with dirty water, seal it, and place it angled in the sun with a clean bottle at the other end. The evaporated water will condense in the second bottle, leaving contaminants behind.

2. DIY Charcoal & Sand Filter

Cut a 2-liter bottle. Layer bottom-to-top: cloth, charcoal (from campfire), sand, then gravel. Pour dirty water in and let gravity do the work. Boil or bleach afterward if you can.

3. T-shirt and Pot Combo

No filter? Pour water through a clean t-shirt into a pot to remove visible gunk. Then boil. Crude but can save your hide.


So… Is Kansas’s Drinking Water Safe?

Here’s the final answer: Only if you make it safe.

Don’t wait for a government alert or a “boil notice” after your kid’s already got diarrhea for three days. Don’t trust a system that thinks it’s okay to dose your drinking supply with trace arsenic and tell you it’s “within acceptable limits.” That’s their limit—not yours.

The reality is, we live in a world where agricultural waste, industrial runoff, and political negligence have tainted the most basic resource we need to survive. Kansas is just one snapshot of a larger crisis. And it’s not just the rural well water, either—urban tap water is under constant threat from aging pipes and overburdened treatment systems.


Water Is Life—Act Like It

If you want to survive what’s coming—and believe me, something is coming—then you better treat water like the life-or-death issue it is. Practice these survival skills. Build DIY setups. Test your water. Filter everything. Assume nothing. And never, ever rely on someone else to keep you alive.

Be angry. Be aware. Be prepared.

Because when the grid fails and the faucets stop flowing, the only people who drink are the ones who planned ahead.

Is Kentucky’s Drinking Water Safe

Is Kentucky’s Drinking Water Safe? Hell No—And Here’s What You Need to Do About It

Let’s cut the crap.

You think just because your tap turns on and water comes out that it’s safe? You think because some suit at the Department of Water Resources says “everything is within limits” that you can trust it? You think a state that’s been dumping coal slurry, fertilizer runoff, and industrial waste into its rivers for decades is going to give you clean drinking water?

Wake. Up.

This isn’t a conspiracy theory. This is observable, measurable, documented reality. Kentucky has over 400,000 people relying on private wells, millions more on aging public water systems, and a long history of toxic spills in the Ohio and Kentucky River basins. You want a crash course in betrayal? Look no further than your kitchen faucet.

The System Is Failing You—And It’s Been Failing You for Years

Let’s talk numbers. In 2023, the Environmental Working Group detected over 250 contaminants in U.S. tap water, including known carcinogens like arsenic, lead, PFAS (those “forever chemicals”), and nitrates. Kentucky didn’t escape that list. In fact, parts of Kentucky scored above the national average in multiple toxic categories.

We’re talking cancer-causing crap in municipal water.

You live in Louisville? Ever check the water reports? Chlorination byproducts through the roof. Pikeville? You’re sucking on heavy metals from mining runoff. Eastern Kentucky’s been getting hammered for decades, and no one’s doing a damn thing about it because it’s “just coal country.”

Yeah. Let that sink in while you sip your sweet tea.

Now let’s say you’re not even on city water. Let’s say you’ve got your own well—your own little slice of independence. That doesn’t mean you’re safe. Not even close. Agricultural pesticides, herbicides, and God-knows-what else leach through soil like ghosts. Unless you’re testing that well quarterly and filtering like your life depends on it—because it does—you’re drinking poison.


15 Water Filtration Survival Skills Every Kentuckian Needs to Learn Yesterday

If the grid goes down, if your well gets contaminated, or if the city shuts off the tap, you better have these water filtration survival skills locked down:

  1. Boiling Water – 1 minute at a rolling boil (3 at elevation) kills most pathogens. If you can’t boil water, you don’t deserve to drink it.
  2. Solar Still Construction – Use the sun to evaporate and collect clean water. Works with vegetation and dirty water alike.
  3. DIY Sand and Charcoal Filter – Layered filter made from sand, activated charcoal, and gravel in a bottle or bucket.
  4. Building a Biosand Filter – A longer-term solution using multiple sediment layers and slow-drip filtration.
  5. Making Activated Charcoal – Burn hardwood in a low-oxygen environment. Crush and rinse. This stuff absorbs toxins like a champ.
  6. Using a LifeStraw or Sawyer Mini Filter – Portable filters that can save your life in a pinch. Never leave home without one.
  7. UV Disinfection with Sunlight – Fill a clear plastic bottle and leave it in the sun for 6 hours. The UV kills bacteria. Not perfect, but better than cholera.
  8. Bleach Purification – 2 drops of plain, unscented bleach per liter of water. Wait 30 minutes. Stir and sniff. Smells like a pool? It’s safe.
  9. Potassium Permanganate Drops – A tiny crystal turns water pink and kills off germs. But be careful: too much and you’ll poison yourself.
  10. Cloth Filtering for Sediment – Simple but effective. Pre-filter water through a clean cloth to remove big debris.
  11. Making a Ceramic Filter – Clay and sawdust kiln-fired to create porous ceramic. It filters most pathogens and lasts for years.
  12. DIY Slow Drip Gravity Filter – Buckets, hoses, and a ceramic or carbon filter. Works great off-grid.
  13. Rainwater Harvesting Systems – Collect rain from your roof. Use a first-flush diverter and filter before drinking.
  14. Testing Water with DIY Kits – Don’t guess. Test. Regularly. Especially if your water has a weird taste, smell, or color.
  15. Distillation Over Fire – Use a pot, lid, and a collection container. Boil and collect steam. It’s pure and safe—just slow.

3 DIY Survival Drinking Water Hacks

Don’t have a Berkey? Can’t afford a fancy system? Fine. Get scrappy. Here are three water hacks straight out of the survival playbook.

Hack #1: The Plastic Bottle Solar Disinfection Trick (SODIS)

  1. Take clear PET bottles (1 or 2-liter soda bottles).
  2. Fill them with water.
  3. Lay them in full sun for 6 hours (more if it’s cloudy).
  4. UV rays will neutralize most bacteria and viruses.

Bonus tip: Place them on reflective foil or corrugated metal roofing to maximize heat and UV exposure.

Hack #2: The Shirt-and-Sand Filter

  1. Cut the bottom off a two-liter bottle.
  2. Flip it upside down.
  3. Layer: clean cloth, gravel, sand, charcoal, repeat.
  4. Pour water through. It’s not sterile, but it’s much cleaner.
  5. Boil or bleach afterward.

Use this in a crisis when your water looks like chocolate milk.

Hack #3: Emergency Pine Filter

  1. Harvest some pine bark and needles (avoid treated trees).
  2. Boil them to extract tannins—natural antimicrobials.
  3. Pour water through pine needle-packed filter layers.
  4. Follow up with boiling or bleach for best results.

Nature’s giving you tools. Don’t be too soft or stupid to use them.


Final Words from the Edge

You can sit around sipping bourbon in your recliner, pretending the EPA is looking out for you. Or you can take control of your own water security like your life depends on it—because it DOES.

Kentucky’s water isn’t safe. Not because it’s always toxic, but because you can’t trust it to stay clean. Aging infrastructure, industrial pollution, mining runoff, chemical spills, and lazy oversight are coming for your tap—slowly, invisibly.

The next train derailment, flood, or chemical dump could take your entire town off the map. Will you be ready, or will you be standing in line at the fire station with a plastic jug like a fool?

Don’t count on the government.
Don’t count on bottled water.
Count on skills, tools, and grit.

Filter everything.
Test often.
Prepare always.

This isn’t fearmongering.

This is reality.

Is Iowa’s Drinking Water Safe

Is Iowa’s Drinking Water Safe? Hell No – And You’d Better Learn These 15 Filtration Skills Before It’s Too Late

Listen up. If you’re sitting around trusting the government or your local utility to provide you clean drinking water—especially in Iowa—you’ve already lost. You’re the sheep, and they’re counting on your ignorance to keep you quiet while they dump nitrates, bacteria, and God-knows-what into your so-called “safe” water supply.

Let me be crystal damn clear: Iowa’s drinking water is under siege.

You think that glass of tap water is pure? Think again. Iowa is surrounded by fields sprayed with chemicals—nitrates, phosphorus, and manure runoff from industrial agriculture. That filth ends up right in your faucet. And they’ll say it’s “within legal limits.” Oh yeah? Legal limits set by bureaucrats who wouldn’t last three days without bottled water.

The truth? If you’re not already treating your water like you’re in a post-collapse scenario, you’re already in danger. You better start living like the grid is one blackout away from failure. You better learn to filter, purify, and protect every drop like your life depends on it—because it does.


15 Water Filtration Survival Skills You Need Yesterday

These aren’t suggestions. These are skills every prepared person must master before the water crisis knocks on your door—or poisons your kids without warning.

1. Boiling Water to Kill Pathogens

Basic, but effective. Boil your water for at least one minute (longer at higher altitudes). Kill bacteria, viruses, and parasites. If you can’t start a fire in under five minutes, you’re not ready.

2. DIY Charcoal Filter

Crush activated charcoal from a campfire. Layer it with sand and gravel in a bottle or PVC pipe. This filters out chemicals and improves taste. Not pretty, but it works when the taps run brown.

3. Using a Survival Straw (LifeStraw, Sawyer, etc.)

Carry one at all times. These suck up directly from rivers or questionable puddles and block bacteria and protozoa. Don’t trust plastic bottles in your go-bag without one.

4. Solar Disinfection (SODIS)

Fill a clear PET bottle, leave it in the sun for 6+ hours. UV rays kill pathogens. It’s low-tech and lifesaving. Got sunlight? You’ve got clean water.

5. Portable Water Filter Pump

Buy one now. Pump water through ceramic or carbon filters. Essential in rivers, ponds, and when the local supply is compromised.

6. Gravity Water Filtration Systems

Like Berkey systems. Let gravity do the work. They’re slow but thorough. Get one, stash extra filters, and keep them dry.

7. Chemical Purification: Bleach

Unscented household bleach. Use 8 drops per gallon, shake and wait 30 minutes. Smells bad, tastes worse—but if it fizzes, you live. Learn the damn math.

8. Chemical Purification: Iodine Tablets

Used by soldiers and preppers. Drop ‘em in water, wait, drink. Kills bacteria and viruses. Watch out if you have thyroid issues.

9. Sand and Gravel Filter Buckets

Layer buckets with gravel, sand, and charcoal. Pour water through top, collect filtered water from bottom spout. Cheap, scalable, effective.

10. Learn to Identify Contaminated Water Sources

Green scum? Dead fish? Metallic smell? Don’t touch it. Cloudy? Murky? Runoff nearby? Filter the hell out of it—or walk away.

11. Know Your Local Watershed

Study maps. Know what feeds your city’s supply. Find natural springs. Know which rivers are downstream of farms or factories. Use your brain.

12. Rainwater Harvesting and Filtering

Collect rain from rooftops into barrels. Filter it before use. It’s illegal in some places—imagine that. Pure water falling from the sky, and they want to regulate it.

13. DIY Bio-Filter System

Use buckets or barrels. Layer charcoal, sand, gravel. Maybe even use cheesecloth or coffee filters. Replace layers often.

14. Distillation

Boil water, catch the steam, condense it back into water. Removes EVERYTHING—chemicals, metals, salt. Slow, but purer than what the city hands you.

15. Test Your Water Regularly

Get test strips or kits. Know the levels of nitrates, lead, E. coli. Trust your results, not the city’s “annual report” full of watered-down half-truths.


3 DIY Survival Drinking Water Hacks for When the SHTF

When it all goes south—and it will—these hacks could be the difference between dying of thirst or dying with a rifle in your hand. Pick your battle, but stay hydrated.

Hack #1: The T-Shirt + Sand Filter

Tear up a shirt, wrap it over a bottle or funnel. Fill it with gravel, then sand, then charcoal. Pour water slowly through it. It won’t kill microbes, but it filters out dirt, bugs, and grime. Follow up with boiling or bleach.

Hack #2: Tree Branch Water Filter

Yup—certain tree branches (like pine or birch) can act like filters. Cut a piece, insert it into tubing, and pour dirty water through. The wood’s xylem filters microbes. Not perfect, but scientifically sound. Look it up.

Hack #3: Emergency Solar Still

Dig a hole, put a cup in the middle. Fill the hole with wet leaves or urine if you’re desperate. Cover with clear plastic, weight the center with a rock. Sunlight evaporates water, it condenses and drips into the cup. Slow as hell, but safe.


Final Warning

Back to Iowa. You think Des Moines has it bad with its nitrate problems? Try living near a CAFO (Concentrated Animal Feeding Operation) and tell me you trust what’s flowing from your faucet. The rivers are poisoned. The groundwater’s tainted. And no one’s coming to fix it when the system crashes.

You have to be your own water utility. Your own chemist. Your own damn filtration plant.

Iowa’s water isn’t just unsafe—it’s a canary in the coal mine. What’s happening there will happen everywhere. It’s a blueprint for environmental collapse and government inaction. They won’t protect you. They’ll tell you it’s fine right up until they’re handing out bottled water on the news.

Don’t wait for that moment. Don’t be the fool crying at a FEMA tent wondering what went wrong. Prepare now. Filter everything. Question everything. Trust nothing.

Because when the lights go out, and the taps go dry, only the prepared will drink.

How to Stay Alive When the Unthinkable Happens: A Survivalist’s Guide to School Shootings

Listen up. This world is broken. While soft-spoken politicians and delusional adults keep patting themselves on the back for “raising awareness,” our kids are getting gunned down in classrooms. You think it’s enough to hide under a desk and pray? Think again. If you want to survive an active shooter situation in school, you better start thinking like a warrior, not a victim.

I’m not here to sugarcoat it. I’m here to give you what you need: the skills, the mindset, and the hacks to stay alive. Because when bullets start flying, only the prepared survive. The rest? They become statistics. Don’t let that be you.


15 Survival Skills You Need to Drill into Your Brain (and Your Kids’ Too)

1. Situational Awareness

You can’t defend yourself if you don’t even know what’s going on. Scan rooms when you enter. Know the exits. Know who looks off, what’s normal, what’s not.

2. Memorize Escape Routes

Don’t wait for an adult to tell you what to do. Know every exit from every room you’re in — the front door, back door, windows, stairwells. Map it in your mind like your life depends on it — because it does.

3. Shadow Movement

Learn to move like a ghost. Stay low. Stay quiet. Hug the walls. Avoid open hallways. Never be a silhouette in front of glass doors or windows.

4. Improvised Lockdown

No lock? Make one. Use belts, shoelaces, backpack straps to bind door handles. Wedge desks, chairs, or trash cans under door handles. Disable the doorknob from the inside if you can. Be a barrier.

5. Barricade Strategy

Stack desks, chairs, and cabinets in front of doors. Build the barricade high and tight. Make it so the shooter would have to waste time breaking in — and time is your best friend in this fight.

6. Weaponization of Everyday Objects

If it comes down to it — you fight. Scissors, fire extinguishers, chairs, metal rulers, even a heavy Chromebook. If you’re cornered, don’t freeze — attack like your life depends on it. Because it does.

7. Silent Communication

Whispering kills. Learn hand signals with your friends or classmates. Thumb up = OK. Two fingers point = shooter direction. Fist = silence. Teach each other. Practice.

8. Phone Discipline

Turn off sound, vibration, brightness. Your glowing screen in a dark room is a beacon. Text quietly if you have to — but don’t make a sound. And don’t call, unless you’re safe or out.

9. First Aid: Bleeding Control

A bullet doesn’t care if you’re popular or smart. Know how to use a tourniquet (belt works in a pinch). Press hard. High and tight on limbs. Keep them alive until help comes.

10. Decoy Diversion

Throw something — a phone, a textbook — in the opposite direction. Sound draws attention. Give yourself that extra 3 seconds to escape or move.

11. Read the Shooter

Is this person walking slowly? Sprinting and shouting? Is it targeted or random? This isn’t compassion — it’s intel. It tells you if they’re hunting someone or spraying indiscriminately.

12. Know the Drill — and Then Go Beyond It

Those fire drills and lockdowns? Half-baked. Real life isn’t rehearsed. Use the drills to run your own plan. Where do you hide? Where do you run? Who’s with you?

13. Escape, Evade, Survive

When in doubt — RUN. Don’t huddle in a corner if there’s a way out. Run in zigzags. Break visual contact. Move behind cover (not just concealment).

14. Group Mentality Strategy

Small groups move faster than mobs. Choose two or three people you trust. Watch each other’s backs. Assign tasks: one watches hallway, one blocks the door, one sends messages.

15. Post-Shooting Awareness

Just because the shooting stops doesn’t mean the danger’s over. Wait for law enforcement’s signal. Don’t run toward sirens blindly. Shooters sometimes fake being victims or plant traps.


3 DIY Survival Hacks That Could Save Your Life

Hack #1: The Belt Lock

In a room with outward-opening doors and no lock? Wrap a belt tightly around the top hinge or door closer, loop it through the handle, and yank hard. It keeps the door from opening easily. Old-school trick, but effective.

Hack #2: Sound Masking Speaker

Keep a cheap Bluetooth speaker in your bag. In a lockdown, crank white noise or static near the door if you’re hiding and want to confuse directionality. The shooter won’t know where the people are if you disorient him.

Hack #3: Window Exit Tool

Carry a keychain glass breaker. Yes, even in school. They’re legal and lifesaving. If you have to bail out a window, this thing turns tempered glass into an open exit in one strike. Cheap. Quiet. Smart.


What the Adults Won’t Tell You

You’re not helpless. But they want you to be. Because if you learn how to think for yourself, act decisively, and fight like hell — you make the system look weak. And guess what? It is weak. It’s reactive. You need to be proactive.

Stop pretending evil won’t walk through your doors. Stop depending on policy to save you. A locked door slows a shooter. A survivor stops him.

Every second matters. Every breath counts. You don’t get do-overs. If a shooter walks into your school, you need to think fast, move smart, and stay deadly calm.


Last Words — and They’re Not Nice

I’m sick of the hand-wringing. I’m done with the candles and hashtags. You want to survive? Good. You better be willing to train harder than your gym teacher ever made you. You better be willing to do what the cowards won’t.

Because when the shooter steps through those doors, it’s not going to be a politician who saves you. It’s not going to be a motivational poster or a principal on the PA system. It’s going to be you.

You and your mind. You and your will to survive. You and every skill you drilled for this very moment.

The world’s gone mad. So be smarter. Be faster. Be tougher.

Be the one who walks out alive.

Jump or Die: Ocean Crash Survival for the Desperate and Prepared

You’re Crashing Into the Ocean – Here’s How Not to Die Like an Amateur

Listen up. You’re 30,000 feet above nowhere, strapped in a glorified soda can, sipping overpriced ginger ale, when BOOM — something goes wrong. Engines flame out. Cabin screams. The pilot starts praying louder than the passengers. That’s when you know: you’re going down. Into the cold, black, unforgiving ocean.

What you do next decides if you live or if your body bloats up and floats ashore for some tourist to find a week later.

This isn’t your average survival blog. This is the real deal. If you’re not ready to move like your life depends on it — because it absolutely does — then close this window and prepare to meet the fish. Otherwise, let’s dive in. Literally.


💥 10 Ocean-Crash Survival Skills Every Passenger Should Know

1. Situational Awareness Before You Even Take Off

Yeah, I know. You want to nap. But if you’re too lazy to count the rows between you and the exits, you deserve what’s coming. Every damn time you fly, you better know where the exits are, where the flotation devices are, and how to manually open the emergency doors.

2. Brace Position That Doesn’t Get You Killed

Forget what they show in the seatback card. In a real crash, you need to protect your head and brace your legs to avoid snapping your spine on impact. Feet flat, knees slightly apart, head down, arms wrapped over your head or seat in front of you. Practice this at home, not when the plane starts rattling.

3. Ditch the Seatbelt at the Right Time

Screenshot

Too early and you fly around like a piñata. Too late and you’re trapped. As soon as the initial impact hits and the plane stops skidding, unbuckle and MOVE. Do NOT freeze. Every second counts.

4. Egress Navigation Underwater

The lights are out. The cabin’s tilting. Water’s rushing in. If you can’t crawl blind toward an exit with your eyes shut, you’re dead. Practice escaping in pools, learn how to hold your breath under stress, and train to follow walls and seats.

5. Inflating Life Vests AFTER Exiting the Aircraft

You inflate inside, you’re a floaty balloon trapped in a sinking coffin. Keep that vest uninflated until you’re outside. If you forget this, you’ll be a buoyed corpse.

6. Identifying and Using Life Rafts

Not all planes have them. Know if yours does. Know where they are. Learn to deploy them and how to board even if you’re exhausted. Also — steal an emergency flashlight. It’ll help signal, and screw the rules. You’re in survival mode now.

7. Cold Water Survival & Hypothermia Prevention

The ocean isn’t your friend. Get out of the water fast. Conserve body heat. Huddle with others. Stay dry, stay moving, and don’t drink seawater unless you’re craving madness.

8. Floating Techniques If You’re Alone

If all you’ve got is a vest and darkness, learn to float without tiring. Back float. Dead man’s float. Anything that keeps your head above water while you catch your breath or wait for rescue.

9. Using the Environment to Signal

Pull mirrors, shiny surfaces, fire-starting tools, even fabric. Signal with smoke, flashlights, or colored clothing. Splash. Yell. Make noise. Draw attention. But save energy when it’s futile.

10. Mental Fortitude Under Terror

You will want to scream, freeze, panic. That’s death. Control your fear. Use adrenaline. Breathe in. Focus. Decide. Act. Don’t wait for orders — think and move like your life depends on you.


🧰 3 DIY Survival Hacks for Escaping a Moving Airplane

Screenshot

1. Improvised Window Breaker

Most plane windows can’t be opened. But sometimes cabin pressure blows out or breaks panels. Keep a solid pen, metal flashlight, or steel water bottle in your carry-on. These can help bust plastic panels or thin interior doors in emergencies.

2. Seat Cushion Raft Hack

Yes, that foam cushion can float. But if you’re smart, you’ll jam two together with your belt or jacket to increase buoyancy. Instant DIY mini-raft. Not comfortable. Not elegant. But it keeps you from sinking.

3. Plastic Bag Floatation Assist

You packed your gear in ziplocks, right? No? Dumb. But if you did — trap air in large bags, seal them, and tie them to your body or under your arms. Not Coast Guard-approved, but better than sinking like a brick.


🛑 Final Word: When That Plane Drops, You’ve Got Seconds

Let me be blunt. Most people freeze. They wait for instructions. They pray. They scream. They forget every drill they saw in that cartoon safety video and then wonder why the hell they’re drowning.

You’re different. Or you better be.

Here’s your checklist:

  • Know your exits.
  • Brace like you mean it.
  • Unbuckle fast.
  • Don’t inflate inside.
  • Get the hell out.
  • Climb onto anything that floats.
  • Signal hard.
  • Conserve warmth.
  • Don’t drink the ocean.
  • Fight the fear. Move.

If you think you’re going to wing it when the fuselage starts groaning and smoke pours in — you’re already dead. But if you drill these into your skull and train like your life depends on it (because it does), you’ll punch the reaper in the face and live to tell the story.

Remember: no one’s coming to save you in time. Save your damn self.

How to Survive in the Wilderness When SHTF (And Everything You Love is Gone)

Let’s get one thing damn clear: when the world burns, your smartphone won’t save you. Amazon ain’t dropping packages in the forest, and nobody’s coming to rescue your soft, GPS-dependent backside. You either learn to live or lie down and rot. That’s the brutal truth. Now pull your head out of your ass and listen up.

Out there in the wilderness, everything is trying to kill you: the weather, the wildlife, and most of all, your own ignorance. If you don’t know what the hell you’re doing, nature will chew you up and spit your bones into the dirt. But if you learn the skills — real survival skills — you can make it. You can thrive. You can be the last one standing when SHTF.

Here’s how. This is survival, not a damn camping trip.


🔥 15 WILDERNESS SURVIVAL SKILLS YOU’D BETTER KNOW IF YOU WANT TO STAY ALIVE:

  1. Fire Starting (Without a Lighter)
    Your Bic won’t last forever, cupcake. Learn how to start a fire with flint and steel, a bow drill, or even a battery and steel wool. Fire is warmth, food, safety, and morale.
  2. Water Purification
    If you drink straight from a river, you’re inviting giardia and dysentery to your apocalypse party. Boil it. Filter it. Solar still it. Know your options or die thirsty with a belly full of parasites.
  3. Shelter Building
    Tarps rip. Tents rot. Know how to build a debris hut, a lean-to, or a log shelter. Hypothermia is a silent, smug son of a bitch.
  4. Navigating Without Tech
    Compasses don’t need batteries. Learn celestial navigation and terrain association. Don’t trust landmarks — memorize the land itself.
  5. Hunting and Trapping
    No more Uber Eats. Set snares. Make deadfall traps. Know how to gut and clean game without puking your guts up.
  6. Fishing Without Gear
    Improvised hooks, fish traps, spearfishing. Learn it. You can’t live off berries forever — unless you enjoy starvation and hallucinations.
  7. Edible Plant Identification
    One wrong leaf and you’re crapping blood for days. Learn what’s safe to eat in your region. Make a damn notebook and memorize it.
  8. Improvised First Aid
    Nobody’s coming with morphine and a gurney. Learn how to close wounds, stop bleeding, and fight infection with natural resources and basic kits.
  9. Stealth and Camouflage
    You’ll need to hide — from people, from animals, from your own mistakes. Learn how to move unseen and build camo shelters.
  10. Signaling for Help
    If you do want rescue, you’d better know smoke signals, mirrored flashes, and ground-to-air symbols. Yelling won’t cut it.
  11. Tool Making
    Can’t buy a new knife out here. Learn to knap stone, carve wood, lash together gear. Primitive tools keep you alive.
  12. Cordage Crafting
    Paracord runs out. Learn to twist plant fibers into strong cord. Without rope, you’re just a well-fed caveman.
  13. Food Preservation
    Salt. Smoke. Drying. Fermentation. Without preservation, every good kill goes rotten before you can say “wasted calories.”
  14. Mental Fortitude
    You will be cold, tired, scared, and alone. Crying won’t help. Mental toughness is as critical as any blade on your belt.
  15. Weather Prediction
    If you can’t read the sky, you’ll freeze in your sleep or get swept downriver. Clouds, winds, bird movement — nature whispers before it screams.

🔧 3 DIY WILDERNESS SURVIVAL HACKS

  1. Soda Can Rocket Stove
    Don’t waste time or fuel. Cut a soda can, create a rocket stove with just a few snips and a nail. Efficient. Light. Packs easy. Great for boiling water or cooking game in tight spots.
  2. Char Cloth Fire Starter
    Take old cotton cloth (yes, your ratty T-shirt), char it over a flame in a tin until it’s black but not burned. That stuff will catch the smallest spark. Gold in wet conditions.
  3. Pine Sap Bandages
    Got a wound? Pine sap is nature’s antiseptic glue. Slap it on, cover with clean cloth or moss. It stops bleeding and helps heal. You’re welcome.

WHY YOU NEED TO TAKE THIS SERIOUSLY

Let me say this loud for the folks in the back who still think DoorDash is gonna work when the grid goes down: You are on your own.

No police.
No hospitals.
No grocery stores.
No laws except the ones you enforce yourself.

People will turn on each other faster than a pack of wild dogs. And the weak — the clueless, the ones who never practiced a damn thing, who thought “roughing it” meant no WiFi — they’ll die first. Not maybe. Definitely.

You think a three-day REI survival course makes you a bush god? Think again. You need months in the wild, not weekends. You need cuts, bruises, freezing nights, burnt food, failed shelters, and near-death experiences to even start learning what it really takes.


YOU WANT A FIGHTING CHANCE? THEN DO THIS:

  • Train. Every week. Go outside. Practice fire making in the rain. Sleep in your DIY shelter. Cook a squirrel over an open flame. Live the way you’ll need to.
  • Stock up, but train without it. Yes, buy gear. But assume it’ll all break or vanish. Know how to survive with nothing.
  • Build your mental armor. This isn’t about six-pack abs. It’s about grit. Fearless, furious, never-quit grit.

Final Words Before the World Ends (Again)

This isn’t a hobby. It’s not a YouTube trend or something you learn from a TikTok prepper doing spoon reviews. This is life and death. This is teeth-gritting, frostbitten, gut-rumbling SURVIVAL in its rawest form.

The wilderness doesn’t give a damn about your excuses. But if you respect it, if you learn its rules and play harder, smarter, meaner than it does — you can beat it.

When SHTF, the soft will cry. The wise will run. But the prepared?
The prepared will rule.

So sharpen that blade, strip off your weakness, and get to work.

You’ve been warned.

Fire Starting Techniques – The Survivalist’s Guide to Fire Starting Techniques

Let me spell it out for you—if you can’t start a fire in a survival situation, you might as well dig your own damn grave and lie down in it. There is no excuse in the world for not knowing how to get a flame going when your life depends on it. Fire is not a luxury. It’s not a camping bonus. It’s life and death. And if you’re the kind of person who thinks a Bic lighter is a complete fire plan, then congratulations—you’re the first one to freeze, starve, or get eaten when the grid goes down.

So buckle up, buttercup. I’m not here to coddle. I’m here to prepare you for the real world, where Mother Nature doesn’t care about your excuses or your dead cell phone. This is the fire-starting gospel, and you’re going to memorize it like your life depends on it—because one day, it just might.


First, Understand This: Fire is Life

Fire gives you warmth, light, cooked food, safe water, and protection. It boosts morale. It keeps wild animals at bay. It disinfects. It even sends signals. Without fire, you’re basically camping with death.

So let’s talk about the four big fire-starting methods every survivalist should master—and I mean MASTER, not “tried once at Boy Scout camp.”


🔥 The Four Core Fire Starting Methods

1. Ferro Rod (Ferrocerium Rod) – The Realist’s Tool

This is the go-to for serious preppers. A ferro rod throws sparks hotter than 3,000°F and laughs in the face of wind and water. All you need is a striker (knife spine, dedicated scraper, whatever) and good tinder.

How to Use:

  • Scrape off some of the rod to make a fine pile.
  • Place tinder close.
  • Scrape hard and fast for sparks to ignite the pile.

If you don’t have a ferro rod in your bug out bag, your EDC kit, your vehicle, your cabin, and your nightstand—you’re doing it wrong.


2. Lighter – The Lazy Man’s Savior

Lighters are great. You press a button and boom—fire. But if it’s wet, cold, out of fuel, or cheap? You’re screwed.

Pro Tip: Carry multiple Bics, vacuum-sealed. And store a Zippo with extra flints and lighter fluid.

Lighters fail. Period. Which is why they should be backup, not primary.


3. Magnifying Glass – The Solar Way

Sunlight is free, baby. And you’d be amazed how well a cheap magnifier or Fresnel lens can work if the sun is shining.

How to Use:

  • Direct sunlight through the lens to a fine point.
  • Focus on dark, dry material—char cloth, dry leaves, even a bit of paper.
  • Hold it steady. Don’t blink. And pray to the sun gods.

This method is quiet, smokeless, and renewable, but only works if you have direct sun.


4. Primitive Methods – The Caveman’s Trial

If you can’t make fire with sticks, you’re not truly prepared. Period.

Two methods worth knowing:

  • Bow Drill: A classic. Requires coordination, patience, and good materials.
  • Hand Drill: Pure misery. Do it just to know you can.

Practice now while your fingers aren’t frozen off. Primitive methods are the last resort—but they can save your life.


💥 15 Fire Starting Survival Skills Every Prepper Must Know

  1. Tinder Mastery – Know what burns fast and hot. Cotton balls + Vaseline, birch bark, fatwood, char cloth, etc.
  2. Feather Sticking – Shaving curls into wood to make kindling more flammable.
  3. Tinder Collection – Always be gathering. Don’t wait for crisis mode.
  4. Waterproofing Your Fire Kit – Ziplocks, tins, vacuum seals. Fire gear MUST stay dry.
  5. Creating Char Cloth – Burn cotton in a sealed tin to make catch-easy embers.
  6. One-Handed Ferro Use – Practice in case you’re injured. You’ll thank me.
  7. Lighting a Fire in the Wind – Shield the flame, build a windbreak, use dense kindling.
  8. Fire Reflector Walls – Reflect heat back into your shelter.
  9. Fire Pit Construction – Dig, ring with rocks, control your flame.
  10. Fire in the Rain – Use dry inner wood, bark shavings, and a solid platform.
  11. Using a Flint and Steel – Classic method, reliable when practiced.
  12. Knowing Local Tinder Sources – Cattail fluff, pine needles, dry moss, etc.
  13. Starting a Fire with Steel Wool and Battery – Touch the terminals with wool. It ignites instantly.
  14. Maintaining Fire Through the Night – Bank coals, add dense fuel, reduce oxygen exposure.
  15. Emergency Fire from Gunpowder – Break a round, use the powder (carefully) with a spark source.

🛠️ 3 DIY Survival Fire Starting Hacks (That Actually Work)

1. Vaseline Cotton Balls in a Straw

  • Stuff cotton balls soaked in Vaseline into a cut plastic straw.
  • Seal the ends with a lighter to make waterproof fire starters.
  • Lightweight, clean, and burns like a torch.

2. Crayon Fire Starter

  • A single crayon will burn for 5–10 minutes.
  • Wrap several in foil and store them in your pack.
  • Great for when all else fails and you need to dry wet tinder.

3. Dryer Lint & Egg Carton Bombs

  • Pack dryer lint into cardboard egg cups.
  • Pour melted wax over them.
  • Let them dry, then cut and store.
  • One of these will burn long and hot—perfect for starting stubborn fires.

Final Words (And You’d Better Listen)

If you think you’ll “figure it out when the time comes,” you’re already dead. Survival isn’t romantic. It’s not a Hollywood movie. It’s harsh, it’s cold, it’s dirty—and without fire, it’s a short ride to hypothermia and regret.

Practice now. Fail now. Learn now. Do not wait until your fingers are numb and the wolves are howling to discover that you don’t know how to make a damn flame.

Fire isn’t optional. It’s mandatory. And in a true survival scenario, it’s the line between you and death.

So get off your ass, get your gear together, and train until it’s second nature. Fire should be your servant—not your weakness.

This isn’t a game. This is life. And if you’re not serious, then you’re a liability—not a survivor.

Now go make a fire—and do it without cheating.