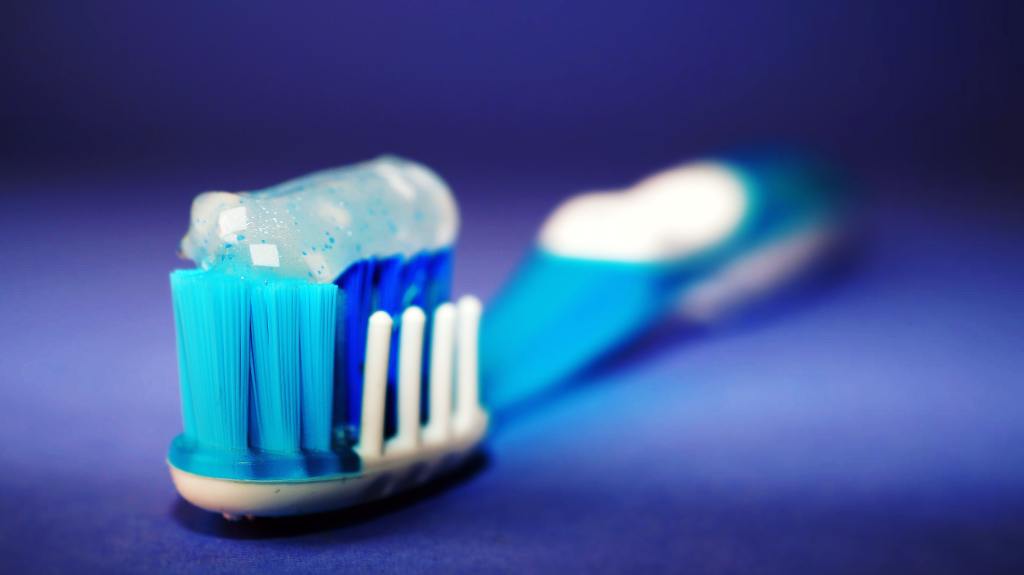
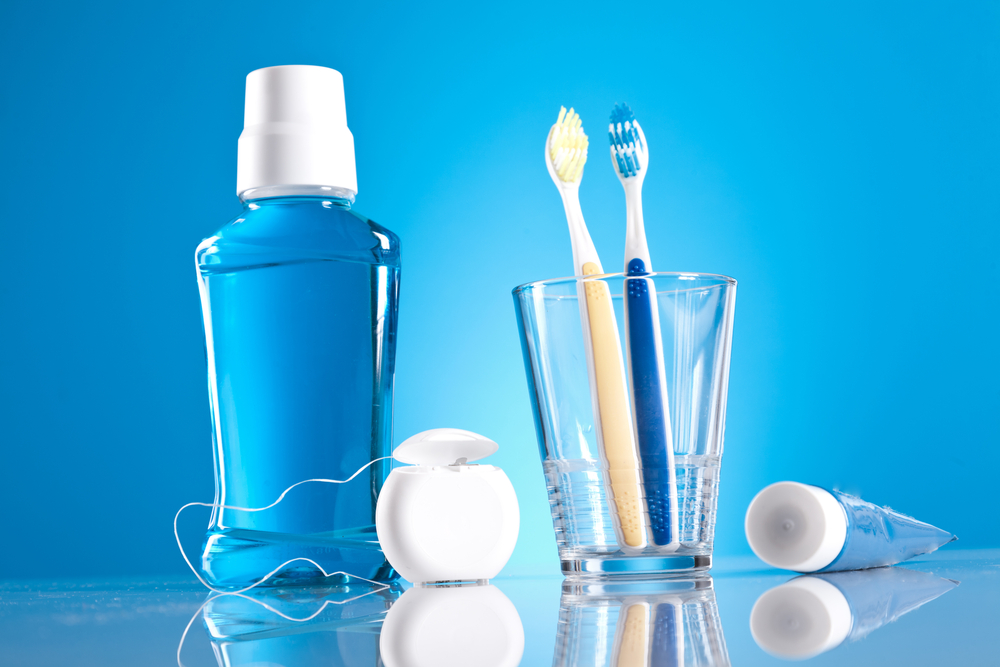
Have you ever been to the oral aisle at the supermarket?
There is a huge variety of products.
Manual and electric toothbrushes…
Fluoride and non-fluoride options kinds of toothpaste…
Mouthwash…
The list goes on.
Dental hygiene is important, but it always gets me thinking…
How did our ancestors brush their teeth?
They didn’t have these items.
But apparently, they survived.
I figured that there must have been some kind of a “trick” that they did.
And that in a survival situation, it might come in handy.
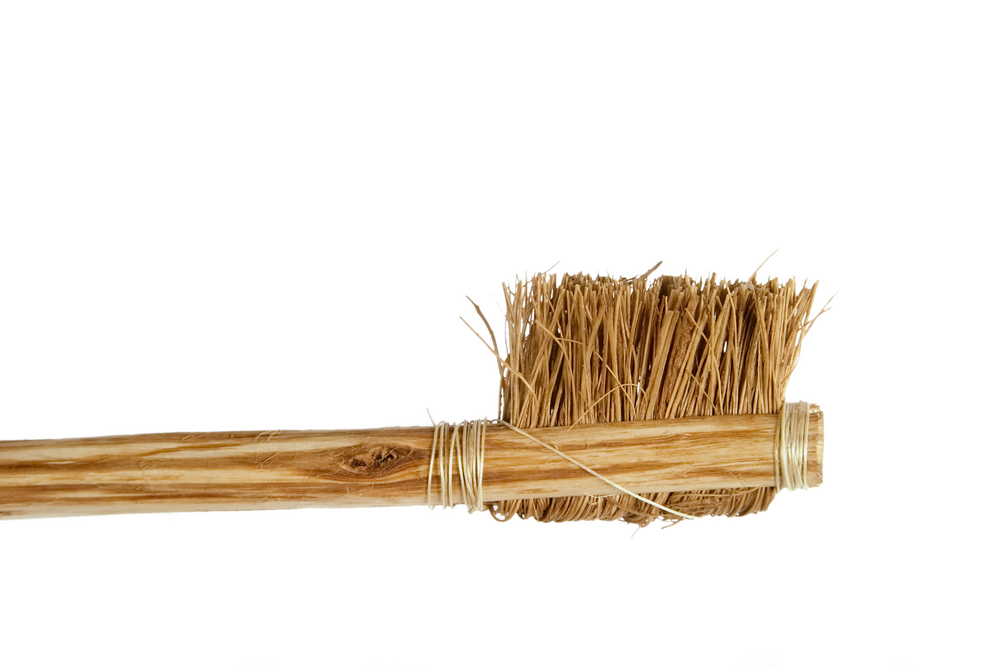
When I did some research, I found that they used a variety of methods.
For example, the ancient Egyptians and Greeks used tooth sticks, which were thin sticks or rods that were used to clean their teeth and massage their gums.
The sticks were often made from twigs or other natural materials and were used much like a toothbrush.
In other cultures, people chewed on twigs or leaves that were believed to have cleansing and medicinal properties.
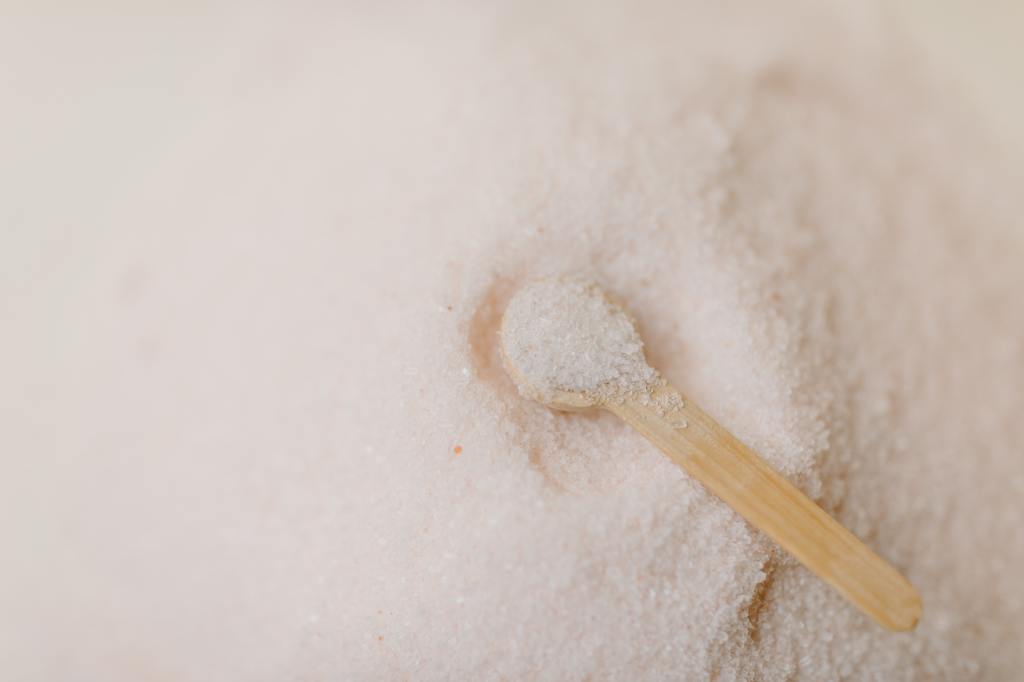
Some used a mixture of ashes and salt to brush their teeth, while others rubbed their teeth with a cloth or used a fingernail to clean them.
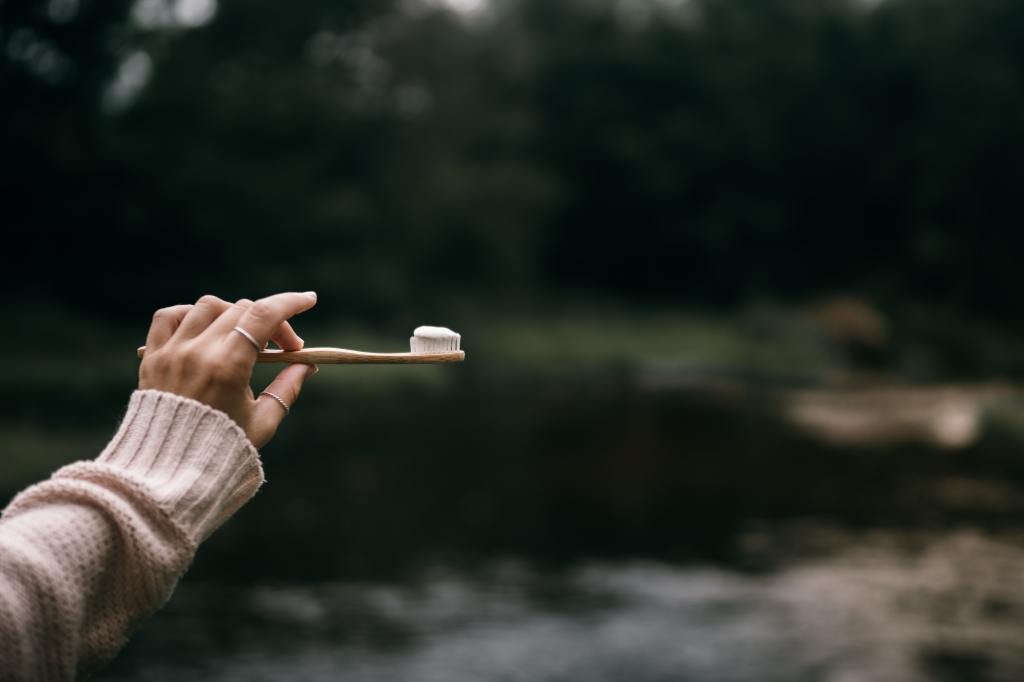
As you can see, there are many different ways to maintain oral hygiene.
In a survival situation, it’s okay if you don’t have your usual tools with you.
You can take care of your teeth and gums as best you can, using improvised methods if necessary.
To maintain good dental hygiene in an emergency, it is recommended to:
Rinse your mouth with water regularly to release food particles and plaque.
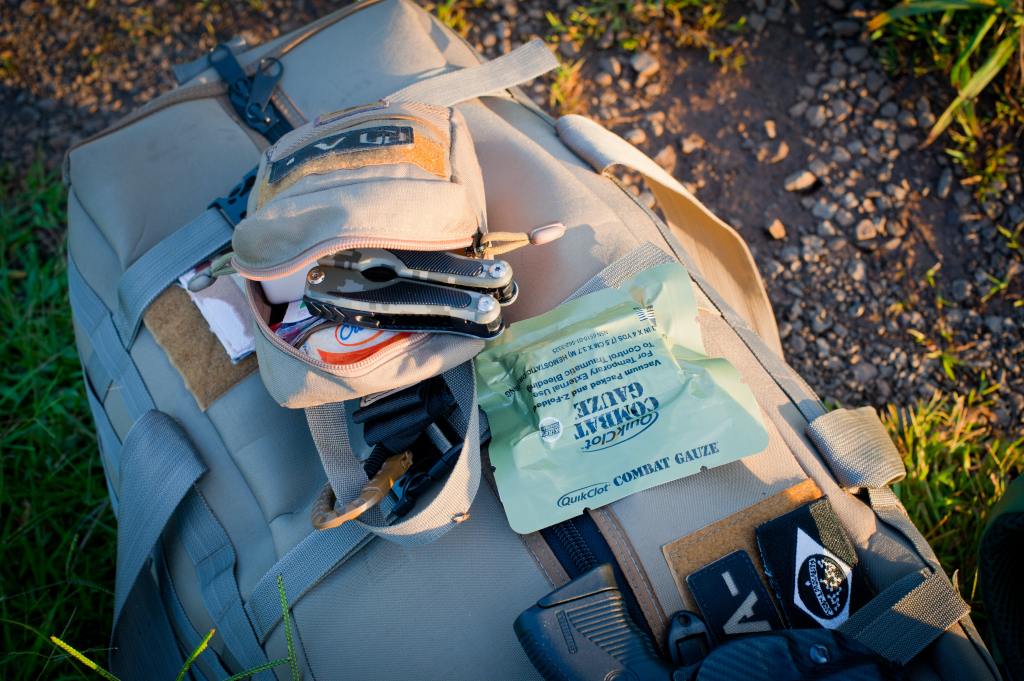
Use a toothbrush or tooth stick to clean your teeth if possible.
Brush your teeth with baking soda or salt if toothpaste is not available.
You can carry these things in your kit.
But even if you don’t have anything with you, you can improvise to take care of your basic oral needs.
Something is always better than nothing.
We should keep this in mind in every prep we do.
If you happen to know any other ways to maintain oral health in emergencies, I would love to hear them!
Did you know getting good at chess would improve your prepping abilities?
Don’t worry, I’m not going to ask you to learn how to play chess.
In fact, I don’t even know the rules of that game!
But I do know that it requires a lot of strategic thinking.
And that professional chess players can quickly think of 15 or 20 moves ahead in each move.
This is exactly what is needed for prepping.
Being prepared means more than just stocking up on food and weapons.
It means having a comprehensive plan in place that covers a wide range of scenarios and contingencies.
Without a plan, we risk being caught unaware and unable to respond effectively to emergencies.
But planning for emergencies is not easy.
There is always something different to prepare for.
Earthquakes…
Tornados…
Power Outages…
One can’t ever account for everything.
Sometimes we don’t even know what we are preparing for.
Take the chemical spill in Ohio, for example.
How could the residents see this coming?
And how could they even prepare for it?
Well, the truth is, with a proper planning system, you can prepare for anything.
You’ll see how in a minute.
First, you need to know:
Why Planning Is So Important.
Imagine you lived in an area that is prone to hurricanes.
You’ve stocked up on food and water…
You have a generator…
…and you’ve secured your house as best you can.
You feel confident that you are prepared for the next big storm.
But suddenly, a huge storm hits.
One that is bigger than any other storm your area has seen.
It completely destroys your preparations and your house is not safe anymore.
You have to bug out.
But the issue is, it happened on a school day. And your children still haven’t gotten back from school.
How will you let them know where to meet?
Your smartphone is not working because the power grid stopped working.
It’s a disaster!
Well, this is where foresight comes in handy.
If you had agreed on a meeting place in case your preparations didn’t work, then this would have been solved.
Getting good at planning means preparing for things that most people would not even think about.
Of course, this was a far-fetched scenario…
But it goes to show…
A proper plan can help you and your family overcome even the craziest catastrophe.
That’s why I’ll show you simple ways to become good at this skill.
And give you ideas on how to practice your planning abilities so that you are always ready.
Find Your Commitment Level
Before you start working on your planning skills, there is something that you have to figure out first…
You need to assess your level of commitment.
The reason this is so important is that developing this skill is not something easy.
You will not become good at it overnight.
Just like professional chess players work very hard to improve their skills, you will have to go over some roadblocks.
If you are aware of your commitment level before you even start, however, you will be in a much better position to work through these roadblocks.
Before you read the rest of the article, ask yourself these questions:
How much time and effort are you willing to invest in planning for emergencies?
If improving your planning skills gets too hard, would you continue working on them?
What challenges are you willing to face?
Take your time and honestly answer these questions.
This way, you can set realistic goals for yourself and ensure that you don’t overcommit or burn out.
How To Improve Your Planning Skills
Once you’ve figured out your commitment level, it is finally time to improve your planning abilities.
When it comes to planning for emergencies, there are some key elements that every prepping plan should include.
These elements include risk assessment, threat analysis, resource inventory, and contingency planning.
Let’s explore each of these elements in more detail:
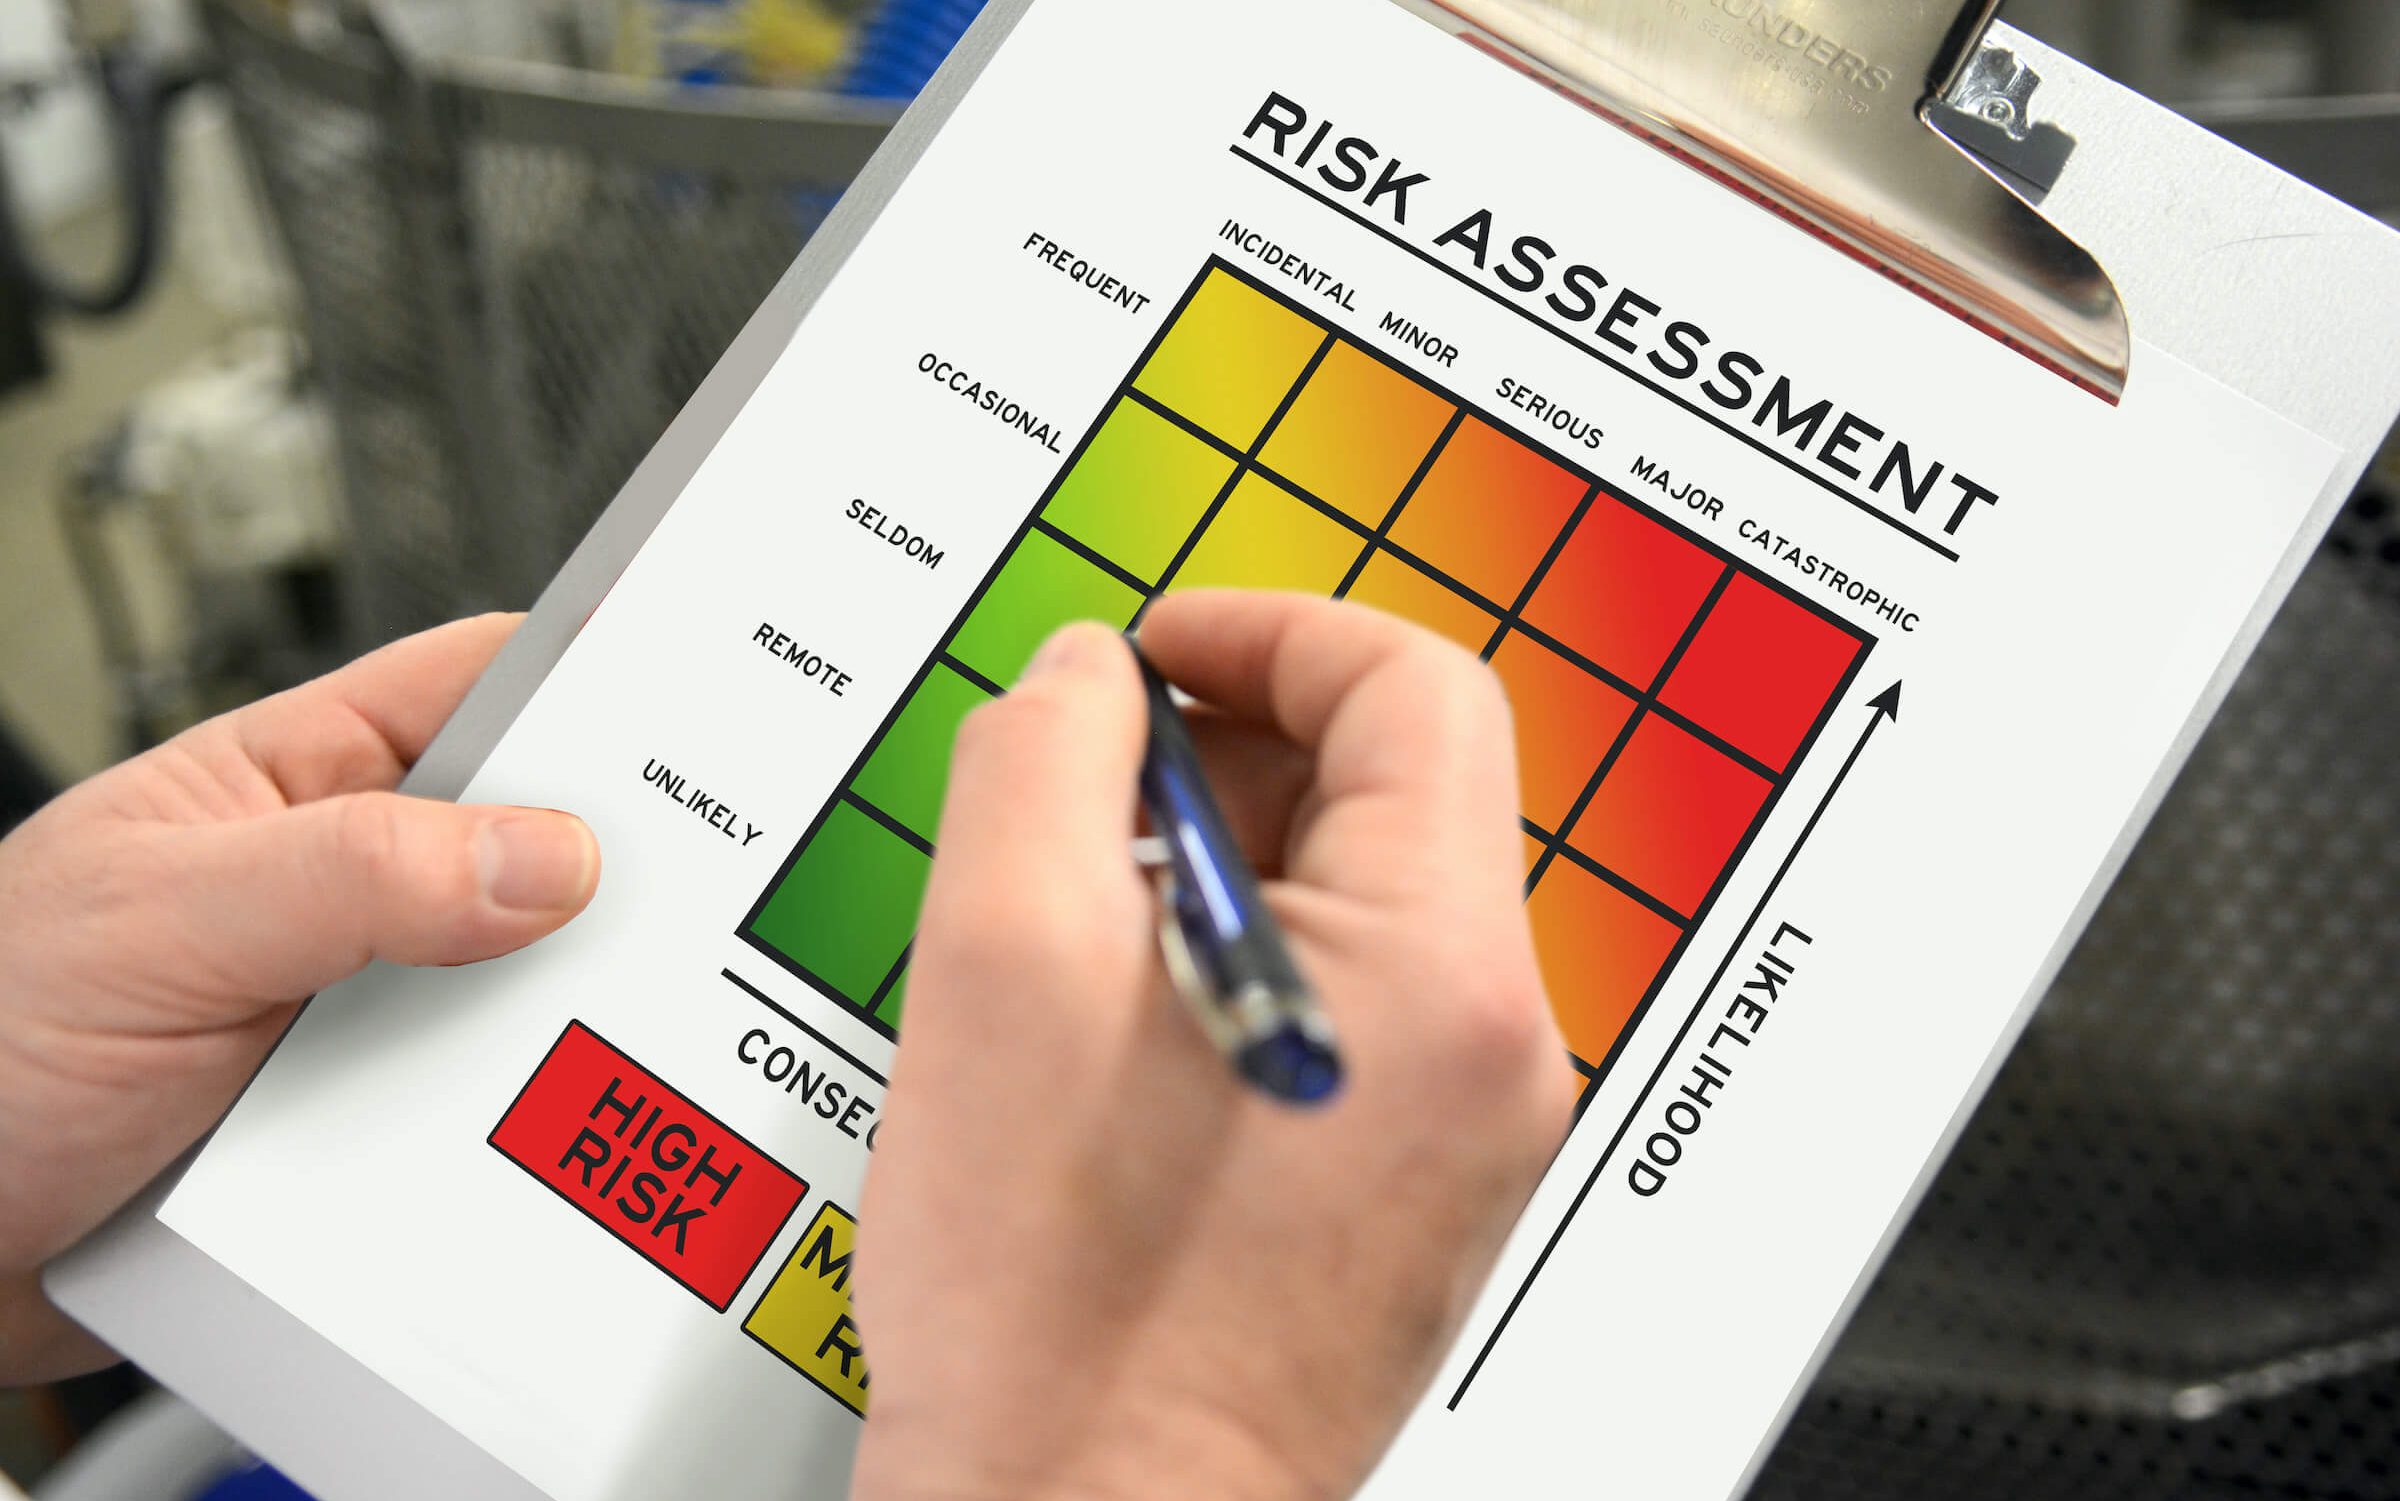
Risk assessment.
This is the process of identifying potential risks and hazards that could affect you and your loved ones.
This includes natural disasters, economic collapse, civil unrest, and other potential emergencies.
You can even include risks that are not your plan.
Neglecting to prepare for something is also a risk.
Consider everything that could go wrong.
Threat analysis.
This is where you evaluate the risks.
Conduct a threat analysis to evaluate:
The likelihood of each threat.
The potential impact of each threat.
This will help you prioritize your planning efforts and allocate resources.
Resource inventory.
A resource inventory involves taking stock of the resources you have on hand and identifying any gaps in your preparedness.
This includes:
Food,
Water,
Medication
Weapons and ammunition
Other essential items.
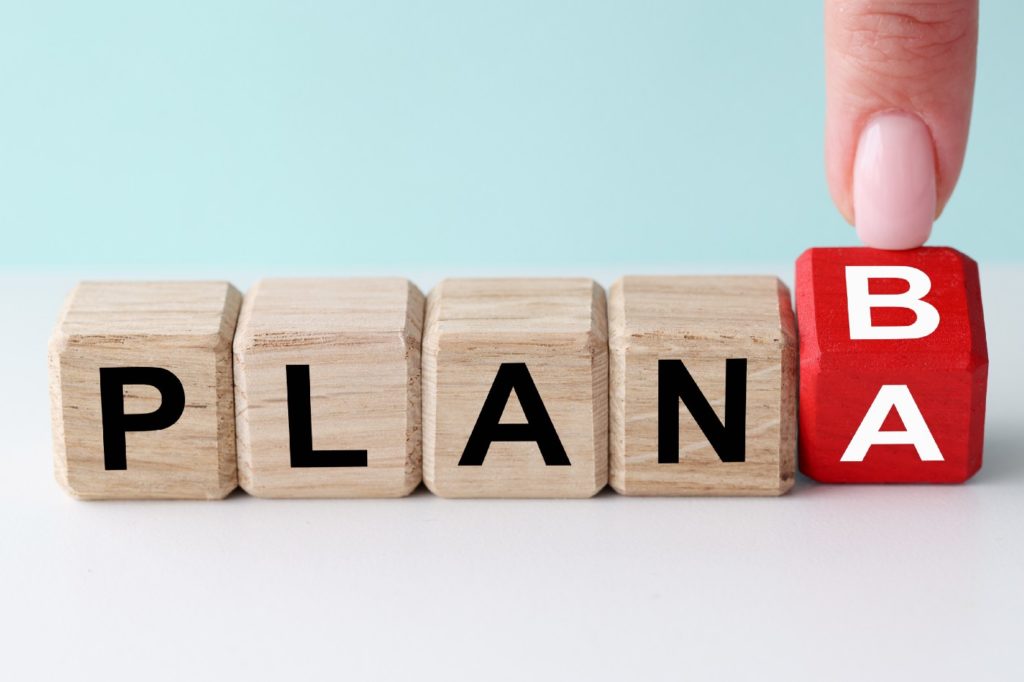
Contingency planning.
Contingency planning involves developing a plan B in case your primary plan fails (Remember the storm example?).
This can include backup evacuation routes, secondary locations for shelter, or contingency supply sources.
By including these key elements in your prepping plan, you can be better prepared for a wide range of emergencies and increase your probability of survival.
Tips That Will Make This Easier
If you’ve read this far, you have probably realized that this will take some work.
But, remember, you are committed.
Which means that you are willing to do whatever it takes to become better at planning.
However, this doesn’t mean that you can’t use simple advice that will make this journey easier.
Start small.
If you are not an experienced prepper, it is easy to become overwhelmed.
Start with a simple plan for a specific scenario, such as a short power outage.
This will help you build confidence and develop your planning skills.
Once you feel ready, move on to harder challenges, such as natural disasters.
Set goals.
Determine what you want to achieve with your prepping plan.
And set realistic, measurable goals to help you stay motivated and on track.
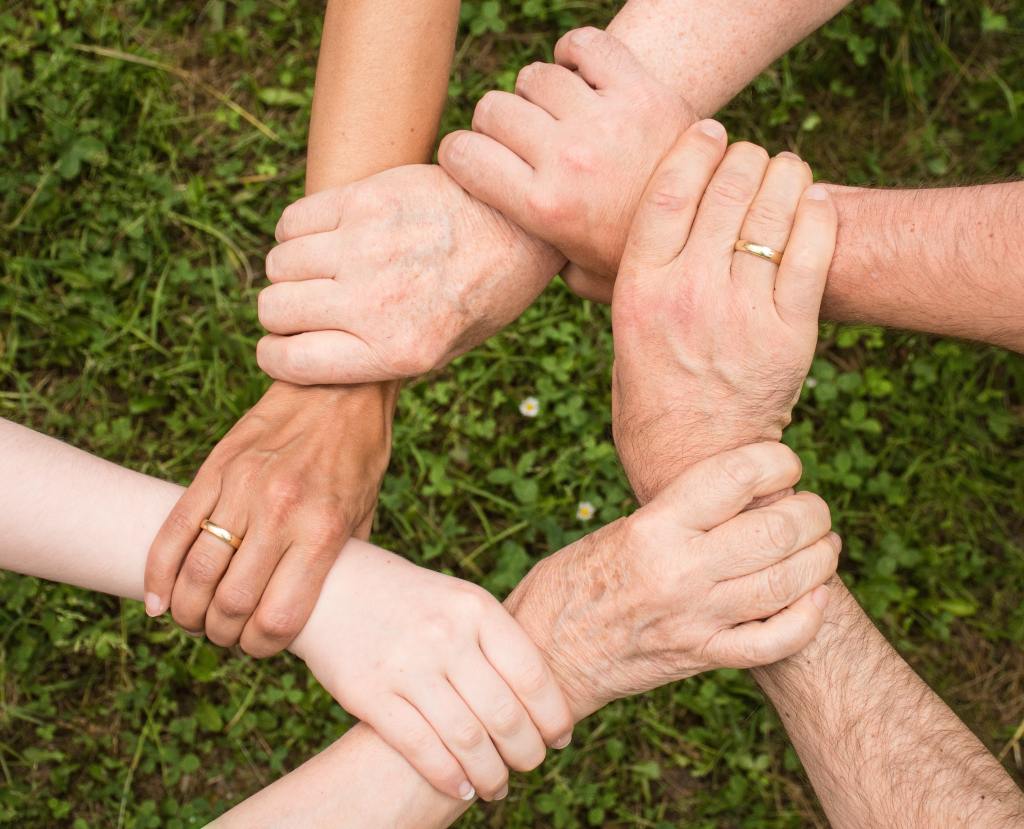
Involve your family.
Doing everything alone is tough. And definitely not fun.
If you involve your whole family in the prepping process, everything will proceed much smoother.
Plus, everyone is going to be on the same page so they will know what to do in emergencies.
Stay organized.
Keep your prepping plan and items organized and easily accessible so you can quickly respond to emergencies.
You can use checklists, journal entries, or your preferred way of taking notes.
Continuously review and update your plan.
The risks we face are constantly changing.
So it’s important to regularly review and update your prepping plan to ensure that it remains effective and relevant.
Planning is a crucial part of prepping.
And can make a huge difference in ensuring your family’s safety.
By developing this skill, you will be in a much better position to survive any emergency.
If you have been trying to prepare for emergencies, then you have probably come across the same roadblock that most preppers have… practice.
As a prepper, it is very difficult to put your prepping skills to the test.
Emergencies simply don’t happen that often.
So you can’t know whether your preparations are up to the task or not.
Practice, however, is a crucial aspect of every skill we develop.
They say that the first step to getting better at anything is to suck at it first.
And to identify your flaws, try to fix them, and improve over time.
But how can you do that with prepping?
Well, with little imagination, you can take steps to test your prepping techniques and stay prepared for any eventuality.
I’ll show you how to do that in a minute.
First, you need to…
Understand Your Prepping Needs
I wish I could give you a clear-cut path that you should follow.
But depending on where you live and your current situation, you need to develop the appropriate skills.
Before testing your skills, though, you need to understand what you need to test.
There are several ways to do that:
Identify Potential Emergencies
The first step is to understand what types of emergencies are most likely to occur in your area.
Look at your town’s history, or ask the local residents what the most dangerous disaster that they had to go through was.
Additionally, consider factors such as natural disasters, power outages, and other events that could disrupt your family.
Assess Your Resources
Take stock of what items and resources you currently have on hand and identify any gaps in your prepping plan.
Consider things like food, water, shelter, clothing, and medication, as well as any tools or equipment that you may need.
Determine Your Priorities
With a clear understanding of your needs, it is easier to prioritize what skills and items you should focus on first.
For example, if you live in an area prone to hurricanes, your priority might be to have a solid evacuation plan in place.
Putting Your Prepping Skills To The Test
It is finally time to test your skills.
You first need to find a safe and controlled environment.
This is where you will be pushing yourself to find flaws in your survival plan.
There are several ways you can do that.
Simulated Emergency Scenarios
One effective way to test your prepping skills is to create simulated emergency scenarios that mimic real situations.
This allows you to see how well you can handle different types of emergencies using your equipment and skills.
For example, you could simulate a power outage, and see how well you can respond to the situation.
We actually make a game out of this in my household and even have the kids evolve in the prepping process.
Practice Essential Skills
This is a simpler one to execute. But it is also time-consuming.
You just try out your essential skills.
This includes building shelters, starting fires, purifying water, and more.
Regularly practicing these skills will help you feel more confident using them in real situations.
And most importantly, it will help you identify any areas that may need improvement.
Seek Feedback From Other Preppers
Sometimes we don’t see an obvious mistake we are making until someone points it out to us.
Just last week, a buddy of mine told me some of my emergency foods had expired.
I had forgotten to look!
Speaking to other preppers can help you see your skills and equipment from a different perspective.
I go over my emergency plans with my friends very often.
And I suggest you do too.
Engage in Community Preparedness Efforts
Your local community can give you tons of chances to test your prepping skills.
Many communities hold emergency preparedness drills and exercises.
These can be excellent times to test your skills and learn from others.
By actively participating in these efforts, you can ensure that you are fully prepared to handle any emergency situation that may arise.
Stay Up-To-Date With Modern Developments
What works nowadays is different from what worked 10 years ago.
The prepping community is always evolving and advancing.
So it is important to stay informed about the latest developments and advancements in the field.
This can include:
Researching and learning about modern technologies and gear.
Stay informed about the latest gear and technologies available to preppers.
There is always different stuff coming out.
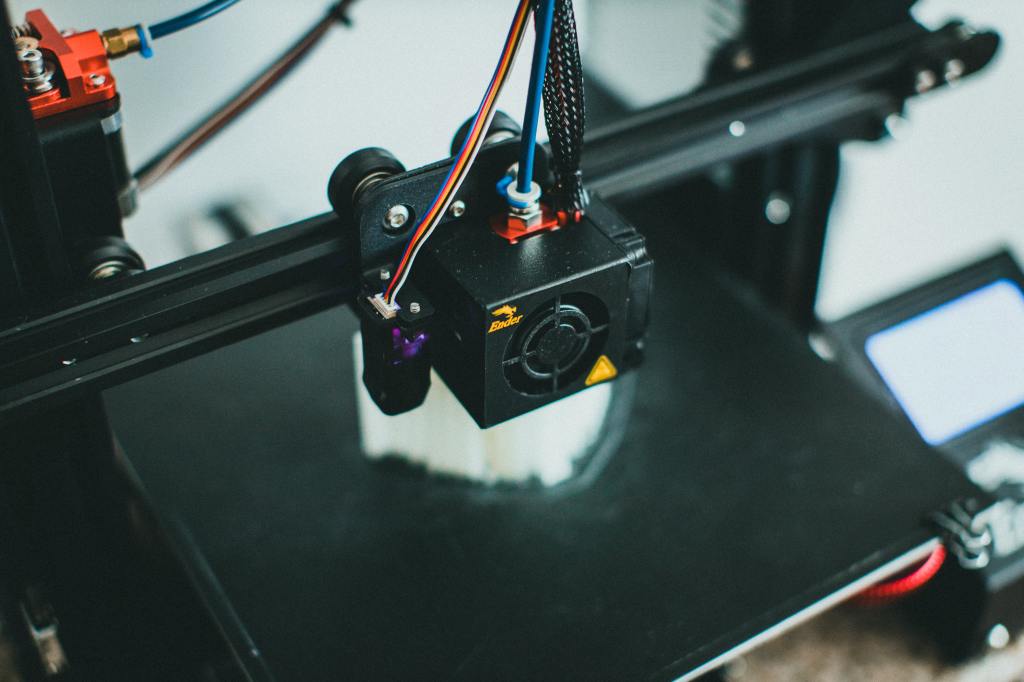
Just recently, for example, I learned that 3D printers are incredible for preppers.
Staying informed about current events.
Information is one of the most crucial aspects of prepping.
Keep up with current events and news that may impact your preparedness.
If there is an occurring strain of a disease or a major flood, for instance, you should be aware of how these events could impact your area and your preparedness plan.
Practice and Maintain Your Prepping Skills Regularly
Prepping is not a goal. It’s a way of living.
You need to regularly evaluate your plan and change it depending on the circumstances.
This is why prepping should be a regular part of your routine.
This could mean setting aside time to practice your skills, update your equipment, and reassess your plan.
Your skills are not ever going to be flawless.
As you learn about different technologies and gear, incorporate them into your survival plan.
This can help you stay prepared and up-to-date with the latest developments.
Socrates said that unexamined lives are not worth living.
Same goes for prepping.
An unexamined plan is not worth having.
You need to constantly reassess your prepping plan to ensure that it is still relevant and effective.
Putting your prepping skills to the test is an essential part of being truly prepared for an emergency.
Prepping is not just about having gear and a plan.
It’s about actively practicing and refining your skills so that you are ready for any situation.
Remember, being prepared means being ready for the unexpected.
So take the time to test your prepping skills and continually improve your preparedness.
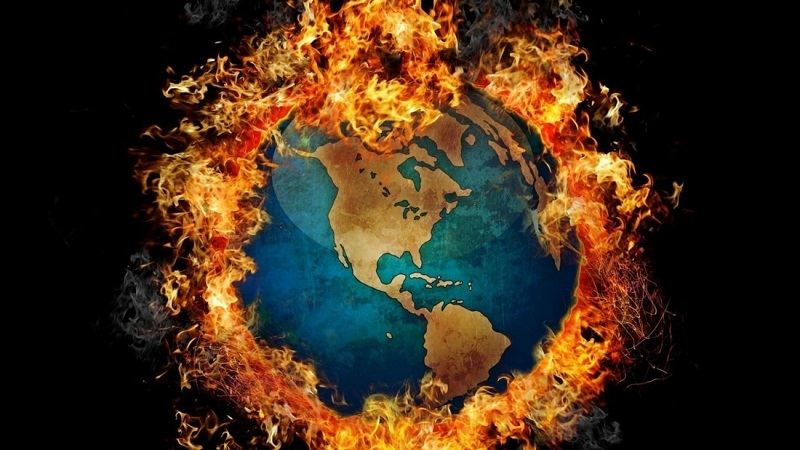
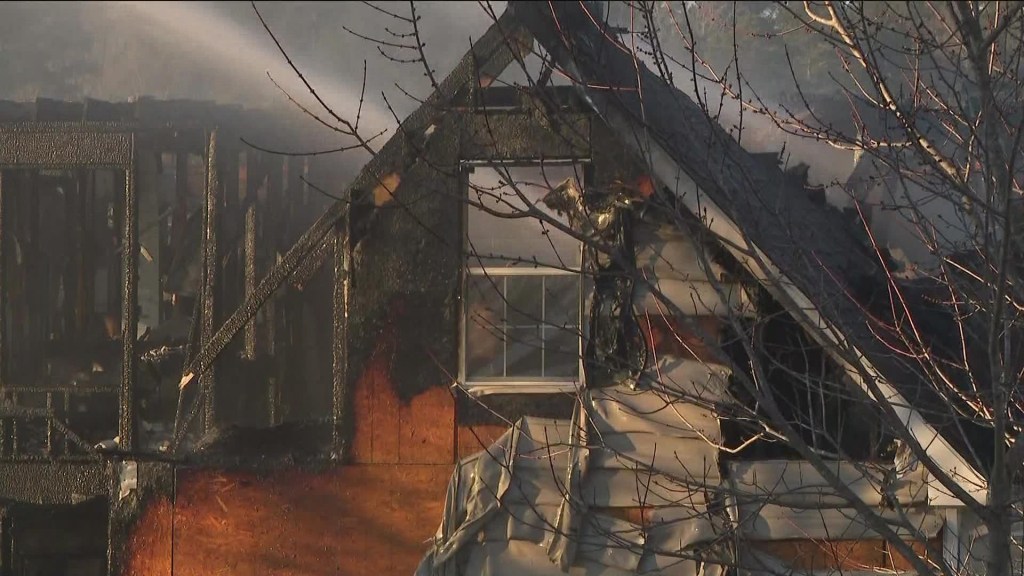
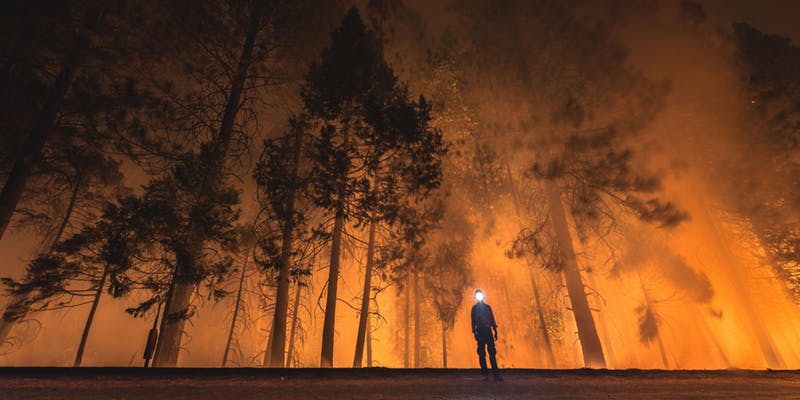
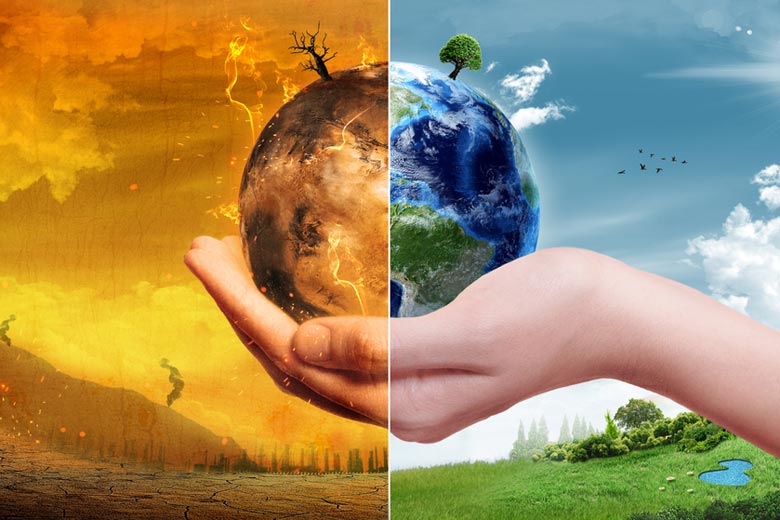
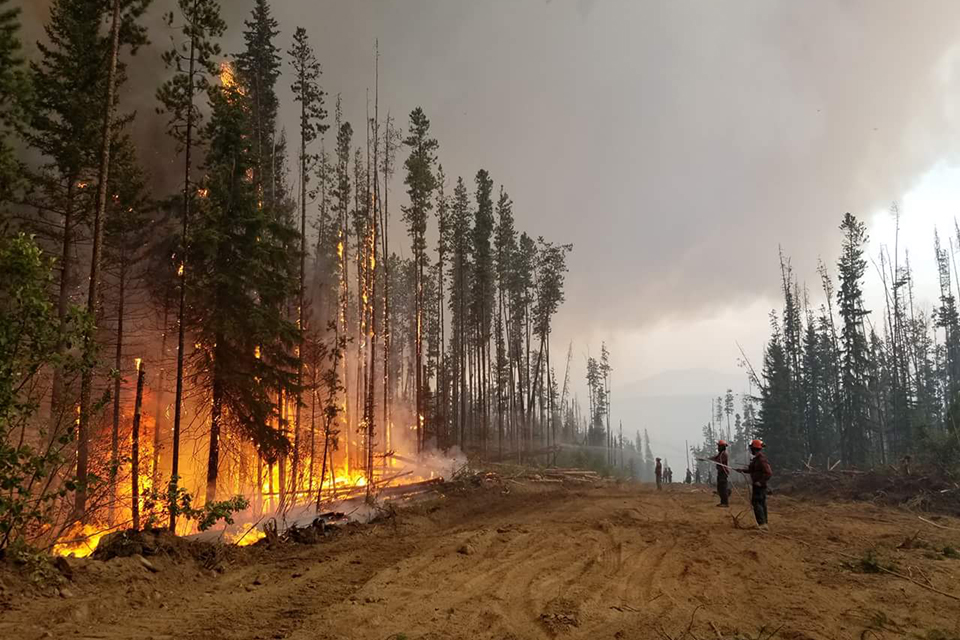
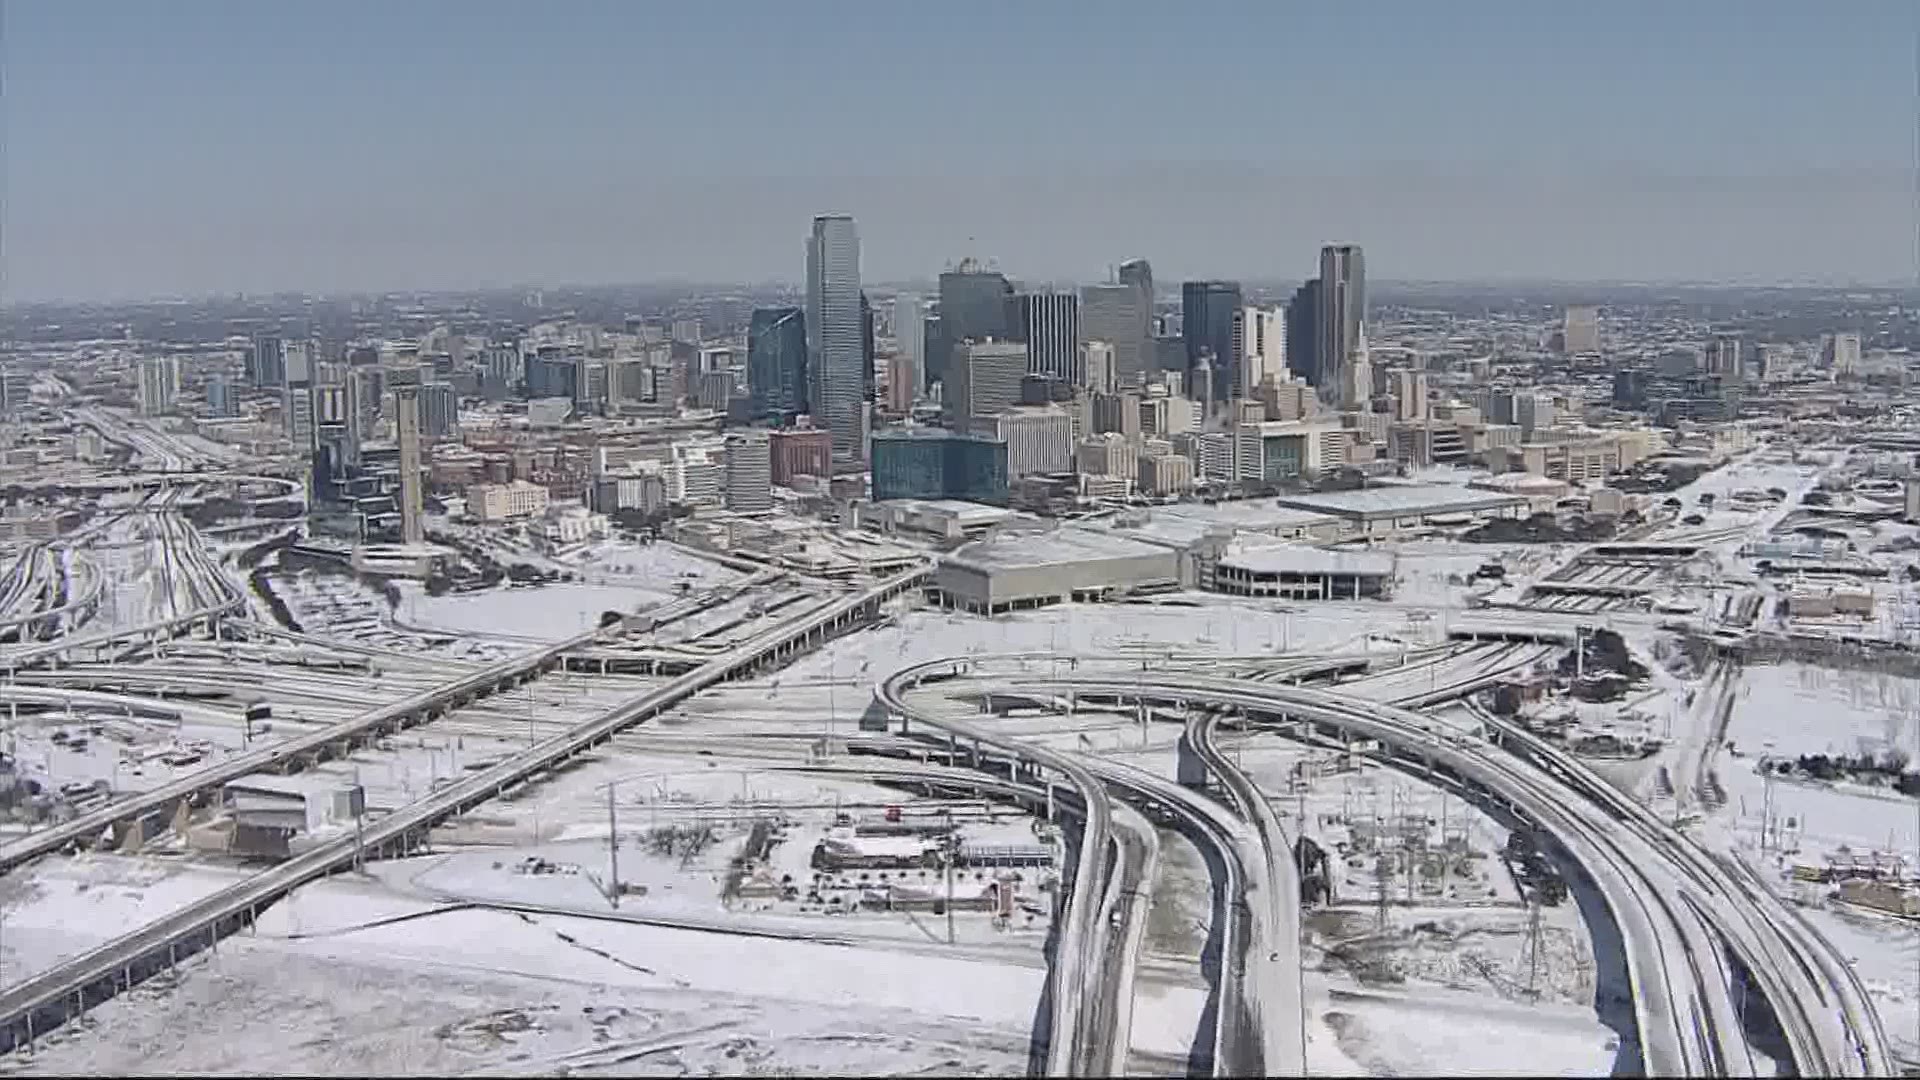
As the world gets drier and hotter, wildfires have become one of the most realistic events people should prepare for.
Wildfires can start by nature, human negligence, and becoming more and more common every year.
I live in California, where you advised us to prepare from July to September.
Sadly, Climate change is making regions hotter and drier. Nowadays, a single spark cab erupts into a massive blaze.
That means wildfire prepping has never been more crucial.
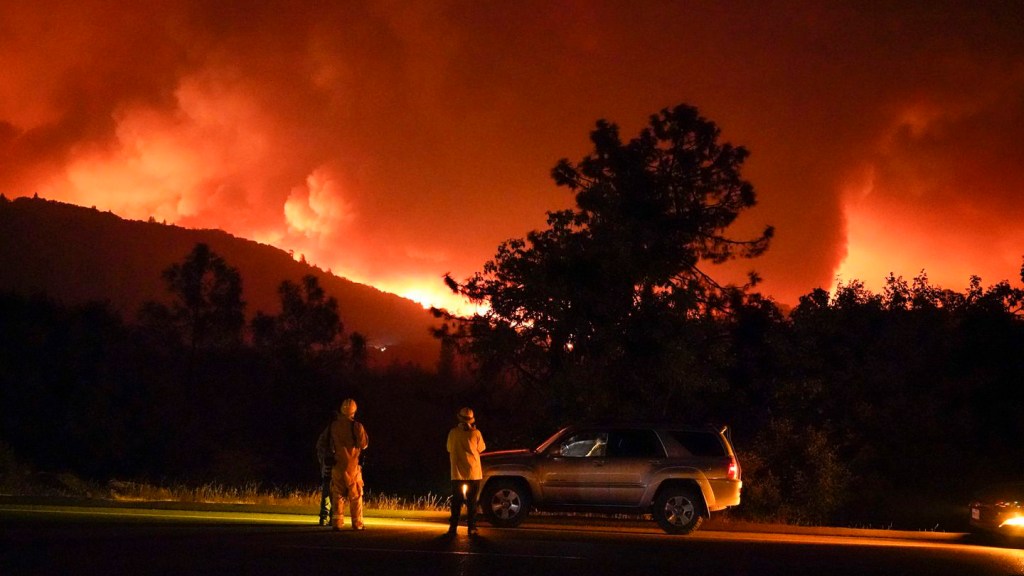
The last few years have brought us the deadliest wildfires the U.S. has ever seen, and there are no signs of it slowing down anytime soon.
While wildfires are fast and unpredictable, often, there is some time to escape if one is coming your way — as long as you have taken the time to prepare. What do you need to know if there is a wildfire threat toward your home?
The Risks
Understanding the risks of wildfires is extremely important. Depending on the time of year, the location, and other key playing factors.
Whether you own a home or are a current renter, there are various ways to protect your assets.
If you are a homeowner, you might find difficulty finding a company willing to insure it for fire.
Contact your state’s wildfire risk number to find something that better fits your needs.
Retrofitting
If your current home does not contain fireproof building materials, you might want to consider retrofitting your property to lower the risk. This could mean re-roofing with flameproof materials, covering vents with metal mesh to prevent cinders from getting pulled into the ventilation system, and taking other steps to make your house fire-resistant.
Be in The Know
Staying informed is your best resource during fire season, especially in places where you can see the smoke from a distance but might not have the best idea of where the fire is.
Stay on top of any updates as they come through your local channels. Emergency services will update you multiple times throughout the day with details like the size of the fire, how much of it is contained, and where it might spread next.
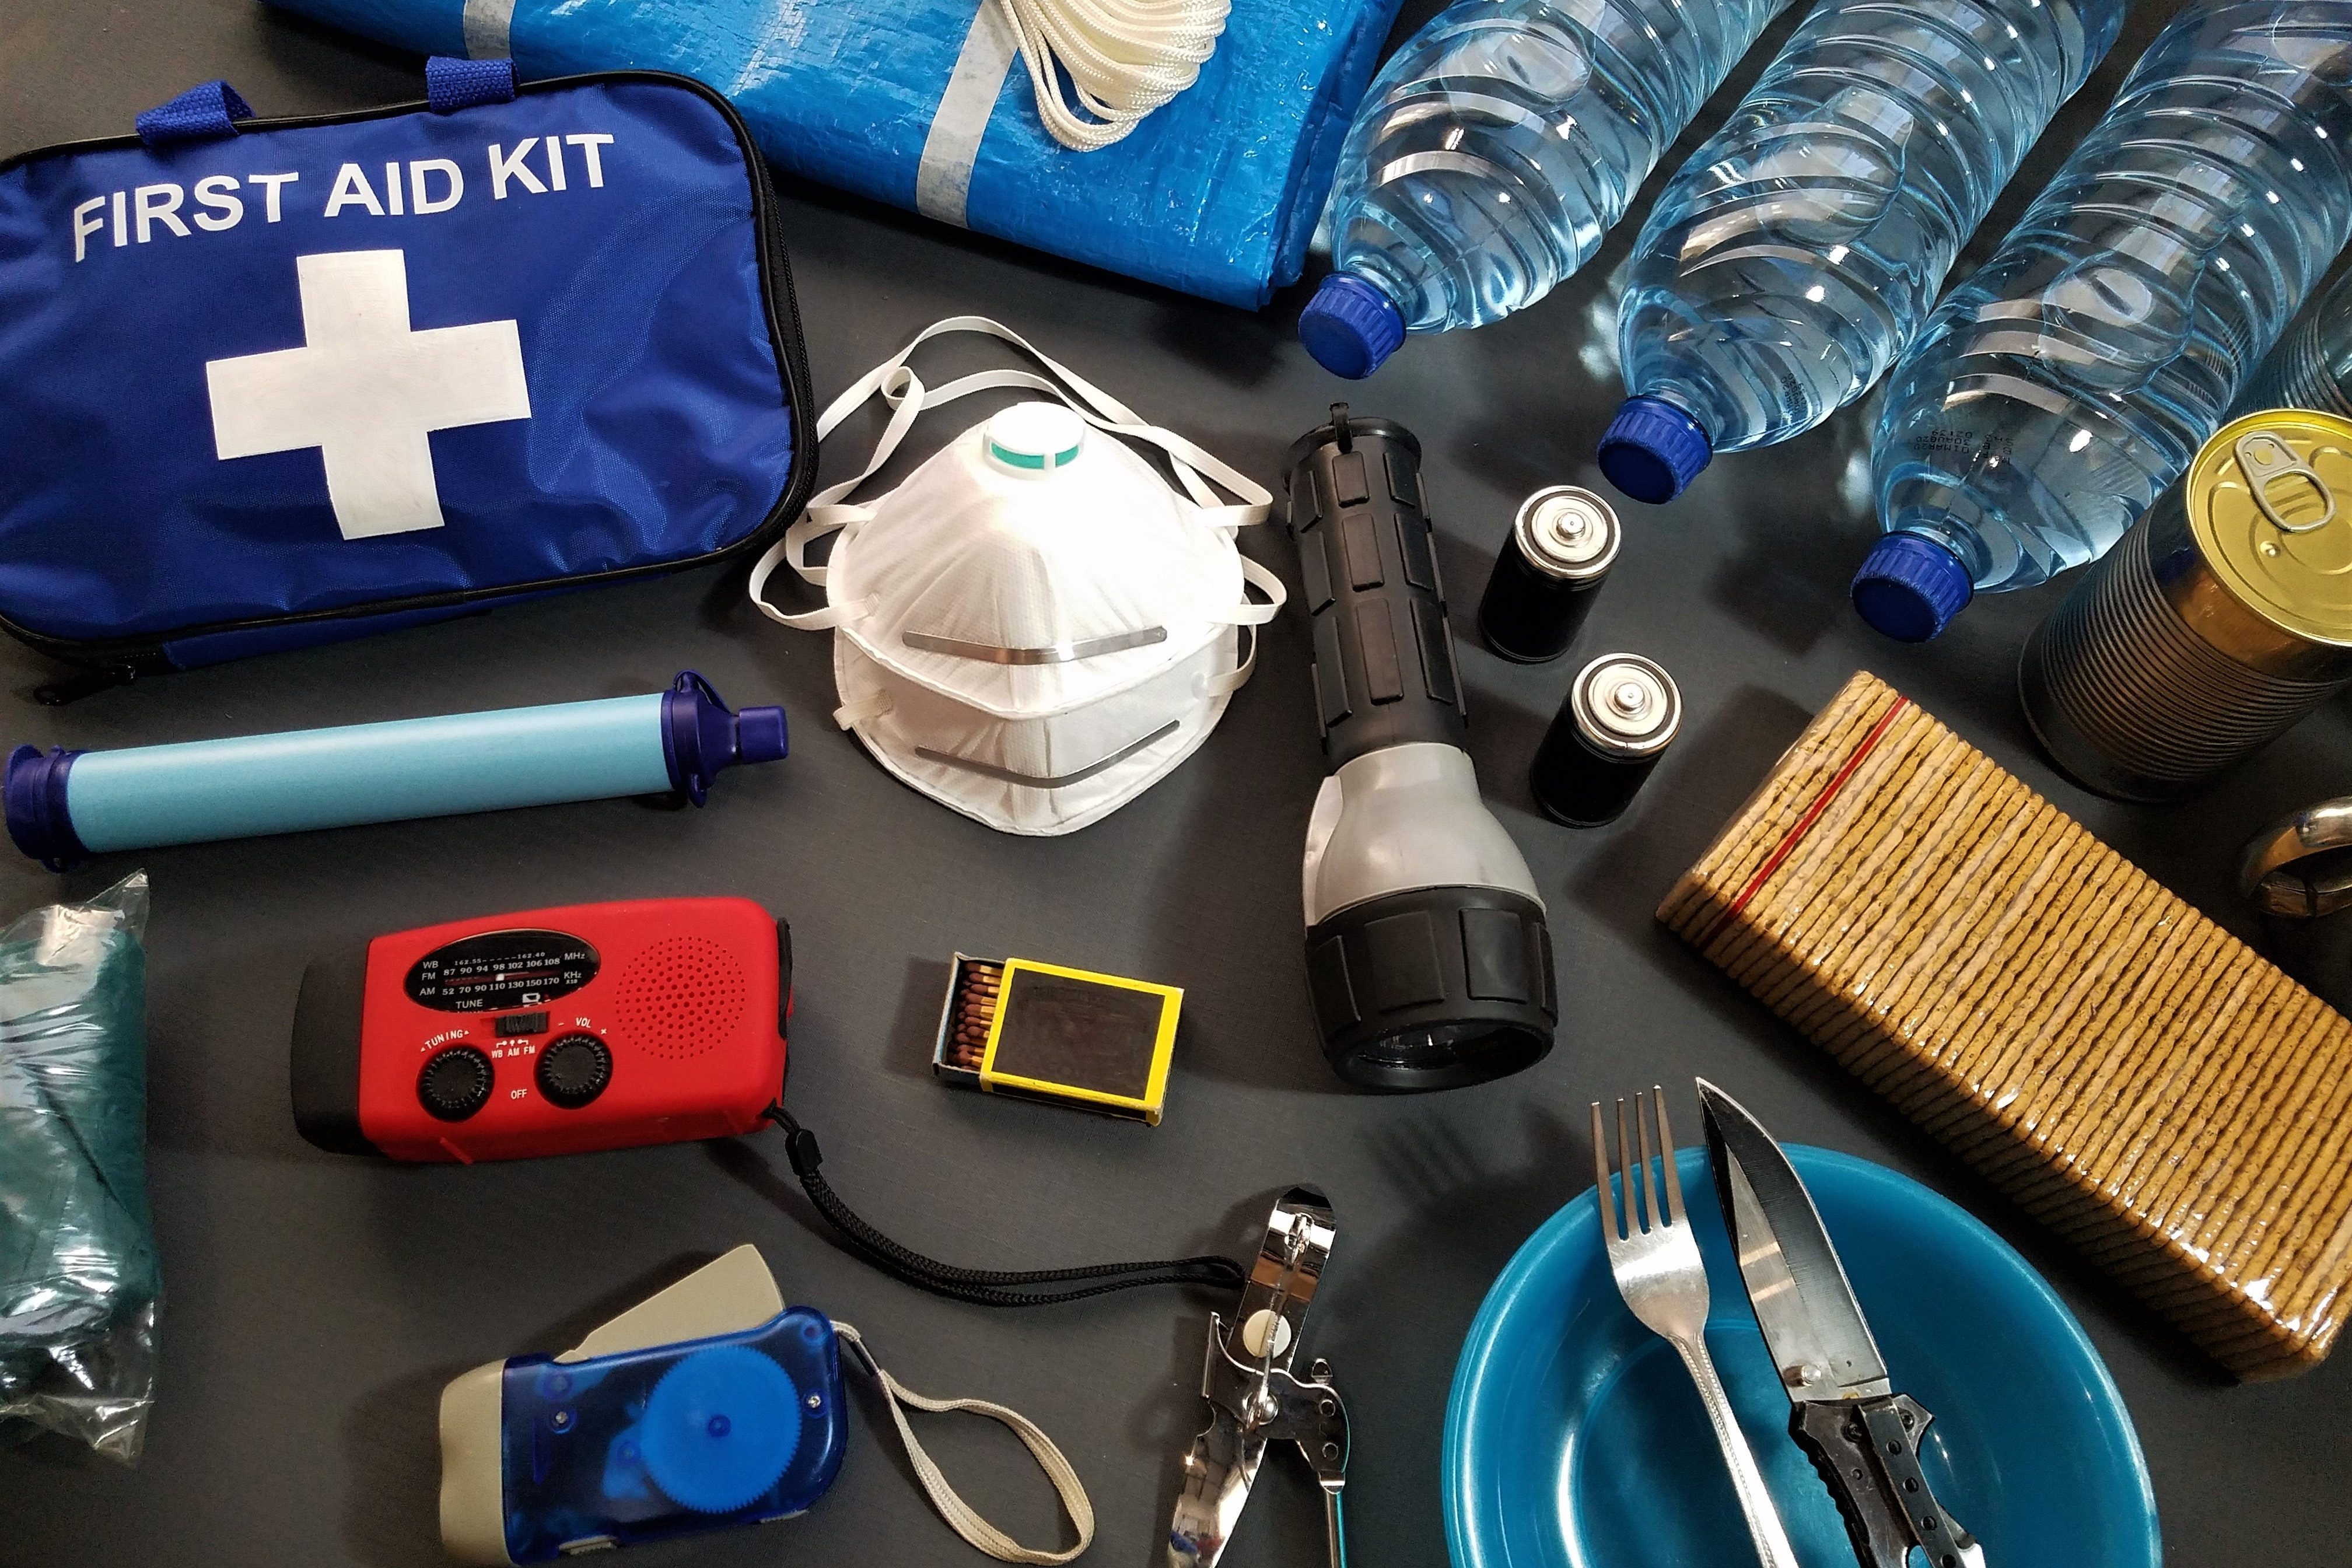
Stock Up on Your Supplies
No matter the situation, you will need supplies. Going to the grocery store won’t be an option until the fire is out and things start to return to normal, so you want to make sure you have everything you need on hand. Backpacks will be the easiest to carry, so buy a few durable ones for each person in your household when it’s time to evacuate.
Store food and water in portable containers like coolers to make these goods easier to transport.
Here are a few items you should consider adding to your list:
* 1 gallon of water per person per day
* Nonperishable Foods
* Cash
* First-aid supplies
* Pet supplies
* OTC and prescription medicine
* Extra Clothes and Shoes
Ideally, you want to have enough supplies for up to two weeks, but at minimum, you want to have enough supplies to be self-sustaining for at least three days.
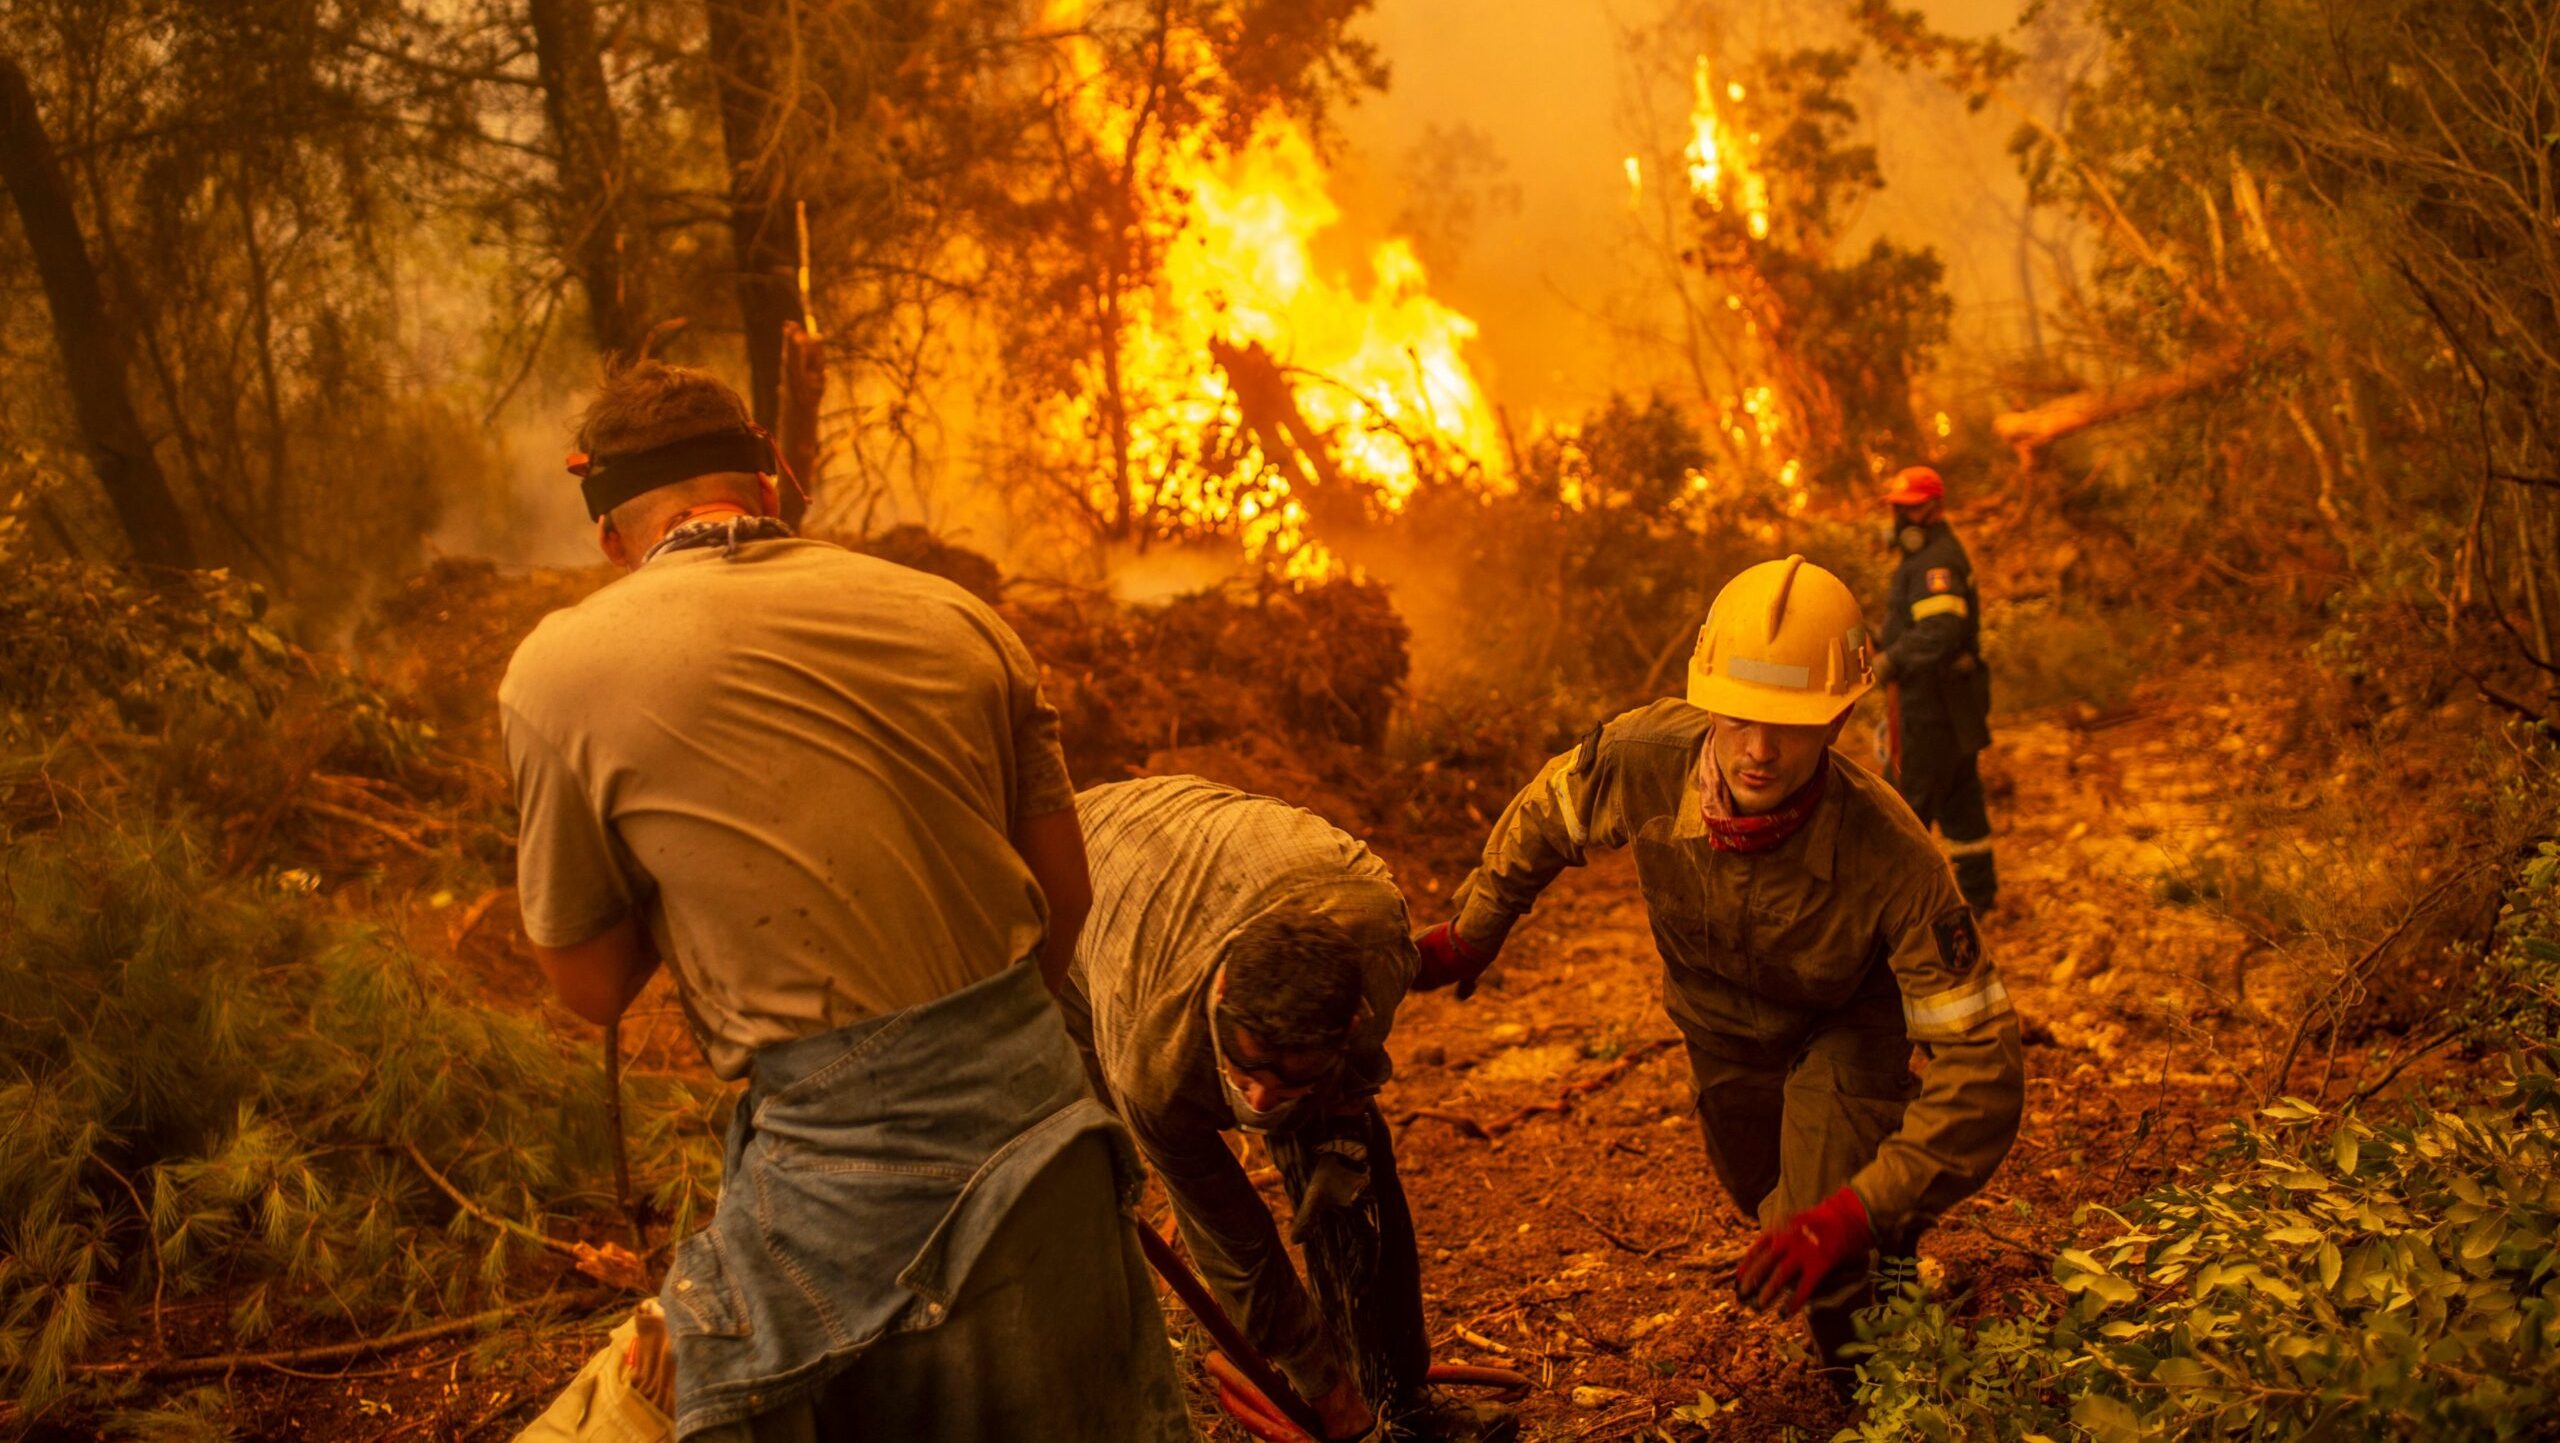
Get Ready to RUN
If a fire is coming your way, your only choice is to evacuate or die. It’s that simple. If you have to leave, be ready to run.
Having a loaded truck or trailer with your supplies and the things you can’t stand to lose is a great way to be prepared.
Be sure your trailer is in good shape before fire season starts, keeping it clean and in a clear path for easy and efficient escape. The last thing you need is to lose all your supplies because of a maintenance issue that could be avoided. The same rules apply to your smaller vehicles. Do not leave yourself stranded with an unreliable car. You won’t be able to outrun the fire on foot.
Plan Your Escape
Where would you go if a fire threats your home? What if the wildfire cuts off your main evacuation route? Plan and practice your escape route ahead of time to avoid making dangerous mistakes.
Predicting where the fire might spread can be difficult, and your main course can quickly end up cut off by a rapidly growing wildfire. Leave yourself some alternatives so you can get away safely.
Once you have planned your routes, practice them. Hook up your trailer and drive. Note places where the trees and brush are near the road because if they catch fire, it could create problems for your plan.
Time For You To Go
Although, this should be common sense and often forgotten. If there is an evacuation order or advised to leave, go. Do not wait around to see if the fire might change its path. Throw your family and your pets in the car, hook up your trailer of supplies if you have one, and leave. There is no time to waste precious minutes trying to pack every – little – sentimental item.
Being a Prepper Can Save You
Wildfires are a part of life for people in many parts of the world. Starting to prepare could save your life and makes it easier to rebuild if the worst happens and a fire takes your home.
Remember, regardless of what happens, your house and everything in it is replaceable. Your life and the lives of your loved ones are not.
More Articles Christians May Find Interesting…
Shocking Truth About NASA Rapture Warning
While the media is busy talking about restrictions and censorship, there’s one story that’s unfolding that no news station is covering.
Yet it could have a direct impact on your life and the lives of your loved ones.
According to a recently declassified document from the U.S. Senate, a monumental end-day threat is about to come crashing down on America.
I’m not talking about a stock market crash or more mandates.
I read a story today that really freaked me out because it said “it’s a sin to be a prep for the end of the world”. It went into detail about having faith in God and knowing he would take care of his believers (regardless of how bad or dangerous of a situation) is all you need to do.
As a fellow Christian, my faith in God has never been stronger. however, If there was a black-out due to a power grid failure, leaving me and my family with no food or water for days or weeks on end, how would I survive that?
I called my good friend and pastor, Chris because he always helps with calming my nerves and remembering god’s message. As it turns out, I’m not the only one that feels puzzled and scared about my future from time to time.
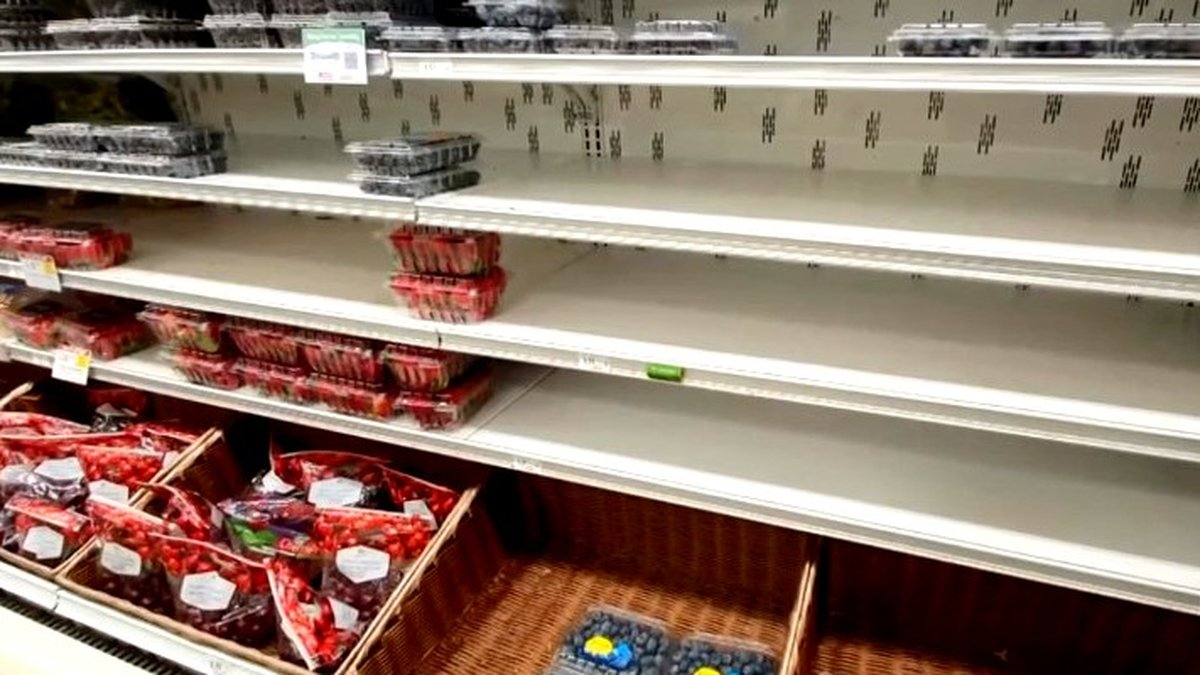
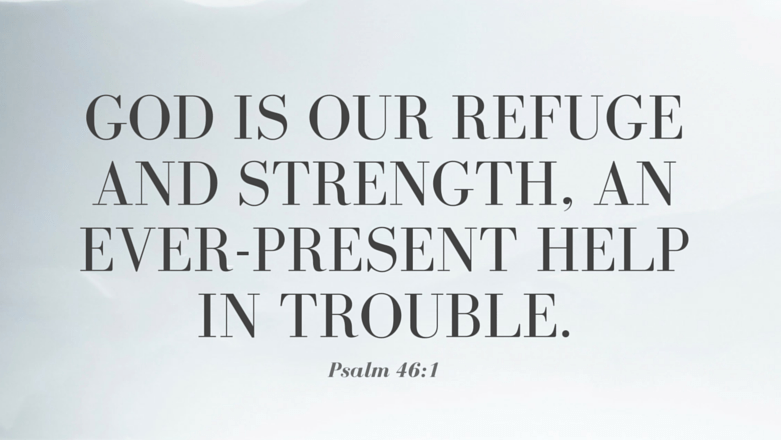
Christians all around the world are preoccupied with the end of the world. The media has shown the empty shelves in grocery stores nationwide, and price gouges in almost every food and product. In pop culture, you see it in movies and TV series. However, there is a balance It’s easy to look at today’s world and feel unsettled. Although many Christians are troubled with fear, anxiety, and worry. There’s a sense of feeling powerless and defeated as we look at the unstable and roller-coaster of a world we live in today. Always remember, “God is our refuge and strength, a very present help in trouble. Therefore we will not fear though the earth gives way, though the mountains are moved into the heart of the sea, though its waters roar and foam, though the mountains tremble at its swelling.” Psalm 46:1–3.
Our savor does not want us to live in a constant state of anxiousness. During hard times like these, he wants us to remember God has not failed us. He has promised to be with us in the middle of tragedy.
A huge area of controversy in prepping today is whether Christians should be preppers. Each situation is unique, but it’s highly encouraged to take your unique situation to God in prayer and ask for His guidance.
Without a question, It is absolutely biblical to prepare yourself and your family for the future when God provides you with the opportunity to do so—spiritually and physically.
Our faith and focus should always remain on Christ, prepping is purely an opportunity we can utilize to be a good steward of God’s blessings and minister to others in times of need.
Well, that’ll all from me for the day. My best friend from Puerto Rico is in town for his birthday and I’ve got to start getting ready (we’re going to a fancy sushi restaurant). But I did want to share what’s been on my mind all day and see if anyone else feels the same? I would love to hear all about it if anyone feels comfortable enough to share. 😊
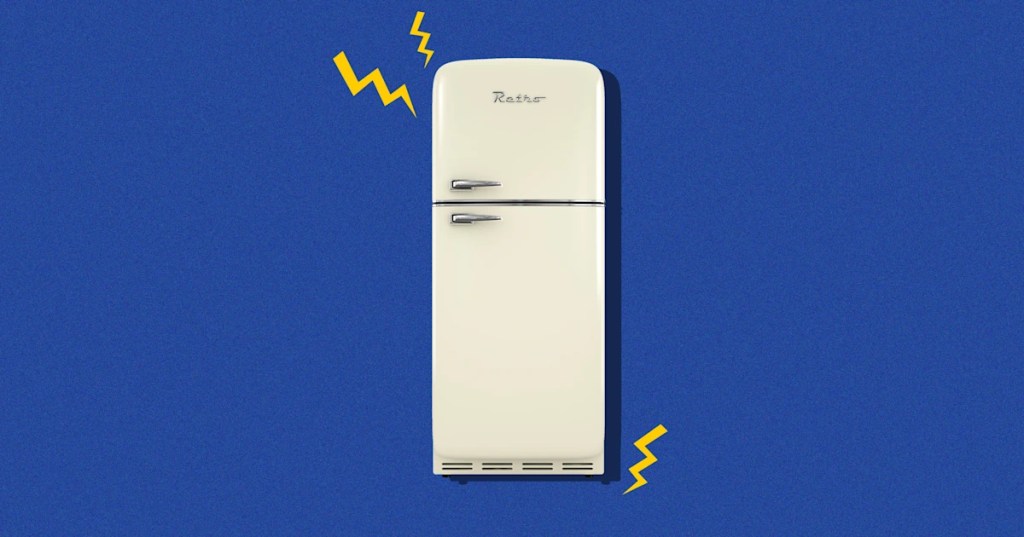
One of the first problems that we face during a grid-down or emergency scenario is the loss of electricity and the failure to keep food from spoiling.
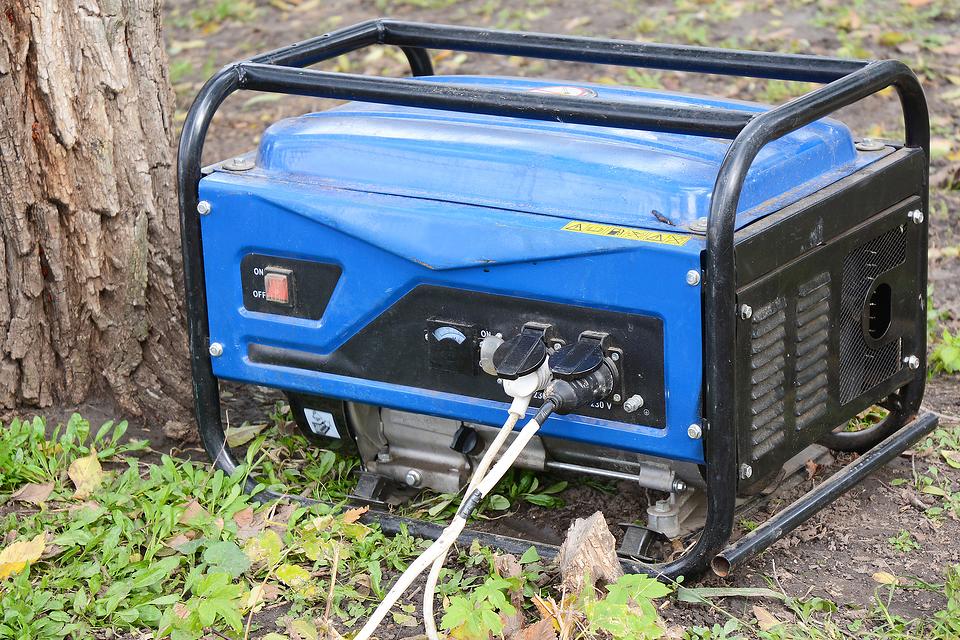
Equipment like generators and other off-grid power options can keep a refrigerator running for a while but drain the battery capacity that could have been used for other important resources.
Setting up an electricity-free refrigerator will assist in preserving battery and fuel stores.
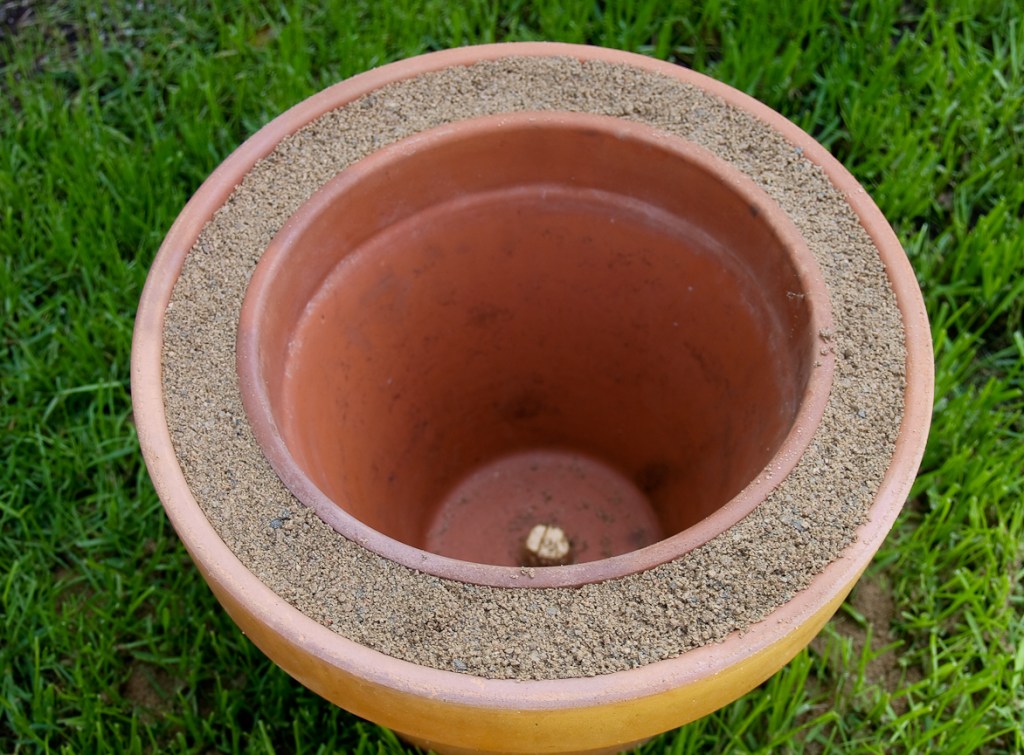
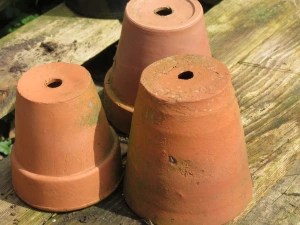
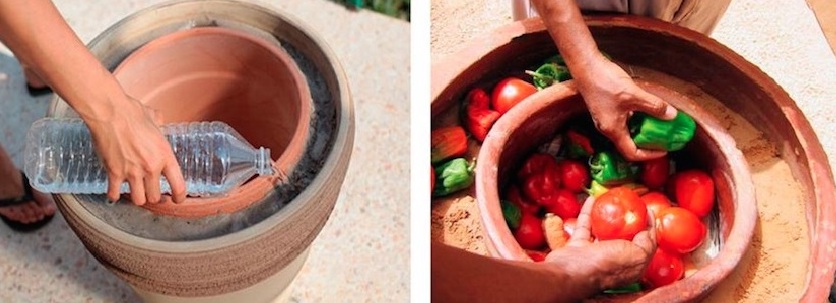
Zeer Pots
Is a pot in another pot refrigeration system, using two unglazed clay pots. These pots are different sizes; the smaller one should fit inside the larger one leaving a gap of about an inch or so.
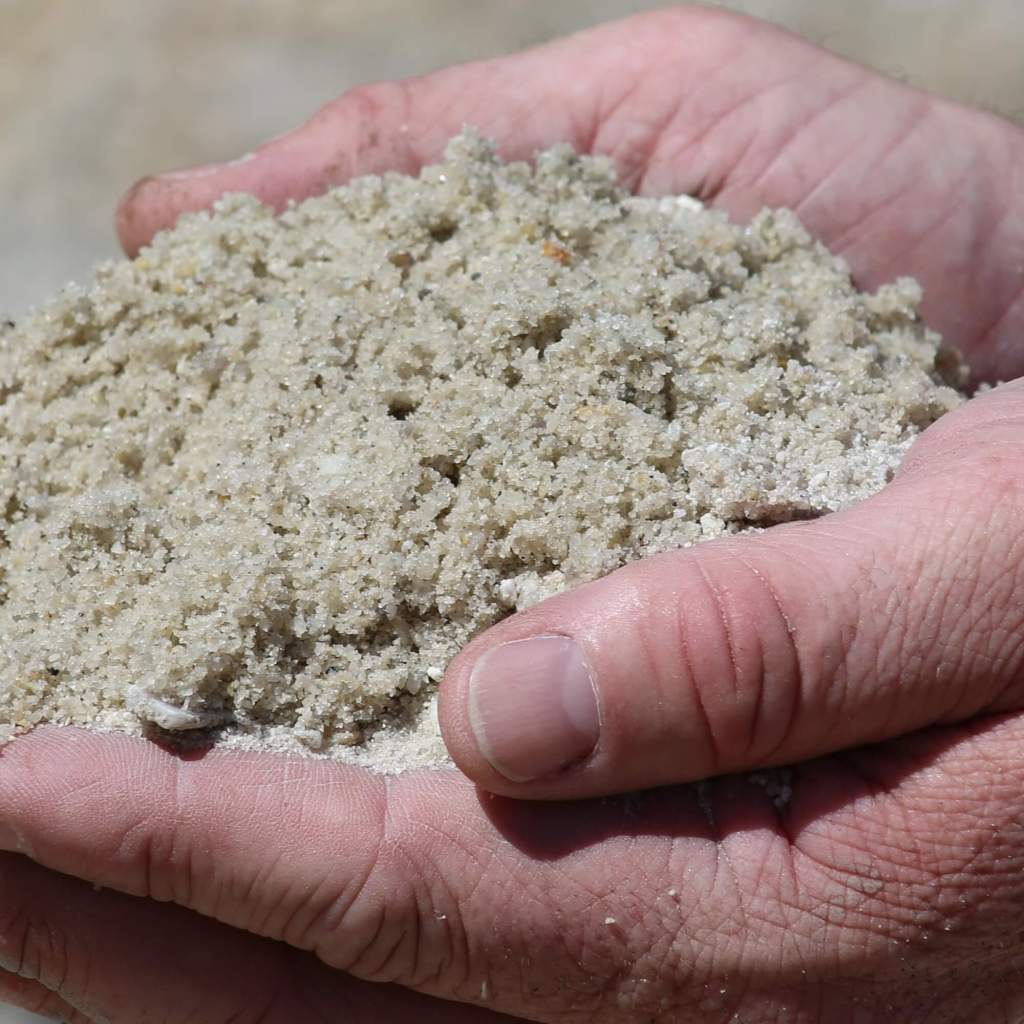
The inner pot is where the food you want to keep cold goes, and the outer pot serves to contain the sand that will fill the gap between the pots.
Through the process of evaporated cooling, Zeer pots can keep the food in the inner clay cool. As the water evaporates, it absorbs heat to turn the liquid water into vapor. While the water vapor absorbs the heat, it will replace the cool air that will settle in the inner pot.
If you’re interested in making your own Zeer pot, a simple google search will show you how easy it is and it only takes about 20 minutes to make. I’ve made life a little easier by providing step-by-step directions below!
Get two unglazed ceramic pots—one that will fit inside the other—plus some sand and water.
Fill the bottom of the larger pot with a couple of inches of sand.
Put the smaller pot in the larger one.
Fill the space between the pots with sand.
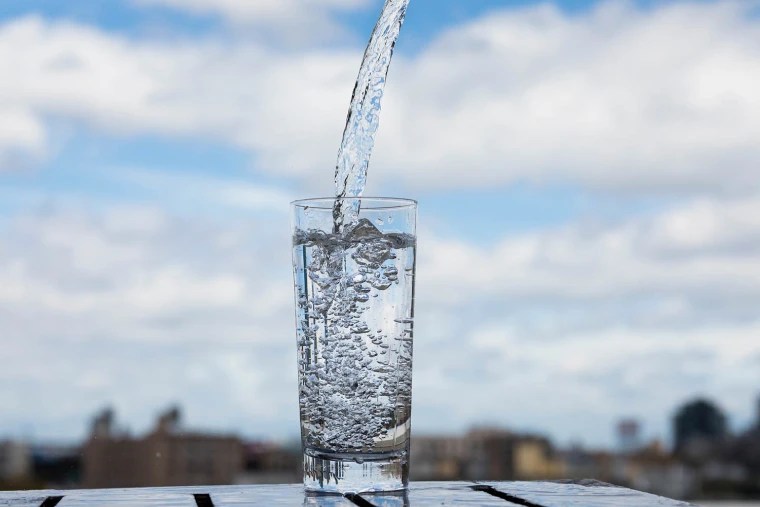
Pour water into the sand.
Cover the pots with a ceramic lid or wet cloth.
That’s it! You’re ready to store food inside. Just remember to add water to the sand every day, like mentioned earlier, it uses evaporation to cool food.
As water evaporates through the clay, it releases energy into the air and cools the space inside the pot. It’s like splashing water on your face on a hot day; the water evaporates off your skin, cooling it in the process. Refrigerator coolant actually works in a similar way, using evaporation to draw heat out of the fridge itself. That’s why the back of your Frigidaire is so warm.
I want to end this blog with an important reminder. KEEP YOUR FOOD COLD!!! Keeping food cold without electricity is tricky. You have to keep your food at a consistent temperature to avoid the spread of bacteria. Make sure you have a thermometer to monitor proper food safety temperature.
Have you ever made a Zeer Pot refrigeration system? If so, what are some tips and tricks that have worked out for you?
Thank you for sticking through another important and informative SHTF situation and I hope this information was helpful.
Please remember to subscribe to my page and let me know which posts you have found most useful in your survival prepping.
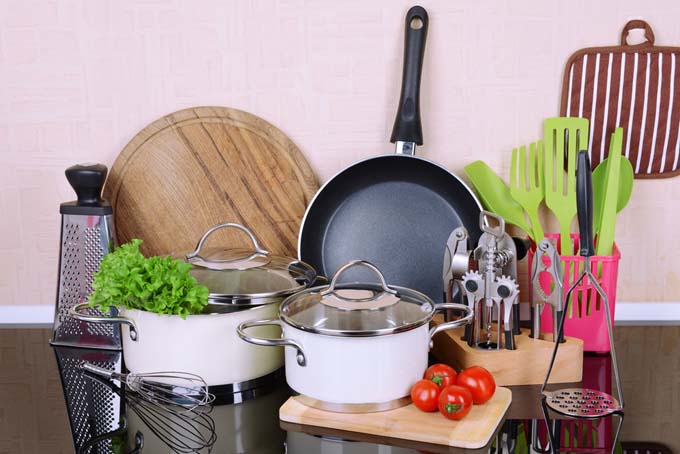
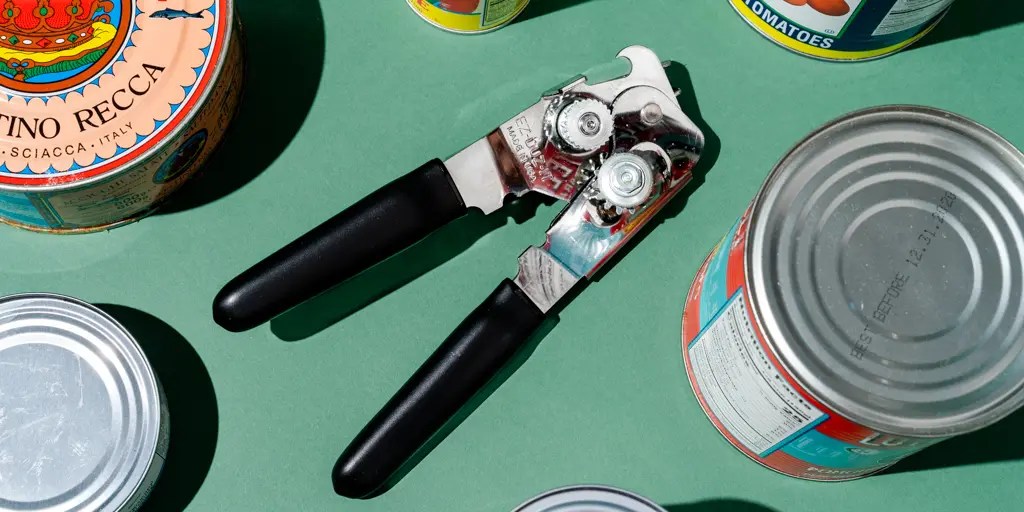
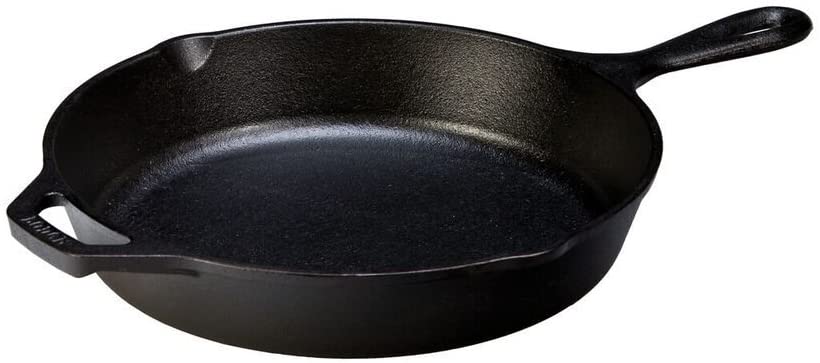
As a prepper, you have most likely spent money on various supplies for your survival stockpile. When SHTF, feeding your family will be on the top of your list of priorities. Worrying about not being able to cook food during a long-term blackout, make sure you have non-electric kitchen items like a cast iron skillet and a can opener.
These 10 non-electric items will really come in handy after a crisis situation.
1. Butter churn and molds
If you make your own butter correctly, it will last for several weeks with little in the way of refrigeration.
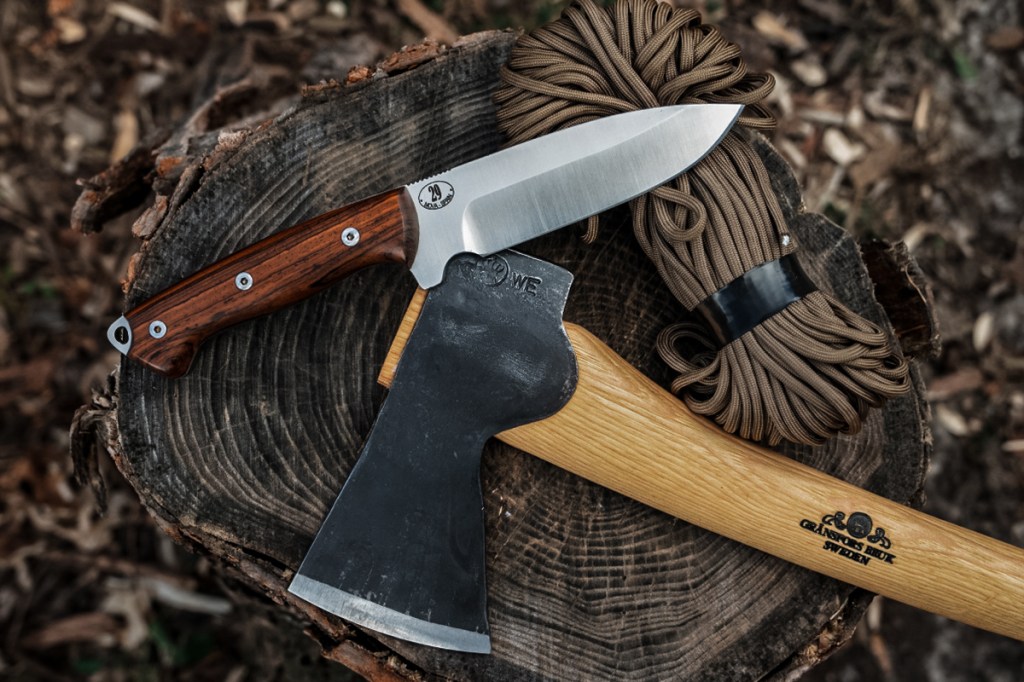
2. Chef’s knife
You need a high-quality and sharp chef’s knife for food prep. This knife can be used to process various meats and for more gentle tasks like peeling, dicing, and mincing.
3. Fridge pot
A “fridge” pot or Zeer pot is an old tool used to chill food using a nesting set of clay pots with a layer of wet sand sandwiched between them.
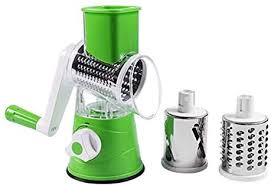
4. Manual Vegetable Slicer
You can save a lot of time during meal prep with a manual vegetable slicer.
5. Reversible Grill Pan and Griddle
A reversible grill pan and griddle has a deeply ridged grill surface for grilling or roasting meat and vegetables. The other side is a smooth griddle perfect for making breakfast.
6. Solar Oven
Solar ovens can be used to bake anything you would in a regular oven but they don’t use electricity! They’re affordable to purchase or there are some excellent in an SHTF situation. There are so many DIY options that could really help with the shelf life of some foods.
7. Water Filter (Very Important)
A quality water filter can help ensure your family is getting clean drinking water, and water for hygienic or medical reasons. Whether you’re sourcing water from a pond, stream, or well on your property without clean water your survival experience will become 10X harder and more dangerous (especially if water is needed for medical reasons.
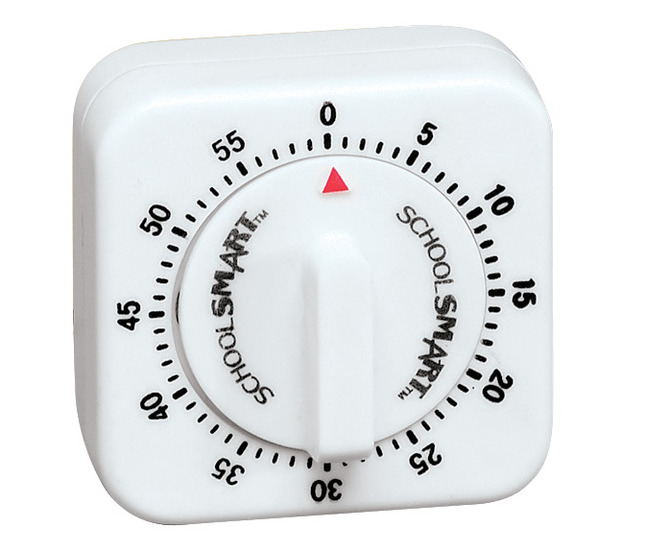
8. Small Timer
Everyone is used to having a timer easily available on their oven or microwave, but when you’re working with powerless appliances it’s handy to have a small wind-up timer.
Conclusion
Now the list goes on what you might need but it’s always better to be prepared and prepped before and survival situation suddenly strikes! Also, every family’s needs and survival criteria are different. It helps if conversations have started prior to any bugging in or out. In my previous posts, I have also shared how to preserve your favorite meals to cut down on a lot of time and equipment needed once the time comes. Another positive for staying proactive is being able to share and trade what you have with your fellow friends, neighbors, or anyone that is in need. Being kind will always be free and good for the soul! I hope everyone has a relaxing Sunday and a great week to come! Thank you for checking out my blog, and please, like, share, and subscribe!
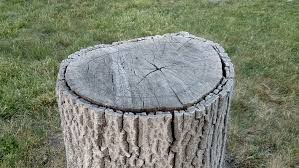
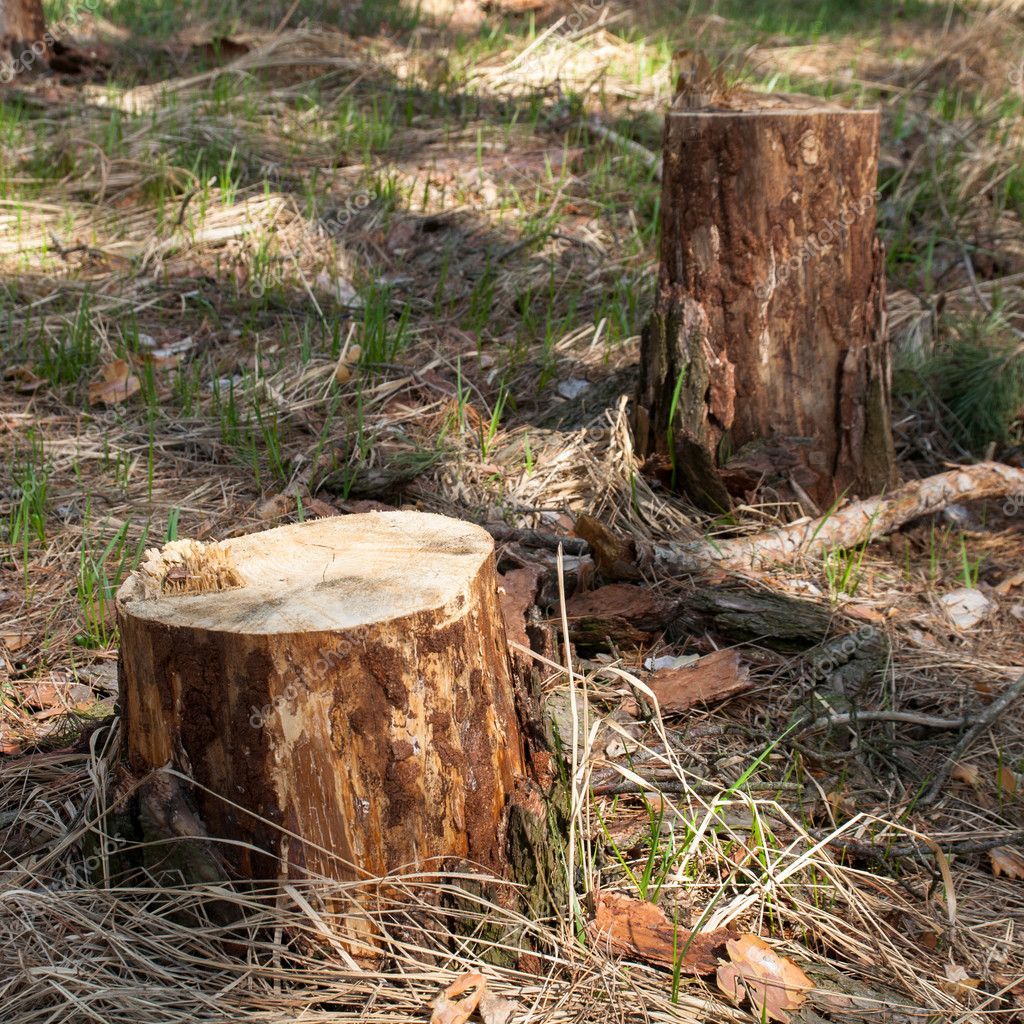
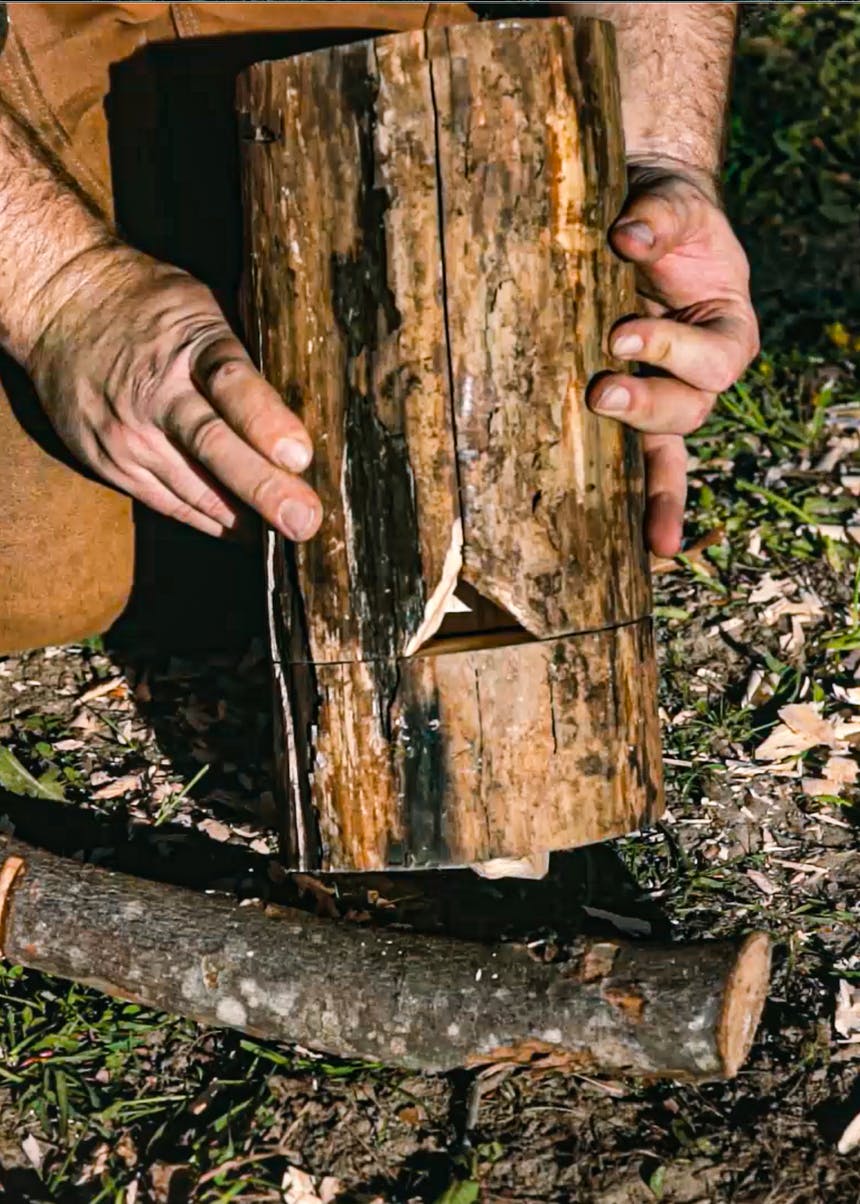
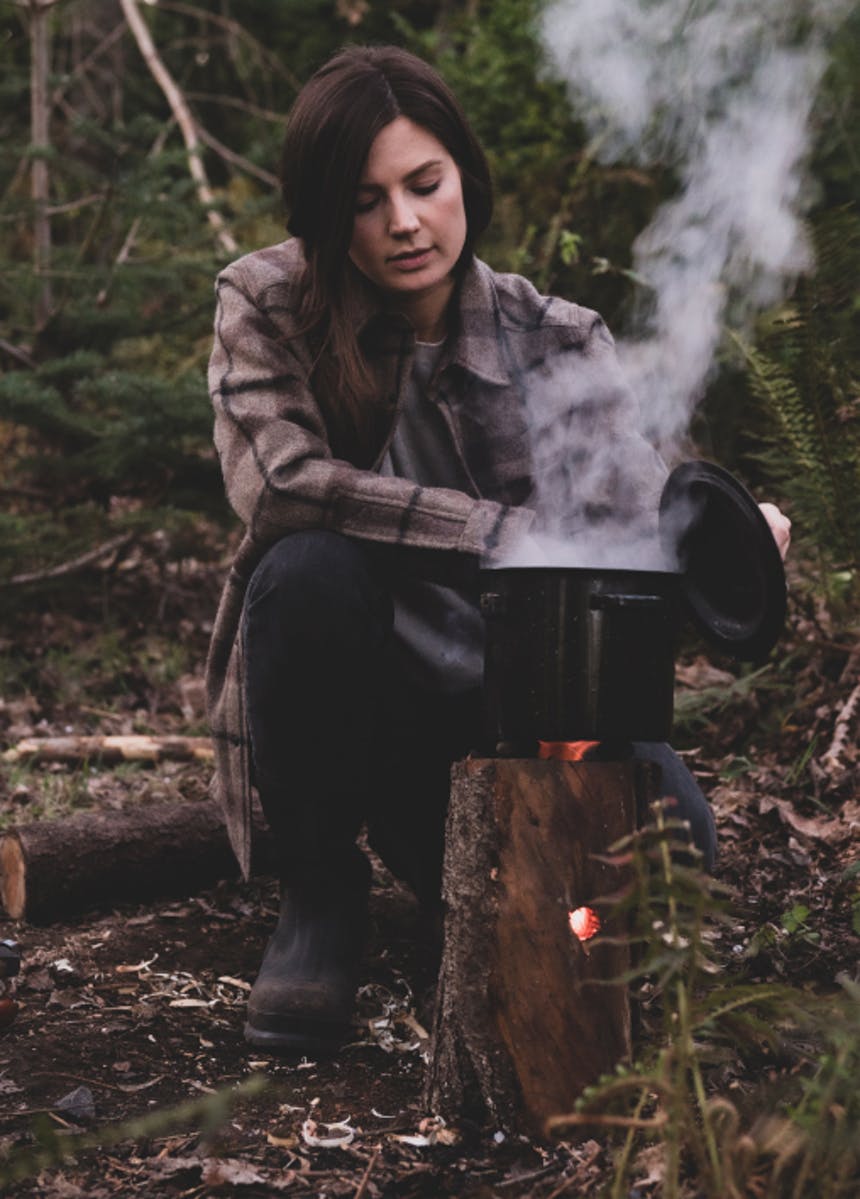
One of the biggest ‘AHA’ moments I’ve had learning about survival is when I learned about the Rocket stove from a tree stump. If you’re at all interested in survival, you need to learn about this simple trick. It may very well save your life someday.
If you are in an emergency situation and need a really easy-to-make stove, look no further than a hollow tree stump.
Before we get started, I’ll list out the items needed for this amazing life hack!
Items Needed:
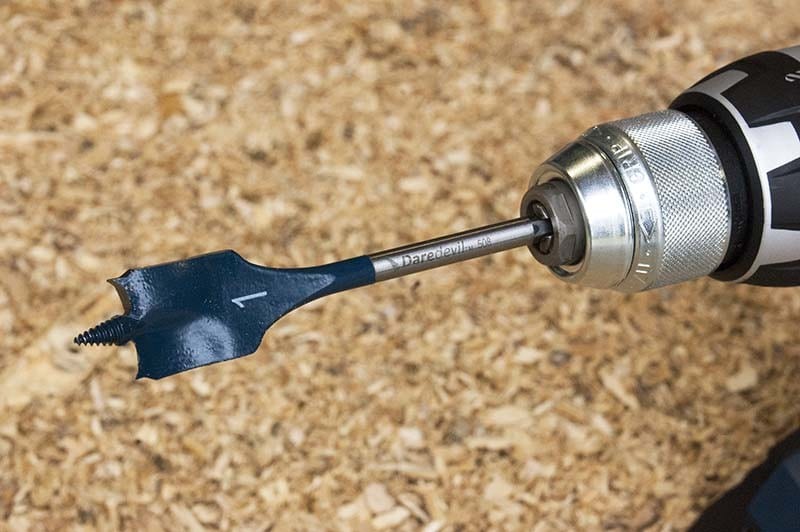
Hollow Tree Stump
1 – 1.5 Spade Bit
Drill
Fire Starter
While you may not have an abundance of hollow tree stumps, chances are you’ll be able to find one if you really are in a survival situation.
Start out by drilling a hole through the top of the stump with your 1.5 spade bit attached to your drill. to act as a chimney and then drill another hole from the side to aid in airflow. The most important factor in this process is having a good dry stump, a drill powerful enough to drill a large diameter hole, and a large diameter bit long enough (5-6 inches) to make connecting holes in your stump making an “L” shape.
Now that you’ve made your stove, grab your kindling wood or your fire starter, light the wood and place it in the second hole to start your fire. There is no need to add more wood, it will burn by itself, and will easily last a couple of hours.
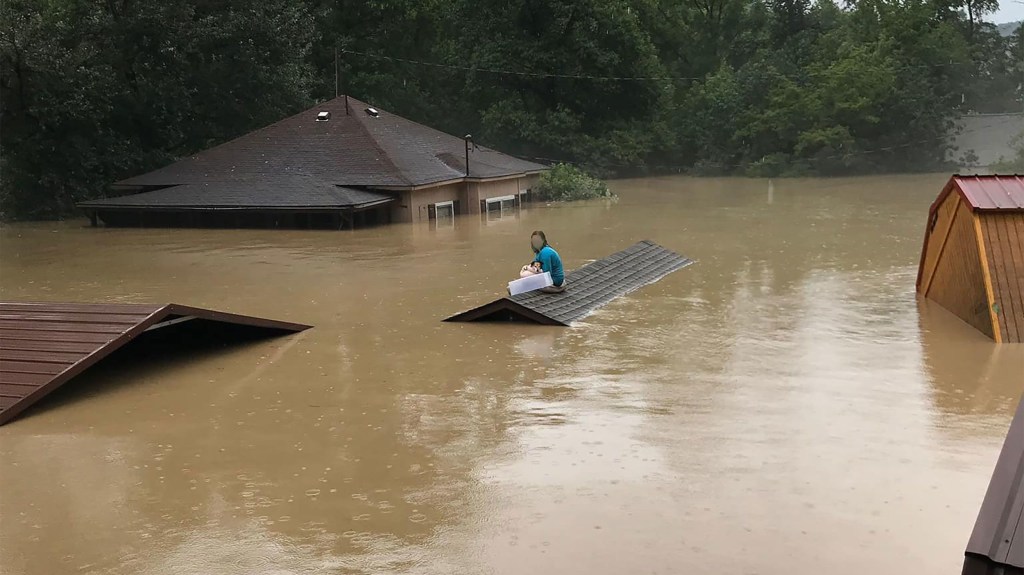
We live in a world suddenly plagued by wildfires, extreme heat, novel viruses, and sociopolitical unrest.
The realities of climate change are slapping me in the face. I’ve had personal run-ins with weather disasters for five straight years now, starting in 2017 when my mom’s house burned down in California’s Tubbs fire. This summer, after temperatures topped off at 116 degrees in Portland, Ore., the city I call home, I know the game has changed. If this can happen, anything can. Snow in Houston: Why not? How about a heatwave in Greenland or severe flooding in Germany? Before summer even began, the entire West — extending as far east as Texas and as far north as British Columbia — was laid flat by record-breaking temperatures, worsening drought, and an unusually early fire season. For more than two weeks, the Bootleg fire has been burning in southern Oregon, so hot and extreme that it generates its own weather.
The only thing predictable about such events is that they will continue to happen, with increased severity and frequency, and they will cause a lot of human misery. They’ve forced me to reevaluate my indifference toward prepping.
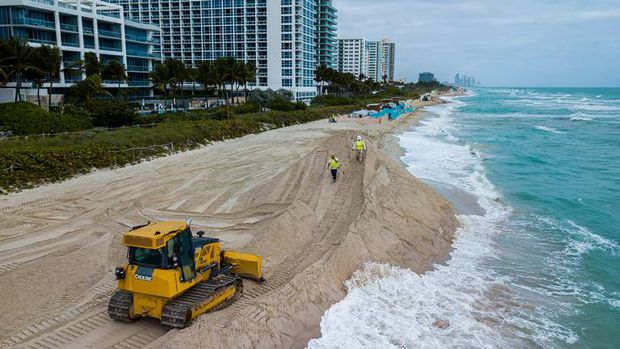
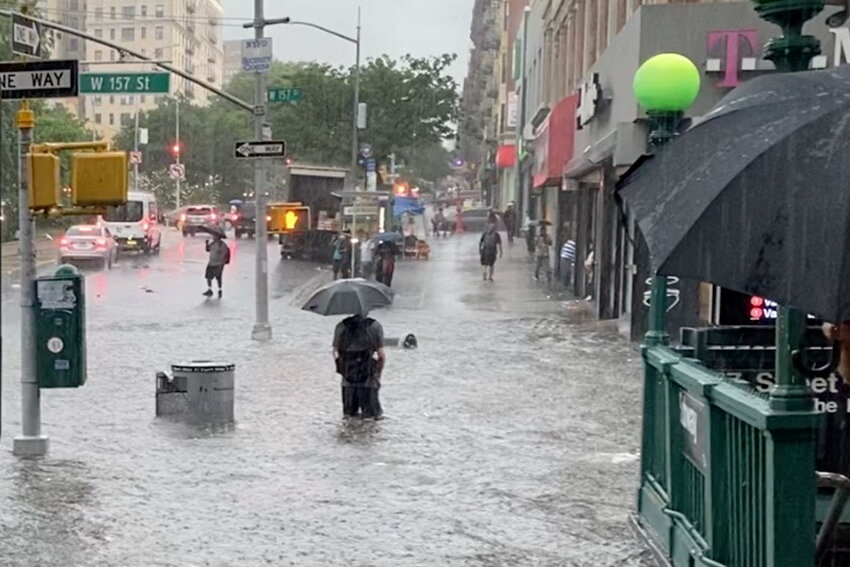
In fact, our whole society seems to have been caught off guard by changes that, not so long ago, seemed far off. Here in the Pacific Northwest, people sweltered in houses that aren’t typically equipped with air conditioning. Our roadways warped and cleaved, and power lines melted; hundreds were hospitalized with heat-related illnesses. In Texas, where my brother lives, state regulators urged citizens to limit power usage during a June heatwave to avoid the massive grid outages that, during a severe winter storm in February, left nearly 70 percent of Texans without electricity and half without water. In New York City, heavy rainfall flooded stretches of the subway system this month; in Miami, the construction of properties on a dissolving shoreline no longer seems sound.
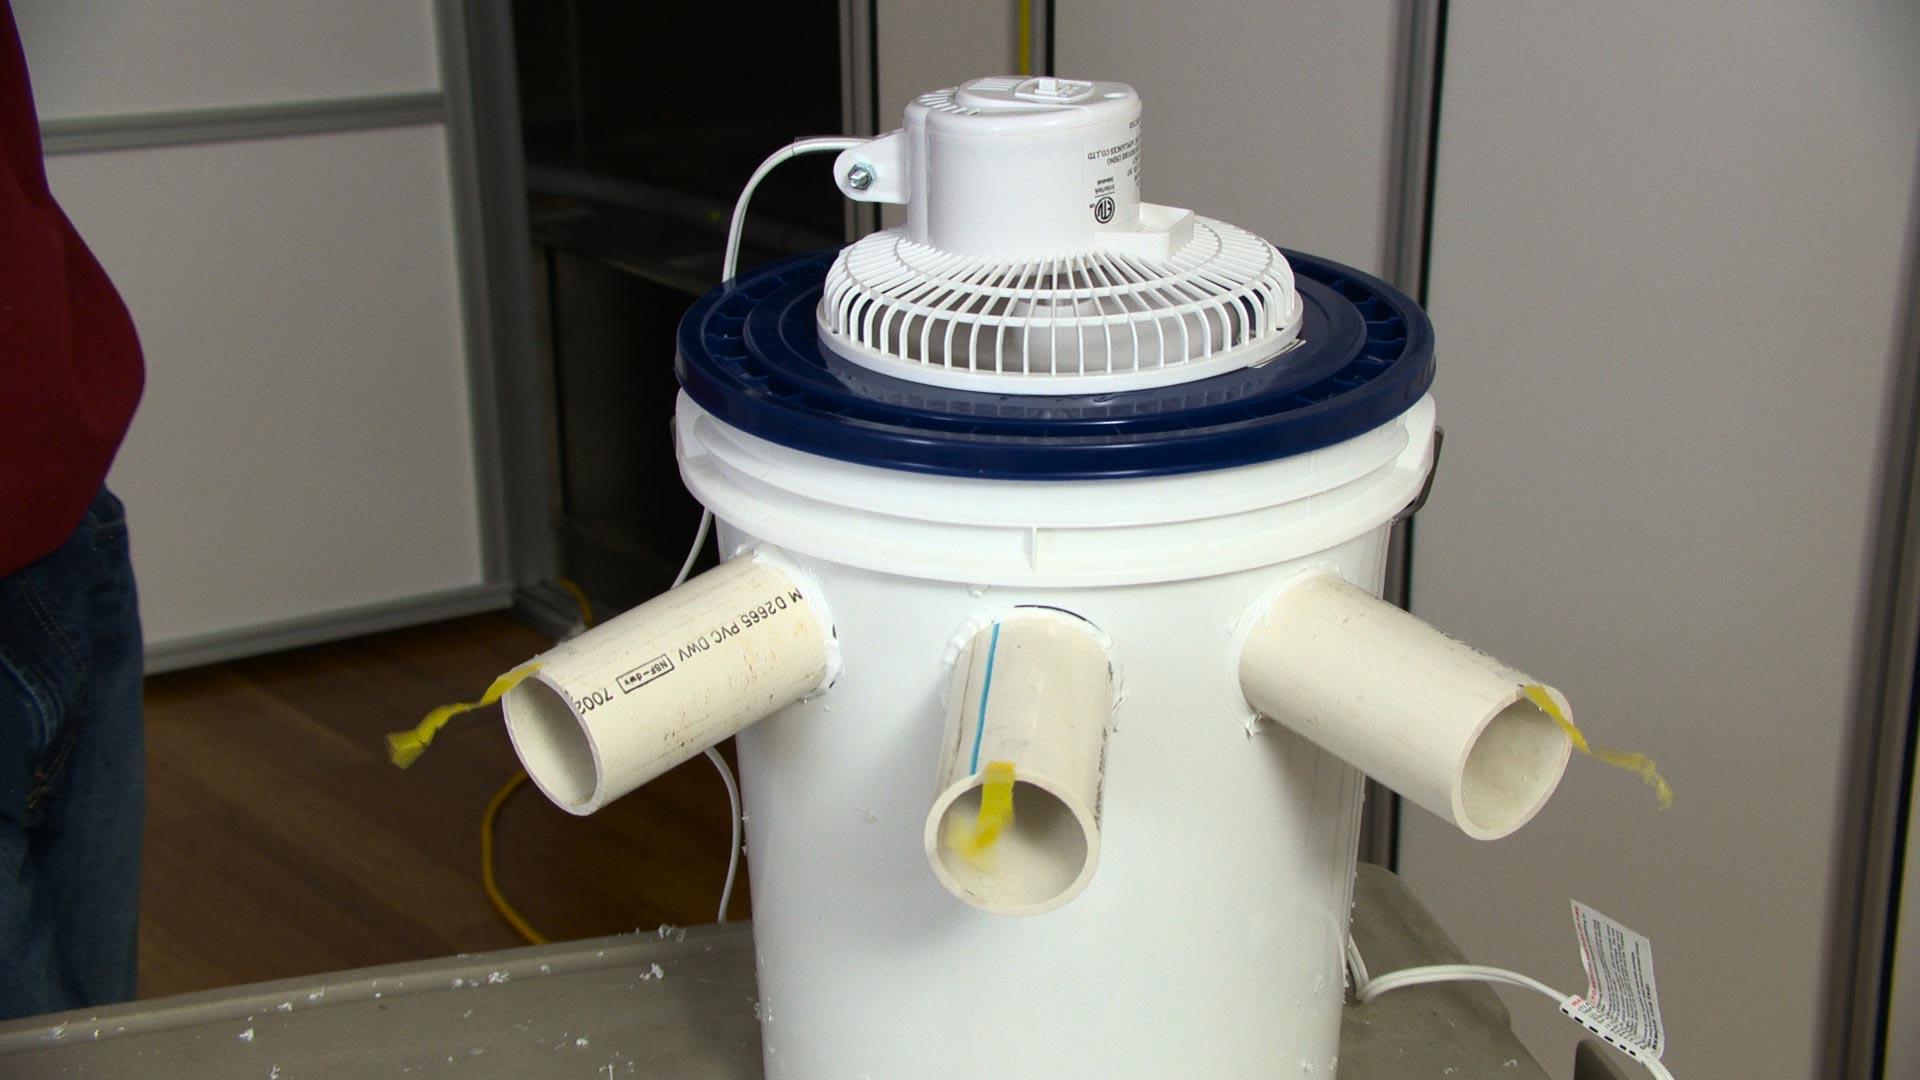
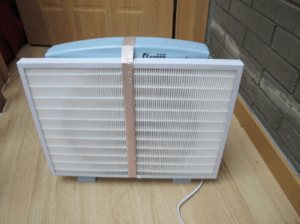
With these infrastructural and governmental inadequacies, people resort to improvised, often subpar measures to stay safe. Last fall, when wildfires surrounded Portland, awarding us the worst air quality in the world, YouTube videos on how to make DIY air purifiers circulated on social media. Though a box fan and a furnace filter panel were the only things required — items typically found at any hardware store — the entire city was sold out.
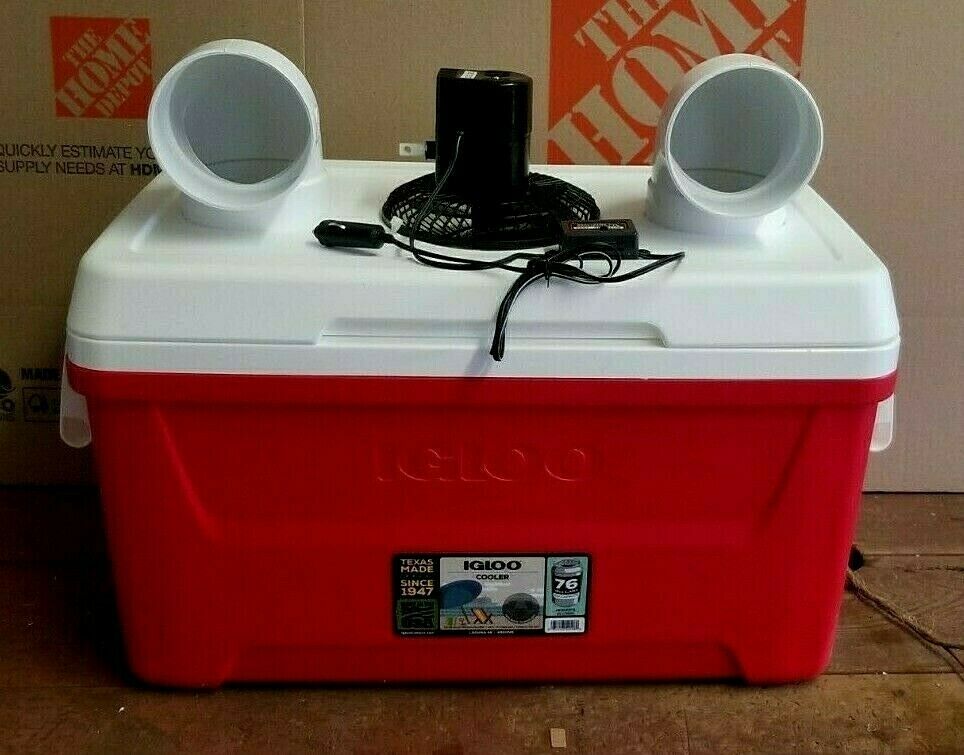
My prepper mentality came to mind again for me when temperatures soared a few weeks ago, and I drove to four different locations looking for ice because our refrigerator had started smoking. (According to my landlord, mine was the third refrigerator that needed replacing in less than 24 hours.) At my last stop, the cashier shook his head apologetically: “Everyone’s trying to stay cool.” This time, city residents were slapping together jury-rigged swamp coolers with large bowls of ice and those perennially versatile box fans. I’d run up against the limits of what the marketplace could provide. In a moment of desperation, I asked my neighbors two doors down if I could store my perishable goods with them. Though they kindly accommodated, it made for awkward interactions later when I had to knock on their door and ask for my coffee creamer or salad greens. After a while, I decided I didn’t really need those things after all.
You can finish reading this article by going here.
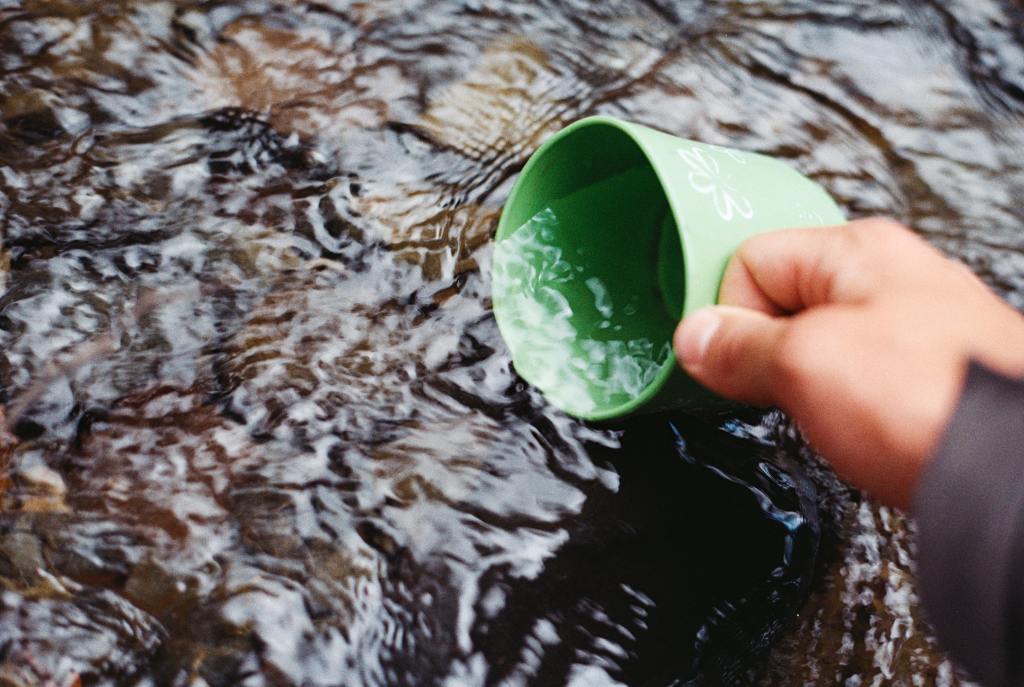
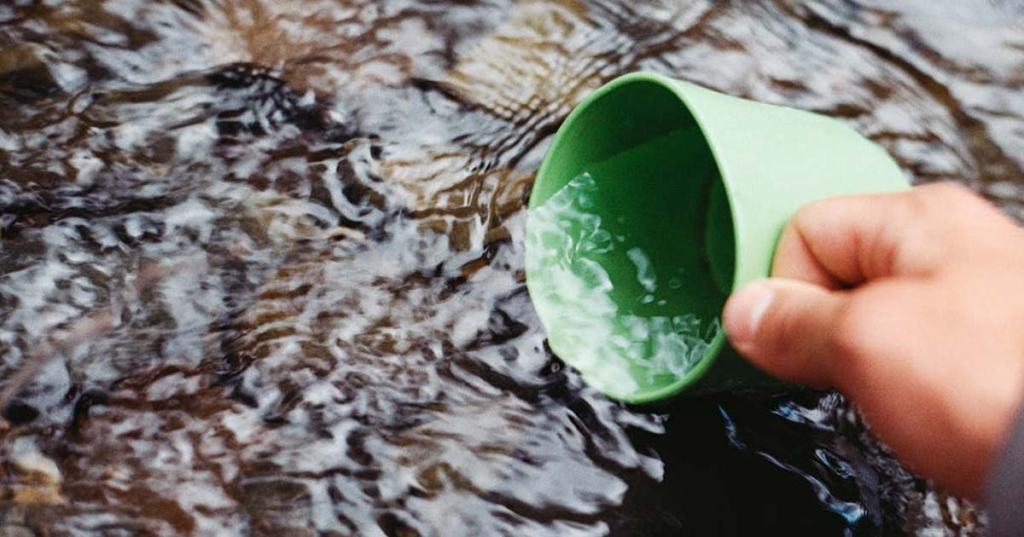
If you are an outdoor lover who enjoys hiking, camping, or trips in the wilderness, you understand how quickly a bottle of water can be consumed. The intense heat of the sun and sweating profusely can require you to drink more to stay hydrated. Water can be consumed quickly and you can run out fast.
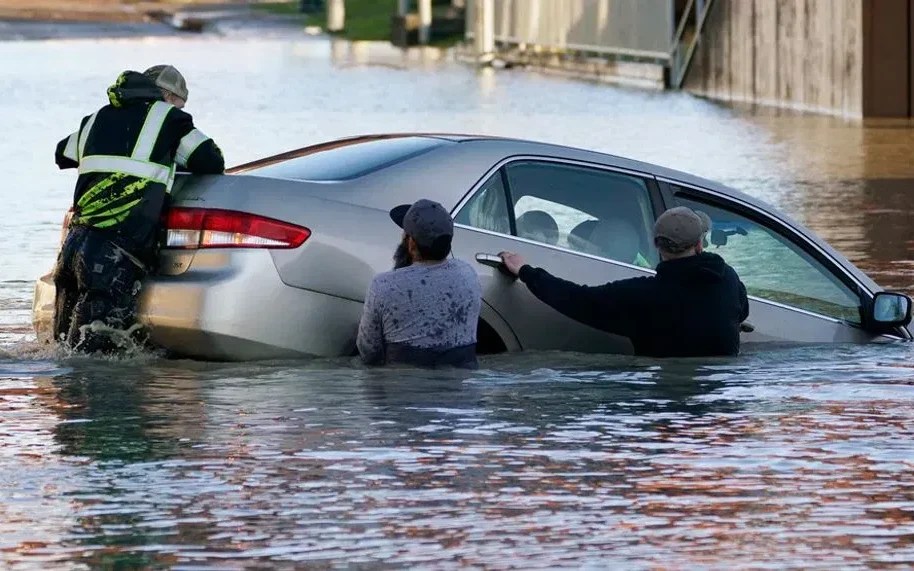
This can be particularly true in a disaster situation where clean water might not be available for a while. An earthquake, flood, hurricane, or other disasters can damage water and sewer lines making freshwater unavailable for homes and families until water lines are repaired or help comes. Drinking unclean and unsafe water can lead to disease and death.
If you are in a situation where you need to find clean water to drink, here are some ideas.
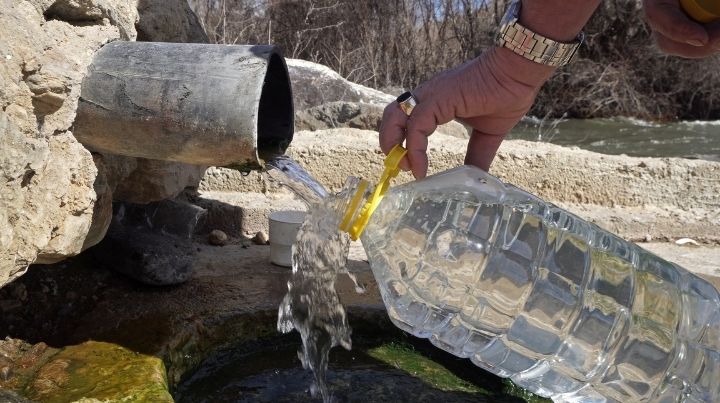
Water Heater Tank
Be sure to turn off the electricity or gas before you unplug the drain at the bottom of your water heater tank. This water is already filtered water, and unless you fear it’s been contaminated, it should be safe to drink.
Stored Water
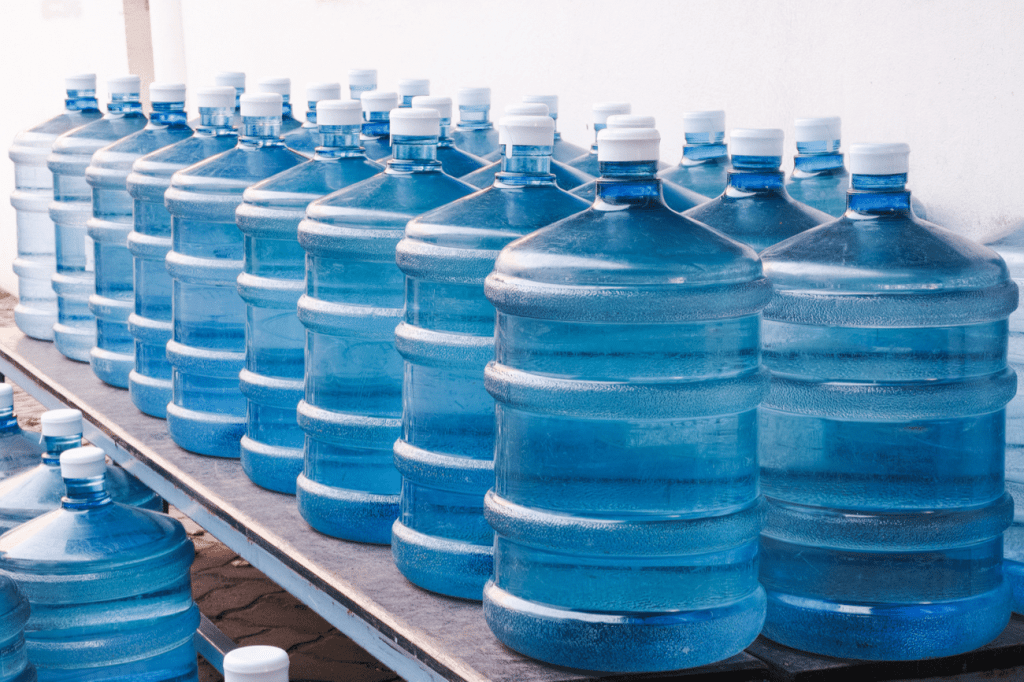
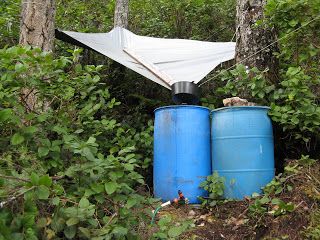
Store water in food-grade clean containers now before a disaster happens. Rinse out and thoroughly clean used 2-liter soda containers or plastic juice jugs and fill them with tap water. You can store these in your closet, behind beds, in your basement, under furniture, or wherever you have room. You can also use containers made for water storage like 5-gallon jugs, 55-gallon drums, or stackable WaterBrick containers. It is suggested that water storage be rotated every six months to 1 year. If not rotated, then have the means to filter if needed. Having some water stored on hand can be a lifesaver in the event of a disaster.
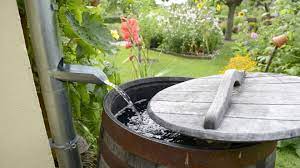
Rainwater
If you can collect rainwater in rain barrels or buckets attached to the downspouts from the roof of your home, it can be your main substitute water next to your stored potable drinking water. Rainwater will still need to be strained, filtered, and purified before you drink it.
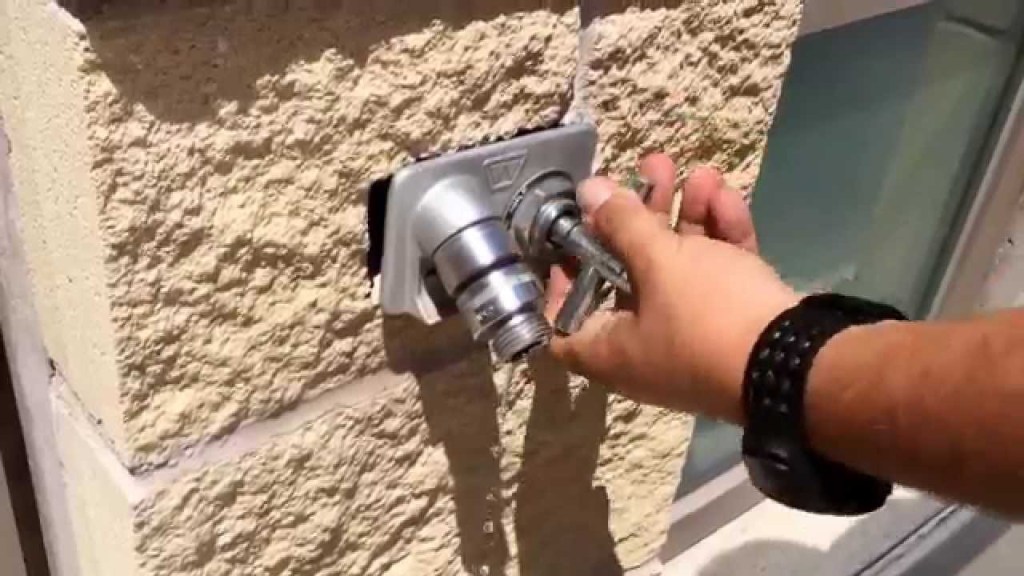
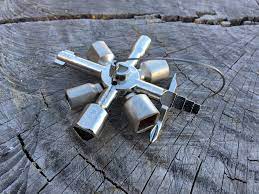
Sillcock Key
A sillcock 4-way key is an inexpensive preparedness item that you can find and purchase online. It gives you access to emergency water in commercial buildings like entertainment venues, mall strips, ballparks, golf courses, government buildings, rest stops, and so forth. Even if the water is turned off in a building, there can still be water in the pipes. Simply locate the water spigot on any business or public building and use the sillcock key to turn the spigot on. Have a bucket or hose ready to collect the water. The Sillcock key can be used where an adjustable wrench or pliers will not.
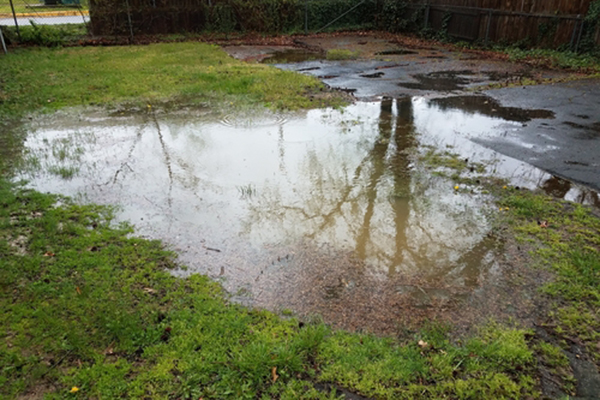
Avoid Standing Water
Pools and puddles of water are typically a focal point for bacteria and other harmful toxins. While this water can be purified, it will probably taste bad and might contain other harmful substances that are more difficult to filter out. Brown or muddy reddish water can be a sign of rust particles or other harmful substances and must be avoided. Most purification methods typically won’t be effective in this case and the water could be dangerous to consume.
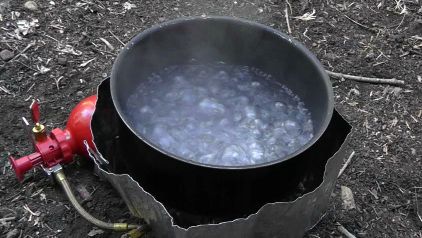
Boiling to Purify Water
If you have any water that you are not sure if it is safe to drink, you will want to purify it. One of the oldest and most proven ways to purify water is by boiling.
To purify by boiling, first, pour the water through a clean piece of cloth or a coffee filter to strain out the visible dirt and debris. Then heat up the water in a pot until it starts to boil. It’s best for the water to reach a boiling point of 212 degrees Fahrenheit or 100 degrees Celsius to destroy pathogens if you have a thermometer to check.
Allow the water to boil for a minute or so to ensure it is completely up to temperature and that anything living in the water is killed. Boiling for too long will cause you to lose some of it to water vapor. You might want to cover it with a lid so that any water you lose to vapor will collect and condense again in the pot.
You also want to note that while boiling water will kill bacteria and dangerous living organisms, it won’t do anything to salts, chemicals, or rust. It also won’t change the taste of the water due to minerals or substances that make it taste bad.
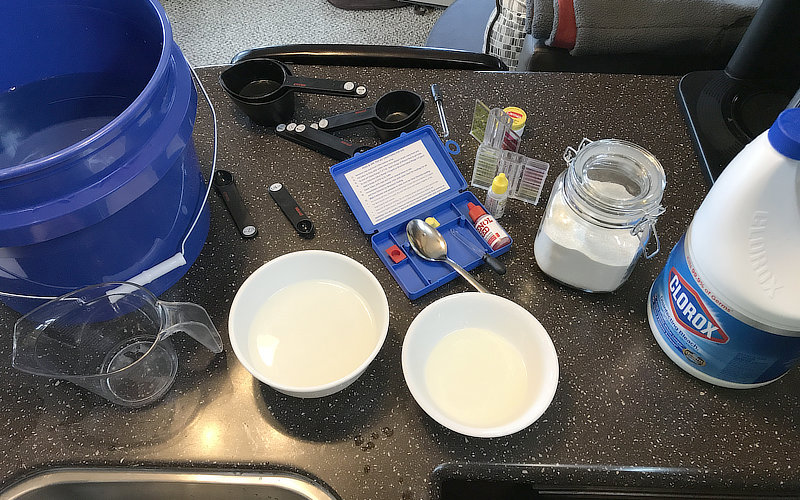
Pool Shock to Purify Water
Calcium Hypochlorite or pool shock can be a bleach substitute for purifying water. Its long shelf-life and affordability make it a good choice to have on hand when needed. It also takes up less space than liquid bleach. The EPA states that you can use granular calcium hypochlorite to disinfect water.
Create a chlorine solution: Put one teaspoon of granular calcium hypochlorite (about ¼ ounce) into ONE gallon of water and allow it to dissolve. This blend creates a stock chlorine solution.
To disinfect water: Add ¾ ounce of the chlorine solution to treat ONE gallon of water.
[The ratio to use is one-part chlorine solution to 100-parts water to be treated. This is about equal to adding 16 ounces (1 pint) of stock chlorine to 12.5 gallons of water.]
To get rid of any unwanted chlorine smell, aerate the disinfected water by pouring it back and forth between two cups or canisters. This is true for bleach purified water, or stored water as well.
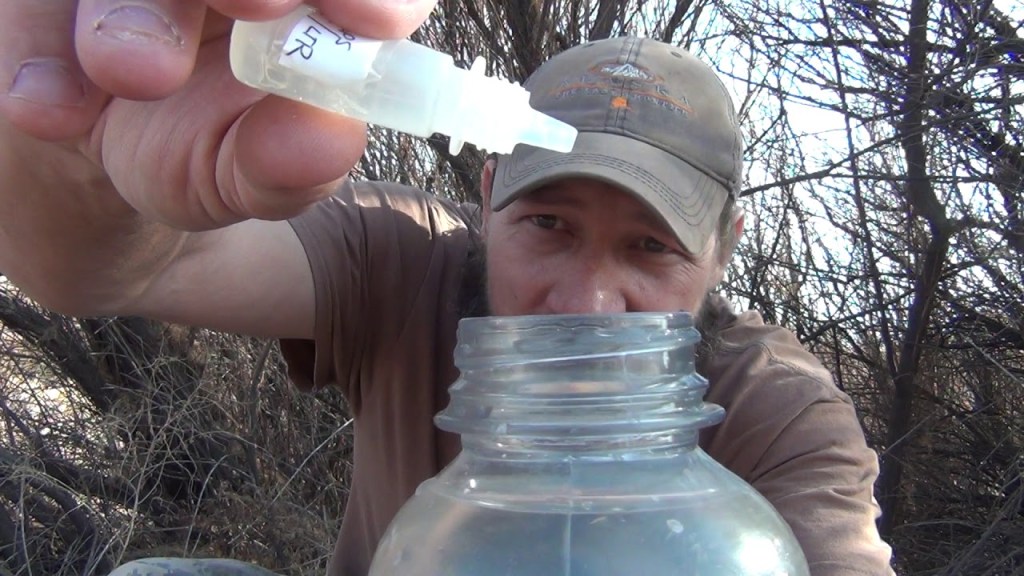
Chlorine Bleach to Purify Water
You can use regular, unscented chlorine bleach to disinfect your water. Check the label that it contains 6 or 8.25% sodium hypochlorite. Avoid using color-safe, scented, or bleaches with added cleaners. Be sure to filter the water getting out any debris or sediments first.
Then use 16 drops (¼ tsp) of chlorine bleach to purify TWO gallons of water or 8 drops to purify ONE gallon. If the water is cloudy, cold, or colored then double this amount. Stir the water and allow to stand for 30 minutes.