Stockpile Smart: Mastering Long-Term Food Storage Techniques

First off, wake up! The world isn’t your safe little bubble anymore. The power grid can go out, trucks can stop delivering, and those fancy supermarkets? Empty shelves faster than you can blink. You want peace of mind? You build a fortress of food, not just some half-assed pantry with expired cans in the back.

But don’t get cocky thinking you can just shove a bunch of junk food in a closet and call it a day. Stockpiling smart means knowing what to store, how to store it, and for how long it’ll last. This isn’t a weekend camping trip; this is about surviving the unknown long haul. Here’s the deal:


10 Survival Skills You MUST Master for Long-Term Food Storage

  1. Food Rotation Management
    Don’t let your stockpile turn into a science experiment. Keep track of expiration dates and always rotate your supplies. Use the oldest first, replace with fresh, and mark everything clearly. No excuses.
  2. Proper Sealing Techniques
    Oxygen and moisture are your enemies. Learn to use vacuum sealers and Mylar bags with oxygen absorbers to extend shelf life. You want airtight containers that can withstand the test of time and pests.
  3. Dehydrating Food
    Drying food is a time-tested method that reduces weight and volume while locking in nutrients. Learn to dehydrate fruits, vegetables, and meats. It’s cheap, effective, and makes your stockpile last longer.
  4. Canning Mastery
    Pressure canning for low-acid foods like beans and meat is a survival skill you can’t ignore. If you botch it, you risk botulism—so get trained or study hard. Home-canned food can last years if done right.
  5. Growing Your Own Food
    Store all you want, but if the disaster drags on, you’ll need to grow your own. Get good at gardening, seed saving, and understanding your soil and climate. Stockpiling alone won’t save you forever.
  6. Foraging Knowledge
    Learn what wild plants are edible and safe. If you have to stretch your stockpile, wild greens, nuts, and berries can supplement your diet. But know them well—one wrong bite and you’re done.
  7. Food Preservation with Salt and Smoke
    If you want to keep meats and fish long-term, get familiar with salting and smoking. These old-school methods work wonders without electricity or fancy gadgets.
  8. Pest Control
    Rodents, bugs, and mold will wreck your food faster than you think. Master pest-proofing your storage area with tight containers, traps, and natural repellents.
  9. Water Purification and Storage
    Food alone won’t do you any good without clean water. Know how to store water safely and purify it on the fly with filters, boiling, or chemical treatments.
  10. Cooking with Minimal Resources
    Long-term survival means you might have to cook on a camp stove, solar oven, or even an open fire. Practice cooking from your stockpile using minimal fuel and tools.

3 DIY Survival Hacks for Smarter Food Storage

  1. DIY Mylar Bag and Oxygen Absorber System
    Don’t waste cash on pre-packaged storage. Buy food-grade Mylar bags in bulk, scoop in your dried or dehydrated food, and throw in oxygen absorbers. Seal the bag with a cheap iron from a thrift store or even a hair straightener. This DIY method will keep your food fresh and bug-free for years.
  2. Repurpose Old Buckets for Bulk Storage
    Got old 5-gallon buckets? Clean ’em out, line with Mylar bags, and store large quantities of grains, beans, or flour. Use gamma seal lids for airtight, stackable storage. This keeps pests out and food fresh. Bonus: buckets can double as water storage or emergency toilets if you’re really in a pinch.
  3. Build a Root Cellar Substitute
    No basement? No problem. Dig a small hole in a shaded, cool part of your yard, line it with bricks or wood, and cover it well with insulating materials. Store root veggies and some canned goods there to keep them cool and extend their shelf life naturally. This is old-school survival wisdom that’s dirt cheap and effective.

Now, why the hell does all this matter?

Because when SHTF, your “funny little stockpile” of expired canned beans and stale crackers won’t cut it. You need a system. A fortress. Something that works when the lights go out and the world flips upside down. If you don’t stockpile smart, you’re just delaying the inevitable starvation party.


More Angry Survivalist Truths About Food Storage

Don’t fall for the marketing crap! Freeze-dried meals and survival kits that cost you a kidney aren’t always the answer. They’re a start, sure, but building your own stockpile with bulk grains, beans, dried vegetables, and home-canned goods is where you build real resilience.

Balance nutrition, dammit! Storing only rice and beans might keep you alive, but you’ll feel like garbage. Get some powdered milk, freeze-dried fruits, nuts, honey, and salt. Your body needs variety to keep fighting.

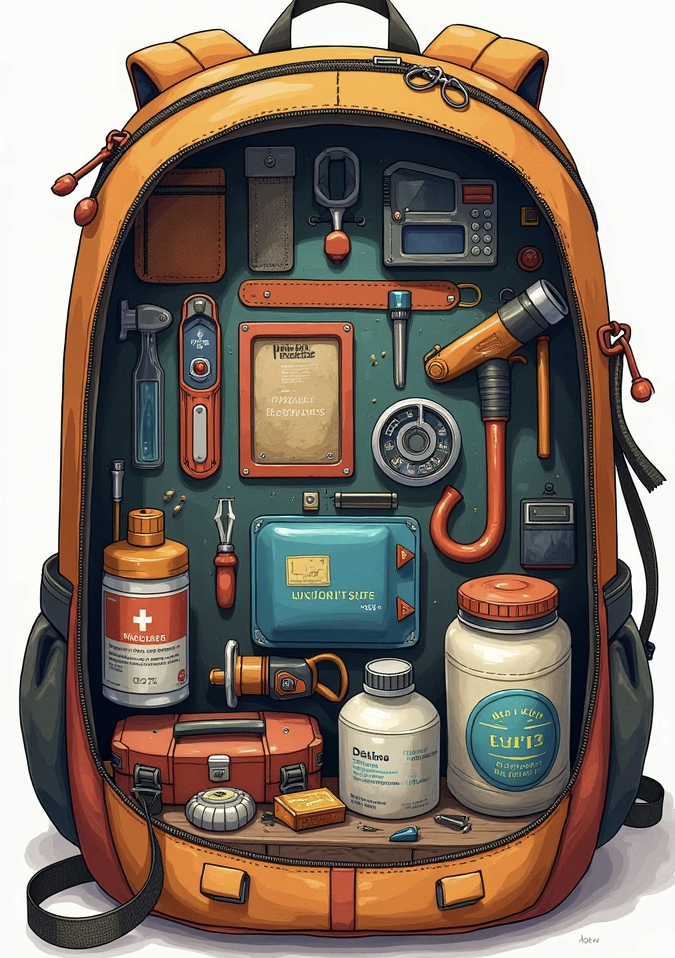
Don’t forget your tools! You better have a manual can opener, a good knife, and a portable stove or two. If you can’t open your food, it’s worthless. No exceptions.

Label everything. No, seriously. Label every container with the contents and date stored. This is survival 101. You don’t want to waste precious calories guessing what’s inside.


Step-by-Step Stockpile Smart Plan

  1. Assess Your Needs
    Calculate how many days or months you want to cover. Factor in family size, calorie needs, and dietary restrictions.
  2. Start Small, Build Fast
    Buy staples in bulk gradually. Don’t blow your entire savings on one haul and then give up.
  3. Get Proper Containers
    Use airtight buckets, Mylar bags, vacuum sealers, and food-grade jars. Plastic bags won’t cut it.
  4. Keep It Cool and Dry
    Temperature and humidity are the enemy of food storage. Find a cool, dark, and dry place for your stockpile.
  5. Learn Preservation Skills
    Master drying, canning, fermenting, and salting. The more techniques you have, the better your chances.
  6. Regularly Inspect Your Stockpile
    Look for leaks, moisture, pests, and spoilage. Catch problems early before your food turns to garbage.
  7. Practice Using Your Stockpile
    Cook meals from your stockpile regularly to familiarize yourself with what you have and avoid surprises.

Final Warning

You want to be the one who survives? Stop whining and start doing. Stockpiling smart isn’t about paranoia; it’s about preparedness. If you wait until disaster strikes, it’ll be too late. Long-term food storage is your insurance policy against chaos.

If you haven’t mastered these skills and built your stockpile yet, you’re playing Russian roulette with your life. Get moving before the next crisis slams the door shut.


So, what are you waiting for? Start learning, start building, and stockpile smart. Because when the world goes dark, it’s not just about surviving. It’s about thriving — and that starts with your food.

Old-School Navigation: How to Read Maps and Use a Compass Like a Pro

Old-School Navigation: How to Read Maps and Use a Compass Like a Dang Pro
(An Angry Survivalist’s No-BS Guide to Not Getting Lost )


Listen up, you soft modern-day wimps addicted to GPS and your goddamn smartphones. When the grid goes down—because trust me, it will—all your fancy gadgets will be about as useful as a screen door on a submarine. If you don’t know how to navigate old-school with nothing but a paper map and a compass, you might as well kiss your survival chances goodbye.

This is a brutal reality check. Nature doesn’t care about your tech, your signals, or your selfies. Nature demands respect and knowledge. So, if you want to survive the wild, you better get off your ass and learn how to read maps and use a compass like a pro—no whining, no shortcuts, no excuses.

Here’s a no-nonsense crash course with seven survival skills and three DIY hacks to keep you from wandering lost in the hellscape that is the wild.


Survival Skill #1: Understand Your Map—Topographic Maps Are Your Bible

First, ditch those crappy road maps or tourist pamphlets. You want topographic maps—those beauties show elevation, terrain features, water sources, trails, and every knoll and valley you might crawl through. Learn to read contour lines: close lines mean steep terrain, wide lines mean gentle slopes. Know the symbols: trees, rivers, cliffs, roads, and trails.

If you can’t interpret your map’s legend, you’re dead meat. This isn’t a joke. Without a clear understanding, you might be aiming for a deadly cliff instead of a river crossing.


Survival Skill #2: Master Your Compass—Know Your Needle and Dial Like Your Life Depends On It

That needle doesn’t spin for fun. It points to magnetic north, which isn’t the same as true north, so you gotta learn the difference—declination—and adjust for it on your compass. If you just blindly follow the needle without accounting for declination, you’ll get lost faster than a squirrel in a maze.

Practice holding the compass flat, lining up the direction-of-travel arrow, and turning the bezel until the orienting arrow matches the magnetic needle. When that’s done, you’ve got a bearing to follow—simple but deadly effective if you screw it up.


Survival Skill #3: Taking a Bearing From the Map—Don’t Guess, Calculate

If you want to get somewhere, first figure out its bearing from your current position. Put the compass on the map with the edge connecting your position and the target. Rotate the bezel until the orienting lines align with the map’s north-south grid. Then, take that bearing off the compass and follow it.

If you skip this and just wander toward “the hill over there,” you’ll be walking in circles and starving before sunset.


Survival Skill #4: Using Landmarks to Confirm Your Position—Trust Your Eyes and Brain

Maps and compasses are useless if you don’t pay attention to the environment. Pick out landmarks—distinct hills, rivers, ridges, or roads—and match them to the map. Confirm your location often, don’t just blindly march forward.

If you’re not checking your surroundings constantly, you’re inviting disaster. Get lost once, and you’ll be lucky if you live to see a rescue.


Survival Skill #5: Pace Counting—Measure Your Distance Without Fancy Gadgets

Without GPS, you need a way to measure how far you’ve gone. Learn to count your paces—a survivalist’s best friend. Count every step for a set distance, then use that to estimate your stride length.

Yes, it’s annoying, but when you’re exhausted and starving, knowing you’ve gone two miles or ten can be the difference between hope and hopelessness.


Survival Skill #6: Back Bearings and Triangulation—Don’t Wander Blind

If you’re lost, don’t panic. Use back bearings to retrace your steps. Point your compass in the direction you came from, turn 180 degrees, and follow that bearing back.

Even better, use triangulation: take bearings on two or three distinct landmarks, draw lines on the map, and where they intersect is where you are. This is survival math—learn it or die trying.


Survival Skill #7: Night and Low-Visibility Navigation—Be Prepared to Improvise

Nightfall or fog doesn’t mean you stop moving. Know how to navigate by the stars or the moon if you lose your compass. Use natural indicators: moss growing on the north side of trees, the sun’s position at dawn or dusk.

Don’t wait for perfect conditions. The wild doesn’t care if you want to rest—it’s relentless. Keep moving with a plan.


DIY Survival Hack #1: Make Your Own Compass—Magnetize a Needle on the Fly

No compass? No problem. Find a sewing needle or small steel piece, rub it vigorously against silk, wool, or your hair to magnetize it, then float it on a leaf in still water. That needle will align north-south.

It’s crude but better than walking blind. Test this method at home before you actually need it—practice saves lives.


DIY Survival Hack #2: Create a Sundial to Approximate Direction

If you have a stick and some sun, you can create a simple sundial. Stick the stick upright in the ground, mark the tip of the shadow. Wait 15-30 minutes and mark the new position of the shadow tip. Draw a line between the two marks—this line runs approximately west-east.

From there, you can orient yourself roughly north-south. It’s not perfect but can save your ass in a pinch.


DIY Survival Hack #3: Use Natural Features as a Map Legend

When you have no map or compass, turn your environment into one. Sketch the terrain with sticks, stones, or in the dirt. Mark streams, hills, and campsites you’ve passed.

This rough “map” helps keep track of your route and prevents doubling back into dangerous spots or traps.


Final Word From the Gritty Trenches of Survival

If you think you can survive with just a phone app and a trust fall into Mother Nature’s arms, wake up. You’ll die cold, lost, and hungry. Old-school navigation isn’t just a skill—it’s a sacred survival rite.

Every survivalist worth their salt swears by the map and compass combo. It’s the purest, most reliable method known to mankind. No batteries, no satellites, just your brain, your eyes, and your hands.

Practice these skills until they’re as natural as breathing. Train yourself to respect the wilderness, to read its cues, and to never wander aimlessly. When the modern world crumbles, only the prepared will thrive.

So get off your lazy butt, print out a topo map, buy a real compass, and start drilling these skills hard. Because when the day comes, and it will come, you’ll either navigate like a pro or perish like the clueless fool you’ve been.

Bleed, Breathe, Survive: A Prepper’s Guide to Emergency Care

Bleed, Breathe, Survive: A Prepper’s Guide to Emergency Care

Listen up. When the world goes sideways — whether it’s a natural disaster, a collapse, or some unholy mix of both — the one thing that’ll separate you from the rotting herd is how fast and sharp you act when it comes to emergency care. I’m talking real, raw, in-your-face survival knowledge, not some PC classroom fluff. You’re bleeding out, choking on dust, or gasping for air — you don’t have time for pansy medical training or waiting for an ambulance that ain’t coming. You fix it. You keep yourself or your people alive. Period.

If you don’t get this, you’re dead meat. So pay attention, because I’m about to drop some serious survival wisdom. Here’s your no-bullshit, angry survivalist guide to handling emergency care when it counts the most.


Survival Skill #1: Stop the Bleed – FAST and HARD

Bleeding out is the number one killer in any emergency scenario. If you don’t stop the blood, your body goes into shock and you’re toast. I’m not just talking about a small scrape; I mean a serious artery gushing blood like a busted fire hydrant.

Skill: Master the tourniquet and pressure bandage like your life depends on it — because it does.

  • Tourniquet — This ain’t just a fancy word. A tourniquet is a lifesaver when a limb is bleeding uncontrollably. Wrap it above the wound tight enough to stop the flow of blood, but not so tight you tear skin or nerves. Get a proper commercial one, but if you don’t have it, make one out of a sturdy belt or cloth and twist it with a stick or pen to tighten.
  • Pressure bandage — If the wound’s on your torso or can’t be tourniquetted, apply direct pressure with clean cloth or gauze. Don’t let up for a minute. If you don’t have gauze, use a T-shirt, towel, or anything clean-ish.

Pro Tip: Always carry a compact trauma kit with a tourniquet, pressure bandages, and hemostatic agents. Hemostatic agents are powders or dressings that make blood clot faster. If you don’t have those, improvise but prioritize stopping the bleeding first.


Survival Skill #2: Control Your Airway – Clear It, Keep It Open

What good is stopping the bleeding if you can’t breathe? When disaster strikes, choking on blood, vomit, or debris is a very real threat. If you don’t keep that airway open, you’re dead before you even get a chance to bleed out.

Skill: Learn to do the Head-Tilt Chin-Lift maneuver and the Heimlich maneuver.

  • Head-Tilt Chin-Lift — If someone’s unconscious or semi-conscious, tilt their head back and lift the chin to open the airway. Clear any visible obstruction with your fingers or a tool.
  • Heimlich Maneuver — If someone’s choking on food or debris, hit that abdomen hard just above the belly button until the obstruction pops out.

Pro Tip: Don’t wait to be a medic to learn CPR. That’s your bread and butter when someone stops breathing or their heart stops. Get certified or at least watch good tutorials and practice.


Survival Skill #3: Build and Use a Splint

Broken bones are no joke in the wild or disaster zones. Without proper immobilization, you risk further injury, bleeding, or infection. You can’t call an ambulance — you are the ambulance.

Skill: Use what you have — sticks, branches, metal, or anything rigid — to immobilize broken or sprained limbs.

  • Find two strong sticks or any sturdy straight object.
  • Pad them with cloth to prevent cutting into the skin.
  • Secure them tightly with rope, tape, strips of cloth, or even shoelaces.
  • Make sure the splint immobilizes the joints above and below the injury.

Pro Tip: Practice making a splint now, so when you need it, you don’t fumble like a scared city slicker.


Survival Skill #4: Improvise a Breathing Filter or Mask

Smoke, chemical fumes, dust, and toxic air can kill you just as fast as a bullet. If you don’t have a gas mask or proper respirator, don’t sit there choking. Use your brain and improvise.

Skill: Make a basic filter using materials around you.

  • Take a clean cloth or bandana and wet it.
  • Layer it with activated charcoal (if you have it) or charcoal from a campfire crushed finely.
  • Fold it to cover nose and mouth tightly.
  • Breathe through it — it won’t be perfect, but it’ll filter out much of the dust and chemicals.

Pro Tip: Store activated charcoal tablets or powder in your survival kit. If you can’t get charcoal, use multiple layers of damp fabric as a minimum barrier.


Survival Skill #5: Keep Calm and Prioritize Care

You can’t do anything if you lose your head. Panic is the biggest killer after injury or trauma. Your body’s adrenaline will spike, but your brain needs to stay cold and tactical.

Skill: Train yourself mentally to triage and act swiftly.

  • Assess the situation quickly: who needs the most urgent care?
  • Stop the bleeding first.
  • Keep the airway clear second.
  • Immobilize injuries third.
  • Prevent shock by keeping the patient warm and calm.

Pro Tip: Practice these steps under pressure with your group or family. If you freeze up in a real disaster, your survival odds drop drastically.


DIY Survival Hack #1: Make a Field Dressing from Household Items

You don’t need fancy medical gear to make a functional dressing.

  • Take clean cotton T-shirts, towels, or even sanitary napkins (they’re sterile and absorbent).
  • Fold them thickly.
  • Use duct tape or strips of cloth to secure them over wounds.
  • If you have honey, rub a thin layer on the wound before dressing. Honey is a natural antibacterial agent and helps prevent infection.

This field dressing will buy you time to get serious care or stabilize someone long enough for evacuation.


DIY Survival Hack #2: Create a DIY Splint from Magazine Pages and Tape

No sticks handy? No problem.

  • Fold several pages of a magazine tightly into a thick, rigid strip.
  • Use duct tape or cloth to secure it firmly around the injured limb.
  • This crude splint isn’t perfect but will stabilize a sprain or minor fracture enough to prevent further damage.

Practice this now so you can whip one out in a pinch.


DIY Survival Hack #3: Homemade Mouth-to-Mouth Shield

If someone’s unconscious and not breathing, you’ll need to perform rescue breaths safely.

  • Cut a small piece of plastic from a sandwich bag or cling wrap.
  • Poke a small hole in the middle (about the size of a dime).
  • Use this as a barrier between your mouth and theirs to reduce infection risk while doing mouth-to-mouth.

This simple device is cheap, easy, and could save a life without risking your own health.


Bottom Line: Bleed, Breathe, Survive

If you think emergency care is something only doctors or medics should worry about, you’re already dead. This survival game is brutal, and you will get hurt — maybe badly. The difference between life and death is having the skills, guts, and knowledge to act immediately and decisively.

You stop the bleeding, clear the airway, immobilize injuries, protect yourself from toxic air, and keep a cool head under pressure. Every second wasted is a second closer to the grave. Get the right gear, practice these skills, and learn these hacks now. Because when SHTF, the world won’t be handing out Band-Aids and breathing masks. You’ll have to be your own damn EMT.

Remember: Bleed, Breathe, Survive. It’s that simple. Or not at all.

Grid Down, Game On: Tailgate Party Power-Out Hacks

Let me tell you something: just because the power grid goes down doesn’t mean the game’s off. In my world, we prep for worst-case scenarios and still know how to have a good time. I’ve hosted tailgate parties in conditions that would make most folks head for the hills—ice storms, blackouts, rolling grid failures. Why? Because morale matters. In a crisis, keeping traditions alive—especially one as sacred as game day—is how communities stay strong.

If you’re looking to keep the party going when the lights go out, you’ve come to the right place. This isn’t your average fluff about burgers and folding chairs. This is grid-down tailgating, survivalist style. And I’ve got 10 rock-solid tips, plus my go-to solar generators that’ll keep your tailgate humming without the grid.


1. Go Solar or Go Hungry

First and foremost: if you’re planning a tailgate with no power, you’ll need an alternative energy source. Generators are great—until they run out of gas. But a solar generator? Quiet, sustainable, and won’t attract the wrong kind of attention. Invest in a good one, and you can power a mini-fridge, speaker system, lights, and even a TV for the game.

More on the best solar options later. Just know this—solar is the lifeline of any blackout bash.


2. Choose Battery-Powered Appliances

When the grid’s gone, every watt counts. Don’t bring energy hogs to your tailgate. Opt for LED lights, battery-powered fans, and low-voltage appliances. I’m talking electric coolers, rechargeable blenders, and portable induction cookers with built-in battery compatibility.

Save your juice for the essentials: food, music, and the game.


3. Set Up a Solar Charging Station

You’re going to have guests, and guests come with dead phones and high expectations. A basic folding solar panel with USB ports can keep devices running. Set up a charging station away from the food zone, and make sure it gets direct sunlight for most of the day.

Pro tip: precharge all your battery banks the day before.


4. Prep Food That Doesn’t Need Power

No one wants to be cooking a 12-hour brisket during a blackout. Plan your menu around items that store well and don’t need much prep. Think smoked sausage, jerky, pre-grilled chicken, sandwiches, wraps, and cold salads. Keep a propane stove or camp grill handy for hot items.

Plan like the fridge isn’t coming back—and you’ll never go hungry.


5. Keep Drinks Ice-Cold Without Electricity

Forget electric coolers if your solar setup’s limited. Use heavily insulated coolers like YETI or RTIC, and pack them tight with ice the night before. Salt the ice to lower its melting point—it’ll last longer. Separate drink coolers from food coolers to reduce how often you open them.

Tailgates are judged by drink temperature. Don’t mess this up.


6. Create a DIY Tailgate Shelter

If the power’s out, there’s a good chance the weather’s part of the problem. Whether it’s too hot or threatening rain, you need shelter. Set up a heavy-duty canopy, and anchor it like you’re expecting 30 mph winds. Add tarps to create walls for windbreaks or shade.

Comfort = morale. Morale = victory.


7. Use a Solar Lantern Setup for After-Dark Fun

Once the sun goes down, you’ll need light. String up solar lanterns during the day to charge, then hang them under your canopy, in trees, or on poles. These will give off ambient light without sucking up battery power like an electric setup.

Avoid fire or open flames in tight areas—you don’t want your blackout party to turn into a burn unit.


8. Keep Entertainment Old-School Ready

If the game’s delayed, or you lose the stream, have backup fun planned. Cornhole, ladder toss, and playing cards keep the party rolling. Don’t rely solely on tech. And make sure your speaker system is either battery-powered or runs efficiently on your solar generator.

And yes, that means downloading the pre-game playlist ahead of time. Spotify doesn’t work when the internet’s out, rookie.


9. Prepare for Safety and Sanitation

Power out? That means bathrooms may be too. Bring a privacy shelter, portable toilet, hand sanitizer, and garbage bags. Stock up on paper towels and have a fire extinguisher on hand near your cooking area.

Sanitation breakdown = party shutdown. Stay clean, stay prepped.


10. Test Your Setup BEFORE Game Day

This one’s non-negotiable. Run a full test of your off-grid tailgate setup at least a week before the event. Make sure your solar panels charge, your battery banks hold, your gear works as expected. You don’t want to find out your “solar-ready” grill needs an outlet 10 minutes before kickoff.

Amateurs improvise. Preppers prepare.


Top Solar Generators for Grid-Down Tailgating

Now let’s talk gear. Not all solar generators are created equal, and you want something that can handle party mode under pressure.

1. Jackery Explorer 1000 Plus

  • Pros: Lightweight, expandable battery, runs cooler boxes and small appliances with ease.
  • Cons: Limited AC outlets, not for heavy-duty items.
  • Why it’s great: Perfect for powering a portable TV and speaker system without burning through reserves.

2. EcoFlow Delta 2 Max

  • Pros: Ultra-fast charging, runs larger devices like grills and even small AC units.
  • Cons: Heavier, but still portable.
  • Why it’s great: A true workhorse for tailgates with a crowd.

3. Bluetti AC200MAX

  • Pros: High capacity, multiple charging ports, can power a small fridge, induction cooktop, and lights all at once.
  • Cons: Pricey, but worth every cent if you tailgate regularly.
  • Why it’s great: Built for blackout situations—and built to party.

4. Anker Solix F2000 (PowerHouse 767)

  • Pros: Expandable, durable, and runs quietly.
  • Cons: Large footprint, not backpack-portable.
  • Why it’s great: You can tailgate through the whole season on a single charge cycle with proper solar input.

Final Word: Party Like a Prepper

Blackout or not, tailgate season doesn’t stop for anything. When the power goes out, it’s the preppers, the planners, and the prepared who keep the good times rolling. If you’ve got solar, smarts, and a solid cooler full of snacks and cold drinks, you’re already ahead of the game.

Remember—it’s not just about surviving, it’s about thriving. And on game day, that means having the best seat in the parking lot, even when the rest of the city’s gone dark.

Grid down? Game on.

EMP Survival Guide: How to Prepare for the Powerless

Let’s get one thing straight: when the lights go out because of an EMP—they’re not coming back anytime soon. We’re not talking about a storm that knocks out the grid for a few hours or a squirrel tripping a transformer. An Electromagnetic Pulse (EMP) attack has the power to shut down everything—communications, transportation, water systems, hospitals, and most critically, your access to supplies. If you’re reading this, it’s because you’re smart enough to know that hoping for the best isn’t a plan—preparing for the worst is survival.

I’ve spent the last 20 years preparing for scenarios most people wouldn’t dream of. And let me tell you—an EMP attack is high on the list because it’s silent, sudden, and absolutely devastating. Whether it comes from a high-altitude nuclear blast or a solar flare like the Carrington Event of 1859, the end result is the same: widespread chaos and the return to a pre-electric civilization.

Here are 10 critical tips for EMP preparedness that could mean the difference between life and death when the grid goes dark.


1. Understand What an EMP Is

Before you can prepare, you’ve got to understand what you’re up against. An EMP is a burst of electromagnetic radiation. It can come from a natural source—like a massive solar flare—or from a man-made source, like a nuclear weapon detonated in the upper atmosphere. The result? It fries electronics, disables circuits, and renders most modern technology completely useless. Cars, phones, computers, even the power grid itself—toast.

A proper understanding of the threat allows you to prepare with purpose, not panic.


2. Build a Faraday Cage

This is Prepper 101 for EMP scenarios. A Faraday cage blocks electromagnetic fields and can protect your electronics from being destroyed. You can buy one, but I recommend building your own. Metal trash cans with tight-fitting lids, lined with cardboard or rubber to insulate the contents from the metal, work great. Store backups of essential electronics like walkie-talkies, a laptop with survival files, solar-powered chargers, LED flashlights, and even an old cell phone.

Just remember—no contact with the metal walls or your gear becomes a fried paperweight.


3. Store Non-Electric Tools and Appliances

You won’t be Googling how to fix things post-EMP. Stockpile manual tools—hand saws, screwdrivers, wrenches, a manual can opener, and analog devices. Anything you can’t operate without power needs to be replaced with a human-powered version.

Get yourself a non-electric grain mill, a mechanical sewing machine, and maybe even a wood-burning stove. It’s time to get old-school.


4. Secure Your Water Supply

City water systems run on electricity. Once the grid fails, water stops flowing. That means no drinking, no flushing, no cleaning unless you’re prepared. Store at least one gallon of water per person, per day for three months (minimum), and invest in high-quality water filters like the Berkey or Sawyer Mini.

Also consider installing a hand pump for your well or identifying natural water sources nearby—rivers, streams, lakes. No water = no survival.


5. Stockpile Long-Term Food Supplies

EMP = no refrigeration, no grocery stores, no Amazon Prime. That means you need a solid stockpile of shelf-stable food: rice, beans, oats, canned meats, freeze-dried meals, peanut butter, honey, salt, and powdered milk. Aim for a minimum of 3 to 6 months of food per person.

Don’t forget a manual grain mill and plenty of seeds for your garden—because you’ll be farming before long.


6. Prepare Off-Grid Power Options

Solar power is your friend—but only if protected. Keep a solar generator and panels stored in your Faraday cage. Small solar chargers can power flashlights, radios, and other essentials. Remember, even solar systems with inverters or controllers might get fried unless properly shielded.

Keep a basic solar setup ready to deploy post-EMP to keep your lights on when everyone else is stumbling in the dark.


7. Harden Your Vehicle

Modern vehicles are vulnerable. Any car made after the mid-1980s is full of sensitive electronics. If you can, invest in an older diesel vehicle with minimal electronics—ideally one built before 1985. These “EMP-proof” rigs can still run post-attack.

At the very least, keep spare parts like the ignition module, ECU, and alternator in a Faraday cage.


8. Fortify Home Security

When the grid’s down, 911 isn’t coming. Desperation will drive people to do unthinkable things. You need to be ready to defend your home and your loved ones. Install reinforced doors, security bars on windows, and deadbolts. Have a plan for night-time watch rotations.

Arm yourself legally and train regularly. If you’ve never handled a firearm, get proper instruction. Security is not optional—it’s survival.


9. Communication Will Be Key

With no cell service or internet, you’ll need backup ways to communicate. A set of two-way radios with a solar charger is a good start. Better yet, get a ham radio license and equipment. Ham radio operators will be the last network standing.

Include local maps, compasses, signal mirrors, and a signal whistle in your preps. Information is power—even more so after the lights go out.


10. Build a Community

This might surprise you—but your greatest asset isn’t your gear. It’s your people. No man is an island, especially post-EMP. Build relationships now with trustworthy neighbors, friends, and like-minded preppers. Form mutual aid networks, exchange skills, and train together.

A lone wolf might survive the initial chaos—but the long haul belongs to strong, organized communities.


The Time to Prepare Is Now

Most folks don’t realize just how fragile our modern life really is. One well-placed EMP, and it all unravels in minutes. No more credit cards, no gas pumps, no medical supplies, no online banking, and no food deliveries. We’re talking back to the 1800s—but with millions of people and none of the skills.

Don’t wait for the government to save you. They won’t. Don’t rely on hope. Hope is not a strategy. Stockpile, practice, train, and prepare like your life depends on it—because when the grid goes down, it just might.

You’ve got a head start just by reading this. Take action. Make a plan. Start today. Because when the EMP hits… it’s already too late.


12,000 nuclear warheads : Nuclear Warheads by Nation

Global Arsenal: Nuclear Warheads by Nation

By a Survival Prepper Who Hates War

You don’t have to be a conspiracy theorist to see the writing on the wall. Just look around. The world is bristling with nuclear weapons—hundreds here, thousands there—all prepped to unleash hell in an instant. I’m not some warmonger or doomsday cultist. I’m a survivalist. And I prepare because history tells us time and time again: when you trust governments with this kind of firepower, you’re rolling the dice with human existence.

Today, I’m breaking down the global nuclear arsenal. Not because I admire it. Hell no. But because knowledge is power—and knowing who holds these weapons, and in what quantities, tells you where the flashpoints are. And where not to be when it all goes sideways.

1. Russia – Approx. 5,889 warheads

Let’s start with the bear in the east. Russia has the largest stockpile of nuclear weapons on Earth. Most of these are part of their strategic arsenal—intercontinental ballistic missiles (ICBMs), submarine-launched ballistic missiles (SLBMs), and long-range bombers. Thousands are retired and awaiting dismantlement, but don’t be fooled: around 1,550 are deployed and ready to fly at a moment’s notice.

Russia’s doctrine has shifted toward tactical nukes too—lower-yield weapons designed for use on the battlefield. In a conflict, that makes escalation a lot more likely. You toss a so-called “small” nuke into the mix, and it’s only a matter of time before someone responds with a bigger one.

2. United States – Approx. 5,244 warheads

Right behind Russia is the U.S., with thousands of nuclear warheads scattered across land-based silos, submarines, and air bases around the world. We’ve had these things since Hiroshima and Nagasaki, and instead of phasing them out, we’ve modernized them. New delivery systems, faster response times, more precise targeting.

I don’t say this with pride. I say it with fear. Our own government talks about deterrence like it’s some magic shield. But deterrence is just another word for mutually assured destruction—MAD, they call it. Fitting, isn’t it?

3. China – Approx. 500 warheads (and growing)

China used to be a distant third, but they’re catching up fast. The Chinese Communist Party is building new missile silos in the desert, expanding their submarine fleet, and investing in hypersonic weapons. Analysts think they could have 1,500 warheads by 2035.

They claim a “no first use” policy, but policies change. If there’s one thing I’ve learned, it’s that doctrines mean squat once the missiles start flying.

4. France – Approx. 290 warheads

France likes to remind the world that it’s independent—and its nuclear deterrent is part of that mindset. Their warheads are primarily deployed on submarines, with a few air-launched options. Small arsenal, relatively speaking, but still enough to end millions of lives.

You don’t need thousands of nukes to destroy civilization. A few hundred well-placed warheads can collapse global infrastructure in a matter of hours. EMPs, radiation, firestorms—choose your poison.

5. United Kingdom – Approx. 225 warheads

The UK relies heavily on its Trident submarine fleet. Like France, their arsenal is smaller, but just as deadly. They’ve recently announced plans to raise the cap on warheads—a reversal of disarmament trends. That tells you where we’re headed. Not toward peace, but rearmament. All it takes is one spark—one miscalculation—and boom. Goodbye, London. Goodbye, humanity.

6. Pakistan – Approx. 170 warheads

This is where things get especially dicey. Pakistan’s nuclear posture is India-focused, but the region is volatile. Border clashes, terrorism, political instability—you name it. And let’s not forget that Pakistan is a country where the military holds major sway, and where extremist elements have occasionally infiltrated institutions.

They’ve developed tactical nuclear weapons too—designed to be used in battlefield scenarios. That scares the hell out of me. Tactical nukes lower the threshold for use. Once the line is crossed, there’s no going back.

7. India – Approx. 164 warheads

India and Pakistan are locked in a nuclear arms race that gets less press than it should. India has a no-first-use policy, but again, policies mean little in the fog of war. They’ve got missiles that can reach deep into China and Pakistan, and their triad—land, sea, and air-based delivery—is developing fast.

We’re talking about two countries with historical animosities, border disputes, and major populations packed into small geographic areas. If a nuclear exchange broke out here, the global fallout—literal and political—would be catastrophic.

8. Israel – Estimated 90 warheads (undeclared)

Israel doesn’t officially admit to having nukes, but everyone knows they do. Their policy of “nuclear opacity” is strategic—keeping enemies guessing. But it’s also dangerous. In the Middle East, where trust is thin and grudges run deep, opacity breeds suspicion.

Israel has submarine-launched missiles, air-based delivery, and possibly land-based systems. Their focus is deterrence, particularly against Iran. But if things spiral, that deterrence can become devastation.

9. North Korea – Estimated 30–50 warheads

This is the wild card. North Korea doesn’t just have nukes—they broadcast them like trophies. They’ve tested ICBMs that can reach the U.S. mainland, and they’re refining their warheads for miniaturization and deployment.

The scariest part? We don’t fully know what they’ve got or how stable their chain of command is. In a crisis, logic and strategy might take a back seat to desperation.


The Bigger Picture

In total, we’re looking at over 12,000 nuclear warheads across the globe. Even if only a fraction of those were used, the result would be apocalyptic. According to scientists, just 100 nukes dropped on cities would trigger a nuclear winter—blocking sunlight, destroying crops, and killing billions through starvation.

And yet, we keep building more.

That’s the insanity of it. We’re stockpiling civilization-ending weapons as if it’s business as usual. Politicians talk about modernization and defense budgets like they’re upgrading smartphones. But we’re not upgrading—we’re gambling with the only planet we’ve got.

Why I Prep

I’m not prepping because I think I can survive a full-blown nuclear exchange. No one really “survives” that. I prep because it gives me options. A remote homestead, clean water, radiation filters, food stores—these aren’t luxuries. They’re necessities in a world where the next war might be the last.

But more than prepping for survival, I speak out because I still have hope. Hope that sanity will prevail. Hope that people will realize the madness of nuclear brinkmanship before it’s too late. I hate war because I love life. I love the land, the forests, the animals, the sound of a creek in spring.

Nukes don’t just end wars. They end everything.

Final Word

Here’s what I’ll tell you, prepper to prepper, citizen to citizen: don’t trust any nation with your future. Know what’s out there. Know who holds the keys to Armageddon. And keep your gear ready—not because we want this war, but because the ones in charge sure don’t seem to mind flirting with it.

Stay alert. Stay prepared. And above all, stay human.

Hiking Michigan’s Famous Trails? Prepare for the Worst and Hope for the Best

Hiking Michigan’s Famous Trails? Prepare for the Worst and Hope for the Best

By someone who’s hiked Michigan, survived a storm with just a tarp, and never goes into the woods without duct tape and a magnesium fire starter.

Hiking Trails: Michigan Hiking

Let me tell you something straight: if you’re heading out into Michigan’s backcountry and you’re not prepared, you’re not just foolish—you’re bait. I love this state. I’ve hiked every trail worth its salt, pitched tents under pine canopies, and woken up to black bears snuffling around camp. Michigan is beautiful—no doubt. But she’s also wild, unpredictable, and merciless if you come unprepared.

If you’re planning to hike Michigan’s famous trails, you’d better treat every trip like it’s the one that tests your mettle. Because one day, it will be.

You see, the average hiker brings a granola bar, a water bottle, and a phone. The smart hiker brings that and then some—fire-starting tools, a map and compass (yes, paper and metal), a good fixed-blade knife, paracord, a tarp, extra socks, and a working knowledge of how to filter pond water through a bandana if the Sawyer filter fails.

Now that we’ve got that squared away, let’s get into what you really came for: the best trails in Michigan. I’ve walked them, camped along them, and, in one case, slept in a tree to avoid coyotes. Here are the Top 20 Hiking Trails in Michigan, each one worth your boots, but not without its own risks.


Top 20 Hiking Trails in Michigan (and Why You’d Better Be Ready)

  1. Porcupine Mountains Escarpment Trail (Upper Peninsula)
    • Wild views, black bears, and weather that changes faster than your GPS signal. Always have a compass.
  2. North Country Trail (Multi-State, including Michigan)
    • 1,150+ miles through Michigan alone. You’re not hiking this without a plan, and I mean a real plan.
  3. Pictured Rocks National Lakeshore (Munising to Grand Marais)
    • Cliffside trails, Lake Superior’s wind, and cold that cuts to the bone. Bring layers, even in July.
  4. Manistee River Trail (Manistee National Forest)
    • Popular, but don’t let that fool you. Poison ivy, ticks, and river crossings galore. Good boots are mandatory.
  5. Jordan River Pathway (Northern Lower Peninsula)
    • A 2-day loop with terrain that punches above its weight. Don’t underestimate the hills—pack light, but smart.
  6. Isle Royale Greenstone Ridge Trail (Isle Royale National Park)
    • Remote? Try “ferry-access only and no roads.” Bring everything you need and expect no cell signal—ever.
  7. Sleeping Bear Dunes Dune Climb Trail (Empire, MI)
    • Beautiful but brutal. Sand hiking is like walking through syrup. Bring electrolytes and a wide-brim hat.
  8. Waterloo-Pinckney Trail (Southeast Michigan)
    • Rolling hills, marshes, and sudden storms. Keep your gear dry and your sense sharp.
  9. Tahquamenon Falls State Park Trails (Upper Peninsula)
    • Boardwalks, backwoods, and blackflies. Bug spray is non-negotiable.
  10. Lakeshore Trail (Pictured Rocks, shorter alternative)
    • Easier, but with slippery cliffs and sudden fog. Always keep to the marked path.
  11. High Country Pathway (Northeast Lower Peninsula)
    • 80+ miles through remote backcountry. Good for solo testing—if you know how to make shelter from scratch.
  12. Hogback Mountain Trail (Marquette, MI)
    • Steep, rocky, and short—but treacherous in wet conditions. Watch your footing, and bring trekking poles.
  13. McCormick Wilderness Trails (Upper Peninsula)
    • True wilderness. Navigation skills required. Don’t rely on marked paths—they’re faint or nonexistent.
  14. South Manitou Island Trails (Lake Michigan)
    • Ferry access only, soft terrain, and ghost-town vibes. Water sources are limited—filter everything.
  15. Pinckney Recreation Area – Potawatomi Trail
    • Loop trail with solid forest cover. Watch for cyclists, and keep an eye on your pace.
  16. Shingle Mill Pathway (Pigeon River Country State Forest)
    • Elk sightings, peaceful woods—but it gets dark fast. Keep a headlamp in your top pouch.
  17. Chapel Loop Trail (Pictured Rocks)
    • Arches, cliffs, and serious drop-offs. Don’t hike it in flip-flops. Yes, I’ve seen that. Don’t be that person.
  18. Porcupine Mountains Lake of the Clouds Trail
    • Amazing views, but a wrong step near the overlook and it’s game over. Respect the edge.
  19. Nordhouse Dunes Wilderness Area (Near Ludington)
    • Dunes, wind, and navigation hell if you’re not good with a map. Mark your trail.
  20. Arcadia Dunes – Baldy Trail
    • Family friendly until weather rolls in. Keep that emergency poncho handy—you’ll need it eventually.

Prepping for Michigan Trails: The Hard Truth

You’re not just walking through the woods—you’re entering nature’s domain. She doesn’t care about your phone battery or your Instagram reel. Out there, it’s about preparation, awareness, and respect.

Gear You Must Carry:

  • Water purification system (plus backup tablets)
  • Knife or multitool (not the cute keychain kind)
  • Fire starter kit (lighter, waterproof matches, ferro rod)
  • First aid kit (include tweezers for ticks)
  • Map and compass (learn how to use them before you go)
  • Rain gear (always assume it will rain)
  • Shelter (tarp, bivy, or ultralight tent)
  • High-calorie snacks (trail mix, jerky, energy bars)
  • Emergency whistle and signal mirror

Mindset You Need:

  • Expect your GPS to fail.
  • Expect the weather to betray you.
  • Expect blisters, bruises, and biting insects.
  • Hope for beauty, peace, and solitude—but prepare for the worst.

A Final Word from the Trail

I’m not here to scare you out of hiking. Quite the opposite—I want you on those trails, breathing that wild Michigan air, crossing paths with a fox at sunrise, or watching Lake Superior turn gold at dusk.

But I want you to live through it.

I’ve seen too many folks hike with earbuds in and no clue where they are. Too many day-trippers caught in a storm with no jacket, or campers whose cheap tent poles snapped in a mild breeze. Don’t let that be you.

When you hike these 20 Michigan trails—some of the best this side of the Mississippi—you owe it to yourself and the land to be prepared. You don’t have to be a full-blown bushcrafter. But bring more than the bare minimum. Practice your knots. Read a map. Learn the plants.

Because in the end, the trail doesn’t care if you’re a newbie or a veteran—it treats everyone the same. The question is: are you ready?

So lace up your boots, zip that pack tight, and head out with confidence.

And remember: prepare for the worst, hope for the best, and hike like your life depends on it—because one day, it might.

The Hidden Dangers of Massachusetts’ Most Popular Hiking Trails: Survival Is Key

Let me tell you something most folks don’t want to hear: just because a trail is popular doesn’t mean it’s safe. I’ve been hiking across the rugged backwoods of Massachusetts for over 20 years—off-grid, compass in hand, and pack on my back—and I can tell you from experience: the biggest threat on the trail isn’t always what’s in front of you. It’s what you didn’t prepare for.

Hiking Trails: Maryland Trails

Massachusetts might not have the Rocky Mountains or the vast deserts of the Southwest, but don’t let that fool you. From sudden weather shifts to venomous snakes, ticks, and disorienting terrain, the threats are real—and often underestimated. Whether you’re trekking the Berkshires or tracing the edge of Cape Cod, survival isn’t just a mindset. It’s a necessity.

Before we dive into the top 20 hiking trails in Massachusetts, let’s break down some of the hidden dangers that even seasoned hikers overlook.


Hidden Threats Lurking on the Trail

1. Weather Whiplash

Massachusetts weather is famously unpredictable. One minute you’re basking in 70°F sunshine, the next you’re drenched in a torrential downpour or socked in by dense fog. Hypothermia doesn’t care that it’s spring. Always carry thermal layers and a compact emergency blanket.

2. Ticks and Lyme Disease

Our forests are tick-infested battlegrounds. Deer ticks, which carry Lyme disease, are nearly invisible. Use permethrin-treated clothing, carry a tick removal kit, and check yourself after every hike.

3. Venomous Wildlife

Yes, we have copperheads and timber rattlers—especially out west in the Berkshires. They’re shy but you don’t want a close encounter. Step carefully around rocks and logs.

4. Trail Misguidance

Marked trails can become misleading after storms or in dense forest. GPS can fail. Always carry a topo map and compass, and know how to use them.

5. False Confidence

This is the biggest one. Folks think a “moderate” rating on AllTrails means they can stroll through in sneakers and shorts. Big mistake. Foot injuries, dehydration, and getting lost can happen fast.


Top 20 Hiking Trails in Massachusetts (and What You Need to Survive Them)

These trails are stunning—but don’t be fooled. Every single one requires planning, gear, and respect.


1. Mount Greylock (Lanesborough)

The highest point in the state. Fog rolls in fast, and trails can be slick. Bring trekking poles and always pack a rain shell.

2. Mount Monadnock (Technically in NH, but popular from MA side)

Steep, granite faces make for great views—and twisted ankles. Sturdy boots are non-negotiable.

3. Blue Hills Reservation (Milton)

Don’t be lulled by its proximity to Boston. With over 125 miles of trails, it’s easy to get disoriented. Mark your route and check your six.

4. Mount Holyoke Range (Hadley/Amherst)

Rocky, technical terrain with limited water sources. Carry a purifier or LifeStraw.

5. Mount Tom (Easthampton)

Cliffs and loose gravel. Slips are common, especially after rain. Gloves help on steep ascents.

6. Wachusett Mountain (Princeton)

Good elevation gain with panoramic views. Sudden temperature drops possible at the summit.

7. Bash Bish Falls (Mount Washington)

Gorgeous, but deadly. Slick rocks have caused injuries and even fatalities. No shortcuts. Stay on the trail.

8. Mohawk Trail (Western MA)

An historic route with hidden side trails. Navigation skills are crucial here.

9. Quabbin Reservoir Trails

Peaceful but sprawling. Easy to wander too far. Cell service is spotty—bring a whistle and mirror for signaling.

10. Midstate Trail

92 miles from Rhode Island to New Hampshire. Multi-day section hiking means serious preparation: maps, rations, and shelter.

11. Cape Cod National Seashore Trails

Stunning dunes and coastal forest. But coastal storms hit fast, and sun exposure is brutal. Don’t forget SPF and electrolytes.

12. Mount Everett (Mount Washington)

Part of the Appalachian Trail, it’s isolated and has sudden elevation changes. Watch for snakes.

13. Purgatory Chasm (Sutton)

Rock scrambles and narrow crevices. Great for agility, but bad for the unprepared. Helmets aren’t a bad idea here.

14. Deerfield River Trail

Flood-prone and muddy in spring. Waterproof boots and gaiters are essential.

15. Appalachian Trail Section (Massachusetts portion)

Part of the grand-daddy of all long hikes. This stretch is beautiful and wild—perfect place to test your survival kit.

16. Notch Trail (Amherst)

Quiet, forested paths, but confusing junctions. Trail markers are scarce in spots—rely on compass, not phone.

17. Beartown State Forest (Monterey)

Remote and lush, with minimal traffic. Good spot for seeing wildlife—but also black bears. Carry bear spray.

18. Harold Parker State Forest (Andover)

Lots of loop trails. Easy to lose your bearing. Always note the sun’s direction to help navigate.

19. Pine Hill (Blue Hills, Quincy)

A popular day hike, but the terrain is tougher than expected. Ankle support is key.

20. Ashland State Park Trails

Wetlands and wooded paths. Great in fall, but flooded sections are common. Watch for unstable ground.


My Core Survival Checklist for Massachusetts Trails

If you’re serious about staying safe and seeing every trail to its end, here’s what you need in your pack—every time:

  • Topo map and compass (and the knowledge to use them)
  • Portable water filter or purification tablets
  • Emergency bivy sack or space blanket
  • Knife/multi-tool
  • First aid kit (with tick remover)
  • Fire-starting gear (ferro rod, waterproof matches)
  • High-calorie snacks (jerky, energy bars)
  • Headlamp with extra batteries
  • Paracord (50 feet minimum)
  • Whistle and signal mirror
  • Rain jacket and thermal base layer
  • Sunscreen and insect repellent
  • Bear spray (western MA)

And here’s the truth: survival isn’t about paranoia. It’s about preparedness. It’s about knowing that you might be the only thing standing between you and a real bad day out there. Popular trails attract more hikers—but also more false confidence. That’s where accidents happen.


Final Words from the Trail

Massachusetts is a state of beauty, history, and wild places. But those places deserve respect. Hiking isn’t a hobby—it’s a proving ground. Every trail teaches you something about the land and about yourself. Sometimes it’s humility. Sometimes it’s vigilance. And sometimes, it’s the hard lesson of what happens when you forget that nature always holds the upper hand.

So lace up your boots, pack smart, and hike like your life depends on it—because one day, it just might.

Survival is key. Always has been. Always will be.

Alabama’s Deadliest Hiking Trails: Popular Routes That Could Be Your Last Hike


Alabama’s Deadliest Hiking Trails: Popular Routes That Could Be Your Last Hike

As a seasoned survivalist and avid hiker, I’ve trekked through Alabama’s rugged terrains, where beauty and danger often walk hand in hand. The state’s diverse landscapes—from dense forests to steep ridgelines—offer exhilarating challenges. However, these same features can turn a peaceful hike into a perilous ordeal if you’re unprepared. In this guide, I’ll walk you through Alabama’s most treacherous trails, highlighting the risks and survival strategies to ensure you make it back.


1. Walls of Jericho Trail

Often dubbed the “Alabama Grand Canyon,” the Walls of Jericho Trail in Estillfork is a 6.4-mile out-and-back journey that leads hikers through dense forests to a stunning waterfall. The path is notorious for its steep descents, slippery rocks, and overgrown vegetation. In summer, the area becomes a haven for venomous snakes, and the lack of cell service makes emergencies challenging.A-Z Animals+1runbryanrun.com+1

Survival Tip: Always hike with a buddy, carry a GPS device, and wear snake gaiters.


2. Sipsey Wilderness

Spanning 45 miles of untamed wilderness, Sipsey Wilderness is a labyrinth of sandstone bluffs and dense forests. Hikers often get lost due to the absence of trail markers and the maze-like terrain. The cliffs can be treacherous when wet, leading to fatal falls.A-Z Animals+1AllTrails.com+1

Survival Tip: Stick to well-marked trails, carry a topographic map, and inform someone of your itinerary.


3. Bear Creek Back Country Trail

This 7.3-mile loop in the Bankhead National Forest descends into a canyon, offering breathtaking views and a waterfall. The trail is challenging due to its steep climbs and slippery rocks. Many hikers turn back after reaching the waterfall, leaving the return journey through the canyon’s rugged terrain.

Survival Tip: Wear sturdy boots, bring trekking poles, and carry sufficient water.


4. Odum Trail to Odum Point

A 7.5-mile out-and-back trail featuring three waterfalls in the first mile, Odum Trail becomes increasingly treacherous beyond that. The path is overgrown with thorns, and ticks and snakes are prevalent in warmer months. The trail’s remoteness means that help is often far away.runbryanrun.com

Survival Tip: Wear long pants, carry a machete, and check for ticks regularly.runbryanrun.com


5. Cheaha Lake to Cheaha Mountain

This 3.3-mile out-and-back trail offers a steep ascent of over 1,200 feet. While the elevation gain is substantial, the trail is less trafficked, increasing the risk of encountering wildlife or getting lost.

Survival Tip: Carry a whistle, stay on the trail, and be aware of your surroundings.


6. Skyway Loop Trail

A 17.2-mile loop with nearly 3,000 feet of elevation gain, the Skyway Loop Trail is a favorite among backpackers and trail runners. The trail offers stunning views but is physically demanding. The remote nature means that assistance is not readily available in case of emergencies.runbryanrun.com

Survival Tip: Plan for an overnight hike, carry a first aid kit, and ensure your phone is fully charged.


7. Pinhoti National Recreation Trail

Stretching over 350 miles, the Pinhoti Trail traverses the Talladega National Forest. While the trail is well-marked, its length and isolation pose risks. Hikers have been known to get lost, and the trail’s elevation changes can be strenuous.en.wikipedia.org

Survival Tip: Break the hike into sections, carry a satellite communicator, and stay hydrated.


8. Pin-Chin-Sky Loop

A 19.3-mile loop offering panoramic views, the Pin-Chin-Sky Loop is challenging due to its length and varied terrain. The trail includes rocky ridges, tranquil streams, and open meadows, but the lack of trail maintenance in some areas can lead to injuries.AllTrails.com

Survival Tip: Use trekking poles, wear appropriate footwear, and carry a repair kit for gear.


9. Deer Skull Falls and Wolfpen Falls Loop

This 4.1-mile loop is not officially maintained and deviates from established paths. The trail’s unmarked sections can lead to confusion and potential accidents. The presence of waterfalls adds beauty but also danger due to slippery rocks.AllTrails.com

Survival Tip: Avoid the trail during wet conditions, and always have a map and compass.


10. Cheaha State Park Trails

While Cheaha State Park offers several trails, some paths are steep and can be hazardous during inclement weather. The park’s elevation changes and unpredictable weather patterns increase the risk of hypothermia and other cold-related injuries.

Survival Tip: Check the weather forecast before hiking, and dress in layers to adjust to temperature changes.


11. Monte Sano State Park Trails

Located near Huntsville, Monte Sano State Park features trails with rocky terrains and elevation changes. The park’s popularity means that trails can become crowded, leading to potential accidents.Huntsville

Survival Tip: Hike during off-peak hours to avoid crowds and reduce the risk of accidents.


12. Oak Mountain State Park Trails

As Alabama’s largest state park, Oak Mountain offers a variety of trails. Some paths are challenging due to their length and elevation changes. The park’s size means that getting lost is a real possibility.

Survival Tip (continued): Always download offline maps, carry an emergency whistle, and pack a space blanket—just in case you’re stuck overnight.


13. Dismals Canyon Trail

Don’t let the name fool you—Dismals Canyon is as treacherous as it is beautiful. Known for its glowing dismalites (think glowworms), this 1.5-mile trail winds through deep canyons, tight rock passages, and slippery wooden bridges. Rain can turn this place into a natural slip-and-slide from hell.

Survival Tip: Waterproof everything. Bring dry socks and a headlamp—those caves can go pitch black fast.


14. Ruffner Mountain Trails

Just outside Birmingham, Ruffner Mountain packs a wallop in a small package. With several interconnecting trails, it’s easy to get turned around. The steep grades and unexpected wildlife encounters (including copperheads) make this more than just a Sunday stroll.

Survival Tip: Mark your map, don’t veer off trail, and keep a basic first-aid kit on hand—especially for bites or falls.


15. Lookout Mountain Trails (DeSoto State Park)

The terrain up here changes dramatically—one moment you’re on smooth dirt, and the next you’re scrambling up loose rock or crossing slippery creek beds. It’s beautiful, no doubt, but one wrong step and it’s a broken ankle or worse.

Survival Tip: Invest in quality ankle-high hiking boots and consider taping weak joints before long hikes.


16. Red Mountain Park Trails

Red Mountain Park in Birmingham offers a scenic mix of old mining ruins and nature—but the ruins themselves are part of the danger. Rusty metal, unstable terrain, and the occasional sinkhole make this a trail to take seriously.

Survival Tip: Keep a flashlight and watch your step around structures. This isn’t a playground—it’s survival training wrapped in history.


17. Flint Creek Trail

This 3-mile trail near Decatur may seem innocent, but the marshy terrain hides dangers. Flash floods, cottonmouth snakes, and mosquitoes thick enough to carry off a small dog make this one to prepare for.

Survival Tip: Treat your clothes with permethrin, bring waterproof boots, and never hike during or after heavy rains.


18. Green Mountain Nature Trail

It’s a family favorite, yes—but that’s the trap. The 1.5-mile loop circles a lake with steep, muddy banks that have claimed their share of unprepared hikers. A misstep here means a cold swim, or worse.

Survival Tip: Don’t underestimate short trails. Assume nothing, and bring the same gear you’d take on a 10-miler.


19. Bluff Line Trail (Monte Sano Nature Preserve)

Part of the Land Trust of North Alabama, Bluff Line Trail runs near dramatic cliffs and drop-offs. Combine loose gravel with distraction from the view, and you’ve got a recipe for disaster.

Survival Tip: Stay three feet from cliff edges, especially in fog or rain. A trekking pole can save your life here.


20. Chinnabee Silent Trail

Beautiful and serene, this 7-mile trail traverses creeks and waterfalls. But don’t get lulled into a false sense of security. When water levels rise, crossings become dangerous, and remote sections are far from help.

Survival Tip: Bring water shoes and a lightweight rope for creek crossings. Know how to assess current strength before stepping in.


Final Words From a Survivalist

If you’ve made it this far, you’re not just any hiker—you’re someone who respects the land and understands that Alabama’s beauty has a wild edge. I’ve been hiking these trails for over a decade, and I’ve seen things go sideways in the blink of an eye. One minute you’re soaking in a waterfall, and the next you’re sliding down a 40-foot embankment wondering if that crunch was a tree branch… or your tibia.

Preparation isn’t paranoia—it’s protection. Alabama’s trails might not have the snowy passes of the Rockies or the bear threats of Montana, but they’ve got their own flavor of danger. Heatstroke in July, venomous snakes in spring, sudden floods in fall… If you don’t plan for every eventuality, you’re gambling with your life.

So here’s my survivalist checklist before tackling any of these death-defying beauties:

  • Tell someone where you’re going. Always.
  • Bring three ways to make fire.
  • Carry more water than you think you need.
  • Have a physical map. Phones die.
  • First-aid kit. Not optional.
  • Knife, headlamp, whistle, and emergency bivvy—bare minimum gear.

When you hike with the mindset that “this could be my last hike,” you’re not being dramatic—you’re being smart. And ironically, that mindset might just be the reason it isn’t your last hike.

Stay sharp. Stay wild. And if the trail ever turns on you, be ready to fight your way back to civilization. Because out here in Alabama’s woods, nature doesn’t care how many likes your hiking photo got. The mountains have claimed hikers before—and if you’re not prepared, they’ll gladly take one more.

Beware: These Arkansas Trails Will Test Your Limits and Push You to Survive

Let me make one thing crystal clear: not all hikes are created equal. Some are walk-in-the-park strolls for tourists and yoga influencers with sparkling water bottles. And then there are trails—the kind that don’t just challenge you physically, they demand your respect. These trails grab you by the collar, stare you in the eye, and ask: Are you built for this? If you’re not, Arkansas will chew you up and spit you out.

I’ve spent decades hiking, climbing, surviving off-grid, and prepping for whatever the world throws at me. I don’t do easy, and I sure as hell don’t do predictable. That’s why I keep coming back to Arkansas. The Natural State hides some of the gnarliest, most breathtaking backcountry paths in the entire U.S., and trust me—they’re not for the faint of heart.

These 20 trails will test your limits. They’ll soak your gear, blister your feet, and if you’re not paying attention, they’ll leave you wondering how to get back before dark. But if you’re the kind of person who feels most alive on the edge, if you crave grit, sweat, and raw, wild beauty—then read on.


1. Eagle Rock Loop (Ouachita National Forest)

26.8 miles
This is the crown jewel for survival junkies like me. River crossings, elevation gain, isolation—it has it all. You’ll wade through creeks and scramble up switchbacks. There are spots where cell service is a myth. You want remote? You got it.

2. Buffalo River Trail (Upper Segment)

37 miles (multi-day)
This trail punches hard. Rugged ridgelines and panoramic bluffs tower over the Buffalo River. Water access and camping spots are scattered, but if you mess up your resupply or underestimate the terrain, you’ll regret it.

3. Ozark Highlands Trail

165 miles total
This monster snakes through the heart of the Ozarks. Tackle it in sections or go all-in. Be ready for long, desolate stretches. Water filtration becomes critical. Good boots and better instincts are non-negotiable.

4. Hemmed-In Hollow Trail

5 miles (round trip)
It sounds short, but don’t be fooled. This hike drops over 1,200 feet into a canyon before climbing right back out. The falls are the tallest between the Rockies and Appalachians, but you’ll earn that view with sweat.

5. White Rock Rim Trail

2.3 miles
Don’t let the distance trick you. The trail skirts the edge of White Rock Mountain, offering dizzying cliffside views. In icy or windy conditions, one wrong step is all it takes. Bring layers, and watch that footing.

6. Athens-Big Fork Trail (within Eagle Rock Loop)

10.5 miles (intense elevation)
Eight steep ridgelines. Eight. You’ll curse every ascent, then breathe in views that remind you why you hike. This trail is a lung-buster and a leg-destroyer. Perfect.

7. Indian Rockhouse Trail

3.5 miles
History and wilderness collide here. Caves, waterfalls, and a descent into a box canyon give you plenty to explore. But be warned: this trail turns slick in the rain. Know your traction limits.

8. Lost Valley Trail

2.1 miles
This is Arkansas’s siren song. Easy enough for tourists to attempt, but filled with surprises for preppers: caves, waterfalls, and a bluff shelter once used by Native Americans. Bring a headlamp if you plan to explore the caverns.

9. Pigeon Roost Trail (Hobbs State Park)

8.5 miles loop
Don’t expect luxury here—just you, the trees, and the path. Minimal facilities mean you pack it in and pack it out. A great solo overnighter with terrain that’ll test your pacing and pack weight strategy.

10. Whitaker Point (Hawksbill Crag)

2.9 miles
Instagram loves this place—but the photos don’t show the narrow ledges, loose gravel, and sheer drop-offs. It’s beautiful, yes, but stay alert. One misstep on the crag and it’s a long way down.

11. Pedestal Rocks Loop Trail

4.6 miles
Pedestal rocks and natural arches are your reward—if you make it. This area is remote, with poor signage and plenty of chances to wander off trail. Keep your compass or GPS handy.

12. Lake Ouachita Vista Trail (LOViT)

45 miles total
A multi-day trek with vistas that’ll burn into your memory. Elevation changes are deceptive, and heat is a real threat in summer. Hydrate and ration intelligently.

13. Bear Cave Trail (Petit Jean State Park)

0.5 miles
Short but packed with giant boulders, crevices, and hideaways. Excellent for honing your navigation and close-quarters movement—think of it as survival training in a natural obstacle course.

14. Butterfield Hiking Trail

15 miles loop
Located in Devil’s Den State Park, this loop tests your endurance and navigation. In wet seasons, the trail turns into a swampy mess. Expect to get muddy, and embrace it.

15. Signal Hill Trail (Mount Magazine)

1.8 miles
Arkansas’s highest point. Not grueling in distance, but exposure and elevation can slap you if you’re underdressed or unprepared. A foggy summit? It happens. Bring your bearings.

16. Seven Hollows Trail (Petit Jean State Park)

4.5 miles
Natural bridges, grottos, and steep-sided hollows make for a wild adventure. Wildlife is active here—keep your eyes peeled for snakes, especially copperheads on sun-warmed rocks.

17. Falls Branch Trail (Lake Catherine State Park)

2 miles
Start out scenic, then hit a rocky stretch near the falls. Slippery footing has sent more than one hiker tumbling. This one’s a wet-weather nightmare if you’re not prepared.

18. Kings Bluff and Pedestal Rocks Scenic Area

Multiple trails totaling 5+ miles
What starts as a scenic hike becomes a bushwhacking challenge if you stray off the main loop. Easy to get turned around—ideal for compass work and situational awareness drills.

19. Glory Hole Falls Trail

1.9 miles
Steep descents and tricky terrain lead to a natural waterfall dropping through solid rock. It’s wild, raw, and gets slick in a heartbeat. Bring trekking poles and waterproof gear.

20. Sylamore Creek Trail

23 miles one-way
It’s long, remote, and changes personality with the season. Some sections are a breeze, others are brutal. Expect stream crossings, thick woods, and total isolation.


Prepper Tips for Surviving Arkansas Trails

I don’t head into the woods without a few basics. Whether it’s a 2-mile trail or a 20-mile slog, treat every trip like you could get stuck overnight:

  • Water Filtration: The rivers and creeks here are beautiful, but never drink raw. I use a Sawyer Mini or Katadyn filter—lightweight and reliable.
  • Map & Compass: GPS is great—until it isn’t. Don’t rely solely on electronics.
  • Layered Clothing: Temps can swing wildly in elevation. Always have a dry base layer.
  • Knife and Firestarter: Two items that could save your life in a survival situation. Don’t skimp.
  • Emergency Shelter: Even a mylar bivvy can keep you alive through a surprise cold snap or storm.
  • First Aid: Snakebite kits, blister treatment, and antiseptic are essentials.

Final Warning

These aren’t just scenic walks in the woods—they’re survival tests disguised as hiking trails. If you underestimate the terrain, weather, or your own limits, you’ll find yourself in trouble fast. But if you prep right, move smart, and embrace the suck… these Arkansas trails will reward you with some of the most epic, soul-stirring experiences you’ll ever have on foot.

So pack your gear, tighten your boots, and enter the wilderness like it’s your proving ground—because out here, it is.