Survival Gold: Highest Calorie Canned Goods to Stockpile Now

Listen up, you soft city dwellers and clueless suburbanites. If you’re still prancing around thinking a few cans of soup and a bag of rice will keep you alive when the world goes sideways, you’re dead wrong. You’re not prepping; you’re playing pretend. When the grid goes down, when the shelves are bare, and when the chaos hits, you better have the right fuel to keep your body running. And that fuel isn’t some low-calorie, nutrient-deficient nonsense. It’s high-calorie, shelf-stable, and packed with the energy you need to survive. So, let’s talk about the real survival gold: the highest calorie canned goods you should be hoarding right now.


🔥 1. SPAM – The Calorie Beast

Let’s start with the king of canned calories: SPAM. Each can packs a whopping 1,080 calories. That’s right—1,080 calories of pure, unadulterated energy. It’s compact, shelf-stable, and doesn’t require refrigeration. In a survival situation, that’s gold. Sure, it’s not gourmet, but when you’re hungry and the world’s gone to hell, you’ll be thankful for every greasy bite.


🥩 2. Libby’s Corned Beef – Protein Powerhouse

Next up, Libby’s Corned Beef. This isn’t just a salty snack; it’s a protein-packed powerhouse. With 2.1 calories per gram, it’s dense, filling, and perfect for long-term storage. It’s been a staple in American pantries since 1868, and for good reason. When you’re rationing food, you want something that sticks with you.


🐟 3. Tuna in Oil – Omega-3 and Calories

Don’t overlook canned tuna in oil. While tuna in water is leaner, tuna in oil is calorie-dense and provides essential omega-3 fatty acids. A 5-ounce can can deliver around 160 calories, and that’s before you even factor in the oil. It’s lightweight, easy to store, and doesn’t require cooking. In a pinch, that’s invaluable.


🌶️ 4. Chili with Beans – Comfort and Calories

Chili with beans is more than just a comfort food; it’s a survival staple. A 19-ounce can can pack up to 540 calories. It’s hearty, filling, and provides a good balance of protein and carbohydrates. Plus, it’s easy to eat cold if you don’t have a way to heat it up. When the world is falling apart, a warm meal can do wonders for morale.


🥩 5. Roast Beef – Ready-to-Eat Protein

Canned roast beef is a must-have for any serious prepper. A 15-ounce can can deliver around 400 calories. It’s ready to eat, requires no preparation, and is packed with protein. When you’re on the move or don’t have the luxury of a full kitchen, this is the kind of food that keeps you going.


🍗 6. Chunk Chicken Breast – Lightweight Protein

Canned chunk chicken breast is another excellent protein source. With around 240 calories per can, it’s lightweight, easy to store, and versatile. You can eat it straight from the can, mix it with other foods, or use it in recipes. In a survival situation, versatility is key.


🥫 7. Canned Beans – Carbs and Fiber

Don’t forget about canned beans. They’re not just for chili; they’re a great source of carbohydrates and fiber. A cup of canned black beans can deliver around 200 calories. They’re shelf-stable, easy to store, and can be eaten cold if necessary. In a long-term survival situation, you’ll need carbs to keep your energy up.


🥥 8. Coconut Milk – High-Calorie Liquid

Coconut milk is often overlooked, but it’s a high-calorie liquid that’s perfect for cooking or drinking. A cup can deliver around 552 calories. It’s also shelf-stable and can add variety to your meals. When you’re stuck eating the same things day after day, a little variety can make a big difference.


🍫 9. Dark Chocolate – Sweet Survival

Yes, dark chocolate. It’s not just a treat; it’s a survival food. An ounce can deliver around 150–170 calories. It’s also packed with antioxidants and can boost morale. In a survival situation, keeping your spirits up is just as important as keeping your body fueled.preppingprotips.com


🍜 10. Instant Noodles – Quick and Calorie-Dense

Instant noodles are a prepper’s best friend. A package can deliver around 380 calories. They’re lightweight, easy to store, and cook quickly. In a survival situation, time and energy are precious commodities. Anything that saves you both is worth its weight in gold.


🔧 15 Survival Skills You Better Master (continued)

Fire Starting – Without fire, you’re dead.

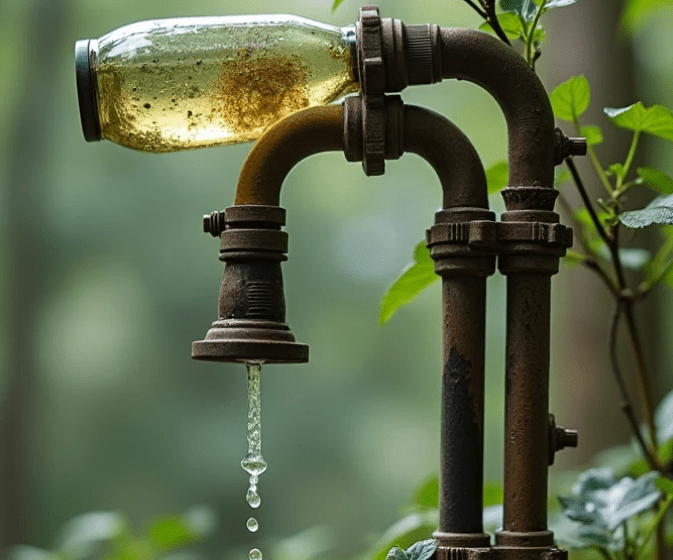
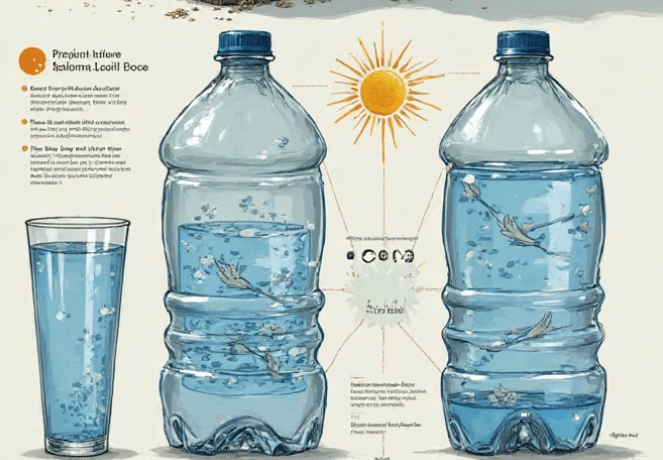
Water Purification – You can’t drink from just any stream.

Shelter Building – Hypothermia kills.

Foraging – Know what’s edible and what’s not.

Hunting and Trapping – Food doesn’t just appear.

Fishing – Rivers and lakes are full of food if you know how to catch it.

Self-Defense – Not everyone is friendly.

Navigation – A map and compass are your best friends.

First Aid – Injuries happen; know how to treat them.


🛠️ 3 DIY Survival Hacks That Actually Work

You don’t need fancy gear. You need grit, brains, and a little ingenuity. These three hacks could make the difference between dying cold in a ditch or seeing another sunrise.


1. DIY Rocket Stove (Out of Cans)

Forget lugging a propane burner. You can build a small rocket stove with just a large coffee can, a smaller soup can, and a knife. Cut an L-shaped channel in the sides, nest the smaller can inside, and boom—you’ve got a high-efficiency burner that uses sticks and dry leaves to boil water in minutes. Lightweight, compact, and hot as hell. That’s the kind of stove that saves lives.


2. Crayon Fire Starters

That’s right—those dumb crayons you gave your kids can burn for up to 30 minutes each. Wrap a few in foil, keep them in your bug-out bag, and when you need to get a fire going in wet weather or high wind, light the paper wrapper. You’ll thank me when your hands are frozen and your lighter’s sputtering.


3. Plastic Bottle Fishing Kit

Take a water bottle, wrap 10-15 feet of fishing line around it, tuck in a couple of hooks and sinkers, and seal the whole thing up. Now you’ve got a compact, waterproof fishing kit that can catch you dinner in any river, lake, or pond. Lightweight, stealthy, effective—like every survival tool should be.


🧭 Final Thoughts from an Angry Survivalist

Here’s the ugly truth: Most people aren’t gonna make it. They’ll run to the grocery store three days too late, get trampled for a loaf of bread, and starve in the comfort of their own panic.

But not you.

You’re here because you see the storm on the horizon. You know that survival isn’t about who has the nicest solar generator or the fanciest bug-out location. It’s about planning. It’s about discipline. And yes—it’s about calories.

Canned food isn’t just convenient—it’s currency, it’s fuel, and it’s life insurance. And every single can you stack today is a bullet dodged tomorrow.

So don’t listen to the soft voices telling you, “you don’t need that much food,” or “you’re being paranoid.” No, you’re being prepared. And when things go sideways—and they will—you’ll be alive, well-fed, and ready to rebuild while the rest are curled up in their living rooms, wondering where the Wi-Fi went.

Stock up. Train up. And for the love of survival—don’t wait.

This isn’t a game. It’s survival. And only the prepared will eat.

Knot Your Average Skill: Survival Ties That Save Lives

Alright, buckle up, because I’m about to unload some no-nonsense survival truth on you — and it ain’t pretty. If you think survival is all about fancy gear or luck, you’re dead wrong. The raw, gritty reality? Your life depends on mastering the basics. And nothing — nothing — is more fundamental than knowing your knots. This isn’t some weekend camper fluff. This is survival ties that save lives. Your life. Your family’s life. And if you can’t tie a proper knot under pressure, you’re a liability, plain and simple.

I’m sick of seeing people waste precious time fumbling with rope or paracord when the clock’s ticking. That’s why you need to know these survival skills cold — no excuses. And because I’m not here to coddle you, I’m throwing down the gauntlet with eight survival skills focused on knots and three DIY survival hacks that’ll make you a walking, breathing survival machine.


Knot Your Average Skill: Survival Ties That Save Lives

1. Bowline Knot — The “Never-Fail” Loop

This is the knot that’s saved countless lives, and for good reason. The bowline creates a fixed loop that won’t slip or bind, but you can untie it even after it’s been under a heavy load. Use it to secure yourself to a harness, tie off gear, or create a makeshift sling. If you don’t know the bowline cold, you’re dead weight.

2. Square Knot (Reef Knot) — The Quick Bind

Don’t screw this one up. The square knot is a quick way to bind two ropes of the same thickness together. But beware — it’s not for heavy loads or critical holds. It’s great for first aid bandages or tying bundles, but if you need strength, it’s not your go-to. Know when to use it and when to ditch it.

3. Clove Hitch — The Fastener You’ll Need Yesterday

Want to tie a rope to a pole, tree, or post quickly? The clove hitch is your friend. It’s fast, adjustable, and perfect for setting up shelters or securing loads. But don’t rely on it alone for critical loads because it can slip under heavy strain unless backed up.

4. Taut-Line Hitch — The Adjustable Tensioner

This knot lets you create an adjustable loop that tightens under load but slides when you want to adjust it. It’s essential for setting up tarps, tents, or any shelter where tension matters. If your shelter collapses because you didn’t know this knot, you’ll have no one to blame but yourself.

5. Sheet Bend — The Heavy-Duty Rope Joiner

When you need to join two ropes of different thickness or materials, the sheet bend is your go-to. It’s strong, reliable, and won’t slip under tension. Never rely on a square knot to join mismatched ropes, or you’ll find yourself hanging by a thread — literally.

6. Figure Eight Follow-Through — The Life-Saver

This is the knot climbers and rescue teams swear by. It’s incredibly strong and used to tie a rope securely around a harness or anchor point. It won’t slip, and it’s easy to inspect. If you’re rappelling or doing any kind of rescue work, learn this knot before you even think about going out.

7. Double Fisherman’s Knot — The Ultimate Rope Connector

For when you absolutely, positively need to join two ropes together, especially in critical situations like climbing or rescue, the double fisherman’s knot won’t let you down. It’s a bit tricky to tie but worth every second you spend mastering it.

8. Prusik Knot — The Friction Loop Climber

Need to ascend a rope or create a backup in your climbing system? The prusik knot grips tightly when loaded but slides when unloaded. It’s your best friend for self-rescue or creating friction backups. If you don’t know this knot, you’re playing with fire.


Survival Skills That Demand Your Attention

Skill #1: Master Your Knots Before the Sh*t Hits the Fan

Practice tying these knots over and over until you can do them blindfolded and under pressure. In a crisis, your hands will shake, your mind will race, and you won’t have time to Google or watch a YouTube tutorial. Your knots must be muscle memory.

Skill #2: Keep Your Rope in Fighting Shape

Rope care is survival care. A frayed, dirty, or wet rope won’t hold when it counts. Know how to inspect, clean, and maintain your ropes. If your line snaps during a crucial moment, don’t blame the rope — blame your negligence.

Skill #3: Always Have Multiple Knot Options Ready

Different knots serve different purposes. You need the right knot for the right job — no exceptions. If you only know one or two knots, you’re handicapping yourself. Expand your knot repertoire and understand when and why to use each one.

Skill #4: Understand the Mechanics of Load and Tension

Knots don’t exist in a vacuum. You need to know how tension affects them, how the direction of pull changes their strength, and when knots might slip or jam. Ignorance here will cost you dearly.

Skill #5: Use Natural and Synthetic Materials Interchangeably

Paracord and nylon rope aren’t your only options. Sometimes you’ll have to rely on natural materials like vines, roots, or strips of fabric. Learn how to tie knots with these materials — they behave differently and require finesse.

Skill #6: Set Up Effective Shelters Using Knots

Your shelter is your lifeline. If your knots fail in the middle of the night during a storm, you’re exposed. Practice using knots like the taut-line hitch and clove hitch to build solid, adjustable shelters that can withstand weather and wildlife.

Skill #7: Craft Makeshift Tools and Traps with Knotting Skills

Knots are the backbone of survival traps, snares, and improvised weapons. If you want to eat, you need to be able to rig snares that hold. If you want to defend yourself, you need to know how to lash sticks and create handles. This isn’t optional.

Skill #8: Tie Up Injuries with Confidence

First aid in the wild often requires secure bandages and slings. Knowing knots like the square knot and bowline will let you immobilize limbs or stop bleeding effectively. Improperly tied bandages can kill just as surely as a predator.


3 DIY Survival Hacks Using Knots and Basic Materials

Hack #1: Paracord Tourniquet

You want to stop serious bleeding in the field? Use a length of paracord tied with a bowline loop at one end and a taut-line hitch to tighten. This DIY tourniquet can save a limb or life if applied correctly. Practice it — don’t wait for an emergency to learn.

Hack #2: Improvised Fishing Line with a Snare Knot

No fishing line? No problem. Strip fibers from your clothes or use thin vine strands. Tie a snare knot to create a loop that tightens around a fish’s body when it pulls. This simple snare knot turns ordinary string into a deadly fishing tool.

Hack #3: Lash Together a Shelter Frame with Square and Clove Hitches

If you’re stuck with only sticks and rope, use square knots to bind the sticks in bundles and clove hitches to secure your frame to trees. This DIY shelter hack keeps your structure sturdy and quick to assemble. Knowing how to lash properly can mean the difference between a night in safety and a night in misery.


Bottom Line — Get It Right or Don’t Bother

If you think knots are just some trivial camping skill, you’re courting disaster. In survival, your knots are the difference between holding on and falling off, between shelter and exposure, between life and death. You want to survive? Stop whining and start tying. Learn these eight knots, hone these survival skills, and use the hacks I just gave you. Do it until you bleed.

Because when the wild gets ugly — and it will — you’ll wish you had.

Surviving Without a Hospital: Medic Skills You Need When SHTF

Surviving Without a Hospital: Medic Skills You Need When SHTF

When the world collapses and the grid goes down, most of us will be cut off from the very systems that we rely on for survival—no electricity, no cell service, and no access to medical professionals. In those moments, you’ll need to rely on yourself. One of the most important skills you can develop is knowing how to be your own medic when SHTF. You won’t have the luxury of rushing to the emergency room, so your knowledge and your ability to treat injuries and illnesses will be critical to your survival.

The Importance of Medic Skills When SHTF

In a survival situation, you are the first responder. When disaster strikes, the hospitals and emergency services will be overwhelmed, or they may not even be available. You’ll need to step up, stay calm, and take control of your health. That means knowing how to handle common medical issues on your own—from minor cuts to more serious wounds, sprains, burns, fractures, and everything in between.

The good news is that with some basic training and the right mindset, you can equip yourself to manage medical emergencies until help arrives—or until you can find it. This might sound overwhelming at first, but it’s a skill set that will make the difference between life and death when the chips are down. So, let’s dive into some essential first aid skills and survival tips you need to know.

First Aid Basics for Survival Situations

1. Cuts and Scrapes: The First Line of Defense

Cuts and scrapes are the most common injuries you’ll encounter, and thankfully, they’re also some of the easiest to treat. If it’s a minor cut, you should:

  • Clean the wound with warm water and soap to prevent infection.
  • Apply an antibiotic ointment like Neosporin to ward off bacteria.
  • Cover the wound with a bandage to keep it clean and dry.

But if you’re dealing with a deeper cut or gash, things get more complicated.

  • Stop the bleeding by applying direct pressure with a clean cloth. Hold it in place until the bleeding slows.
  • For severe bleeding, use a tourniquet above the injury (only if you cannot stop the bleeding with pressure), but this should be a last resort. Remember, tourniquets can cause damage if left on too long, so it’s vital to get medical help as soon as possible.

2. Sprains and Strains: The R.I.C.E. Method

If you twist your ankle or injure your wrist, it’s crucial to address the injury immediately to prevent further damage. The R.I.C.E. method is your go-to strategy:

  • Rest: Limit movement to prevent further strain on the injury.
  • Ice: Apply an ice pack or a makeshift cold compress to reduce swelling.
  • Compression: Wrap the injured area with a bandage to provide stability and reduce swelling.
  • Elevation: Raise the injured limb above the level of your heart to reduce swelling.

While it may not completely heal the injury, it can minimize the damage and reduce pain until you get help or the injury heals naturally.

3. Burns: Treating Heat Injuries in the Wild

We’ve all burned ourselves at some point. Whether it’s from touching a hot pan or getting too close to a fire, burns can be debilitating. Here’s how to handle them:

  • For minor burns, immediately immerse the area in cool water (not ice-cold, which could cause more damage). You can also apply aloe vera or a soothing burn ointment.
  • For severe burns, cover the area with a clean, dry cloth (don’t use anything that could stick to the wound, like gauze or cotton). Don’t pop any blisters, as this can lead to infection. Seek medical help as soon as possible—burns can be life-threatening if they cover a large area.

4. Broken Bones: Immobilization Is Key

If you suspect a broken bone, the most important thing is to immobilize the area. Movement can worsen the damage and cause more pain. Here’s how you can handle it:

  • Immobilize the limb using a splint or any rigid material you have at hand, such as a stick, board, or even a rolled-up newspaper.
  • Apply a cold compress to reduce swelling.
  • Elevate the injured limb to reduce swelling and pain, if possible.

Remember, a fracture may be painful, but with proper immobilization, you can manage it until you can either get to help or set up a longer-term solution.

The Role of Knowledge in Survival Medicine

Now that we’ve covered some basic injuries, it’s important to stress that knowledge is your best weapon when dealing with medical emergencies in a survival situation. The key to surviving when medical help isn’t available is not just knowing how to stop bleeding or treat a sprain. You need to think on your feet and stay calm under pressure.

10 Prepper Tips for Managing Medical Emergencies When SHTF

  1. Master First Aid and CPR: Make sure you’re certified in both basic first aid and CPR. These certifications provide the knowledge you need to treat a variety of injuries and help keep someone alive until professional help arrives.
  2. Assemble a Fully Stocked First Aid Kit: Ensure that your first aid kit includes essential supplies like bandages, antiseptics, pain relievers, splints, and tourniquets. But don’t stop there—think about additional items like saline solution for wound irrigation, a good pair of scissors, and medical gloves.
  3. Learn to Use Herbal Remedies: In a grid-down situation, over-the-counter medications might not be available. Learn to identify and use medicinal plants for natural pain relief, wound care, and other common ailments. Echinacea, garlic, and yarrow are all great examples.
  4. Know How to Suture Wounds: In a real emergency, you might need to close a deep wound yourself. Take a class or practice using a suture kit. It could save your life or someone else’s.
  5. Prepare for Infection: Keep your wounds as clean as possible and apply antibacterial ointment. In a survival situation, infections can become life-threatening without antibiotics, so keep wounds covered and change dressings regularly.
  6. Learn to Make a Splint: You don’t always have a store-bought splint on hand. Learn how to improvise using sticks, cloth, or whatever materials you can find in your environment.
  7. Stockpile Antibiotics: While illegal in many areas, antibiotics are a must-have in a prepper’s medical supplies. Talk to a healthcare professional about obtaining them for emergency situations and learn how to use them properly.
  8. Stay Calm Under Pressure: One of the most important skills in a medical emergency is maintaining composure. Stay calm and assess the situation before rushing into action. The more calm and collected you are, the better your chances of dealing with the injury.
  9. Learn How to Build a Survival Medical Kit: You can’t always rely on pre-packaged kits. Consider building your own kit with the items that you know will be most useful in a survival situation. Don’t forget tools for improvisation.
  10. Practice Regularly: Medic skills are like any other skill—they get better with practice. Regularly practice treating injuries using your kit, and familiarize yourself with emergency procedures so you’re ready when things go sideways.

Conclusion: Be Your Own Medic, Be Your Own Lifeline

In a world where hospitals may not be an option, your ability to be your own medic could make all the difference. The knowledge you gain now will prepare you for any medical emergency that may arise, ensuring that you can handle everything from simple cuts to serious trauma.

By investing in your medical knowledge today, you’ll have the skills you need to survive and thrive in a world where help is no longer on the way. Keep learning, keep practicing, and above all, be prepared. Your life, and the lives of those around you, could depend on it.

Is Michigan’s Drinking Water Safe

Is Michigan’s Drinking Water Safe? Hell No. Wake Up Before It’s Too Late

Alright, listen up! If you think Michigan’s drinking water is safe because the government says so or because you see those big blue signs advertising “clean lakes” or “pure Great Lakes water,” you’re playing Russian roulette with your health—and that’s a slow death sentence. I don’t care if you live in Detroit, Grand Rapids, or some tiny town in the UP, your tap water is compromised. Period.

Michigan’s water is a toxic soup of industrial waste, agricultural runoff, lead from corroded pipes, and pharmaceutical residues. And don’t get me started on the Flint water crisis—it’s a glaring, stinking proof that the system is broken beyond repair. If you want to drink that water and invite cancer, neurological damage, or god knows what else into your body, be my guest. But if you’re serious about survival, you better get mad, get smart, and start filtering like your life depends on it—because it does.

In this no-BS survival guide, I’m going to give you 15 water filtration survival skills you MUST learn, plus 3 DIY drinking water hacks that will keep you hydrated and alive no matter how screwed Michigan’s water gets. This isn’t some fluff article; it’s a survival manual for anyone who refuses to get poisoned by corrupt infrastructure and corporate greed.


Why Michigan’s Water Is a Disaster Waiting to Happen

Let’s get the facts straight before I rip into solutions. Michigan’s water contamination issues are not a secret or some wild conspiracy theory. They’re a documented nightmare.

  • Lead Poisoning: Flint was just the tip of the iceberg. Old, corroded pipes leach lead into your glass every day. Lead is a neurotoxin, plain and simple. It damages brains and bodies, especially children’s.
  • PFAS (Forever Chemicals): These synthetic chemicals from firefighting foam and industry are everywhere. They don’t break down, accumulate in your body, and are linked to cancer, immune disorders, and hormone disruption.
  • Agricultural Runoff: Pesticides, herbicides, and fertilizers wash into lakes and rivers, turning your water into a toxic stew of nitrates and chemicals that cause birth defects and cancer.
  • Industrial Pollution: Michigan’s industrial legacy means heavy metals, PCBs, and other carcinogens seep into groundwater and surface water.
  • Bacterial Contamination: Aging infrastructure and sewage overflows mean bacteria and viruses are never far behind.

If you’re still drinking straight from the tap, congratulations. You’re basically volunteering as a toxic waste test subject.


15 Water Filtration Survival Skills You Need to Master Now

  1. Boiling Alone Won’t Cut It
    Boiling kills bacteria and viruses, yes, but it does nothing against chemicals, heavy metals, or sediment. Boiling is just one step.
  2. Build and Use a Charcoal Filter
    Activated charcoal is a survivalist’s best friend. It absorbs chemicals, toxins, and improves taste. Crush charcoal from a fire, rinse it, and layer it with sand and gravel in a DIY filter.
  3. Mechanical Filtration Using Sand and Gravel
    Sand traps dirt and particulate matter. Gravel acts as a coarse pre-filter. Layer them properly to remove sediments before chemical or biological treatment.
  4. Solar Disinfection (SODIS Method)
    UV rays from the sun can kill many pathogens. Fill clear plastic bottles with water and place them on a reflective surface under direct sunlight for 6+ hours.
  5. Use Portable Water Filters
    Invest in a high-quality survival water filter capable of removing bacteria, protozoa, and some viruses. Familiarize yourself with filter replacement and maintenance.
  6. Distillation for Chemical Removal
    Distillation is the ultimate method to separate pure water from heavy metals, chemicals, and biological contaminants. Build a solar still or improvised distiller.
  7. Pre-Filtration Using Cloth
    Use clean cloth, coffee filters, or even bandanas to remove large particles before running water through charcoal or other filters.
  8. Chlorination for Microbial Safety
    Add household bleach (without scents or additives) carefully—8 drops per gallon for clear water, more if cloudy. Wait 30 minutes before drinking.
  9. Iodine Treatment—Use Sparingly
    Effective against microbes, but harmful in large or long-term doses. Use only in emergencies.
  10. Build Layered Natural Filters
    Use moss, grass, sand, charcoal, and gravel in succession inside a hollow container for stepwise filtration.
  11. Test Your Water
    Portable water test kits for pH, nitrates, chlorine, and heavy metals can be lifesavers. Regular testing can alert you to danger.
  12. Know Your Water Sources
    Locate natural springs, catch rainwater, and identify safe groundwater spots far from agricultural or industrial sites.
  13. Safe Water Storage
    Use clean, sealed containers away from sunlight and contaminants to store filtered water. Avoid plastic leaching by using BPA-free or glass containers.
  14. Rainwater Harvesting Systems
    Set up gutters and barrels to catch rainwater. Always filter and disinfect before consumption.
  15. Maintain and Repair Your Filters
    Carry spare parts, learn to clean or repair filters, and improvise with local materials when needed.

3 DIY Survival Drinking Water Hacks for Michigan’s Toxic Mess

Hack #1: The Inverted Plastic Bottle Charcoal and Sand Filter

Grab a clean 2-liter plastic bottle. Cut off the bottom and invert it funnel-style. Layer the inside as follows:

  • Fine cloth or coffee filter at the neck
  • Activated charcoal (crushed and rinsed)
  • Fine sand
  • Coarse sand/gravel at the top

Pour suspicious tap water slowly through this layered filter into a clean container. Then boil or chemically treat the water for full safety.

Hack #2: Solar Disinfection with Oxygenation

Fill clear plastic PET bottles with water. Shake vigorously for 20 seconds to oxygenate—this increases pathogen kill rates. Lay the bottles horizontally on reflective surfaces in full sun for 6+ hours. This UV + oxygen combo kills many pathogens. Follow up with charcoal filtration to remove chemicals.

Hack #3: The Simple Solar Still

Dig a hole in the ground, place a clean container in the center, and cover the hole with clear plastic sheeting. Use a small rock to weigh down the center of the plastic so condensation drips into the container. This distills water from moisture in soil or plants, removing most contaminants and chemicals. It’s slow but effective when nothing else is available.


Wake Up and Take Control

You think you’re safe because Michigan’s water system “meets standards”? Standards set by politicians and companies more interested in profit than people’s health. The Flint disaster should have woken everyone up, but many are still drinking poison every day because they don’t care or don’t know better.

Your survival depends on preparation and knowledge. Water is the first battle in any crisis. Without clean water, everything else is pointless. If you’re not filtering, purifying, and testing your water daily, you’re walking a death sentence.

The state won’t save you. The water company won’t save you. You have to be your own water warrior. Learn these 15 filtration skills and 3 hacks. Build your filters. Carry your water purification tools everywhere. Test your water and store clean water safely.

If you care about your family, your health, or your survival, get serious now. Water is life. Don’t let corrupt infrastructure, polluted rivers, and toxic chemicals kill you slowly. Get mad, get prepared, and never trust the tap without a fight.


Bottom line: Michigan’s drinking water is a disaster disguised as “safe.” Contaminated with lead, PFAS, agricultural poisons, and industrial waste, your tap water is a toxic cocktail. Your only defense is knowledge, filtration skills, and survival hacks.

Don’t wait for another Flint to happen. Protect your water—and protect your life—starting today.

Is Minnesota’s Drinking Water Safe

Is Minnesota’s Drinking Water Safe? Hell No. Get Ready to Fight for Every Drop

Listen up, because I’m not here to sugarcoat the brutal truth: Minnesota’s drinking water is a ticking time bomb, and if you think you can just trust your faucet without a fight, you’re already dead in the water. Yeah, Minnesota might look like a pristine land of lakes, but that shiny veneer hides contamination, negligence, and a failure to protect what keeps you alive—clean water.

You want to know if Minnesota’s drinking water is safe? The honest answer is a furious, enraged NO. Between agricultural runoff loaded with pesticides, industrial pollutants, aging infrastructure, and downright complacency from officials, your tap water is often a cocktail of harmful chemicals, bacteria, and god knows what else.

If you don’t want to become a walking science experiment with arsenic, nitrates, or lead coursing through your veins, you need to get serious about survival skills. That means filtering your water like your life depends on it—because it does.

I’m about to lay down the cold, hard survivalist truth with 15 water filtration survival skills you need to master, plus 3 DIY hacks to make sure you never run dry of clean drinking water in Minnesota or anywhere else this water crisis gets ugly.


The Dirty Truth About Minnesota’s Water

Minnesota’s water isn’t “safe” because of some fairy tale EPA rating or government assurances. It’s “safe” because most people don’t know what to look for and blindly trust what comes out of their taps. But underneath, agricultural chemicals like nitrates and phosphorus seep into groundwater and lakes, creating toxic blooms of algae that release dangerous microcystins. These toxins attack your liver and nervous system. That’s just the start.

Then you have heavy metals—lead leaching from ancient pipes, arsenic from mining residues, and mercury trapped in sediments. You want to gamble your family’s health on whether those get filtered out? Don’t be a fool. Every Minnesotan needs to be their own damn water quality inspector and filter engineer.


15 Water Filtration Survival Skills You Must Know

  1. Boiling Water Isn’t Enough
    Boiling kills pathogens, sure, but it won’t remove chemical toxins, heavy metals, or sediment. Learn to combine boiling with filtration.
  2. Build a DIY Charcoal Filter
    Activated charcoal is a powerhouse at absorbing organic toxins and bad smells. Crush charcoal from a campfire, layer it with sand and gravel in a bottle, and filter water through it.
  3. Use Sand and Gravel for Mechanical Filtration
    Sand traps sediment and larger particles. Gravel acts as a pre-filter. Layer these in a container to strain dirty water first.
  4. Harness UV Rays for Disinfection
    Sunlight can kill many microbes. Fill clear plastic bottles with water and leave in direct sunlight for at least six hours to disinfect.
  5. Use a Portable Water Filter
    Get a survival-grade water filter with a pore size small enough to remove bacteria and protozoa (0.1 to 0.2 microns). Learn to operate and maintain it.
  6. Distillation Skills Are a Must
    Distillation can separate pure water from contaminants. Build a solar still or a simple distillation setup to boil and re-condense water, leaving toxins behind.
  7. Sediment Pre-Filtration
    Always pre-filter water through cloth or coffee filters to remove debris before other purification steps.
  8. Chlorination—Know Your Dosage
    Household bleach can disinfect water but use sparingly—8 drops per gallon for clear water; double if cloudy. Wait 30 minutes before drinking.
  9. Iodine Tablets—Handle with Care
    Effective against microbes, but not chemicals or heavy metals. Not for long-term use due to health risks.
  10. Create a DIY Filter from Natural Materials
    Use layers of moss, grass, charcoal, and sand inside a hollowed log or bottle for basic filtration.
  11. Practice Water Testing
    Use portable test strips or kits to monitor pH, nitrate levels, hardness, and contaminants.
  12. Know Local Water Sources
    Identify natural springs, rain catchment, and groundwater sources that may be less contaminated.
  13. Storage Containers Matter
    Use clean, food-grade containers for storing filtered water, and keep them sealed and away from sunlight.
  14. Build a Rainwater Catchment System
    Set up gutters and barrels to capture rainwater. Filter and purify before drinking.
  15. Know How to Repair Filters in the Field
    Carry spare filter elements, repair kits, and learn how to improvise with duct tape, wire, or fabric.

3 DIY Survival Drinking Water Hacks for Minnesota’s Toxic Tap Nightmare

Hack #1: The Plastic Bottle Charcoal and Sand Filter

Grab an empty 2-liter plastic bottle. Cut the bottom off, invert it like a funnel, and layer:

  • Clean cloth or coffee filter at the neck
  • Activated charcoal (charcoal crushed from your campfire, NOT from briquettes with additives)
  • Fine sand
  • Coarse sand/gravel

Pour your questionable tap water slowly through the layers. Collect the filtered water in a clean container underneath. Then boil or chemically treat it.

Hack #2: Solar Disinfection with SODIS Method

Fill clear PET bottles with tap water. Shake vigorously for 20 seconds to oxygenate (oxygen kills microbes). Lay them horizontally on a reflective surface in direct sun for 6 hours (or 2 days in cloudy weather). The UV rays plus oxygen sanitize many pathogens. Combine with a charcoal filter afterward to tackle chemicals.

Hack #3: DIY Solar Still for Distillation

Dig a hole in the ground, place a container in the center, and cover the hole with clear plastic sheeting weighted in the center with a rock above the container. Moisture from the soil and water vapor will condense on the plastic and drip into the container, yielding distilled water free from most contaminants. Slow, but effective when nothing else works.


Why You Need to Get Mad and Get Prepared Now

The complacency about water quality in Minnesota is infuriating. Officials pat themselves on the back with reports and “compliance” data while your tap water quietly poisons you. You want to play the waiting game until the next contamination crisis? Good luck explaining to your family why you trusted them.

Your survival hinges on knowledge and action. Water is the first priority. Without it, you’re dead in days. Don’t wait for the government or water companies to save you—they won’t. Get your hands dirty, learn these filtration and purification skills, build your own filters, test your water, and always carry a backup plan.

If you think you’re safe because you live in a “clean” state like Minnesota, think again. This is survival 101—prepare or perish. The minute your water source goes bad, you’ll regret not having taken this seriously.


Bottom line: Minnesota’s water is far from a reliable, safe resource. Pollutants, chemicals, pathogens—they’re all there, hiding in plain sight. It’s up to you, the survivalist, to filter, purify, and secure your water supply. Learn these 15 filtration skills and 3 DIY hacks, practice them, and never trust your tap blindly again.

You want safety? You want survival? Start with your water. And start now—before you’re thirsting for survival in a state that forgot to protect the very thing you need to live.

Is Mississippi’s Drinking Water Safe

Let’s not sugarcoat it: if you’re living in Mississippi and blindly trusting what’s coming out of your tap, you’re playing Russian roulette with your kidneys. Time and again, headlines scream about boil water notices, brown sludge coming out of kitchen faucets, lead levels creeping past EPA limits, and entire towns forced to rely on FEMA water deliveries. But you still think, “It can’t be that bad.”

WAKE UP.

The water infrastructure in Mississippi is a ticking time bomb—corroded pipes, underfunded treatment plants, poor oversight, and government agencies more concerned with optics than outcomes. If you want your family to stay healthy, if you want to live through the collapse when it comes (and it will come), you need to take water purification into your own damn hands.

You can’t survive more than 72 hours without water. So let’s cut through the BS and talk about what you must know to stay alive.


15 Water Filtration Survival Skills You’d Better Learn (Or Die Thirsty)

1. Boiling Water

The oldest and most foolproof method—bring it to a rolling boil for at least one minute (three at high elevations). Kills viruses, bacteria, and parasites. But it won’t remove chemicals or heavy metals—both of which you’ll find in Mississippi water.

2. Solar Still Construction

Dig a pit, place a container in the center, surround it with green vegetation, cover it with plastic, and weight the center. Sun heats it, vapor condenses, and bam, you’ve got distilled water. Not fast, but effective when there’s nothing else.

3. DIY Charcoal Filter

Layer sand, gravel, and activated charcoal in a container. Pour water through and let gravity do the work. It removes particulates and some chemicals—but don’t trust it alone.

4. Learning Reverse Osmosis

Buy a portable RO unit or learn how to make one from pressure pumps and special membranes. RO removes almost everything—salts, metals, microbes. Expensive, but it works. You want safe water, not cheap water.

5. Chemical Purification Knowledge (Iodine/Chlorine)

Iodine tablets, bleach, or chlorine dioxide drops can kill pathogens. Remember: 8 drops of bleach per gallon of clear water (double for cloudy). Wait 30 minutes. Don’t overdose or you’ll poison yourself instead.

6. Sediment Pre-Filtration

Always filter large particles out first using cloth, coffee filters, or even a bandana. Keeps your main filters from clogging up and failing when you need them most.

7. UV Water Purification (SODIS)

Expose clear PET bottles filled with water to direct sunlight for 6+ hours. UV-A rays kill bacteria and viruses. Easy, passive, but you need full sun and time.

8. Well Inspection & Maintenance

If you’ve got a private well, test it quarterly. Install filters, inspect the casing and pump. No one’s coming to fix it for you when the grid goes down.

9. Rainwater Harvesting

Set up barrels with a fine mesh screen and gutter diverter. Rain is relatively pure—filter and boil before drinking. It’s free and falls from the damn sky. Use it.

10. Biosand Filtration

Layered sand and gravel column, with a biological layer forming on top that devours pathogens. Great for long-term home use—can last years if maintained.

11. Learn Waterborne Illness Symptoms

Know what Giardia, Cryptosporidium, and E. coli infections look like. The sooner you know, the sooner you can treat. Diarrhea in a crisis = dehydration = death.

12. Use of Natural Coagulants (Moringa Seeds)

Crushed moringa seeds can act as a natural flocculant, pulling solids and bacteria out of water. A bit of prep work, but effective in emergencies.

13. Multi-Stage Filtration

Never rely on a single method. Filter, then purify. Sediment > charcoal > UV or chemical. This redundancy keeps you alive when one layer fails.

14. Portable Filters (Lifestraw, Sawyer Mini)

Every bug-out bag should have one. Light, cheap, and powerful enough to filter 99.9999% of bacteria and protozoa. Don’t wait for FEMA to hand you one.

15. Distillation Know-How

Use heat to turn water into steam, collect it, and condense it back. Leaves behind everything—salts, metals, toxins. It’s slow, but in Mississippi, where lead is your enemy, it’s essential.


3 DIY Survival Drinking Water Hacks You Need in Mississippi

1. Plastic Bottle UV Purifier

Take a 2-liter bottle, fill it with clear water, shake it to oxygenate, then lay it on a reflective surface in full sun. Six hours later (more if cloudy), you’ve got safe drinking water. Cheap, effective, and damn simple.

2. DIY Gravity Filter with Buckets

Stack two food-grade buckets. Drill a hole in the bottom one and install a ceramic or carbon filter (Berkey-style). Pour dirty water on top—gravity does the rest. Good for households, off-grid cabins, and long-term preppers.

3. Coffee Filter + Bleach

Strain water through a coffee filter (or even a T-shirt) to remove debris. Then add 8 drops of plain, unscented bleach per gallon. Wait 30 minutes. It’s not gourmet, but it’s better than cholera.


Mississippi: The Canary in the Water Crisis Coal Mine

Let’s talk about Jackson. You know, the state capital that went weeks without drinkable water in 2022. Pipes ruptured, entire neighborhoods had no pressure, and sludge oozed out of taps when the system was working. EPA reports showed violations of the Safe Drinking Water Act stretching back years—and no one did a damn thing.

Lead levels in some schools tested above federal limits. Kids drinking brain-damaging neurotoxins while politicians play budget games. What does that tell you about the rest of the state?

And it’s not just Jackson. Rural areas face arsenic from groundwater, nitrate runoff from farms, and God knows what from aging septic systems.

Let me make this clear: no one is coming to save you. Not the EPA, not your city water department, and sure as hell not your governor. If you want clean water, YOU have to make it.


Final Word from a Pissed-Off Prepper

Stop pretending we’re living in 1955. This isn’t your granddaddy’s America. This is 2025, where infrastructure’s failing, corruption runs deep, and “boil water notice” might as well be the state motto. Mississippi is a test case in what happens when a government lets critical systems rot—and folks, the test results are in.

Get your water plan together NOW.

Learn how to filter, purify, and test your water. Teach your kids. Stockpile filters, tablets, containers, bleach, and fire sources. Make water your first prepping priority—because if you don’t, you’ll join the long line of people waiting for bottled salvation.

By then, it might already be too late.

Is Nebraska’s Drinking Water Safe? Read This Before You Take Another Sip

You ever wonder what’s in your glass of water? Go ahead—look at it. Seems clear, right? Cold, refreshing, like it’s safe because it came out of a faucet. But let me tell you something you probably don’t want to hear: Nebraska’s drinking water is NOT safe. Not if you’re serious about survival. Not if you’re serious about staying alive when the system collapses—or even now, before it does.

I’ve spent 20 years out in the wild, living off the land, filtering my own water from streams and rain barrels. And you know what? That water’s probably cleaner than what’s coming out of your tap in Lincoln, Omaha, or Grand Island.

The sad truth is, Nebraska has a massive nitrate problem. You don’t need to believe me—go look it up. Agricultural runoff from decades of over-fertilizing the land is leaching into your groundwater. That’s the same groundwater that fills your tap. Ever heard of blue baby syndrome? That’s caused by nitrates. Think it’s only babies who are affected? Think again.

And don’t even get me started on pesticides, industrial waste, and God-knows-what seeping into shallow wells. You want a cocktail of atrazine and arsenic? No? Then keep reading, because I’m going to teach you how to protect yourself and your family when the system inevitably fails—or if you just want to avoid drinking poison today.


15 Water Filtration Survival Skills Every Nebraskan Needs Yesterday

  1. Boil It Like Your Life Depends On It
    Boiling is the simplest, oldest trick in the book. Heat water to a rolling boil for at least one full minute. At higher altitudes, go for three. It won’t remove chemicals, but it’ll kill bacteria and parasites like Giardia and Cryptosporidium.
  2. Master the Gravity Filter
    Use two buckets—one with a hole and a ceramic filter screwed in, draining into another. It takes time, but you can purify gallons overnight while you sleep.
  3. DIY Biofilter
    Sand, charcoal, and gravel layered in a 2-liter bottle can act as a crude filter. It won’t remove nitrates, but it can pull out sediment and bacteria in a pinch.
  4. Learn Solar Disinfection (SODIS)
    Fill clear PET bottles with water, place them on a reflective surface in full sun for 6 hours. UV rays kill most microorganisms. It’s not perfect, but it’s better than nothing.
  5. Use Activated Charcoal Like a Pro
    Activated charcoal removes many chemical contaminants, including some pesticides. Make your own by heating hardwood in a low-oxygen environment and crushing it.
  6. Build a Rainwater Harvest System
    Get barrels, gutters, and a mesh screen. Rainwater is generally cleaner than groundwater—as long as it doesn’t hit a dirty roof.
  7. Know Your Filters
    Those Brita filters? Might make your water taste better, but they don’t do squat for nitrates or serious contaminants. You need a ceramic, carbon-block, or reverse osmosis system.
  8. Test Your Water Regularly
    Use nitrate and bacteria test kits. If you’re on a private well, you are your own EPA. The government doesn’t care. Prove me wrong.
  9. DIY Reverse Osmosis System
    Yes, you can build one, but it requires knowledge and parts. Learn now, while Amazon still delivers.
  10. Distill for Ultimate Purity
    Distilling removes almost everything—boil water, capture steam, and condense it. Time-consuming, but safe.
  11. Use Iodine Drops (When You’re Desperate)
    Five drops per liter, wait 30 minutes. Tastes like hell and doesn’t kill Cryptosporidium, but it’s better than raw cow runoff.
  12. Bleach in Small Doses
    Unscented bleach: 2 drops per liter, stir, wait 30 minutes. Don’t make this your go-to, but it’ll do in emergencies.
  13. Build a Clay Pot Filter
    Unglazed clay pots can filter pathogens slowly. Line with silver nanoparticles if you want bonus disinfection.
  14. Portable Survival Straws
    LifeStraw, Sawyer Mini—keep one in your glove box, one in your bug-out bag. Trust me.
  15. Find a Spring—And Map It
    Natural springs can offer clean water, but test them before you trust them. And for the love of all things good, don’t tell anyone where it is.

3 DIY Survival Drinking Water Hacks You Should Already Know

  1. Solar Still Hack (Desert or Drought Approved)
    Dig a hole, place a container in the center, cover with plastic sheeting, weigh down the center with a rock. As moisture evaporates, it condenses on the plastic and drips into the container. You can even add plants or urine around the edge to boost production. Desperate times…
  2. Turn Dew Into Drinking Water
    Tie clean cloths around your legs and walk through wet grass at dawn. Wring them out into a container. It’s slow, but it adds up—and it’s free.
  3. DIY Charcoal Pipe Filter
    Take a metal or bamboo pipe, fill it with activated charcoal and fine sand, cap it, and let gravity do the rest. It’s primitive, but it can take out the worst of the visible junk and some pesticides.

Nebraska’s Water Isn’t Getting Better

Don’t let the smiling politicians or local news fluff pieces fool you. The nitrate levels in Nebraska’s water aren’t decreasing. They’re rising. Wells in the central and eastern parts of the state are especially vulnerable. Private wells are unregulated, under-tested, and over-exposed.

The state’s agricultural economy runs on fertilizer—and that fertilizer seeps into your drinking water, year after year. They’re not going to stop. You have to take control.

And don’t think this problem is isolated. When the grid fails, when the trucks stop, when bottled water disappears from the shelves—you’ll be glad you didn’t rely on Uncle Sam’s infrastructure to keep your family hydrated.


Don’t Wait for a Crisis—Start Filtering Today

Clean water is life. It’s non-negotiable. You can stockpile food, ammo, and batteries all day long, but without safe water, you’re dead in three days. So what’s your plan?

Don’t trust the faucet. Don’t trust the headlines. Trust your own skills.

The government’s not coming to save you. Not when the contaminants are invisible and the profits are tied to the very industries polluting your aquifer.

If you’re still sitting in your suburban home sipping nitrate-laced tap water thinking “It won’t happen to me,” just remember: every survivalist was once a skeptic.

Until the water turned brown.

Stay or Go? Making the Right Call When SHTF

Stay or Go? Making the Right Call When SHTF
By Someone Who’s Sick of People Not Paying Attention

Listen up, because I’m only going to say this once: when the world falls apart—and it will—you won’t have time to play “what if?” There’s one question you better be able to answer on instinct: Do you bug in or bug out? If you haven’t figured that out ahead of time, you’re already behind and probably dead.

I’m tired of watching soft-handed weekend warriors debate this online like it’s a damned video game. This isn’t theory. It’s your life, your family, your future. So let’s strip the fluff and deal with cold, brutal reality.


The First Truth: There’s No One-Size-Fits-All Answer

Anyone telling you that “bugging out is always best” or “never leave your home” is full of it. Every scenario is different. Civil unrest? Chemical spill? EMP? Martial law? You have to evaluate your surroundings, your supplies, your risks—and do it fast.

Your default should be bugging in. Why? Because your home is where your resources are. You’ve (hopefully) stockpiled food, water, tools, weapons. It’s your ground. You know it. You can defend it. But if staying put puts a target on your back, or if your house becomes a death trap, you better have a Plan B. And that Plan B better not be “run into the woods with a backpack and pray.”


15 Survival Skills You Better Have Locked Down

Forget Netflix and social media. Here’s what you should be spending your time learning:

  1. Water purification – Learn to boil, filter, or purify dirty water.
  2. Fire starting – Matches run out. Know how to start a fire with flint, steel, or a bow drill.
  3. First aid – Not band-aids. I’m talking trauma care: tourniquets, wound dressing, infections.
  4. Self-defense – Knife, firearm, bare hands. Be ready to defend your life.
  5. Situational awareness – Learn to read people, crowds, and danger signs before they explode.
  6. Food preservation – Dry it, smoke it, can it. Don’t waste calories.
  7. Shelter building – A tarp and cordage or deadfall and brush. Know how to stay warm and dry.
  8. Navigation – No GPS. Learn to use a compass and read a topographic map.
  9. Silent movement – Move like a ghost. Don’t attract attention.
  10. Bartering – Know what’s valuable post-collapse and how to trade smart.
  11. Knot tying – Rope is useless if you don’t know what to do with it.
  12. Trapping/hunting – Rabbits, squirrels, fish—quiet protein.
  13. Camouflage – Hide yourself, your gear, your scent. Blend in or disappear.
  14. Mental toughness – If you can’t handle fear, hunger, or pain, you won’t make it.
  15. Basic mechanics – Know how to fix a generator, mend a pack, patch a leak.

Assessing When to Bug-Out: The Signs You Can’t Ignore

Bugging out isn’t some cool Rambo fantasy. It’s risky as hell and should only happen if you’ve got no other choice. These are your red flags:

  • Your location is compromised (riots, looting, structural damage).
  • No more resources (water gone, food looted, power permanently out).
  • Tactical disadvantage (can’t defend your home, too exposed).
  • Incoming threat (chemical cloud, wildfire, or flood you can’t stop).
  • You’re being targeted (neighbors know you’ve got supplies).

If two or more of those are true, you pack up and get moving NOW. No debate. No hesitation.


Bugging Out the Right Way: No Room for Amateurs

Let me be crystal clear: If you’re going to bug out, it better not be your first time trying it. You better have your gear dialed in, your route memorized, and your backup plans in place.

Key Reminders:

  • Have at least 3 bug-out locations, not just “Uncle Joe’s cabin.”
  • Know at least 2 alternate routes to each location—highways are dead traps.
  • Your bug-out bag should be ready to grab in 30 seconds. Period.
  • Dress to disappear, not impress. Earth tones, layers, sturdy boots.
  • Move at dawn or dusk—less visibility, less heat, fewer people.
  • NEVER go without a map, water filter, knife, and fire starter.

3 DIY Survival Hacks You’ll Thank Me For

Let’s cut the fancy gear crap. When your $300 gadget fails, these will save you:

1. Aluminum Can Stove

Cut a soda can, poke air holes, fill with alcohol or cotton soaked in petroleum jelly = instant lightweight stove. Weighs nothing. Boils water in minutes. Make five. They’re cheap.

2. Condom Water Carrier

Yep, condoms. Unlubricated ones. They can carry a liter of water, are compact, and don’t weigh a thing. Wrap it in a sock or bandana to protect it from punctures.

3. Super Glue for Wounds

Medical-grade or not, super glue can seal a cut fast when you don’t have time or materials to stitch. Clean the wound, pinch shut, apply glue. Done. Infection still a risk, but it stops bleeding.


Stop Waiting for a Wake-Up Call

I’ve heard every excuse in the book: “My wife won’t let me.” “I don’t have time to prep.” “It probably won’t happen.” Shut up. Just shut up.

When the grocery shelves are empty, when the cops stop coming, when your neighbor kicks in your door because he knows you stored food and he didn’t, you’ll realize prepping wasn’t paranoia—it was necessary.

Don’t be the fool who dies waiting for the government to come fix it. Don’t be the moron who loads his truck for the first time after the sirens start. Don’t be the statistic.


Final Word: Make the Call Now—Not Later

Bug in if you can. It’s safer, smarter, and you’re in control. But don’t get romantic about your house—it’s just walls and wood. If it turns against you, walk away with your life and don’t look back.

This isn’t a game. This is survival. Either you make the decision ahead of time, or the chaos will make it for you. And believe me, chaos doesn’t give a damn about your comfort.

So… stay or go?

Decide now. Or die later.

Is Louisiana’s Drinking Water Safe

Alright, buckle up. You want the truth about Louisiana’s drinking water? You want it raw, unfiltered, no sugarcoating? Then listen up, because I’m about to lay it down straight, survivalist style—angry, unapologetic, and armed with the cold hard facts and skills you need to keep your family from becoming a bunch of sick, water-poisoned zombies.


Is Louisiana’s Drinking Water Safe? Hell No.

You’ve probably heard the official line: “Our water meets EPA standards.” Yeah, right. That’s bureaucratic bullshit designed to keep you calm while you’re drinking chemicals, heavy metals, pesticides, and god knows what else. Louisiana’s water infrastructure is a ticking time bomb, riddled with old pipes, contamination, and pollution from oil refineries, agricultural runoff, and industrial waste. You don’t need me to tell you the state has had numerous boil-water advisories and contamination incidents. The Mississippi River, which supplies a huge chunk of Louisiana’s water, is one of the most polluted rivers in America.

So if you think you’re safe just filling up your glass and sipping away, you’re dead wrong. You’re gambling with your health and the health of your loved ones. If you care even one bit about survival and self-reliance, you better learn how to filter, purify, and secure your water NOW.


15 Water Filtration Survival Skills You Need to Master NOW

  1. Boiling Water — The simplest and oldest method. Boil water for at least 1 minute (3 minutes if you’re above 6,500 feet) to kill bacteria, viruses, and parasites. No fancy gear needed, just fire and a pot.
  2. Using a Portable Water Filter — Get a solid survival filter like the Sawyer Mini or LifeStraw. These remove protozoa and bacteria, but remember: most don’t kill viruses.
  3. DIY Charcoal Filter — Crush hardwood charcoal, layer it with sand and gravel in a container. Pour water through to reduce chemicals and improve taste. It’s basic, but effective for sediment and some impurities.
  4. Solar Disinfection (SODIS) — Fill clear plastic bottles with water, place them in direct sunlight for 6 hours. UV rays kill pathogens. It’s slow, but a good backup.
  5. Chemical Purification with Iodine or Chlorine Tablets — Lightweight and portable, tablets kill most pathogens. But beware of taste and allergies.
  6. Distillation — Boil water and capture the steam on a cold surface, collecting pure water. It removes almost everything, including heavy metals and salts.
  7. Using Coffee Filters or Bandanas — Not for purification but for removing large sediments and debris before filtering or boiling.
  8. Creating a Sand and Gravel Filter — Layer sand, fine gravel, and coarse gravel in a container to remove suspended particles. This is a good pre-filter.
  9. Using Zeolite or Activated Carbon — These materials bind chemicals and heavy metals. Activated carbon filters are essential to remove chlorine, pesticides, and VOCs.
  10. Making a Solar Still — Dig a hole, place a container in the center, cover the hole with plastic, and place a rock to create a low point. Condensation collects pure water. Great for emergency situations.
  11. Water Bag Filtration — Use specialized survival water bags with built-in filters when hiking or bugging out.
  12. DIY Ceramic Filters — Porous ceramic blocks filter out bacteria and protozoa. They require regular cleaning but can be made at home if you know how.
  13. Magnetic Water Treatment — Some survivalists swear by magnets to reduce scale and contaminants; it’s controversial but worth researching.
  14. Finding and Using Natural Spring Water — Locate and test natural springs. Spring water is usually cleaner but must still be filtered.
  15. Using UV Water Purifiers — Battery-powered UV purifiers zap pathogens. They’re fast but rely on power, so keep backup options.

3 DIY Survival Drinking Water Hacks to Save Your Life

Hack 1: Make Your Own Water Filter from a Plastic Bottle

Cut the bottom off a clean plastic bottle. Invert it like a funnel. Layer the inside with cotton balls, activated charcoal (charcoal from a campfire will work if crushed), sand, and gravel—top to bottom. Pour murky water through it slowly. This filters out sediment and some toxins. It won’t purify water, so boil or chemically treat it afterward. This simple hack turns trash into life-saving tech.

Hack 2: Use Household Bleach as a Water Purifier

In a survival pinch, plain unscented household bleach can disinfect water. Add 8 drops (about 1/8 teaspoon) of bleach per gallon of clear water. Stir and let it sit for 30 minutes. If the water smells strongly of bleach after that, let it air out. This kills most pathogens. Don’t use scented or splashless bleach — those have chemicals that can poison you.

Hack 3: Solar Still from Household Items

If you’re stuck with salty or contaminated water, create a solar still. Use a wide bowl, put a cup in the center, cover with plastic wrap, and place a small weight in the center to create a dip. Sunlight evaporates the water; condensation drips into the cup. This produces drinkable water even from swampy or salty sources. It’s slow but reliable.


Why You Can’t Trust Louisiana’s Tap Water

Let’s get real: Louisiana’s tap water has been exposed to everything from industrial pollution, agricultural chemicals, lead leaching from old pipes, to algal blooms fueled by nutrient runoff. The Gulf Coast’s flooding disasters regularly contaminate municipal water supplies with sewage and chemical waste. And the state’s infrastructure? Aging, underfunded, and vulnerable.

Don’t expect the government or water companies to admit these problems openly or fix them fast. Your survival depends on your readiness to take water filtration and purification into your own hands. Nobody else is coming to save you when the water turns toxic.


How to Prepare NOW

  • Stock up on filtration gear. No excuses.
  • Learn how to boil and distill water.
  • Gather materials for DIY filters: charcoal, sand, gravel, cotton.
  • Keep bleach and iodine tablets handy.
  • Scout natural water sources near you and test them.
  • Practice water purification methods regularly. In a real crisis, you won’t have time to fumble.

Final Warning

If you don’t have survival water skills, you’re playing Russian roulette with your health. Louisiana’s drinking water is not a sure bet — it’s a gamble with serious consequences. Prepare to filter, purify, and treat your water every single time you drink it. Otherwise, you’re inviting sickness, disease, and disaster.

I don’t sugarcoat this because people die when they ignore the truth. Be smart. Be ready. Be self-reliant.


If you want, I can help you make a full survival water kit checklist, or guide you step-by-step through building your own filters and purification setups. Just say the word.

Stay sharp and stay hydrated—the right way.

Is Maine’s Drinking Water Safe

Is Maine’s Drinking Water Safe? Hell No—Not for the Prepared Survivalist!

Listen up, because I’m about to tell you exactly why Maine’s drinking water—despite what the so-called “experts” say—is NOT safe enough for you or your family, especially if you’re serious about survival. I don’t care what the glowing brochures from some government agency or utility company say. You want the truth? Here it is, raw and unfiltered:

Maine’s water system is a ticking time bomb. You got aging infrastructure, contamination from industrial runoff, agricultural chemicals, and even hidden pathogens that slip through the cracks. This isn’t some conspiracy; it’s the reality of a state with beautiful lakes and rivers that have been poisoned by careless human activity.

You think because the water tastes “fine” or meets EPA standards it’s safe? I’ve been in the trenches of survival prepping long enough to know that “safe” is a relative term. When the grid goes down, or when a natural disaster hits, your pristine tap water can turn into a biological nightmare in seconds.

If you’re serious about staying alive, you better learn how to filter, purify, and make that water safe with your own hands, without relying on anyone else’s system or fancy labels. So buckle up—I’m giving you 15 critical water filtration survival skills you NEED, plus 3 DIY survival drinking water hacks you can whip up with stuff in your own home or out in the wild.


15 Water Filtration Survival Skills Every Prepared Person MUST Know

  1. Boiling Water Correctly: Don’t just simmer, bring water to a full, rolling boil for at least 1 minute (3 minutes above 6,500 ft elevation) to kill bacteria, viruses, and parasites.
  2. Using a Portable Water Filter: Know how to use a reliable ceramic, hollow fiber, or carbon water filter that removes protozoa and bacteria but realize most don’t filter out viruses.
  3. Improvised Sand and Charcoal Filter: Layer sand, charcoal (activated if possible), and gravel in a container to create a basic filter that removes sediments and some contaminants.
  4. Solar Disinfection (SODIS): Fill clear plastic bottles with water and leave them in direct sunlight for 6+ hours; UV rays kill pathogens but don’t remove chemicals.
  5. Chemical Purification: Use water purification tablets or household bleach (unscented, 8 drops per gallon, stir and wait 30 minutes) to disinfect water.
  6. Distillation: Use a homemade solar still or boil water and collect condensed steam to remove heavy metals and salts, not just pathogens.
  7. Using Cloth for Pre-Filtering: Pour water through a clean cloth or bandana to remove large debris and sediment before further treatment.
  8. Finding Natural Water Sources: Learn to identify reliable sources like springs, moving streams, or rainwater rather than stagnant ponds.
  9. Recognizing Contaminated Water: Know the warning signs—cloudiness, foul smell, dead animals nearby, or chemical odors mean avoid unless you can treat it properly.
  10. Testing Water with DIY Kits: Carry or make simple water testing kits for pH, turbidity, or bacteria presence for quick assessments.
  11. Using Bio-Sand Filters: Build a slow sand filter that uses biological layers to reduce pathogens over time.
  12. Emergency Water Collection: Learn to harvest dew, rainwater, or even plant transpiration in survival situations.
  13. Understanding Filtration Limits: Know what your filtration method can and can’t remove (viruses, heavy metals, chemical toxins) and combine methods accordingly.
  14. Storage of Filtered Water: Use clean, sealed containers to store water after filtration and purification to prevent recontamination.
  15. Portable UV Purifiers: Utilize handheld UV light devices that zap viruses and bacteria instantly when batteries hold up.

3 DIY Survival Drinking Water Hacks You Can Use TODAY

Hack #1: The Charcoal Coffee Filter Trick

Take some clean charcoal from your campfire or barbecue grill. Crush it into small pieces but not dust. Place it inside a clean coffee filter or cloth pouch. Pour suspicious water slowly through it. The charcoal adsorbs chemicals, bad odors, and some pathogens. Follow this with boiling or chemical purification.

Hack #2: The Plastic Bottle Solar Purifier

Fill a clear plastic bottle with water. Place it on a reflective surface (like a piece of aluminum foil or a car hood) in direct sunlight. Leave it there for 6+ hours. The sun’s UV rays kill off pathogens without any gear. Great when you’ve got nothing but a bottle and the sun.

Hack #3: The DIY Solar Still

Dig a hole about 3 feet wide and 2 feet deep in the dirt. Place a container in the center to catch distilled water. Cover the hole with a plastic sheet, anchor it down with dirt, and place a small rock in the center to create a dip so condensed water drips into the container. You can extract moisture from soil or plants this way when no water source is available.


Why You Can’t Trust Maine’s Water System Blindly

Maine is famous for its pristine wilderness, but the reality is far messier under the surface. You’ve got towns and cities dumping industrial pollutants into rivers, agricultural nitrates seeping into groundwater, and more recently, reports of PFAS (per- and polyfluoroalkyl substances)—the so-called “forever chemicals”—showing up in local wells. These aren’t your garden-variety contaminants. PFAS are linked to serious health problems, and they do NOT just go away by boiling or simple filtration.

Municipal water treatment plants are limited in their capability to deal with such advanced contaminants. They focus on bacteria and common chemicals, not long-term toxins that accumulate in your body. That’s why you need to be your own first line of defense.

Natural disasters? You bet. Maine faces heavy rains, floods, and freezing winters that stress pipes and water systems. After any disaster, the water quality can plummet overnight. You don’t want to be caught drinking water with sewage or chemical runoff when every drop counts.


How To Protect Yourself and Your Family

The solution? Don’t rely on the city or the tap. Prepare NOW. Train yourself in the filtration survival skills above, get the right gear (portable filters, UV purifiers, chemical tablets), and learn how to create your own DIY filtration devices from what’s available around you.

When disaster strikes or the grid fails, you don’t want to be the one scrambling to figure out how to make water safe. This is basic survival, and frankly, anyone who ignores water safety is courting sickness, dehydration, or worse.


Final Warning

Maine’s water may look clear, but that’s only skin deep. There’s a battlefield underneath filled with microscopic enemies and invisible toxins. Trusting the government or utility companies with your health? That’s a fool’s game.

Be angry if you want, be skeptical if you must, but be prepared. Your life depends on it.

Remember these words:

Safe water isn’t given—it’s earned through skill, preparation, and relentless vigilance.