How To Stay Alive During a Los Angeles Riot

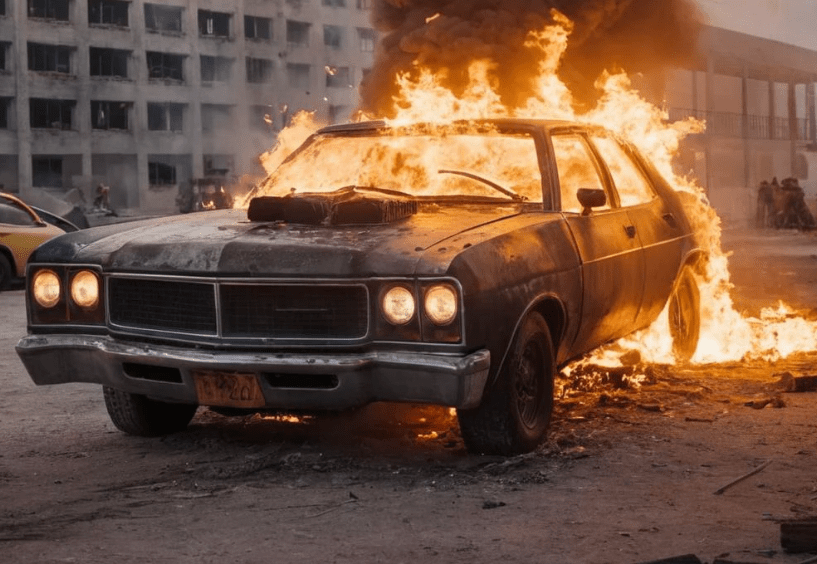
When the streets of Los Angeles erupt in chaos—burning storefronts, sirens wailing, mobs overrunning city blocks—you don’t want to be figuring things out in the moment. As a seasoned survival prepper and self-defense trainer, I’ve learned that survival doesn’t depend on luck. It depends on preparation, situational awareness, and knowing how to respond when society takes a nosedive.

Riots, especially in a sprawling city like LA, are unpredictable and can spiral out of control within minutes. It doesn’t matter if you’re caught in Koreatown or driving near Melrose when the flash mobs hit—you need to know how to defend yourself, protect your loved ones, and get out alive.

This guide lays out 8 must-know self-defense skills, 3 DIY weapons you can make from household items, and the mindset you need to adopt when the city turns into a war zone.


Understand the Environment

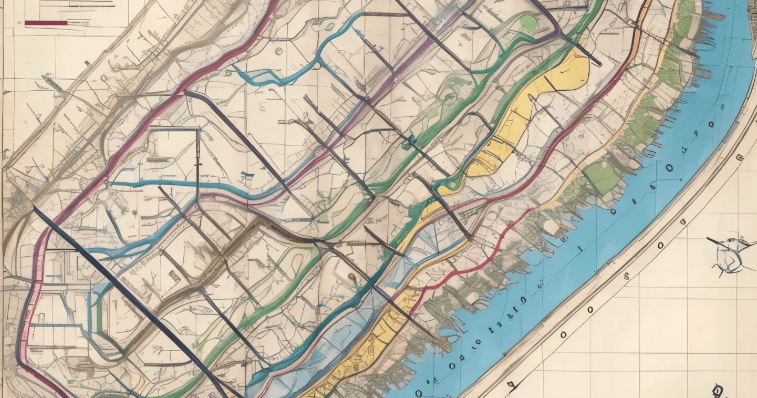
First, get real about where you are. Los Angeles is a sprawling urban jungle with over 4 million people, and it has a history of civil unrest—from the 1992 Rodney King riots to the George Floyd protests in 2020. When a riot starts, it spreads fast. You need to know the chokepoints, escape routes, and danger zones in your neighborhood.

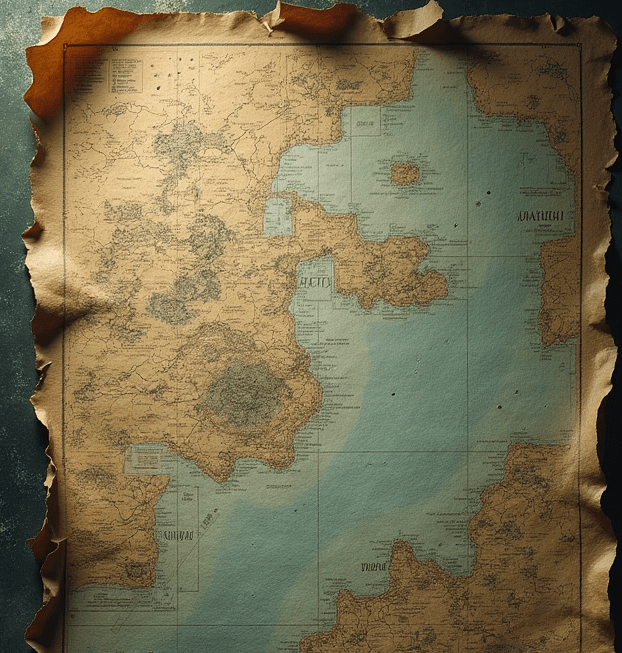
Download offline maps and mark exits out of your area. Freeways can get jammed—sometimes it’s better to travel on foot through alleys than be stuck in a car.


8 Must-Know Self-Defense Skills

These aren’t gimmicks. These are battle-tested techniques that can save your life:

1. Situational Awareness (SA)

Your first and strongest weapon. Always know your surroundings—who’s near you, where cover is, and where the exits are. Riots are fluid; mobs move. Don’t stand still and don’t look like an easy target.

Pro tip: Keep your head on a swivel—avoid tunnel vision.

2. Verbal De-escalation

Not every confrontation needs to go physical. Being able to read body language and talk someone down is underrated. Stay calm. Use strong, clear voice commands. Maintain distance and confidence without aggression.

3. Open-Hand Strikes

If you must defend yourself, open-hand strikes are safer for your hands than punches. Target the eyes, throat, and nose—areas that disable, not just hurt.

4. Knee Strikes

If someone gets too close, a knee to the midsection or groin can end the fight quickly. Practice good balance and aim.

5. Escape From Grabs

Learn basic escapes from wrist grabs, chokes, and bear hugs. Practice the principle of going “with the grab” to break free using leverage and momentum—not strength.

6. Improvised Weapon Use

A pen, belt, flashlight, or broken chair leg can become a powerful weapon if used right. Practice using household items as force multipliers.

7. Ground Defense

Fights may go to the ground. Learn how to shrimp, bridge, and get to your feet. Never stay flat on your back during a riot—mob mentality shows no mercy.

8. Team Movement Tactics

If you’re with family or a small group, you need to move like a unit. Establish hand signals. Appoint a point person. Never break formation unless you absolutely have to.


3 DIY Survival Weapons From Household Items

If you’re caught without a firearm, knife, or baton, don’t panic. The best survivalists know how to build tools with what’s available. Here are three effective DIY survival weapons you can create with common items in a pinch.

1. PVC Pipe Baton

Materials: 18-24 inch PVC pipe (¾” diameter), duct tape, sand or nails for weight.

How To Make: Fill the pipe with sand or nails, cap both ends with duct tape, and wrap the handle with extra tape for grip. It’s lightweight, concealable, and can deliver bone-cracking force in close quarters.

2. Sling Weapon From Paracord and a Sock

Materials: Paracord, a rock or a padlock, thick sock.

How To Make: Place the heavy object inside the sock, tie the open end with paracord, and now you have a makeshift flail. Easy to conceal, fast to deploy, and devastating when used against limbs or to clear space.

3. Modified Tactical Flashlight

Materials: Heavy-duty flashlight, steel nuts, epoxy.

How To Make: Epoxy a couple of steel nuts around the head of your flashlight. You’ve now turned a common tool into a bludgeon that can break bones and glass alike.


What to Do When the Riot Starts

1. Get Off the X
If you see crowds forming or hear sirens nearby, move. Don’t film it. Don’t spectate. The X is the danger zone—get off it and don’t look back.

2. Secure Your Home
If you can’t evacuate, barricade entrances using furniture and tools. Booby-trap the approach with noise-makers (like aluminum cans on string). A dog, even a small one, can give you vital early warning.

3. Blend In
Wear neutral colors—gray, tan, brown. Avoid tactical clothing or bright colors. Don’t give anyone a reason to think you’re with the opposing side. Use calm, slow body language. Avoid eye contact.

4. Go Grey Man
Blend into the environment. Hide valuables, ditch flashy gear, and move low-profile. The grey man survives because no one notices him. That’s your goal.

5. Know When to Fight and When to Flee
A real survivalist doesn’t fight every battle. If escape is possible, take it. If confrontation is unavoidable, finish it fast and disappear.


Bonus Tips for Staying Alive

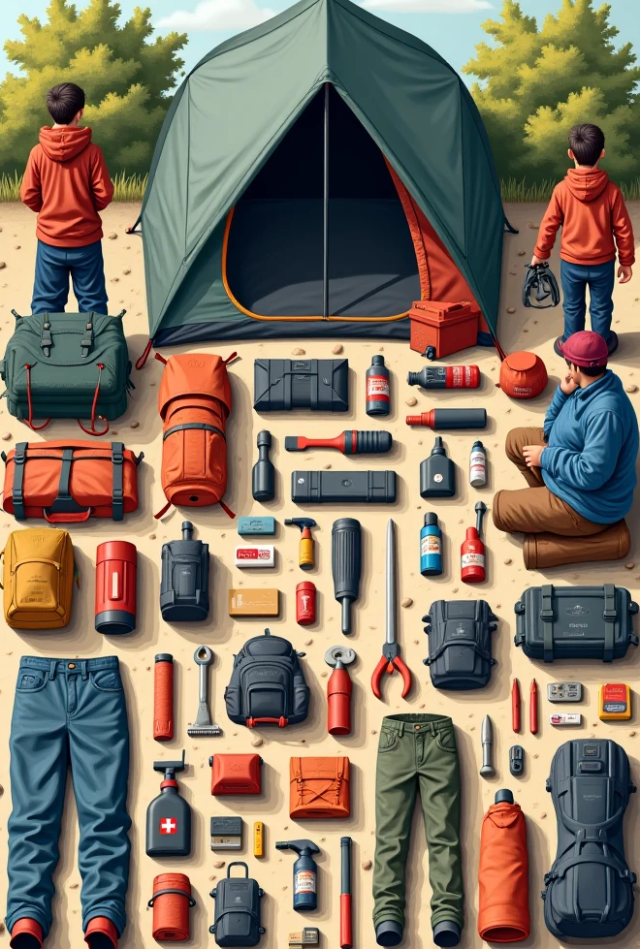
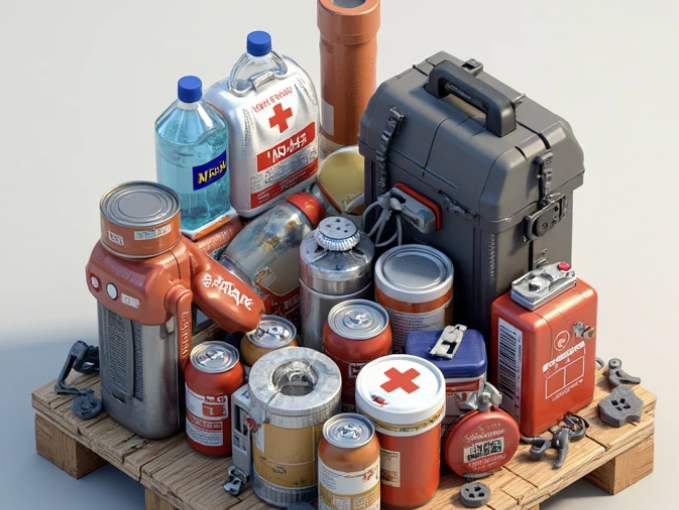
  • Have a go-bag with first aid, water, a multi-tool, N95 mask, flashlight, extra phone battery, gloves, and protein bars.
  • Memorize key phone numbers. Don’t rely solely on your cell service.
  • Use radios or encrypted apps like Signal if communication goes down.
  • Secure your documents and cash. Riots are a magnet for looting—if your home burns, your ID and emergency cash better not be in your sock drawer.

Train Before You Need It

None of this matters if you’re not training. Self-defense and survival are perishable skills. Practice them. Drill your family or group. Take classes in Krav Maga, Brazilian Jiu-Jitsu, or urban survival tactics. When it hits the fan, you’ll either react with clarity—or panic and become part of the problem.


Final Words

Los Angeles is a beautiful, complex, and volatile city. If the next riot breaks out tomorrow, will you be ready? Or will you be scrambling for supplies, wondering how to defend your home with a frying pan and hope?

Get prepared. Stay trained. Think ahead. And never underestimate the power of calm, confident readiness.

Stay sharp out there.

How To Stay Safe and Survive During a Riot in Georgia (Especially in Atlanta)

If you’re reading this, you’re already ahead of the pack. You understand that survival isn’t about panic—it’s about preparation. In times of social unrest, especially during a riot, staying safe demands a blend of street smarts, calm decision-making, self-defense training, and practical survival know-how. Living in Georgia, where protests and civil unrest have occasionally escalated into full-blown riots, makes understanding how to navigate this type of chaos not just useful—but necessary.

First Rule: Avoidance Is Victory

The first step in any survival situation is avoidance. Don’t play the hero. You’re not there to take sides. You’re there to get yourself and your loved ones home safe. Situational awareness is your most powerful ally.

Keep up with local news, police scanners, and community alerts. If you hear about demonstrations turning volatile in Atlanta, Macon, Augusta, or any major city, change your route or stay put. Avoid bottlenecked roads, city centers, and anywhere there’s a chance of getting trapped.

But if you’re already caught in a riot, here’s how to survive—and how to protect yourself.


8 Self-Defense Skills Every Urban Survivor Must Know

1. The Fence (Verbal and Physical Boundary Setting)

Before things turn physical, you need to manage the space between you and an aggressor. The Fence is a stance that places your hands non-threateningly in front of your torso, giving you a barrier to block, strike, or push off if needed. It also sends a clear message: Back off.

2. Close-Quarter Striking (Palm Strikes & Elbows)

Forget fancy martial arts kicks. In a riot, space is tight. Learn to deliver powerful palm strikes to the nose or chin, and sharp elbow strikes to vulnerable areas like the temple or throat. These techniques are quick, devastating, and don’t damage your hands like punching might.

3. Escape and Evasion Footwork

Riots are mobile. If you’re stationary, you’re a target. Train your footwork to move through crowds, avoid stampedes, and navigate obstacles. Zigzag, stay low when needed, and don’t run in straight lines when being chased. Learn the terrain like a ghost.

4. Clinch Defense

If someone grabs you, you need to control the clinch. A basic overhook or underhook can help you break the hold or control their body. Head control is key—push their head down and away to break their balance and escape.

5. Improvised Weapons Training

Learn how to use what’s around you. A belt with a heavy buckle becomes a flail. A tactical flashlight blinds and bludgeons. A pen? That’s a spike. Look at your environment as an arsenal, not an obstacle.

6. Knife Defense and Offense

You don’t need to be a Navy SEAL, but you must understand the basics of blade work. Know how to defend against slashes and thrusts, and more importantly—how to use a knife as a deterrent or tool. Keep a fixed-blade or quality folding knife accessible.

7. Ground Survival (Getting Back Up)

You may get knocked down. Your ability to get back up could save your life. Practice “technical stand-ups” and rolling maneuvers to regain your footing. Never stay on the ground in a riot. You’re vulnerable there.

8. Mental Conditioning

Your mind is your ultimate weapon. Practice controlled breathing, visualization, and scenario planning. Staying calm under pressure allows you to think clearly while everyone else is panicking. Panic kills—mental prep saves.


DIY Survival Weapon Skills: When You Need More Than Your Hands

When chaos reigns and law enforcement is overwhelmed, it’s your responsibility to protect yourself. These simple DIY weapons can give you the upper hand if things go south.

1. The Pipe Baton

Grab a 12-18 inch section of galvanized steel pipe, wrap the grip with paracord or duct tape, and you’ve got a riot-ready baton. Keep it in a go-bag or vehicle. Compact, brutal, and easy to carry.

Pro Tip: Use a hollow pipe and stuff the inside with lead fishing weights to give it more density. Secure with end caps.

2. The Survival Spear

Lash a knife or sharpened steel rod onto a broomstick or sturdy wooden pole. Use paracord, zip ties, or duct tape to secure it. A spear extends your reach and gives you a major advantage in keeping aggressors at a distance.

Bonus: In rural Georgia or wooded areas, this also serves for hunting small game.

3. Pepper Slingshot with Glass Beads

Take a heavy-duty slingshot and load it with marbles or steel/glass beads. Easy to aim, silent, and painful. If you want non-lethal deterrence, fill balloons with powdered cayenne or crushed peppercorns—when they burst on impact, they irritate eyes and lungs.

Warning: Practice accuracy before relying on it.


Strategic Tips: Before, During, and After the Riot

Before the Riot

  • Stock up: Water, food, first-aid, batteries, and comms gear.
  • Harden your home: Reinforce doors, install security cameras, and set up motion lights.
  • Plan multiple escape routes out of your neighborhood.
  • Build a Go-Bag: First aid, fire-starting tools, knife, flashlight, spare clothes, cash, radio, mask, gloves, ID copies.

During the Riot

  • Stay off main roads. Take backstreets or service alleys.
  • Avoid police lines and aggressive crowds alike.
  • Carry a mask and goggles to protect against tear gas and smoke.
  • If you’re in your vehicle, avoid confrontation—turn around or abandon it if you’re surrounded.
  • Stay silent, stay gray. Don’t film. Don’t yell. Don’t attract attention.

After the Riot

  • Document any damage to property for insurance.
  • Restock supplies.
  • Debrief your family or group. What worked, what didn’t?
  • Train harder. Get better. Adapt your gear and skills.

Know Georgia’s Unique Risks

In Georgia, weather can change fast—riots during high heat can cause mass dehydration and faster escalation. Also, gun ownership here is common. That means you must assume others are armed.

Stay legal. Know Georgia’s stand-your-ground and concealed carry laws. If you use force in self-defense, it must be justified. Learn when to fight and when to walk.

Also, the urban/rural divide in Georgia is real. What works in downtown Atlanta won’t help you in the Georgia backwoods. Adapt accordingly.


Final Words from a Survivalist

Riot survival is 30% gear and 70% mindset. Gear breaks. Batteries die. But your awareness, training, and willpower? That sticks. Teach your kids. Train your spouse. Don’t hope for the best—prepare for the worst.

Always remember: When the system breaks down, your preparation is your only safety net. Be smart, stay light on your feet, and never stop learning.

How To Stay Safe and Survive During a Riot in California (Especially LA)

Riots are unpredictable, chaotic, and fast-moving. In a place like California—where cities are densely populated and political tensions run high—things can spiral out of control in an instant. I’ve spent years honing my survival and self-defense skills, not just for wilderness emergencies, but for exactly these kinds of urban disasters. If you’re reading this, you’re likely looking to protect yourself and your loved ones. You’re in the right place. Let me walk you through how to stay safe and survive during a riot in California, using practical strategies, real-world self-defense techniques, and a few DIY weapon skills that could save your life.


1. Stay Informed – Before It Hits the Fan

The first rule of survival is awareness. Riots don’t usually just explode without warning. There are always signs: heated protests, political turmoil, viral videos igniting public anger. Monitor news outlets, police scanners, and social media feeds. In California, apps like Citizen, Nextdoor, and local Reddit threads can give you real-time updates.

Keep a Get-Home Bag in your vehicle, especially if you’re traveling into a city like Los Angeles, San Francisco, or Sacramento. It should include essentials: water, energy bars, N95 mask, eye protection, gloves, a flashlight, multitool, and a burner phone with emergency contacts.


2. Avoid the Chaos If You Can

Let me be clear: your #1 strategy is to avoid confrontation. Don’t be a hero. Get out before things escalate. If you’re at work and see unrest brewing downtown, leave early. If you’re at home, fortify your entry points and stay inside.

Do NOT try to “watch” the riot or record it for social media clout. That kind of foolishness can get you targeted in seconds.


3. Situational Awareness is Your Best Defense

I can’t stress this enough: stay alert. Keep your head on a swivel. In a riot, threats don’t always come from the angry crowd—you could be ambushed by opportunists looting, mugging, or looking to cause harm.

Watch for exit points, safe zones (like police stations or fire departments), and stay away from choke points like bridges or alleys. Always have an escape route.


4. Learn and Master These 8 Self-Defense Skills

When escape is no longer an option, you’ll need to defend yourself. These eight self-defense skills could make the difference between life and death:

1. Situational De-escalation

Before you engage physically, try to de-escalate. Calm voice, hands visible, avoid aggressive posture. Many confrontations can be avoided with the right words and tone.

2. Palm-Heel Strike

Simple, effective. Aim for the nose or jaw. The base of your palm is strong and unlikely to injure you. Practice striking upward from a neutral position.

3. Elbow Strikes

If you’re in close quarters, elbows are powerful tools. Strike the side of the head, temple, or collarbone.

4. Escape from Wrist Grabs

Always pull toward the thumb. Practice breaking free from various grips. Pair it with a strike and run.

5. Knee Strikes

Deliver a strong knee to the groin or solar plexus. Even large attackers will drop if you hit with force and precision.

6. Tactical Flashlight Usage

A sturdy tactical flashlight can blind, distract, and serve as a blunt weapon. Shine it directly into the eyes and follow with a strike if necessary.

7. Ground Defense

If you’re taken down, protect your head and get to your feet quickly. Learn how to shrimp and kick upward if pinned.

8. Improvised Weapon Defense

You won’t always have a knife or baton—learn to defend using what’s around you: a backpack, a belt, a pen, or a water bottle.

Pro tip: train regularly. Muscle memory can save your life when adrenaline spikes.


5. Blending In – The Gray Man Strategy

Dress to blend. If you’re walking through an angry crowd, don’t stand out. No flashy clothes, no political logos, no bright colors. Go full “gray man”—neutral clothing, low profile, calm demeanor.

Avoid eye contact, keep your head low, and walk with purpose but without fear. Confidence without aggression makes you less of a target.


6. DIY Survival Weapons – When You Have to Improvise

In some riot situations, police and security are overwhelmed, and 911 might as well be out of service. You may need to build and arm yourself with improvised tools. Here are three DIY survival weapons you can make at home or in a pinch:

1. PVC Pipe Baton

  • Take a 1.5 ft length of 1-inch PVC pipe.
  • Fill it with sand or gravel for weight.
  • Seal both ends with duct tape.
  • Wrap the middle with paracord for grip.

It’s non-lethal but effective for crowd control or breaking windows in an emergency.

2. Tactical Sling Weapon

  • Use a strong sock or paracord pouch.
  • Fill it with heavy coins, ball bearings, or small rocks.
  • Whip it like a medieval flail.

Compact and silent, this weapon can deliver serious pain and force attackers to back off.

3. Makeshift Spear

  • Duct tape or lash a kitchen knife or sharpened stick to a broom handle or metal rod.
  • Use zip ties, paracord, or sturdy tape.

Great for defense at a distance and keeping attackers out of arm’s reach.

Note: these are last-resort tools. Don’t bring a weapon into a crowd unless you’re absolutely sure you need it—and understand the legal consequences under California law.


7. Shelter in Place – Fortify Your Home

If the riot is near your neighborhood, stay home and lock down.

  • Reinforce doors with a security bar or heavy furniture.
  • Close blinds and curtains to prevent visibility inside.
  • Keep lights off in front rooms.
  • Fill bathtubs with water (in case of power or water loss).
  • Charge all devices and power banks.
  • Have your defensive tools within arm’s reach.

And don’t answer the door for anyone except law enforcement, and even then, verify credentials if possible.


8. Know When and How to Bug Out

If your home becomes unsafe—fires spreading, mobs looting homes—you need to bug out fast.

Have a Bug Out Bag ready:

  • Copies of ID
  • Cash in small bills
  • Water and purification tablets
  • Lightweight food
  • Knife/multitool
  • First-aid kit
  • Change of clothes
  • Flashlight
  • Emergency radio

Pre-plan multiple evacuation routes. Avoid highways if they’re clogged. Think like a scout: move silently, stick to the shadows, and trust no one unless you know them well.


9. Post-Riot Recovery

Even after the chaos dies down, danger still lingers—downed power lines, fires, civil unrest, and desperate people. Stay alert, continue monitoring communications, and only return home if it’s safe.

Document any damage for insurance, but be ready to defend your property if looters return. And take mental health seriously—what you experience in a riot can leave psychological scars. Talk to someone if you need to.


Final Words from One Prepper to Another

Surviving a riot in California—or anywhere—comes down to mindset, preparation, and adaptability. You don’t have to be a Navy SEAL to make it out alive. You just need to stay smart, stay calm, and be ready to act when others panic.

Remember: You are your own first responder.

Train. Prepare. Stay safe. And may you never need to use what you’ve learned—though it’s better to know it and not need it than the other way around.

Stay sharp out there.

Louisiana’s Worst Roads to Drive on During a Disaster

I’ve driven through war zones in the Middle East, flash floods in Indonesia, and blackouts in California, but let me tell you something straight—Louisiana’s roads during a disaster? They’ll test every ounce of grit, patience, and tactical skill you’ve got behind the wheel.

The roads here aren’t just roads—they’re trapdoors waiting to open. Bayous overflow, pavement buckles, potholes morph into craters, and if you’re not paying attention, you might just end up swallowed by a backwater swamp or stuck on a bridge that’s now a boat ramp. Hurricanes, flash floods, tornadoes, and heat waves? The Bayou State gets them all. And when it hits the fan, knowing which roads to avoid and how to maneuver becomes the line between making it out or becoming part of the debris.

The Louisiana Gauntlet: Roads to Avoid When It All Goes South

Here are some of the worst roads in Louisiana during a disaster—routes you should avoid like a rattlesnake in your boot:

  1. I-10 between Baton Rouge and Lafayette
    Flood-prone and prone to traffic bottlenecks, especially around the Atchafalaya Basin Bridge. If the water doesn’t get you, the stalled traffic will.
  2. I-610 in New Orleans
    A deathtrap during hurricanes. Low elevation, lots of exits prone to flooding, and traffic that grinds to a halt fast.
  3. US-90 near Morgan City
    This area’s like a sponge—it soaks up floodwaters and keeps them. Debris, broken asphalt, and submerged stretches are common.
  4. LA-1 South to Grand Isle
    Beautiful under normal skies, but it’s a one-way ticket to being stranded when the Gulf decides to rage.
  5. I-20 near Shreveport
    During tornado season, it turns into a wind tunnel. Add low visibility from storms, and it’s a high-speed hazard.
  6. Airline Highway (US-61)
    Passes through flood-prone and urban zones. Infrastructure’s outdated, and during a crisis, it’s a twisted mess.
  7. Causeway Bridge over Lake Pontchartrain
    Don’t let its beauty fool you. High winds, zero shelter, and panic drivers make it lethal in a storm.
  8. LA-70 through Assumption Parish
    A scenic drive turned swampy rollercoaster when the water rises.
  9. Chef Menteur Highway
    Long, flat, and exposed—especially dangerous during storm surge conditions.
  10. River Road in Baton Rouge
    Flirts with the Mississippi. One good surge and the whole route can disappear.

Now that you know what roads to think twice about, let’s get into how you survive them when you don’t have a choice.


15 Survival Driving Skills That’ll Keep You Alive in a Disaster

  1. Situational Awareness
    Scan the road, your mirrors, the skies, and even other drivers. Awareness keeps you ahead of danger by minutes, which is a lifetime in a disaster.
  2. Off-Road Maneuvering
    Learn how to navigate mud, gravel, or grassy terrain. Sometimes the ditch is the road when the pavement’s gone.
  3. Water Wading Judgment
    Know how deep your vehicle can go. Six inches of water can cause loss of control. A foot? You’re floating.
  4. Brake Feathering
    Feather your brakes when you need control on slick roads—especially during heavy rain or floods.
  5. Throttle Control
    Smooth inputs save lives. Gunning it gets you stuck or sliding. Know when to creep and when to charge.
  6. Evasive Maneuvering
    Can you dodge a falling tree or swerving semi at 60 mph? Practice J-turns, quick swerves, and emergency braking.
  7. Map Mastery
    GPS may die. Paper maps don’t. Keep one in your glovebox with disaster escape routes marked in red.
  8. Driving Without Headlights
    Sometimes stealth matters. Know how to move silently and unseen—especially in looting-prone zones.
  9. Mechanical Literacy
    Know your vehicle. Change a tire blindfolded. Patch a radiator. Rig a fan belt with paracord if needed.
  10. Fuel Economy Driving
    No jackrabbit starts. Coast on declines. Save every drop because the next station might be 100 miles of chaos away.
  11. Convoy Driving
    If you’re with a group, learn to drive in formation. Keep spacing, use signals, and maintain visual contact.
  12. Bridge & Overpass Assessment
    Some look solid but are structurally weak after quakes or flooding. Don’t be the tester.
  13. Night Vision Discipline
    Use red light inside the vehicle. Don’t blind yourself or others with high beams when stealth or night travel’s essential.
  14. Wind Awareness
    Crosswinds can flip box trucks—and your SUV if it’s loaded top-heavy. Stay low-profile and move cautiously.
  15. Urban Escape Routes
    Study back alleys, industrial roads, and railway access paths. Cities will lock down fast—know the ratlines out.

3 DIY Survival Driving Hacks When You Run Out of Gas

Let’s say you’ve run out of fuel and you’re miles from help. Here’s how to MacGyver your way to another few miles or stay put safely:

1. The Campfire Fuel Extractor

If stranded with access to old vehicles or lawn equipment, siphon gas using a piece of hose and gravity. No hose? Melt a piece of hard plastic into a funnel and drain the fuel tank manually.

2. The Ethanol Boost

Got alcohol-based hand sanitizer, vodka, or even mouthwash? In small quantities, these can supplement gasoline in a pinch—IF your engine can handle it (older engines or multi-fuel vehicles only). Add no more than 10% volume and run gently.

3. Solar Battery Starter

No jump cables? Rig up solar lights or panels (many people have cheap solar garden lights) to trickle-charge your battery. Strip the wires, connect carefully to terminals, and give it time. It won’t start the car immediately, but over time can give you enough juice to crank once.


Final Thoughts from the Road

In Louisiana, roads are as wild as the swamps they cut through. When a disaster strikes, they morph into battlegrounds—where skill, preparation, and grit will mean more than any four-wheel drive badge on your bumper. You don’t rise to the occasion, you fall to your level of training. So, train now. Drive smart. Map your exits. Keep your gear close and your instincts sharper.

Remember, survival driving isn’t about speed—it’s about making decisions that keep you rolling when others are stuck, submerged, or stranded. From the Spanish moss-covered bridges near Slidell to the cracked pavement outside of Lake Charles, every inch of this land has a story. Make sure yours doesn’t end in the ditch.

The Ultimate EDC Checklist: Are These Key Items in Your Kit?

Imagine this scenario for a moment—you’re heading out the door, running errands, or even just walking to the mailbox. Everything seems perfectly normal. Then, suddenly, the unexpected happens. A power outage. A car breakdown. An emergency situation where you need to think on your feet and act fast.

Now, ask yourself: Are you really prepared for the unexpected?

Most people go about their day with the bare minimum in their pockets or bags: a wallet, a smartphone, and a set of keys. But what if that wasn’t enough? What if you could make a few small changes to your everyday carry (EDC) that could help you in a survival situation or simply make life a little easier?

It’s time to think beyond the basics and upgrade your EDC. When disaster strikes—whether it’s a natural disaster, power outage, or even just an unexpected situation—you’ll want to be as prepared as possible. With the right EDC, you can navigate these events with confidence, without being caught off guard.

Let’s go over the crucial items every survivalist should have in their everyday carry kit. These tools could very well be the difference between surviving and being caught unprepared.

1) Multi-tool

A multi-tool is perhaps the most essential item in your EDC. This versatile tool is your Swiss Army knife for modern-day survival. From knives and screwdrivers to bottle openers and pliers, a quality multi-tool will serve you in nearly any situation. Whether you’re fixing a broken item, opening a package, or handling an unexpected repair on the go, having a multi-tool at your disposal is invaluable.

Survival Prepper Tip: Choose a multi-tool that’s compact, durable, and easy to carry. Look for one that includes a knife, scissors, pliers, and a few screwdrivers. Don’t forget about the weight – you want something that’s easy to carry without weighing you down.

2) Flashlight

When the lights go out, a flashlight is your best friend. Whether you’re facing a power outage at home, navigating through a dark area, or even just trying to find something in a poorly lit space, a flashlight is a must-have in your EDC. Opt for a small, durable, and powerful flashlight that can be easily carried in your bag or pocket. There’s nothing worse than fumbling around in the dark when you need light the most.

Survival Prepper Tip: Look for a flashlight that uses rechargeable batteries, which can save you money in the long run. Solar-powered models are an excellent choice for preppers who want a sustainable option. Always have spare batteries in your kit as well.

3) Fire Starter

When you’re caught in a situation where you need warmth, cooking, or a signal for help, a reliable fire starter can be a game-changer. A Ferro rod fire starter is compact and easy to carry, and it’s capable of igniting a fire even in wet conditions. You never know when you might need to create a fire to cook food, stay warm, or send out an emergency signal. Fire is also essential for purification, whether you’re boiling water for drinking or disinfecting something.

Survival Prepper Tip: Practice using your fire starter before you need it. The last thing you want is to struggle with it during an emergency. Keep a few fire-starting supplies, like cotton balls soaked in petroleum jelly or tinder, in your kit for easy ignition.

4) Water Bottle

Water is life, and in any survival scenario, access to clean drinking water is critical. Carrying a durable, reusable water bottle ensures you’re never without hydration when you need it. Additionally, a high-quality water bottle with a built-in filter can help you purify water from lakes, streams, or questionable sources. Having access to clean water is a fundamental survival skill, and carrying it with you makes it a part of your everyday readiness.

Survival Prepper Tip: Choose a stainless steel or BPA-free plastic water bottle. If you’re worried about contamination, consider one with a built-in filtration system. This ensures you can purify water from a variety of sources in the wild.

5) First Aid Kit

When you’re in a survival situation, injuries can happen fast—whether it’s a cut, burn, sprain, or something more serious. A small but well-stocked first aid kit is essential in your EDC. You should be able to address minor injuries and have supplies for more serious situations, like infection prevention or wound care.

Survival Prepper Tip: At the very least, your first aid kit should include antiseptic wipes, bandages, gauze, medical tape, tweezers, pain relievers, and any personal medications. Don’t forget to include an emergency whistle, as it can help you signal for help if you need it.

6) Paracord

Paracord is one of those items that you’ll be glad you packed, even though you might never need it. However, when you do, you’ll be amazed at its versatility. From building shelter, tying down gear, making repairs, to even using it for fire-starting (by stripping it), paracord is a survivalist’s go-to utility tool. Keep at least 10 feet of it in your EDC kit.

Survival Prepper Tip: Choose a high-quality, 550-paracord with a higher tensile strength. It should be durable enough to withstand harsh conditions. If possible, look for a paracord bracelet, so you have it easily accessible.

7) Survival Blanket (Mylar Blanket)

A Mylar survival blanket, also known as a space blanket, is a must-have in your EDC. It’s small, lightweight, and helps retain body heat in extreme temperatures. It can also be used as a reflective signaling device in emergencies. These blankets are an essential part of your kit because they protect you from hypothermia and other weather-related dangers.

Survival Prepper Tip: The reflective nature of Mylar blankets makes them ideal for signaling. Use them in survival situations to attract attention from rescuers. Consider carrying a small survival shelter or poncho for added protection.

8) Knife

A high-quality, folding pocket knife is essential for your EDC. From preparing food to cutting rope, a sharp knife can help you handle multiple survival tasks. Choose a compact, easy-to-carry knife that is capable of handling heavy-duty tasks. Make sure the blade is durable, and the handle is comfortable to grip.

Survival Prepper Tip: When selecting a knife, consider the lock mechanism for safety. Always sharpen your blade and check for rust to maintain optimal performance.

9) Compact Tool Kit

While a multi-tool is great, sometimes you need specialized tools for specific tasks. A small, compact tool kit with essentials like a small wrench, pliers, or even a screwdriver set can be a lifesaver. This can help you with repairs or minor fixes during your day-to-day life or in emergency situations.

Survival Prepper Tip: A lightweight, minimal tool kit with just a few essential tools will help you make repairs on the go without adding unnecessary bulk to your kit.

10) Tactical Pen

A tactical pen is another item that can be part of your EDC kit without drawing attention. While it functions as a regular pen, it also serves as a self-defense weapon, glass breaker, and even a tool for small repairs. It’s an inconspicuous but practical addition to your gear, and it could come in handy in a wide variety of scenarios.

Survival Prepper Tip: Choose a tactical pen made of heavy-duty materials, like aluminum or titanium, so it can withstand rugged use. Ensure it also has a reliable writing mechanism to make it functional as a regular pen.


Final Thoughts:

In a survival situation, your ability to adapt, improvise, and make use of the resources at hand is what will keep you alive. Your EDC is more than just a collection of random items. It’s a critical component of your overall preparedness strategy. The key to an effective EDC is to make sure you have the tools that you need to handle unexpected situations, whether that’s a minor inconvenience or a full-blown emergency.

By having these items in your kit, you’re setting yourself up for success. Keep refining your gear, add more items as necessary, and always stay alert. The world is unpredictable, but with the right tools in your pocket, you’ll be ready for whatever comes your way.

Survival Prepper Tip: Regularly review your EDC kit. Seasons change, your needs evolve, and new gear becomes available. Keeping your kit up to date will ensure that you’re always ready for whatever life throws your way.

The Wifi Trap: What Most Preppers Overlook When SHTF

As preppers, we’re always thinking about the “what ifs” — what if the power grid goes down? What if food becomes scarce? What if our security is compromised? But one thing that often gets overlooked in prepping is how we handle something as common as wifi when SHTF (Sh*t Hits The Fan).

Sure, most of us are used to having wifi at our fingertips. It’s something we take for granted in our daily lives, whether we’re at home, at a café, or even traveling. But when disaster strikes—whether it’s a natural disaster, an EMP, or some form of societal collapse—the wifi we rely on can become a huge liability.

Think about it: every time a major storm hits or an earthquake shakes things up, what happens? The power grid goes down, cell towers collapse, and suddenly, we’re cut off from the world. The internet disappears. But if you’re a prepper, you’ve probably planned ahead. You’ve got your own generator, and maybe even a backup power source for your wifi. You’re sitting pretty, right?

Well, not quite.


The Dangerous Wifi Mistake Most People Make

The truth is, while having wifi during a crisis can be a blessing—it can also make you a target. When you’ve got a working wifi signal in an otherwise digitally dead area, you’re sending out a beacon. A signal to anyone with a device searching for a connection. And when people are desperate—whether it’s for information, communication, or resources—they’ll stop at nothing to get to you. That includes the possibility of using force.

Picture this: a massive power outage or grid failure. You’re sitting in your home with your backup generator, using your wifi to access essential information or stay in touch with other preppers. But that signal, that tiny little wave bouncing off your router, is broadcasting to anyone nearby. And when resources are scarce, there are plenty of people who would be willing to do whatever it takes—perhaps even storm your house or break into your perimeter—to steal those resources.

This is a situation we must be prepared for. If you’ve got wifi set up for a SHTF scenario, there are a few things you need to understand to stay safe.


Reducing Your Wifi Range: A Smart Strategy

What’s the solution? Do we simply throw our routers out the window during a power outage? Of course not. But there are steps you can take to ensure your wifi doesn’t make you an easy target in an already dangerous situation.

One way to protect yourself is by reducing the range of your wifi signal. Most modern wifi routers allow you to adjust the power output—basically controlling how far your signal reaches. By lowering the power, you can restrict your wifi’s range and make it much less noticeable to anyone outside your immediate vicinity.

This is a smart strategy for preppers who don’t want to broadcast their presence to the wrong people.

Tip #1: Most wifi routers allow you to control the transmit power. Check your router’s settings and adjust the power output. You’ll want to reduce it to a level where only those inside your home or immediate property can access the signal.

Tip #2: Always refer to your router’s manual or interface to make sure you’re adjusting the correct settings. Each router model is different, but most will have an option to control the signal strength or transmit power.


How to Hide Your Wifi with Physical Barriers

Now, let’s say you’re not tech-savvy or don’t want to mess with your router settings. There’s another simple method you can use: physical barriers. You can reduce the range of your wifi signal by surrounding your router with dense materials like concrete or stones.

Think about it: wifi signals can only travel through certain materials. Concrete, metal, and stone are excellent at blocking signals. By placing your router in a space surrounded by these materials, you’re naturally limiting the range without having to adjust any settings. For example, if you have a basement or a sturdy, windowless room in your house, that could serve as a great space to keep your router safe.

Tip #3: A simple and effective method is placing your router in a room with thick concrete walls or a storage area made of dense materials. This will help shield the signal from reaching the outside world.


Prepping for Emergencies Beyond the Basics

As a prepper, it’s crucial to think outside the box, especially when you’re facing an unprecedented situation. Most people think of wifi as a convenience, not as a potential vulnerability. But in an emergency, your technology can become both a tool and a liability. The key is to adapt.

Tip #4: Don’t just prep for short-term scenarios. Plan for long-term sustainability. A few days without the grid is one thing; surviving for months or even years is something entirely different.


The Importance of Digital Security

Just as you would lock your doors and secure your home, you need to protect your digital space. In the chaos following a major disaster, people might go to extreme lengths to obtain your resources. You need to be aware of how much you’re broadcasting. This goes beyond just wifi—think about all the digital signals your devices are sending out. Cell phones, radios, and even Bluetooth can be tracked or intercepted if you aren’t careful.

Tip #5: Turn off Bluetooth, GPS, and Wi-Fi on devices when not in use. The fewer signals you send out, the less chance you’ll attract attention from those looking to exploit your resources.


Additional Wifi Safety Measures

Another smart move is to create a network that’s encrypted and secure. In a post-collapse world, information is power, and anyone who can hack into your system will have a major advantage. Set up a VPN (Virtual Private Network) to protect your online communications and data.

Tip #6: Always use a VPN on your devices. It encrypts your online activity and adds an extra layer of security when accessing the internet in a crisis.


Know Your Neighbors (But Keep Your Distance)

If you’re living in a close-knit neighborhood, don’t underestimate the value of knowing who is nearby. The stronger your community connections, the better prepared you’ll be to handle any situation. But even within a close community, you need to remain vigilant. Trust is built, not given.

Tip #7: Form a prepper group with trusted neighbors, but always remain cautious about who you allow into your circle. Trust, but verify.


Redundancy is Key to Prepper Success

While you’re reducing your wifi signal and securing your digital footprint, remember that redundancy is critical. You can’t rely on a single system. A backup communications plan is necessary, whether it’s a two-way radio or even an old-fashioned CB.

Tip #8: Invest in walkie-talkies or ham radios for backup communication in case the internet and cell towers fail completely.


Stay One Step Ahead

At the end of the day, the goal is to stay one step ahead of the game. By taking these simple but effective precautions, you reduce your exposure and keep your home from becoming a target when the chips go down.

Tip #9: Be proactive, not reactive. Anticipate problems before they occur, and stay prepared for any scenario that may unfold.


Conclusion: A Tactical Approach to Wifi in a Crisis

When SHTF, you’re going to face a whole new set of challenges. Wifi may be a tool, but it can also be a dangerous liability if you don’t handle it right. From adjusting power settings to using physical barriers, there are simple and effective ways to reduce the range of your wifi signal and avoid drawing attention to yourself.

Tip #10: Continuously reassess your preparedness plan. Emergencies evolve, and your prepping must evolve with them.

By being aware of the wifi mistake that many preppers overlook, you’re one step closer to ensuring that your home remains secure—and that you’re truly ready when the chips go down.

Caught to Survive: The Prepper’s Guide to Traps and Snares

Alright, listen up, because I’m only gonna say this once. If you’re dumb enough to think survival is just about stocking up on canned beans and pretending that’ll keep you alive when the world goes sideways, then this rant isn’t for you. Survival is about doing — using your brain, your hands, and yes, your grit — to catch what you can, snare what you need, and make it through whatever hellhole we find ourselves dropped into.

Welcome to Caught to Survive: The Prepper’s Guide to Traps and Snares — a no-BS blueprint for anyone who refuses to be just another dead body left behind when the grid goes dark. If you don’t know how to make a trap or a snare, you might as well start digging your grave now.


15 Survival Skills Every Prepper Should Master — Or Die Trying

1. Basic Knot Tying
If you don’t know a bowline from a granny knot, you’re already screwed. Traps and snares depend on strong, reliable knots. Practice until you can tie them blindfolded and with one hand tied behind your back.

2. Crafting Deadfall Traps
This ain’t your grandpa’s picnic. Knowing how to build a deadfall trap using logs and rocks can catch rabbits, squirrels, or whatever dumb critter walks into your line.

3. Snare Making
Wire snares are the backbone of stealth trapping. Know how to twist, set tension, and place snares where animals naturally run — otherwise, you’re wasting time.

4. Camouflage and Concealment
A trap that’s obvious gets disabled or avoided. Learn to hide your gear in plain sight with branches, leaves, or dirt. If your traps aren’t invisible, they’re useless.

5. Tracking Animal Behavior
Study animal trails, feeding spots, and habits. Set traps where animals will be, not where you wish they’d show up. If you’re just hoping for luck, you’ll be eating dirt.

6. Fire Starting Under Any Conditions
You’ll need fire to cook your catch, sterilize traps, and keep warm. Practice friction, flint, and modern methods until you can start a blaze in a rainstorm with nothing but grit.

7. Knotless Snares and Loop Placement
Sometimes animals are wary of wire loops with knots. Master creating smooth, sliding loops to increase your catch rate.

8. Butchering Small Game
Trapping isn’t just about capture — you’ve got to know how to clean and prepare your kill fast and sanitary. You’re not hunting dinner for fancy; you’re hunting survival.

9. Using Natural Materials for Traps
Wire might run out. Learn to use vines, strips of bark, and wood for snares and triggers.

10. Primitive Tools Making
Carve your own hooks, spears, and trap components from stone, bone, or wood. If you don’t have gear, make it. No excuses.

11. Emergency Shelter Building
Trapping is useless if you freeze to death. Know how to build shelters with minimal materials while you lay traps and prepare food.

12. Water Sourcing and Purification
Without water, you’re dead in 3 days. Find and purify water near your trap zones. Don’t poison your own food source with careless water mistakes.

13. First Aid for Trapping Injuries
Cut yourself setting a snare? Step on a rusty nail? Know basic first aid to keep infection from killing you.

14. Disguise Your Scent
Animals smell better than you think. Use mud, leaves, or natural scents to hide your human odor near trap lines.

15. Understanding Local Wildlife Laws and Ethics
Yeah, when society is functioning, respect the laws and the animals. But when survival’s on the line, knowing the legal boundaries beforehand saves you headaches later.


3 DIY Survival Hacks to Boost Your Trap and Snare Game

Hack #1: The “Tripwire Alarm”
Use a length of thin wire or strong cord connected to a can filled with rocks or anything noisy. Place it across a path where you expect an animal. When triggered, it alerts you without you having to stay glued to the trap all day. No more missing your catch because you were distracted or sleeping.

Hack #2: The “Improvised Spring Snare”
If you don’t have steel wire or springs, carve a Y-shaped flexible sapling branch. Attach a loop of vine or wire to the top and set the snare with the bent sapling tensioned. When the animal steps into the loop, the sapling snaps back, tightening the noose. It’s noisy but effective if you can’t get your hands on commercial gear.

Hack #3: The “Natural Glue Trap”
Mix pine resin with charcoal or crushed leaves to make a sticky, natural glue. Spread it on a flat surface or a small stick and place near bait. Small rodents get their paws stuck, making capture easier. It’s messy but works when you’re desperate and wire’s not an option.


Here’s Why This Matters — And Why You Should Be Mad Too

When disaster strikes, the entire system you rely on falls apart. Power? Gone. Grocery stores? Looted or empty. Police? Who knows. The only reliable source of food will be your hands and your wit. If you’re not trapping and snaring, you’re begging for scraps or starvation. And no one’s gonna hand you a sandwich when chaos rules the day.

Get angry. Get serious. This is not a game. Every second you waste scrolling your phone or buying more junk you don’t need, someone else is learning to survive without it. The animals don’t care about your excuses. If you can’t catch food, you die.

Traps and snares are the silent soldiers of survival — no loud guns, no wasting ammo, just pure skill and patience. They’re the tools that will keep your belly full when the world crumbles. Master them or prepare to be a statistic.


Final Warning: If You’re Not Willing to Get Dirty, Stay Home

Setting traps isn’t glamorous. It’s tedious, frustrating, and sometimes downright gross. You’ll get bitten by bugs, scratched by thorns, and spend hours just watching a snare you set. But that’s the price of survival — patience and resilience.

Get angry at the world for making survival necessary. Get angry at yourself for not preparing sooner. But channel that anger into action. Learn every skill, practice every hack, and build traps until they’re second nature.

Because when the grid goes dark and the streets fill with chaos, no one’s coming to save you. You’re on your own. And if you don’t catch to survive, you won’t.


There. Now stop whining and start doing. What do you want me to break down first — setting snares? Finding the best trap locations? Or maybe how to butcher a rabbit clean in under five minutes?

Stay or Go? Making the Right Call When SHTF

Stay or Go? Making the Right Call When SHTF
By Someone Who’s Sick of People Not Paying Attention

Listen up, because I’m only going to say this once: when the world falls apart—and it will—you won’t have time to play “what if?” There’s one question you better be able to answer on instinct: Do you bug in or bug out? If you haven’t figured that out ahead of time, you’re already behind and probably dead.

I’m tired of watching soft-handed weekend warriors debate this online like it’s a damned video game. This isn’t theory. It’s your life, your family, your future. So let’s strip the fluff and deal with cold, brutal reality.


The First Truth: There’s No One-Size-Fits-All Answer

Anyone telling you that “bugging out is always best” or “never leave your home” is full of it. Every scenario is different. Civil unrest? Chemical spill? EMP? Martial law? You have to evaluate your surroundings, your supplies, your risks—and do it fast.

Your default should be bugging in. Why? Because your home is where your resources are. You’ve (hopefully) stockpiled food, water, tools, weapons. It’s your ground. You know it. You can defend it. But if staying put puts a target on your back, or if your house becomes a death trap, you better have a Plan B. And that Plan B better not be “run into the woods with a backpack and pray.”


15 Survival Skills You Better Have Locked Down

Forget Netflix and social media. Here’s what you should be spending your time learning:

  1. Water purification – Learn to boil, filter, or purify dirty water.
  2. Fire starting – Matches run out. Know how to start a fire with flint, steel, or a bow drill.
  3. First aid – Not band-aids. I’m talking trauma care: tourniquets, wound dressing, infections.
  4. Self-defense – Knife, firearm, bare hands. Be ready to defend your life.
  5. Situational awareness – Learn to read people, crowds, and danger signs before they explode.
  6. Food preservation – Dry it, smoke it, can it. Don’t waste calories.
  7. Shelter building – A tarp and cordage or deadfall and brush. Know how to stay warm and dry.
  8. Navigation – No GPS. Learn to use a compass and read a topographic map.
  9. Silent movement – Move like a ghost. Don’t attract attention.
  10. Bartering – Know what’s valuable post-collapse and how to trade smart.
  11. Knot tying – Rope is useless if you don’t know what to do with it.
  12. Trapping/hunting – Rabbits, squirrels, fish—quiet protein.
  13. Camouflage – Hide yourself, your gear, your scent. Blend in or disappear.
  14. Mental toughness – If you can’t handle fear, hunger, or pain, you won’t make it.
  15. Basic mechanics – Know how to fix a generator, mend a pack, patch a leak.

Assessing When to Bug-Out: The Signs You Can’t Ignore

Bugging out isn’t some cool Rambo fantasy. It’s risky as hell and should only happen if you’ve got no other choice. These are your red flags:

  • Your location is compromised (riots, looting, structural damage).
  • No more resources (water gone, food looted, power permanently out).
  • Tactical disadvantage (can’t defend your home, too exposed).
  • Incoming threat (chemical cloud, wildfire, or flood you can’t stop).
  • You’re being targeted (neighbors know you’ve got supplies).

If two or more of those are true, you pack up and get moving NOW. No debate. No hesitation.


Bugging Out the Right Way: No Room for Amateurs

Let me be crystal clear: If you’re going to bug out, it better not be your first time trying it. You better have your gear dialed in, your route memorized, and your backup plans in place.

Key Reminders:

  • Have at least 3 bug-out locations, not just “Uncle Joe’s cabin.”
  • Know at least 2 alternate routes to each location—highways are dead traps.
  • Your bug-out bag should be ready to grab in 30 seconds. Period.
  • Dress to disappear, not impress. Earth tones, layers, sturdy boots.
  • Move at dawn or dusk—less visibility, less heat, fewer people.
  • NEVER go without a map, water filter, knife, and fire starter.

3 DIY Survival Hacks You’ll Thank Me For

Let’s cut the fancy gear crap. When your $300 gadget fails, these will save you:

1. Aluminum Can Stove

Cut a soda can, poke air holes, fill with alcohol or cotton soaked in petroleum jelly = instant lightweight stove. Weighs nothing. Boils water in minutes. Make five. They’re cheap.

2. Condom Water Carrier

Yep, condoms. Unlubricated ones. They can carry a liter of water, are compact, and don’t weigh a thing. Wrap it in a sock or bandana to protect it from punctures.

3. Super Glue for Wounds

Medical-grade or not, super glue can seal a cut fast when you don’t have time or materials to stitch. Clean the wound, pinch shut, apply glue. Done. Infection still a risk, but it stops bleeding.


Stop Waiting for a Wake-Up Call

I’ve heard every excuse in the book: “My wife won’t let me.” “I don’t have time to prep.” “It probably won’t happen.” Shut up. Just shut up.

When the grocery shelves are empty, when the cops stop coming, when your neighbor kicks in your door because he knows you stored food and he didn’t, you’ll realize prepping wasn’t paranoia—it was necessary.

Don’t be the fool who dies waiting for the government to come fix it. Don’t be the moron who loads his truck for the first time after the sirens start. Don’t be the statistic.


Final Word: Make the Call Now—Not Later

Bug in if you can. It’s safer, smarter, and you’re in control. But don’t get romantic about your house—it’s just walls and wood. If it turns against you, walk away with your life and don’t look back.

This isn’t a game. This is survival. Either you make the decision ahead of time, or the chaos will make it for you. And believe me, chaos doesn’t give a damn about your comfort.

So… stay or go?

Decide now. Or die later.

Bug Out Bags (BOB) – What to pack, how to tailor it to your needs, and keeping it ready.

Let me be crystal clear right off the bat: if you don’t have a Bug Out Bag (BOB) packed and ready to grab this dang second, you are not ready for anything but a front-row seat to your own demise. This isn’t some Boy Scout sleepover or a cute Instagram hike. This is survival, plain and ugly. When the world turns sideways — and trust me, it will — you won’t have time to debate the pros and cons of your gear choices. You either grab your bag and get out, or you stay put and rot. Those are your options.

What the Heck Is a Bug Out Bag, and Why You Need One Yesterday

A Bug Out Bag is your lifeline — your emergency pack for when staying where you are means death, detention, or destruction. It needs to sustain you for at least 72 hours of full self-reliance. You can build it for longer, but don’t make the mistake of packing your whole garage. You’re not moving house. You’re escaping Hell.

Most of the world walks around with their heads shoved so far up their rear ends they could see their own tonsils. They think Amazon Prime and a 911 call are going to save them. Let me tell you something, cupcake — no one’s coming to save you. You are the cavalry. So get off your ass and start packing your BOB.


The 15 Survival Skills You Better Damn Well Know Before You Bug Out

You can have the best gear in the world, but if you don’t know what the hell you’re doing, you’re just a well-equipped corpse. Learn these skills like your life depends on them — because it does.

  1. Fire Starting (Without a Lighter) – Learn to spark a flame with flint, steel, a ferro rod, or hell, even a damn battery and steel wool.
  2. Water Purification – Boil, filter, use iodine tablets — or die slowly from diarrhea. Your call.
  3. Shelter Building – Tarps, space blankets, or natural materials. Know how to stay dry and off the ground.
  4. Knot Tying – You think rope ties itself? Learn real knots: bowline, taut-line hitch, trucker’s hitch.
  5. Navigation Without GPS – Compass, topographical map, sun and stars. Your phone’s going to be dead weight in a real crisis.
  6. First Aid – CPR, wound care, infection control. Blood is slippery; learn how to deal with it.
  7. Food Foraging – Know what plants won’t kill you and which ones will make you vomit blood.
  8. Hunting and Trapping – You’re not living off granola bars forever. Know how to snare, fish, and shoot.
  9. Security and Self-Defense – Know how to use a knife and a firearm. And not like a damn movie star — properly.
  10. Stealth Movement – Loud people die first. Learn how to move like a ghost.
  11. Situational Awareness – Pay attention. Stop looking at your feet. Know your surroundings.
  12. Camouflage and Concealment – Blending in isn’t just fashion; it’s survival.
  13. Bartering and Negotiation – People will kill for toilet paper. Know how to deal and not get swindled.
  14. Mental Toughness – Stop crying. Stay calm. Think fast. Panic is a killer.
  15. Improvisation – You won’t always have gear. Learn to MacGyver your way through life-threatening situations.

How to Tailor Your BOB Without Being a Damn Idiot

Here’s where most people screw up — they copy a list from the internet without thinking. Tailor your bag to your region, your climate, your body, your skills, and your realistic bug-out plan.

Are you in the city or the woods?
If you’re in a city, weight matters more — you may be walking 20 miles in boots. You’ll need more water purification and urban navigation tools. If you’re out in the boonies, focus on shelter and hunting tools.

What’s your climate?
Cold? Pack layers, a thermal bivvy, and waterproof gear. Hot? Shade tarp, hydration tabs, light clothing, and sunscreen.

Got kids? A dog? Medical issues?
If you need meds, pack extra. If you have kids, double water and snacks. Dogs? They eat and drink too, genius.

Fitness level?
Don’t pack a 60-pound bag if you can’t jog across the street without wheezing. Tailor it to your real ability, not your fantasy.


What Goes in a Bug Out Bag – The Non-Negotiables

Screenshot

Here’s the foundation. Don’t argue. Just pack it.

  • Water: At least 1 liter per day. Bring purification tabs, LifeStraw, Sawyer Mini, and a metal container for boiling.
  • Food: MREs, energy bars, trail mix, jerky. High calories, low space. Rotate stock every 6 months.
  • Shelter: Tarp, space blanket, bivvy sack, paracord.
  • Fire: Ferro rod, waterproof matches, dryer lint in a pill bottle. Redundancy matters.
  • Knife: Fixed-blade full-tang. Don’t bring some flimsy kitchen crap.
  • Multi-tool: Leatherman or equivalent.
  • First Aid Kit: Stop bleeding. Kill infection. Include tourniquet, QuikClot, trauma shears, gauze.
  • Light: Headlamp with spare batteries.
  • Clothing: Season-appropriate. Layers. Wool socks. Underwear. Gloves.
  • Navigation: Compass, local map, laminated and marked.
  • Cash: Small bills. ATMs will be dead.
  • Documents: Copies of ID, insurance, prescriptions, in a waterproof pouch.
  • Comms: Crank radio, emergency whistle, signal mirror.
  • Self-defense: You do what’s legal in your area. Just be able to protect what’s yours.
  • Hygiene: Toothbrush, soap, toilet paper, feminine supplies. Sanity matters.
  • Misc: Duct tape, zip ties, super glue, fishing kit, sewing needle and thread.

3 DIY Survival Hacks You’ll Thank Me For Later

You want clever? Here’s your clever. These hacks are field-tested, dirt-approved, and desperation-certified.

1. Altoid Tin Survival Kit
Pack a mini kit in an old mint tin: fire striker, fish hooks and line, a mini compass, a razor blade, needle and thread, safety pins, water purification tabs. Throw it in your BOB as backup — or stash one in your glovebox, jacket, and every damn coat pocket you own.

2. Tampon Trick
Not just for first aid or hygiene — tampons are compact, sterile, and super absorbent. Use them to stop bleeding, as tinder, or even a water filter (in a pinch). Keep a couple in a Ziploc bag. Laugh now, live later.

3. Crayon Candle
In the dark and need light? A standard crayon burns for 20–30 minutes. Use a paperclip as a stand, light the tip — now you’ve got emergency lighting in a pinch. Carry a couple in your bag. Cheap, light, and long-burning.


Keep It Ready — Or Kiss Your Ass Goodbye

A Bug Out Bag that isn’t ready is just a duffel full of dead weight. Rotate your food every six months. Check your water filters, batteries, and meds. Do a seasonal gear audit. You want to find out your flashlight’s dead when your home’s on fire?

Stash your BOB by the exit. Not in the attic. Not buried under camping gear. Put it somewhere you can grab it with your eyes closed. Hell, practice doing just that. Run drills. Time yourself. You should be out the door in 60 seconds, max.


Final Thought

This world doesn’t owe you a damn thing. Not power. Not food. Not peace. If you’re still waiting for the government to take care of you, you’re already dead — they’ll get around to scraping up what’s left of you after the dust settles.

But if you’ve got a solid Bug Out Bag, real skills, and a plan, then maybe — just maybe — you’ll be one of the few standing when the smoke clears.

So get mad, get ready, and get packed.

Old-School Navigation: How to Read Maps and Use a Compass Like a Pro

Old-School Navigation: How to Read Maps and Use a Compass Like a Dang Pro
(An Angry Survivalist’s No-BS Guide to Not Getting Lost )


Listen up, you soft modern-day wimps addicted to GPS and your goddamn smartphones. When the grid goes down—because trust me, it will—all your fancy gadgets will be about as useful as a screen door on a submarine. If you don’t know how to navigate old-school with nothing but a paper map and a compass, you might as well kiss your survival chances goodbye.

This is a brutal reality check. Nature doesn’t care about your tech, your signals, or your selfies. Nature demands respect and knowledge. So, if you want to survive the wild, you better get off your ass and learn how to read maps and use a compass like a pro—no whining, no shortcuts, no excuses.

Here’s a no-nonsense crash course with seven survival skills and three DIY hacks to keep you from wandering lost in the hellscape that is the wild.


Survival Skill #1: Understand Your Map—Topographic Maps Are Your Bible

First, ditch those crappy road maps or tourist pamphlets. You want topographic maps—those beauties show elevation, terrain features, water sources, trails, and every knoll and valley you might crawl through. Learn to read contour lines: close lines mean steep terrain, wide lines mean gentle slopes. Know the symbols: trees, rivers, cliffs, roads, and trails.

If you can’t interpret your map’s legend, you’re dead meat. This isn’t a joke. Without a clear understanding, you might be aiming for a deadly cliff instead of a river crossing.


Survival Skill #2: Master Your Compass—Know Your Needle and Dial Like Your Life Depends On It

That needle doesn’t spin for fun. It points to magnetic north, which isn’t the same as true north, so you gotta learn the difference—declination—and adjust for it on your compass. If you just blindly follow the needle without accounting for declination, you’ll get lost faster than a squirrel in a maze.

Practice holding the compass flat, lining up the direction-of-travel arrow, and turning the bezel until the orienting arrow matches the magnetic needle. When that’s done, you’ve got a bearing to follow—simple but deadly effective if you screw it up.


Survival Skill #3: Taking a Bearing From the Map—Don’t Guess, Calculate

If you want to get somewhere, first figure out its bearing from your current position. Put the compass on the map with the edge connecting your position and the target. Rotate the bezel until the orienting lines align with the map’s north-south grid. Then, take that bearing off the compass and follow it.

If you skip this and just wander toward “the hill over there,” you’ll be walking in circles and starving before sunset.


Survival Skill #4: Using Landmarks to Confirm Your Position—Trust Your Eyes and Brain

Maps and compasses are useless if you don’t pay attention to the environment. Pick out landmarks—distinct hills, rivers, ridges, or roads—and match them to the map. Confirm your location often, don’t just blindly march forward.

If you’re not checking your surroundings constantly, you’re inviting disaster. Get lost once, and you’ll be lucky if you live to see a rescue.


Survival Skill #5: Pace Counting—Measure Your Distance Without Fancy Gadgets

Without GPS, you need a way to measure how far you’ve gone. Learn to count your paces—a survivalist’s best friend. Count every step for a set distance, then use that to estimate your stride length.

Yes, it’s annoying, but when you’re exhausted and starving, knowing you’ve gone two miles or ten can be the difference between hope and hopelessness.


Survival Skill #6: Back Bearings and Triangulation—Don’t Wander Blind

If you’re lost, don’t panic. Use back bearings to retrace your steps. Point your compass in the direction you came from, turn 180 degrees, and follow that bearing back.

Even better, use triangulation: take bearings on two or three distinct landmarks, draw lines on the map, and where they intersect is where you are. This is survival math—learn it or die trying.


Survival Skill #7: Night and Low-Visibility Navigation—Be Prepared to Improvise

Nightfall or fog doesn’t mean you stop moving. Know how to navigate by the stars or the moon if you lose your compass. Use natural indicators: moss growing on the north side of trees, the sun’s position at dawn or dusk.

Don’t wait for perfect conditions. The wild doesn’t care if you want to rest—it’s relentless. Keep moving with a plan.


DIY Survival Hack #1: Make Your Own Compass—Magnetize a Needle on the Fly

No compass? No problem. Find a sewing needle or small steel piece, rub it vigorously against silk, wool, or your hair to magnetize it, then float it on a leaf in still water. That needle will align north-south.

It’s crude but better than walking blind. Test this method at home before you actually need it—practice saves lives.


DIY Survival Hack #2: Create a Sundial to Approximate Direction

If you have a stick and some sun, you can create a simple sundial. Stick the stick upright in the ground, mark the tip of the shadow. Wait 15-30 minutes and mark the new position of the shadow tip. Draw a line between the two marks—this line runs approximately west-east.

From there, you can orient yourself roughly north-south. It’s not perfect but can save your ass in a pinch.


DIY Survival Hack #3: Use Natural Features as a Map Legend

When you have no map or compass, turn your environment into one. Sketch the terrain with sticks, stones, or in the dirt. Mark streams, hills, and campsites you’ve passed.

This rough “map” helps keep track of your route and prevents doubling back into dangerous spots or traps.


Final Word From the Gritty Trenches of Survival

If you think you can survive with just a phone app and a trust fall into Mother Nature’s arms, wake up. You’ll die cold, lost, and hungry. Old-school navigation isn’t just a skill—it’s a sacred survival rite.

Every survivalist worth their salt swears by the map and compass combo. It’s the purest, most reliable method known to mankind. No batteries, no satellites, just your brain, your eyes, and your hands.

Practice these skills until they’re as natural as breathing. Train yourself to respect the wilderness, to read its cues, and to never wander aimlessly. When the modern world crumbles, only the prepared will thrive.

So get off your lazy butt, print out a topo map, buy a real compass, and start drilling these skills hard. Because when the day comes, and it will come, you’ll either navigate like a pro or perish like the clueless fool you’ve been.