Don’t Be Fooled: Louisiana’s Most Dangerous Hiking Trails Are Waiting for You

Screenshot

Don’t Be Fooled: Louisiana Hiking Trails Are Waiting for You

Let me be real straight with you from the get-go—Louisiana ain’t just mossy cypress trees, jazz music, and beignets. For those of us who lace up our boots, strap on a pack, and feel more alive ten miles deep in the woods than we ever do in town, Louisiana is a wild frontier that will chew you up if you walk into it thinking it’s all gumbo and gators.

I’m not trying to scare you (okay, maybe a little), but I’ve spent more time in the wilderness than most people spend in front of a TV, and I’m telling you: the Pelican State’s most dangerous hiking trails are out there, waiting, and they don’t care one bit if you’ve only brought your Instagram spirit and a half-empty water bottle.

The Misconception of “Safe” Trails

Too many greenhorns make the mistake of underestimating Louisiana’s terrain. They assume that because we’re not dealing with towering mountain ranges or desert canyons, the risk is low. That’s where they’re dead wrong. You see, danger in the backcountry doesn’t always come in the shape of cliffs or blizzards. Sometimes, it’s the slow creep of heat exhaustion. Sometimes, it’s losing the trail after heavy rain. Sometimes, it’s a cottonmouth at your ankle before you’ve even registered the hiss.

If you’re hiking here thinking the land is forgiving, you’re gonna learn fast. Or worse—you won’t.

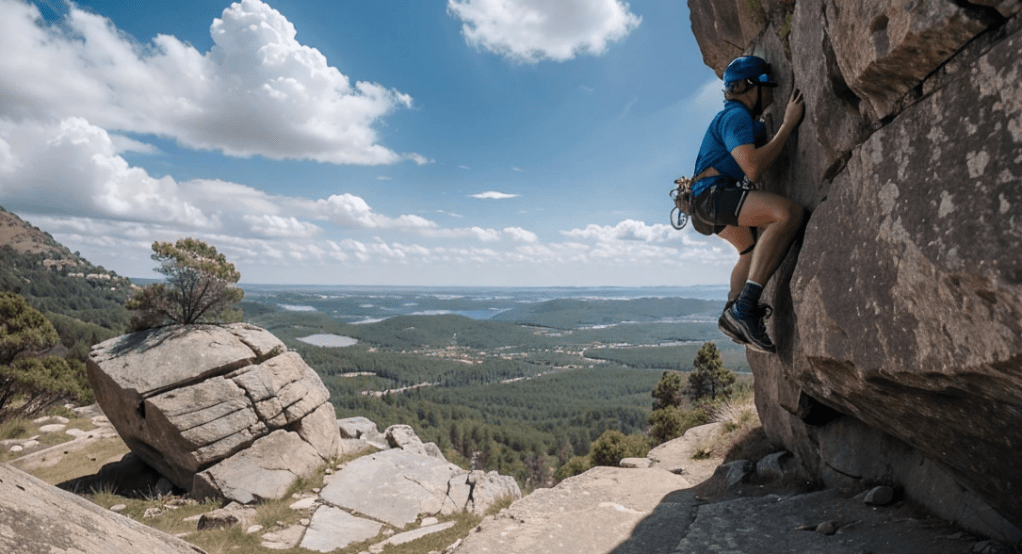
1. Kisatchie National Forest: Backbone Trail

Kisatchie is where I first cut my teeth on serious solo treks. It’s beautiful, no doubt. Longleaf pine, sandstone outcrops, and a quiet that gets into your bones. But don’t be fooled—this is no stroll in the woods.

The Backbone Trail is only about 7.5 miles one way, but it’s remote, exposed in stretches, and poorly marked in others. One misstep off-trail and you can be bushwhacking in thick underbrush with no clear way out. I once had to bivy overnight with just a poncho and a flint after missing a turn near the Bayou Cypre. Thank God I had my topo map and compass—GPS was useless under cloud cover and the canopy. Lesson: Don’t hike Kisatchie without serious prep. Period.

2. Wild Azalea Trail: Longest and Loneliest

This is Louisiana’s longest trail at around 31 miles. It’s stunning in spring with blooming azaleas, but don’t let the flowers fool you. Isolation is your biggest enemy here. Cell service is a joke, and water sources are questionable in the hotter months.

Hiking this without a solid purification system and heat protocol is a rookie mistake. Temps can climb past 95°F with swamp-like humidity. I’ve seen folks get heatstroke six miles in because they underestimated their water needs. I pack minimum 4 liters and a Lifestraw even in cooler seasons. You want to test your limits? Fine. But don’t test them with one bottle and a Cliff bar.

3. Barataria Preserve Trails: Wet, Wild, and Watching You

The Barataria Preserve, part of the Jean Lafitte National Historical Park, looks like a nature walk—and that’s what makes it dangerous. The boardwalk trails lull you into thinking it’s all smooth sailing, but the surrounding swamp is alive. I mean alive. Cottonmouths, gators, and enough mosquitoes to drain a man dry if he’s not wearing proper layers and repellant.

Once, I watched a tourist lean too far over a railing to get a photo of a gator. Slipped. Landed inches from the water. Lucky it wasn’t feeding time. Lesson there? Respect the wildlife and remember: these trails are built because the terrain is not passable.

Best Hiking Gear and Tools to Keep You Safe at All Times – Click Here

Also, storms roll in fast. A sunny morning can turn into a lightning-riddled swamp trap by noon. I always pack a tarp shelter and emergency rations, even on short hikes. If you can’t ride out a surprise downpour without panicking, you’ve got no business on these trails alone.

4. Tunica Hills: Slippery and Steep

Now, if you want terrain that rivals Appalachia in microbursts, Tunica Hills is your bet. These trails north of St. Francisville are surprisingly rugged. Elevation shifts, steep ridges, and—get this—actual waterfalls in Louisiana. Beautiful, yes. But when wet (which is often), those hills turn into slick mud chutes.

I’ve known experienced hikers to blow out knees or worse, sliding on wet clay with a 30-pound pack. It’s not the Rockies, sure, but in the South, unexpected injury is a death sentence if you can’t self-rescue. I never hit this trail without trekking poles, a first-aid kit with a trauma dressing, and my sat phone. A twisted ankle out here isn’t an inconvenience—it’s a full-blown crisis.

The Survivalist’s Mindset

Now let me drop some truth that’s saved me more than once: Prepare for the worst, hope for the best.

Every time I pack for a trail in Louisiana—whether it’s a two-hour jaunt or a multi-day slog—I pack like I’m not coming back. Sounds paranoid? Maybe. But I’ve seen too many casual hikers get rescued dehydrated, snakebitten, or just plain lost because they treated the backcountry like a theme park.

Survival out here isn’t about being the toughest. It’s about being the smartest. Here’s what I never hike without:

  • Water (and purification tools)
  • Detailed topo maps & compass (learn to use ’em)
  • Knife, fire starter, poncho, and emergency bivy
  • First-aid kit (with pressure bandage, not just Band-Aids)
  • High-calorie food, not just “snacks”
  • Weather-appropriate clothing & rain gear
  • Flashlight/headlamp (with backup batteries)
  • Satellite communication if I’m going deep
  • 10 Hiking Trail Wilderness Skills for the State of Louisiana
    Louisiana might not have towering peaks or vast deserts, but make no mistake: the wild down here is unforgiving if you’re unprepared. Swamps, heat, sudden storms, and unpredictable terrain mean you need more than just a water bottle and a trail map. Here are 10 essential wilderness skills every hiker needs before stepping onto Louisiana’s trails:

    1. Navigation Without GPS
    GPS can fail fast under thick tree cover or stormy skies. Learn how to read a topographic map and use a compass. The Kisatchie backcountry and Wild Azalea Trail demand solid wayfinding skills.
    2. Water Purification
    Heat and humidity drain you quick. Always carry a water filter or purification tablets, especially on longer hikes like the Wild Azalea Trail. Swamp and creek water may look clear but can carry bacteria and parasites.
    3. Snake Awareness and First Aid
    Cottonmouths, copperheads, and rattlers are real risks in Louisiana. Learn to identify venomous snakes and carry a proper first-aid kit—not just bandages, but compression wraps and a plan for getting help fast.
    4. Weather Reading Skills
    Louisiana weather can turn from sunny to storming in an hour. Recognize signs of incoming thunderstorms and have rain gear ready. Hypothermia can strike even in the South if you’re soaked and stuck overnight.
    5. Heat Management
    Understand heat exhaustion and heatstroke symptoms. Hike early, take shade breaks, wear light layers, and consume electrolytes—not just water.
    6. Insect Protection
    Mosquitoes, ticks, and chiggers thrive here. Know how to use repellents, wear long sleeves, and check yourself thoroughly after hikes. Tick-borne illness isn’t just a northern problem.
    7. Emergency Shelter Setup
    If you get stranded or caught in a sudden storm, knowing how to rig a tarp or emergency bivy is critical. Don’t count on finding natural shelter in swampy terrain.
    8. Fire-Starting
    In wet conditions, starting a fire is a challenge. Learn to use fire starters, waterproof matches, and build a fire that works even when your wood is damp.
    9. Wildlife Awareness
    From wild boars to gators, Louisiana wildlife demands space. Know how to store food properly and react calmly to animal encounters.
    10. Trail Etiquette and Leave No Trace
    Always follow Leave No Trace principles. Preserve the beauty of Louisiana’s wild spaces so future hikers can enjoy them too.

It’s Not About Fear. It’s About Respect.

Look, I love Louisiana’s wild places. I’ve seen sunrises over misty bayous that’ll humble you. I’ve watched deer move through cypress groves like ghosts. But I’ve also buried my boots knee-deep in muck, watched lightning hit 50 yards away, and fended off a raccoon hellbent on stealing my food stash.

Hiking here is rewarding, yes. But it’s real. Raw. And sometimes, downright dangerous. That’s the point. That’s the thrill. That’s the why.

So if you’re coming down here with city eyes and an ultralight TikTok pack, do yourself a favor: gear up, study up, and take this land seriously. It demands respect, and if you don’t give it, it’ll take it.

Don’t be fooled by the moss and melody. Louisiana’s most dangerous hiking trails are waiting for you—with all the beauty, brutality, and backcountry tests a true prepper could ask for.

And I wouldn’t have it any other way.

Top Hiking Trails in Arizona: Conquer Them, But Don’t Underestimate Their Threat

Arizona. Land of sun-scorched deserts, towering red rock cathedrals, and canyon chasms that could swallow you whole if you take one misstep. For many, it’s just a destination for a winter getaway. But for folks like me—part mountain goat, part doomsday prepper—it’s a sacred battleground. Hiking here isn’t just about breathtaking views. It’s about survival. It’s about sharpening your mind, your feet, and your instincts against nature’s unforgiving terrain.

If you’re looking to challenge yourself mentally, physically, and even spiritually, these top hiking trails in Arizona are for you. But don’t let their postcard beauty fool you. These trails can humble the unprepared. And in the backcountry, humility can turn into mortality real quick.

So buckle up your pack, double-check your gear, and listen up. I’ve hiked ’em all, prepped for worst-case scenarios on every one, and I’m still here to tell the tale.


1. Bright Angel Trail – Grand Canyon National Park

Let’s start with a classic. Bright Angel Trail is the gateway into the Grand Canyon’s abyss. Sure, it’s well-maintained and popular. But that’s also why people let their guard down—and that’s a fatal mistake.

Distance: 9.5 miles one way to the river
Threat Level: High if unprepared

The descent feels easy, deceptively so. You’re walking downhill into cooler air, shaded pockets, and canyon beauty. But the moment you turn around to ascend, it hits you: the heat, the elevation gain, the brutal sun reflecting off those rock walls like an oven.

Survival Tip: Always hike out with twice the water you think you’ll need. I don’t care if you saw someone hike it with a bottle of Gatorade and flip-flops. People die here every year because they underestimate that return climb. Bring electrolytes, emergency rations, and a headlamp—even if you think you’ll be done by noon.


2. Camelback Mountain – Echo Canyon Trail

This one sits right in the heart of Phoenix. It’s only 2.4 miles round trip. Sounds like a breeze, right? Think again.

Distance: 1.2 miles one way
Threat Level: Extreme due to overconfidence

This is where weekend warriors go to get humbled. The ascent is steep, rocky, and often crowded with people who didn’t bring water or wore fashion sneakers. In the summer, the trail closes midday due to extreme heat—and with good reason.

Survival Tip: Camelback is the most rescued trail in Arizona. Bring gloves for the rock scrambles, wear proper footwear, and start before sunrise if it’s summer. I carry a trauma kit every time, because twisted ankles, dehydration, and even heat stroke can strike fast here.


3. Havasu Falls Trail – Havasupai Reservation

Ah, Havasu. The crown jewel. Those turquoise waterfalls look like a dream. But getting there? That’s a 10-mile trek one way through canyonland with little to no shade.

Distance: 20 miles round trip
Threat Level: High due to isolation and permit restrictions

The danger here isn’t just the hike—it’s the logistics. You need a permit to access the trail, which books up fast. The trailhead is remote, and once you’re down in the canyon, there’s no cell service, and helicopters only fly out in emergencies.

Survival Tip: Respect the land. This is sacred territory. Prepare for total self-reliance. Bring water purification, backup batteries, and a printed map. I also stash a collapsible solar panel in my kit—sunlight is abundant, but power sources are not.


4. Superstition Mountains – Siphon Draw to Flatiron

The Superstitions earn their name. Legend has it there’s lost gold hidden deep in these mountains, but many have gone looking and never returned. I believe it. This is rugged, remote, and technical terrain.

Distance: ~6 miles round trip
Threat Level: Dangerous for the uninitiated

Flatiron via Siphon Draw is not marked. You’ll scramble, boulder-hop, and lose the trail more than once. In summer, the heat can exceed 110°F before noon. In winter, ice on the rocks makes falls deadly.

Survival Tip: Bring GPS, but don’t rely on it. Know how to read topo maps. This is where you learn that true survivalists navigate with compass and instinct. Carry extra food, a bivvy sack, and expect delays. Weather changes fast out here.


5. Rim to Rim – Grand Canyon

This isn’t a trail. It’s a rite of passage. And it’s not for amateurs.

Distance: ~24 miles one way
Threat Level: Expert only

Whether you start at the North Rim or the South Rim, you’ll cross multiple ecosystems, descend thousands of feet, and ascend thousands more. It’s brutal. Most people camp overnight. Some ultra-athletes do it in one day. But even the toughest break here.

Survival Tip: Train like your life depends on it—because it does. Hydrate two days before. Cache water at Phantom Ranch if you can. Know your exit points, and have a resupply strategy. Don’t attempt in summer unless you really know what you’re doing.


6. Humphreys Peak – San Francisco Peaks

Arizona’s highest point, 12,637 feet, might look like a walk in the pine forest. And it is—for the first few miles. Then the altitude starts gnawing at you.

Distance: 10 miles round trip
Threat Level: Medium-High for altitude novices

The weather up top can change in minutes. Lightning storms roll in suddenly. Snow can coat the trail into June. I’ve seen grown men turn back with altitude sickness while 12-year-olds push ahead. Nature doesn’t care how tough you are. It’s about preparedness.

Survival Tip: Dress in layers and check the weather at three altitudes: base, tree line, and summit. Always carry a storm shell, space blanket, and signaling mirror. If you’re above treeline and see thunderheads, descend immediately.


Final Words From a Fellow Trail-Hardened Soul

Hiking in Arizona isn’t a Sunday stroll through some suburban park. It’s a test. A glorious, beautiful, soul-recharging test that will challenge every part of you—if you do it right. And if you do it wrong, it’ll take something from you. Maybe just your pride. Maybe your gear. Maybe more.

Respect the land. Learn the terrain. Treat every hike like a survival scenario, because every time you hit the trail, you’re running a live-fire drill for the real deal. Whether it’s a lost hiker, a flash flood, a heat wave, or just plain bad luck, nature doesn’t play favorites.

The trails I listed above? They’re more than just “top hikes.” They’re battlegrounds of self-reliance. Places where you can build resilience and clarity, one blistered step at a time.

So get out there. Conquer them. But don’t you dare underestimate their threat.

Signed, your boots-on-the-ground, compass-carrying, water-purifying, fire-starting hiking prepper.

Survive These Hiking Trails in North Dakota, or Don’t Survive at All

Let me be clear: hiking isn’t just a hobby—it’s a test. A crucible. A simulation of survival, wrapped up in the illusion of leisure. And when it comes to North Dakota? You’d better come prepared, because these trails don’t play nice. The wind cuts, the terrain shifts under your feet, and the sun doesn’t care how far you are from the next water source. These aren’t your gentle strolls through the woods. These are battlegrounds. And I’m here to walk you through them.

I’ve hiked across most of the Lower 48, and I’ve bugged out in more states than some people have even driven through. But North Dakota… it gets under your skin. Wide skies, rugged land, and North Dakota Hiking that will chew you up and spit you out if you come unprepared. So lace up your boots, pack like it’s the end of days, and pay attention.


1. Maah Daah Hey Trail — 144 Miles of Character Building

You want a challenge? This is it. One hundred and forty-four miles through the heart of the Badlands, where rattlesnakes sunbathe on your path and the wind will strip the moisture from your bones. The Maah Daah Hey isn’t just long—it’s relentless. Expect rolling buttes, deep coulees, river crossings, and solitude so thick you’ll forget the rest of the world exists.

There are designated campgrounds, sure—but don’t count on them. Learn to dig a cat hole. Filter every drop you drink. Carry iodine tabs even if you’ve got a Sawyer filter, because redundancy isn’t optional—it’s survival.

Pro Tip: Wildfires can sweep through here in the summer like hell on wheels. Bring a radio, keep your head on a swivel, and know your exit points. This trail weeds out the soft.


2. Theodore Roosevelt National Park Trails — Beauty with Teeth

This park is split into North and South Units, both riddled with trails that snake through some of the wildest terrain in the state. You’ll see bison, you’ll see feral horses, and if you’re unlucky, you might just step between a cow and her calf. That’s a mistake you won’t make twice—if you make it at all.

My go-to? The Petrified Forest Loop. It’s about 10 miles and features terrain that swings from desolate moon-crater badlands to eerie stands of fossilized wood. You’ll feel like you’re walking through ancient history—and maybe you are. But don’t lose focus. A twisted ankle out here with no cell service is a one-way ticket to a real-life evacuation.

Gear Checklist:

  • GPS with offline maps
  • Satellite communicator (I use a Garmin InReach—worth every penny)
  • 3 liters of water minimum
  • High-calorie trail food (jerky, nuts, and pemmican—none of that energy gel crap)

3. North Country National Scenic Trail (ND Segment) — For the Long-Haulers

Most folks don’t even know the North Country Trail exists, let alone that it runs through North Dakota. But it does—over 400 miles of it, winding through the Sheyenne National Grassland and beyond. This trail will test your mental game more than your legs. Endless prairie. Minimal shade. Monotonous terrain that can turn your brain to mush if you’re not grounded.

But that’s where the survivalist thrives. Boredom is a killer just like dehydration or exposure. If you can hike this stretch solo and keep your wits, you’re a cut above. Bring a journal. Sharpen your awareness. Practice mental discipline.

Warning: Lightning storms roll in fast here, and there’s nowhere to hide. Get low, stay off ridgelines, and never be the tallest thing in the field.


4. Pembina Gorge — North Dakota’s Secret Weapon

Most people think of North Dakota as flat and dry. But then they stumble across the Pembina Gorge, up in the northeast, and it flips their script. Think forested hills, steep ravines, and rivers that don’t care if your boots are waterproof. It’s lush. It’s wild. And it’s a perfect place to lose your bearings if you’re not tracking every step.

The Pembina Gorge State Recreation Area has about 12 miles of designated trails, but the real training starts when you step off them. This is bushcraft territory. Test your fire-making skills, practice shelter-building, and track game sign—not to hunt, but to understand the land. You never know when the lessons will matter.


5. Little Missouri State Park — Erosion as a Lifestyle

If erosion had a capital city, it’d be here. This place is a maze of steep, cracked trails and deep drainages carved by the Little Missouri River. Horses use these trails too, so don’t be surprised if you step into a hoof print big enough to swallow your boot.

The park has over 45 miles of trail, and most of them feel like you’re hiking on the spine of a giant fossil. One wrong step and you’re sliding 40 feet into a ravine. I recommend trekking poles and a sense of humility. This isn’t a park that forgives arrogance.

Situational Awareness Tip: Weather turns quick out here. A dry trail in the morning turns into a clay slip-n-slide by afternoon. If the clouds roll in, bail early. Pride doesn’t taste as good as dinner back at basecamp.


Final Thoughts: The Prepper’s Mindset Wins

If you take one thing away from this, let it be this: Hiking in North Dakota is less about scenery and more about strategy. The views are a bonus. Survival is the mission.

Don’t trust your phone. Bring a compass, and know how to use it. Don’t trust the weather. Bring a poncho, an emergency bivy, and a change of socks in a dry bag. Don’t trust your body. Bring blister kits, spare laces, and enough electrolytes to revive a camel.

I don’t hike to escape the world. I hike to prepare for it. Every step on these trails is a step toward self-reliance, grit, and readiness. North Dakota’s wilderness doesn’t coddle—it clarifies. It strips away the noise and leaves only the truth: Can you survive this?

If yes, you earn the view. If no? Well, the land doesn’t care. It was here before you. It’ll be here after.

So pack right, tread smart, and respect the terrain.

Survive these hiking trails in North Dakota—or don’t survive at all.

Dangerous Terrain Ahead: The Most Popular Yet Risky Hiking Trails in Florida

Florida doesn’t look like trouble. At first glance, it’s all palm trees, sunshine, and theme parks. But don’t let the postcard fool you. Florida is deceptively dangerous when it comes to hiking. Swamps, sinkholes, venomous snakes, flash floods, lightning, disorientation, and brutal heat—it’s all waiting, just off the beaten path.

I’ve been hiking for over 20 years. I’ve walked alpine ridges in Montana and lava fields in Hawaii. But Florida Hiking Trails? It’s a different beast altogether. It’s flat, yes. But it’s also wild, wet, and full of hidden hazards that’ll test your preparedness like few other places in the U.S.

Best Hiking Gear and Tools to Keep You Safe at All Times – Click Here

You want a real challenge in survival? Try getting lost in a mosquito-infested cypress swamp with a thunderstorm rolling in. So if you’re itching to hit Florida’s most talked-about hiking trails, listen up. These trails are popular—and with good reason. But they’re also risky. Underestimate them, and you may not make it out in one piece.


1. Florida Trail – Big Cypress National Preserve

You ever walked through water for miles with no solid ground beneath your feet? That’s Big Cypress.

This southern section of the Florida Trail is about 30 miles of flooded swampland where you’ll be knee- to thigh-deep in murky water. And that’s on a good day. You’ll share the trail with gators, snakes, and hordes of mosquitoes that’ll bleed you dry.

Disorientation is a major risk. The trail isn’t always marked clearly, especially when the water’s high. One wrong turn and you’re in a tangle of brush with no visible path and no dry place to rest.

Survival Tips:

  • Waterproof everything. Dry bags are non-negotiable.
  • Use GPS and map/compass—electronics fail in high humidity.
  • Gaiters will save your legs from cuts, leeches, and hidden snakes.

2. Black Bear Wilderness Loop – Seminole State Forest

It’s only seven miles, but don’t let the distance fool you. This loop is rugged, rooty, and swampy, with narrow boardwalks and thick vegetation. Alligators sun near the trail, and yes—black bears are common here.

In rainy season, parts of the trail flood out fast. And in the dry season, the underbrush thickens and the bugs multiply. I’ve seen people hit the halfway point and want to turn back, only to realize the second half is even worse.

Survival Tips:

  • Always carry insect repellent—you’ll regret it if you don’t.
  • Travel with a buddy—predators aren’t the only concern. Injuries happen often.
  • Don’t rely on the boardwalks. Some are rotted and collapse under weight.

3. Torreya Challenge Trail – Torreya State Park

This one’s a hidden gem up in northern Florida—and it packs a serious punch. Think steep ravines, sudden drops, slick clay hills, and switchbacks that’ll put your legs to the test.

It’s one of the only places in the state with actual elevation gain. Most folks underestimate it and pay the price—especially after rainfall, when the clay turns into a slippery mess.

Add in exposed ridges, deep woods, and few bailout options, and you’ve got a trail that’ll punish the ill-prepared.

Survival Tips:

  • Trekking poles are a lifesaver on slippery hills.
  • Wear high-traction boots. Florida clay is slick as ice.
  • Monitor weather closely. A storm can make this trail impassable in hours.

4. Juniper Prairie Wilderness – Ocala National Forest

Want isolation? You’ve got it here. This area of the Ocala National Forest is beautiful—and completely wild. It’s hot, exposed, and there’s no reliable water unless you know where to look.

Getting turned around is easy. The trail can fade in places, and vegetation grows back quickly. Add in wild boar, bear sightings, and the ever-present fire ants, and you’ve got a trail that demands constant awareness.

Survival Tips:

  • Bring more water than you think you’ll need—then bring more.
  • Learn how to identify pitcher pumps and filter swamp water in a pinch.
  • Always file a trip plan with someone. If you go missing, help needs to know where to look.

5. Myakka River Hiking Trail – Myakka River State Park

This one’s a fan favorite—and a predator’s playground. Gators sun themselves just feet from the trail. Water moccasins (cottonmouths) slither into puddles you’ll walk through. The Myakka River area is beautiful but teeming with wildlife that doesn’t care about your hiking Instagram goals.

This trail can flood fast, and the soil becomes slippery and unstable. Lightning is a real threat during storm season, and the wide-open spaces offer little shelter.

Survival Tips:

  • Don’t hike here during peak storm months unless you’re ready to move fast.
  • Know your snakes. Cottonmouths are aggressive—give them a wide berth.
  • Carry a long stick to test puddles and watch for submerged critters.

6. Wekiwa Springs to Rock Springs Run Trail

Just outside of Orlando lies a surprisingly wild trail system with deep woods, river crossings, and dense undergrowth. This one lures day hikers in with easy access, but the back half becomes wild fast.

Swamp sections flood unpredictably, and the mosquitoes can be insane. There have been panther sightings here too—not common, but enough to keep your eyes scanning.

Survival Tips:

  • Long sleeves and pants. I don’t care how hot it is—bug protection is critical.
  • Mark your route. Bring flagging tape or use GPS breadcrumbs.
  • Don’t hike after heavy rain—the water level can trap you in.

Florida Trails Demand Respect

Florida might not have snow-covered peaks or 14,000-foot summits, but don’t mistake “flat” for “easy.” The dangers here are subtler—but just as deadly. Heat stroke, dehydration, snake bites, lost trails, flooded crossings—these are real threats in the Sunshine State.

People die on Florida trails every year—not because the hikes are hard, but because they’re unprepared. They think the risk lives in the Rockies or the Sierra Nevadas. But ask any rescue worker in Big Cypress or Ocala, and they’ll tell you: Florida will humble the cocky, and punish the unprepared.


10 Hiking Trail Wilderness Skills for the State of Florida

Florida might not have towering mountains, but don’t let the lack of elevation fool you—the state’s wilderness is just as dangerous, and in many ways, more deceptive. From alligator-infested waters to disorienting swamps, hiking here requires sharp survival skills and serious respect for the terrain. Here are 10 essential wilderness skills every Florida hiker needs to stay safe.


1. Navigation Without Landmarks

Florida’s flat terrain and dense vegetation can make trails confusing. Learn to navigate with a compass and topographic map—not just GPS. Trails can disappear in the underbrush or flood without warning.


2. Water Purification

You’ll sweat buckets in Florida’s heat. Streams, puddles, and springs might look tempting, but they could be contaminated with bacteria or leptospirosis. Carry a water filter or purification tablets, and always have backup.


3. Heat Management

Learn to recognize signs of heat exhaustion and heat stroke. Hydrate constantly, hike early or late, and wear breathable, moisture-wicking clothing. Florida’s humidity can kill faster than you think.


4. Wildlife Awareness

Florida is home to venomous snakes, wild hogs, black bears, and alligators. Know how to respond calmly and correctly to encounters—especially when hiking near water or dense underbrush.


5. Swamp and Water Crossing Skills

Trails often pass through standing water or boggy terrain. Learn to assess depth, test footing with a stick, and move steadily to avoid slipping—or stepping on something dangerous.


6. Lightning Safety

Florida leads the nation in lightning strikes. If a storm rolls in, avoid open fields, ridgelines, and tall solitary trees. Crouch low, separate from metal objects, and wait it out.


7. First Aid for Bites, Cuts, and Stings

Minor injuries can get serious fast in the heat and humidity. Learn to treat infections, bites, and allergic reactions. Fire ants, spiders, and thorns are common hazards.


8. Bug Protection

Mosquitoes and ticks are relentless. Know how to use repellents effectively, wear long sleeves, and perform tick checks after every hike.


9. Trail Flood Awareness

Rainstorms can turn dry trails into knee-deep swamps. Know the terrain, check the weather, and avoid hiking during heavy rain periods.


10. Self-Reliance

Cell service is spotty in the backcountry. Always hike with the mindset that help may not be coming. Carry essential gear and know how to use it.


Florida’s wilderness isn’t forgiving—respect it, prepare for it, and you’ll thrive.

Final Advice from a Trail-Hardened Prepper:

  • Always pack the ten essentials. That includes map, compass, fire starter, knife, extra food, first aid, and water treatment. No excuses.
  • Leave your route with someone you trust. Rescue teams need a starting point.
  • Don’t hike in cotton. Wet clothes in swamp air = chafing and hypothermia risk.
  • Practice your bushcraft. Learn how to filter water, make shelter, and navigate with the sun and stars.

You want adventure? Florida delivers. But you’d better respect the land. Because once you’re out there, you’re on your own.


The Dark Side of Georgia’s Famous Hiking Trails: Beauty Hides Danger

Georgia Hiking Trails have a way of calling to your soul. Towering Appalachian peaks, moss-covered hollows, waterfalls crashing like ancient drums—this state was carved by nature’s raw hand, and if you’ve ever set foot on the Benton MacKaye or tackled a slice of the Appalachian Trail here, you know the magic. But too many folks forget: what’s beautiful can also be brutal. These mountains don’t care how many Instagram followers you’ve got. They don’t care if you’ve read Wild or watched Into the Wild. They’ll chew you up and spit you out if you walk in unprepared.


Best Hiking Gear and Tools to Keep You Safe at All Times – Click Here

🥾 Top 20 Best Hiking Trails in Georgia

1. Blood Mountain via Byron Reece Trail (Appalachian Trail Section) – Blairsville

  • Length: 4.3 miles round trip
  • Difficulty: Moderate to strenuous
  • Highlights: Highest peak on the Georgia section of the Appalachian Trail, epic views, rugged terrain.

2. Amicalola Falls Loop Trail – Dawsonville

  • Length: 2.1 miles
  • Difficulty: Moderate
  • Highlights: 729-foot waterfall (tallest in Georgia), stair climb, forested paths.

3. Raven Cliff Falls Trail – Helen

  • Length: 5.9 miles round trip
  • Difficulty: Moderate
  • Highlights: Scenic waterfall emerging from a cliff face, lush forest, river crossings.

4. Tallulah Gorge North & South Rim Trails – Tallulah Falls

  • Length: Varies by route (2–3 miles)
  • Difficulty: Moderate to strenuous
  • Highlights: Jaw-dropping gorge views, suspension bridge, waterfalls.

5. Preacher’s Rock via Appalachian Trail – Near Dahlonega

  • Length: 2 miles round trip
  • Difficulty: Easy to moderate
  • Highlights: Short hike with a big payoff—amazing mountain vistas.

6. Panther Creek Falls Trail – Near Clarkesville

  • Length: 7 miles round trip
  • Difficulty: Moderate
  • Highlights: Large cascading falls, swimming holes, scenic creek trail.

7. Brasstown Bald Summit Trail – Hiawassee

  • Length: 1.1 miles round trip (or longer options)
  • Difficulty: Moderate (steep but paved)
  • Highlights: Highest point in Georgia (4,784 ft), observation deck views.

8. Cloudland Canyon West Rim Loop – Rising Fawn

  • Length: 5 miles
  • Difficulty: Moderate
  • Highlights: Canyon views, waterfalls, forest paths, great for photography.

9. Springer Mountain via Appalachian Approach Trail – Amicalola

  • Length: 8.5 miles one way
  • Difficulty: Strenuous
  • Highlights: Southern terminus of the Appalachian Trail, wilderness solitude.

10. East Palisades Trail (Chattahoochee River NRA) – Atlanta

  • Length: 4.5 miles
  • Difficulty: Moderate
  • Highlights: River views, bamboo forest, wildlife sightings.

11. Yonah Mountain Trail – Cleveland

  • Length: 4.4 miles round trip
  • Difficulty: Strenuous
  • Highlights: Rock scrambles, panoramic views, popular with military training groups.

12. Emery Creek Falls Trail – Chatsworth

  • Length: 5.9 miles round trip
  • Difficulty: Moderate
  • Highlights: Multiple creek crossings, waterfalls, wildflowers.

13. Indian Seats Trail at Sawnee Mountain – Cumming

  • Length: 3.2 miles
  • Difficulty: Moderate
  • Highlights: Forest trail, historical quartz mining pits, mountain views.

14. Sope Creek Trail – Marietta

  • Length: 3 miles
  • Difficulty: Easy to moderate
  • Highlights: Civil War-era ruins, creek views, family-friendly.

15. Dukes Creek Falls Trail – Near Helen

  • Length: 2 miles round trip
  • Difficulty: Easy
  • Highlights: Large cascading waterfall, wheelchair-accessible portions.

16. Lake Trahlyta Trail (Vogel State Park) – Blairsville

  • Length: 1 mile loop
  • Difficulty: Easy
  • Highlights: Lake views, Trahlyta Falls, ideal for beginners or families.

17. Coosa Backcountry Trail – Vogel State Park

  • Length: 12.9 miles
  • Difficulty: Strenuous
  • Highlights: Tough loop with serious elevation gain, great for seasoned hikers.

18. Helton Creek Falls Trail – Blairsville

  • Length: 0.3 miles
  • Difficulty: Easy
  • Highlights: Twin waterfalls, quick scenic stop, great for kids.

19. Jacks River Falls Trail (via Beech Bottom) – Cohutta Wilderness

  • Length: 9 miles round trip
  • Difficulty: Moderate to strenuous
  • Highlights: Wilderness experience, waterfalls, river crossings (boots required).

20. Arabia Mountain Trail – Lithonia

  • Length: Varies (up to 30+ miles total paved network)
  • Difficulty: Easy to moderate
  • Highlights: Moon-like granite outcrops, wildflowers, lakes, historic ruins.

I’ve hiked Georgia’s trails for over 30 years. I’ve bushwhacked where the map says “trail ends,” and I’ve taught survival classes in the Blue Ridge backcountry. I love this land. But let me tell you something straight: danger lives in these woods. If you don’t respect it, you might not come back.

1. The Siren Song of Blood Mountain

Blood Mountain—just the name should raise the hair on your neck. It’s the highest peak on Georgia’s portion of the Appalachian Trail, and it lures thousands of day hikers every year. The view from the summit is breathtaking, sure. But too many folks don’t realize what they’re walking into.

Weather up there turns on a dime. You can start in warm sunshine and be in freezing fog two hours later. I’ve seen it happen. I’ve rescued folks it’s happened to. Hypothermia can set in fast, especially when you’re wet and the wind picks up. One guy I met on the trail last year was wearing a cotton hoodie and mesh sneakers… in November. He thought it was just a “little hike.” That “little hike” could’ve cost him his toes if I hadn’t handed him dry socks and a Mylar blanket.

Preppers like me always hike with layers, a poncho, and an emergency bivvy. You should too.

2. Wild Animals: Not Your Disney Friends

We’ve got bears here, sure. Black bears mostly. But bears aren’t even the top concern if you ask me. It’s the feral hogs that’ll mess you up if you’re not watching. These suckers are smart, aggressive, and fast. I had a close call down near Cohutta Wilderness one dusk when a pack—yeah, a pack—came charging through the underbrush. You don’t outrun hogs in thick woods. You don’t reason with them either. I had to climb a pine and wait ‘em out.

Rattlesnakes too. Copperheads. Cottonmouths if you’re low enough. I wear snake gaiters every summer and carry a suction kit—not because I’m paranoid, but because I’ve seen the aftermath. One bite and you’re three hours from help, minimum. If you’re lucky, you’ll get cell service. If not? You’d better know how to improvise a splint and start hiking.

People ask me if I carry a gun. Damn right I do. Not for people. For wild things that don’t blink when they charge. Know the law, get your license, and carry responsibly.

3. Flash Floods and Deadly Streams

You’d think water is life. Out here, it can be death. Georgia gets some heavy rain, and when it comes fast, it doesn’t seep—it runs. I’ve seen creeks turn to rivers in an hour flat. Once, deep in the Tallulah Gorge area, I watched a gentle stream rise four feet while we broke camp. A couple hikers upstream tried crossing, lost their footing, and one of them almost didn’t make it.

Rule of thumb: never cross moving water above your knees. And don’t trust every “ford” on a trail map. I keep a paracord line and a compact throw bag in my pack for exactly this reason.

Also, water purification is non-negotiable. I don’t care if the spring looks crystal clear—it could be carrying giardia or cryptosporidium. Every prepper should carry a Sawyer filter or at least iodine tablets. Diarrhea in the woods is more than unpleasant—it’s dangerous.

4. Navigation Nightmares

“Just follow the trail,” people say. Yeah, until a storm knocks down blazes, or fog rolls in and you can’t see five feet in front of you. Georgia trails are notoriously rugged and sometimes poorly marked, especially in the wilderness areas where maintenance is spotty at best.

I always hike with a physical topo map and compass in addition to GPS. Electronics fail. Batteries die. Phones lose signal. The number of people who wander off the trail and end up miles in the wrong direction would shock you. Some are never found. Look up the case of Meredith Emerson, God rest her soul. She went missing on Blood Mountain. That trail isn’t a city park—it’s remote and isolated. Evil can hide in paradise.

5. People Problems: The Real Monsters

Nature can be brutal, but let’s not kid ourselves—humans can be worse. I hate to say it, but remote trails attract more than just outdoorsmen. Over the years I’ve crossed paths with some shady characters, especially when hiking solo or in the off-season.

Illegal hunters, drug runners, paranoid squatters—you name it. One time, I stumbled on what looked like an abandoned grow site way off the Benton MacKaye. Booby traps were still set up. You think you’re out there alone? Think again. I always advise hikers to let someone know your route and expected return. Better yet, carry a Garmin inReach or satellite messenger. One press of a button and you’ve got a lifeline.

6. Overconfidence Will Kill You

I’ve seen it too many times—young hikers, trail runners, or overconfident backpackers charging into Georgia’s backcountry without a clue. They underestimate the elevation gain, the terrain, and how fast the weather turns. By the time they realize they’re in trouble, it’s already too late.

It’s not about fear—it’s about respect. Respect for the land. Respect for what can go wrong. That’s what separates survivalists from statistics.

Here’s a bare-bones list every hiker should carry, no exceptions:

  • Fire starter (ferro rod + waterproof matches)
  • Water filter + backup purification tablets
  • Mylar emergency bivvy
  • Map, compass, GPS
  • Headlamp (with spare batteries)
  • Trauma kit (not just a few Band-Aids)
  • Knife or multitool
  • Extra food (calorie dense, non-perishable)
  • Signaling tools (whistle, mirror, flashlight)
  • Paracord
  • Pepper spray or sidearm (if trained)

10 Hiking Trail Wilderness Skills for the State of Georgia


Essential Know-How for Surviving and Thriving in the Peach State’s Backcountry

Georgia’s wilderness is stunning—lush with hardwood forests, rolling mountains, rocky outcrops, and countless miles of trails weaving through it all. But if you plan to explore trails like the Appalachian Trail, Raven Cliffs, or the Cohutta Wilderness, you need more than sturdy boots and a water bottle. Georgia’s backcountry can be as unforgiving as it is beautiful, and having the right wilderness skills could make the difference between a great hike and a dangerous situation.

Here are 10 must-have hiking trail wilderness skills every Georgia hiker should master:


1. Navigation with Map and Compass
Trails in Georgia’s wilderness areas aren’t always clearly marked. Learn to read topographic maps and use a compass—without relying solely on GPS—especially in remote areas like Tray Mountain or the Cohutta backcountry.

2. Water Purification
Creeks and springs are plentiful, but drinking untreated water can lead to serious illness. Carry a filtration system and chemical backup like iodine tablets.

3. Shelter Building
Weather can change fast, especially in the mountains. Know how to build an emergency shelter using a tarp, paracord, or even natural materials in case you’re forced to hunker down.

4. Fire Starting
Always carry waterproof matches, a lighter, and a ferro rod. Practice building fires safely, even with damp wood. Fire provides warmth, a signal, and psychological comfort.

5. First Aid Basics
From snake bites to blisters, injuries can escalate quickly. Learn basic wound care, how to splint limbs, and carry a trauma-ready first aid kit.

6. Wildlife Awareness
Georgia is home to black bears, rattlesnakes, feral hogs, and more. Know how to store food, react to encounters, and avoid surprising animals on the trail.

7. Weather Reading
Thunderstorms can roll in fast, especially in the summer. Learn to read clouds, watch barometric pressure, and recognize lightning danger zones.

8. Route Planning and Time Management
Know your pace, trail conditions, and daylight hours. Many rescues in Georgia happen because hikers misjudge how long a trail will take.

9. Leave No Trace Ethics
Georgia’s natural beauty relies on responsible hikers. Know the seven Leave No Trace principles to protect the land for future generations.

10. Emergency Signaling
A whistle, mirror, or flashlight can help you be found if you’re lost. Three sharp whistle blasts is the universal distress signal.

Closing Thoughts from the Trail

I love these trails. I love Georgia’s wild, unpredictable, often unforgiving terrain. But I’ve learned the hard way, and I’ve taught others so they don’t have to. Every scar I carry tells a story—and every story holds a lesson.

So the next time you lace up your boots and head toward that breathtaking ridge or secluded waterfall, remember: beauty hides danger. But if you prep like your life depends on it—because it just might—you’ll come back stronger, wiser, and with a deeper connection to the wild heart of Georgia.

Now get out there… but don’t forget your headlamp. The woods don’t care if you make it back by sundown.

The Hawaiian Hiking Trails Everyone Talks About— But Few Survive

Let me start by saying this: when people think of Hawaii, they picture beaches, cocktails, and tourists waddling around in flip-flops. But me? I think of cliffs that drop off into nothing, jungle trails that vanish in the rain, and knife-edge ridgelines that’ll have your knees knocking.

Hawaii Hiking Trails: Hawaii Trails

See, Hawaii isn’t just a tropical paradise—it’s a survivalist’s dream and nightmare rolled into one. These islands don’t play by mainland rules. One wrong step out here and you’re not spraining an ankle—you’re disappearing into a ravine. You’ll hear the same names floating around in hiking circles: Kalalau, Olomana, Mauna Loa… But what most people don’t tell you is how these trails chew up the unprepared.

So, if you’re thinking of tackling Hawaii’s most infamous trails, listen up. I’m not here to sugarcoat. I’m here to lay it out—real, raw, and brutally honest. These are the Hawaiian trails everyone talks about… but few truly survive—mentally, physically, or sometimes literally.

Best Hiking Gear and Tools to Keep You Safe at All Times – Click Here


1. Kalalau Trail – Kauai’s Jungle Gauntlet

You’ve seen the photos—lush coastline, towering sea cliffs, waterfalls. But let me tell you something: the Kalalau Trail isn’t a postcard—it’s a trap for the unready.

At 11 miles one way, it might not sound like much. But the trail is narrow, often slick, and it hugs cliffs hundreds of feet above the surf. Then there’s Crawler’s Ledge—a sketchy, eroded section where one slip can launch you into the Pacific.

Flash floods are another killer here. Streams that are ankle-deep when you cross in the morning can become chest-high torrents by afternoon. People have died trying to turn back.

Survival Tips:

  • Bring real traction, not tourist sneakers. Microspikes help in muddy areas.
  • Monitor rain forecasts like your life depends on it—because it does.
  • Don’t underestimate the return trip. That’s when exhaustion hits hardest.

2. Olomana Trail (Three Peaks) – Oahu’s Deadly Skyline

Locals call it a challenge. I call it a wake-up call. The Olomana Trail takes you up and across three jagged ridgelines, with ropes, vertical drops, and wind that’ll try to knock you sideways.

The first peak gives you views and ego. The second humbles you. The third? That one’s just a dare from the mountain gods.

People have fallen here. There are memorials along the trail for a reason. Most accidents happen because folks push beyond their skill set. One slip on the crumbly ridge and it’s over.

Survival Tips:

  • Gloves for grip. These ropes are exposed to the elements and not maintained.
  • Go early—afternoon clouds roll in fast and reduce visibility to nothing.
  • Stop at Peak One if you’re unsure. No shame in knowing your limit.

3. Mauna Loa Summit Trail – Big Island’s Martian Test Zone

Ever want to hike on Mars? Head to Mauna Loa. At 13,681 feet, it’s one of the largest volcanoes on Earth, and hiking it is more mental than physical.

It’s not steep. It’s not jungly. It’s endless. Lava fields stretch forever, and trail markers are little rock cairns that disappear in bad weather. If fog rolls in—and it does often—you can lose your bearings in minutes. No water. No shade. No mercy.

The altitude gets to people too. You’ll start to feel it around 10,000 feet, and there’s no rescue team waiting nearby.

Survival Tips:

  • Hydration is king. At elevation, dehydration sneaks up fast.
  • GPS is your friend—but know how to navigate old-school in case it dies.
  • Hike with someone. If you go solo out here, you better be experienced and leave a plan.

4. Ka’au Crater Trail – Oahu’s Mud Pit of Mayhem

This one’s hidden in the back of Palolo Valley, and it’s got everything: waterfalls, ridge hiking, rope climbs, and mud that’ll swallow your boots. What starts as a scenic trail quickly becomes a slippery, technical climb along narrow paths and over roots.

Fall in the wrong spot and you’re in for a rough time—or worse. And when it rains (which it often does), this trail turns into a slick death slide.

Survival Tips:

  • Leave the white shoes at home. You’ll never see that color again.
  • Use trekking poles or gloves to help with vertical climbs.
  • Know that the crater ridge section is long and exposed—pace yourself.

5. Pu’u Manamana – Oahu’s Secret Knife Edge

Not officially sanctioned. Not recommended for beginners. But hikers whisper about it because it’s one of the most adrenaline-pumping ridges on Oahu.

We’re talking narrow as a balance beam—with drops on either side that don’t forgive mistakes. It’s technical, steep, and totally exposed. One gust of tradewind and you’re done.

There are ropes, but again—who installed them? When? Are they still secure? Don’t count on anything but your own balance and instincts.

Survival Tips:

  • If you’re not 100% confident in your ridge hiking skills, don’t do it.
  • Keep your pack light and your footing lighter.
  • Don’t go alone. And don’t go when wet.

6. Waimanu Valley via Muliwai Trail – Big Island’s Jungle Isolation

This one flies under the radar—but it’s one of the most challenging hikes in the state. Starting from the black sand beach of Waipio Valley, the trail climbs 1,200 feet straight up before taking you through 13 switchbacks, multiple stream crossings, and thick jungle.

You’ll feel like you’ve stepped into a different time. Waimanu is remote. Cell service? Forget it. If something happens out here, you’re on your own.

And the mosquitoes? Let’s just say, bring the strongest repellent you can find—or prepare to be eaten alive.

Survival Tips:

  • Take your time. This is a two-day hike, minimum.
  • Water filtration is critical. The streams are beautiful—and full of bacteria.
  • Bear bag your food—feral pigs will try to raid your stash.

10 Hiking Trail Wilderness Skills for the State of Hawaii

Hiking in Hawaii might sound like a dream—lush rainforests, volcanic ridgelines, and ocean views—but don’t be fooled. These islands are as dangerous as they are beautiful. Trails are steep, narrow, muddy, and often poorly marked. Flash floods, unstable cliffs, and sudden weather changes make wilderness skills not just useful—but essential.

Here are 10 survival-minded trail skills every hiker needs before stepping onto a Hawaiian trail:


1. Navigation Without Cell Signal

Most Hawaiian trails lack reliable cell service. Learn to read topographic maps and use a compass. Offline GPS apps like Gaia GPS or AllTrails (with downloaded maps) are helpful—but don’t rely solely on electronics.


2. Rain and Flash Flood Awareness

Know how to read the terrain for flood risk. If you’re hiking near streams or through gulches, be alert. Learn how to identify rising water and signs of upstream rainfall—because in Hawaii, flash floods can be deadly.


3. Ridge Line Safety and Rope Use

Many Hawaiian trails involve narrow, exposed ridgelines. Practice balance, foot placement, and how to test ropes for safety before trusting them. Gloves can help on steep ascents and descents with ropes.


4. Jungle Navigation Skills

Dense vegetation can hide trails. Learn how to recognize and follow overgrown paths, and how to backtrack effectively if you lose your way. Carry a whistle in case you need to signal.


5. Water Purification

Never assume stream water is safe to drink. Giardia and leptospirosis are real concerns in Hawaii. Always carry a filter or purification tablets.


6. Mud and Terrain Management

Trails can be extremely slick. Master the skill of moving through mud—side-stepping, grabbing roots for balance, and using trekking poles for stability.


7. First Aid for Tropical Hazards

Know how to treat cuts (which can get infected quickly in humidity), heat exhaustion, insect bites, and dehydration. Carry a compact, waterproof first aid kit.


8. Weather Pattern Recognition

Clouds roll in fast. Know how to spot signs of an incoming storm. Being caught in heavy rain on a ridgeline can be fatal.


9. Respect for Sacred and Restricted Areas

Understand and follow cultural boundaries. Treading where you shouldn’t can lead to real trouble—culturally, legally, and spiritually.


10. Self-Reliance and Preparedness

Never hike in Hawaii assuming rescue is easy. Carry essentials, know your route, and hike like no one’s coming for you. Because they might not.


Master these skills—and the islands just might let you walk away in one piece.

7 Survival Items to Always Take on a Hike in the State of Hawaii

Hiking in Hawaii isn’t all sunshine and waterfalls—it’s slippery ridgelines, sudden rainstorms, and remote terrain that doesn’t forgive mistakes. Whether you’re trekking through dense jungle or scaling volcanic ridges, you need to come prepared. These 7 survival essentials could mean the difference between a beautiful adventure and a life-threatening situation.


1. Water Filtration or Purification System

Hawaii’s heat and humidity will dehydrate you fast, and while streams are common, they aren’t always safe to drink from. Leptospirosis, a bacterial disease found in Hawaiian freshwater, is a serious threat. Always carry a compact water filter or chemical tablets to treat any water you collect.


2. Fully Charged Phone with Offline GPS

Cell service is unreliable on most Hawaiian trails. Download offline maps using Gaia GPS, AllTrails, or OnX Hunt before you head out. A fully charged phone—with a backup battery or power bank—is your lifeline for navigation and emergency calls if you reach a signal.


3. Lightweight Rain Gear

In Hawaii, it can go from sunny to storming in under 10 minutes. A compact, waterproof rain jacket or poncho is essential, especially at higher elevations or on ridgelines. Getting soaked can lead to hypothermia, even in a tropical climate.


4. Headlamp or Flashlight with Extra Batteries

Trails can take longer than expected, and Hawaii’s dense forests get dark fast. A headlamp keeps your hands free and helps you find your way out if night falls. Don’t rely on your phone’s flashlight—it’ll drain your battery in minutes.


5. First Aid Kit

Scrapes and blisters are common on muddy, uneven trails. Pack a small first aid kit with bandages, antiseptic wipes, tweezers (for thorns or centipedes), and antihistamines for allergic reactions. In Hawaii’s jungle environment, even minor cuts can become infected quickly.


6. Emergency Whistle or Signal Device

Many Hawaiian trails are isolated. A whistle or signal mirror can help rescuers find you if you get lost or injured. Three short blasts is the universal distress signal.


7. High-Energy Snacks

Bring more food than you think you’ll need. Energy bars, nuts, jerky—calorie-dense fuel is critical on long or unexpected hikes, especially in the heat and humidity.


In Hawaii’s wilderness, nature calls the shots—pack like your life depends on it.

Hawaii Hiking Is No Joke

People come to Hawaii expecting easy trails and ocean views. But the truth is, these islands are wild. They’re alive. The terrain changes with every rainfall, and nature doesn’t care if you’re here for Instagram or enlightenment.

This isn’t the mainland. This is survival hiking.

Every step can be slick, every trail deceptive. You don’t have the luxury of ignoring gear lists or skipping preparation. One bad choice and you might not make it back down.

So if you’re planning to hike in Hawaii—really hike, not just meander to a waterfall with a coconut drink in hand—treat the land with respect. Gear up. Know your limits. Train for it. And remember:

You don’t conquer these trails. You survive them.

Survival of the Fittest: The Idaho Hiking Trails That Will Challenge Your Skills

Let me be clear right out of the gate: if you’re looking for a leisurely stroll in the park, this article ain’t for you. I’m not talking about manicured trails with convenient benches and ice cream stands at the end. I’m talking about real hiking. The kind that puts blisters on your feet, mud in your teeth, and grit in your soul. The kind that tests your mettle and forces you to confront just how prepared—or not—you really are.

Idaho isn’t just potatoes and pickup trucks. It’s raw, rugged, and gloriously unforgiving. It’s a state built for survivalists and hard-core hikers like me who live for the burn in the legs and the pounding of the heart as you climb higher, push further, and prove to yourself that you still have what it takes.

So if you’re ready to leave the weak behind and embrace the wilderness, here are the Idaho hiking trails that’ll chew you up and spit you out—unless you’re prepared.

Idaho Hiking Trails: Idaho Trails


1. Sawtooth Wilderness – Alpine Lake Loop

Location: Central Idaho
Distance: ~11 miles
Elevation Gain: 2,500+ ft

You want drama? The Sawtooths will give it to you. Towering jagged peaks, alpine lakes as cold as your ex’s heart, and trails that seem to vanish just when you need them most. The Alpine Lake Loop isn’t your average Sunday hike. You’re climbing hard, sometimes scrambling, sometimes wading through snow in June.

Here’s the kicker: you’re deep in bear country. Grizzlies, black bears—you name it. This trail forces you to think like a survivor. Can you navigate without markers? Can you keep your food secure overnight? Do you know how to respond to a bear encounter? If not, you’d better learn, fast.

Pro tip: Don’t even think about hitting this trail without a solid map, a working GPS (with offline maps), and a bear canister. Also, water filtration is a must—those crystal-clear lakes can still pack a microbial punch.


2. Borah Peak – Idaho’s Tallest Beast

Location: Lost River Range
Distance: ~7.5 miles round trip
Elevation Gain: Over 5,200 ft
Summit: 12,662 ft

Borah Peak is the heavyweight champ of Idaho hiking. You want altitude? You got it. But it’s not just the thin air that’ll mess with you. It’s the route itself. The infamous “Chickenout Ridge” has claimed more than a few nerves—and injuries. It’s exposed, narrow, and if you slip, you will fall a long way. This is mountaineering more than hiking.

There’s no water up there. No cover. No mercy. If you’re not acclimated, if you’re not carrying the right gear, and if you don’t know how to self-rescue, Borah will beat you.

Pack layers—it gets frigid at the top even in August. Helmet for the ridge. Gloves with grip. And enough endurance to climb over a vertical mile and still descend safely. This one isn’t about the view (though it’s spectacular); it’s about proving you’ve got the chops to survive the climb.


3. Seven Devils Loop – Hells Canyon National Recreation Area

Location: Western Idaho
Distance: ~28 miles loop
Elevation Gain: 7,800+ ft

This trail is an exercise in extremes. The Seven Devils loom above the deepest gorge in North America—yes, deeper than the Grand Canyon. The trail wraps around the devils, offering epic vistas and brutal ascents.

Remote? You bet. Cell signal? Forget it. You’re relying on your map, your instincts, and your survival training.

The trail network is complex, and snow can linger into late summer. Thunderstorms come out of nowhere. Water sources are limited in dry months. And if you twist an ankle out here, you’re looking at a long, painful hike out—or worse, a night in the wild with only what you’ve packed.

Test your gear before you come out here. Your tent, your stove, your boots—all of it. If anything fails, there’s no REI just around the corner. It’s just you, your pack, and whatever you can carry.


4. Imogene Lake via Hell Roaring Creek

Location: Sawtooth National Forest
Distance: ~17 miles round trip
Elevation Gain: 2,200 ft

Don’t let the whimsical name fool you—Hell Roaring Creek earns it. Water crossings can get sketchy during high runoff. You’ll navigate boulder fields, washouts, and the ever-present threat of thunderstorms that roll in like clockwork at 3 p.m.

The reward is one of the most remote and breathtaking alpine lakes in the Sawtooths—Imogene Lake. But don’t expect to have it all to yourself unless you’re willing to push in deeper than most people dare. Bushwhacking might be necessary if sections of the trail are washed out, which happens more often than the maps suggest.

Bug netting is a game-changer here. In the summer, the mosquitoes are relentless. And don’t underestimate the psychological challenge of a long hike out after a high-altitude night. Cold, tired, and sore—this is where mental toughness separates the survivors from the tourists.


5. Big Creek to Chamberlain Basin – Frank Church Wilderness

Location: Central Idaho
Distance: 40+ miles
Elevation Gain: 5,000+ ft

Now we’re talking real backcountry. The Frank Church—River of No Return Wilderness is the largest contiguous wilderness in the Lower 48. This isn’t a weekend hike; it’s a multi-day test of endurance, planning, and bushcraft.

You’ll cross creeks, navigate poorly maintained trails, and possibly run into wolves, elk, or even mountain lions. The remoteness means you carry everything—and I mean everything. Satellite communicator? Non-negotiable. Redundancy in your water filtration? Yes. Backup fire starter? You bet your life.

The Chamberlain Basin offers solitude and silence that’s hard to find anywhere else. But it demands total respect. Complacency kills in the Frank Church.


10 Hiking Trail Wilderness Skills for the State of Idaho

Idaho’s backcountry is as beautiful as it is brutal. With its towering peaks, deep canyons, and remote wilderness, hiking here isn’t just recreation—it’s a test of skill and preparedness. If you’re heading into Idaho’s rugged terrain, these ten wilderness skills are essential for staying safe, self-reliant, and ready for whatever the trail throws your way.

1. Map and Compass Navigation

GPS is great—until it dies. Idaho’s remote trails often lack signal, so knowing how to read a topographic map and use a compass is non-negotiable. Practice before you head out.

2. Water Purification

From glacial lakes to fast-moving creeks, Idaho offers plenty of water sources. But don’t drink untreated. Learn how to use filters, iodine tablets, or boil water to kill pathogens like giardia and cryptosporidium.

3. Wildlife Awareness

You’re in bear, moose, and mountain lion country. Know how to store food in bear-proof containers, when to use bear spray, and how to avoid triggering dangerous encounters.

4. Leave No Trace Practices

Respect Idaho’s fragile ecosystems. Know how to properly dispose of waste, minimize campfire impact, and leave what you find to preserve the wild for others.

5. First Aid and Trauma Response

With long evacuation times in remote areas, knowing how to handle sprains, cuts, dehydration, and hypothermia is critical. Take a wilderness first aid course—you might save a life.

6. Fire Craft

Whether you’re fighting cold or cooking food, being able to build and safely maintain a fire is a vital skill. Always know the current fire restrictions before striking a match.

7. Backcountry Navigation Apps (Offline)

Gaia GPS, AllTrails, and OnX can be lifesavers—if you download your maps offline before entering a no-service zone. Don’t rely solely on them, but use them wisely.

8. Shelter Setup

Storms hit fast in the Idaho high country. Know how to pitch a tent quickly or rig a tarp with paracord. Shelter can mean the difference between comfort and hypothermia.

9. Trail Weather Reading

Learn how to read the clouds and changes in wind. Thunderstorms roll in fast in the Sawtooths and Bitterroots—knowing when to turn back can save your life.

10. Self-Reliance Mindset

Ultimately, your best tool is your mindset. In Idaho’s wilderness, you can’t count on rescue. Plan, train, and hike like you’re on your own—because you just might be.

7 Survival Items to Always Take on a Hike in the State of Idaho

Idaho’s wilderness is vast, rugged, and unforgiving. Whether you’re tackling the granite spires of the Sawtooths or venturing into the deep canyons of the Frank Church Wilderness, being prepared is more than just good practice—it’s a necessity. Weather turns fast, trails vanish, and help can be days away. That’s why every hiker venturing into Idaho’s backcountry should carry these 7 survival essentials—every single time.

1. Map and Compass (and Know How to Use Them)

Digital navigation tools are helpful, but batteries die and signals fail. A detailed topographic map of your route and a compass can save your life if you get lost. But don’t just carry them—practice using them regularly. In Idaho’s vast trail systems, it’s easy to get turned around.

2. Water Filtration System

Water is plentiful in Idaho, but drinking it untreated is a gamble. A lightweight filter, purification tablets, or a UV purifier can turn questionable water into a safe resource. Dehydration can sneak up fast, especially at elevation.

3. Fire Starter Kit

Hypothermia can strike even in summer. Always pack waterproof matches, a lighter, and a fire starter like cotton balls soaked in petroleum jelly. Idaho’s weather can turn cold and wet in a matter of hours—fire is comfort, warmth, and safety.

4. Shelter

Even on a day hike, carrying an emergency bivvy sack or lightweight tarp is a smart move. If you’re injured, lost, or stuck overnight, having shelter from wind and rain could be the difference between life and death.

5. First Aid Kit

Customize your first aid kit for Idaho’s hazards—blisters, sprains, insect bites, and altitude issues. Add items like tweezers (for ticks), antihistamines, and extra bandages. Don’t forget to include any personal medications.

6. Multi-tool or Knife

A quality multi-tool or survival knife is indispensable. Use it to repair gear, make kindling, cut cordage, or in rare cases, defend yourself. It’s the ultimate piece of wilderness utility.

7. Headlamp with Extra Batteries

Idaho’s remote trails are dark and disorienting after sunset. A headlamp keeps your hands free, and spare batteries ensure you’re not stuck navigating by moonlight.


The Idaho wild doesn’t forgive unpreparedness. Bring these items. Every hike. Every time.

Final Thoughts from a Trail-Hardened Prepper

I hike because it hones the edge. Every footstep out there teaches me something about myself—and about the wild. It teaches patience, resilience, and above all, preparation. The woods don’t care about your ego. Idaho certainly doesn’t. It rewards those who come ready. Those who train. Those who plan. And those who respect the land.

So if you’re thinking about tackling one of these brutal beauties, do yourself a favor: prep like your life depends on it. Because out there, it just might.

Gear up. Train hard. Hike smart. And remember: survival isn’t a slogan. It’s a skill.